Sherman I Composito (Italy)
| This page is about the premium medium tank Sherman I Composito (Italy). For other M4 Shermans, see M4 Sherman (Family). For other uses, see M4 (Disambiguation). |
Contents
Description
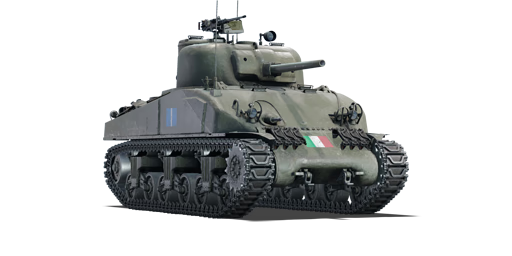
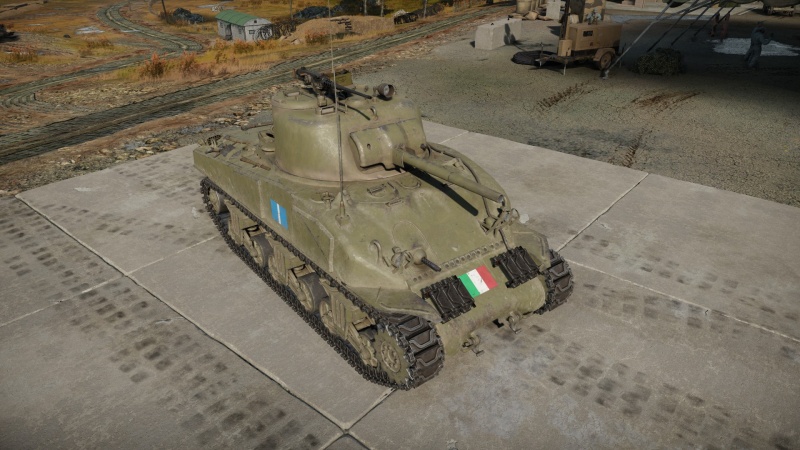
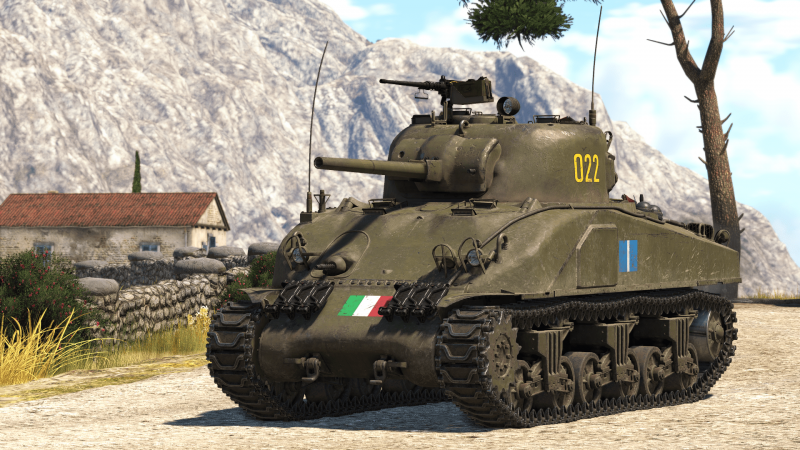
The M4 Hybrid Sherman is a special combination of the first and second variants of the early-generation Medium Tank M4 (Sherman) family. The M4 Hybrid variant was built by Chrysler Corporation using an M4 variant main hull structure combined with an M4A1 variant frontal glacis, essentially a hybrid of cast and rolled armour. The U.S. Army did not adopt a new classification to distinguish them from the totally welded-hull M4 variant. Due to their striking resemblance, these were commonly misinterpreted as M4A1 variations in historical documents like unit rosters and even certain Ordnance Department Test Reports. The British designated them "Sherman I Hybrid." From August 1943 through January 1944, Chrysler produced 1676 units of M4 hybrids. Following the reconstruction of Italy in 1945, some M4 Hybrid variants were transported to Italy. In 1946, a minor military command was founded for territory defence, and the force was supplied with several M4 Sherman variants such as the M4 Hybrid, M4A4, M4A4 VC Firefly, and M4 Hybrid IC Firefly Tipo.
Introduced in Update "Starfighters", the M4 Hybrid is the first reliable foreign medium tank capable of engaging adversaries for the Italian ground forces. Multiple variants of the Medium Tank M4 (Sherman) family will serve as the backbone of the Italian ground forces. The M4 Hybrid is armed with a 75 mm M3 tank gun in a completely traversable turret that can fire a wide range of ammunition depending on the situation. The frontal cast hull construction of the M4 Hybrid variant, which results in a curved hull shape, is quite similar to that of the M4A1 variant. Nonetheless, its armour provides adequate protection against enemy fire from smaller calibre weapons, and it is a reliable medium tank capable of performing most duties on the battlefield.
General info
Survivability and armour
The hull is very similar to the US M4A1 with a 50.8 mm frontal sloped armour but with a front glacis welded on the rest of the hull instead of a cast one. Protruding viewports and truncated corners interrupt the sloped armour of the glacis and thus are weak spots easy to target for the enemy when up close. The hull sides feature appliqué armour plates covering the ammunition stowage racks. The turret is also very similar but lacks the M4's appliqué armour on the right cheek (gunner side), leaving a small weakened zone in that area. Frontal protection is quite good for its rank and shots from smaller anti-tank guns can generally be shrugged off, particularly when hull down. However more powerful guns such as the Pz.IV F2's long 75 mm can destroy the tank easily, so care should be taken. The side armour is only 38.1 mm thick and can be easily penetrated by just about any anti-tank gun if not angled.
Armour type:
- Rolled homogeneous armour (hull sides, rear and roof)
- Cast homogeneous armour (front glacis, transmission housing, turret, gun mantlet)
| Armour | Front (Slope angle) | Sides | Rear | Roof |
|---|---|---|---|---|
| Hull | 50.8 mm (54-57°) Front glacis 50.8 mm (43-48°) Viewports 38.1 (spherical) + 50.8 mm MG port 50.8 mm (cylindrical) Transmission housing 50.8 mm (8°) Truncated glacis over the tracks |
50.8 mm (7°) Front part 38.1 mm 38.1 + 25.4 mm Ammo racks |
38.1 mm (10°) | 50.8 mm (0-48°) Front glacis 19.5 mm Turret area 19.5 mm (7°) Engine bay - centre 19.5 mm (23°) Engine bay - sides |
| Turret | 76.2 mm (7-65°) Turret front 50.8 mm (7-25°) Turret front - gunner side 38.1 + 38.1 mm (cylindrical) Gun mantlet |
50.8 mm (1-4°) Turret sides 50.8 mm (58-66°) Roof radius |
50.8 mm (2-4°) Sponson 50.8 mm (61-66°) Roof slope |
25.4 mm |
| Cupola | 50.8 mm (16°) | 25.4 mm | ||
Notes:
- Suspension wheels are 15 mm thick while tracks are 20 mm thick and bogies are 10 mm thick.
Mobility
| Game Mode | Max Speed (km/h) | Weight (tons) | Engine power (horsepower) | Power-to-weight ratio (hp/ton) | |||
|---|---|---|---|---|---|---|---|
| Forward | Reverse | Stock | Upgraded | Stock | Upgraded | ||
| Arcade | 43 | 6 | 31.5 | 620 | 763 | 19.68 | 24.22 |
| Realistic | 38 | 5 | 354 | 400 | 11.24 | 12.7 | |
Based on the chassis of the M4A1, the Sherman I Composito (Italy) has the same good all-round mobility: the tank accelerates quickly and is able to reach a maximum speed of 42 km/h in a dozen of seconds. The brakes are powerful and will make the M4 Hybrid skid rather than slow down when driving at maximum speed. The violent braking also causes the hull to wobble, but your vertical stabilizer will fully compensate this effect as soon as your vehicle is slower than 20 km/h. The reverse speed is rather poor: it won't get you out of a dangerous situation quickly enough. The lack of neutral steering makes turning on the spot slow (2 km/h): make sure to build a little speed before turning and you'll turn much faster (11 km/h). Turning in reverse is equally slow (-2 km/h) Turning at full speed doesn't make you lose much speed as your acceleration is good. The offroad mobility is good: the Sherman I Composito (Italy) reaches 19 km/h when fording, 17 km/h when driving uphill with some speed built-up but a mere 10 km/h uphill from a stop start. The tracks are large and grant you a decent mobility on hard (solid ground, roads) and soft terrain (mud, snow, sand). Light and medium obstacles (fences, posts, bushes and small trees) are not a problem but large obstacles will reduce your mobility: avoid them.
Modifications and economy
Armaments
Main armament
| 75 mm M3 | Turret rotation speed (°/s) | Reloading rate (seconds) | |||||||||||
|---|---|---|---|---|---|---|---|---|---|---|---|---|---|
| Mode | Capacity | Vertical | Horizontal | Stabilizer | Stock | Upgraded | Full | Expert | Aced | Stock | Full | Expert | Aced |
| Arcade | 97 | -10°/+25° | ±180° | Vertical | 22.8 | 31.6 | 38.4 | 42.5 | 45.2 | 6.50 | 5.75 | 5.30 | 5.00 |
| Realistic | 14.3 | 16.8 | 20.4 | 22.6 | 24.0 | ||||||||
Ammunition
When discussing Sherman I Composito (Italy) shells, one always has to account for the fact that it's a medium tank. This means short to medium engagement range, so realistically it can benefit more from its short-range penetration figures than long-range sniping tanks would.
- M72 shot - AP - Solid shot, stock shell. Acceptable penetration, poor post-penetration damage.
- M48 shell - HE - Low-velocity shell useful against soft targets, in particular when hitting an open-topped vehicle. Harmless against any vehicle with more than 10 mm of armour.
- M61 shot - APCBC - This shell has a better penetration than the M72 thanks to its ballistic cap and a good post-penetration damage thanks to its explosive filler.
| Penetration statistics | |||||||
|---|---|---|---|---|---|---|---|
| Ammunition | Type of warhead |
Penetration @ 0° Angle of Attack (mm) | |||||
| 10 m | 100 m | 500 m | 1,000 m | 1,500 m | 2,000 m | ||
| M72 shot | AP | 91 | 88 | 78 | 67 | 57 | 49 |
| M48 shell | HE | 10 | 10 | 10 | 10 | 10 | 10 |
| M61 shot | APCBC | 104 | 102 | 93 | 84 | 75 | 68 |
| Shell details | ||||||||||||
|---|---|---|---|---|---|---|---|---|---|---|---|---|
| Ammunition | Type of warhead |
Velocity (m/s) |
Projectile mass (kg) |
Fuse delay (m) |
Fuse sensitivity (mm) |
Explosive mass (TNT equivalent) (g) |
Ricochet | |||||
| 0% | 50% | 100% | ||||||||||
| M72 shot | AP | 619 | 6.3 | - | - | - | 47° | 60° | 65° | |||
| M48 shell | HE | 463 | 6.3 | 0.2 | 0.1 | 666 | 79° | 80° | 81° | |||
| M61 shot | APCBC | 618 | 6.79 | 1.2 | 14 | 63.7 | 48° | 63° | 71° | |||
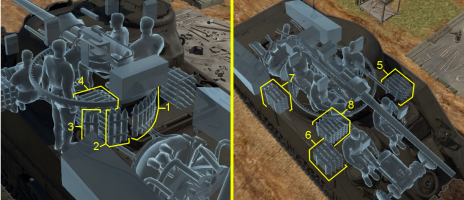
Ammo racks

| Full ammo |
1st rack empty |
2nd rack empty |
3rd rack empty |
4th rack empty |
|---|---|---|---|---|
| 97 | 91 (+6) | 88 (+9) | 86 (+11) | 78 (+19) |
| 5th rack empty |
6th rack empty |
7th rack empty |
8th rack empty |
Visual discrepancy |
| 63 (+34) | 46 (+51) | 31 (+66) | 1 (+96) | No |
Notes:
- Racks disappear after you've fired all shells in the rack.
- To go into battle with the turret basket empty of ammo, pack 78 (+19) shells (racks 1 to 4 emptied).
- To go into battle with the turret basket and the flanks empty of ammo, pack 31 (+66) shells (Racks 1 to 7 empty).
- The 8th rack is large and located at a weak spot: the bottom section of the armour. In case of penetration, there is a high risk of ammo rack detonation. Make sure not to expose your flanks unnecessarily.
Machine guns
| 12.7 mm M2HB | ||||
|---|---|---|---|---|
| Mount | Capacity (Belt) | Fire rate | Vertical | Horizontal |
| Pintle | 400 (200) | 577 | -10°/+25° | ±60° |
The roof-mounted M2HB .50 cal heavy machine gun is very good at knocking out tracks, punching through lightly armoured vehicles and shooting down low-flying aircraft. Use it sparsely because of its low ammo count.
| 7.62 mm M1919A4 | ||||
|---|---|---|---|---|
| Mount | Capacity (Belt) | Fire rate | Vertical | Horizontal |
| Coaxial | 3,000 (250) | 500 | N/A | N/A |
The small calibre of the M1919A4 machine gun makes it largely ineffective against all armoured vehicles but the ones with an open compartment. It still can be used to ping targets as a rangefinding help or to mow down minor obstacles blocking your line of sight.
Usage in battles
The M4 Sherman is an effective medium-range combat tank. Equipped with a fast-firing 75 mm gun and with good handling characteristics, the M4 can be an extremely useful asset in most battles.
In battle the M4 performs well as an all-rounder; the thick turret front and 10 degrees of gun depression make the tank ideal for taking hull-down positions which protect the thinner hull armour from being penetrated by enemy fire. The sloped front upper glacis, when angled, also provides good protection against enemy fire. An unusual - and useful - difference is that the upper glacis is sloped at 56 degrees rather than the standard 45 degrees, making it more of a threat and more powerful due to improving the chances of a round ricochet. The only downfall may be the 2 crew member position in the front that protrudes out to form a flat surface, but both are covered with an additional 20 mm plate. The reasonable mobility of the Sherman makes flanking a viable tactic. The main weakness of the M4 is the side armour - not only is it vertical and thin, but behind it most of the ammunition is stowed. The tall silhouette of the tank also makes finding suitable cover difficult. Overall, the M4 Sherman can be considered as an armoured jack-of-all-trades - it will serve a tanker well, however it will not excel in any particular role.
In battle, try to use terrain as cover. Hull-down positions are especially strong in the M4 Sherman, as it has a good 10 degrees of gun depression. The gun mantlet and turret are reasonably strong, but avoiding shots is still the best strategy. In this respect, a hull-down position hides the vulnerable hull. If this is not available, then angling the hull armour to present a greater slope is often a good idea, as this can bounce some low-powered cannon at any range and at longer ranges, render the hull impenetrable.
Another way to play the M4 Sherman is to tap into its traditional cavalry role, its mobility. The M4 Sherman is a great flanker as it is fast enough to get the jump on the enemy's side. Defeat the enemy at their weak front lines or go around the entire enemy force. Once in position at their sides or rear, ambush them. Ideally, the enemy should be too busy focusing on allies attacking in the front to notice the M4 instantly. Take out the weaker light or medium tanks, the 75 mm gun is not very ideal against heavy tanks like the KV-1 so take out its friends to allow allies more room to outmanoeuvre the KV tank. An organized attack will increase the M4 chances on the battlefield and success.
Enemies worth noting:
M4A2 / A4 - These Sherman tanks are widely used by over 3 nations that spread across both the Allied and the Axis side, so no matter which nation you play they can be quite tough to destroy in the hands of a skilled tanker. Given the rather weak penetration of your short 75 mm gun, their hull can be almost impossible to penetrate when angled, hull down or 300 m away. For a M4A4, there are 2 apparent bulges on the upper front plate, a penetration through there is a guaranteed kill most of the times. But in case the opponent covers them up or when it's a M4A2, aim for the middle parts of the gun mantlet or the turret armour unprotected by the mantlet, you can at least make them defenseless. Note that their guns are equally weak against you, so wiggle around to disrupt their aim while you reload, you have a good chance of bouncing some shells.
Churchill Mk I, Churchill Mk III - The Churchills, with their complex hulls and sturdy turrets, can be quite hard to kill at range. Again, manoeuvre as close to them as possible, the idea distance being no more than 200 m. If they are angling their hull but facing their turret at you, only go for the turret. For the Mk I Churchills, aim at the near-vertical part of their rounded cheeks to ensure successful penetrations. For the Mk III, also aim for their flat turret which is at most 89 mm. The shell should go in easily and knock out most, if not all of the crew. Only when you are facing their hull without any angles should you shoot the hull, otherwise shoot the turret only, as their big tracks can easily get in front of the frontal hull. The side hull have multiple layers of armour, some of which are weirdly angled and can absorb plenty of shells.
KV-1 (ZiS-5) - A vehicle that the M4 Sherman will have trouble against is the KV-1. While the L-11 is underpowered, the ZiS-5 is potent enough to punch through the Sherman's front, and the Sherman is unable to penetrate the KV-1's thick armour especially with its add-on armour plates. If this heavy tank is encountered frontally, aim at the vertical area on the round gun mantlet as it is only 90 mm thick. You can knock out its gunner this way. Or shoot at the vertical part where the gun mantlet doesn't cover to disable its turret ring and gunner / loader. Note: do not shoot at the frontal hull as it is too thick for the M61 shell. Of course, the best way is to shoot at its sides and rear without any angle, where its armour is unsloped, though it will still have to be at a close range to penetrate the armour. In addition, shots to the sides will most likely hit fuel tanks or ammunition storage, causing a fire or ammunition detonation and at best, time to reassess the situation.
R3 T20 FA-HS (AB / mixed RB) - This speedy wheeled vehicle can circle around you with ease and wipe out all your crew with its fast firing autocannon. In a close encounter, never expose your side to it, and do not even angle your hull. Face your hull directly to the R3, because on each side of the cast hull, above the inducer wheel there is a triangular area that blends and connects the upper front plate to the side. By angling the hull, this triangle becomes unangled to the R3, making it easily penetrated, and the driver / gunner will usually get knocked out first. It is harder for the R3 to penetrate your unangled hull thus giving you more time to react and destroy it.
Pros and cons
Pros:
- Excellent gun depression of -10° plus the angled frontal turret allows it to utilise hills very well
- Great penetration and post-penetration damage when using M61 shells; can frontally penetrate and knock out most opponents
- Great turret traverse speed allows it to deal with multiple threats easily
- Well angled upper front plate can bounce quite some shells when properly angled
- Adequate top speed allows it to get to positions in time, or to do tactical manoeuvres like flanking
- Pintle-mounted HMG provides an anti-aircraft defence or anti-tank duty against tank destroyers like Marder III
- Fitted with a vertical stabilizer, allowing more accurate fire on the move compared to other tanks, as well as better usage of shoot-n-scoot tactics
Cons:
- Large profile and weak side armour; flankers like the Sd.Kfz.234/2 can easily see and penetrate it
- The cast hull creates frontal weak spots with very little effective thickness, e.g. the triangles between upper front plate and the side, and the curved hull hatches
- Frontal armour is still inadequate, will get frontally penetrated and knocked out by tanks like Pz.IV F2/G, StuG III F/G, and M10
- The best M61 shell struggles to penetrate heavy targets like KV-1 (ZiS-5), Churchill III or even the T-34 and M10 when angled
- Trajectory is curved and velocity is low due to its short barrel, thus distant/moving targets are hard to shoot at
- Hull traverse is quite slow, making it sluggish in a turn
- Roof armour of 19.5 mm thick is vulnerable to aircraft equipped with AP cannons like the M2 Browning
History
- Development
In America the first M4 Hybrid was built on the 28th Aug of 1943 by the company Chrysler. The tank consisted of a M4 Sherman hull (RHA) welded with a frontal glacis (UFP) of M4A1, basically a mixture of cast and rolled armour. They only modified the hull and the rest was the same. These tanks were sent to Pacific and to Europe theatres where they were used by Allies in that time to fight Germany, Italy and Japan. Later, the tanks would be modified with better guns, leading to various variants showing up around the world. (ex. M4 Tipo IC).
- Italy
In Italy the Armistice was signed in September 1943, ending the Italian armoured Troops, Italian tanks ended up captured by the enemy (Germany and Italian Social Republic) or they were destroyed. The Italian Armoured Troops were dislocated in Sardegna and Corsica and were not authorized to join the 1° Raggruppamento Motorizzato Italiano, constituted the 28 September 1943 in the area of Puglia, or the Corpo Italiano di Liberazione (C.I.L.) (Italian Liberation Corp) and Gruppi di Combattimento (Fighting Groups) who fought the Axis forces with the Allies from October 1943 to April 1945.
After the war, Italy reconstituted in 1945 and 1946 a minor military command for the territorial defense, the unit was equipped wih Italian, British and American Tanks. For example, America and Great Britain would give Italy many Shermans tank variants for free, which they used extensively post-war, some of the Sherman tanks used were :
- M4 75/37 (M4 Hybrid, M4A4)
- M4 76/55 (M4 Tipo IC, M4 Tipo Vc)
- M4 105/22 (M4A3(105))
These tanks and armoured vehicles were given to Italy, the first official armoured corps for Italy was founded in September 1947 and was reunited in Roma to create the first post-war tankers School. Italian Shermans were used from 1948 until the early 1950s, the last ones being officially put out of service in 1952.
Media
- Skins
- Videos
See also
- Vehicles equipped with the same composite hull
External links
Paste links to sources and external resources, such as:
- topic on the official game forum;
- other literature.
| Italy medium tanks | |
|---|---|
| Italy | |
| M13/40 | M13/40 (I) · M13/40 (II) · M13/40 (III) |
| M14/41 | M14/41 · M14/41 (47/40) |
| M15/42 | M15/42 |
| M16/43 | Celere Sahariano |
| P26/40 | P40 · P40 "G.C. Leoncello" |
| OF-40 | OF-40 · OF-40 Mk.2A · OF-40 (MTCA) |
| Ariete | Ariete (P) · Ariete · Ariete PSO · Ariete AMV |
| Germany | ▄Pz.III N · ▄Pz.IV G · ▄Leopard 1A5 |
| Allied powers | ▄Sherman I Composito · Sherman Ic · ▄Sherman Vc · ▄Sherman V · M26 "D.C.Ariete" · M26A1 · M47 (105/55) · M60A1 "D.C.Ariete" |
| Hungary | |
| Turán | Turan I · Turan II · Turan III |
| Germany | ◔Leopard 2A4 · Leopard 2A7HU |
| USSR | ◔T-72M1 |
| Italy premium ground vehicles | |
|---|---|
| Light tanks | L6/40 (31 Rgt.) · Toldi IIA · AUBL/74 HVG · VRCC · Centauro RGO |
| Medium tanks | M13/40 (II) · Turan II · M14/41 (47/40) · Celere Sahariano · P40 "G.C. Leoncello" · ▄Sherman I Composito · ▄Pz.IV G |
| M26 "D.C.Ariete" · M60A1 "D.C.Ariete" · OF-40 (MTCA) | |
| Heavy tanks | Tigris |
| Tank destroyers | Breda 90/53 · M43 "G.C.Leoncello" · Zrinyi I |


