M4A1

From War Thunder Wiki
Jump to: navigation, search
Rank IV USSR | Premium | Golden Eagles
Tu-1 Pack
This page is about the American medium tank M4A1. For other M4 Shermans, see M4 Sherman (Family). For other uses, see M4 (Disambiguation).
M4A1
us_m4a1_1942_sherman.png
GarageImage M4A1.jpg
ArtImage M4A1.png
M4A1
AB RB SB
3.3 3.3 3.3
Class:
Research:9 200 Specs-Card-Exp.png
Purchase:16 000 Specs-Card-Lion.png
Show in game

Description

The M4A1 Sherman is the first variant of the early-generation Medium Tank M4 (Sherman) family. The M4 Sherman medium tank, named after the great American Civil War general William T. Sherman, was one of the Allies' most iconic fighting vehicles during World War II, and one of the most famous tanks in history. However, while this historic distinction was achieved partly owing to its inherent virtues, it was also due to the sheer quantity of them supplied, which was only topped by the Soviet Union's T-34, with a staggering 50,000 units produced. During World War II, it was by far the most commonly utilized tank in the Allies. It developed into many different variants and had a long postwar service that lasted well into the Cold War. It was frequently compared to the T-34 and had the opportunity to engage several during the Korean War. The M4A1 was the first major variant to be introduced, in February 1942. The upper hull was entirely cast and rounded. The standard M4A1 variant was produced in 6,281 units until December 1943, when it was superseded by the late-generation M4A1 (76) W variant, which received a more powerful 76 mm M1 tank gun. Until March 1945, 3,396 of these improved variants were created. This tank was nearly identical to the M4 (second variant; early-generation), having the same engine, automotive systems, and weaponry. The main distinction was the cast upper hull. The upper hull was a single massive casting. This was a difficult task with the casting technique at the time and something the Germans could not have replicated since they did not possess the advanced technology and equipment required. Everything from hatches to wheels, turrets, and weapons could be swapped between the M4 and different Sherman variants.

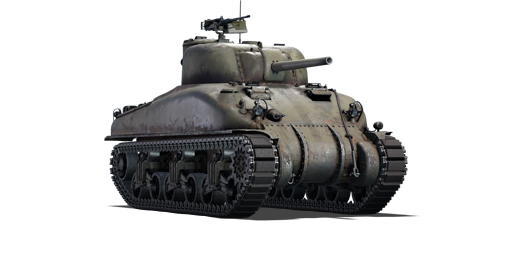
Introduced in Update 1.45 "Steel Generals", the M4A1 supplies the U.S. Army ground forces with the first reliable medium tank capable of engaging enemies. The M4A1 is armed with a 75 mm M3 tank gun in a fully traversable turret and can fire a variety of ammunition depending on the situation. The M4A1 variant is distinguished by its cast hull construction, which results in a curved hull shape. This results in the hull's upper front armour plate having a varied slope angle throughout the upper glacis, but it also introduces various flaws. The first is in the frontal hull and side joints, which have relatively flat angles while angling the tank, and the second is the cast construction, which reduces the overall effectiveness of the frontal hull armour. The last are the view blocks at the frontal hull's top. Nevertheless, its armour is still effective against enemy fire from smaller calibre guns. The 75 mm M3 tank gun is positioned in the M34 gun mantlet with the periscope, a smaller gun mount than the future M34A1 gun mantlet in which all future 75 mm M4 Sherman variants will be installed. This reduces the general protection of the frontal turret but also presenting a slightly greater gun depression by -2° than future M34A1 mantlet.

General info

Survivability and armour

Armourfront / side / back
Hull51 / 38 / 38
Turret76 / 51 / 51
Crew5 people
Visibility103 %

Armour type:

  • Cast homogeneous armour (hull, turret, cupola)
  • Rolled homogeneous armour (hull side - bottom)
Armour Front (Slope angle) Sides Rear Roof
Hull 19.5 mm (63-84°) Front glacis - Upper section
50.8 mm (48-63°) Front glacis - Centre section
34 + 25.4 mm (spherical) MG port
38.1 mm (spherical) Front glacis - Sides
50.8 mm (cylindrical) Transmission housing
38.1 mm (1-24°) Top
38.1 mm Bottom
38.1 mm Upper plate
38.1 mm (13°) Lower plate
38.1 mm (50°) Lower glacis
50.8 mm (27-39°) Front glacis
19.5 mm (0-28°) Turret area
19.5 mm (7°)
Engine bay - centre
19.5 mm (20-24°)
Engine bay - sides
Turret 50.8-76.2 mm (18-71°) Turret front
50.8 + 76.2 mm (cylindrical) Gun mantlet
50.8 mm (cylindrical) 50.8 mm (4°) 25.4 mm
Cupola 50.8 mm (spherical) 50.8 mm (spherical) Outer ring
25.4 mm Centre

Notes:

  • Suspension wheels are 15 mm thick while bogies are 10 mm thick and tracks are 20 mm thick.
  • Belly armour is 12.7 mm thick.
  • A small patch on the turret front right side is thinner (50.8 mm) than the rest (76.2 mm).
  • Bolt edges on the transmission housing are 101.6 mm thick.

Taking out the M4A1 Sherman is not an incredibly difficult task. Any gun with 100+ mm of penetration will go through the front plate. Panzer III users, however, would have some trouble penetrating the sloped frontal armour, even the later Panzer III models with the 50 mm KwK39 cannon. The T-34 with the L-11 cannon can also have a difficult time penetrating the front armour. Instead, use your speed and mobility to flank the Sherman, and a shot to the 38 mm thick side armour will most likely cause an ammo detonation, destroying the Sherman. If you are forced to face a Sherman head-on, aim for the flat spot around the vision blocks at the top of the front plate. They are extremely thin and upon penetration will destroy or heavily disable the Sherman.

Mobility

Speedforward / back
AB43 / 6 km/h
RB and SB38 / 5 km/h
Number of gears5 forward
1 back
Weight30.6 t
Engine power
AB763 hp
RB and SB400 hp
Power-to-weight ratio
AB24.9 hp/t
RB and SB13.1 hp/t
Game Mode Max Speed (km/h) Weight (tons) Engine power (horsepower) Power-to-weight ratio (hp/ton)
Forward Reverse Stock Upgraded Stock Upgraded
Arcade 43 6 30.6 620 763 20.26 24.93
Realistic 38 5 354 400 11.57 13.07

Modifications and economy

Repair costBasic → Reference
AB553 → 711 Sl icon.png
RB631 → 812 Sl icon.png
SB800 → 1 029 Sl icon.png
Total cost of modifications8 400 Rp icon.png
9 490 Sl icon.png
Talisman cost640 Ge icon.png
Crew training4 500 Sl icon.png
Experts16 000 Sl icon.png
Aces160 Ge icon.png
Research Aces190 000 Rp icon.png
Reward for battleAB / RB / SB
30 / 50 / 60 % Sl icon.png
118 / 118 / 118 % Rp icon.png
Modifications
Mobility Protection Firepower
Mods new tank traks.png
Tracks
Research:
560 Rp icon.png
Cost:
630 Sl icon.png
95 Ge icon.png
Mods new tank suspension.png
Suspension
Research:
380 Rp icon.png
Cost:
430 Sl icon.png
65 Ge icon.png
Mods new tank break.png
Brake System
Research:
380 Rp icon.png
Cost:
430 Sl icon.png
65 Ge icon.png
Mods new tank filter.png
Filters
Research:
700 Rp icon.png
Cost:
790 Sl icon.png
115 Ge icon.png
Mods new tank transmission.png
Transmission
Research:
680 Rp icon.png
Cost:
770 Sl icon.png
115 Ge icon.png
Mods new tank engine.png
Engine
Research:
680 Rp icon.png
Cost:
770 Sl icon.png
115 Ge icon.png
Mods tank tool kit.png
Improved Parts
Research:
560 Rp icon.png
Cost:
630 Sl icon.png
95 Ge icon.png
Mods extinguisher.png
Improved FPE
Research:
380 Rp icon.png
Cost:
430 Sl icon.png
65 Ge icon.png
Mods tank reinforcement us.png
Crew Replenishment
Research:
700 Rp icon.png
Cost:
790 Sl icon.png
115 Ge icon.png
Mods new tank horizontal aiming.png
Horizontal Drive
Research:
560 Rp icon.png
Cost:
630 Sl icon.png
95 Ge icon.png
Mods tank cannon.png
Adjustment of Fire
Research:
380 Rp icon.png
Cost:
430 Sl icon.png
65 Ge icon.png
Mods tank ammo.png
75mm_usa_APCBC_ammo_pack
Research:
380 Rp icon.png
Cost:
430 Sl icon.png
65 Ge icon.png
Mods new tank vertical aiming.png
Elevation Mechanism
Research:
700 Rp icon.png
Cost:
790 Sl icon.png
115 Ge icon.png
Mods art support.png
Artillery Support
Research:
680 Rp icon.png
Cost:
770 Sl icon.png
115 Ge icon.png
Mods tank ammo.png
75mm_us_M89_Smoke_ammo_pack
Research:
680 Rp icon.png
Cost:
770 Sl icon.png
115 Ge icon.png

At this rank, the difference between a stock tank and an upgraded one are quite minimal as the M4 Sherman still has adequate firepower and mobility to make a difference on the front-lines. The most notable traits would be sluggishness due to the engine and general inaccuracy over long ranges.

Focus on the survival parts, and then move on towards the M61 shot module, which will improve instant destruction upon penetration.

Armaments

Main armament

Vertical stabilizer
Reduces the swing of the gun in one plane while moving
Ammunition90 rounds
Reloadbasic crew → aces
6.5 → 5.0 s
Vertical guidance-12° / 18°
Main article: M3 (75 mm)
75 mm M3 Turret rotation speed (°/s) Reloading rate (seconds)
Mode Capacity Vertical Horizontal Stabilizer Stock Upgraded Full Expert Aced Stock Full Expert Aced
Arcade 90 -12°/+18° ±180° Vertical 22.8 31.6 38.4 42.5 45.2 6.50 5.75 5.30 5.00
Realistic 14.3 16.8 20.4 22.6 24.0

Ammunition

When discussing M4A1 shells, one always has to account for the fact that it's a medium tank. This means short to medium engagement range, so realistically it can benefit more from its short-range penetration figures than long-range sniping tanks would.

  • M72 shot - AP - Solid shot, stock shell. Acceptable penetration, poor post-penetration damage.
  • M48 shell - HE - Low-velocity shell useful against soft targets, in particular when hitting an open-topped vehicle. Harmless against any vehicle with more than 10 mm of armour.
  • M61 shot - APCBC - This shell has a better penetration than the M72 thanks to its ballistic cap and a good post-penetration damage thanks to its explosive filler.
  • M89 smoke shell - Useful to blind enemy vehicles that are too remote for you to disable so that you can progress towards objectives.

Penetration statistics
Ammunition Type of
warhead
Penetration @ 0° Angle of Attack (mm)
10 m 100 m 500 m 1,000 m 1,500 m 2,000 m
M72 shot AP 91 88 78 67 57 49
M48 shell HE 10 10 10 10 10 10
M61 shot APCBC 104 102 93 84 75 68
Shell details
Ammunition Type of
warhead
Velocity
(m/s)
Projectile
mass (kg)
Fuse delay
(m)
Fuse sensitivity
(mm)
Explosive mass
(TNT equivalent) (g)
Ricochet
0% 50% 100%
M72 shot AP 619 6.3 - - - 47° 60° 65°
M48 shell HE 463 6.3 0.2 0.1 666 79° 80° 81°
M61 shot APCBC 618 6.79 1.2 14 63.7 48° 63° 71°
Smoke shell characteristics
Ammunition Velocity
(m/s)
Projectile
mass (kg)
Screen radius
(m)
Screen deploy
time (s)
Screen hold
time (s)
Explosive mass
(TNT equivalent) (g)
M89 259 3 9 5 20 50

Ammo racks

Ammo racks of the M4A1
Full
ammo
1st
rack empty
2nd
rack empty
3rd
rack empty
4th
rack empty
5th
rack empty
6th
rack empty
7th
rack empty
8th
rack empty
Visual
discrepancy
90 82 (+8) 75 (+15) 72 (+18) 70 (+20) 54 (+36) 38 (+52) 22 (+68) (+89) Yes

Notes:

  • The visual discrepancy concerns rack 8: 28 shells are modeled but it contains only 21 shells.
  • Racks disappear after you've fired all shells in the rack.
  • Flanks and turret empty: 22 (+68) shells.

Machine guns

Ammunition600 rounds
Belt capacity200 rounds
Reloadbasic crew → aces
10.4 → 8.0 s
Fire rate575 shots/min
Vertical guidance-10° / 22°
Horizontal guidance-60° / 60°
Ammunition3 000 rounds
Belt capacity250 rounds
Reloadbasic crew → aces
10.4 → 8.0 s
Fire rate500 shots/min
12.7 mm M2HB
Mount Capacity (Belt) Fire rate Vertical Horizontal
Pintle 600 (200) 577 -10°/+22° ±60°

The roof-mounted M2HB .50 cal heavy machine gun is very good at knocking out tracks, punching through lightly armoured vehicles and shooting down low-flying aircraft. Use it sparsely because of its low ammo count.

7.62 mm M1919A4
Mount Capacity (Belt) Fire rate Vertical Horizontal
Coaxial 3,000 (250) 500 N/A N/A

The small calibre of the M1919A4 machine gun makes it largely ineffective against all armoured vehicles but the ones with an open compartment. It still can be used to ping targets as a range-finding help or to mow down minor obstacles blocking your line of sight.

Usage in battles

The M4A1 Sherman is a very capable medium tank. The 75 mm M3 cannon is capable of destroying nearly all armoured targets at the battle rating. Combined with the very fast turret traverse rate, fast reload time of 6.5 seconds and a vertical gun stabilizer, this tank is suited to an aggressive playstyle due to the M4A1's ability to react quickly and fire relatively accurately without coming to a full stop. The gun depression of -12° also makes this tank excel in hull-down positions, unlike any other tank. One must take into account this tanks very thin side armour of 38.1 mm thick, anti-tank weaponry of any rank will be capable of penetrating this weak side armour so protect the flanks.

Beware of this tank's very poor reverse speed as it only has one reverse gear. This affects the tank's ability to play in a defensive role. In addition, this tank is very prone to an engine fire, so the FPE is a modification that must be completed ASAP. Also, be sure not to let the enemy get sight of the driver and radio operators hull viewports. One single halfway decent shot, even from 20 to 30 mm guns can end the M4A1.

When it comes to armour, it may save you from time to time, but don't rely on it too much. Never angle this tank, because the rounded edges of the upper frontal plate are very thin. Remember that your biggest advantage is the combination of good mobility, capable gun, and decent armour.

The M4A1 Sherman plays best in an aggressive role. Firing on the move is not a difficult task with this tank due to the vertical stabilizer. Take advantage of this tank's immense gun depression of -12°.

The tall profile of the tank is an advantage and disadvantage. In the context of a hull down position, it is an advantage due to the M4A1 being able to angle the turret down over a hill or crest without having to pull further up the hill. The tall profile, however, does make the M4A1 more visible and the tall hull makes it easy to set off an ammo rack.

Enemies worth noting at this rank are the Panzer IV F2, the T-34 variants with the F-34 cannon, and the British Churchill infantry tank. All these tanks have adequate guns that could destroy the M4A1 in one shot.

If the M4A1 has been uptiered then it has a significantly higher chance of being picked off due to its weak side armour and with the rest of its armour being less effective due to more advanced enemy cannons.

Enemies worth noting:

M4A2 / A4 - These Sherman tanks are widely used by over 3 nations that spread across both the Allied and the Axis side, so no matter which nation you play they can be quite tough to destroy in the hands of a skilled tanker. Given the rather weak penetration of your short 75 mm gun, their hull can be almost impossible to penetrate when angled, hull down or 300 m away. For a M4A4, there are 2 apparent bulges on the upper front plate, a penetration through there can guarantee a knock out most of the times. But in case the opponent covers them up or when it's a M4A2, aim for the middle parts of the gun mantlet or the turret armour unprotected by the mantlet, you can at least make them defenseless. Note that their guns are equally weak against you, so wiggle around to disrupt their aim while you reload, you have a good chance of bouncing some shells.

Churchill I, Churchill III, Pz.Kpfw. Churchill - The Churchills, with their complex hulls and sturdy turrets, can be quite hard to penetrate at range. Again, manoeuvre as close to them as possible, the ideal distance being no more than 200 m. If they are angling their hull but facing their turret at you, only go for the turret. For the Mk I Churchills, aim at the near-vertical part of their rounded cheeks to ensure successful penetrations. For the Mk III and the German Churchill, also aim for their flat turret which is at most 89 mm. The shell should go in easily and knock out most, if not all of the crew. Only when you are facing their hull without any angles should you shoot the hull, otherwise shoot the turret only, as their big tracks can easily get in front of the frontal hull. The side hull have multiple layers of armour, some of which are weirdly angled and can absorb plenty of shells.

Pz.IV F2/G/H/J - The historical nemesis of any Sherman, the Panzer IV is one of the Sherman's biggest threats at this rank. The long barrel 75 mm gun will easily penetrate the Sherman from the front. The F2 variant is admittedly easy to deal with. A single APCBC to its hull or turret should end it pretty quickly, even at long range. The other variants are slightly harder to deal with. They have thicker hull armour, at 80 mm, which will be much harder to penetrate with the APCBC over 500 m. Luckily the turret armour remains the same at 50 mm, so aim at the turret if at longer ranges.

StuG III F/G - Another historical nemesis of the Sherman, and another big threat. The StuG III packs the same punch as the Panzer IV line with its long barrel 75 mm gun, whilst losing the turret, which turns out to be both an advantage and a disadvantage. Lacking a turret means that it will have to traverse the whole vehicle to target an enemy, but it also means that it has a lower profile. The StuG's armour profile is also more complex than the Panzer IV, with less flat areas. Certain areas are sloped and very bouncy. Luckily, there is a big weak spot. There are two flat plates on the front of the hull. The flat plate on the right is the drivers port. Shoot that and you are able to knock out the driver, gunner and loader in one go. This is a very efficient way to destroy this vehicle. With the F variant, you can use APCBC to instantly knock out this vehicle with a single shot. With the G variant, it is more reliable to use AP at ranges within 500 m to ensure penetration.

R3 T20 FA-HS - This speedy wheeled vehicle can circle around you with ease and wipe out all your crew with its fast firing 20 mm autocannon. Watch out for your gun barrel, as the R3 can easily destroy it. In a close encounter, never expose your side to it, as the 20 mm will shred through the thin 38 mm plate and detonate your ammo. However, a good thing is that you can rely on your .50 cal to destroy the R3.

Pros and cons

Pros:

  • Good 75 mm gun, with adequate damage and a decent rate of fire
  • Frontal glacis offers good armour at its rank and tend to make rounds ricochet
  • Very fast turret traverse speed
  • Thick gun mantlet, and overall very good sloped turret armour
  • Very strong when in a hull down position
  • Excellent gun depression -12 degrees
  • Very mobile once acceleration kicks in
  • Pintle-mounted HMG provides an anti-aircraft defence and can shoot down lightly armoured targets
  • Fitted with a vertical stabilizer, allowing more accurate fire on the move compared to other tanks, as well as better usage of shoot-n-scoot tactics

Cons:

  • Armour is not as strong against up-gunned vehicles like the Pz.IV F2 and the T-34 (1942)
  • The 38.1 mm side armour is vulnerable to even Rank I anti-tank fire and anti-aircraft guns
  • Narrow tracks offer poor ground flotation, thus poor off-road capabilities
  • Prone to damage by artillery barrages, tracks can be hit and the fuel supply can be ignited
  • Ammunition storage is vulnerable to cooking off
  • May tip over when travelling across steep inclines
  • A shot through hull vision blocks can set off turret's ammo supply and hull sponson ammo and a lucky shot might even knock the M4A1 out
  • Has a high profile especially when compared to other medium tanks
  • The cast hull creates frontal weak spots with very little effective thickness, e.g. the triangles between upper front plate and the side, and the curved hull hatches

History

Development

The Battle of France in 1940 proved to America that their current tank arsenal would not be able to withstand a German assault. The only tanks in their inventory at that time was the M2 Light Tanks and the M2 Medium Tank, both are inadequate against the German Panzer IIIs and the Panzer IVs. The US Army, in response, ordered for a tank armed with a 75 mm gun. While a 75 mm gun was available for use, a turret able to mount the gun was not. So while the turret and tank design underwent development, the 75 mm would be mounted on the stopgap design, the M3 Lee tank in a sponson mount. This interim design put the 75 mm on a lower and limited traverse mount that restricted its firing angle, but it did give the Allies a tank with the gun, so it was issued by the thousands until a better design could be made.

During the M3's development, the designs of the 75 mm armed vehicle were being drawn up and submitted by the Ordnance Department. Specifications on the tank design were strict, with restrictions made on the tank's height, width, and weight in order to make it able to be transported over bridges, roads, railroads, and on ships. These specifications would help the army by making the tank be very flexible on strategic, logistical, and tactical grounds. On April 1941, the Armored Force Board chose the simplest of the designs, which was a redesigned M3 hull and chassis with a turret mounting the 75 mm gun designated the T6, completed in September 1941. This tank would then designated the Medium Tank M4 in American service. The tank would become the most used Allied tank during World War II as it was lent out by the thousands in the Lend-Lease program to the Allied countries. The British called the M4 the "Sherman", which coined into the tank's name M4 Sherman that it would be known as in history. The production for the Shermans began on October 1941 and would continue to be produced until the end of the war in 1945 with around 50,000 units produced, making it the second most-produced tank in World War II before the T-34 tank.

Design

Many variants of the Shermans were produced, but they all followed a similar layout. The driver and bow gunner sat in the front driving compartment, the fighting compartment in the middle housed the turret its three crew member, and in the back was the engine compartment. The Sherman used many features present in previous American tank designs, the vertical volute suspension system (VVSS) and radial engine from the M2 light tanks, and the sloping armour of the M2 Medium. This became a contributing factor on the Sherman's reliability on the field, as most of the design flaws were ironed out with the previous tank designs. The tank-mounted the 75 mm M3 gun, giving the tank very good AP and HE capabilities. The Sherman's turret traverse speed was very fast, able to traverse a full 360 degrees in only 15 seconds, which is considerably faster than the traverse speed on most German tanks. Another unique feature on the Sherman was the installation of a gyroscopic stabilizer on the gun and sight, making the Sherman one of the first produced tanks to incorporate those features. While the stabilization was only done for the vertical plane, it kept the gun stable enough to be able to shoot on the move effectively, with a study showing a 70 % hit probability on an enemy 300 to 1,200 yards away when moving at a speed of 15 mph. However, this feature was controversial among the crew and experiences with it vary.

The M4A1 Sherman model ran on a gasoline Continental R975C-1 radial engine and was one of the first models of the Sherman developed. The model in-game features the early M38 telescopic sight in the M4 periscope with no zoom, which was later replaced with an M55 telescopic sight in the gun mantlet by recommendation from the British.[1] The tank's hull was fully cast, giving the tank a distinctive rounded slope front and sides. Though the rounded shape gave the frontal armour uneven angling, it provided adequate protection up to 100 mm in thickness in certain areas. Casting the hull took fewer man hours to perform, but suffered from the limited capability of most American factories and was hard to repair on the field. Thus, welding was prioritized as the primary manufacturing method in the other Sherman variants.[2] Nevertheless, up to 6,281 M4A1s were produced from February 1942 to December 1943, out of the 49,234 Sherman units produced in the war.

Combat usage

European theater

The Shermans first saw combat in the North African Campaign in the Second Battle of El Alamein in October 1942 in the hands of the British. It was much quicker to reinforce the British armoured divisions with the more than 300 M4 Shermans sent to North Africa than it was to create new American ones. It proved much better than the German Panzer IIIs and Panzer IVs, able to eliminate them at distances more than 2,000 yards away. The Americans received their first Shermans in the next month in Operation Torch. However better the Shermans were to the German tanks at the time, the Allied armoured units still suffered casualties against the German tanks and anti-tank guns, most notably in the Battle of Kasserine Pass. In Italy, the Shermans proved much more mobile than the German Panzers, able to travel cross-country on the hilly terrain with ease. However, it was at this stage that the Sherman's shortcoming began to take face in the advent of the newer German tanks, the Tiger Is and Panthers. These two tanks featured armour that proved impenetrable when fired at the front, and with guns that could take out the Shermans from farther than the Sherman's effective combat range. The Shermans have to hit the side of these tanks for penetration and at ranges that were considered suicidal. Although programs were initiated to up-gun the Sherman with a 76 mm gun, American leaders determine that the Panther and Tigers would not be produced in large quantities and were not as great as a threat as these two vehicles could still be destroyed by the 75 mm gun and standard anti-tank equipment.

During the Invasion of France, it was clear that the Sherman's current build with a 75 mm gun was no longer going to cut it against the German armoured forces. While the Sherman was adequate against what little Panzer III and IVs the Germans have left and against infantry and fortifications with the 75 mm gun, the Panthers and Tigers were in much large quantity than expected, and proved better in armour and firepower to the Shermans. Though in the bocage country of France, the Allies lost more tanks to hidden anti-tank guns and infantry weapons than to tanks. Despite these losses, the mass production of M4 Sherman back in the United States ensured that enough tanks were available for the Allied Forces as they spearhead through France, plus the lack of any other capable tanks meant they had to use the Shermans for the time being. The large quantities of Shermans produced during the war gave the Allied armoured units a major advantage of being fully equipped as the German panzer divisions were rarely in full strength, with some US infantry divisions having more tracked vehicles than some of the panzer divisions. Due to the high attrition rates, tank crews sometimes add improvised armour onto their Shermans in the form of sandbags and logs in hopes of increased survival, but these were determined to be ineffective from evaluations. A more effective method was to have metal armour welded on in improvisation, and an official project was made for such "assault tanks" that ended with the M4A3E2 "Jumbos" with 250 made for the Battle of Normandy. During the Battle of Normandy, the first 76 mm Shermans on the M4A1 were put into combat in Operation Cobra in limited numbers. The Allies continued to primarily use the 75 mm Shermans until the Battle of the Bulge in Winter 1944, when the commanders request only 76 mm Shermans to be brought into Europe as the battle showed the intense armour disparity with the German's large numbers of Panthers and Tiger IIs. While new units arriving in Europe were armed exclusively with 76 mm armed-Shermans, the veteran units kept the 75 mm Shermans, to which it continued to do well against softer targets with little threat from German armour due to their extreme declining numbers.

Pacific theater

The M4 Sherman's importance in the Pacific theatre was less than that of the European theatre due to the different tactical doctrine established from the amphibious nature of combat. Only about 20 tank battalions fielded by the US Army were sent to support the Pacific theatre of operations, compared to the total 16 armoured divisions and 70 tank battalions they have in service. The low priority in tanks was due to the following reasons. Firstly, the jungle terrain on most of the islands fought for against the Japanese were unsuitable for the deployment of large-scale armoured units, relegating armour support to light tanks such as the M3 Stuarts. Secondly, the Japanese forces' armoured units were rather inferior to the American tank forces by 1943. While the Japanese Type 95 Ha-Go tank was comparable to the M2A4 light tank, the Shermans out gun these tanks by a large margin. Such a large margin that the tank crew prefer to use high-explosive shots against the Japanese tank than regular armour-piercing as the AP rounds would penetrate straight through without causing much damage in the interior of the tank. The Japanese developed the Type 3 Chi-Nu and the Type 4 Chi-To to fight back the Shermans, but these two never saw combat as they were kept at the Japanese Homeland for the defence against the Allied invasion.

The Shermans, when deployed, were superior to most of the Japanese anti-tank equipment and often were essential to some of the Marine's advances on some of the island assaults. In 1945, the equipping of flamethrower Shermans known as M4A3R3, nicknamed "Zippos", were a significant boost to the infantry's firepower in having a very long range of fire compared to the standard infantry-modelled flamethrowers with the benefit of being in an armoured vehicle. The Zippos are able to flush out enemy combatants from within heavily fortified bunkers and caves that would be dangerous for even flamethrower infantry to take out. The Japanese solution against the Shermans, other than with their 47 mm anti-tank guns, were often suicidal tactics ranging from placing satchel charges right onto the tank, using pole-mounted anti-tank mines to reach and destroy the tank or even simply throwing oneself underneath a tank with mine or other explosive and triggering it manually.

Lend-Lease

The Sherman tank was given out in large numbers to American Allies during World War II under the Lend-Lease policy. While America retained about 20,361 Shermans in the Army and Marine Corps, 17,184 went to Britain (about 34% of Shermans produced and 78% of Shermans given out) and the Soviet Union obtained 4,102 Shermans.[3] China obtained 812 Shermans, Brazil with 53, and New Zealand and Australia for 153 Shermans total. Other countries using the Shermans were Poland, Free France, and Czechoslovakia. The British deployed the Sherman among their armoured squadrons in such a large number to become the standard tank of their armoured forces. The increased threat of German tanks in the European theatre also provoked the British to up-gun the M4 Sherman with a more capable gun, resulting in the Firefly.

Post-War

After the war, the Shermans continued serving America and its allies as the M4A3E8 with a new suspension and 76 mm gun. The M26 Pershing that was introduced late in World War II was phased out for the Shermans due to its unreliability, and the Sherman stayed until the M46 Patton was introduced. After being phased out of American service, many other countries still used the Sherman as their main tank, mainly Israel where they up-gun the tank with the much powerful post-war French 75 mm and 105 mm gun as the M-50 and M-51 respectively (nicknamed "Super Shermans"). These proved successful as they were able to fight against the Soviet-supplied T-54 tanks and T-34-85s in Middle East service, proving the Sherman as a successful and adaptable design for many years to come.


Archive of the in-game description

The M4A1 was an M4 medium tank with a cast hull, cast turret, and the 350 hp Continental R-975, a gas-powered radial engine. The M4A1 went into full-fledged production in February 1942, with 6,281 rolling off the lines between then and January 1944. The hull's front plate initially had viewing slits cut out, though later it was made from one piece. The front section of the gear compartment was made out of three pieces, subsequently becoming a single section. The M34 cannon mantlet was replaced with the M34A1 by 1943.

M4A1 tanks were shipped to Great Britain as part of Lend-Lease. The Sherman's baptism by fire came in North Africa, where the British thought the new American tanks played a fairly significant role in the victory at El Alamein. M4A1s also served in Italy.

The tank enjoyed a strong reputation in battle, quickly replacing the M3 as the Americans' main medium tank. The M4 turned out to be best for desert combat, a conclusion confirmed by post-war experience as well. The flat, wide open spaces in Africa were a perfect natural environment allowing it to exploit its reliability, high speed, comfortable interior, excellent field of view, and radio communications. The tank's range suffered, but the Allies handled that issue by streamlining their supply lines. In addition, tankers often carried along with extra fuel in canisters. A high silhouette made the M4 easy to target, and its armament was made obsolete in 1943 with the appearance of the German Pz.V and Pz.VI tanks. The M4's weaknesses were an engine, ammunition, and fuel tanks prone to fire and explosions due to its relatively light armour.


Media

Skins
Videos

See also

Other M4A1 vehicles in the game

External links

References

Bibliography
  1. Zaloga Steven. Armored Thunderbolt: The U.S. Army Sherman in World War II Stackpole Books, 2008, "Baptism Of Fire"
  2. Zaloga Steven. Armored Thunderbolt: The U.S. Army Sherman in World War II Stackpole Books, 2008, "The School of Tank Technology"
  3. Zaloga Steven. Armored Thunderbolt: The U.S. Army Sherman in World War II Stackpole Books, 2008, "The British Sherman"


USA medium tanks
M2  M2
M3  M3 Lee · ▃Grant I
M4  M4 · Calliope · M4A1 · M4A1 (76) W · M4A2 · M4A2 (76) W · M4A3 (105) · M4A3 (76) W · M4/T26
M26 Pershing  T20 · T25 · M26 · M26 T99 · M26E1
M46/47/48 Patton  M46 · M46 "Tiger" · M47 · M48A1 · T54E1 · T54E2
M60  M60 · M60A1 (AOS) · M60A1 RISE (P) · M60A2 · M60A3 TTS · M728 CEV · 120S
MBT-70  MBT-70 · XM803
M1 Abrams  XM1 (Chrysler) · XM1 (GM)
  M1 Abrams · M1 KVT · IPM1
  M1A1 · M1A1 HC · M1A1 Click-Bait
  M1A2 Abrams · M1A2 SEP · M1A2 SEP V2
Other  T95E1
Australia  M1A1 AIM
Canada  M4A5
Israel  ▃Magach 3 (ERA) · ▃Merkava Mk.1 · ▃Merkava Mk.2B · ▃Merkava Mk.3D
Turkey  M60 AMBT