M10 GMC (China)

From War Thunder Wiki
Jump to: navigation, search
Rank VI USA | Premium | Golden Eagles
A-10A Thunderbolt (Early)
This page is about the Chinese tank destroyer M10 GMC (China). For other uses, see M10 (Disambiguation). For other vehicles of the family, see M10 (Family).
us_m10.png
GarageImage M10 GMC (China).jpg
␗M10 GMC
AB RB SB
3.7 3.3 3.3
Research:11 000 Specs-Card-Exp.png
Purchase:22 000 Specs-Card-Lion.png
Show in game

Description

In 1948, the Republic of China's party, Kuomintang, ordered the Armoured Forces Command to acquire abandoned military surplus specially from the Pacific theatre. A total of 34 M10 TDs were purchased from the US, which at the time was trying to dispose as much military surplus as possible. The vehicles never saw combat in mainland China, instead they were evacuated to Taiwan. In 1949, with the new government established in Taiwan, the vehicles received several modifications, some of which included the installation of a Japanese Type 91 105 mm howitzer, effectively transforming the vehicle into a self-propelled artillery piece. At the end, the vehicles were retired from said role, with the introduction of the more specialized M7 Priest in 1955-1957.

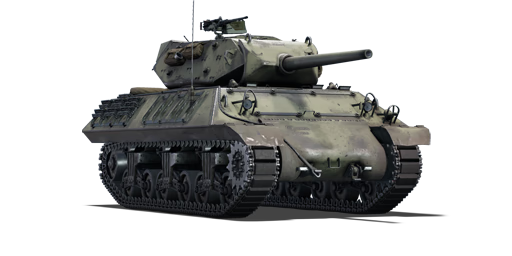
It was introduced in Update 1.91 "Night Vision". This Chinese vehicle is identical to the US M10 GMC, however it does not have access to the Add-on Armor modification. It is armed with a very powerful gun for its BR, but that comes with some downsides, mainly mobility and survivability. The turret has an extremely poor traverse, and the survivability against HE projectiles or artillery is not ideal, since it is open top. It should be played as a tank destroyer, waiting around corners and in defensive positions.

General info

Survivability and armour

Armourfront / side / back
Hull51 / 25 / 25
Turret57 / 25 / 25
Crew5 people
Visibility87 %

Although the armour on the M10 is rather thin, it is actually quite effective as it is sloped. The gun mantlet area is quite strong, and since you'll most likely be fighting at range, it can easily bounce shells. The 38 mm hull front is also at a good angle, so the effective thickness is actually closer to 60 mm. The least armoured parts of the M10 are the sides and the back of either the hull or the turret. They will be easily penetrated by just about any gun at your battle rating. However, the turret's back has a 50 mm thick angled counterweight that adds protection.

Armour type:

  • Rolled homogeneous armour
  • Cast homogeneous armour (Gun mantlet, Transmission area)
  • Structural steel (Counterweight)
Armour Front (Slope angle) Sides Rear Roof
Hull 38.1 mm (55°)
50.8 mm (7-55°) Transmission area
19.05 mm (38°) Top
25.4 mm Bottom
19.05 mm (28°) Top
25.4 mm (7-52°) Bottom
19.05 mm Front
9.5 mm Rear
Turret 25.4 mm (68-89°) Turret front
57.15 mm (0-47°) Gun mantlet
25.4 mm (24-47°) 25.4 mm (30-47°) Turret rear
50 mm (0-50°) Counterweight
N/A

Notes:

  • Suspensions wheels are 20 mm thick, bogies are 10 mm thick, and tracks are 20 mm thick.
  • Belly armour is 12.7 mm thick.
  • Hull rear sides are protected by attached grousers that give 20 mm of extra armour.

The armour of the M10 is quite decent for the rank and can make shells ricochet when angled properly, but nonetheless, the armour is not thick enough to resist the stronger tank weapons of Rank II. The thickest part of the front hull is the 51 mm lower plate and the upper plate is 38 mm, though both are sloping at 55 degrees from vertical. The sides and back are only 19 mm slightly angled and thus can be penetrated by most weapons stronger than a 12.7 mm machine gun. This fact is made worse by the positioning of ammo racks on the sides, making it easy to knock the M10 GMC out with a side penetration. The turret has slightly better armour with the gun mantlet having 57 mm angled at 45 degrees on the front, but it is still very weak on the sides and back. The front of the turret can often eat shells as the shell will fragment on the initial armour, and the massive breech of the 76 mm cannon will often absorb most if not all of the spalling, leaving the turret crew untouched. This will take the M10 out of combat, but when backed up by team-mates it is possible to reverse away to repair. The turrets top is exposed and because of that artillery barrages and HE shells are much more lethal to the crew. One should avoid angling the armour a great degree as it may expose the weaker side armour at a more perpendicular angle.

For those fighting the M10 from the front, firing towards the upper left side of the hull glacis (towards the right from the firing perspective) will be able to knock out both the driver and/or gunner if the shot penetrates in the right angle. If this does not completely destroy the tank, it certainly has crippled it and the follow-up shot should go towards the opposite side to knock out the rest of the crew. Repeat if necessary in cases where the crews are still active inside the tank. It is also a good idea to shoot the bottom of the hull to disable the transmission if the M10 is trying to flee.

The M10's side is lined with ammo racks and it's extremely easy to knock the tank out. Simply aim below the turret, shoot the side and the ammo should explode in a blaze of glory. If the ammo does not explode the first time, then try shooting the same spot again or aim more to the front of the hull to knock out any remaining crew. It is possible to blow up the fuel tanks or set it on fire by shooting the rear of the M10, the worse case at least the engine will be disabled.

There is not a whole lot of places to shoot at the back of the M10, though a shot at the turret can knock out the turret crew or a shot in the hull can cripple the engine. Two ammo racks are present at the rear of the turret, but these racks are most likely empty as 1) They are the first two to run dry and 2) Players will usually keep this empty with reduced ammo load. The best place to shoot in the rear would be the engine to immobilize the M10 and potentially set it on fire.

Mobility

Speedforward / back
AB53 / 6 km/h
RB and SB49 / 5 km/h
Number of gears5 forward
1 back
Weight29.9 t
Engine power
AB782 hp
RB and SB410 hp
Power-to-weight ratio
AB26.2 hp/t
RB and SB13.7 hp/t
Game Mode Max Speed (km/h) Weight (tons) Engine power (horsepower) Power-to-weight ratio (hp/ton)
Forward Reverse Stock Upgraded Stock Upgraded
Arcade 53 6 29.9 582 782 19.46 26.15
Realistic 49 5 363 410 12.14 13.71

Modifications and economy

Repair costBasic → Reference
AB737 → 911 Sl icon.png
RB884 → 1 093 Sl icon.png
SB1 074 → 1 328 Sl icon.png
Total cost of modifications10 430 Rp icon.png
13 830 Sl icon.png
Talisman cost750 Ge icon.png
Crew training6 300 Sl icon.png
Experts22 000 Sl icon.png
Aces210 Ge icon.png
Research Aces220 000 Rp icon.png
Reward for battleAB / RB / SB
50 / 80 / 100 % Sl icon.png
124 / 124 / 124 % Rp icon.png
Modifications
Mobility Protection Firepower
Mods new tank traks.png
Tracks
Research:
690 Rp icon.png
Cost:
910 Sl icon.png
90 Ge icon.png
Mods new tank suspension.png
Suspension
Research:
470 Rp icon.png
Cost:
620 Sl icon.png
60 Ge icon.png
Mods new tank break.png
Brake System
Research:
470 Rp icon.png
Cost:
620 Sl icon.png
60 Ge icon.png
Mods new tank filter.png
Filters
Research:
870 Rp icon.png
Cost:
1 200 Sl icon.png
115 Ge icon.png
Mods new tank transmission.png
Transmission
Research:
1 700 Rp icon.png
Cost:
2 200 Sl icon.png
220 Ge icon.png
Mods new tank engine.png
Engine
Research:
1 700 Rp icon.png
Cost:
2 200 Sl icon.png
220 Ge icon.png
Mods tank tool kit.png
Improved Parts
Research:
690 Rp icon.png
Cost:
910 Sl icon.png
90 Ge icon.png
Mods extinguisher.png
Improved FPE
Research:
470 Rp icon.png
Cost:
620 Sl icon.png
60 Ge icon.png
Mods tank reinforcement cn.png
Crew Replenishment
Research:
870 Rp icon.png
Cost:
1 200 Sl icon.png
115 Ge icon.png
Mods new tank horizontal aiming.png
Horizontal Drive
Research:
690 Rp icon.png
Cost:
910 Sl icon.png
90 Ge icon.png
Mods tank cannon.png
Adjustment of Fire
Research:
470 Rp icon.png
Cost:
620 Sl icon.png
60 Ge icon.png
Mods tank ammo.png
76mm_usa_APCBC_ammo_pack
Research:
470 Rp icon.png
Cost:
620 Sl icon.png
60 Ge icon.png
Mods new tank vertical aiming.png
Elevation Mechanism
Research:
870 Rp icon.png
Cost:
1 200 Sl icon.png
115 Ge icon.png

First off, get both protection modifications: Parts and FPE. After that, it is recommended to research the M62 APCBC shell, then move on to other modifications from the Firepower tree: Horizontal Drive, Adjustment of Fire, and the Elevation Mechanism. Lastly research the Mobility tree: Tracks, Filters, Engine, Transmission, Suspension, Brake System.

Armaments

Main armament

Ammunition54 rounds
Reloadbasic crew → aces
7.1 → 5.5 s
Vertical guidance-10° / 30°
Main article: M7 (76 mm)

The 3-inch (76 mm) cannon is a wonderful and very powerful gun. APCBC ammo can penetrate and knock out most tanks on the battlefield even from long range. The M10 also has an AP round with no explosive filler that has higher penetration but does less post-penetration damage. Because the APCBC shell has enough penetration, the AP shot is less useful, although carrying a few of these shells could prove useful in certain situations. It is not a bad idea to carry HE ammo as well to fight lightly-armoured and open top tanks like the M16 MGMC.

The powerful gun and potent ammunition make the M10 a good sniper vehicle at its battle rating, especially with its -10° gun depression, giving the M10 the ability to maximize a hull-down position. Unfortunately, even though this tank destroyer does feature a turret, its turret rotation speed is extremely slow (< 4.0°/s) due to its historic configuration of only possessing a hand crank for the turret traverse. It is possible to crest a ridge and watch as the enemy rotates their turret, takes aim, and shoots the M10, all while the latter is rotating its turret into position. Thus, it is better to see it as a regular fragile SPG instead of a turreted SPG and fight from a distance and in possible concealment.

Take warning that the gun's excellent penetration is too much for lower rank tanks and can lead to over-penetration, thus dealing less or even no damage to the enemy. Also, start each round with at least six missing shells (as detailed in the Ammo Racks section) to remove the ammo racks on the rear of the turret, reducing turret penetration vulnerability to an instant cook-off.

76 mm M7 Turret rotation speed (°/s) Reloading rate (seconds)
Mode Capacity Vertical Horizontal Stabilizer Stock Upgraded Full Expert Aced Stock Full Expert Aced
Arcade 54 -10°/+30° ±180° - 4.0 5.5 6.7 7.4 7.8 7.15 6.32 5.83 5.50
Realistic 2.7 3.2 3.8 4.2 4.5

Ammunition

Penetration statistics
Ammunition Type of
warhead
Penetration @ 0° Angle of Attack (mm)
10 m 100 m 500 m 1,000 m 1,500 m 2,000 m
M79 shot AP 134 132 121 109 99 89
M42A1 shell HE 17 16 15 13 12 10
M62 shell APCBC 149 146 133 119 106 94
Shell details
Ammunition Type of
warhead
Velocity
(m/s)
Projectile
mass (kg)
Fuse delay
(m)
Fuse sensitivity
(mm)
Explosive mass
(TNT equivalent) (g)
Ricochet
0% 50% 100%
M79 shot AP 792 6.8 - - - 47° 60° 65°
M42A1 shell HE 853 5.84 0.2 0.1 390 79° 80° 81°
M62 shell APCBC 792 7 1.2 14 63.7 48° 63° 71°

Ammo racks

Ammo racks of the M10 GMC (identical).
Full
ammo
1st
rack empty
2nd
rack empty
3rd
rack empty
4th
rack empty
5th
rack empty
Visual
discrepancy
54 49 (+5) 37 (+17) 25 (+29) 13 (+41) (+53) No

Note:

  • As they are modelled by sets of 2, shells disappear from the rack only after you fire both shells in the set.

Machine guns

Ammunition400 rounds
Belt capacity200 rounds
Reloadbasic crew → aces
10.4 → 8.0 s
Fire rate575 shots/min
Vertical guidance-10° / 28°
Horizontal guidance-60° / 60°
Main article: M2HB (12.7 mm)
12.7 mm M2HB
Mount Capacity (Belt) Fire rate Vertical Horizontal
Pintle 400 (200) 575 -10°/+28° ±60°

Usage in battles

The M10 is a support vehicle. Find a good sniping position and lay behind the team taking out enemy tanks from a distance. Try to stay away from enemy tanks to avoid getting destroyed quickly. To make full use of its decent sniping capacity, find a spot that:

  • Overlooks the battlefield, streets or some passage
  • Is Away from the frontline
  • Offer slopes or cover and bushes
  • Is easily accessible

With a location like that, the M10 can utilise its -10° gun depression and use hull down. Its turret front and mantlet can consistently cause ricochets especially in a downtier. Looming behind bushes, an M10's well aimed shots should be able to knock out most enemy tanks at the battle rating range from long range. Even if you get spotted, any slope or hard covers will provide protection for you.

If fighting in a close quarter's environment, do not try to push forward without support. Stay behind friendly tanks in order to support them without being shot at. If in an urban scenario on maps like Poland or Normandy, utilize the tank's turning speed to rotate the turret to the right angle. But, the best option is still to find a hull down location. For example, in Normandy, during arcade, the best location is towards the C point, where there are hills and dips that can be used to hide the hull, while giving a good view of the battlefield.

The M10 has a very slow turret rotation speed, but the M10 can traverse faster than it can rotate its turret and use its high speed when at high gear to produce some interesting skids via the physics engine to swerve the M10 and angle its gun at an enemy tank around the corner. It is recommended to understand and get a good feel of the M10's mobility and horsepower on dirt and paved roads before attempting this stunt. The low turret rotation speed means that a M10 player must always be aware of where the enemy tanks are, because they will not be able to turn the turret quickly if the enemy is able to flank the M10. In addition, the M10's side armour is weak, and the ammunition storage is in the hull sides, so if the enemy is able to shoot the M10 at that location, it is very likely to explode the ammo rack and destroy the tank with one shot.

Enemies worth noting:

R3 T20 FA-HS: this vehicle is the exact opposite tank when comparing to an M10: extremely high top-speed, great traverse and fast gun rotation. A well-manoeuvred R3 can easily circle around the M10 and shoot AP shells through the thin side, while the M10 struggles to get the gun on target even when traversing the hull with the gun. If you know an R3 is around, you better turn your hull towards the possible direction and be ready to engage. Move the hull with the gun to target quicker. Even if you miss, the M2 Browning can still penetrate the R3 and knock out its crews. Note that a side shot on the R3 does not guarantee a kill as the fuse might not get triggered, and the crew are pretty separated. The R3 can run away and repair for another attack. A frontal shot, however, is likely to knock it out as the crew are all lined up.

8,8 cm Flak 37 Sfl.: also known as the "flak truck", it is rather hard to knock out due to the fact that its armour is so thin that almost every shell will over-penetrate, dealing almost no critical damage. Plus this vehicle mostly face their side to the targets, making it even harder to kill them as the crew are all far apart. So it can usually take quite some hits and take out the shooters one by one. As the shooter, aim for the left side of its turret first to disable its gunner first, then knock out the rest of its crew (right turret & driving compartment). Do not hope that the M2 HB can kill all the the crew members; the "flak truck" 's armour is also angled enough for any MG to penetrate.

Pros and cons

Pros:

  • Powerful gun, APCBC shell can penetrate virtually any opponent it encounters, even the Tiger H1
  • Good top speed for a SPG; allows it to get to positions timely
  • The huge, V-shaped gun mantlet and gun breech can often bounce / absorb shells (e.g. 75 mm M3 and 76 mm F-34 / ZIS-5)
  • Good gun depression of -10° adapts almost all terrains
  • Powerful roof-mounted M2 Browning can effectively damage light vehicles or low flying aircraft

Cons:

  • Very poor turret traverse speed and sluggish hull traverse; not adequate results in close distance engagements
  • Base armour is quite thin, easily penetrated by common opponents like the Pz.IV F2 or the US M10
  • Open topped, vulnerable to aircraft strafing
  • Only x3.5 gunsight zoom making it hard to shoot distant targets
  • Poor reverse speed; affects the ability to retreat quickly
  • Does not have access to Add-on Armor, more vulnerable to enemy fire as a result

History

Some years after the Second World War, in 1948. The Republic of China's party, Kuomintang, ordered the Armoured Forces Command to establish special groups of personnel dedicated to locating and acquiring surplus equipment or abandoned materials of war. These groups travelled to several places, including the Pacific theatre.

The groups managed to collect several M10 tank destroyers used by the Americans during battles in the Pacific. Other vehicles like the M5 Stuart and the amphibious LVT-2 also were collected. Most of these vehicles were only lightly damaged by combat. But the majority of their original 76 mm guns were either destroyed or not reliable for service.

By the end of 1948, another 34 M10 tank destroyers were purchased from the United States. These findings and acquisitions were then shipped to Shanghai Longhua Tank Plant in mainland China for restorations and modifications.

Around this time, the Chinese Civil War was still ongoing. The numerous battles were frequently won by the Communist Party of China's armoured forces; and their rising superiority in tank numbers. This lead to their eventual total control of mainland China and the retreat of the Kuomintang to Taiwan.

M10's modifications

Once the Longhua Tank Plant was re-established in Taiwan, in 1949, the modifications planned for these M10 tank destroyers continued. They intended to increase the firepower and armour of these vehicles since it was considered obsolete for post-war use. The modifications would provide artillery support against a possible communist disembark on the ROC's islands.

The original 76 mm gun was to be replaced by a Japanese Type 91 105 mm howitzer, turning the vehicle into self-propelled artillery piece. However, the old turret design did not provide sufficient space for the crew and the new gun, so modifications to the turret had to be executed. After successful trials of this modification, about another 18 were modified.

After the modifications finished, they participated in the 1950's New Year's military parade, and in national parades during 1952 and 1953.

It is uncertain if they took part in any battle before this, since the Chinese Communist Army never successfully invaded Republic of China's islands, the M10s had to be evacuated from the Battle of Shanghai, and their use during the battle in mainland China would have been severely limited due to a shortage of ammunition available.

M10s in ROC's service ultimately got decommissioned by the arrival of the US's M7 Priest through 1955-1957. Most of the M10 were scrapped or their modifications disassembled.

Media

Skins

See also

Vehicles equipped with the same chassis

External links


U.S. Army Ordnance Department/Corps*
Light tanks  T18E2 · M24 (Designed in collaboration with Cadillac)
M3 Stuart  M3 · M3A1 Stuart · M3A1 (USMC)
M5 Stuart  M5A1
Medium tanks  M3 Lee
M4 Sherman  M4 · M4A1 · M4A2 · M4A3 (105) · Calliope
  M4A1 (76) W · M4A2 (76) W · M4A3 (76) W
M26 Pershing  T20 · T25 · M26 · M26E1 · M26 T99
Patton Series  M46 · M46 "Tiger" · M47
Prototypes  T54E1 · T95E1
Heavy tanks  M103
M4 Jumbo  M4A3E2 · Cobra King · M4A3E2 (76) W
M6 Heavy  M6A1 · M6A2E1 · T1E1
M26 Pershing  T26E1-1 · T26E5
Prototypes  T14
T29  T29 · T30 · T34
T-32  T32 · T32E1
Tank destroyers  M3 GMC · M10 GMC · M56
M8 GMC  M8 HMC · M8A1 GMC
M36 GMC  M36 GMC · M36B2
Prototypes  T28 · T95
SPAAGs 
Production  M19 MGMC · M42
Export/Captured  ␗M8 HMC · SU-57
Stuart  Stuart I · Stuart III · ␗M3A3 Stuart · ␗M3A3 (1st PTG) · ▄M3A3 · ▄M3A3 Stuart · ▃Stuart VI (5th CAD) · ␗M5A1
Lee/Grant  ▂M3 Medium · ▃Grant I · Grant I
M4 Sherman  Sherman II · ▄M4A1 · ␗M4A1 (75) W · ▀M4 748 (a) · ▂M4A2 · ▄M4A3 (105) · ▅M4A3 (76) W · ▄M4A3E2
  ␗M4A4 · ␗M4A4 (1st PTG) · ▄Sherman V · ▄M4A4 · ▄Sherman I Composito
M26 Pershing  M26 "D.C.Ariete" · M26A1
M47 Patton  mKPz M47 G · ▅M47
M10 GMC  ␗M10 GMC · ▄M10 GMC
M36 GMC  ␗M36 GMC · M36B1 · ▅M36 · ▄M36B2
M19 MGMC  ▅M19A1
M42 MGMC  ▅M42 · ␗M42
  *The Ordnance Department was renamed to the Ordnance Corps after the Army Reorganization Act of 1950.

China tank destroyers
PLA 
Gun vehicles  PLZ83 · PTZ89
Missile vehicles  AFT09
ROC 
Missile vehicles  CM25
USA 
Gun vehicles  ␗M8 HMC · LVT(A)(4) (ZiS-2) · ␗M10 GMC · ␗M36 GMC
Missile vehicles  ␗M113A1 (TOW)
USSR 
Gun vehicles  ␗SU-76M · ␗ISU-152 · ␗ISU-122 · ␗SU-100