Difference between revisions of "Ki-87"
(→Description) |
m (Many changes. Pros/cons updates, Mec updates, combat strategies update) (Tag: Visual edit) |
||
| Line 128: | Line 128: | ||
=== Tactics to Win With === | === Tactics to Win With === | ||
[[File:Ki87 gunview.png|thumb|Ki-87 Boom and Zooms a Bearcat]] | [[File:Ki87 gunview.png|thumb|Ki-87 Boom and Zooms a Bearcat]] | ||
| + | |||
* '''Force head-ons''': The Ki-87 can't energy fight or turn fight with any props (save [[Ta 152 C-3]] and [[P-47M-1-RE]]). It will be outclassed. The only time you should ever turn fight is if the enemy is crippled or in a low energy state. To deal with fighters that are higher than you, you need to step up and force a head-on. Most likely, Allied players will take the head-on. Your guns' good velocity should be enough to kill them. Remember to pull off early, as even a quick burst can kill you. If the enemy is higher than you and appears to engage, dive down. The enemy will most likely level out. Keep your speed high, as this will allow you to pull up and engage in vertical head-ons. This is your last chance to score the kill, as the enemy will now be at an advantage. | * '''Force head-ons''': The Ki-87 can't energy fight or turn fight with any props (save [[Ta 152 C-3]] and [[P-47M-1-RE]]). It will be outclassed. The only time you should ever turn fight is if the enemy is crippled or in a low energy state. To deal with fighters that are higher than you, you need to step up and force a head-on. Most likely, Allied players will take the head-on. Your guns' good velocity should be enough to kill them. Remember to pull off early, as even a quick burst can kill you. If the enemy is higher than you and appears to engage, dive down. The enemy will most likely level out. Keep your speed high, as this will allow you to pull up and engage in vertical head-ons. This is your last chance to score the kill, as the enemy will now be at an advantage. | ||
| − | * '''Keep your | + | * '''Keep your altitude''': You need to worry about speed and altitude. DO NOT go for ground targets, as you will be an easy target for enemy fighters (a low and slow Ki-87 is as good as dead). Instead, keep your speed and altitude high, and have spatial awareness. Know where your enemy is. |
| + | * '''B&Z''': Since you lack air spawn, you will have to spend 7-9 minutes on side climbing until you can confirm that you are higher than all enemy fighters. Don't let them see you during climb phase, if they aggro on you, you will have to waste a lot of time getting away from them (and only if they are not flying plane adapted to high altitudes). When you get above targeted enemy, remember to change MEC settings (Radiator 10% Prop Pitch 75%) and proceed with dive attack. Do not over commit. You need to kill target before speed in dive reaches 700 km/h IAS (elevator compression kicks in). Don't let yourself be dragged to less than 3000m. You will lose all limited performance edge you have on low altitude. Pursuit targets to low altitudes only when you are 100% sure, there is no other enemy at same altitude as you currently. Ki-87 energy retention greatly decreases with increase of air density. | ||
| + | * '''"Opportunity-Fighter"''': Stay at high altitudes (5500m and above) and look for lone targets. Avoid groups of enemies, even pairs. Wait for mistakes that enemy players will commit with passing time. Your capability as fighter is VERY limited. Take all occasions you can get. Play it safe. Your cards are very limited but you still has some. Take 20-30 min fuel load. Do not WEP when you reach desired altitude, WEP time is limited. Be protective of your altitude, do not let any enemies care freely climb to you, spitfires are exceptionally vulnerable during their climb. Conserve your energy to the best of your ability. There is no "uptier" or "downtier" for you, 4.7 fighters easily out do you. Stay cautious and reserved, you were brave enough to press "To Battle" button in that thing, no need to feel ashamed, run when you can, be as passive as it needed. Good luck and fight honorable. (Remember, if you will be overwhelmed by amount of enemies and simply will not see a way to win, return to main airfield, repair, and j-out to avoid all penalties. Those who leave battle after repairing on airfield, do not count as dead or neither have to pay repair costs). | ||
=== Manual Engine Control === | === Manual Engine Control === | ||
| Line 148: | Line 151: | ||
|} | |} | ||
| − | You'll need to keep the prop pitch at | + | You'll need to keep the prop pitch at 80-85-90% while in steeper climb (increase with altitude). This should not be done in prolonged manner as engine will fry very quickly on any other radiator setting than 100% (but this has serious impact on energy retention/speed). |
| + | |||
| + | Adjust prop pitch to 75% when traveling above 700 km/h. | ||
| + | |||
| + | After you reach desired altitude, and you are about to dive on someone or level out (15-10 degrees), change propeller pitch to 75% and radiator to 10% if you want to conserve as much energy as possible. | ||
| − | + | Change prop pitch back to 100% if you end up in vertical or stall fight (but only after you become slower than 350 km/h). | |
| − | + | Prop pitch should be gradually increased when in level flight (5-10 degrees) for max performance with increasing altitude. | |
=== Pros and cons === | === Pros and cons === | ||
| Line 159: | Line 166: | ||
'''Pros:''' | '''Pros:''' | ||
| − | * Excels in high-altitude bomber intercepting | + | |
| − | * | + | * Excels in high-altitude bomber intercepting. |
| − | * Powerful armament consisting of 2 x 30 mm cannons and 2 x 20 mm cannons | + | * Decent gun velocity, you can engage bombers from 1 km away. |
| − | * No wing-mounted fuel tanks | + | * Powerful armament consisting of 2 x 30 mm cannons and 2 x 20 mm cannons. |
| − | * 30 mm cannons have a huge amount of ammo | + | * No wing-mounted fuel tanks. |
| − | * High red-line speed of 840 km/h | + | * 30 mm cannons have a huge amount of ammo. |
| − | * Fast at diving | + | * High red-line speed of 840 km/h. |
| − | * Can equip bombs, although it will affect the aircraft's speed and turning time | + | * Fast at diving. |
| + | * Can equip bombs, although it will affect the aircraft's speed and turning time. | ||
| + | * Sturdier than your typical Japanese fighter (yet still fragile compared to other nations). | ||
| + | * Competitive horsepower output at 8000m thanks to turbocharger (Can runaway from planes that were not adapted to fight at high altitudes, while maintaining shallow climb angle). | ||
'''Cons:''' | '''Cons:''' | ||
| − | * Not as | + | |
| − | * Really bad energy retention, especially when coming out of a dive | + | * Manual Engine Controls are required to play plane competitively. Auto settings greatly hinder plane (already limited) performance. |
| − | * Fuselage fuel-tank is susceptible to fire | + | * Not as maneuverable as other aircraft, it's very sluggish. |
| − | + | * Really bad energy retention without MEC, especially when coming out of a dive. | |
| − | * Mediocre climb rate | + | * Fuselage fuel-tank is susceptible to fire. |
| − | * No interceptor spawn | + | * Mediocre climb rate (19m/s). |
| − | * 30 mm HEF-T has only a maximum penetration of 2 mm | + | * No interceptor spawn, has to spend 8 minutes on side climbing. |
| − | * Begins to lock up at around 700 km/h (435 mph) | + | * 30 mm HEF-T has only a maximum penetration of 2 mm. |
| + | * 30 mm HEF round fuze will not trigger unless it hits some aircraft component (wing spar, fuel tank, crew member). | ||
| + | * Begins to lock up at around 700 km/h (435 mph). | ||
| + | * Can engage fighters only when it is in higher energy state than it's enemy. Any other 1v1 engagement will lead to death. | ||
== History == | == History == | ||
| Line 194: | Line 207: | ||
;Skins | ;Skins | ||
| + | |||
* [https://live.warthunder.com/feed/camouflages/?vehicle=ki_87 Skins and camouflages for the {{PAGENAME}} from live.warthunder.com.] | * [https://live.warthunder.com/feed/camouflages/?vehicle=ki_87 Skins and camouflages for the {{PAGENAME}} from live.warthunder.com.] | ||
| Line 213: | Line 227: | ||
* ''reference to the series of the aircraft;'' | * ''reference to the series of the aircraft;'' | ||
* ''links to approximate analogues of other nations and research trees.'' --> | * ''links to approximate analogues of other nations and research trees.'' --> | ||
| + | |||
;Aircraft of comparable role, configuration and era | ;Aircraft of comparable role, configuration and era | ||
| + | |||
* Japanese: | * Japanese: | ||
** [[Ki-94-II]] | ** [[Ki-94-II]] | ||
Revision as of 19:14, 30 December 2023


Contents
Description
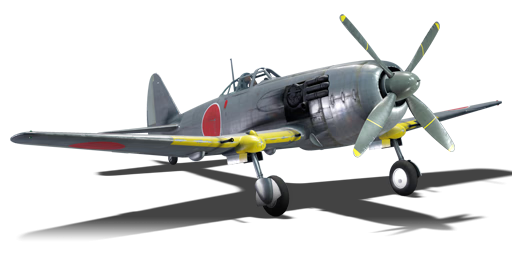
The Ki-87 was a high-altitude fighter-interceptor designed to counter the American B-29 Superfortress raids on Japan. It was powered by a Nakajima Ha-44-12 radial engine with an exhaust-driven turbo-supercharger, which gave it a high performance at altitudes above 10,000 meters. The Ki-87 had a pressurized cockpit, a four-bladed propeller, and a rearward folding undercarriage. It was armed with two 30 mm and two 20 mm cannons, and could carry a 250 kg bomb under the fuselage. The Ki-87 was developed from 1942, but faced delays due to technical problems and material shortages. Only one prototype was completed and flown in April 1945, but no production aircraft were built before the end of the war.
It was introduced in Update 1.63 "Desert Hunters" as a pack vehicle. The Ki-87 is a Japanese super prop with a powerful armament and a turbo-supercharger. It performs poorly in sharp turns, rolls slowly, and overheats on WEP. Manual engine control is needed to optimize its performance. The Ki-87 excels at high altitude combat, where it can outperform many planes and dive at high speeds. The cannons are very effective and can destroy bombers easily. The Ki-87 has a fair climb-rate and is able to maintain energy after a dive to regain altitude. The recommended settings are minimum fuel, 500 m gun convergence, vertical targeting, tracer belts for 30 mm and universal belts for 20 mm.
The Ki-87 was discontinued from the store after the 2018 Independence Day Sale, but was brought back for War Thunder's 7th Anniversary as a premium purchasable in-game for 6,090 Golden Eagles ![]() .
.
General info
Flight performance

The flight performance feels slow and sluggish, yet powerful. The turning and energy retention is not good either. This plane also has overheating issues. to solve performance issues, it's always best to go for a side climb, especially when in uptiers! The plane dives insanely well. The turbo supercharger will keep the plane's performance up while at altitudes above 5,000 metres.
| Characteristics | Max Speed (km/h at 10,000 m) |
Max altitude (metres) |
Turn time (seconds) |
Rate of climb (metres/second) |
Take-off run (metres) | |||
|---|---|---|---|---|---|---|---|---|
| AB | RB | AB | RB | AB | RB | |||
| Stock | 684 | 664 | 13800 | 23.1 | 23.9 | 11.6 | 11.6 | 370 |
| Upgraded | 739 | 707 | 21.6 | 22.0 | 23.0 | 15.0 | ||
Details
| Features | ||||
|---|---|---|---|---|
| Combat flaps | Take-off flaps | Landing flaps | Air brakes | Arrestor gear |
| ✓ | ✓ | ✓ | X | X |
| Limits | ||||||
|---|---|---|---|---|---|---|
| Wings (km/h) | Gear (km/h) | Flaps (km/h) | Max Static G | |||
| Combat | Take-off | Landing | + | - | ||
| 880 | 320 | 457 | 428 | 280 | ~13 | ~6 |
| Optimal velocities (km/h) | |||
|---|---|---|---|
| Ailerons | Rudder | Elevators | Radiator |
| < 450 | < 450 | < 460 | > 324 |
Survivability and armour

- 70 mm (63°) Bulletproof glass in cockpit front.
- 16 mm (12°) Steel plate behind the pilot.
Modifications and economy
| Flight performance | Survivability | Weaponry | ||||||||||||||||||||
|---|---|---|---|---|---|---|---|---|---|---|---|---|---|---|---|---|---|---|---|---|---|---|
|
|
|
Armaments

Offensive armament
The Ki-87 is armed with:
- 2 x 30 mm Ho-155 cannons, wing-mounted (150 rpg = 300 total)
- 2 x 20 mm Ho-5 cannons, wing-mounted (150 rpg = 300 total)
Japanese rank IV aircraft are typically armed with a respectable array of guns, and the Ki-87 is no exception. Although the 20 mm Ho-5s are nothing to write home about, the 30 mm cannons are some of the most feared, respected and deadly weapons in the entire game. When armed with the Tracer belt, the Japanese 30 mm cannons have a muzzle velocity that surpasses even the M2 and M3 Browning .50 cal HMGs at a staggering 920 m/s, and when combined with the high explosive filler and large calibre, these beasts will make short work of any aircraft that's unfortunate enough to end up in their crosshairs.
The usual issue with 30 mm cannons on WW2-era propeller planes - that being their lack of sufficient ammunition capacity - is notably absent on the Ki-87, which mounts 150 round per gun instead of the usual 60 seen on other aircraft like the Ki-84 hei and J7W1. Although this increased ammunition capacity is indeed wonderful, the pilot should still take care to not be too trigger happy, as the exceptional ballistics of the cannons will prevent the need to waste copious amounts of bullets on a single target, increasing the endurance of the aircraft in the hands of a patient pilot.
Suspended armament

The Ki-87 can be outfitted with the following ordnance:
- Without load
- 1 x 50 kg Army Type 94 GPHE bomb (50 kg total)
- 1 x 250 kg Army Type 92 GPHE bomb (250 kg total)
Usage in battles

Unlike the usual Japanese low-altitude and highly manoeuvrable fighter aircraft, the Ki-87 is a high-altitude bomber interceptor with mediocre speed and climb rate but less impressive agility. Featuring something relatively new for a Japanese fighter, the Ki-87 has a notably visible turbo-supercharger to boost its high altitude performance at the cost of aircraft weight and size. As such, it cannot be played like most other aircraft from the Japanese tree, but rather as a reserved Boom-&-Zoom that can abuse its brutal acceleration in a dive to pick off unwary victims.
For engaging the enemy, The Ki-87 is best at boom-and-zoom tactics. Sideclimb to around 6,000 m and fly over enemy formations, once in position roll the plane to target, maintain coordinated control and correct rudder as at that altitude it is very easy to stall. Descend fast but not so much that the controls get sluggish. Once lined up and in range fire a short burst, the very heavy armament will rip the enemy plane apart; even evasive countermeasures will be insufficient for a properly executed Boom & Zoom.
If no bombers are present, then you might have issues engaging enemy fighters. The Ki-87 can only do a 21 m/s climb at 17 degrees, which makes it vulnerable to being outclimbed by nearly everything. As such, you'll need to side climb and then engage from the side. Do not try to turn with anything.
Against heavily armed aircraft such as the B-17, B-24, and B-29, and other heavy bombers, climb at least 600 m above them use slashing boom and zoom tactic firing short bursts, once the bullets hit the target, fire longer busts then jump back up. Ideally you should aim for large critical parts such as the wings and tail plane. The cannons on the Ki-87 will make short work of essential components and being substantial offer best chance of hitting. Never attack behind and at nearly same speed as you become a perfect target for multiple weapons. The Ki-87's fuel tanks are somewhat easy to ignite, and you won't last long if they do.
Tactics to Win With

- Force head-ons: The Ki-87 can't energy fight or turn fight with any props (save Ta 152 C-3 and P-47M-1-RE). It will be outclassed. The only time you should ever turn fight is if the enemy is crippled or in a low energy state. To deal with fighters that are higher than you, you need to step up and force a head-on. Most likely, Allied players will take the head-on. Your guns' good velocity should be enough to kill them. Remember to pull off early, as even a quick burst can kill you. If the enemy is higher than you and appears to engage, dive down. The enemy will most likely level out. Keep your speed high, as this will allow you to pull up and engage in vertical head-ons. This is your last chance to score the kill, as the enemy will now be at an advantage.
- Keep your altitude: You need to worry about speed and altitude. DO NOT go for ground targets, as you will be an easy target for enemy fighters (a low and slow Ki-87 is as good as dead). Instead, keep your speed and altitude high, and have spatial awareness. Know where your enemy is.
- B&Z: Since you lack air spawn, you will have to spend 7-9 minutes on side climbing until you can confirm that you are higher than all enemy fighters. Don't let them see you during climb phase, if they aggro on you, you will have to waste a lot of time getting away from them (and only if they are not flying plane adapted to high altitudes). When you get above targeted enemy, remember to change MEC settings (Radiator 10% Prop Pitch 75%) and proceed with dive attack. Do not over commit. You need to kill target before speed in dive reaches 700 km/h IAS (elevator compression kicks in). Don't let yourself be dragged to less than 3000m. You will lose all limited performance edge you have on low altitude. Pursuit targets to low altitudes only when you are 100% sure, there is no other enemy at same altitude as you currently. Ki-87 energy retention greatly decreases with increase of air density.
- "Opportunity-Fighter": Stay at high altitudes (5500m and above) and look for lone targets. Avoid groups of enemies, even pairs. Wait for mistakes that enemy players will commit with passing time. Your capability as fighter is VERY limited. Take all occasions you can get. Play it safe. Your cards are very limited but you still has some. Take 20-30 min fuel load. Do not WEP when you reach desired altitude, WEP time is limited. Be protective of your altitude, do not let any enemies care freely climb to you, spitfires are exceptionally vulnerable during their climb. Conserve your energy to the best of your ability. There is no "uptier" or "downtier" for you, 4.7 fighters easily out do you. Stay cautious and reserved, you were brave enough to press "To Battle" button in that thing, no need to feel ashamed, run when you can, be as passive as it needed. Good luck and fight honorable. (Remember, if you will be overwhelmed by amount of enemies and simply will not see a way to win, return to main airfield, repair, and j-out to avoid all penalties. Those who leave battle after repairing on airfield, do not count as dead or neither have to pay repair costs).
Manual Engine Control
| MEC elements | ||||||
|---|---|---|---|---|---|---|
| Mixer | Pitch | Radiator | Supercharger | Turbocharger | ||
| Oil | Water | Type | ||||
| Controllable | Controllable Not auto controlled |
Controllable Not auto controlled |
Controllable Not auto controlled |
Separate | Not controllable 1 gear |
Auto controlled |
You'll need to keep the prop pitch at 80-85-90% while in steeper climb (increase with altitude). This should not be done in prolonged manner as engine will fry very quickly on any other radiator setting than 100% (but this has serious impact on energy retention/speed).
Adjust prop pitch to 75% when traveling above 700 km/h.
After you reach desired altitude, and you are about to dive on someone or level out (15-10 degrees), change propeller pitch to 75% and radiator to 10% if you want to conserve as much energy as possible.
Change prop pitch back to 100% if you end up in vertical or stall fight (but only after you become slower than 350 km/h).
Prop pitch should be gradually increased when in level flight (5-10 degrees) for max performance with increasing altitude.
Pros and cons

Pros:
- Excels in high-altitude bomber intercepting.
- Decent gun velocity, you can engage bombers from 1 km away.
- Powerful armament consisting of 2 x 30 mm cannons and 2 x 20 mm cannons.
- No wing-mounted fuel tanks.
- 30 mm cannons have a huge amount of ammo.
- High red-line speed of 840 km/h.
- Fast at diving.
- Can equip bombs, although it will affect the aircraft's speed and turning time.
- Sturdier than your typical Japanese fighter (yet still fragile compared to other nations).
- Competitive horsepower output at 8000m thanks to turbocharger (Can runaway from planes that were not adapted to fight at high altitudes, while maintaining shallow climb angle).
Cons:
- Manual Engine Controls are required to play plane competitively. Auto settings greatly hinder plane (already limited) performance.
- Not as maneuverable as other aircraft, it's very sluggish.
- Really bad energy retention without MEC, especially when coming out of a dive.
- Fuselage fuel-tank is susceptible to fire.
- Mediocre climb rate (19m/s).
- No interceptor spawn, has to spend 8 minutes on side climbing.
- 30 mm HEF-T has only a maximum penetration of 2 mm.
- 30 mm HEF round fuze will not trigger unless it hits some aircraft component (wing spar, fuel tank, crew member).
- Begins to lock up at around 700 km/h (435 mph).
- Can engage fighters only when it is in higher energy state than it's enemy. Any other 1v1 engagement will lead to death.
History
Improved metallurgy and engineering in the 1930s saw a massive leap in aircraft performance, especially the once bulky, boxy, lumbering bombers reborn as sleek and sexy machines that left old fashioned wooden fighters in its vapour trail. It was not long before those flying rag fighters were also updated with gleaming aluminum and once again surpassed the bombers top speed. Yet bombers still had a trick up their sleeves, altitude.
Flying above 9,000 m (29,500 ft) in super cold thin air and rarefied oxygen was both a technical and physiological challenge. The long wings and large interiors of bombers offered space needed for extreme high altitude flight, example the Ju 86P/R bomber which flew above 12,000 m (40,000 ft) with impunity over England, beyond the RAFs reach for months. The B-17 and B-24 could also operate at altitudes the Bf 109 and Fw 190 had difficulty reaching.
Predicting the same for Japan, the military wisely ordered research into high altitude single engine fighters as early as 1942 and by 1943 work was underway on the future Nakajima Ki-87 and the alternate Tachikawa Ki-94. At 12,000 m the air density is about 1/4 that of sea level necessitating a huge supercharged engine, but its internal "blower" needed an additional boost so a "turbo-supercharger" was added, powered by high velocity exhaust gas. This combination is exactly like the P-47 Thunderbolt has, except this time the turbo was mounted on the right side of nose on the prototypes and not in rear fuselage. High aspect-ratio wings were chosen for the thin air (compare Fw 190 with Ta 152), but with limited space to mount the dual pair of 30 mm and 20 mm cannons in an unusual step Nakajima chose a landing gear retraction like on P-40 Kittyhawk. High altitude flight is also extremely uncomfortable for the pilot so the cockpit was partially pressurized and extra tanks of oxygen installed. Pilot armour, thick bulletproof glass, self-sealing fuel tanks, and hard point for bombs were also added. Finally enough fuel for at least 2 hours flight resulted in a massive aircraft for the Japanese, well over twice the weight of the A6M2 Zero.
It was an enormous technical challenge for Japanese industry taking a long time to overcome teething issues. Japanese aircraft rarely utilized turbo-superchargers in their planes, so experience in operation was limited, and although the 90° retracting gear was a favourite design, it took Nakajima months to get it to operate correctly.
The prototype flew for the first time in April 1945 at a time when the anticipated B-29 bomber was pounding Japan, but by then it was too late. Disruption by bombing and dwindling resources prevented the second prototype from flying and attrition of what little fighter defence Japan had. Ironically, with such weak home defence, the B-29s flew much lower so they could bomb more accurately, negating the purpose of the high altitude Ki-87.
Media
- Skins
- Images
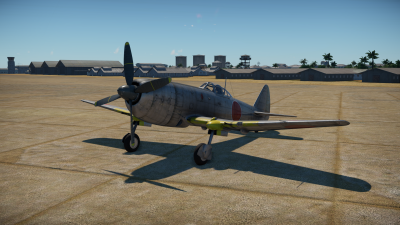
Ki-87 over the Pacific
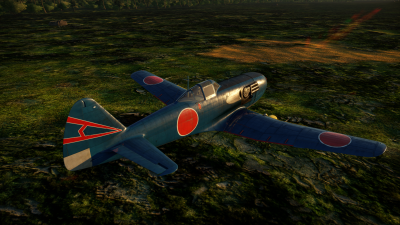
A Ki-87 sporting a blue camouflage
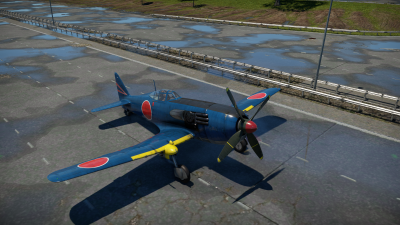
Ki-87 at cargo port
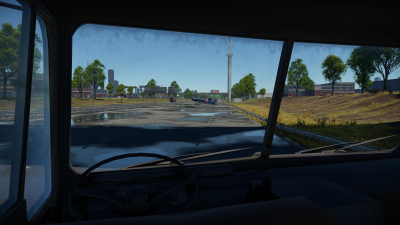
Ki-87 from viewed from a truck at Cargo Port

Ki-87's guns do work on an enemy Bearcat
The Ki-87 on an airfield at Midway


- Videos
See also
- Aircraft of comparable role, configuration and era
- Japanese:
- Other:
External links
| Nakajima Aircraft Company (中島飛行機株式会社 ) | |
|---|---|
| Fighters | Ki-27 otsu · Ki-27 otsu Tachiarai |
| Ki-43-I · Ki-43-II · Ki-43-III otsu | |
| Ki-44-I · Ki-44-I 34 · Ki-44-II otsu · Ki-44-II hei | |
| Ki-84 ko · Ki-84 otsu · Ki-84 hei | |
| Ki-87 | |
| Hydroplanes | A6M2-N* |
| Interceptors | J1N1 · J5N1 |
| Bombers | B5N2 |
| B6N1 Model 11 · B6N2 Model 12 · B6N2a Model 12Ko | |
| G5N1 · G8N1 | |
| Ki-49-I · Ki-49-IIa · Ki-49-IIb · Ki-49-IIb/L | |
| Recon | E8N2 |
| Jet Fighters | Kikka |
| Captured | ␗Ki-27 otsu · ▃Ki-43-II · ␗Ki-43-III ko · ␗Ki-44-II hei · ␗Ki-84 ko |
| *Refit of the Mitsubishi A6M2 mod. 11 | |
| See also | Fuji Heavy Industries (1957-2017) |
| Japan fighters | |
|---|---|
| Navy | |
| Carrier-based fighter | |
| A5M | A5M4 · Hagiri's A5M4 |
| A6M | A6M2 mod. 11 · A6M2 · A6M3 · A6M3 mod. 22 · A6M3 mod. 22Ko · A6M5 · A6M5 Ko · A6M5 otsu · A6M5 Hei · A6M6c |
| A7He | A7He1* |
| A7M | A7M1 (NK9H) · A7M2 |
| Land-based Fighter | |
| J2M | J2M2 · J2M3 · J2M4 Kai · J2M5 · J2M5 (30 mm) |
| J6K | J6K1 |
| J7W | J7W1 |
| N1K-J | N1K1-Ja · N1K2-J · N1K2-Ja |
| Fighter seaplane | |
| N1K | N1K1 |
| A6M-N | A6M2-N |
| Army | |
| Ki-10 | Ki-10-I · Ki-10-I C · Ki-10-II · Ki-10-II C |
| Ki-27 | Ki-27 otsu · Ki-27 otsu Tachiarai |
| Ki-43 | Ki-43-I · Ki-43-II · Ki-43-III otsu |
| Ki-44 | Ki-44-I · Ki-44-I 34 · Ki-44-II otsu · Ki-44-II hei |
| Ki-61 | Ki-61-I ko · Ki-61-I otsu · Ki-61-I hei · Tada's Ki-61-I hei · Ki-61-I tei · Ki-61-II Otsu Kai |
| Ki-84 | Ki-84 ko · Ki-84 otsu · Ki-84 hei |
| Ki-87 | Ki-87 |
| Ki-94 | Ki-94-II |
| Ki-100 | Ki-100 · Ki-100-II |
| Other countries | ▅F4U-1A · ▅P-51C-11-NT · ▅Bf 109 E-7 · ▅Fw 190 A-5 |
| *Imported designation of the He 112 (A6M was in development - A7M would take A7 designation after the cancelation of the A7He) | |
| Japan premium aircraft | |
|---|---|
| Fighters | Hagiri's A5M4 · A7He1 · Ki-27 otsu Tachiarai |
| Ki-44-II otsu · ▅Bf 109 E-7 · ▅F4U-1A · Ki-100-II · Ki-44-I 34 | |
| ▅Fw 190 A-5 · A7M1 (NK9H) · Tada's Ki-61-I hei · ▅P-51C-11-NT | |
| J2M4 Kai · A6M5 Ko · A6M6c · J2M5 · Ki-87 · J6K1 | |
| Twin-engine fighters | Ki-96 |
| Jet fighters | F-86F-40 JASDF▅ · T-2 Early · F-4EJ ADTW |
| Bombers | Ki-21-I hei · Ki-48-II otsu · H8K3 · B7A2 (Homare 23) · ▅B-17E |
