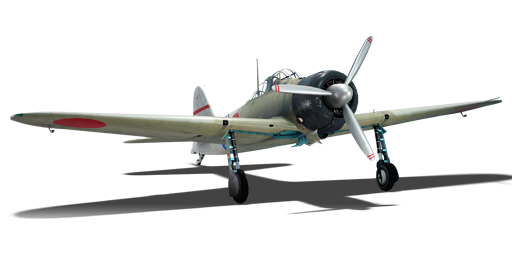
A6M2 mod. 11
| This page is about the Japanese fighter A6M2 mod. 11. For other versions, see A6M (Family). |


Contents
Description
The A6M2 mod. 11, designated as the Type 0 Carrier-based Fighter Model 11 (零式艦上戦闘機一一型), was the pre-production model of the A6M series and was designed for combat evaluation over China. It differed from the later variants of the A6M in that it was not adapted for carrier operations; it lacked a tail hook, foldable wing tips, and the ability to carry external fuel tanks. The Navy was so impressed by the performance of the A6M1/2 prototypes that they ordered 15 units to be sent to China before official testing was completed. The A6M made its combat debut over China, where 13 A6M's shot down 27 Soviet-built I-15s and I-16s in three minutes without any losses, demonstrating the A6M's superiority over these aircraft. Once reports reached Navy HQ, they quickly authorized the mass production of the A6M as the A6M2 mod. 21.
It was introduced in Update 1.39. The Model 11 is essentially a land-based prototype of the famous A6M series, without the necessary equipment for carrier operations. However, the A6M2 still retains the combat performance of a Zero. It has near unprecedented manoeuvrability, and deadly but limited and low-velocity 20 mm cannons. The A6M2 can dominate any dogfight at its own or lower altitude, depending on the pilot's skill, but it can be easily outrun by faster enemies. In that case, the pilot has to decide whether to take a final shot or break off the engagement, as pursuing the enemy may expose the Zero to interception by other fighters. If faced with a Boom-N-Zoom attack, the pilot must avoid the enemy's fire by using the Zero's agility, as the plane has no armour, self-sealing fuel tanks or robust airframe. Although the A6M2 is not the fastest plane in its tier, it can keep up with its opponents better than the later A6M5s, which encounter proportionally much faster aircraft more often.
- Nicknames
- IJN Pilot nickname: Reisen (零戦) / Zerosen (ゼロ戦) (Abbreviation of 0 - 戦).
- Allied reporting name: Zeke / Zero.
General info
Flight performance
The Zero is almost the ideal dogfighter. Very good turn times and better overall manoeuvrability let you easily move onto the tail of the enemy. It is slower compared to most of the opposition, thus be mindful of what is around you.
| Characteristics | Max Speed (km/h at 4,400 m) |
Max altitude (metres) |
Turn time (seconds) |
Rate of climb (metres/second) |
Take-off run (metres) | |||
|---|---|---|---|---|---|---|---|---|
| AB | RB | AB | RB | AB | RB | |||
| Stock | 491 | 475 | 10300 | 17.7 | 18.2 | 10.1 | 10.1 | 175 |
| Upgraded | 532 | 510 | 16.7 | 17.0 | 17.5 | 13.3 | ||
Details
| Features | ||||
|---|---|---|---|---|
| Combat flaps | Take-off flaps | Landing flaps | Air brakes | Arrestor gear |
| ✓ | ✓ | ✓ | X | X |
| Limits | ||||||
|---|---|---|---|---|---|---|
| Wings (km/h) | Gear (km/h) | Flaps (km/h) | Max Static G | |||
| Combat | Take-off | Landing | + | - | ||
| 0 | 310 | 484 | 451 | 280 | ~14 | ~8 |
| Optimal velocities (km/h) | |||
|---|---|---|---|
| Ailerons | Rudder | Elevators | Radiator |
| < 270 | < 420 | < 410 | > 324 |
Survivability and armour
The A6M series was stripped of all armour to lighten the aircraft. This means that your pilot is easily sniped and your fuel tanks, which are not protected, catch on fire very easily.
- No armour protection
- Not self-sealing fuel tanks
Modifications and economy
| Flight performance | Survivability | Weaponry | ||||||||||||||||||||
|---|---|---|---|---|---|---|---|---|---|---|---|---|---|---|---|---|---|---|---|---|---|---|
|
|
|
Armaments
Offensive armament
The A6M2 mod. 11 is armed with:
- 2 x 20 mm Type 99 Model 1 cannons, wing-mounted (60 rpg = 120 total)
- 2 x 7.7 mm Type 97 navy machine guns, nose-mounted (680 rpg = 1,360 total)
The 2 x 20 mm cannons make this aircraft a frightening foe. Be mindful of the low ammo count.
Suspended armament
The A6M2 mod. 11 can be outfitted with the following ordnance:
- Without load
- 2 x 60 kg Navy Type 97 Number 6 bombs (120 kg total)
Although this aircraft can carry bombs, it makes you an easy target and is really not worth the added weight in realistic or simulator battles.
Usage in battles
The best tactic to use in this aircraft is to sneak up behind your enemies and use your excellent turn rate to your advantage, something that most other fighters don't have at the BR. The most dangerous enemies in this aircraft come from above, Boom and Zoomers will rain fire from above if you are not careful.
Force an enemy pilot into a dogfight at 370 - 400 km/h and below 6,000 m. At this speed and altitude, no enemy fighter can out-manoeuvre or out-climb you. Jump on cruising enemy aircraft from above. Fasten onto the tail of the bandit, use your superior manoeuvrability to match his evasive moves, and put enough rounds into him to bring him down. Use your machine guns first to "bore-sight" the enemy - once you get hits on him, finish him off with your cannons. Below 480 km/h you can fling the Zero all over the sky to get on an enemy's tail or to shake off all but the most determined attacker. Climb away from most enemy aircraft, hanging on your prop in a near-vertical climb. Manoeuvres like the Immelmann are easy, and heavier fighters can't stay with you. The Zero rolls faster to the left than to the right. Roll left to tighten your turn and get onto the enemy's six. Don't dive away from attackers - your plane doesn't have the power or weight to out-run most fighters. To exploit your plane's best performance, force the enemy lower and slow down the pace of the engagement.
- In Simulator, the A6M Zero is overall a great plane to fly. Its advantages include the extremely smooth handling, impressive turn rate, low stall speed, the ability to not enter spins in extreme manoeuvres, and decent rear visibility. It is able to pull really tight turns or barrel rolls without losing control or going into a spin, allowing the player to use this stability to their advantage. Its disadvantages, however, are the fragile protection, wing-mounted guns with very little ammo, and the cockpit scattered with frames. Although not thick, these frames can still be obstructions in a fight. Also the gunsight is small and mounted very low, resulting in inadequate visibility over the nose. This can limit the player's ability to see the target in a turn fight since to lead the target, the player must cut inside its turn, meaning the nose will now block the target. The A6M can perform dogfighting, some ground pounding and some intercepting.
- You can bring the minimum amount of fuel (29 minutes) since this model of the Zero only has a 60-round drum per cannon, as a result you might need to constantly return to airfield to reload so there is no need to bring more fuel. Set the convergence to 150-300 m. When taking off, the A6M will shift severely to the left so it is best to set separate keybind for left and right brakes to counter the torque.
- For dogfighting, it is better to engage with an altitude advantage so climb to around 2,500 m. Track the opponent using lead or pure pursuit, as with lag pursuit you will eventually end up at the 6'o clock of the target aircraft whose fuselage will soak up most of your MG bullets, and your wing mounted cannons will become really awkward to aim. With the amazing stableness the aim should be easy. Target their wings or nose and avoid the back half of the fuselage as there is usually nothing in there. You can turn with most planes with your combat/takeoff flaps deployed. Note that it is best to fire in 5-round/half-second bursts to avoid wasting cannon rounds. Once the cannons are out, the leftover 7.7 mm MGs can only effectively damage single engine fighters.
- For ground pounding with bombs, look for tanks and pillboxes. First you need some separation between you and the target so you have enough time to line-up the drop. Dive at the target at a rather shallow angle, and release the 60 kg bombs when you are very close, with the target below the gunsight and filling up around half of it. If you only use the MGs, your targets are trucks, AAA and howitzers. Dive at it and stabilise the plane so the gunsight stays overall still at the target. Then, once the target fills out around 1/6 of the gunsight, open fire. If your aim is accurate you can destroy one target in a single pass. However, it is very recommended to set keybind for firing MG only as you can definitely not waste the valuable cannon rounds. Save them for any unexpected dogfights.
- Landing is easy thanks to the low stall speed and lovely handling. Line up and approach the airstrip at treetop, decrease speed to at most 210 km/h and deploy combat, takeoff and landing flaps in order. Further decelerate so the touchdown speed is no more than 180 km/h to avoid bouncing up. Keep braking until the plane reaches a full stop, you don't have to worry about the nose dipping down and causing a propeller strike.
Enemies worth noting:
- P-61C-1: this plane is one tough nut to crack. It is quite fast, packs a fatal punch, has a searching radar, and a deadly turret on top. The turret consists of 4 x 12.7 mm M2 Browning machine guns that cover the upper half of the plane, and most P-61 players tend to fly low or get you into their upper half to target you with the turret. Avoid being above them at all costs, utilise the Zero's manoeuvrability and sneak under their belly. Its appearance resembles a P-38: a center fuselage with two engine nacelles extending backwards and forming the twin tail like a frame, you will know it is a Black Widow and not a Lightning when red tracer bullets start shooting out from it.
- I-16: the late I-16s are equipped with ShVAK cannons that can be pretty dangerous to your fragile airframe. They can turn equally well as the Zero, have superior roll rate but the stability is so terrible that as soon as they pull a little more on the stick, they will enter spins. Therefore it is quite easy to counter them: engage a turnfight with them and turn tighter and tighter, or do a few barrel rolls. They will quickly lose control and start spinning and it is quite hard to recover. Then simply get some separation, turn around and put some solid shots into them. They have the I-15's short and fat fuselage, a flat radial engine and triangular stabilisers located right after the low-mounted mono wings, all covered in olive green paint.
Manual Engine Control
| MEC elements | ||||||
|---|---|---|---|---|---|---|
| Mixer | Pitch | Radiator | Supercharger | Turbocharger | ||
| Oil | Water | Type | ||||
| Controllable | Controllable Not auto controlled |
Controllable Not auto controlled |
Controllable Not auto controlled |
Separate | Not controllable 1 gear |
Not controllable |
Pros and cons
Pros:
- A6M for Carrier-based fighter:
- Strictly air-to-air role
- Gets 2 x Type 97 No.6 Land Bomb (60 kg), but strongly ill-advised for air battles
- Decent cannon armament
- Extremely manoeuvrable
- Excellent turn rate
- Excellent roll rate
- Very short takeoff distance
- Strictly air-to-air role
- Common Navy plane construction:
- Excellent manoeuvrability
- Nose-mounted armament
- Small radiator drag
Cons:
- A6M for Carrier-based fighter:
- Strictly air-to-air role
- Limited ammo
- Slow
- Low dive speed, and easily compressed in a dive
- Common Navy plane construction:
- Poor MG offensive armament: 7.7 mm Type 97 MG
- Poor Cannon offensive armament: 20 mm Type 99 Model 1 Cannon
- Very low muzzle velocity
- Fragile, little armour, and no self-sealing fuel tanks
- A6M2 mod. 11 specific:
- Evaluation model, doesn't come with tail hook
History
The A6M2 mod. 11 was the third prototype to be built. It was powered by a 950 hp Nakajima Sakae engine. Production started in 1939 and a total of 64 were built. These aircraft saw combat in China.
Media
- Skins
See also
- Aircraft of comparable role, configuration and era
External links
| Mitsubishi Company (三菱商会) | |
|---|---|
| Fighters | A5M4 · Hagiri's A5M4 |
| A6M2 mod. 11 · A6M2 · A6M3 · A6M3 mod. 22 · A6M3 mod. 22Ko · A6M5 · A6M5 Ko · A6M5 otsu · A6M5 Hei · A6M6c | |
| A7M1 (NK9H) · A7M2 | |
| J2M2 · J2M3 · J2M4 Kai · J2M5 · J2M5 (30 mm) | |
| Hydroplanes | F1M2 |
| Interceptors | Ki-83 · Ki-109 |
| Bombers | G4M1 |
| Ki-21-Ia · Ki-21-I hei · Ki-67-I Ko · Ki-67-I otsu | |
| Jet Fighters | Ki-200 |
| Captured | ▃A6M2 · ␗A6M2 |
| See also | Mitsubishi Heavy Industries, Ltd. (Post-War) |
| Japan fighters | |
|---|---|
| Navy | |
| Carrier-based fighter | |
| A5M | A5M4 · Hagiri's A5M4 |
| A6M | A6M2 mod. 11 · A6M2 · A6M3 · A6M3 mod. 22 · A6M3 mod. 22Ko · A6M5 · A6M5 Ko · A6M5 otsu · A6M5 Hei · A6M6c |
| A7He | A7He1* |
| A7M | A7M1 (NK9H) · A7M2 |
| Land-based Fighter | |
| J2M | J2M2 · J2M3 · J2M4 Kai · J2M5 · J2M5 (30 mm) |
| J6K | J6K1 |
| J7W | J7W1 |
| N1K-J | N1K1-Ja · N1K2-J · N1K2-Ja |
| Fighter seaplane | |
| N1K | N1K1 |
| A6M-N | A6M2-N |
| Army | |
| Ki-10 | Ki-10-I · Ki-10-I C · Ki-10-II · Ki-10-II C |
| Ki-27 | Ki-27 otsu · Ki-27 otsu Tachiarai |
| Ki-43 | Ki-43-I · Ki-43-II · Ki-43-III otsu |
| Ki-44 | Ki-44-I · Ki-44-I 34 · Ki-44-II otsu · Ki-44-II hei |
| Ki-61 | Ki-61-I ko · Ki-61-I otsu · Ki-61-I hei · Tada's Ki-61-I hei · Ki-61-I tei · Ki-61-II Otsu Kai |
| Ki-84 | Ki-84 ko · Ki-84 otsu · Ki-84 hei |
| Ki-87 | Ki-87 |
| Ki-94 | Ki-94-II |
| Ki-100 | Ki-100 · Ki-100-II |
| Other countries | ▅F4U-1A · ▅P-51C-11-NT · ▅Bf 109 E-7 · ▅Fw 190 A-5 |
| *Imported designation of the He 112 (A6M was in development - A7M would take A7 designation after the cancelation of the A7He) | |
