A6M5 Ko

From War Thunder Wiki
Jump to: navigation, search
Rank VI | Premium | Golden Eagles
Chinese A-5C Pack
This page is about the Japanese gift fighter A6M5 Ko. For other versions, see A6M (Family).
A6M5 Ko
a6m5ko.png
GarageImage A6M5 Ko.jpg
ArtImage A6M5 Ko.png
A6M5 Ko
Show in game

Description

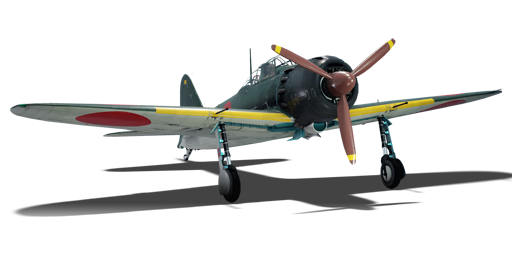
The A6M5 mod. 52 Kō, designated as the Type 0 Carrier-based Fighter Model 52A (零式艦上戦闘機五二型甲), is the first minor modification of the A6M5. The Model 52A (Kō) switches out the drum-fed Type 99 mod.2 mark 3 (20 mm) for the belt-fed Type 99 mod.2 mark 4 (20 mm), increasing the total ammo count to 250 rather than 200.

It has been in the game since the start of the Open Beta Test prior to Update 1.27. With all the modifications done to the A6M5 over the other A6M, performance improved but faces stronger enemy aircraft which proportionally perform even better. While still unrivalled in manoeuvre dogfights capable of dodging, weaving, and out-turning the pursuer into getting on their six, staying on the six of an aircraft will be harder to maintain due to the higher top speeds all other aircraft will have over the A6M5. The A6M5 Ko comes with slightly more 20 mm ammo giving it more chances to attack more often. As the last main-production A6M, the A6M5s in War Thunder also come with a late-war modification which allows them to be converted into "bakusen", mounting a 250 kg bomb in place of the centreline drop tank.

It was removed from the store at the end of the 2023 Summer sale but was made available temporarily for purchase in-game with Golden Eagles (Ge icon.png) for the 2024 "National Foundation Day in Japan" mini-event.

Nicknames
  • IJN Pilot nickname: Reisen (零戦) / Zerosen (ゼロ戦) (Abbreviation of 0 - ).
  • Allied reporting name: Zeke / Zero.

General info

Flight performance

Arrestor gear
Accelerates braking by grabbing the brake cable on the deck of the aircraft carrier
Max speed
at 6 000 m540 km/h
Turn time16 s
Max altitude10 900 m
EngineNakajima Sakae 21
TypeRadial
Cooling systemAir
Take-off weight3 t

As with the other A6M5 variants, the A6M5 Ko features an improved exhaust system that gives the plane more thrust and acceleration. While this does not help the Zero to catch up with any enemy fighters, it helps to retain the plane's energy rather well which will certainly be a great asset in a dogfight.

Although this variant of Zero has a good climb rate, the Zero's limited top speed and frail airframe makes it ill-suited for bomber hunting and boom-and-zoom tactics. The weak airframe also worsens the Zero's manoeuvrability when the plane reaches a speed of 600 km/h in a dive.

Characteristics Max Speed
(km/h at 6,000 m)
Max altitude
(metres)
Turn time
(seconds)
Rate of climb
(metres/second)
Take-off run
(metres)
AB RB AB RB AB RB
Stock 521 503 10900 16.6 17.2 13.4 13.4 190
Upgraded 563 540 15.8 16.0 21.4 16.9

Details

Features
Combat flaps Take-off flaps Landing flaps Air brakes Arrestor gear
X
Limits
Wings (km/h) Gear (km/h) Flaps (km/h) Max Static G
Combat Take-off Landing + -
740 300 397 368 220 ~14 ~6
Optimal velocities (km/h)
Ailerons Rudder Elevators Radiator
< 280 < 420 < 410 > 336

Survivability and armour

Crew1 person
Speed of destruction
Structural0 km/h
Gear300 km/h
  • No armour protection
  • Non-self-sealing fuel tanks

Modifications and economy

Repair cost
AB1 536 Sl icon.png
RB4 645 Sl icon.png
SB5 039 Sl icon.png
Crew training10 000 Sl icon.png
Experts290 000 Sl icon.png
Aces940 Ge icon.png
Research Aces960 000 Rp icon.png
Reward for battleAB / RB / SB
Talisman.png 2 × 90 / 220 / 450 % Sl icon.png
Talisman.png 2 × 166 / 166 / 166 % Rp icon.png
Modifications
Flight performance Survivability Weaponry
Mods aerodinamic fuse.png
Fuselage repair
Mods radiator.png
Radiator
Mods compressor.png
Compressor
Mods aerodinamic wing.png
Wings repair
Mods new engine.png
Engine
Mods metanol.png
Engine injection
Mods armor frame.png
Airframe
Mods armor cover.png
Cover
Mods ammo.png
type89_belt_pack
Mod arrow 0.png
Mods weapon.png
type97_new_gun
Mods pilon bomb.png
9 in (mod30)
Mod arrow 1.png
Mods ammo.png
type99mk2_belt_pack
Mod arrow 0.png
Mods weapon.png
type99mk2_new_gun
Mods pilon bomb.png
12 in (mod30)

Armaments

Offensive armament

Ammunition250 rounds
Fire rate490 shots/min
Ammunition1 400 rounds
Fire rate900 shots/min

The A6M5 Ko is armed with:

  • 2 x 20 mm Type 99 Model 2 cannons, wing-mounted (125 rpg = 250 total)
  • 2 x 7.7 mm Type 97 navy machine guns, nose-mounted (700 rpg = 1,400 total)

Suspended armament

List of setups (2)
Setup 12 x 60 kg Navy Type 97 Number 6 ground bomb
Setup 21 x 250 kg Navy Type Number 25 Model 2 bomb

The A6M5 Ko can be outfitted with the following ordnance:

  • Without load
  • 2 x 60 kg Navy Type 97 Number 6 bombs (120 kg total)
  • 1 x 250 kg Navy Type Number 25 Model 2 bomb (250 kg total)

Usage in battles

The Zero is outclassed by everything it faces in terms of speed. The only thing left to hang on to is its famous manoeuvrability. More than ever, the key is to exploit its nimbleness to force the enemy to make mistakes. Every single aircraft in this battle rating is faster - the P-47N-15 is both faster in a straight line and in a dive - meaning the slow A6M5 Ko will have limited opportunities to engage. It is not common to see enemies turn fight with a Zero, but most will break away and attempt to flee. As such, the A6M5 Ko's best bet is to try and end the fight quickly with good shot placement and lead so that the A6M5 Ko can dis-engage before its target flees. During the downtime if the enemy plane continues fleeing or was shot down, start re-climbing to prepare for engaging new targets that approaches the A6M5 Ko.

The Zero's infamous reputation for catching fire after being shot by any incendiary rounds continue - the lack of armour is detrimental to the Zero meaning if it gets hit, it's likely going to be fatal. This means the pilot needs to do their best to dodge all shots coming the A6M5 Ko's way by utilizing the Zero's incredible manoeuvrability. Remember to turn into the enemy to spoil their aim. With good shot placement, the A6M5 Ko's weaponry can dispatch foes as they pass by due to the amazing turn time on the Zero. Then, it's a simple matter of getting onto their six and taking small, accurate bursts at the opponent. The A6M5 Ko can also frustrate its enemies by constantly evading all of their attempts to force head-ons, or the A6M5 Ko can dive down on unsuspecting pilots as the Zero still has quite a good climb rate compared to other aircraft of its battle rating.

  • In Simulator, the A6M Zero is overall a great plane to fly. Its advantages include the extremely smooth handling, impressive turn rate, low stall speed, the ability to not enter spins in extreme manoeuvres, decent rear visibility, and increased cannon ammo capacity. It is able to pull really tight turns or barrel rolls without losing control or going into a spin, allowing the player to use this stability to their advantage. Its disadvantages, however, are the fragile protection, wing-mounted guns, and the cockpit scattered with frames. Although not thick, these frames can still be obstructions in a fight. Also the gunsight is small and mounted very low, resulting in inadequate visibility over the nose. This can limit the player's ability to see the target in a turn fight since to lead the target, the player must cut inside its turn, meaning the nose will now block the target. The A6M can perform dogfighting, some ground pounding and some intercepting.
  • You can bring the minimum amount of fuel (29 minutes) as even this Zero has the new 20 mm guns with 125 rounds each and you won't need to restock ammo as often, it is not a huge increase and returning to the airfield to resupply will still be a common occurrence. Set the convergence to 150-300 m. When taking off, the A6M will shift severely to the left so it is best to set separate keybind for left and right brakes to counter the torque.
  • For dogfighting, it is better to engage with an altitude advantage so climb to around 2,500 m. Track the opponent using lead or pure pursuit, as with lag pursuit you will eventually end up at the 6'o clock of the target aircraft whose fuselage will soak up most of your MG bullets, and your wing mounted cannons will become really awkward to aim. With the amazing stableness the aim should be easy. Target their wings or nose and avoid the back half of the fuselage as there is usually nothing in there. You can turn with most planes with your combat/takeoff flaps deployed. Note that it is best to fire in 10-round/one-second bursts to avoid wasting cannon rounds. Once the cannons are out, the leftover 7.7 mm MGs can only effectively damage single engine fighters.
  • For ground pounding with bombs, look for tanks and pillboxes. First you need some separation between you and the target so you have enough time to line-up the drop. Dive at the target at a rather shallow angle, and release the 60 kg bombs when you are very close, with the target below the gunsight and filling up around half of it. For the 250 kg, drop it with the gunsight slightly more above the target. If you only use the MGs, your targets are trucks, AAA and howitzers. Dive at it and stabilise the plane so the gunsight stays overall still at the target. Then, once the target fills out around 1/6 of the gunsight, open fire. If your aim is accurate you can destroy one target in a single pass. However, it is very recommended to set keybind for firing MG only as you can definitely not waste the valuable cannon rounds. Save them for any unexpected dogfights.
  • Landing is easy thanks to the low stall speed and lovely handling. Line up and approach the airstrip at treetop, decrease speed to at most 210 km/h and deploy combat, takeoff and landing flaps in order. Further decelerate so the touchdown speed is no more than 180 km/h to avoid bouncing up. Keep braking until the plane reaches a full stop, you don't have to worry about the nose dipping down and causing a propeller strike.

Enemies worth noting:

  • P-61: this plane is one tough nut to crack. It is quite fast, packs a fatal punch, has a searching radar, and a deadly turret on top. The turret consists of 4 x 12.7 mm M2 Browning machine guns that cover the upper half of the plane, and most P-61 players tend to fly low or get you into their upper half to target you with the turret. Avoid being above them at all costs, utilise the Zero's manoeuvrability and sneak under their belly. Its appearance resembles a P-38: a center fuselage with two engine nacelles extending backwards and forming the twin tail like a frame, you will know it is a Black Widow and not a Lightning when red tracer bullets start shooting out from it.
  • F4U, F6F, P-47, etc: these planes are a huge threat to the late Zeros as they have superior firepower, speed, dive acceleration and robust airframes. Their 12.7 mm MGs can easily tear you apart or simply pilot-snipe you even when they are far away, as the M2 Brownings have great velocity and trajectory. They can also set you aflame easily. Start a turnfight whenever you see these stubby planes. The F4U has a long cylindrical nose and the iconic inverted gull wing. The P-47 has a huge, jug-like fuselage, bubble canopy and elliptical trailing edge that usually have invasion stripes painted on them. The F6F, on the other hand, might get confused with other planes as it looks rather average.
  • Late Spitfires: their turn time will come close to the A6M5. They are fast, and can boom and zoom. To avoid them, don't panic when they are spotted trying to boom and zoom. Counter by pretending that they have not been noticed, lulling them into a false sense of security. Then, just as they fire the first shots, dodge them, and head upwards and loop around to take the shot on them. The Spitfires have a streamlined nose with the iconic large, elliptical wings.
  • P-51: their machine guns can do severe damage to the A6M5. However, a common tendency of novice P-51 pilots is to get into a manoeuvring fight with the A6M5. Simply dodge their attacks, do a loop to get on their tail, and take shots at the opportune moments. Even better, when beating them in a turn fight, their aircraft's top profile are fully exposed, allowing for a larger surface area to be shot up and even the cockpit to hit the pilot inside.
  • Yak 3/9: their 20 mm cannons are devastating if they hit. Do not try to head on them, just dodge the attacks by looping around the bullets, get on their tail, and shoot them before they get away!

Manual Engine Control

MEC elements
Mixer Pitch Radiator Supercharger Turbocharger
Oil Water Type
Controllable Controllable
Not auto controlled
Controllable
Not auto controlled
Controllable
Not auto controlled
Separate Controllable
2 gears
Not controllable

Pros and cons

Pros:

  • A6M for Carrier-based fighter:
    • Strictly air-to-air role
    • Decent cannon armament
    • Extremely manoeuvrable
      • Excellent turn rate
      • Excellent roll rate
    • Very short takeoff distance
  • AP-I:
  • Shreds soft targets, and can weaken / destroy weak top armoured tanks, especially engine decks
  • Easily sets fire to air targets
  • HEF(T):
  • Tracer can help you aim on target
  • The few rounds in the belt can still wreck havoc on enemy planes with their HE filler
  • Stealth: great for air battles
  • No tracers
  • HEF:
  • Near full HE belt
  • Wrecks havoc on enemy planes with HE filler
  • AP-I:
  • Easily sets fire to air targets
  • Excellent manoeuvrability
  • Nose-mounted armament
  • Small radiator drag
  • A6M5 specific:
    • Good climb rate
    • Can mount a bomb rack for a single 250 kg bomb, still strongly ill-advised for air-battles

Cons:

  • A6M for carrier-based fighter:
    • Strictly air-to-air role
    • Limited ammo
    • Slow
    • Low dive speed, and easily compressed in a dive
  • Common Navy plane construction:

History


Archive of the in-game description

Mitsubishi Type 0 Model 52 "Kou" (A6M5 Model 52a, reporting names: Zeke/Hamp/Zero) single-engine carrier-based fighter

In the middle of 1942, the Allies in the Pacific Ocean Theatre took the offensive, while the Japanese were more and more often on the defensive. In 1943, new types of high-speed fighters entered service with the USAAF and the USNAF, and they outperformed the Zeros in many respects. Low survivability, the main disadvantage of the Japanese aircraft, was made clear in the fierce air duels between the planes. The fighter's flight characteristics also required some improvement, and Mitsubishi Heavy Industries designers began to upgrade the A6M again in August 1943.

The Zero received a smaller-area wing (with a span of only 11 m) with rounded tips. The wing folding mechanism was removed. To increase the plane's allowable diving speed, its wing surface skin was reinforced.

Since more powerful engines were not yet available, the designers had to make the most of a Nakajima Sakae 21 engine. Every pair of cylinders was given an individual exhaust pipe instead of a common heavy exhaust manifold. This added exhaust gas thrust to the propeller thrust, which resulted in a higher aircraft speed. The fuselage skin had to be reinforced with steel sheets in the area of the pipes, since the hot exhaust gases quickly burned through thin duralumin.

The new version of the aircraft was designated Model 52 (A6M5 Model 52). The plane became slightly heavier, but its maximum speed at a height of 6,000 m reached 565 km/h. This was the speed limit for the Zero, since all further modifications made to the machine only increased its weight and, consequently, reduced its maximum speed.

The next stage in upgrading the Zero was the Model 52 "Kou" (A6M5a Model 52a). This improvement significantly reinforced the plane's armament by replacing the wing-mounted Type 99-2 Model 3 drum-fed cannons (with 100 rounds each) with Type 99-2 Model 4 belt-fed cannons (with 125 rounds). This added 25 rounds per cannon and slightly improved the plane's rate of fire. Now the fighter's armament consisted of two synchronous 7.7 mm Type 97 machine guns with 500 rounds each plus two wing-mounted 20 mm Type 99-2 Model 4 cannons with 125 rounds each.

The A6M5a fighter could carry bombs: two 60 kg (132 lb) bombs suspended under the wing and one weighing 250 kg (551 lb) under the fuselage.

In addition, the A6M5a's wing structure was reinforced yet again, which resulted in a maximum allowable diving speed of 740 km/h. However, this was still inferior to the diving speed of the American F4U fighter.

Mass production of the A6M5a variant began in March 1944. Mitsubishi Heavy Industries manufactured 391 machines. An additional unknown quantity of this variant was built by Nakajima Aircraft.


Media

Skins
Videos

See also

Aircraft of comparable role, configuration and era

External links


Mitsubishi Company (三菱商会)
Fighters  A5M4 · Hagiri's A5M4
  A6M2 mod. 11 · A6M2 · A6M3 · A6M3 mod. 22 · A6M3 mod. 22Ko · A6M5 · A6M5 Ko · A6M5 otsu · A6M5 Hei · A6M6c
  A7M1 (NK9H) · A7M2
  J2M2 · J2M3 · J2M4 Kai · J2M5 · J2M5 (30 mm)
Hydroplanes  F1M2
Interceptors  Ki-83 · Ki-109
Bombers  G4M1
  Ki-21-Ia · Ki-21-I hei · Ki-67-I Ko · Ki-67-I otsu
Jet Fighters  Ki-200
Captured  ▃A6M2 · ␗A6M2
See also  Mitsubishi Heavy Industries, Ltd. (Post-War)

Japan fighters
Navy 
Carrier-based fighter 
A5M  A5M4 · Hagiri's A5M4
A6M  A6M2 mod. 11 · A6M2 · A6M3 · A6M3 mod. 22 · A6M3 mod. 22Ko · A6M5 · A6M5 Ko · A6M5 otsu · A6M5 Hei · A6M6c
A7He  A7He1*
A7M  A7M1 (NK9H) · A7M2
Land-based Fighter 
J2M  J2M2 · J2M3 · J2M4 Kai · J2M5 · J2M5 (30 mm)
J6K  J6K1
J7W  J7W1
N1K-J  N1K1-Ja · N1K2-J · N1K2-Ja
Fighter seaplane 
N1K  N1K1
A6M-N  A6M2-N
Army 
Ki-10  Ki-10-I · Ki-10-I C · Ki-10-II · Ki-10-II C
Ki-27  Ki-27 otsu · Ki-27 otsu Tachiarai
Ki-43  Ki-43-I · Ki-43-II · Ki-43-III otsu
Ki-44  Ki-44-I · Ki-44-I 34 · Ki-44-II otsu · Ki-44-II hei
Ki-61  Ki-61-I ko · Ki-61-I otsu · Ki-61-I hei · Tada's Ki-61-I hei · Ki-61-I tei · Ki-61-II Otsu Kai
Ki-84  Ki-84 ko · Ki-84 otsu · Ki-84 hei
Ki-87  Ki-87
Ki-94  Ki-94-II
Ki-100  Ki-100 · Ki-100-II
Other countries  ▅F4U-1A · ▅P-51C-11-NT · ▅Bf 109 E-7 · ▅Fw 190 A-5
  *Imported designation of the He 112 (A6M was in development - A7M would take A7 designation after the cancelation of the A7He)

Japan premium aircraft
Fighters  Hagiri's A5M4 · A7He1 · Ki-27 otsu Tachiarai
  Ki-44-II otsu · ▅Bf 109 E-7 · ▅F4U-1A · Ki-100-II · Ki-44-I 34
  ▅Fw 190 A-5 · A7M1 (NK9H) · Tada's Ki-61-I hei · ▅P-51C-11-NT
  J2M4 Kai · A6M5 Ko · A6M6c · J2M5 · Ki-87 · J6K1
Twin-engine fighters  Ki-96
Jet fighters  F-86F-40 JASDF▅ · T-2 Early · F-4EJ ADTW
Bombers  Ki-21-I hei · Ki-48-II otsu · H8K3 · B7A2 (Homare 23) · ▅B-17E