Difference between pages "IS-3" and "F-89D"
(→Survivability and armour) (Tag: Visual edit) |
(Edits) |
||
| Line 1: | Line 1: | ||
| − | {{Specs-Card|code= | + | {{Specs-Card|code=f-89d}} |
| + | {{About | ||
| + | | about = American jet fighter '''{{PAGENAME}}''' | ||
| + | | usage = other version | ||
| + | | link = F-89B | ||
| + | }} | ||
== Description == | == Description == | ||
| − | <!--In the description, the first part should be about the history of the creation and combat usage of the | + | <!-- ''In the description, the first part should be about the history of and the creation and combat usage of the aircraft, as well as its key features. In the second part, tell the reader about the aircraft in the game. Insert a screenshot of the vehicle, so that if the novice player does not remember the vehicle by name, he will immediately understand what kind of vehicle the article is talking about.'' --> |
| − | [[File: | + | [[File:GarageImage_{{PAGENAME}}.jpg|420px|thumb|left]] |
| − | {{ | + | {{Break}} |
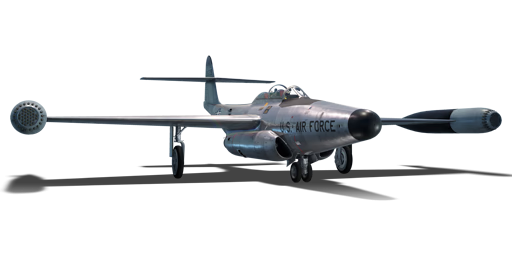
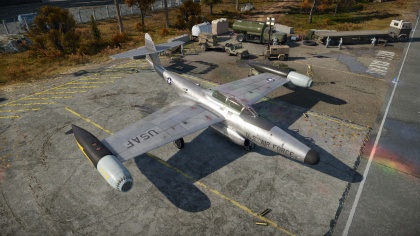
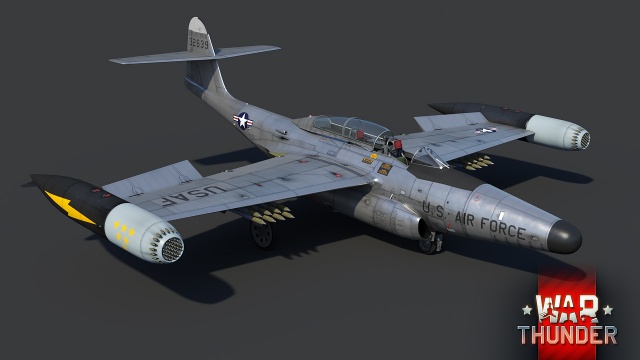
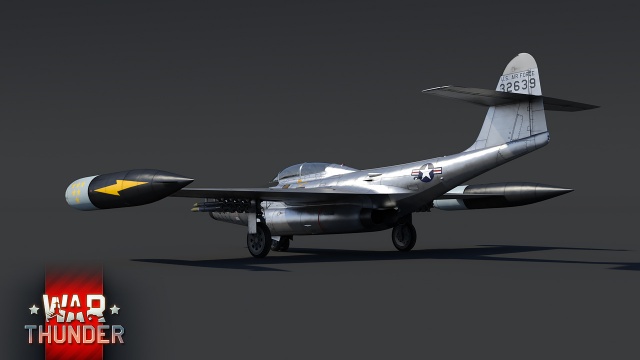
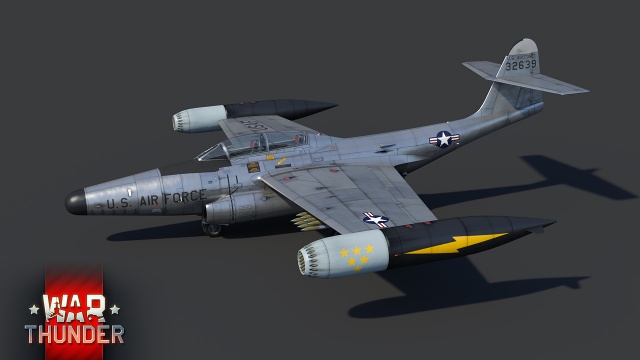
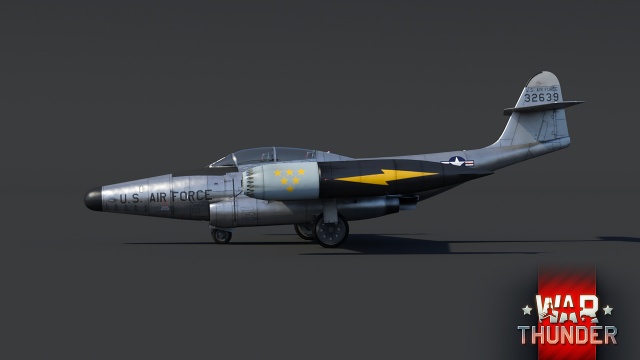
| − | The '''{{Specs|name}}''' is a rank {{Specs|rank}} | + | The '''{{Specs|name}}''' is a premium rank {{Specs|rank}} American jet fighter {{Battle-rating}}. It was introduced in [[Update 1.91 "Night Vision"]]. |
| − | + | The {{PAGENAME}} Scorpion was designed and built to be an all-weather interceptor intended to neutralize any potential invading Soviet bomber force. The USAAF was intent of replacing the P-61 Black Widow with another night fighter, one specifically which would fly faster (minimum 530 mph/850 kph) almost assuredly requiring the usage of jets, six sixty-calibre machine guns or 20 mm autocannons and armed with internally stored aerial rockets. To round out the aircraft for ground attack if needed, it would also need to accommodate 1,000 lb bombs and eight larger rocket types externally. Initial wind tunnel testing of the fighter determined that the proposed swept-wings were insufficient at slow speeds and were changed out with straight wings. Though causing a loss of high-end performance, increased stability at low speeds was necessary. | |
| − | + | Other changes to the horizontal stabilizer also increased the effectiveness of the elevators and rudder. Concerns about the fuel tanks situated right over the engines were nullified when it was determined that efforts made by Northrop to protect them were considered sufficient, anything else would have required a complete redesign of the aircraft. | |
| − | + | Other key features of the Scorpion was the usage of decelerons or clamshell-style split ailerons which work as a standard aileron, however, can open up as a dive brake or be utilized as a takeoff/landing flap. Last-minute changes by the Air Force required upgrading the engines and outfitting an afterburner, adding a radar system, fire control system, permanent wingtip fuel tanks, reconfigured nose guns and easy access to lower the entire engine to make for easier maintenance. | |
| − | + | Having determined that the six autocannons originally specced with the F-89A and B models would be less effective against bomber formations as it requires relative precision to damage or destroy the enemy bombers. On the other hand, a new requirement for the F-89 to house 104 Folding-Fin Mighty Mouse Aerial Rockets and underwing HVAR rockets would allow the F-89 (now designated as the {{PAGENAME}}) the ability to launch salvos of rockets and quickly targeting another bomber to launch more and allow for the potential of one or more rockets in the salvo to accomplish the required amount of damage necessary to destroy them or cause them to turn around and retreat. Though unguided and not terribly accurate, a salvo of rockets typically allowed for one or two rockets to explode near enough to be a successful hit. | |
| − | + | To aid in the aerodynamics of the rocket launchers, they were outfitted around the wing-tip fuel tanks. Engineered so that the launching rockets would not damage the fuel tanks, the underwing still allowed for the mounting of the larger HVAR rockets to be used against bombers, but also along with the FFAR rockets be used against ground targets. The {{PAGENAME}} though best used with higher speeds, can be used as a dive-bomber of sorts, when going against ground targets, the fighter should throttle back, extend dive brakes, line up the shot and fire the rockets. Immediately when finished firing, retract the brakes and full-throttle the engines to gain speed and distance from any enemy fighters which may have targeted you. | |
== General info == | == General info == | ||
| − | === | + | === Flight performance === |
| − | <!--Describe | + | <!-- ''Describe how the aircraft behaves in the air. Speed, manoeuvrability, acceleration and allowable loads - these are the most important characteristics of the vehicle.'' --> |
| − | + | The {{PAGENAME}} has probably the best acceleration for its BR, but mediocre turn rate and rolling. It locks up around 900 km/h. The plane can reach rip speeds in level flight and even shallow climbs. | |
| − | |||
| − | |||
| − | + | Considering its mediocre turn rate & rolling speed, it's best used as a boom & zoomer. | |
| − | |||
| − | {| class="wikitable" | + | {| class="wikitable" style="text-align:center" width="70%" |
| + | ! rowspan="2" | Characteristics | ||
| + | ! colspan="2" | Max Speed<br>(km/h at 3,200 m) | ||
| + | ! rowspan="2" | Max altitude<br>(metres) | ||
| + | ! colspan="2" | Turn time<br>(seconds) | ||
| + | ! colspan="2" | Rate of climb<br>(metres/second) | ||
| + | ! rowspan="2" | Take-off run<br>(metres) | ||
|- | |- | ||
| − | ! | + | ! AB !! RB !! AB !! RB !! AB !! RB |
|- | |- | ||
| − | | | + | ! Stock |
| + | | 1,009 || 1,002 || rowspan="2" | {{Specs|ceiling}} || 33.3 || 34.8 || 31.1 || 26.7 || rowspan="2" | 1,036 | ||
|- | |- | ||
| − | | | + | ! Upgraded |
| + | | 1,034 || 1,022 || 32.7 || 33.0 || 47.5 || 38.9 | ||
|- | |- | ||
|} | |} | ||
| − | |||
| − | |||
| − | |||
| − | |||
| − | |||
| − | |||
| − | |||
| − | |||
| − | |||
| − | |||
| − | |||
| − | |||
| − | |||
| − | |||
| − | |||
| − | |||
| − | |||
| − | |||
| − | |||
| − | |||
| − | + | ==== Details ==== | |
| − | + | {| class="wikitable" style="text-align:center" width="50%" | |
| − | |||
| − | |||
| − | |||
| − | |||
| − | |||
| − | |||
| − | |||
| − | |||
| − | |||
| − | |||
| − | |||
| − | |||
| − | |||
| − | |||
| − | |||
| − | |||
| − | |||
| − | |||
| − | |||
|- | |- | ||
| − | + | ! colspan="6" | Features | |
|- | |- | ||
| − | ! | + | ! Combat flaps !! Take-off flaps !! Landing flaps !! Air brakes !! Arrestor gear !! Drogue chute |
|- | |- | ||
| − | + | | ✓ || ✓ || ✓ || ✓ || X || X <!-- ✓ --> | |
| − | |||
| − | |||
| − | |||
| − | | | ||
| − | | | ||
|- | |- | ||
|} | |} | ||
| − | + | {| class="wikitable" style="text-align:center" width="50%" | |
| − | {| class="wikitable | ||
| − | |||
|- | |- | ||
| − | + | ! colspan="7" | Limits | |
| − | |||
| − | ! colspan=" | ||
|- | |- | ||
| − | ! | + | ! rowspan="2" | Wings (km/h) |
| − | ! | + | ! rowspan="2" | Gear (km/h) |
| − | ! | + | ! colspan="3" | Flaps (km/h) |
| − | ! | + | ! colspan="2" | Max Static G |
| − | |||
| − | |||
|- | |- | ||
| − | + | ! Combat !! Take-off !! Landing !! + !! - | |
|- | |- | ||
| − | | | + | | {{Specs|destruction|body}} || {{Specs|destruction|gear}} || 554 || 448 || 379 || ~7 || ~3 |
| − | |||
| − | |||
| − | |||
| − | |||
| − | |||
| − | |||
| − | |||
| − | |||
| − | | | ||
| − | |||
| − | |||
| − | |||
| − | |||
| − | |||
| − | |||
| − | |||
| − | |||
| − | |||
| − | |||
| − | |||
| − | |||
| − | |||
| − | |||
| − | |||
| − | |||
| − | |||
|- | |- | ||
| − | |||
| − | |||
| − | |||
| − | |||
| − | |||
| − | |||
|} | |} | ||
| − | |||
| − | |||
| − | |||
| − | |||
| − | |||
{| class="wikitable" style="text-align:center" | {| class="wikitable" style="text-align:center" | ||
|- | |- | ||
| − | ! | + | ! colspan="4" | Optimal velocities (km/h) |
| − | + | |- | |
| − | ! | + | ! Ailerons !! Rudder !! Elevators !! Radiator |
| − | ! | ||
| − | ! | ||
| − | ! | ||
| − | ! | ||
| − | ! | ||
|- | |- | ||
| − | || | + | | < 760 || < 800 || < 700 || N/A |
|- | |- | ||
|} | |} | ||
| − | + | ==== Engine performance ==== | |
| − | |||
| − | |||
| − | |||
| − | |||
| − | === | ||
| − | |||
| − | |||
| − | |||
{| class="wikitable" style="text-align:center" | {| class="wikitable" style="text-align:center" | ||
|- | |- | ||
| − | ! colspan=" | + | ! colspan="3" | Engine |
| + | ! colspan="6" | Aircraft mass | ||
| + | |- | ||
| + | ! colspan="2" | Engine name || Number | ||
| + | ! colspan="3" | Empty mass || colspan="3" | Wing loading (full fuel) | ||
|- | |- | ||
| − | + | | colspan="2" | Allison J35-A-35 || 2 | |
| + | | colspan="3" | 12,509 kg || colspan="3" | 318 kg/m<sup>2</sup> | ||
|- | |- | ||
| − | ! colspan=" | + | ! colspan="3" | Engine characteristics |
| − | ! | + | ! colspan="5" | Mass with fuel (no weapons load) || rowspan="2" | Max Takeoff<br />Weight |
| − | |||
| − | |||
|- | |- | ||
| − | | colspan=" | + | ! Weight (each) || colspan="2" | Type |
| + | ! 21m fuel || 30m fuel || 45m fuel || 60m fuel || 70m fuel | ||
|- | |- | ||
| − | | | + | | 1,300 kg || colspan="2" | Afterburning axial-flow turbojet |
| − | + | | 14,158 kg || 14,850 kg || 16,002 kg || 17,162 kg || 17,923 kg || 20,301 kg | |
|- | |- | ||
| − | ! colspan=" | + | ! colspan="3" | {{Annotation|Maximum engine thrust @ 0 m (RB / SB)|The maximum thrust produced by each engine, while mounted in the aircraft. NOTE: Thrust varies significantly depending on speed & altitude.}} |
| + | ! colspan="6" | Thrust to weight ratio @ 0 m (WEP) | ||
|- | |- | ||
| − | ! | + | ! Condition || 100% || WEP |
| + | ! 21m fuel || 30m fuel || 45m fuel || 60m fuel || 70m fuel || MTOW | ||
|- | |- | ||
| − | + | | ''Stationary'' || 2,303 kgf || 3,051 kgf | |
| − | + | | 0.43 || 0.41 || 0.38 || 0.36 || 0.34 || 0.30 | |
| − | |||
| − | |||
|- | |- | ||
| − | | | + | | ''Optimal'' || 2,350 kgf<br />(100 km/h) || 3,237 kgf<br />(800 km/h) |
| + | | 0.46 || 0.44 || 0.40 || 0.38 || 0.36 || 0.32 | ||
|- | |- | ||
|} | |} | ||
| − | == | + | === Survivability and armour === |
| − | <!-- | + | <!-- ''Examine the survivability of the aircraft. Note how vulnerable the structure is and how secure the pilot is, whether the fuel tanks are armoured, etc. Describe the armour, if there is any, and also mention the vulnerability of other critical aircraft systems.'' --> |
| + | The {{PAGENAME}}is quite a sturdy machine and won't crash from regular hits, both the pilots in the cockpit have control over the plane, so if one is knocked out, you can still fly him safe home. Not only are there two pilots in this machine, but also two engines, which if one of them is shot out, the other can still thrust you back to safety for repairs. | ||
| − | + | Losing a wing tip isn't a problem as you can still fly with it, with minor compensation for aerodynamics. The thing that will mostly bring you down if you get caught in a firefight will be loss of control surfaces. So as long as you still are able to control your plane, you're good to go. | |
| − | === | + | == Armaments == |
| − | + | === Suspended armament === | |
| + | <!-- ''Describe the aircraft's suspended armament: additional cannons under the wings, bombs, rockets and torpedoes. This section is especially important for bombers and attackers. If there is no suspended weaponry remove this subsection.'' --> | ||
| + | {{main|FFAR Mighty Mouse|HVAR}} | ||
| − | + | The '''''{{PAGENAME}}''''' can be outfitted with the following ordnance: | |
| + | * 104 x FFAR Mighty Mouse rockets | ||
| + | * 16 x HVAR rockets + 104 x FFAR Mighty Mouse rockets | ||
| + | * 104 x FFAR Mighty Mouse rockets M439 | ||
| − | ' | + | The {{PAGENAME}} is unique in its weapons loadout and stands out in a class of its own with the F-86D Sabre Dog in that the only weapons found on the fighter/interceptor are unguided aerial rockets (both FFAR and HVAR). It is not the intention of this aircraft to dogfight other fighters, instead its purpose is to was to eliminate Soviet bombers. The {{PAGENAME}} when given the clearance, would zoom-climb to bomber altitude with its afterburners engaged and then would utilise its Folding-Fin Aerial Rockets (Mighty Mouse) by shooting salvos (with 104 total rockets on board, a few could be fired off or a large amount) at inbound bomber aircraft. The rockets would spread out similar to how a shotgun works and the result should be enough rockets make contact or explode near the bombers to take them out. While these unguided rockets may not be accurate, with the amount on-board, many can be fired to increase the interceptor's chances of hitting. The HVAR rockets are larger and only a few are mounted under the wings. These rockets should be reserved for the larger and slower bombers, notwithstanding there are less to work with which decreases the chances to hit compared to the FFARs. |
| − | + | While the {{PAGENAME}} was built and configured for aerial interception and destruction of aircraft, the rockets, both FFAR and HVAR can be utilised on ground targets too. The {{PAGENAME}} is outfitted with decelerons which double as speed brakes which open up in a clam-shell style. The Scorpion can dive on ground targets, engage the dive brakes, line up the target and then unleash either the FFAR or HVAR rockets depending on the target types. With the 104 FFAR Mighty Mouse rockets, enemy vehicles which are clustered together are an excellent target to unleash salvos of rockets at. Another opportunity is during domination maps, the rockets come in very handy for taking out aircraft which are attempting to cap the airfield as the rocket spread does not need to be super accurate to still achieve a critical hit or destruction of the aircraft capping the airfield. | |
| − | + | == Usage in battles == | |
| + | <!-- ''Describe the tactics of playing in the aircraft, the features of using aircraft in a team and advice on tactics. Refrain from creating a "guide" - do not impose a single point of view, but instead, give the reader food for thought. Examine the most dangerous enemies and give recommendations on fighting them. If necessary, note the specifics of the game in different modes (AB, RB, SB).'' --> | ||
| + | There's two ways to play the {{PAGENAME}}, either as a ground pounder or as fighter with irregular ammunition, being proxy fuse FFAR's | ||
| − | ''' | + | ==== Ground pounder ==== |
| + | When taking the {{PAGENAME}} as a ground pounder, the preferable loadout would be taking all the rockets possible, 104 FFAR's + 16 HVAR's. Pay close attention as the HVAR's fire first before making use of the HVAR's. Exploit the fact that the {{PAGENAME}} is among the fastest accelerating for its battle rating and when arriving near targets will be quite relaxing as your enemies will still be on their way towards you. | ||
| − | + | Be warned considering the fact that the FFAR pods are quite far away from each other and targeting isn't as easy as using the HVAR's, firing in salvo's is advised, and having 104 rockets will be plenty enough before you have to re-arm. Hit as much as you can and run away as soon as enemies are coming for your cannonless machine. | |
| − | + | ==== Fighter ==== | |
| + | The best way to achieve kills in the {{PAGENAME}} is by taking the proximity-fuse FFAR's and playing it by boom and zooming, making great use of the high acceleration and fast climb rate. The rockets are quite inaccurate because of the fact they're spread out so much, so shooting in salvo's is strongly advised. Extremely deadly in a head-on. Rockets work down to RNG, sometimes they can annihilate and other times you can get hit after hit. | ||
| − | + | === Modules === | |
| + | {| class="wikitable" | ||
| + | ! Tier | ||
| + | ! colspan="2" | Flight performance | ||
| + | ! Survivability | ||
| + | ! Weaponry | ||
| + | |- | ||
| + | | I | ||
| + | | Fuselage repair | ||
| + | | | ||
| + | | | ||
| + | | | ||
| + | |- | ||
| + | | II | ||
| + | | | ||
| + | | Compressor | ||
| + | | Airframe | ||
| + | | | ||
| + | |- | ||
| + | | III | ||
| + | | Wings repair | ||
| + | | | ||
| + | | | ||
| + | | | ||
| + | |- | ||
| + | | IV | ||
| + | | | ||
| + | | Engine | ||
| + | | Cover | ||
| + | | | ||
| + | |- | ||
| + | |} | ||
| − | + | * As a premium aircraft all modifications are unlocked on purchase of the vehicle. | |
| − | |||
| − | * | ||
| − | |||
| − | |||
| − | |||
| − | |||
| − | |||
| − | |||
| − | |||
| − | |||
| − | |||
| − | |||
| − | |||
| − | |||
| − | |||
| − | |||
| − | |||
| − | |||
| − | |||
| − | |||
| − | |||
| − | |||
| − | |||
| − | |||
| − | |||
| − | |||
=== Pros and cons === | === Pros and cons === | ||
| − | <!--Summarise and briefly evaluate the vehicle in terms of its characteristics and combat effectiveness. Mark its pros and cons in | + | <!-- ''Summarise and briefly evaluate the vehicle in terms of its characteristics and combat effectiveness. Mark its pros and cons in the bulleted list. Try not to use more than 6 points for each of the characteristics. Avoid using categorical definitions such as "bad", "good" and the like - use substitutions with softer forms such as "inadequate" and "effective".'' --> |
| − | |||
| − | |||
| − | |||
| − | |||
| − | |||
| − | |||
| − | |||
| − | |||
| − | |||
| − | ''' | + | '''Pros:''' |
| + | * Fearsome rocket armament, both Mighty Mouse and HVARs | ||
| + | * Decent high-speed manoeuvrability | ||
| + | * Dual-engine, can fly with one (though, head back to base!) | ||
| + | * Targeting radar equipped | ||
| + | * Bomber interceptor or ground attacker role capable | ||
| + | * Armament will be able to easily destroy enemy planes in a head-on | ||
| + | * Use of decelerons as ailerons, dive brakes (clamshell-type) or flaps | ||
| − | + | '''Cons:''' | |
| − | + | * No autocannon armament | |
| − | * | + | * Rockets are inaccurate, odds increased when launched in salvos |
| − | * | + | * Not very manoeuvrable at low speeds |
| − | * | + | * Large target wing-surface |
| − | * | + | * Heavy wing-tips, losing one throws the aircraft off balance |
| − | * | + | * Not as nimble as single-engine MiGs |
| − | * | ||
| − | |||
== History == | == History == | ||
| − | <!--Describe the history of the creation and combat usage of the | + | <!-- ''Describe the history of the creation and combat usage of the aircraft in more detail than in the introduction. If the historical reference turns out to be too long, take it to a separate article, taking a link to the article about the vehicle and adding a block "/History" (example: <nowiki>https://wiki.warthunder.com/(Vehicle-name)/History</nowiki>) and add a link to it here using the <code>main</code> template. Be sure to reference text and sources by using <code><nowiki><ref></ref></nowiki></code>, as well as adding them at the end of the article with <code><nowiki><references /></nowiki></code>. This section may also include the vehicle's dev blog entry (if applicable) and the in-game encyclopedia description (under <code><nowiki>=== In-game description ===</nowiki></code>, also if applicable).'' --> |
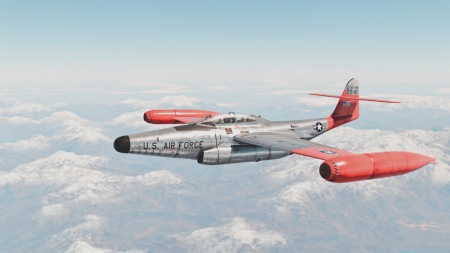
| − | + | [[File:F-89D_fulzy_nyan.jpg|450px|thumb|right|'''{{PAGENAME}}''' at cruising altitude.]] | |
| − | + | Almost immediately after WWII, the Nothrop Corporation began developing an experimental jet fighter-interceptor to meet the new requirements for that class of aircraft. The American interceptor’s primary targets were supposed to be Soviet bombers, so the projected model’s flight characteristics and armament had to meet this objective. At first the two-seater twin-engine jet was developed to have a rather interesting four gun turret. This turret was to be mounted on the aircraft’s nose and could fire on targets either automatically or manually along a vertical plane either forward, up, down or, in some cases, backward. However, when the experimental model of the aircraft was ready, the turret still hadn’t undergone testing yet, so the military decided to install traditional static frontal guns on it, as well as HVARs on the wing pylons. It was with this loadout that the Scorpion F-89A and F-89B went into service. The armament was switched exclusively to rockets somewhat later. To make the change to rockets, the designers implemented an interesting solution: Mighty Mouse unguided rockets were installed on the front of the wing-mounted fuel tanks in such a way that the rocket and fuel sections of this part of the design were separated by a fireproof barrier. This also made it possible to install heavier, more destructive HVARs under the wing. The F-89D or “rocket” version of the Scorpion went on to become the most widespread version of the aircraft in the US air force – 682 of them were manufactured. | |
| − | |||
| − | |||
| − | |||
| − | |||
| − | |||
| − | |||
| − | |||
| − | |||
| − | |||
| − | |||
| − | |||
| − | |||
| − | + | ''- From [[wt:en/news/6371-development-f-89b-and-f-89d-scorpion-jet-bros-en|Devblog]]'' | |
| − | |||
| − | |||
| − | |||
| − | |||
| − | |||
| − | |||
| − | |||
| − | |||
| − | |||
| − | |||
| − | |||
== Media == | == Media == | ||
| − | <!--Excellent additions to the article would be video guides, screenshots from the game, and photos.--> | + | <!-- ''Excellent additions to the article would be video guides, screenshots from the game, and photos.'' --> |
| − | + | ;Images | |
| − | ; | + | <gallery mode="packed"> |
| − | + | File:F_89d_wallpaper001.jpg | |
| − | + | File:F_89d_wallpaper002.jpg | |
| − | + | File:F_89d_wallpaper003.jpg | |
| − | + | File:F_89d_wallpaper004.jpg | |
| − | + | File:F_89d_wallpaper005.jpg | |
| − | + | </gallery> | |
| − | |||
| − | < | ||
== See also == | == See also == | ||
| − | ''Links to the articles on the War Thunder Wiki that you think will be useful for the reader, for example:'' | + | <!-- ''Links to the articles on the War Thunder Wiki that you think will be useful for the reader, for example:'' |
| + | * ''reference to the series of the aircraft;'' | ||
| + | * ''links to approximate analogues of other nations and research trees.'' --> | ||
| − | * | + | * [[F-89B]] - Cannon-armed variant of the jet. |
| − | |||
== External links == | == External links == | ||
| − | <!--Paste links to sources and external resources, such as: | + | <!-- ''Paste links to sources and external resources, such as:'' |
* ''topic on the official game forum;'' | * ''topic on the official game forum;'' | ||
| − | * ''encyclopedia page on the | + | * ''encyclopedia page on the aircraft;'' |
| − | * ''other literature.''--> | + | * ''other literature.'' --> |
| − | * [ | + | * [[wt:en/news/6371-development-f-89b-and-f-89d-scorpion-jet-bros-en|[Development<nowiki>]</nowiki> F-89B and F-89D Scorpion: Jet Bros]] |
| − | {{ | + | {{AirManufacturer Northrop}} |
| + | {{USA jet aircraft}} | ||
| + | {{USA premium aircraft}} | ||
Revision as of 13:44, 21 April 2020
Contents
| This page is about the American jet fighter F-89D. For other version, see F-89B. |
Description
The F-89D is a premium rank V American jet fighter
with a battle rating of 6.7 (AB), 7.0 (RB), and 7.3 (SB). It was introduced in Update 1.91 "Night Vision".
The F-89D Scorpion was designed and built to be an all-weather interceptor intended to neutralize any potential invading Soviet bomber force. The USAAF was intent of replacing the P-61 Black Widow with another night fighter, one specifically which would fly faster (minimum 530 mph/850 kph) almost assuredly requiring the usage of jets, six sixty-calibre machine guns or 20 mm autocannons and armed with internally stored aerial rockets. To round out the aircraft for ground attack if needed, it would also need to accommodate 1,000 lb bombs and eight larger rocket types externally. Initial wind tunnel testing of the fighter determined that the proposed swept-wings were insufficient at slow speeds and were changed out with straight wings. Though causing a loss of high-end performance, increased stability at low speeds was necessary.
Other changes to the horizontal stabilizer also increased the effectiveness of the elevators and rudder. Concerns about the fuel tanks situated right over the engines were nullified when it was determined that efforts made by Northrop to protect them were considered sufficient, anything else would have required a complete redesign of the aircraft.
Other key features of the Scorpion was the usage of decelerons or clamshell-style split ailerons which work as a standard aileron, however, can open up as a dive brake or be utilized as a takeoff/landing flap. Last-minute changes by the Air Force required upgrading the engines and outfitting an afterburner, adding a radar system, fire control system, permanent wingtip fuel tanks, reconfigured nose guns and easy access to lower the entire engine to make for easier maintenance.
Having determined that the six autocannons originally specced with the F-89A and B models would be less effective against bomber formations as it requires relative precision to damage or destroy the enemy bombers. On the other hand, a new requirement for the F-89 to house 104 Folding-Fin Mighty Mouse Aerial Rockets and underwing HVAR rockets would allow the F-89 (now designated as the F-89D) the ability to launch salvos of rockets and quickly targeting another bomber to launch more and allow for the potential of one or more rockets in the salvo to accomplish the required amount of damage necessary to destroy them or cause them to turn around and retreat. Though unguided and not terribly accurate, a salvo of rockets typically allowed for one or two rockets to explode near enough to be a successful hit.
To aid in the aerodynamics of the rocket launchers, they were outfitted around the wing-tip fuel tanks. Engineered so that the launching rockets would not damage the fuel tanks, the underwing still allowed for the mounting of the larger HVAR rockets to be used against bombers, but also along with the FFAR rockets be used against ground targets. The F-89D though best used with higher speeds, can be used as a dive-bomber of sorts, when going against ground targets, the fighter should throttle back, extend dive brakes, line up the shot and fire the rockets. Immediately when finished firing, retract the brakes and full-throttle the engines to gain speed and distance from any enemy fighters which may have targeted you.
General info
Flight performance
The F-89D has probably the best acceleration for its BR, but mediocre turn rate and rolling. It locks up around 900 km/h. The plane can reach rip speeds in level flight and even shallow climbs.
Considering its mediocre turn rate & rolling speed, it's best used as a boom & zoomer.
| Characteristics | Max Speed (km/h at 3,200 m) |
Max altitude (metres) |
Turn time (seconds) |
Rate of climb (metres/second) |
Take-off run (metres) | |||
|---|---|---|---|---|---|---|---|---|
| AB | RB | AB | RB | AB | RB | |||
| Stock | 1,009 | 1,002 | 14996 | 33.3 | 34.8 | 31.1 | 26.7 | 1,036 |
| Upgraded | 1,034 | 1,022 | 32.7 | 33.0 | 47.5 | 38.9 | ||
Details
| Features | |||||
|---|---|---|---|---|---|
| Combat flaps | Take-off flaps | Landing flaps | Air brakes | Arrestor gear | Drogue chute |
| ✓ | ✓ | ✓ | ✓ | X | X |
| Limits | ||||||
|---|---|---|---|---|---|---|
| Wings (km/h) | Gear (km/h) | Flaps (km/h) | Max Static G | |||
| Combat | Take-off | Landing | + | - | ||
| 920 | 379 | 554 | 448 | 379 | ~7 | ~3 |
| Optimal velocities (km/h) | |||
|---|---|---|---|
| Ailerons | Rudder | Elevators | Radiator |
| < 760 | < 800 | < 700 | N/A |
Engine performance
| Engine | Aircraft mass | |||||||
|---|---|---|---|---|---|---|---|---|
| Engine name | Number | Empty mass | Wing loading (full fuel) | |||||
| Allison J35-A-35 | 2 | 12,509 kg | 318 kg/m2 | |||||
| Engine characteristics | Mass with fuel (no weapons load) | Max Takeoff Weight | ||||||
| Weight (each) | Type | 21m fuel | 30m fuel | 45m fuel | 60m fuel | 70m fuel | ||
| 1,300 kg | Afterburning axial-flow turbojet | 14,158 kg | 14,850 kg | 16,002 kg | 17,162 kg | 17,923 kg | 20,301 kg | |
| Maximum engine thrust @ 0 m (RB / SB) | Thrust to weight ratio @ 0 m (WEP) | |||||||
| Condition | 100% | WEP | 21m fuel | 30m fuel | 45m fuel | 60m fuel | 70m fuel | MTOW |
| Stationary | 2,303 kgf | 3,051 kgf | 0.43 | 0.41 | 0.38 | 0.36 | 0.34 | 0.30 |
| Optimal | 2,350 kgf (100 km/h) |
3,237 kgf (800 km/h) |
0.46 | 0.44 | 0.40 | 0.38 | 0.36 | 0.32 |
Survivability and armour
The F-89Dis quite a sturdy machine and won't crash from regular hits, both the pilots in the cockpit have control over the plane, so if one is knocked out, you can still fly him safe home. Not only are there two pilots in this machine, but also two engines, which if one of them is shot out, the other can still thrust you back to safety for repairs.
Losing a wing tip isn't a problem as you can still fly with it, with minor compensation for aerodynamics. The thing that will mostly bring you down if you get caught in a firefight will be loss of control surfaces. So as long as you still are able to control your plane, you're good to go.
Armaments
Suspended armament
The F-89D can be outfitted with the following ordnance:
- 104 x FFAR Mighty Mouse rockets
- 16 x HVAR rockets + 104 x FFAR Mighty Mouse rockets
- 104 x FFAR Mighty Mouse rockets M439
The F-89D is unique in its weapons loadout and stands out in a class of its own with the F-86D Sabre Dog in that the only weapons found on the fighter/interceptor are unguided aerial rockets (both FFAR and HVAR). It is not the intention of this aircraft to dogfight other fighters, instead its purpose is to was to eliminate Soviet bombers. The F-89D when given the clearance, would zoom-climb to bomber altitude with its afterburners engaged and then would utilise its Folding-Fin Aerial Rockets (Mighty Mouse) by shooting salvos (with 104 total rockets on board, a few could be fired off or a large amount) at inbound bomber aircraft. The rockets would spread out similar to how a shotgun works and the result should be enough rockets make contact or explode near the bombers to take them out. While these unguided rockets may not be accurate, with the amount on-board, many can be fired to increase the interceptor's chances of hitting. The HVAR rockets are larger and only a few are mounted under the wings. These rockets should be reserved for the larger and slower bombers, notwithstanding there are less to work with which decreases the chances to hit compared to the FFARs.
While the F-89D was built and configured for aerial interception and destruction of aircraft, the rockets, both FFAR and HVAR can be utilised on ground targets too. The F-89D is outfitted with decelerons which double as speed brakes which open up in a clam-shell style. The Scorpion can dive on ground targets, engage the dive brakes, line up the target and then unleash either the FFAR or HVAR rockets depending on the target types. With the 104 FFAR Mighty Mouse rockets, enemy vehicles which are clustered together are an excellent target to unleash salvos of rockets at. Another opportunity is during domination maps, the rockets come in very handy for taking out aircraft which are attempting to cap the airfield as the rocket spread does not need to be super accurate to still achieve a critical hit or destruction of the aircraft capping the airfield.
Usage in battles
There's two ways to play the F-89D, either as a ground pounder or as fighter with irregular ammunition, being proxy fuse FFAR's
Ground pounder
When taking the F-89D as a ground pounder, the preferable loadout would be taking all the rockets possible, 104 FFAR's + 16 HVAR's. Pay close attention as the HVAR's fire first before making use of the HVAR's. Exploit the fact that the F-89D is among the fastest accelerating for its battle rating and when arriving near targets will be quite relaxing as your enemies will still be on their way towards you.
Be warned considering the fact that the FFAR pods are quite far away from each other and targeting isn't as easy as using the HVAR's, firing in salvo's is advised, and having 104 rockets will be plenty enough before you have to re-arm. Hit as much as you can and run away as soon as enemies are coming for your cannonless machine.
Fighter
The best way to achieve kills in the F-89D is by taking the proximity-fuse FFAR's and playing it by boom and zooming, making great use of the high acceleration and fast climb rate. The rockets are quite inaccurate because of the fact they're spread out so much, so shooting in salvo's is strongly advised. Extremely deadly in a head-on. Rockets work down to RNG, sometimes they can annihilate and other times you can get hit after hit.
Modules
| Tier | Flight performance | Survivability | Weaponry | |
|---|---|---|---|---|
| I | Fuselage repair | |||
| II | Compressor | Airframe | ||
| III | Wings repair | |||
| IV | Engine | Cover | ||
- As a premium aircraft all modifications are unlocked on purchase of the vehicle.
Pros and cons
Pros:
- Fearsome rocket armament, both Mighty Mouse and HVARs
- Decent high-speed manoeuvrability
- Dual-engine, can fly with one (though, head back to base!)
- Targeting radar equipped
- Bomber interceptor or ground attacker role capable
- Armament will be able to easily destroy enemy planes in a head-on
- Use of decelerons as ailerons, dive brakes (clamshell-type) or flaps
Cons:
- No autocannon armament
- Rockets are inaccurate, odds increased when launched in salvos
- Not very manoeuvrable at low speeds
- Large target wing-surface
- Heavy wing-tips, losing one throws the aircraft off balance
- Not as nimble as single-engine MiGs
History
Almost immediately after WWII, the Nothrop Corporation began developing an experimental jet fighter-interceptor to meet the new requirements for that class of aircraft. The American interceptor’s primary targets were supposed to be Soviet bombers, so the projected model’s flight characteristics and armament had to meet this objective. At first the two-seater twin-engine jet was developed to have a rather interesting four gun turret. This turret was to be mounted on the aircraft’s nose and could fire on targets either automatically or manually along a vertical plane either forward, up, down or, in some cases, backward. However, when the experimental model of the aircraft was ready, the turret still hadn’t undergone testing yet, so the military decided to install traditional static frontal guns on it, as well as HVARs on the wing pylons. It was with this loadout that the Scorpion F-89A and F-89B went into service. The armament was switched exclusively to rockets somewhat later. To make the change to rockets, the designers implemented an interesting solution: Mighty Mouse unguided rockets were installed on the front of the wing-mounted fuel tanks in such a way that the rocket and fuel sections of this part of the design were separated by a fireproof barrier. This also made it possible to install heavier, more destructive HVARs under the wing. The F-89D or “rocket” version of the Scorpion went on to become the most widespread version of the aircraft in the US air force – 682 of them were manufactured.
- From Devblog
Media
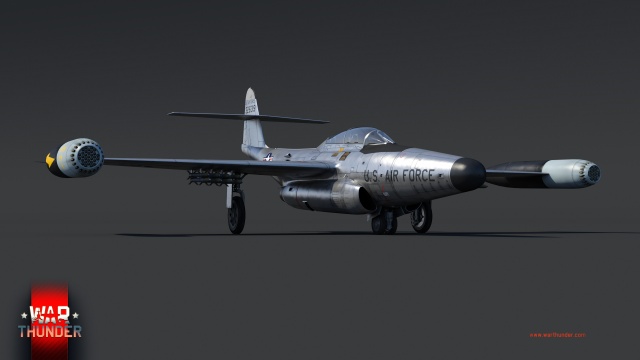
- Images
See also
- F-89B - Cannon-armed variant of the jet.
External links
| Northrop Corporation | |
|---|---|
| Fighters | P-61A-11 · P-61C-1 |
| Jet fighters | F-89B · F-89D |
| F-5A · F-5C · F-5E | |
| F-20A | |
| Export | ␗F-5A · ▄F-5E FCU |
| USA jet aircraft | |
|---|---|
| Fighters | |
| F-4 | F-4C Phantom II · F-4E Phantom II · F-4J Phantom II · F-4S Phantom II |
| F-5 | F-5A · F-5C · F-5E · F-20A |
| F-8 | F8U-2 · F-8E |
| F-80 | F-80A-5 · F-80C-10 |
| F-84 | F-84B-26 · F-84F · F-84G-21-RE |
| F-86 | F-86A-5 · F-86F-25 · F-86F-2 · F-86F-35 |
| F-89 | F-89B · F-89D |
| F-100 | F-100D |
| F-104 | F-104A · F-104C |
| F-14 | F-14A Early · F-14B |
| F-15 | F-15A |
| F-16 | F-16A · F-16A ADF · F-16C |
| F9F | F9F-2 · F9F-5 · F9F-8 |
| Other | P-59A · F2H-2 · F3D-1 · F3H-2 · F4D-1 · F11F-1 |
| Strike Aircraft | |
| FJ-4 | FJ-4B · FJ-4B VMF-232 |
| A-4 | A-4B · A-4E Early |
| A-6 | A-6E TRAM |
| A-7 | A-7D · A-7E · A-7K |
| AV-8 | AV-8A · AV-8C |
| A-10 | A-10A · A-10A Late |
| B-57 | B-57A · B-57B |
| F-105 | F-105D |
| F-111 | F-111A |
| USA premium aircraft | |
|---|---|
| Fighters | Thach's F2A-1 · Galer's F3F-2 · F2G-1 · F4U-4B VMF-214 · P-26A-34 · P-40C · P-43A-1 |
| P-47M-1-RE · ⋠P-47M-1-RE · P-51A · P-51D-10 · P-51D-20-NA · ␠Kingcobra · XP-55 | |
| ▃A6M2 · ▃Ki-43-II · ▃Ki-61-Ib · ▃Bf 109 F-4 · ▃Fw 190 A-8 · ▃Spitfire LF Mk IXc | |
| Twin-engine fighters | XP-38G · Bong's P-38J-15 · P-38K · YP-38 · P-61A-11 · XF5F · XP-50 · F7F-3 |
| Jet fighters | P-59A · F-86F-35 · F-89B · F-89D · F-4S Phantom II · F-5C · F-20A |
| Strike aircraft | A-1H · A2D-1 · AU-1 · XA-38 · AV-8A · A-6E TRAM · A-10A |
| Bombers | A-26C-45DT · B-10B · BTD-1 · PBM-3 "Mariner" · PV-2D |


