


The Japanese A6M2 "Zero" was perhaps one of the most capable fighter aircraft in the Pacific Theater, and while some Allied aircraft and tactics allowed pilots to reach parity to contest the Zero, there was an effort to understand the aircraft in order to devise better countermeasures to destroy it. This moment came in July 1942 when the Americans discovered a crashed but intact A6M2 in Alaska during Japanese operations in the area in June. The recovered A6M2, which would become known as the "Akutan Zero", was sent back to the United States mainland, repainted and repaired, then tested to find weaknesses that the Allies could exploit. The Akutan Zero continued to serve with the USA until a training accident in February 1945 caused a SB2C Helldiver to crash into it.
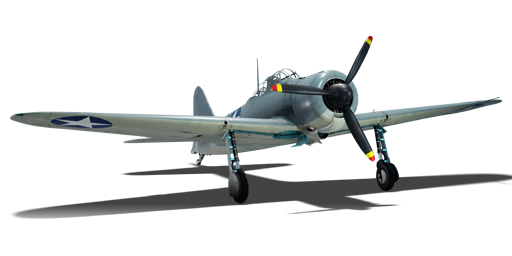
The American A6M2, present since the start of the Open Beta Test prior to Update 1.27, is identical performance-wise to the A6M2 in the Japanese tech tree. The main differences are cosmetic, with a similar colour scheme to other American naval fighters. The A6M2's fame for manoeuvrability can be utilised to dance around opponents while achieving a good aiming solution to destroy the target. Unlike the usual American aircraft with a large reserve of heavy machine gun rounds, A6M2 players must exercise good trigger discipline as there are only 120 rounds of 20 mm cannon ammunition to use, or 60 rounds per gun. The different capabilities the A6M2 introduces allow players to experience a whole new type of gameplay while staying in the American tech tree.
flaps
flaps
flaps
brake
| Belt | Belt filling | Armor penetration (mm) at a distance: | |||||
|---|---|---|---|---|---|---|---|
| 10 m | 100 m | 500 m | 1000 m | 1500 m | 2000 m | ||
| T/HEF-I/HEF-I/APHE | 19 | 18 | 12 | 7 | 5 | 4 | |
| HEF-T/HEF/HEF/APHE | 21 | 20 | 13 | 8 | 5 | 4 | |
| APHE/APHE/APHE/APHE/HEF/HEF-T | 21 | 20 | 13 | 8 | 5 | 4 | |
| HEF-T | 4 | 4 | 4 | 4 | 4 | 4 | |
| HEF/HEF/HEF/APHE/APHE | 21 | 20 | 13 | 8 | 5 | 4 | |
| Belt | Belt filling | Armor penetration (mm) at a distance: | |||||
|---|---|---|---|---|---|---|---|
| 10 m | 100 m | 500 m | 1000 m | 1500 m | 2000 m | ||
| T/AP/IAI/AP/I | 13 | 12 | 7 | 3 | 2 | 0 | |
| T/AP/IAI/AP | 13 | 12 | 7 | 3 | 2 | 0 | |
| T/T/T/AP | 13 | 12 | 7 | 3 | 2 | 0 | |
| I/AP/AP/AP/IAI | 13 | 12 | 7 | 3 | 2 | 0 | |


 2 x (60 / 220 / 270) %
2 x 136 %
2 x (60 / 220 / 270) %
2 x 136 %
Flight performance | |
|---|---|
Survivability |
|---|
Weaponry |
|---|
