
Aviation
B-57A
V
Rank
AB
8.0
RB
8.3
SB
7.7
AB
—
RB
7.7
SB
7.7
AB
8.0
RB
8.3
SB
—
Battle rating

USA
Research country
Bomber
Main role
105,000

Research
300,000

Purchase
General information
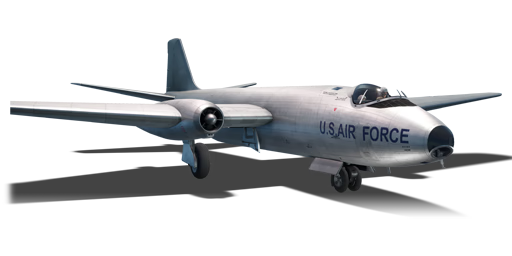
The B-57A is an American jet bomber. It was introduced in Update 1.43.
The B-57A is an unarmed plane so survivability depends on the speed. Luckily the two Wright Aeronautical J65 turbojet engines provide enough thrust to out-speed many fighters. Maximum speed is 950 km/h for a fully upgraded variant and 902 km/h for a stock variant. As was mentioned manoeuvrability is the key, but be aware of pulling your nose down, because the airframe can survive only -6G. However, +12G is almost unreachable value for the vast majority of your opponents. These attributes allow doing very sharp and high-G turns. The payload is adequate. Of course, it's not a B-29, but 9 x 500 lb bombs or 6 x 1,000 lb bombs can do a really nice job.
Camouflages
Flight performance
Max speed
at 0 m
946901960927 km/h
Rate of Climb
322340.224.8 m/s
Turn time
586056.959.2 s
Max altitude
13,716 m
Takeoff Run
850 m
Landing
flaps
flaps
Take-off
flaps
flaps
Combat
flaps
flaps
Air
brake
brake
General characteristics
Crew
3 persons
Engine
Length
20 m
Wingspan
19.5 m
Wing Loading
204 kg/m²
Weight:
Base weight
11.5311.911.2311.84 t
Fuel in main tanks
6.62 t (50m)
Limits:
Max Speed Limit (IAS)
990 km/h
Mach Number Limit
0.85 M
G limit
≈ -3/8 G
Flap Speed Limit (IAS)
320 km/h
Gear Speed Limit (IAS)
450 km/h
Suspended armament
Setup 1
9 × 500 lb AN-M64A1 bomb
Setup 2
6 × 1000 lb AN-M65A1 Fin M129 bomb
Economy
Repair cost
Basic → Reference
AB
3,024 → 4,240
RB
10,643 → 14,921
SB
15,690 → 21,997
Crew training
86,000
Experts
300,000
Aces
1,700 
Research Aces
720,000
Reward multiplier
AB / RB / SB
100 / 300 / 600 %
196 %
Total cost of modifications
90,000
145,400
Talisman cost
2,100
Flight performance | |
|---|---|
Survivability |
|---|
Weaponry |
|---|
Rating by players
You must play more than 3 battles for the last week and more than 10 battles in a vehicle to rate it.
Like:
32
Flight performance:
Not enough ratings
Survivability:
Not enough ratings
Aerial combat:
Not enough ratings
Ground attack:
Not enough ratings
Balance:
Not enough ratings
Features & Facts
This space is currently empty
Do you know any interesting vehicle features?
Loading...

No articles about this vehicle yet
Become the first author and get rewards!
Write a guide, tell about interesting historical facts, make a tutorial or simply an interesting post.
No more content