Swift F.7
| This page is about the British jet fighter Swift F.7. For the other version, see Swift F.1. |

Contents
Description
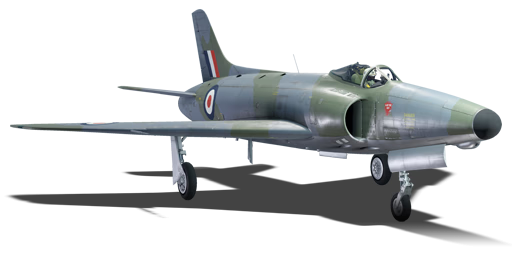
Following the failure of the Swift F.1, a number of upgrades were made, including the installation of afterburn-capable engines, structural modifications, and a longer nose to accommodate cameras and a more powerful radar. The variants culminated in the Swift F.7, notably the first and only Swift to be fitted with guided air-to-air missiles, namely the Fireflash. However, despite having resolved most of the issues plaguing the Swift line, the F.7 never entered service, having been made redundant by the Hawker Hunter, and the 14 built aircraft were relegated to training purposes and trialling of the Fireflash.
Introduced in Update 1.91 "Night Vision", the Swift F.7 builds upon the characteristics of the preceding F.1 variant, in particular with a new afterburning engine allowing the Swift to accelerate even faster. The beam-riding Fireflashes can also pose a new and unusual threat, as opponents are unlikely to be expecting an air-to-air missile capable of being launched in head-on engagements. The Swift F.7 continues to excel at catching enemies by surprise, and utilising its speed and energy retention to stay out of harm's way. However, it also maintains the F.1's poor manoeuvrability, which can make obtaining shooting solutions and dodging the increasingly common IR-guided missiles difficult without proper speed management.
General info

Flight performance
The Swift F.7 is a good fighter which excels in playing the interceptor role; however, like the three bears from Goldilocks' story, this jet has a sweet spot in speed where the controls give maximum performance. Like many jets, this one does not do so well when slow and it becomes an easy target for others to attack. On the other hand, flying too fast causes the controls to lock up, preventing plane from pulling up fast. If playing in realistic or simulator battles, breaking the sound barrier will instantly obliterate the plane, but it's extremely difficult to reach unless intentionally done. Doing "extreme overload" manoeuvre at 700+ km/h while having a weight displacement might also damage the wing and force the pilot to return to the airfield.
The sweet spot or "just right" speed zone for the Swift F.7 is between 700 km/h and 810 km/h. Here the jet will have enough speed to bleed and will be able to snap onto incoming plane quicker, although flying at 900+ km/h will allow it to climb harder or change directions multiple times. Maintaining a speed close to 1,000 km/h can be a viable strategy, as most aircraft on the enemy team will struggle to keep up with you, while the lockup of the controls will be within a manageable level. Diving either to shoot down another aircraft or to get away from someone on your tail can be a challenge as doing so can result in the aircraft superseding the 810 km/h threshold (easily going into the mid 900s). This aircraft does not have an air brake, instead the take-off flaps have been reinforced and should not rip when used to slow the aircraft down and can be deployed and retracted as needed.

The plane does not lose much speed in a straight line due to being a delta-wing (kind of like Javelin F.(A.W.) Mk.9, but less extreme), just reducing the throttle will not affect it very much either. As soon as plane hits 450 km/h speed it keeps itself afloat and can glide around. When taking off from airfield, lifting off at about 320 km/h and keeping plane low at ground level until 450 km/h will ensure its stability and better climb rate later on. Stable nature of plane helps to conserve fuel after going into 900+ km/h in WEP mode, as at 100% the speed will not reduce at level flight. The aircraft also will not care as much if engine was put to 0% to evade IR missiles or for other reasons. The implication is also that even if the pilot foolishly spent all of the fuel, the plane still can glide across entire map back to airfield, if it had enough speed or height left, easily gliding 40 km from 3 km height or even more depending on remaining speed.
Speed management is key to survival - the afterburner can aid with increasing the aircraft's speed if slow - and with the afterburner the aircraft has a really good climb rate - it can accelerate significantly even in a steep climb. Due to the fact that engine can sustain afterburner for a good 15 minutes, one can just fly with afterburner on all the time. Unfortunately, afterburner doubles plane heat signature, so if any enemy plane with IR missiles is on the tail, it should not be used.
Aircraft can start landing when at 400 km/h. To bleed excess speed, the plane can do some pulls and rolls simultaneously at 0% engine, much like with early propeller planes, but due to the plane's shape it will take longer. After reaching proper speed, landing flaps can deployed to force the plane to finally stop gliding. The wheels of the Swift are very flimsy, so touchdown should only happen at 300 km/h or below, or the wheels will just crush under the plane's weight. In air RB, Swift can intentionally break the wheels to stop faster on plane belly, but there is always a risk of accidentally destroying the plane.
| Characteristics | Max Speed (km/h at 3,048 m) |
Max altitude (metres) |
Turn time (seconds) |
Rate of climb (metres/second) |
Take-off run (metres) | |||
|---|---|---|---|---|---|---|---|---|
| AB | RB | AB | RB | AB | RB | |||
| Stock | 980 | 977 | 12192 | 26.5 | 26.9 | 14.8 | 10.1 | 850 |
| Upgraded | 993 | 985 | 24.1 | 25.0 | 42.6 | 28.0 | ||
Details
| Features | |||||
|---|---|---|---|---|---|
| Combat flaps | Take-off flaps | Landing flaps | Air brakes | Arrestor gear | Drogue chute |
| X | ✓ | ✓ | X | X | X |
| Limits | ||||||
|---|---|---|---|---|---|---|
| Wings (km/h) | Gear (km/h) | Flaps (km/h) | Max Static G | |||
| Combat | Take-off | Landing | + | - | ||
| 1,167 | 435 | N/A | 1,035 | 465 | ~9 | ~5 |
| Optimal velocities (km/h) | |||
|---|---|---|---|
| Ailerons | Rudder | Elevators | Radiator |
| < 850 | < 600 | < 600 | N/A |
Engine performance
| Engine | Aircraft mass | |||||
|---|---|---|---|---|---|---|
| Engine name | Number | Basic mass | Wing loading (full fuel) | |||
| Rolls-Royce Avon Mk.116 | 1 | 6,639 kg | 276 kg/m2 | |||
| Engine characteristics | Mass with fuel (no weapons load) | Max Takeoff Weight | ||||
| Weight (each) | Type | 7m fuel | 20m fuel | 26m fuel | ||
| 1,000 kg | Afterburning axial-flow turbojet | 7,213 kg | 8,089 kg | 8,553 kg | 9,530 kg | |
| Maximum engine thrust @ 0 m (RB/SB) | Thrust to weight ratio @ 0 m (WEP) | |||||
| Condition | 100% | WEP | 7m fuel | 20m fuel | 26m fuel | MTOW |
| Stationary | 3,126 kgf | 4,501 kgf | 0.62 | 0.56 | 0.53 | 0.47 |
| Optimal | 3,158 kgf (1,167 km/h) |
4,548 kgf (1,167 km/h) |
0.63 | 0.56 | 0.53 | 0.48 |
Survivability and armour
- Armour
- 12.7 mm steel plate behind pilot's seat
- 50 mm bulletproof glass in canopy windscreen
The simple armour setup on this fighter affords protection to the pilot, via the front windscreen having 50 mm bulletproof glass to help protect against head-on attacks. Behind the pilot's seat is a 12.7 mm steel plate which is in place to provide protection for the pilot if their aircraft is shot from behind. The fuel tanks and the engine should take most of the brunt of an attack from behind, but in the event, something gets through the steel plate is meant to be the last line of protection.
If the aircraft takes some damage to the wing's root, it will lose control and fall. Most of other damage can be sustained without immediately crashing, the plane will often not even notice if half of its tail is gone.
Modifications and economy
| Flight performance | Survivability | Weaponry | ||||||||||||||||||||||||
|---|---|---|---|---|---|---|---|---|---|---|---|---|---|---|---|---|---|---|---|---|---|---|---|---|---|---|
|
|
|
Armaments

Offensive armament
The Swift F.7 is armed with:
- 2 x 30 mm ADEN cannons, belly-mounted at right side (135 + 185 = 320 total)
This aircraft has been outfitted with two 30 mm ADEN autocannons. Though they are mounted on the fuselage resulting in not having to configure for convergence the pilot will need to account for both autocannons being mounted on the right side of the aircraft fuselage near the right air intake. Pilots which are used to having balanced machine guns or autocannons (equal amounts on both left and right side) will need to slightly adjust their aim to ensure the bullets don't miss just to the side of where they would normally aim. The ADEN cannons when they do hit their mark usually result in a critical hit or a destroyed aircraft with wings flying in one direction and tail sections going in another.
As with Swift F1, the plane is allowed to have pure HE-I belt (air targets belt), making any critical hit that much worse for the enemy.
When the gun has no set distance and the plane is flying straight, the moving scope in cockpit is demonstrating where the shells will go at about 700 m mark. To hit a plane that is further than that it is necessary to aim that above them. Do remember that this is not a true aim assist and is merely a suggestion.
Suspended armament
The Swift F.7 can be outfitted with the following ordnance:
- Without load
- 2 x Fireflash missiles
The Fireflash missile was the first air-to-air guided missile put into service with the United Kingdom's Royal Air Force. Built by Fairey Aviation, the same company who built the Swordfish, this missile utilised radar beam riding guidance to get the missile onto a target. Though not as simple to use as other missiles found in-game, it can be a surprise to enemy fighters: they are usually not expecting head-on attacks and it will result in them having to go back and watching replays in disbelief to see what took them out.
The odd-looking missile consists of a central dart attached to two boosters. The boosters spin-stabilize the missile in flight and propel the missile to speeds upwards of Mach 2. 1.5 seconds after launch, with fuel spent, the boosters separate and the missile would coast the rest of the way to the target, still receiving guidance from the controlling aircraft. Only one can be guided at any time, launching both at once can result in instant self-destruct sequence, potentially obliterating Swift F7 itself.
When launched without lock or if the radar is offline, the missile will follow the static middle dot of the scope in cockpit. It is possible to offset the aim away from the dot (default hotkeys ALT+WASD), much like with MCLOS missiles of opponents, but doing this too much is counterproductive, since the scope itself does not move when doing so, providing no visual feedback. When obtaining radar lock, missile will attempt to follow the locked target to the best of its ability and there is no need to fly literally directly at the enemy anymore (though deviating too much might break the lock, so caution is advised). If the lock was still maintained when the missile passes enemy aircraft, it will self-destruct, blowing off half of the enemy plane in process even if they dodge a direct hit. The missile will also detonate if passing extremely close to any aircraft (including allies).
The Fireflash is a finicky missile which requires practice and patience, as it has maximum overload of 2G and is basically unable to do a sharp turn or pull. When the missile exceeds its turn limit (does anything more than minimal corrections), it starts to bleed speed at an extreme rate and will not be able to chase the opponent properly. At 2 km height this missile can chase a target at about 2.1 km away and it can go for about 14 seconds (flying 10-12 km in process) before it no longer has the kinetic energy to continue and just explodes. Reasonable minimum range is 0.8-1.4 km when head-on, 0.5 km when fired from behind.
This missile is best used in short-range encounters such as head-on attacks where the enemy fighter is closing the distance rather than flying away, particularly because there is not that many head-on missiles in early jet era and Swift F7 basically has a monopoly on that kind of missile attack. The best distance to launch is 2 km or closer - although most people will take at least 2 seconds to process "wait, that is a missile being fired", so it will be already too late for them, some will just evade automatically on muscle memory and the missile cannot cut them off very well, at best detonating their engine or missing entirely. In such situation it is necessary to either assist it with the cannons or just give up and move onto the next target. With high level of skill and attention, Fireflashes can be used to shut down some chasing aircraft (about 4-5 km away) if plane can turn onto enemy fast enough then launch one at near point-blank ranges, hoping that radar obtains the lock in time or it just hits them into cockpit.
This missile can also be used during tail chases as long as the radar lock is kept on the enemy long enough for the missile to reach its target and they seem to not pay attention (not likely after firing the cannon). This also works when hitting targets when they just got out of a climb, or simply hesitate between pulling up or dropping down, but the window for such attack is very narrow.
Having only two of these missiles to rely on will require the pilot to exercise restraint and not launch one if the chances of a hit are marginal and instead maybe turn to the 30 mm cannons instead in that instance.
| Unlike heat-seeking missiles, beam riding missiles will not trigger a missile launch warning for the enemy player, nor will it care about flares that they use. However, in a tail chase scenario chaff can fool the onboard radar and make it detonate the missile prematurely. |
Usage in battles

The Swift F.7 is played similar to the Hunter as more of a Boom and Zoom aircraft, though it retains dogfighting capability. The aircraft has a sweet spot for its manoeuvrability around 600-800 km/h. Above those speeds, sustaining a hard turn (or alternatively turning and rolling simultaneously) can result in a ripped wing. It is generally advised to keep some altitude with the aircraft. The missiles are SACLOS-guided and can be useful in head-on. The vehicle has an afterburner which results in higher acceleration than most jets that you will face, though opponents such as the Shenyang F-5 and AV-8A Harrier are capable of accelerating faster. It is recommended to use either 20 minutes of fuel or full tank as 7 minutes does not allow for prolonged use of the afterburner, nor does it allow for loitering.
The Swift F.7 is capable of maintaining a 960 km/h climb at a pitch of 15°, allowing it to achieve altitude of 4 to 5 km easily while maintaining a high speed and catching climbing opponents off-guard. It performs excellently in the support role, where it can Boom and Zoom pre-occupied enemies or maintain a very high speed of over 1,000 km/h in level flight, making gentle turns and passes on opponents who are pre-occupied and being put into vulnerable positions by allied aircraft.
Alternatively the Swift F.7 can be played more aggressively, making use of its energy retention and high thrust-to-weight to engage and wear down enemy fighters. Its take-off flaps can be used as air brakes due to their high rip speed and allow it to manoeuvre at high angles of attack, helping to get guns on target in one-on-one engagements at lower speeds, though it is not recommended to use them excessively nor rate fight due to the speed that will be bled. It is important to note that usage of the take-off flaps at over ~850 km/h will counter-intuitively reduce the turning rate of the aircraft, so they should not be used to manoeuvre on target in high speed dives and passes.
When in a compromised position against a more manoeuvrable aircraft the priority should be to gain separation with the enemy. This can be done against most opponents by accelerating to high speeds using the afterburner, as you can maintain a higher speed in level flight than most aircraft you will face - the Swift F.7 is capable of reaching 1,100 km/h in level flight at sea level while making use of the afterburner. Once separation has been achieved you can make use of your higher energy state and speed to gain some altitude and re-engage on your terms.
Enemies worth noting:
MiG-21S (R-13-300) - This premium Soviet plane has radar missiles (can do a head-on attack just like you, but from further ranges) and IR missiles. It flies much, much faster than the Swift F.7, so chasing it is often pointless. It usually hangs above at 6-7 km height, so you can easily spot it by the white trail of its engine exhaust. Best you can do is bait it down and then try to exploit any of its mistakes. Taking it head-on is a really good way to get destroyed as the radar missiles can pull more Gs than the Fireflash and will not miss.
F-104 - Not nearly as deadly as the MiG-21, but have an extremely annoying habit of getting behind you and then dumping IR missiles in your back when you aren't paying attention and flying with afterburner on. Climbing into their face with the most provoking behaviour (using smoke trails, going straight at them, etc) will often entice them into head-on, where you can just blast them with the Fireflash, as they don't seem to be able to leave a committed dive in time. If they know better and avoid fighting you, you just have to deal with it and keep in mind that something can dive on you at any minute.
S.O.4050 Vautour IIN (late) - Vautours are usually an easy plane to get rid of, but there is a specific interceptor model that can fire radar missiles. Unfortunately, it is difficult to tell which one it is exactly from just looking at it, but if a bomber for some reason looks unafraid of you and rather turns onto you instead of running away or going straight for the base, you might want to prepare to dodge instead of just going head-on.
G.91 R/4 and similar planes - Although these planes are rather slow and may seem kind of as a joke to the Swift F.7, they can have rear-aspect IR missiles which can be heated up instantly. Be mindful where you are flying, because when fighting something else, you might expose yourself to an entire wing of these planes which will not hesitate to unload half of their missiles into your back. Cutting engine to 0% and dodging does work, but this will bring you down to their level, so it's better to avoid this situation to begin with.
Radars
The Swift F.7 is equipped with an AN/APG-30 rangefinding radar, located in the nose of the aircraft. It will automatically detect other planes within the scanning area and display the range to the closest target. It is linked with a gyro gunsight and can help with aiming at close range. In RB, it simply guides the Fireflashes.
The radar is rather vulnerable to the ground clutter and might refuse to lock onto targets until they are way too close at low altitudes. When the radar is blinded, Fireflash should be launched and guided manually if situation demands it.
| AN/APG-30 - Rangefinding radar | |||
|---|---|---|---|
| Maximum Tracking Range |
Minimum Tracking Range |
Azimuth Tracking Angle |
Elevation Tracking Angle |
| 2,750 m | 300 m | ±9° | ±9° |
Pros and cons
Pros:
- Superb flight performance thanks to the afterburner; retains energy very well in turns
- Access to excellent Fireflash short-range beam-guided air-to-air missiles, that also work against light tanks and helicopters in Ground Realistic Battles
- Equipped with two powerful 30 mm ADEN autocannons
- Fireflash can be considered as all-aspect missiles; unfazed by flares and equipped with a proximity fuse
- Flaps and wings have a very high rip speed limit
- Can withstand some damage from 7.62 mm and .50 cal rounds
- Afterburner takes about 8-15 minutes of continuous use to cause engine overheating
Cons:
- No dedicated airbrake, must use take-off flaps as an airbrake at high speeds
- Both autocannons are on the right side of the aircraft fuselage, requires slight adjustment when aiming
- Fireflash missiles have to be manually guided when there is no radar lock; 2 Gs overload limits the performance
- Poor manoeuvrability at high speeds (> 950 km/h) and high risk of ripping wings while pulling extreme Gs
- Less ammunition for 30 mm ADEN than the F.1 variant; requires trigger discipline
History
In the years following the end of WW2, Great Britain focused their efforts on rebuilding their nation from the devastation caused by the war as the British government didn't consider a new war possible in the following ten years. Under these circumstances, developing new military technology wasn't considered a priority in most cases.
As a result, Great Britain found itself lagging behind in military aviation at the start of the 1950s by the outbreak of the Korean War. This prompted the RAF to hastily look for a new fighter aircraft to put into service, even if it meant taking into consideration an interim design.
One of the designs that sparked the RAF's interest was a new swept-wing aircraft developed by the Supermarine company - the Type 510. Being in essence just a modified Supermarine Attacker, development of this design continued, eventually maturing into the Type 541.
Soon, the Type 541 received the highest development priority and was hastily rushed through testing and into production as the Supermarine Swift. In fact, production was so rushed that it began before necessary design changes could even be applied from the results of the test flights conducted with the Type 541 prototypes.
Nonetheless, the Supermarine Swift F.1 entered service with the RAF in February 1954, followed shortly afterwards by the F.2 variant. However, many of the aircraft's teething problems weren't resolved as a result of being rushed into production. This resulted in a number of accidents happening early on involving the Swift , leading to the aircraft being grounded for a time.
Newer modifications were developed, which addressed most of the known issues. However, it was a case of too little too late for the Swift, as it quickly became replaced by the Hawker Hunter. In the end, just under 200 Supermarine Swifts were produced out of the close to 500 planned aircraft. The Swift was phased out of active service relatively quickly after its introduction, with the last fighter models being withdrawn by the RAF in the mid to late 1950s.
- From Devblog
Media
- Skins
- Images


- Videos
See also
- Related development
- Supermarine Attacker FB 1
- Supermarine Attacker FB.2
- Aircraft of comparable role, configuration and era
- North American F-86 Sabre
- Dassault M.D.450B Ouragan
- de Havilland Venom
- Grumman F9F Cougar
- Hawker Hunter
- Mikoyan-Gurevich MiG-17
- Saab J29D Tunnan
External links
- [Development] Supermarine Swift: Banking on Success
- Official data sheet - more details about the performance
| Supermarine | |
|---|---|
| Spitfires | |
| Merlin engine | Spitfire Mk Ia · Spitfire Mk IIa · Spitfire Mk.IIa Venture I · Spitfire Mk IIb |
| Spitfire Mk Vb · Spitfire Mk Vb/trop · Spitfire Mk Vc · Spitfire Mk Vc/trop | |
| Spitfire F Mk IX · Spitfire F Mk IXc · Spitfire F Mk XVI | |
| Spitfire LF Mk IX · Plagis' Spitfire LF Mk IXc | |
| Griffon engine | Spitfire F Mk XIVc · Spitfire F Mk XIVe · Prendergast's Spitfire FR Mk XIVe · Spitfire F Mk XVIIIe · Spitfire F Mk 22 · Spitfire F Mk 24 |
| Export | ▄Spitfire Mk Vb/trop · ▃Spitfire LF Mk IXc · ▂Spitfire Mk IXc · Spitfire Mk IXc · Spitfire Mk.IX (CW) · Weizman's Spitfire LF Mk.IXe · ▄Spitfire FR Mk XIVe |
| Seafires | Seafire LF Mk.III · Seafire F Mk XVII · Seafire FR 47 |
| Export | ▄Seafire LF Mk.III |
| Jet fighters | Attacker FB 1 · Attacker FB.2 · Scimitar F Mk.1 · Swift F.1 · Swift F.7 |
| Hydroplanes | Walrus Mk.I |
| Britain jet aircraft | |
|---|---|
| Blackburn | Buccaneer S.1 · Buccaneer S.2 · Buccaneer S.2B |
| British Aerospace | Harrier GR.7 · Sea Harrier FRS.1 (e) · Sea Harrier FRS.1 · Sea Harrier FA 2 |
| British Aircraft Corporation | Strikemaster Mk.88 |
| English Electric | Canberra B Mk 2 · Canberra B (I) Mk 6 · Lightning F.6 · Lightning F.53 |
| Gloster | Meteor F Mk 3 · Sea Meteor F Mk 3 · Meteor F Mk 4 G.41F · Meteor F Mk 4 G.41G · Meteor F Mk 8 G.41K · Meteor F Mk.8 Reaper |
| Javelin F.(A.W.) Mk.9 | |
| de Havilland | Vampire F.B.5 · Venom FB.4 · Sea Venom FAW 20 · Sea Vixen F.A.W. Mk.2 |
| Hawker | Sea Hawk FGA.6 · Hunter F.1 · Hunter F.6 · Hunter FGA.9 · Harrier GR.1 · Harrier GR.3 |
| Panavia | Tornado GR.1 · Tornado F.3 · Tornado F.3 Late |
| SEPECAT | Jaguar GR.1 · Jaguar GR.1A · Jaguar IS |
| Supermarine | Attacker FB 1 · Attacker FB.2 · Scimitar F Mk.1 · Swift F.1 · Swift F.7 |
| Foreign | Phantom FG.1 (USA) · Phantom FGR.2 (USA) · F-4J(UK) Phantom II (USA) |
| South Africa | ▄JAS39C |
| India | ▄MiG-21 Bison |
