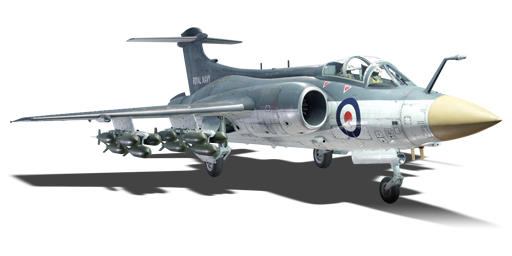
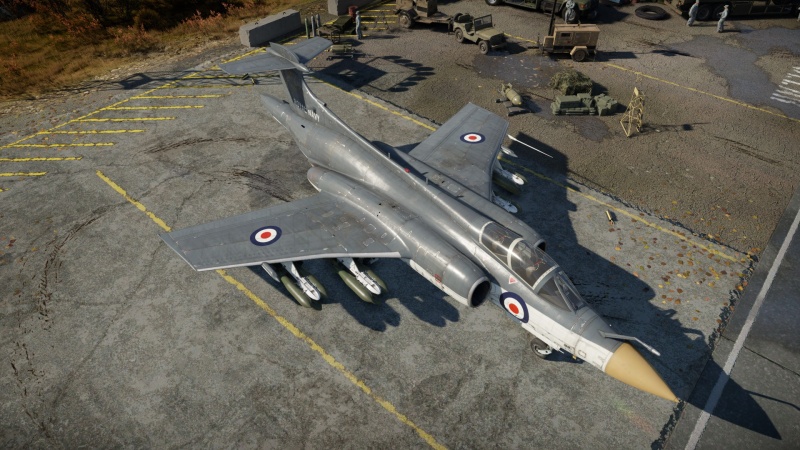
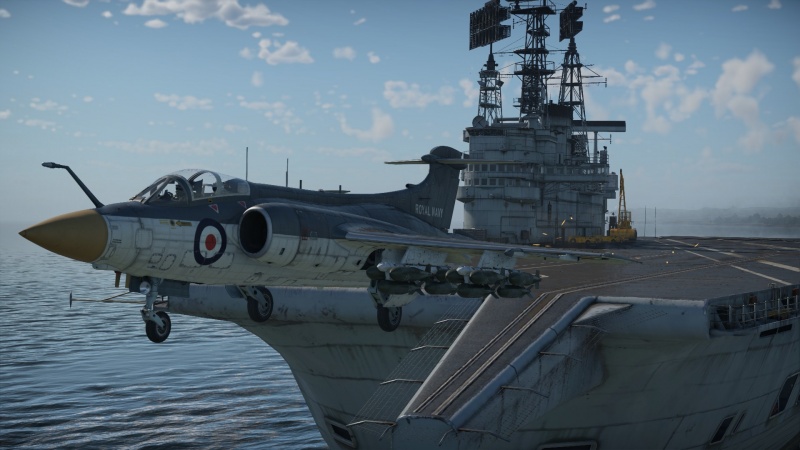
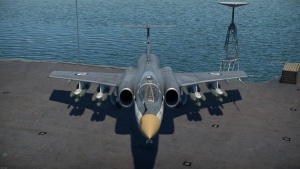
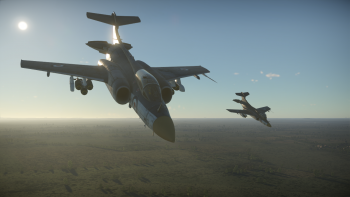
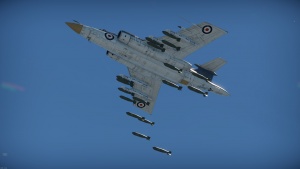
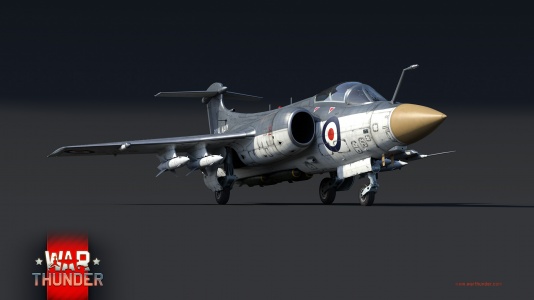
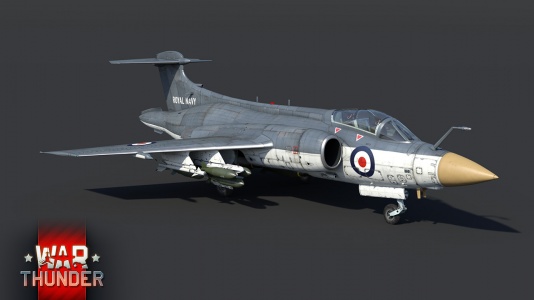
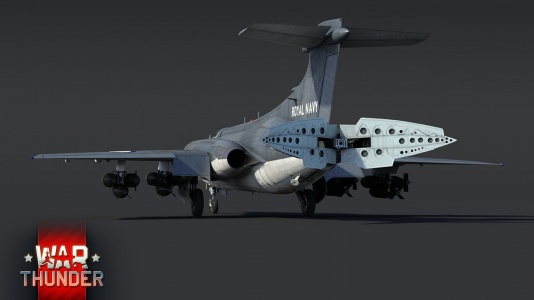
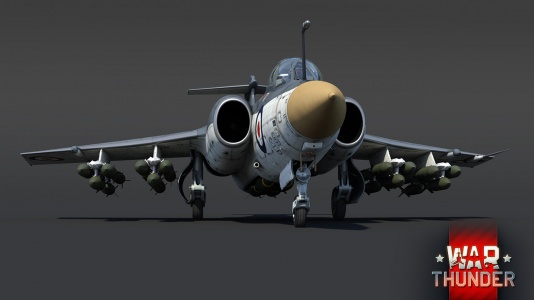
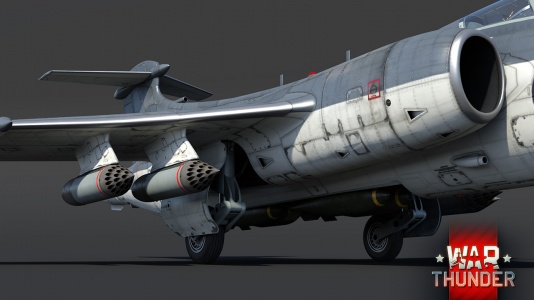
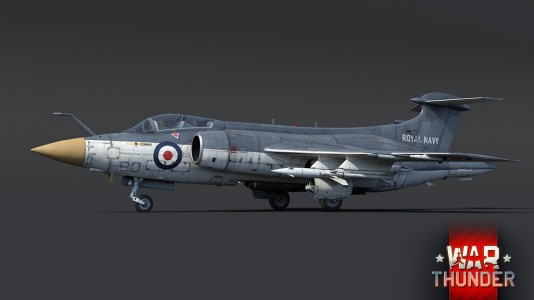
Buccaneer S.2
| This page is about the strike aircraft Buccaneer S.2. For other versions, see Buccaneer (Family). |
Contents
Description
The initial model of the Blackburn Buccaneer was rather underpowered, being unable to take off from an aircraft carrier with full fuel and weapons load, but successfully demonstrated the viability of the new doctrine and the airframe. To remedy this, the Buccaneer S.2 was designed, replacing the de Havilland Gyron Junior turbojet engines with new Rolls-Royce Spey turbofans, which were significantly more powerful while also reducing fuel consumption. The installation of the new engines required enlargement of the engine nacelles, subsequently causing the wings to be partially remodelled. All Buccaneers in Royal Navy service were converted to the S.2 standard by the end of 1966. The new S.2 variant also piqued the interest of the RAF, whose plans for a new supersonic, nuclear-capable interdictor to replace the English Electric Canberra (namely by the BAC TSR-2 project and import of the F-111K as a subsequent substitute) had both fallen through. The first models entered RAF service from 1969. Following the retirement of the Royal Navy's last large aircraft carriers in 1979, the remaining Buccaneers were transferred to the RAF, being replaced in naval roles by the V/STOL-capable Sea Harrier. The end of the Cold War marked the end of the Buccaneer in the RAF, the final units being retired in 1994 in favour of the Panavia Tornado.
Introduced in Update "Hot Tracks", the Buccaneer S.2 is a significant improvement over both the S.1 variant and the Canberra B (I) Mk 6 that precedes it, featuring much greater engine power and ordnance capacity, as well the ability to equip AIM-9B Sidewinder missiles and countermeasure pods for self-defence. While not quite supersonic, the Buccaneer is able to easily reach and maintain its transonic top speed even when equipped with its maximum 16,000 lb bomb load, allowing it to quickly strike one or two bases, then make its way back to the airfield while attempting to avoid interception with the aid of its surprising manoeuvrability and equippable countermeasure pods. The Buccaneer S.2 also retains the ability to equip the guided AGM-12B Bullpup missiles, which may find some utility in ground battles, although greater efficacy may be found in equipping a conventional bomb load for some high altitude carpet-bombing.
General info
Flight performance
Despite being the heaviest, longest and biggest jet attacker in the game, the Buccaneer has an impressive cruise speed, manoeuvrability and climb rate even when fully loaded. It should be noted that it is nowhere near on being the fastest plane at its battle rating but can become a forceful opponent when being hunted down, especially if the Buccaneer has a speed advantage. Despite having a max speed of 1,084 km/h, the aircraft is able to reach that speed even when fully loaded flying at level flight. It is able to surpass the max speed at level flight up to 1,112 km/h but any sudden turn will tear apart the wings. Overall agility of the Buccaneer is impressive for a plane of its size capable of doing hard turns with relative ease even with payload.
When on take-off:
The Buccaneer MUST use take-off flaps in order to achieve enough air lift to lift the plane at ~270 km/h and do a safe take-off fully loaded with 16,000 lb of bombs. Not doing so may be cause of running out of airstrip before taking off and crashing into buildings or environment. When taking off from carriers, there is no need to use take-off flaps but it is recommended as it is prompt to lose altitude when leaving the deck.
When on landing:
Landings should be done below 400 km/h but depending on the situation, map and place where the Buccaneer will land (aircraft carrier or airfield) this may vary. When landing on a carrier, maintain greater speeds than 360 km/h but less than 400 km/h, this is to ensure a safe pull up if the hook is missed. When landing on airfield, maintain greater speeds than 280 km/h but less than 360 km/h, this is to ensure the plane has enough strip to break and slowdown. Thanks to being a massive plane, the momentum is tremendous, meaning it will require longer distances in order to fully land. Use air-break in order to make a faster slowdown.
The Buccaneer is one of only a few aircraft in the game to have a blown flaps system, meaning that under certain conditions air from the engine's compressor is blown over the flaps / control surfaces. This means that despite the Buccaneer's massive weight it has an extremely low stall speed, and impressive low-speed responsiveness (so long as the blowing system is active). As can be seen in the video on the right, with the blowing system active the buccaneer can maintain (and even gain) altitude at speeds as low as ~170 km/h. The blowing system is activated whenever takeoff or landing flaps are selected and throttle is at greater than 30%. This means that you may wish to consider keeping your throttle above 30% while landing in some situations.
| Characteristics | Max Speed (km/h at 0 m - sea level) |
Max altitude (metres) |
Turn time (seconds) |
Rate of climb (metres/second) |
Take-off run (metres) | |||
|---|---|---|---|---|---|---|---|---|
| AB | RB | AB | RB | AB | RB | |||
| Stock | 1,156 | 1,151 | 15000 | 32.9 | 34.4 | 71.1 | 64.7 | 900 |
| Upgraded | 1,177 | 1,166 | 31.5 | 32.0 | 102.9 | 86.0 | ||
Details
| Features | |||||
|---|---|---|---|---|---|
| Combat flaps | Take-off flaps | Landing flaps | Air brakes | Arrestor gear | Drogue chute |
| ✓ | ✓ | ✓ | ✓ | ✓ | X |
| Limits | ||||||
|---|---|---|---|---|---|---|
| Wings (km/h) | Gear (km/h) | Flaps (km/h) | Max Static G | |||
| Combat | Take-off | Landing | + | - | ||
| 1181 | 416 | 518 | 463 | 370 | ~8 | ~5 |
| Optimal velocities (km/h) | |||
|---|---|---|---|
| Ailerons | Rudder | Elevators | Radiator |
| < 585 | < 600 | < 548 | N/A |
Engine performance
| Engine | Aircraft mass | ||||||
|---|---|---|---|---|---|---|---|
| Engine name | Number | Basic mass | Wing loading (full fuel) | ||||
| Rolls-Royce Spey 101 | 2 | 14,206 kg | 425 kg/m2 | ||||
| Engine characteristics | Mass with fuel (no weapons load) | Max Takeoff Weight | |||||
| Weight (each) | Type | 10m fuel | 20m fuel | 30m fuel | 35m fuel | ||
| 2,361 kg | Low-bypass turbofan | 15,854 kg | 17,503 kg | 19,151 kg | 19,975 kg | 25,950 kg | |
| Maximum engine thrust @ 0 m (RB/SB) | Thrust to weight ratio @ 0 m (100%) | ||||||
| Condition | 100% | WEP | 10m fuel | 20m fuel | 30m fuel | 35m fuel | MTOW |
| Stationary | 5,020 kgf | N/A | 0.63 | 0.57 | 0.52 | 0.50 | 0.39 |
| Optimal | 5,120 kgf (1,000 km/h) |
N/A | 0.65 | 0.59 | 0.53 | 0.51 | 0.39 |
Survivability and armour
The Buccaneer is a large target with no armour. The fuel tanks are all mounted in the upper fuselage (above the bomb bay) and although a relatively small target the engines are exposed (mounted not far back from the air intakes). This means that enemy fire will often damage the fuel tanks, the engines, or both. The Buccaneer can fly ok with damage, but is prone to enter a flat spin if one engine is lost during low speed flight (i.e. when landing).
The Buccaneer uses drooping ailerons (the ailerons deflect downwards with the flaps); this increases the lift produced when flaps are deployed. However it means that if you go too fast and rip your flaps off the ailerons are likely to be ripped off as well (as the ailerons also act as flaps), this makes the aircraft very hard to control. If the tail is destroyed, the plane will also lose its elevator as both are connected. The Buccaneer has access to Radar Warning Receiver, meaning the pilot will realize when there is a radar who has a detected the plane (there will be a beeping sound) and a ping will be displayed on display which will activate on the HUD when there is a radar signal and when there is a radar lock there will be a continuous alert sound. This is useful when there is an aircraft with radar guided missiles and ground based radar anti air.
Modifications and economy
Armaments
| Ballistic Computer | |||
|---|---|---|---|
| CCIP (Guns) | CCIP (Rockets) | CCIP (Bombs) | CCRP (Bombs) |
| |
|
|
|
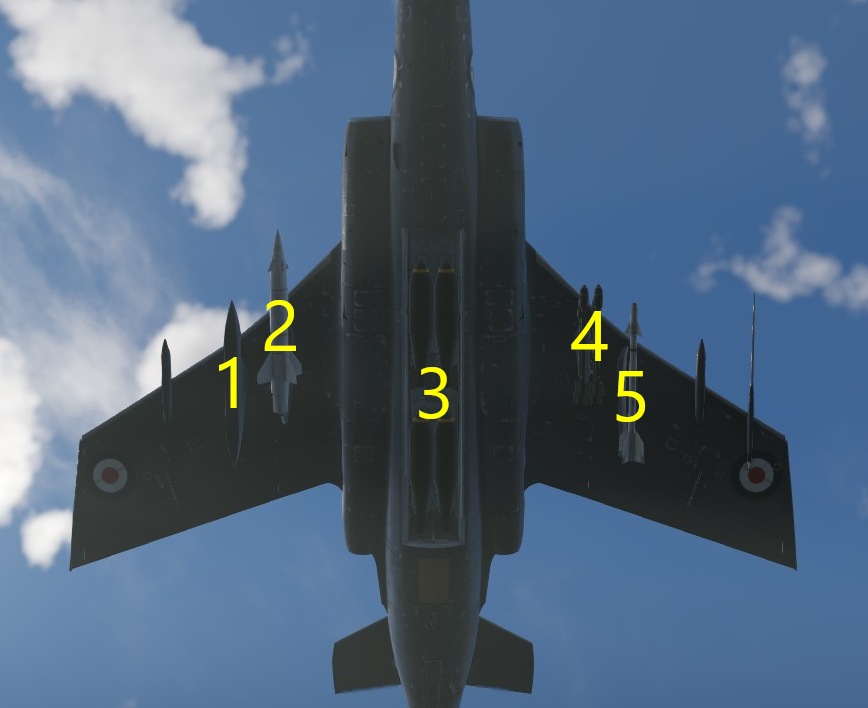
Suspended armament
The Buccaneer S.2 can be outfitted with the following ordnance:
| 1 | 2 | 3 | 4 | 5 | ||
|---|---|---|---|---|---|---|
| 500 lb H.E. M.C. Mk.II bombs | 6 | 6 | 4 | 6 | 6 | |
| 540 lb Mk.M2 bombs | 6 | 6 | 4 | 6 | 6 | |
| 1,000 lb H.E. M.C. Mk.13 bombs | 2, 3 | 2, 3 | 4 | 2, 3 | 2, 3 | |
| 1,000 lb H.E. M.C. Mk.13 No.117 bombs | 3 | 3 | 4 | 3 | 3 | |
| 1,000 lb L.D H.E. M.C. Mk.1 bombs | 2, 3 | 2, 3 | 2, 3 | 2, 3 | ||
| RP rockets | 36 | 36 | 36 | 36 | ||
| RP-3 rockets | 4 | 4 | 4 | 4 | ||
| AGM-12B Bullpup missiles | 1 | 1 | 1 | 1 | ||
| AIM-9B Sidewinder missiles | 1 | 1 | ||||
| Large calibre countermeasures | 52 | 52 | ||||
| Maximum permissible weight imbalance: 1,500 kg | ||||||
| Default weapon presets | |
|---|---|
| |
Usage in battles
The Buccaneer is a fully air-to-ground plane with very limited defensive capabilities against aircraft, with no interceptor or bomber spawn. It should never be used to attack enemy aircraft despite having the AIM-9B. These missiles are meant to be used in defence if there is a chance to get behind the enemy who is engaging the aircraft or against helicopters in combined battles. Using the Buccaneer as a fighter will quickly lead to death.
The role of the Buccaneer is pretty straight forward when it comes to air battles: base bombing or ground/naval units bombing. It is recommended to utilize the different bomb payloads combined with flares or with the AIM-9B if the pilot wants. It is not recommended to take Bullpup AGMs as bombs are more useful in the air battles environment, including in Enduring Confrontation Simulator battles. Rockets are not recommended to be taken as they are inaccurate and useless even with ballistics computer against lightly armoured vehicles. Bullpups can be an sort of effective guided weapon when engaging enemy vessels. They are not recommended to be used against destroyers, cruisers, or battleships in any sort of match. Instead, use them for pinpoint hits on enemy carriers. A well-placed Bullpup is enough to make a carrier sink, it won't be as fast as with bombs but it will use a considerably less amount of ordnance.
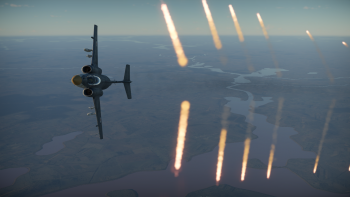
The Buccaneer has a wide variety of bomb payloads for all types of players, for those who want to be fast and engage bases or ground targets as quickly as possible and for those who want to carry out as much destruction as possible. The absurd amount of bomb payloads will fit all types of players and their needs. The only drawback is that the plane is not able to carry AIM-9B and flares at the same time. Flares also take up the two outer-most pylons of the plane. The recommended payload for a fair trade in speed, firepower and defensive capabilities is the "104 x Flares + 10 x 1,000 lb G.P. Mk.I bombs" payload. More than enough bombs to take 2 bases in maps where there are only 3 bases and airfield or 1 of the 4 respawning bases like on Ruhr which take double the payload. Only 3 x 1,000 lb G.P. Mk.I bombs are needed per base when there are 3 bases. When in Ruhr or similar maps, bases take the whole 10 bombs (in reality it takes ~8.5 bombs but due to the drop sequence, it is recommended to drop all 10 as you are unable to drop 9 bombs). If the player wants to play a more aggressive full bomb payload, then the "16 x 1,000 lb G.P. Mk.I bombs" payload should be carried. More than enough bombs to destroy the 3 bases in a 3 base map and still have enough payload for the airfield or a base and a half in maps like Ruhr. In enduring confrontation maps, any payload is recommended as EC is more forgiving payload wise as multiple strikes can be done to a base or an airfield.
The use of AIM-9B in the Buccaneer
The AIM-9B are far from being the best anti-air missiles in the game due to their speed and G-limit. They are not to be used against turning targets nor to chase supersonic targets, the use of AIM-9B is really limited but can be the main offensive line against an unaware enemy plane, specially since at that battle rating almost no aircraft has access to Missile Alert Warning. This makes the AIM-9B a reliable anti-air weapon and relatively long distances considering there is no other AA ordnance. This is specially reliable in Enduring Confrontation/Simulator battles as in other type of gamemodes, knowing the presence of the launcher and when the missile has been fired by eye contact is the main reason why AIM-9B are so easily evaded and countered. If the Buccaneer is to be used as a heavy missile fighter, this is the recommended attack flight path:
- The method of engagement is a fairly standard low-risk hit-and-run pass. Approach the enemy, shoot, and break off. There's nothing too special about it, and it relies more on the speed to get into the target area, fire a single missile or a salvo if needed, and then get out of the danger zone as soon as possible lest you become the target of unwanted attention. It requires little in the way of skill and little in the way of performance upgrades, as the Buccaneer already has considerable engine power. However, it does not allow for sustained time on target and gives you only a small window of opportunity to make the shot.
Reliable targets for the AIM-9B:
- All sorts of enemy AI attackers and bombers can be easily killed with a missile as they do not dump flares or do evasive manoeuvres like players
- Helicopters (both AI and player controlled) as long as they are not the most modern attack choppers (Ka-50/52, AH-64, EC-665 HAD/HAP/UHT, etc)
Flight paths and engagement paths
There are multiple rules which should be followed when flying the Buccaneer in order to prevent and counter a wide variety of threats. The first and pretty straight forward rule is stay out of Line of Sight (LOS). This is one of the most basic rules for any aircraft in the game, but specially due to the size of the Buccaneer, it is crucial as it is easier to spot a Buccaneer at distances than an F-84. The Buccaneer is far from being the easiest plane to conceal, but due to its camouflage, it can become invisible to eye sight if whoever is the threat falls in the trap. Do not rely on the camouflage to conceal you most of the time, it depends or the LOS azimuth, distance and enemy pilot's awareness. The blue colour is reliable on both sea and land environments although it is not recommended to rely on it in Realistic or Arcade battles as, once the aircraft is detected, a marker will appear on the Buccaneer revealing the position. Depending on the situation and gamemode, there are multiple environmental hiding places which can make the Buccaneer have a safe flight to target zone, this will be divided into Optical Hiding and Technological Hiding. Both of them are to be complimented by each other, the pilot must not focus on just one or the other. Both have to be done at the same time in order to achieve the best survivability in game.
Optical Hiding:
The name is pretty straight forward, hiding from eye sight. This is one of the easiest to hide from in most places and gamemodes, even better if it is a Simulator battle. This hiding spots could be doing a "grass-cutting" flight path (flying as close to the ground as possible), flying behind any sort of of environmental obstructions (mountains, inside canyons, inside river banks, etc) or a really high altitude flight. This can become a double edge sword but can make the Buccaneer have a high survivability against enemy planes, not only because the flight ceiling is the highest one in the game (15 km) but also because no aircraft is able to catch it up (at that altitude, the Buccaneer keeps a speed of ~700 km/h). This is to be used only if required in extreme cases, it is not recommended to be used in a normal basis.
Technological Hiding:
By this term, we are talking about hiding yourself against all sorts of airborne and ground based detection systems, being radar or Infrared Search and Track (IRST). Hiding against them can be tricky depending on the purpose of the aircraft. In this case, hiding from airborne radar is the easiest as cluttering is enough to cause detection issues (refer to Airborne radars for further explanation of airborne radars and the following explained terms). If the pilot is facing aircraft with airborne radars, the best way to counter is flying low or behind environmental obstructions. Flying high can be a double edge sword depending on the distance, altitude, radar scan pattern and azimuth. Flying extremely high can make the aircraft invisible to enemy radars, both ground based and airborne (ground based get a max range of 15 km detection range at most), depending on the other players, but doing a low flight path ensures key points which are vulnerabilities. Radar Warning Receiver (RWR) will be the main line of defence against all types of radars, any radio wave detected will be displayed on the HUD and the pilot will know if a change in the flight path must be made.
The story changes when there are IRST systems on the battle (only ground based at the game in the Stormer HVM), they do not trigger RWR on search nor track, making this one of the most menacing threat to the Buccaneer as there are no ways to know if there is a missile lock at you.
Use of bomb sights and ballistic computer:
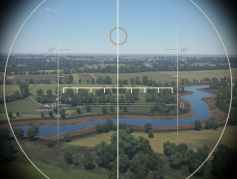
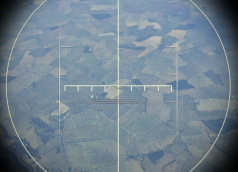
As the rest of the bombers, the bomb sights are the main aiming tool for delivering ordnance in Air Realistic battles and Simulator, and the Ballistic Computer in Ground Realistic battles. Depending on the speed of the aircraft, flight attitude and flight altitude, the bomb sight may look different (refer to pictures). Being a jet bomber makes the use of bomber sight at low altitudes trickier compared to prop bombers, mainly for the fact of speed (the greater the speed, the more horizontal parabola will the bombs get). Bomb sights are recommended to be used in altitudes greater than 500 m (see the difference of azimuth between the pictures) and ballistic computer reticle in altitudes less than 500 m. Both have their pros and cons, but the bomb sights are more Simulator-based and while the ballistic computer can be used for everything else, even bombing in Air Realistic battles. Due to being a bomber, the bomb reticle on the ground will never disappear (different from the rest of aircraft with bomb targeting ballistic computers in which the plane must be aiming to the ground at a certain angle to make the reticle display).
Attack runs with the Buccaneer:
The Buccaneer is the fastest and heaviest long range bomber in game (at low flying it can reach speeds of Mach .95 with the 16,000 lb payload) and thus, it is perfect to be used as a "Lightning Strike" bomber thanks to the speed and ballistic computer. Lighting Strikes refer to doing a grass-cutting flight at the fastest speed as possible and dropping bombs on targets as close to the ground as possible in order to ensure accuracy but still maintain high speeds. This is primarily the best engagement path when engaging ground targets (GRB preferably as in Simulator is harder due to the restricted cabin/bomb sight views but not impossible) as you counter enemy's radar, situational awareness and reaction time. By the time the enemy SPAA will engage the Buccaneer will be long gone from the combat zone due to the high speeds. When using Bullpups, engagement paths should be different. The Buccaneer must have a clear LOS not only because trees will be able to detonate the air-to-ground missile but also because they are manually guided.
Missile Evasion and Defensive Manoeuvres
This can be the most tricky and complicated part of the Buccaneer as the pilot must know their enemy, the way such plane is meant to be flown, the suspended armament it can carry and the flight performance of such plane. One of the most common threat faced in all environments are air-to-air missiles from any nation. From AIM-9Gs to R-60s, the Buccaneer is able to face them and counter them utilizing diverse methods but not all of them will apply to all missiles. The Buccaneer has no problems in doing evasive manoeuvres and "break, bank and jink" against enemy missiles. However, the best counter to this is not letting the enemy launch missiles at all. Keep your tail pointed away from enemy radars and the front of enemies. Do not stay still for prolonged periods of time without checking behind you for tell-tale white streaks or the missile markers.
When facing AIM-9s:
Early AIM-9 variants such as the AIM-9B can easily be evaded by making a turn, but later variants such the AIM-9G are extremely hard to evade without the use of flares. Draining the missile of its energy is also possible but only when the launch distance is >3-3.5 km depending on speed.
When facing AIM-7s, R-3Ss and Matra 530:
There is not much to say about radar-guided missiles besides their threatening speed and the uselessness of flares against them as they are radar locked. In order to counter this, the pilot can create radar cluttering by flying close to the ground in order to nullify the missile tracking and "break" (doing a hard turn only when the missile is closer than 2.5 km can also evade the missile). These sorts of missiles will be the easiest to spot as RWR will give a significant alert when there is a radar lock.
When facing R-60s:
R-60s are a different story as they are the opposite of AIM-7s and AIM-9s. They have an effective range of 2 km, making them useless for long range combat but are able to pull 30G, meaning R-60s have to be countered the other way around. Instead of attempting to out-turn R-60s try outrunning them instead with the use of flares.
When facing SRAAMs:
This event is highly unlike to happen due to the SRAAM being a British missile while the Buccaneer is a British aircraft, but in case this happens, the aircraft must do a similar procedure as with the R-60s but with much more carefulness and responsiveness. The SRAAM is a vectoring thrust missile, meaning the missile can start turning without the need of much speed as the vectoring thrust changes the direction of the thrust, making it much more agile. It can be easily countered with speed (effective range is less than 1.2 km) and with the use of flares.
Pros and cons
Pros:
- Massive bomb load of up to 16,000 lb with various payload options and combinations
- Reasonably good flight performance
- Very low stall/landing speed thanks to blown flaps
- Can land on aircraft carriers
- Has countermeasures and RWR
- Can carry two AIM-9B Sidewinder missiles for limited air defence roles
- Has a ballistics computer with CCIP for bombs and rockets, as well as CCRP. The CCIP works in level flight, unlike on most other aircraft.
- Has a Head-Up Display in the cockpit which provides flight information and weapon aiming functionality.
Cons:
- No guns; the only effective way to fight enemy aircraft are the two AIM-9B missiles
- Big target; often will be targeted by enemy aircraft
- Flares are carried in pods suspended from the outboard pylons; must sacrifice ordnance to carry them
- If flaps rips off the ailerons will be ripped off as well, making the aircraft very hard to control
- Heavily loaded wings can rip in turns if not careful
History
The Blackburn Buccaneer was a response to the threatening expansion the Soviet Navy was having at the time. This expansion was the main menace to ships in the Atlantic, especially merchant ships. Thus, the British MoD opted to utilize their already existing naval weaponry and not make a new fleet to counter this expansion. In 1952, the preliminary requirements were set out: a carrier based two-seat jet with maximum speed of 550 knots and combat range of 400 nautical miles, able to carry 8,000 lb of both conventional weaponry and special weaponry such as the Red Beard free-fall nuclear bomb and the Green Cheese anti-ship missile. First responses were made in 1953 and the first prototyping of the Buccaneer was made. It was codenamed BNA (Blackburn Naval Aircraft) or BANA (Blackburn Advanced Naval Aircraft) which lead to the nickname "Banana jet". The first flight of the prototype was made in 1958. This turned into a successful aircraft and was produced under the name of Buccaneer S.1 and served with the FAA in 1963. It was powered by a pair of de Havilland Gyron Junior turbojets. Despite the success of the aircraft, the thrust generated by these engines was lacklustre and failed to achieve the required lift in order to carry the aircraft with full armament and fuel load. This could be resolved by taking the required amount of fuel needed to rendezvous with an aerial refuelling aircraft. While being a solution, it was inefficient as the low thrust generated by both engines while depending on lift blow marked a serious danger.
As a long-term solution, the engines were replaced to Rolls-Royce Spey turbofan engine which could generate 40% more thrust that the previous engines. This new version was named Buccaneer S.2. Blackburn, which was bought later by Hawker Siddeley, ordered production of the S.2 in 1962. The already built Buccaneer S.1s were retrofitted to S.2 standards by the end of 1966.
The Royal Navy was not the only one which asked for Blackburn Buccaneer. The RAF was looking for a replacement for the Canberra bombers. After the cancellation of the acquisition of the General Dynamics F-111K, the RAF stood in crisis. It was therefore that the RAF decided in 1968 to adopt the Blackburn Buccaneer S.2 as a replacement for the Canberra bomber. 46 units were built and delivered to the RAF for service. These specific units were renamed to Buccaneer S.2B. These had the RAF type communitcations and avionics equipment as well as their weaponry including the Martel air-to-surface missile and a bulged bomb bay which could hold an extra fuel tank. Some of these units were capable of firing the anti-ship version of the Martel. These units were renamed to Buccaneer S.2D and the remaining were renamed to S.2C, a major upgrade for the Buccaneer which included enhanced Electronic Warfare systems and AIM-9 Sidewinder capabilities. In 1979, some Buccaneers were fitted with the AN/AVQ-23 Pave Spike laser designator pod for the Paveway II laser guided bombs.
In October 1962, 16 aircraft were ordered for the South African Air force named as Buccaneer S.50, these were retrofitted Buccaneer S.2 with Bristol Siddeley BS.605 rocket engines to provide additional take-off thrust. South African Air Force was also the only export operator of the Buccaneer. They acquired the Buccaneers in the Simontown Agreement. South Africa purchased 20 more Buccaneers but the British Government blocked the proposition. The South African Buccaneers were used in a maritime strike role using the French AS-30 Anti Ship missiles. In March 1971, A few Buccaneers launched 12 AS-30s at the stricken tanker Wafra but luckily for the ship and unluckily for the South African pilots, the missiles failed to sink the Wafra. The AS-30s were also capable of ground attack roles and were very effective. The Buccaneers were used extensively in the South African Border War often flying over Angola and Namibia bombing and attacking guerrilla forces and their camps. The Buccaneers would also provide Close Air Support for the ground troops . During the Battle for Cassinga, Buccaneers were used to destroy armoured vehicles of the SWAPO and covering the retreat of the South African troops. At the Buccaneer's retirement in 1991, only 5 Buccaneers remained in SAAF service after either crashing or being cannibalised for spare parts. 3 Buccaneers were maintained in flying condition in South Africa until 2016, when operations ceased.
Devblog
In the early days of the Cold War, the Soviet construction program of the new Sverdlov-class cruisers caused the British military a great deal of concern. Believing the Sverdlovs would pose a similar threat as the German 'pocket battleships' in the previous war, the Admiralty decided to counter this issue not by building new ships of their own, but developing a new strike aircraft instead.
After issuing a set of requirements for a new jet-powered attack aircraft with nuclear strike capabilities, the Admiralty chose Blackburn's design as the winner of the competition in 1955. A few years later, in 1958, the first prototype of the Blackburn Buccaneer undertook its maiden flight.
The first production version of the Buccaneer, the S.1, entered service with the FAA in the early 1960's. However, the Buccaneer's early service career was plagued with issues relating to its underpowered and unreliable turbojet engines. Therefore, Blackburn almost immediately began working on an improved variant by the time the problems became apparent. Outfitting the aircraft with much more powerful and economical turbofan engines, Blackburn introduced the Buccaneer S.2 in the mid '60's, with the first aircraft joining the ranks of the FAA in March 1965.
However, after the British fleet carriers began being decommissioned in the late 1970's as part of a foreign policy agenda change, the Buccaneer S.2's were also being phased out of active service along with them. The roughly 80 produced Buccaneer S.2's largely participated in exercises and training missions under FAA service, but saw more extensive use with the RAF, after being retired by the Navy.
Media
- Skins
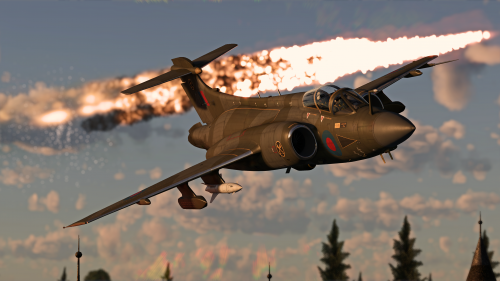
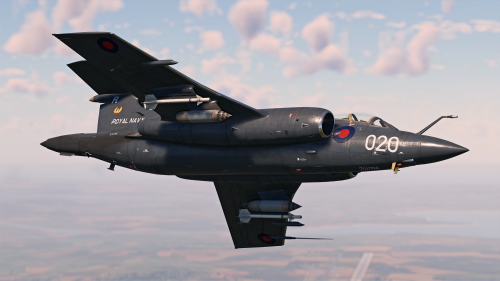
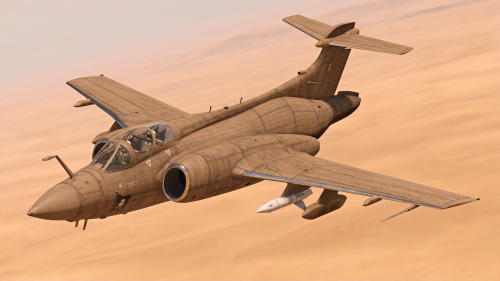
- Images
- Buccaneer S.2 Devblog Images
- Videos
See also
External links
- [Devblog] Blackburn Buccaneer S.2: Banana Jet
- Official data sheet - more details about the performance
| Blackburn Aircraft Ltd. | |
|---|---|
| Fighters | Firebrand TF Mk IV · Firecrest |
| Strike aircraft | Buccaneer S.1 · Buccaneer S.2 · Buccaneer S.2B |
| Britain jet aircraft | |
|---|---|
| Blackburn | Buccaneer S.1 · Buccaneer S.2 · Buccaneer S.2B |
| British Aerospace | Harrier GR.7 · Sea Harrier FRS.1 (e) · Sea Harrier FRS.1 · Sea Harrier FA 2 |
| British Aircraft Corporation | Strikemaster Mk.88 |
| English Electric | Canberra B Mk 2 · Canberra B (I) Mk 6 · Lightning F.6 · Lightning F.53 |
| Gloster | Meteor F Mk 3 · Sea Meteor F Mk 3 · Meteor F Mk 4 G.41F · Meteor F Mk 4 G.41G · Meteor F Mk 8 G.41K · Meteor F Mk.8 Reaper |
| Javelin F.(A.W.) Mk.9 | |
| de Havilland | Vampire F.B.5 · Venom FB.4 · Sea Venom FAW 20 · Sea Vixen F.A.W. Mk.2 |
| Hawker | Sea Hawk FGA.6 · Hunter F.1 · Hunter F.6 · Hunter FGA.9 · Harrier GR.1 · Harrier GR.3 |
| Panavia | Tornado GR.1 · Tornado F.3 · Tornado F.3 Late |
| SEPECAT | Jaguar GR.1 · Jaguar GR.1A · Jaguar IS |
| Supermarine | Attacker FB 1 · Attacker FB.2 · Scimitar F Mk.1 · Swift F.1 · Swift F.7 |
| Foreign | Phantom FG.1 (USA) · Phantom FGR.2 (USA) · F-4J(UK) Phantom II (USA) |
| South Africa | ▄JAS39C |
| India | ▄MiG-21 Bison |


