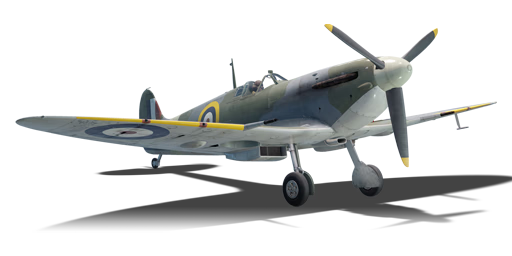
Spitfire Mk IIb

From War Thunder Wiki
Jump to: navigation, search
VTOL | Rank 5 USA
AV-8A Harrier Pack
This page is about the British fighter Spitfire Mk IIb. For other versions, see Spitfire (Family).
spitfiremkii.png
GarageImage Spitfire Mk IIb.jpg
Spitfire Mk IIb
AB RB SB
3.7 3.7 3.0
Class:
Research:9 200 Specs-Card-Exp.png
Purchase:16 000 Specs-Card-Lion.png
Show in game

Description

In 1939, a trial was undertaken in which a Spitfire Mk I was fitted with a new 1,175-hp Merlin XII engine, the success of which resulted in the designation of a new variant: the Spitfire Mk II. Other improvements included a new, more efficient cooling system, and a move away from the previous external electric engine starting systems. The Mk IIb variant in particular was fitted with the "B-type" wing, a modification of the A-type wing of the Mk Ia and Mk IIa replacing the inner .303 machine guns with 20 mm Hispano cannons. Spitfire Mk IIs were rapidly manufactured and delivered, replacing all Mk Is in active service by April 1941.

The Spitfire Mk IIb has been in the game since the start of the Open Beta Test. With the introduction of the 20 mm Hispano cannons, the Mk IIb resolves the flaws of the preceding Mk IIa, namely the weak armaments, while retaining all of its other characteristics. However, this also comes with an increase in battle rating, meaning that its previous advantages in climb rate and speed against common opponents, while still adequate, are no longer as prominent. Turn-fighting becomes even more important against the sheer speed and power of German and American fighters. While the increased power of the cannons will be helpful in taking down opponents once a firing solution is achieved, trigger discipline is advised in order to preserve ammunition for those crucial moments.

General info

Flight performance

Max speed
at 4 572 m571 km/h
Turn time15 s
Max altitude10 000 m
EngineRolls-Royce Merlin-XII
TypeInline
Cooling systemWater
Take-off weight3 t

As mentioned constantly, the Spitfire Mk IIb has excellent turn-fighting, climbing, and speed characteristics for a fighter. With the Merlin engine, the Spitfire Mk IIb can utilise the power to gain speed and altitude for an energy advantage over its opponents, as well as having the manoeuvrability to perform aerobatic manoeuvres to get out of a sticky situation.

Characteristics Max Speed
(km/h at 4,572 m)
Max altitude
(metres)
Turn time
(seconds)
Rate of climb
(metres/second)
Take-off run
(metres)
AB RB AB RB AB RB
Stock 550 534 10000 15.9 16.5 16.0 16.0 300
Upgraded 597 571 14.4 15.1 23.9 19.4

Details

Features
Combat flaps Take-off flaps Landing flaps Air brakes Arrestor gear
X X X X
Limits
Wings (km/h) Gear (km/h) Flaps (km/h) Max Static G
Combat Take-off Landing + -
760 270 N/A N/A 230 ~10 ~6
Optimal velocities (km/h)
Ailerons Rudder Elevators Radiator
< 321 < 400 < 350 > 500
Compressor (RB/SB)
Setting 1
Optimal altitude 100% Engine power WEP Engine power
4,490 m 1,140 hp 1,311 hp

Survivability and armour

Crew1 person
Speed of destruction
Structural760 km/h
Gear270 km/h
  • 38 mm Bulletproof glass in cockpit front.
  • 4 mm Steel plate in pilot's seat
  • 6-7 mm Steel plate behind the pilot.
  • Critical components located at the front of aircraft (fuel, pilot, engine, controls)
  • More fuel tanks located in wings near the fuselage
  • Cooling systems heat up ridiculously fast

Modifications and economy

Repair costBasic → Reference
AB495 → 626 Sl icon.png
RB1 077 → 1 363 Sl icon.png
SB1 447 → 1 831 Sl icon.png
Total cost of modifications8 400 Rp icon.png
9 390 Sl icon.png
Talisman cost640 Ge icon.png
Crew training4 500 Sl icon.png
Experts16 000 Sl icon.png
Aces180 Ge icon.png
Research Aces190 000 Rp icon.png
Reward for battleAB / RB / SB
30 / 70 / 150 % Sl icon.png
118 / 118 / 118 % Rp icon.png
Modifications
Flight performance Survivability Weaponry
Mods aerodinamic fuse.png
Fuselage repair
Research:
560 Rp icon.png
Cost:
630 Sl icon.png
85 Ge icon.png
Mods radiator.png
Radiator
Research:
560 Rp icon.png
Cost:
630 Sl icon.png
85 Ge icon.png
Mods compressor.png
Compressor
Research:
630 Rp icon.png
Cost:
710 Sl icon.png
95 Ge icon.png
Mods aerodinamic wing.png
Wings repair
Research:
700 Rp icon.png
Cost:
790 Sl icon.png
105 Ge icon.png
Mods new engine.png
Engine
Research:
700 Rp icon.png
Cost:
790 Sl icon.png
105 Ge icon.png
Mods metanol.png
Engine injection
Research:
910 Rp icon.png
Cost:
1 000 Sl icon.png
140 Ge icon.png
Mods armor frame.png
Airframe
Research:
630 Rp icon.png
Cost:
710 Sl icon.png
95 Ge icon.png
Mods armor cover.png
Cover
Research:
910 Rp icon.png
Cost:
1 000 Sl icon.png
140 Ge icon.png
Mods ammo.png
bmg303_belt_pack
Research:
560 Rp icon.png
Cost:
630 Sl icon.png
85 Ge icon.png
Mod arrow 0.png
Mods weapon.png
bmg303_new_gun
Research:
630 Rp icon.png
Cost:
710 Sl icon.png
95 Ge icon.png
Mods ammo.png
hispano_belt_pack
Research:
700 Rp icon.png
Cost:
790 Sl icon.png
105 Ge icon.png
Mod arrow 0.png
Mods weapon.png
hispano_mk1_new_gun
Research:
910 Rp icon.png
Cost:
1 000 Sl icon.png
140 Ge icon.png

Your priorities should be the weaponry upgrades and engine upgrades. It is suggested to research the gun upgrades first, and use engine upgrades to unlock tiers. New 7 mm MGs are not really needed since the Brownings are relatively reliable. Airframe upgrades can take priority over the 7 mm MGs. However, to really make this bird sing, you need to have the radiator upgrade and all 20 mm cannon upgrades.

Armaments

Offensive armament

Ammunition120 rounds
Fire rate600 shots/min
Ammunition1 400 rounds
Fire rate1 000 shots/min

The Spitfire Mk IIb is armed with:

  • 2 x 20 mm Hispano Mk.I cannons, wing-mounted (60 rpg = 120 total)
  • 4 x 7.7 mm Browning .303 machine guns, wing-mounted (350 rpg = 1,400 total)

In continuous firing, assuming that no jams happen at all, the Hispano's ammo will dry up quicker than the 7.7 mm Brownings. However, jams do happen and the Hispanos will jam quicker than the Brownings.

Usage in battles

A Spitfire Mk IIb, perched on a hill.

The Spitfire is a high-performance thoroughbred, which is more than a match for any and all opposition it faces at its battle rating. However, if you don't know what you're up against and just try to out-turn everything with flat turns, you'll be able to get kills you need to grind up the tree, but you will not be able to excel in using the plane. Something important to remember is the seven P's: Proper Perusal, Planning & Preparation Prevents Poor Performance.

In order to use your plane most effectively, you need to know your own plane and the planes you will be facing at your BR inside and out (Preparation). You need to climb at the start of the match and watch the battle unfold...where are your enemies and where are your teammates going in relation to the objectives (Perusal). Look for teammates that need help, or enemies off on their own, then plan your attack (Planning). Always try to set up situations where you have the advantage and have an escape planned for when things turn against you (which they will very quickly, especially if you get tunnel vision on a target).

The Spitfire Mk IIb is a very good turn-fighter, being one of the most agile aircraft in the game, and has good weapons configurations that can be used against enemies. It can reliably out-turn many of the aircraft in-game, and out-zoom-climb some as well with WEP on. It has an excellent rate of climb, and due to this and the armament, is a good bomber interceptor. Using its agility, speed, and rate of climb, it can easily run rings around enemy fighters and dispense punishing blows as well. However, there are several points to be kept in mind while flying the Spitfire Mk IIb. These are:

  1. The relatively low damage that the 7.7 mm Browning machine guns, especially against heavy fighters and bombers.
  2. The propensity of the 20 mm Hispano to jam after prolonged firing
  3. Lack of any armour on the engine and (relatively) small amounts of windscreen glass armour
  4. Decreased engine power at altitudes higher than ~3900-4300 m
  5. Proximity of vital systems towards the front of the aircraft, including a forward fuel tank that does not self-seal, and will keep burning until all the fuel inside has disappeared.
  6. Lack of combat flaps
  7. Increased efficiency of control surfaces (ailerons, elevators, rudder) at medium speeds (300 km/h-450 km/h) and engine efficiency at low altitudes (below 4,500 m)
  8. Inability to hold WEP for long, before the engine begins overheating without MEC
  9. The float carburetor, should the plane pull any negative G, the carburetor will be fuel-starved cutting power to the engine
  10. Similarity of the muzzle velocity of the 20 mm Hispano and the 7.7 mm Brownings (meaning that they'll have similar trajectories- this seems unimportant, but the significance will be explained shortly)

This fighter, unlike American and German fighters, is neither a gun platform nor a potent Boom & Zoom fighter. It is well-armed and can Boom & Zoom decently, but if an aspiring pilot tries to fly it like a P-40, the Spitfire will be shot down very, very quickly. Conversely, if a pilot tries to fly it like a Bf 109, while they might have some amounts of success, the Spitfire is outperformed as a B&Z fighter by US fighters such as the F4U-1A and German fighters such as the Bf 109. It will not be able to hold its top speed for very long due to its lacking cooling systems unless the radiator is forced open by manual engine control - which doubles or triples the WEP time when used properly (forced 100% radiator directly after takeoff). In addition, the aircraft does not have combat flaps, which means you cannot have 'reserve manoeuvrability' to out-turn a fighter in order to retreat.

Try to find lone opponents to face off against as the Spitfire performs best when facing enemies one at a time. Always keep an eye on the tactical map as your adversaries (mostly 109s) will travel in "wolf packs" and shoot you down. For fighting at low altitude stay above the opponent you have singled out and dive on them. If you have too much energy go for a high yo-yo manoeuvre to bleed your energy. 90% of the time you will easily out-manoeuvre anything you face so get on their tail and shoot them down. For high altitude fighting, try to get the altitude advantage and bait your opponent into a turn fight. Stay away from energy sapping manoeuvres as at high altitude this will lead to the Mk IIb being left a sitting duck (also stay away from 1v2s and the like).

Abuse the vertical as well as the horizontal in a fight. Use manoeuvres such as yo-yos and chandelles that will bleed the speed of an enemy while allowing you to retain more speed than your enemy. Your primary opponent - Bf 109s (Primarily E-3s and E-4s, sometimes even F-4s) - perform better in the vertical than you do, so do not try to out-dive or out-climb them. Should you try to climb against a Bf 109 ending its dive and entering a loop, usually, you will bleed speed and stall out, making you a sitting duck for anybody who decides to target you. If you can, try to fly downwards instead of heading up. Make a split-S instead of an Immelmann to perform a reversal- roll inverted (upside down) and then pull hard on the elevator, looping back up to get back into a fight. Use your superior turning abilities in the semi-vertical, making chandelles instead of pure loops. You can theoretically use flat turns only, but if you get into an uptier, you'll be out-performed by Zeroes (who perform better at lower speeds) and Fw 190 A-1s (which have excellent energy retention and will still be going fast when you're stalled out in a turn). When fighting these aircraft, it is recommended that you fight less in terms of strictly up or down, but instead, plan your engagement according to whether you're travelling at a faster speed (You're outrunning them) or above/below them. When engaging these aircraft, having altitude definitely helps. Spitfires can out-dive A6M2s, and can out-turn Fw 190s. In both cases, however, if you bleed too much speed, you will be shot down due to becoming easy meat. The A6M2 stalls at a lower speed than you and also turns better at speeds below 330 km/h (205 mph), while the Fw 190, although unable to turn as fast as you do, will be able to keep its speed for longer.

Of course, to do everything that was described, it is better to have altitude before doing so. For example, you can't make a split-S from the astronomically low altitude of 200 m (650 ft) and expect not to crash into the ground. While pilots may tell you otherwise, you should not climb to 3,000 m and stay there for the entire match. Remember the proverb: Speed is Life. Altitude is Speed in the Bank. Spitfire pilots should use their excellent Merlin engine to climb into the 4,000 m range in order to be able to gain energy when necessary to either run away or to fight an enemy.

Experienced players may recommend that you use landing flaps below 250 km/h to get an edge in turn time. Don't do this if you're a new pilot. The Spitfire IIb will slow down dramatically if you do so and you'll end up losing too much speed. Landing flaps may increase lift, but they also reduce your speed by acting as brakes by increasing drag. They also rip easily, and unless micromanaged, they will immediately rip off, leading to difficulties in controlling the plane.

Using the armaments:

A possible strategy for the Spitfire Mk IIb's set of armaments is one akin to that used on the Hurricane Mk IV, using the cannons sparingly to conserve ammo and reduce chances of jamming. Use the cannons when in the aircraft's most effective convergence range and envelope, and use the machine guns to 'sight' the cannons. Fire the machine guns tracer belts for maximum AP-I and tracer ammo to get an idea of where the cannon rounds will go, and then fire cannons once you know where you should aim. This technique works well because the Hispano cannons and the 7.7 mm machine guns share similar muzzle velocities to one another.

The video below shows how to use the aiming technique described:

Go for deflection shots against enemy aircraft. These shots are side-on shots where you "lead" an enemy aircraft in front of you, and get off a burst when you're not directly behind them, but instead when they're turning. While this may be difficult for newer players, it provides valuable training and is a good learning experience for later tiers. In addition, should you use this technique, you can easily cause enemy planes' wings to completely fall off if you pull it off right and hit a wing spar. Bf 109s, with their single wing spars, are especially vulnerable to a well-aimed side-on shot. If your cannon ammo drops to 50 rounds or below that, try and return to base quickly. That way, if you get bounced on the way back, you can at least have some cannon ammo left to surprise any raider looking to attack you.

Fighting the enemy:

Click Expand to show

Msg-info.png Disclaimer: This is a very general guide to the aircraft's capabilities. Following these to the letter without consideration of the enemy's abilities can still lead to a loss.

Tips for using the Spitfire against other nations' fighters are as follows:

  • American fighters - In mixed battle, you will face US fighters such as the F4F, the P-39s and sometimes P-47Ds (Including the German and Soviet premiums) and many other aircraft which have .50 calibre machine guns. These large-calibre machine guns will shred a Spitfire to pieces if given the opportunity to fire a long, sustained burst at you, such as in a head-on engagement. Lure the enemy down and force them to lose energy, using your manoeuvrability to break the enemy's aiming solution at the last moment with manoeuvres such as the scissors and barrel rolls.
  • German fighters will usually have cannons and hold a speed advantage over you, as well as being more capable at higher speeds and altitudes. If you head-on a German fighter, you will lose over 90% of the time, unless you are lucky and manage to land critical hits on the engine and the pilot - and this is also unlikely given that the 7.7 mm machine guns and thie hispano cannons are not known for their armour-piercing abilities. Like with American fighters, try to make the enemy bleed speed, while dodging enemy fire. You can also attempt to lure the enemy into turning with you. You may have a chance with a head-on, but this requires that you know your plane completely. Head-ons are suicide, since F-model Bf 109 Variants have their guns mounted near the engine, and the Fw 190 A-1 has an overwhelming frontal armament. Although the spitfire can shrug off a few hits from machine guns or 20 mm MG FFs, it cannot survive hits from mine-shell equipped MG FF/M or MG 151/20 cannons, such as those on the Bf 109 E-4.
  • Soviet fighters will have cannons, large-calibre machine guns, or both, in conjunction with small-calibre guns, mounted in-line on the fuselage, but are weak and vulnerable to fires. Again, facing these head-on is suicide, and at the low altitudes you will meet them at, you cannot disengage by running or climbing away. Keep in mind that while you can turnfight, Soviet fighters are very, very manoeuvrable at low altitudes. Again, like always, abuse the vertical with the horizontal. Soviet planes have inferior ShVak cannons, but they have 12.7 mm Berezin UBs with API ammo. Do not try to head-on them unless you know how to get your shots into the enemy's fuel tank or engines or pilot on the first try. If you let them get into firing range in a head-on, you're absolutely cooked.
  • Japanese fighters are more nimble than you. If you enter a turn-fight with them, and the pilot is smart, he or she can and will deploy their combat flaps and shoot you down. Attempt to bait them into energy-fighting manoeuvres (otherwise known as Boom-and-zoom), where your superior speed, acceleration, and climb rate will prove you to be the victor.
  • Italian fighters are the high-performance counterparts of the Germans, just like the British are to the Americans. They possess either similar agility (Re.2001-series aircraft) or superior speed and energy retention in vertical manoeuvres (C. 202 & C. 205-series aircraft). In addition, all of them are equipped with versions of the Bf 109's DB-605 engine, and they do well at high operating altitudes. Most Italian aircraft at the BR range of 2.3-3.3 are extremely poorly armed, with only two low-velocity, slow-rate-of-fire 12.7 mm Breda-SAFAT machine guns coupled with a pair of 7.7 mm Breda-SAFAT machine guns. However, a few aircraft- namely the Re.2001 CN and the C. 202EC- have two 20 mm MG 151/20 cannons, making them dangerous opponents.
  • French fighters are a bit of a mixed bag, having some of the more heavily armed aircraft and some of the less heavily armed aircraft in the game. In general, however, they will have either cannons or heavy-calibre machine guns, and good manoeuvrability. Turn-fighting these aircraft is preferable to a head-on engagement. They will also do better at high altitudes and speeds. Rope-a-dope them into fighting you on your own terms at lower speeds and altitudes where you'll have a chance. In addition, they have low ammo count (60 rounds for cannons and 300-500 for machine guns), just like you do, so try and make them waste their ammo.

Specific enemies worth noting:

Click Expand to show

  • BV 238 - Don't face these things from above, level, or from the rear. The massive amounts of defence armaments on this flying boat will ensure the Spitfire will be shot down. They're also massive - but not impossible to shoot down. The only reasonable chance of shooting the BV 238 down is via aiming for the cockpit at the front (very hard), or by aiming at the wings. The process to do this is to get to its rear and dive down below the enemy, corkscrewing and rolling and skidding across the sky seemingly at random and get within 600 m of it and approximately a hundred metres below. Start firing machine guns at the wings. Once closed into 400 m, fire the cannons. Once you set fire to a BV, usually, it will not go out
  • A6M2 - These nimble fighters may have low-velocity cannons, but they can easily out-turn you with combat flaps and stay with you in a fight, and out-turn you with flaps on. Don't even bother trying to turn-fight them. Use boom-and-zoom manoeuvres. Even if the enemy pilot wants to, the A6M2's climb rate is not very good compared to the Spitfire, and it will not be able to keep up. Get at least 2 km away from the enemy before you go in again, or at least wait until it is distracted by another enemy.
  • I-153P "Chaika" - The I-153P is a Soviet biplane from the late 1930s. These small biplanes will rip you to shreds if you don't play smart. These biplanes have an insane turn rate and will effortlessly out-turn you without any flaps. They are armed with two 20 mm ShVAK cannons that will obliterate you if you present a side-on profile to them (i.e. let them get a "deflection" shot on you), and they can destroy you in a head-on if you're not careful. To counter these aircraft you do not engage in a turn fight, instead you energy fight (a recommended tactic is to use yo-yos and to out-climb/out-speed the enemy) as your Spitfire is much faster, has an excellent climb rate, and has superior energy retention.
  • Bf 109 E-1/Bf 109 E-3/Bf 109 E-4 - These planes have superior high-altitude performance, top speed, dive characteristics, as well as two centrally mounted machine guns and two cannons. However, you can outclimb them at low altitudes. You may find it hard to out-turn them, though. Trying to out-turn a Bf 109 is harder than it seems, since the two planes are both very agile. Abuse the vertical to get a definite edge on them. Use low-yo-yos and high-yo-yos to gain the altitude or speed advantage over a turning Bf 109.
  • Bf 109 F-1/Bf 109 F-2/Bf 109 F-4 - These aircraft climb, accelerate and dive faster than you. However, they will find it much harder to out-turn you. Use split-S's to get under them and a combination of high/low yo-yos. If one tries to engage in a head-on, fire off a desultory burst of MG fire and hope to hit something, and immediately dive and try to get under it. If you lock into a head-on, it is likely that they will hit your cooling system and your engine will die, along with your plane.
  • Fw 190 A-1 - This aircraft has a similar turn radius to you, but superior acceleration, (arguably) superior armament, superior high-altitude performance and better top speed than you do, but a worse rate of climb. You can turn faster than it, but you can't out-turn it per se. Don't get baited into a turn-fight. You should have the altitude advantage, since most Fw 190 pilots stay low (around 3,500 m), where their engine does best. You can out-climb them when they're slow, so try and energy fight them. Just don't use loops, since the Fw 190 will happily slice and dice you when you're in a loop using its superior energy retention. Don't turn-fight it, since it'll make you bleed speed and subsequently use its superior energy retention to turn and burn for longer periods of time and eventually get on your six and shoot you down in flames. This plane has the feared Minengeschoß round (mine shell) for its 20 mm cannons, and four machine guns, so do not head-on this plane.
  • C. 202EC - This aircraft is easily the most dangerous enemy that you will ever face. It brings excellent armament, top speed, energy retention and dive characteristics to the table, along with excellent high-altitude performance and climb rate. Do not head-on this plane. This aircraft has two MG151/20s with Mine shot, and will absolutely shred you into pieces should you enter a head-on. C. 202EC pilots are usually confident in their abilities to chop enemy aircraft into pieces in a head-on, and some (including this contributor) will actively seek it. It also has two 12.7 mm machine guns, centrally mounted in the nose, which can do some damage if the C. 202 can get close. You can out-turn a C. 202EC, and possibly out-climb it, but not much else. The C. 202EC does best at high speeds and high altitudes, so try and bring things into your favour. Force it into a low-speed fight, or bait it towards other friends who are better able to deal with it.

Manual Engine Control

MEC elements
Mixer Pitch Radiator Supercharger Turbocharger
Oil Water Type
Controllable Controllable
Not auto controlled
Not controllable
Not auto controlled
Controllable
Not auto controlled
Separate Not controllable
1 gear
Not controllable

Pros and cons

Pros:

  • Absolutely amazing turn capabilities, even at low speeds
  • Superb climb capabilities
  • Relatively good armament with a 20 mm and 7.7 mm combination arrangement
  • Very easy aircraft to control
  • Good acceleration
  • Short bursts can decimate the enemy, even bombers if aimed correctly

Cons:

  • 7.7 mm machine guns have low damage and stopping power
  • Cannons have a low ammo count in general - just enough for 6 seconds of firing
  • Hispano Mk.I 20 mm has a tendency to jam under continuous firing when not upgraded
  • Hispano cannons may be finicky to use if you are not able to aim them well
  • Due to its weapon disadvantages, proper trigger discipline, convergence, and knowing the effective cone of fire is key
  • Wings overload quickly when turning at high speeds
  • Most enemy contemporaries in the matchmaking bracket can out-dive you
  • Low dive speed limit
  • Poor roll rate, especially at high speed
  • Poor high-altitude performance (compared to lower altitudes)
  • The engine easily overheats
  • There are only two positions for flaps: raised and landing

History


Archive of the in-game description

The Supermarine Spitfire was a British fighter which served with various nations from the late 1930s up into the 1950s. It was a single-engine, all-metal, low-wing monoplane with retractable landing gear. Various modifications served as fighters, interceptors, high-altitude fighters, fighter-bombers and reconnaissance aircraft. A total of some 20,300 Spitfires of all types were built during the war, including two-seater trainers.

In the summer of 1939, an early Spitfire Mk I was fitted with the new Rolls Royce Merlin XII engine, which had a higher output of 1,175 HP and was fitted with a Coffman engine starter instead of the previous Merlin's electrical starter system. This, combined with the Rotol variable pitch propeller which had been used on many Spitfire Mk Is would now form the powerplant of the new Spitfire Mk II, although some production models used the De Havilland propeller. The Mk II was some 6-7 mph faster than the later Spitfire Mk I, but still slower than the original Spitfires before a series of modifications increased the aircraft's weight. As with the Mk I, the Spitfire Mk II was produced with either eight machine guns as the Spitfire Mk IIA, or two 20 mm cannon and four machine guns as the Mk IIb. The earlier problems with cannon fitted to the Mk IB had now been solved by introducing a belt feed system to the weapon to replace the earlier drum, turning the cannon on its side and fitting a blister on the wing to house the new mechanism.

920 Spitfire Mk IIs entered service; 750 Mk IIA and 170 MK IIB, although fighters used in the air-sea rescue role were later designated Mk IIC. The Spitfire II quickly replaced the Spitfire I, with the older variant being relegated to use in Operational Training Units. By April 1941, RAF Fighter Command had completed re-equipping with the Mk II, although this too would soon be replaced by the Mk V.


Media

Skins
Videos

See also

External links


Supermarine
Spitfires 
Merlin engine  Spitfire Mk Ia · Spitfire Mk IIa · Spitfire Mk.IIa Venture I · Spitfire Mk IIb
  Spitfire Mk Vb · Spitfire Mk Vb/trop · Spitfire Mk Vc · Spitfire Mk Vc/trop
  Spitfire F Mk IX · Spitfire F Mk IXc · Spitfire F Mk XVI
  Spitfire LF Mk IX · Plagis' Spitfire LF Mk IXc
Griffon engine  Spitfire F Mk XIVc · Spitfire F Mk XIVe · Prendergast's Spitfire FR Mk XIVe · Spitfire F Mk XVIIIe · Spitfire F Mk 22 · Spitfire F Mk 24
Export  ▄Spitfire Mk Vb/trop · ▃Spitfire LF Mk IXc · ▂Spitfire Mk IXc · Spitfire Mk IXc · Spitfire Mk.IX (CW) · Spitfire LF Mk.IXe Weizman's
Seafires  Seafire LF Mk.III · Seafire F Mk XVII · Seafire FR 47
Export  ▄Seafire LF Mk.III
Jet fighters  Attacker FB 1 · Attacker FB.2 · Scimitar F Mk.1 · Swift F.1 · Swift F.7
Hydroplanes  Walrus Mk.I

Britain fighters
Fury  Fury Mk I · Fury Mk II
Nimrod  Nimrod Mk I · Nimrod Mk II
Gladiator  Gladiator Mk II · Tuck's Gladiator Mk II · Gladiator Mk IIF · Gladiator Mk IIS
Sea Gladiator  Sea Gladiator Mk I
Hurricane  Hurricane Mk I/L · Hurricane Mk.I/L FAA M · Hurricane Mk IIB/Trop
Sea Hurricane  Sea Hurricane Mk IB · Sea Hurricane Mk IC
Martin-Baker  MB.5
Spitfire (early-Merlin)  Spitfire Mk Ia · Spitfire Mk IIa · Spitfire Mk.IIa Venture I · Spitfire Mk IIb · Spitfire Mk Vb/trop · Spitfire Mk Vb · Spitfire Mk Vc/trop · Spitfire Mk Vc
Spitfire (late-Merlin)  Spitfire F Mk IX · Spitfire LF Mk IX · Spitfire F Mk IXc · Plagis' Spitfire LF Mk IXc · Spitfire F Mk XVI
Spitfire (Griffon)  Spitfire F Mk XIVc · Spitfire F Mk XIVe · Prendergast's Spitfire FR Mk XIVe · Spitfire F Mk XVIIIe · Spitfire F Mk 22 · Spitfire F Mk 24
Seafire  Seafire LF Mk.III · Seafire F Mk XVII · Seafire FR 47
Typhoon  Typhoon Mk Ia · Typhoon Mk Ib · Typhoon Mk Ib/L
Tempest  Tempest Mk II · Tempest Mk V
Sea Fury  Sea Fury FB 11
Twin-engine fighters  Hornet Mk.I · Hornet Mk.III · Whirlwind Mk I · Whirlwind P.9
  Foreign:
Australia  ▄Boomerang Mk I · ▄Boomerang Mk II
France  ▄D.520 · ▄D.521
USA  ▄Martlet Mk IV · ▄Corsair F Mk II · ▄Hellcat Mk II · ▄Thunderbolt Mk.1 · ▄Mustang Mk IA