Difference between revisions of "Leopard A1A1 (L/44)"
Inceptor57 (talk | contribs) (Modified text to be relevant to more scenarios like general uptiers.) |
FADESHADOW (talk | contribs) (→Pros and cons) (Tag: Visual edit) |
||
| (50 intermediate revisions by 19 users not shown) | |||
| Line 1: | Line 1: | ||
| − | {{ | + | {{Specs-Card|code=germ_leopard_a1a1_120}} |
| − | | about | + | {{Notice|''This page is about the medium tank '''{{PAGENAME}}'''. For other uses, see [[Leopard (Disambiguation)]]''}} |
| − | |||
| − | |||
| − | |||
| − | |||
| − | |||
| − | |||
| − | |||
| − | }} | ||
== Description == | == Description == | ||
| − | <!-- ''In the description, the first part | + | <!--''In the description, the first part needs to be about the history of the creation and combat usage of the vehicle, as well as its key features. In the second part, tell the reader about the ground vehicle in the game. Insert the screenshot of the vehicle. If the novice player does not remember the vehicle by name, they will immediately understand what kind of vehicle it is talking about.''--> |
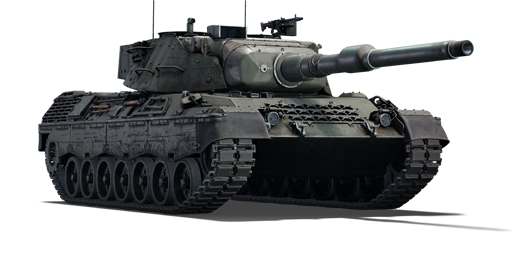
| − | The '''{{Specs|name}}''' is a | + | [[File:GarageImage Leopard A1A1 (L 44).jpg|420px|thumb|left]] |
| + | {{break}} | ||
| + | The '''{{Specs|name}}''' is a gift rank {{Specs|rank}} German medium tank {{Battle-rating}}. It was introduced in [[Update 1.81 "The Valkyries"]]. | ||
== General info == | == General info == | ||
=== Survivability and armour === | === Survivability and armour === | ||
| − | + | <!--''Describe armour protection. Note the most well protected and key weak areas. Appreciate the layout of modules as well as the number and location of crew members. Is the level of armour protection sufficient, is the placement of modules helpful for survival in combat?'' | |
| − | <!-- ''Describe armour protection. Note the most well protected and key weak areas. Appreciate the layout of modules as well as the number and location of crew members. Is the level of armour protection sufficient, is the placement of modules helpful for survival in combat? | ||
| − | + | ''If necessary use a visual template to indicate the most secure and weak zones of the armour.''--> | |
| − | + | Players who have purchased the Leopard A1A1 L44 should be familiar with the armor of non-premium Leopard 1s. If not, the Leopard may not be what people expect a tank to be. It was developed before composite materials were discovered at a time where HEAT shells were so effective that in order for armour to be effective, it would be so thick that it would not be practical. Hence, the designers of Leopard 1s, knowing that there was no possible way of stopping HEAT rounds, removed the concept of armor. In essence, the Leopard A1A1 has no armor. The front hull, accounting slope, is only some 130mm thick. The turret and gun mantle is some 100mm depending on angle. [[BMP-2]]'s auto-cannon, racked with APDS, will penetrate your turret and will cause major damage. Any HEAT projectile impacting the tank will likely result in instantly being destroyed. However, the engine block can at times reliably save the crew from HEAT shells. APDS and APFSDS are a different story. The armor on the Leopard A1A1 is so thin that most non-explosive-filled shells will seldom cause spalling upon penetrating the side of the tank. Frontal penetrations will cause much more damage, as the armor is just enough to cause spalling. | |
| − | + | The ready rack ammo is stored vertically within your turret to the left side of the tank. So AP penetrations to the right side of your tank may not set off the ammo. But, 3/4 of your crew are sited in a single file on the right side. So a penetration will knock you out nonetheless. Try to take no more than 20 shells, as it will increase the likelihood of ammo cook-off. The point is not to get hit, because if anything hits you, it will go through, and it will cause damage. | |
| − | + | In some cases, you could operate the tank backwards and use your engine block as shield, as most HEAT shells will be absorbed by your transmission, radiator and engine. | |
| − | |||
| − | |||
| − | |||
| − | |||
| − | |||
| − | |||
| − | |||
| − | |||
| − | |||
| − | |||
| − | |||
| − | |||
| − | |||
| − | |||
| − | |||
| − | |||
| − | |||
| − | |||
=== Mobility === | === Mobility === | ||
| − | + | <!--''Write about the mobility of the ground vehicle. Estimate the specific power and manoeuvrability, as well as the maximum speed forward and backward.''--> | |
| − | <!-- ''Write about the mobility of the ground vehicle. Estimate the specific power and manoeuvrability, as well as the maximum speed | ||
| − | |||
| − | |||
| − | The mobility of the | + | The mobility of the Leopard A1A1 is between the [[XM-1 (GM)|XM-1]] and [[T-55AM-1|T-55AM-1]]. Forward speed off road, expect some 40-50km/h. Reverse is about 15km/h off road. The neutral steering is absolutely amazing, you are able to swivel your tank easily. The suspensions are also great, very soft with great dampening effects, so expect a smooth drive. |
| − | |||
| − | |||
| − | |||
== Armaments == | == Armaments == | ||
| − | |||
=== Main armament === | === Main armament === | ||
| − | + | <!--''Give the reader information about the characteristics of the main gun. Assess its effectiveness in a battle based on the reloading speed, ballistics and the power of shells. Do not forget about the flexibility of the fire, that is how quickly the cannon can be aimed at the target, open fire on it and aim at another enemy. Add a link to the main article on the gun: <code><nowiki>{{main|Name of the weapon}}</nowiki></code>. Describe in general terms the ammunition available for the main gun. Give advice on how to use them and how to fill the ammunition storage.''--> | |
| − | <!-- ''Give the reader information about the characteristics of the main gun. Assess its effectiveness in a battle based on the reloading speed, ballistics and the power of shells. Do not forget about the flexibility of the fire, that is how quickly the cannon can be aimed at the target, open fire on it and aim at another enemy. Add a link to the main article on the gun: <code><nowiki>{{main|Name of the weapon}}</nowiki></code>. Describe in general terms the ammunition available for the main gun. Give advice on how to use them and how to fill the ammunition storage.'' --> | ||
| − | |||
| − | |||
| − | |||
| − | |||
| − | |||
| − | + | The legendary 120mm Rheinmetall L44 cannon does not fall short of its name. You get access to only two types of shells, APFSDS and HEAT-FS. Although the APFSDS sounds like a decent option, it actually isn’t. Apart from the fact that it cost SL to use, it also isn't very good at destroying your greatest threats: BMPs. Most times, the APFSDS will fly right through lightly armored vehicles with its 390mm penetration. The HEAT-FS, on the other hand, will result in hull-breaks on lightly armored targets while also being free of cost. The 120 mm HEAT with its 650mm penetration is able hull-break [[Object 120]]s and [[Object 906|906]]s, and anything that's not a MBT. For example, you can hit the tracks of an anti-aircraft vehicle, and it will hull-break. As such, the HEAT-FS has some more favorable characteristics than the APFSDS, while also retaining the fast velocity of 1100m/s, so it is quite easy to aim. | |
| − | |||
| − | |||
| − | |||
| − | |||
| − | |||
| − | |||
| − | |||
| − | |||
| − | |||
| − | |||
| − | |||
| − | |||
| − | |||
| − | |||
| − | + | Note that the "Stabilized" gun is only really stable when travelling under 30km/h. | |
| − | |||
| − | |||
| − | |||
| − | |||
| − | |||
| − | |||
| − | |||
| − | |||
| − | |||
| − | |||
| − | |||
| − | |||
| − | |||
| − | |||
| − | |||
=== Machine guns === | === Machine guns === | ||
| − | + | <!--''Offensive and anti-aircraft machine guns not only allow you to fight some aircraft, but also are effective against lightly armoured vehicles. Evaluate machine guns and give recommendations on its use.''--> | |
| − | + | The {{PAGENAME}} is armed with two MG 3A1s, which fires a 7.62 mm round. However, these are more of deterrents to helicopters, as the small caliber bullets will rarely cause critical damage to helicopters. | |
| − | <!-- ''Offensive and anti-aircraft machine guns not only allow you to fight some aircraft but also are effective against lightly armoured vehicles. Evaluate machine guns and give recommendations on its use.'' --> | ||
| − | |||
| − | |||
| − | The {{PAGENAME}} | ||
| − | |||
| − | |||
| − | |||
| − | |||
| − | |||
| − | |||
| − | |||
| − | |||
| − | |||
| − | |||
| − | |||
| − | |||
== Usage in battles == | == Usage in battles == | ||
| − | + | ''Describe the tactics of playing in the vehicle, the features of using vehicles in the team and advice on tactics. Refrain from creating a "guide" - do not impose a single point of view but give the reader food for thought. Describe the most dangerous enemies and give recommendations on fighting them. If necessary, note the specifics of the game in different modes (AB, RB, SB).'' | |
| − | |||
| − | |||
| − | |||
| − | |||
| − | |||
| − | |||
| − | |||
| − | |||
| − | |||
| − | |||
=== Pros and cons === | === Pros and cons === | ||
| − | <!-- '' | + | <!--''Summarize and briefly evaluate the vehicle in terms of its characteristics and combat effectiveness. Mark its pros and cons in a bulleted list. Try not to use more than 6 points for each of the characteristics. Avoid using categorical definitions such as "bad", "good" and the like - they have a substitution in the form of softer "inadequate", "effective".''--> |
| + | '''Pros:''' | ||
| − | + | * Good mobility | |
| − | + | * Effective gun with well-performing HEATFS | |
| − | * Good mobility | + | * The reload speed hasn't changed despite its new 120mm cannon |
| − | * Effective gun with | + | * It has laser rangefinder |
| − | * The reload speed hasn't changed despite its new | + | * despite the addition of bigger gun the mobility hasn't changed |
| − | * | + | * Good reverse speed |
| − | * | ||
| − | * | ||
| − | |||
'''Cons:''' | '''Cons:''' | ||
| − | * | + | * Armor is still the same and the turrets front plates are removed |
| − | * | + | * Slightly worse turret rotation |
| − | * | + | * Guns still tends to bounce a bit at high speeds |
| − | * | + | * Ammunition exposed |
== History == | == History == | ||
| − | <!-- ''Describe the history of the creation and combat usage of the vehicle in more detail than in the introduction. If the historical reference turns out to be too | + | <!--''Describe the history of the creation and combat usage of the ground vehicle in more detail than in the introduction. If the historical reference turns out to be too big, take it to a separate article, taking a link to an article about the vehicle and adding a block "/ History" (example: <nowiki>https://wiki.warthunder.com/(Vehicle-name)/History</nowiki>) and add a link to it here using the <code>main</code> template. Be sure to reference text and sources by using <code><nowiki><ref></nowiki></code>, as well as adding them at the end of the article.''--> |
| − | + | Development of a Leopard 1 fitted with the 120mm L44 cannon began as a private venture of the Rheinmetall company, hoping that such a Leopard 1 variant would be of interest, not just to the German army due to logistical commonalities with the Leopard 2 and higher performance of the gun, but also to international customers seeking third generation MBT features on older machines. | |
| − | + | ||
| − | + | In the early 1980s, a Leopard 1A1A1 was modified with a thicker cast steel mantlet, suitable for mounting the Rheinmetall 120mm cannon, and additional interior changes to hold the respective ammunition. Further changes were applied in early 1985, with the installation of the EMES 18 fire control system from the Leopard 1A5. | |
| − | Development of a Leopard 1 fitted with the | ||
| − | + | Although there were several different prototypes based on Leopard 1 outfitted with the 120mm Rheinmetall cannon, none of them managed to justify a costly large scale upgrade effort of existing Leopard 1s. The upgrade was largely considered redundant due to the already more advanced Leopard 2 being in service. | |
| − | + | ''- From [https://warthunder.com/en/news/5724-development-leopard-1-with-the-rheinmetall-120mm-l44-en Devblog]'' | |
== Media == | == Media == | ||
| − | + | ''An excellent addition to the article will be video guides, as well as screenshots from the game and photos.'' | |
| − | + | == See also == | |
| + | ''Links to the articles on the War Thunder Wiki that you think will be useful for the reader, for example:'' | ||
| − | |||
| − | |||
| − | |||
| − | |||
| − | |||
| − | |||
| − | |||
* ''reference to the series of the vehicles;'' | * ''reference to the series of the vehicles;'' | ||
| − | * ''links to approximate analogues of other nations and research trees.'' | + | * ''links to approximate analogues of other nations and research trees.'' |
| − | |||
| − | |||
| − | |||
| − | |||
| − | |||
| − | |||
| − | |||
| − | |||
== External links == | == External links == | ||
| − | <!-- ''Paste links to sources and external resources, such as:'' | + | <!--''Paste links to sources and external resources, such as:'' |
* ''topic on the official game forum;'' | * ''topic on the official game forum;'' | ||
| − | * ''other literature.'' --> | + | * ''encyclopedia page on tank;'' |
| + | * ''other literature.''--> | ||
| − | * [ | + | * [https://warthunder.com/en/news/5724-development-leopard-1-with-the-rheinmetall-120mm-l44-en [Devblog<nowiki>]</nowiki> Leopard 1 with the Rheinmetall 120mm L44] |
{{Germany medium tanks}} | {{Germany medium tanks}} | ||
{{Germany premium ground vehicles}} | {{Germany premium ground vehicles}} | ||
| − | |||
Revision as of 13:27, 30 March 2019
Contents
| This page is about the medium tank Leopard A1A1 (L/44). For other uses, see Leopard (Disambiguation) |
Description
.jpg)
The Leopard A1A1 (L/44) is a gift rank VI German medium tank
with a battle rating of 9.3 (AB/RB/SB). It was introduced in Update 1.81 "The Valkyries".
General info
Survivability and armour
Players who have purchased the Leopard A1A1 L44 should be familiar with the armor of non-premium Leopard 1s. If not, the Leopard may not be what people expect a tank to be. It was developed before composite materials were discovered at a time where HEAT shells were so effective that in order for armour to be effective, it would be so thick that it would not be practical. Hence, the designers of Leopard 1s, knowing that there was no possible way of stopping HEAT rounds, removed the concept of armor. In essence, the Leopard A1A1 has no armor. The front hull, accounting slope, is only some 130mm thick. The turret and gun mantle is some 100mm depending on angle. BMP-2's auto-cannon, racked with APDS, will penetrate your turret and will cause major damage. Any HEAT projectile impacting the tank will likely result in instantly being destroyed. However, the engine block can at times reliably save the crew from HEAT shells. APDS and APFSDS are a different story. The armor on the Leopard A1A1 is so thin that most non-explosive-filled shells will seldom cause spalling upon penetrating the side of the tank. Frontal penetrations will cause much more damage, as the armor is just enough to cause spalling.
The ready rack ammo is stored vertically within your turret to the left side of the tank. So AP penetrations to the right side of your tank may not set off the ammo. But, 3/4 of your crew are sited in a single file on the right side. So a penetration will knock you out nonetheless. Try to take no more than 20 shells, as it will increase the likelihood of ammo cook-off. The point is not to get hit, because if anything hits you, it will go through, and it will cause damage.
In some cases, you could operate the tank backwards and use your engine block as shield, as most HEAT shells will be absorbed by your transmission, radiator and engine.
Mobility
The mobility of the Leopard A1A1 is between the XM-1 and T-55AM-1. Forward speed off road, expect some 40-50km/h. Reverse is about 15km/h off road. The neutral steering is absolutely amazing, you are able to swivel your tank easily. The suspensions are also great, very soft with great dampening effects, so expect a smooth drive.
Armaments
Main armament
The legendary 120mm Rheinmetall L44 cannon does not fall short of its name. You get access to only two types of shells, APFSDS and HEAT-FS. Although the APFSDS sounds like a decent option, it actually isn’t. Apart from the fact that it cost SL to use, it also isn't very good at destroying your greatest threats: BMPs. Most times, the APFSDS will fly right through lightly armored vehicles with its 390mm penetration. The HEAT-FS, on the other hand, will result in hull-breaks on lightly armored targets while also being free of cost. The 120 mm HEAT with its 650mm penetration is able hull-break Object 120s and 906s, and anything that's not a MBT. For example, you can hit the tracks of an anti-aircraft vehicle, and it will hull-break. As such, the HEAT-FS has some more favorable characteristics than the APFSDS, while also retaining the fast velocity of 1100m/s, so it is quite easy to aim.
Note that the "Stabilized" gun is only really stable when travelling under 30km/h.
Machine guns
The Leopard A1A1 (L/44) is armed with two MG 3A1s, which fires a 7.62 mm round. However, these are more of deterrents to helicopters, as the small caliber bullets will rarely cause critical damage to helicopters.
Usage in battles
Describe the tactics of playing in the vehicle, the features of using vehicles in the team and advice on tactics. Refrain from creating a "guide" - do not impose a single point of view but give the reader food for thought. Describe the most dangerous enemies and give recommendations on fighting them. If necessary, note the specifics of the game in different modes (AB, RB, SB).
Pros and cons
Pros:
- Good mobility
- Effective gun with well-performing HEATFS
- The reload speed hasn't changed despite its new 120mm cannon
- It has laser rangefinder
- despite the addition of bigger gun the mobility hasn't changed
- Good reverse speed
Cons:
- Armor is still the same and the turrets front plates are removed
- Slightly worse turret rotation
- Guns still tends to bounce a bit at high speeds
- Ammunition exposed
History
Development of a Leopard 1 fitted with the 120mm L44 cannon began as a private venture of the Rheinmetall company, hoping that such a Leopard 1 variant would be of interest, not just to the German army due to logistical commonalities with the Leopard 2 and higher performance of the gun, but also to international customers seeking third generation MBT features on older machines.
In the early 1980s, a Leopard 1A1A1 was modified with a thicker cast steel mantlet, suitable for mounting the Rheinmetall 120mm cannon, and additional interior changes to hold the respective ammunition. Further changes were applied in early 1985, with the installation of the EMES 18 fire control system from the Leopard 1A5.
Although there were several different prototypes based on Leopard 1 outfitted with the 120mm Rheinmetall cannon, none of them managed to justify a costly large scale upgrade effort of existing Leopard 1s. The upgrade was largely considered redundant due to the already more advanced Leopard 2 being in service.
- From Devblog
Media
An excellent addition to the article will be video guides, as well as screenshots from the game and photos.
See also
Links to the articles on the War Thunder Wiki that you think will be useful for the reader, for example:
- reference to the series of the vehicles;
- links to approximate analogues of other nations and research trees.
External links
| Germany medium tanks | |
|---|---|
| Pz.III | Pz.III B · Pz.III E · Pz.III F · Pz.III J · Pz.III J1 · Pz.III J1 TD · Pz.III L · Pz.III M · Pz.III N |
| Pz.IV | Pz.IV C · Pz.IV E · Pz.IV F1 · Pz.IV F2 · Pz.IV G · Pz.IV H · Pz.IV J · Pz.Bef.Wg.IV J |
| Pz.V | VK 3002 (M) · Panther A · Panther D · Panther F · Panther G · Ersatz M10 · Panther II |
| M48 upgrades | M48A2 G A2 · M48 Super |
| Leopard 1 | Leopard I · Leopard A1A1 · Leopard A1A1 (L/44) · Leopard 1A5 · C2A1 · Turm III |
| Leopard 2 | PT-16/T14 mod. · Leopard 2K · Leopard 2AV |
| Leopard 2A4 · Leopard 2 (PzBtl 123) · Leopard 2 PL · Leopard 2A5 · Leopard 2 PSO · Leopard 2A6 · Leopard 2A7V | |
| Trophies | ▀M4 748 (a) · ▀T 34 747 (r) |
| Other | Nb.Fz. · KPz-70 |
| USA | mKPz M47 G · M48A2 C |
| USSR | ◊T-72M1 |
| Germany premium ground vehicles | |
|---|---|
| Light tanks | Pz.II C (DAK) · Pz.Sfl.Ic · Pz.Sp.Wg.P204(f) KwK · Sd.Kfz. 140/1 · Sd.Kfz.234/1 · Ru 251 · SPz 12-3 LGS · TAM 2IP |
| Medium tanks | Nb.Fz. · Pz.III N · Pz.Bef.Wg.IV J · ▀M4 748 (a) · ▀T 34 747 (r) · Ersatz M10 |
| mKPz M47 G · Turm III · Leopard A1A1 (L/44) · Leopard 2 (PzBtl 123) | |
| Heavy tanks | ▀Pz.Kpfw. Churchill · ▀KV-IB · ▀KW I C 756 (r) · ▀KW II 754 (r) |
| VK 45.01 (P) · ␠Tiger · Pz.Bef.Wg.VI P · Tiger II (H) Sla.16 | |
| Tank destroyers | Sd.Kfz.234/3 · Sd.Kfz.234/4 · Sd.Kfz.251/10 · Sd.Kfz.251/22 · 15 cm Pz.W.42 |
| Brummbär · Panzer IV/70(A) · VFW · Bfw. Jagdpanther G1 · Elefant · 38 cm Sturmmörser | |
