Pz.III M
| This page is about the German medium tank Pz.III M. For other versions, see Panzer III (Family). |
Contents
Description
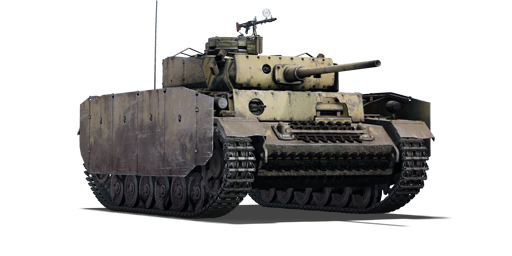
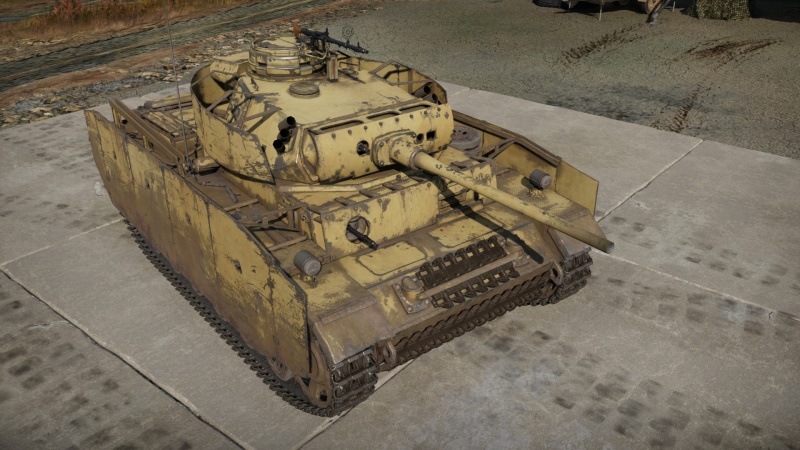
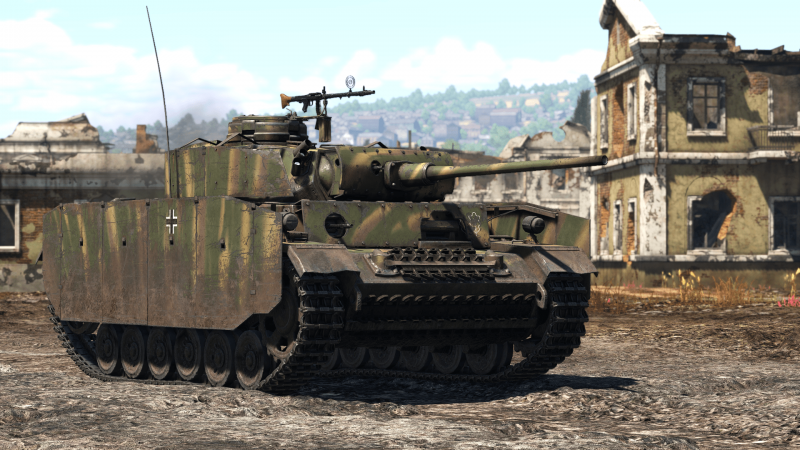
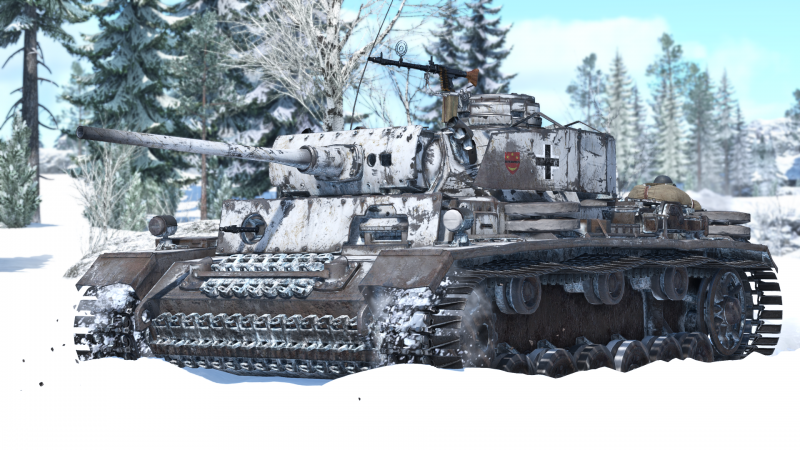
The Panzerkampfwagen III Ausführung M (Panzer III M) (Sd.Kfz. Index: Sd.Kfz. 141/1) is the eleventh variant of the Panzerkampfwagen III medium tank family (the "I" variant was skipped). In February 1942, orders for the Panzer III M were placed. They shared the same characteristics as the Panzer III L but were outfitted with deep-wading equipment. It was mounted with the same long-barrelled 50 mm Kampfwagenkanone (KwK) 39 L/60 tank gun. While the greater length of the barrel increased the 50 mm KwK 39 L/60 tank gun's velocity and penetration power over the previous 50 mm KwK38 L/42 tank gun, the introduction of the Soviet T-34 medium tanks and KV-1 heavy tanks quickly rendered it obsolete. With the arrival of the long-barrelled 75 mm KwK40 L/43 tank gun in the Panzer IV F2, the German Wehrmacht eventually decided to discontinue all future Panzer III manufacturing and redirect all resources to the development of more Panzer IVs. Beginning in May 1943, 5 mm side skirt armour panels known as Schürzen were installed on the hull side to prevent the Soviet 14.5 mm anti-tank rifle from penetrating the Panzer III's side armour. More plates were added to completely surround the turret, leaving only the front open for the main gun. Since the Panzer III M fought in the North African Campaign during fierce engagements with British forces, it has been painted in the distinctive Dunkelgelb yellow coat.
Introduced in the Closed Beta Test for Ground Forces before Update 1.41, the Panzer III M variant retains the overall characteristics of the earlier Panzer III L variant. The most visible changes are the integration of 5 mm Schürzen armour plates on both sides of the hull, as well as additional armour plates that completely surround the turret, leaving only the front open for the main gun. This layout is quite similar to the Panzer IV H variant of the Panzer IV medium tank family. It is the ultimate modification of the Panzer III medium tank, combining firepower, protection, and mobility. The enhanced protection will undoubtedly be appreciated by players, particularly against low-calibre tank guns from early opponent light tanks. However, when fighting against enemies of higher rank, the Panzer III M will suffer greatly, owing to the fact that the 50 mm KwK39 L/60 tank gun lacks the penetration required to engage enemies from a distance. Closing in on the adversary is frequently essential, yet doing so often allows the enemy to penetrate the Panzer III M more easily.
General info
Survivability and armour
Armour type:
- Rolled homogeneous armour
- Cast homogeneous armour (Gun barrel shroud, Cupola)
- High hardness rolled armour (Front spaced armour)
| Armour | Front | Sides | Rear | Roof |
|---|---|---|---|---|
| Hull | 50 + 20 mm (12°) Front plate 25 mm (85°), 50 mm (52°) Front glacis 50 mm (25°) Lower glacis |
30 + 5 mm | 50 mm | 15 mm |
| Turret | 57 mm + 20 mm Turret front 50 + 20 mm Gun mantlet |
30 + 5 mm | 30 mm | 10 mm |
| Cupola | 100 mm | 10 mm |
Notes:
- The tank has 50 mm of armour at the front of the hull and 57 on the turret front, but there is an additional 20 mm plate on the upper hull and at the front of the turret, increasing the effective armour to 70 mm and 77 mm respectively. When the armour is angled, this tank becomes very strong frontally.
- Side armour of the hull and turret are 30 mm and are protected by an extra 5 mm plate that protects from HEAT and HE rounds.
- The strong turret armour makes this tank powerful when hull-down, as many enemies will only be able to penetrate the cupola, only knocking out the commander. However, don't allow anyone to freely fire there, as some unlucky shot fired there can still occasionally cause severe damage.
- Suspension wheels are 15 mm thick while tracks are 20 mm thick.
- Side skirts are removed when the "Winterketten" modification is installed.
Mobility
| Game Mode | Max Speed (km/h) | Weight (tons) | Engine power (horsepower) | Power-to-weight ratio (hp/ton) | |||
|---|---|---|---|---|---|---|---|
| Forward | Reverse | Stock | Upgraded | Stock | Upgraded | ||
| Arcade | 60 | 12 | 23 | 465 | 572 | 20.22 | 24.87 |
| Realistic | 54 | 10 | 265 | 300 | 11.52 | 13.04 | |
Modifications and economy
Armaments
Main armament
| 50 mm KwK39 | Turret rotation speed (°/s) | Reloading rate (seconds) | |||||||||||
|---|---|---|---|---|---|---|---|---|---|---|---|---|---|
| Mode | Capacity | Vertical | Horizontal | Stabilizer | Stock | Upgraded | Full | Expert | Aced | Stock | Full | Expert | Aced |
| Arcade | 84 | -10°/+20° | ±180° | N/A | 13.3 | 18.4 | 22.4 | 24.8 | 26.4 | 4.81 | 4.25 | 3.92 | 3.70 |
| Realistic | 8.3 | 9.8 | 11.9 | 13.2 | 14.0 | ||||||||
Ammunition
- PzGr 39 - Armour Piercing Capped shell - This is the main ammo type; use it whenever it is possible to penetrate the target. It deals the most damage because of its explosive filler. It also offers the best penetration at very long range (over 1,500 m). Combat at this range is, however, not recommended.
- PzGr 40/1 - Armour Piercing Composite Rigid shell - This type of ammo should be used if the gun is having trouble penetrating the opponent, or trying to hit a fast-moving tank at some distance. However, its damaging potential is much lower because it has no explosive filler to further enhance damage after the penetration. It should be used only at close and medium ranges. PzGr 40 is better.
- PzGr 40 - Armour Piercing Composite Rigid shell - this variation of APCR is lighter, slightly faster and offers the best penetration. Use it against heavily armoured tanks like KV-1 (If unable to flank them). However, don't expect it to cause any real damage upon penetration. It's even worse than that of the PzGr 40/1. It basically only deals damage to modules/crew straight in its path. It is therefore almost useless to fire them at things like turret cupolas, as it will usually just fly right through them.
- Sprgr 38 - High Explosive ammo - Carry only very few of these. They are completely useless against anything other than unarmoured AA vehicles, to which it is lethal.
| Penetration statistics | |||||||
|---|---|---|---|---|---|---|---|
| Ammunition | Type of warhead |
Penetration @ 0° Angle of Attack (mm) | |||||
| 10 m | 100 m | 500 m | 1,000 m | 1,500 m | 2,000 m | ||
| PzGr 39 | APC | 106 | 101 | 83 | 65 | 50 | 39 |
| PzGr 40/1 | APCR | 130 | 121 | 90 | 62 | 43 | 29 |
| PzGr 40 | APCR | 137 | 126 | 88 | 56 | 36 | 23 |
| Sprgr. 38 | HE | 12 | 11 | 9 | 7 | 6 | 5 |
| Shell details | ||||||||||||
|---|---|---|---|---|---|---|---|---|---|---|---|---|
| Ammunition | Type of warhead |
Velocity (m/s) |
Projectile mass (kg) |
Fuse delay (m) |
Fuse sensitivity (mm) |
Explosive mass (TNT equivalent) (g) |
Ricochet | |||||
| 0% | 50% | 100% | ||||||||||
| PzGr 39 | APC | 835 | 2.05 | 1.2 | 9 | 28.9 | 48° | 63° | 71° | |||
| PzGr 40/1 | APCR | 1,130 | 1.07 | - | - | - | 66° | 70° | 72° | |||
| PzGr 40 | APCR | 1,180 | 0.9 | - | - | - | 66° | 70° | 72° | |||
| Sprgr. 38 | HE | 870 | 1.82 | 0.4 | 0.1 | 217.6 | 79° | 80° | 81° | |||
Ammo racks
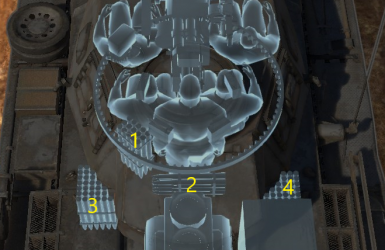
| Full ammo |
1st rack empty |
2nd rack empty |
3rd rack empty |
4th rack empty |
Visual discrepancy |
|---|---|---|---|---|---|
| 84 | 70 (+14) | 62 (+22) | 34 (+50) | 1 (+83) | No |
Note:
- Turret empty: 62 (+22) shells.
Machine guns
| 7.92 mm MG34 | ||||
|---|---|---|---|---|
| Mount | Capacity (Belt) | Fire rate | Vertical | Horizontal |
| Coaxial | 3,750 (150) | 900 | N/A | N/A |
| Pintle | 2,100 (150) | 900 | -10°/+25° | ±180° |
Usage in battles
The Panzer III M is a tank worth mastering. Try to play it like a standard battle tank, but only in a support role. Never fight on the front lines, as other tanks will be able to take advantage of the Panzer III's weaknesses. The tank's armour is far too weak for close counters engagements. With its surprisingly good gun penetration and good battle rating, it does fairly well with the tanks it is put up against. Feel free to carry plenty of shells; this Panzer has its ammunition stored in such a way where it will not get ammo racked too easily. After a while, any player will probably realise that after a few games they use a lot of shells with the fast firing 50 mm gun.
Always remember that the tank doesn't have the best gun around, but it has a good rate of fire to compensate and is still powerful enough against most threats (especially deadly at close/medium ranges). The Panzer III M may not always knock out the opponent in one blow, so try prioritizing on what to aim first. Here is a list of priority targets when attacking a (superior) enemy:
- Turret - The turret contains some vital crew members and modules. If a successful penetration is scored, it will most likely knock out the loader, gunner, and commander. A solid penetration on an enemy's turret will most likely knock out/damage the following modules: cannon breech, ammo rack, and the horizontal and vertical turret drives. By knocking out any of these crew members and modules with the first fired shot, it will greatly decrease the time it will take to destroy the enemy tank while minimizing its immediate threat.
- If the enemy hasn't been blown up yet, focus on shooting at the enemy's weak spots and known areas of vital/fragile modules (e.g. ammo rack, fuel tank, engine). The rear part of every tank is the most lightly armoured one, so focus fire there and maybe score a penetration to the engine block/transmission. Enemies without the "FPE" module installed will succumb to the flames.
- If the opponent is still alive after repeated attacks, the best thing to do is to get up close and personal. Try to analyze what damage has been done and alter the attack based on the modules/crew destroyed. However, never underestimate the enemy and always approach the enemy with caution, no matter how much damage has been inflicted. Get up close and personal and land shots wherever they can penetrate to do the most damage.
While the armour is something to take note of, this tank will perform best in flanking attacks. It has good penetration and fires fast enough to destroy an enemy tank quickly and efficiently. Stay close to the battlefield as this tank does not fare well in long range combat. The Panzer III M is best utilized as support or front line tank that can move quickly across the battlefield.
- Use the tank's mobility - The Pz.III M has a good gun, but don't let that encourage camping gameplay in one spot and wait for enemies to come over. Be proactive and move actively around the map; the tank is perfectly suited to perform this role. As mentioned above, applying flanking tactics is the most effective way to use this tank.
- Spaced armour and Schürzen - The Pz.III M may fool itself into believing that those 5 mm plates on the sides of the tank's hull and turret are useless and that they just add dead weight to the tank. This is simply untrue. Their main purpose is to absorb HEAT/HE shells and prematurely activate the fuse on some AP rounds. They are definitely a useful component to any tank.
- Angling the armour - Despite the fact that this vehicle has a sufficient armour thickness and spaced armour to protect itself from HEAT shells, the Pz.III M can always find itself in the situation when the tank is just too close to the enemy and armour thickness isn't an advantage anymore. Do not let the enemies take well-aimed shots; the weak spots around the machine gun ports and driver's viewport are tempting targets. In this case, it's best to angle the armour at around a 45-60 degree angle and start moving to maximize the effective armour thickness and increase chances of the enemy shell ricocheting. Try not to over-angle the hull; once the side armour loses the high angle advantage, anything can punch through.
- Cover the lower glacis - The Panzer III M has a very exposed lower glacis. Although mostly covered by attached spare tracks, if the tank takes a hit there, it will most likely result in a knocked out transmission, a fire burning, and an incapacitated driver. Thus, whenever possible, try to use natural cover like rocks and obstacles to protect the lower glacis from enemy attack.
- Carry as much ammo not as needed - That's right, if unsure of particular shooting skills, or just like to shoot at everything that moves, bring all the ammo. The ammo is stored in a relatively safe location in the lower part of the tank, so ammo rack hits are uncommon.
Always try to get the first shot off. With a clear shot, make sure to hit a vital point. For heavier tanks, aim for the gunner or turret ring, as they are fairly easy targets for this tank. Once the tank is disabled, start hitting "sweet spots" like the rest of the crew members. The 50 mm gun reloads quickly so this feat is easily achieved.
- The KV-1s, especially the heavily armoured KV-1 (ZiS-5) will be a problem! Their gun mantlets and certain areas on the hull can be penetrated, but take the time with the shot; if not, be expected to be spotted and be hit quickly! APCR shells are a viable option, but several shots are often required to destroy the enemy tank. It, on the other hand, usually only needs 1 or 2 shots to send the Panzer III back to the garage.
- T-34 is another problematic opponent to deal with, especially the later modifications. Their hull is basically invulnerable to the 50 mm gun, and weak spots on it and the turret are difficult to hit, especially when the vehicle is moving. Their gun is also lethal to most tanks.
- US M10 GMC and M4 Shermans are other tanks that should be avoided and flanked, rather than engaged directly. They often deploy "hull-down" tactics, covering their hulls behind terrain. Plus, their turret armour is very good.
- Lastly, from the German Side, always look out for their tank destroyers and Pz.IVs equipped with long 7.5cm guns (like Pz.IV F2 or Pz.IV G ). Their guns can easily punch through the Panzer III armour at any distance.
Pros and cons
Pros:
- Strong armour on frontal hull armour and turret against common opponents like T-34, M24
- Decent speed and manoeuvrability
- Decent firepower with high accuracy, deadly shells, fast reload, and great -10° gun depression
- Shells travel fast, making it easier to aim
- Side skirts help prevent damage from HEAT and HE shells (e.g. from SU-122, M4A3 (105))
- Small size makes it difficult to hit when on the move
- 100 mm thick commander's cupola eliminates this weak spot
- Access to smoke launchers, can conceal the tank if needed
Cons:
- Gun is unreliable when facing certain tanks frontally (e.g. KV-1) unless one aims for weak spots or uses PzGr40 shells (APCR)
- Gun is bad for long-range combat
- Has weak spots: lower plate, machine gun, and driver's viewport
- Weak side and rear armour, vulnerable against flankers
- Spaced armour won't resist powerful guns (e.g. M10)
- Flat armour reduces ricochet
History
Development
The Panzerkampfwagen III medium tank or the Panzer III was developed in the 1930s. Starting in early 1934, Heinz Guderian set down some specifications for a new tank, which Army Weapons Department took up to design the tank to weigh no more than 24,000 kg with a top speed of 35 km/h. This tank's role was to be the main tank of the German army and was expected to destroy opposing tanks, as opposed as a tank made to destroy anti-tank guns and opposing infantrymen, which the Panzer IV was created for.
Daimler-Benz, Krupp, MAN, and Rheinmetall produced prototypes meeting the specifications and the Daimler-Benz model was chosen after testing in 1936-1937. The Panzer III model used a leaf-spring suspension in its early models (Ausf. A - Ausf. D) before utilizing a six-wheeled torsion-bar suspension in the Ausf. E and beyond. The Panzer III had a crew of five people, the commander, gunner, loader, driver, and assistant driver. The best feature of the Panzer III during its introduction that is the most overlooked was the three-man turret, which was not as common at the time. This freed the commander to be able to effectively command the tank while maintaining situational awareness rather than be burdened by the role of a loader or gunner, improving the combat effectiveness of the tank. Despite this rather advanced design, the turret did not have a basket for the crew. It was a proven design and production began in May 1937. The total number of Panzer IIIs constructed in its production life was 5,774 units (excluding StuG III variant).
Specifications
The Panzer III Ausf. M has the 50 mm KwK39 as its main armament, giving it the firepower to go against the Allied tanks T-34s and M4 Shermans. The Panzer III Ausf. M still featured the armour from the Ausf. L, with 50 mm of hull armour and offset armour on the front of the hull and turret that are 20 mm effective. Aside from that, there was also the instalment of the Schürzen side armour skirts also being applied onto the Panzer IVs. These offset armour and Schürzen also apply as spaced armour due to not being attached to the hull or turret mantlet. The spaced armour on the front helped defend the tank against Soviet anti-tank rounds or HEAT rounds fired at it on those plates, as it dissipates the penetration power before striking the hull.
Combat usage
Despite its newer aspects compared to older Panzer IIIs, the prevalence of newer German tanks such as the Tiger I and Panther tanks, plus the establishment upgunned Panzer IVs made these more able to take on Allied tanks than the Panzer III. The Panzer III began slowly to be relegated to secondary roles such as training or anti-partisan activities. Nevertheless, the Panzer IIIs proved a versatile armoured platform in German service, as even though it was obsolete in late 1941, it was constantly upgraded with better guns, better protection, or modified completely to fit a different role more efficiently than its original. Even when phased out of service, its chassis was used as the basis of Germany's most lethal tank destroyer, the StuG III.
The Panzer III, after being relegated as secondary roles, was made into an infantry support tank with the Panzer III Ausf. N variant, which featured the 75 mm KwK37 howitzer originally equipped in the first few Panzer IV models.
| Archive of the in-game description | |
|---|---|
|
This new tank was actually the Ausf. L variant, adapted to handle water obstacles up to a depth of 1.4 m without requiring additional preparation. This was achieved by sealing all of the hatches, installing additional covers over the engine and ventilation air intakes, and installing a muffler high above the ground and equipped with a valve. The tank's length reached a total of 6,410 mm, including its cannon. The escape hatches in the side of the tank's hull were removed. This allowed the tank to carry 98 shells instead of the earlier 84. The smoke generators in the tank's rear were replaced with six mortars for launching 90 mm NbK smoke grenades. Almost all of the tanks of this variant were equipped with 5 mm Schürzen side skirts, increasing the width of the tank to 3,100 mm. 1,000 of the tanks were ordered initially, but this order was soon reduced to 775 tanks, since the Pz.Kpfw. IV surpassed the Pz.Kpfw. III in some ways. By the end of its production, which ran from October 1942 to February 1943, only 250 of this variant had actually been produced. The remaining tanks were converted to StuG III vehicles and flame tanks. Tanks of this variant were used en masse in the summer of 1943, during the fighting in the Kursk Bulge area. At that time, about 60% of the German tanks on the Eastern Front were of this variant. After suffering heavy losses, the remaining tanks were converted into command vehicles, flame tanks, or self-propelled StuG III anti-aircraft guns. | |
Media
- Skins
- Sights
- Videos
See also
Links to the articles on the War Thunder Wiki that you think will be useful for the reader, for example:
- reference to the series of the vehicles;
- links to approximate analogues of other nations and research trees.
External links
Paste links to sources and external resources, such as:
- topic on the official game forum;
- other literature.
| Germany medium tanks | |
|---|---|
| Pz.III | Pz.III B · Pz.III E · Pz.III F · Pz.III J · Pz.III J1 · Pz.III J1 TD · Pz.III L · Pz.III M · Pz.III N |
| Pz.IV | Pz.IV C · Pz.IV E · Pz.IV F1 · Pz.IV F2 · Pz.IV G · Pz.IV H · Pz.IV J · Pz.Bef.Wg.IV J |
| Pz.V | VK 3002 (M) · Panther A · Panther D · Panther F · Panther G · Ersatz M10 · Panther II |
| M48 upgrades | M48A2 G A2 · M48 Super |
| Leopard 1 | Leopard I · Leopard A1A1 · Leopard A1A1 (L/44) · Leopard 1A5 · C2A1 · Turm III |
| Leopard 2 | PT-16/T14 mod. · Leopard 2K · Leopard 2AV |
| Leopard 2A4 · Leopard 2 (PzBtl 123) · Leopard 2A4M · Leopard 2 PL · Leopard 2A5 · Leopard 2 PSO · Leopard 2A6 · Leopard 2A7V | |
| Trophies | ▀M4 748 (a) · ▀T 34 747 (r) |
| Other | Nb.Fz. · KPz-70 |
| USA | mKPz M47 G · M48A2 C |
| USSR | ◊T-72M1 |


