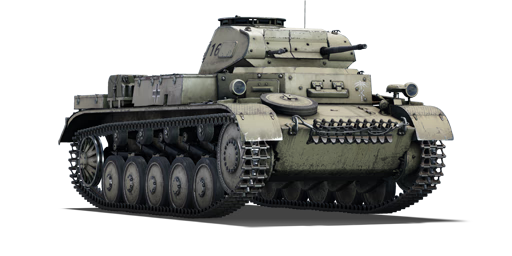
Pz.II C (DAK)

From War Thunder Wiki
Jump to: navigation, search
Rank 6 USA
F-5C Pack
This page is about the German light tank Pz.II C (DAK). For other versions, see Pz.II (Disambiguation).
Pz.II C (DAK)
germ_pzkpfw_ii_ausf_c_dak.png
GarageImage Pz.II C (DAK).jpg
ArtImage Pz.II C (DAK).png
Pz.II C (DAK)
AB RB SB
1.7 1.3 1.3
Purchase:250 Specs-Card-Eagle.png
Show in game

Description

The Panzerkampfwagen II Ausführung C Deutsches Afrikakorps (Panzer II C DAK) (Sd.Kfz. Index: Sd.Kfz. 121) is a third variant of the Panzer II light tank family that was used by the Afrika Korps, a German expeditionary force in Africa during World War II's North African campaign. Initially sent as a defensive force to help Italy defend its African colonies, the formation fought in Africa under several names from March 1941 until its surrender in May 1943. Field Marshal Erwin Rommel was the unit's most well-known commander. On 11 January 1941, the Afrika Korps was founded, and on 11 February, one of Adolf Hitler's favourite generals, Erwin Rommel, was appointed commander. Originally, Hans von Funck was supposed to lead it, but Hitler despised von Funck since he had been Werner von Fritsch's personal staff officer until von Fritsch was fired in 1938. Except for minor differences, the Panzer II C (DAK) is fairly similar to the standard Panzer II C variant. The Panzer II C (DAK) primarily operated in the desert with the 2nd Battalion, 5th Panzer Regiment, 21st Division. The cooling air intake and exhaust apertures were expanded in these tanks, and the radiator fan was replaced with a high-performance version to cope with the intense desert temperatures. In 1942, four poles were installed around the turret cupola to serve as a base for a Fla-MG anti-aircraft machine gun.

Introduced in the Closed Beta Test for Ground Forces before Update 1.41, the premium Panzer II C (DAK) is a unique historical vehicle that is identical in performance to the standard Panzer II C variant. It is painted in desert camouflage to reflect its involvement in the North African campaign. Despite the modifications made to the Panzer C (DAK) during its service, they are not actively portrayed in the game. In general, the Panzer II C (DAK) is a dangerous light tank in the hands of an experienced player. As most enemy tanks in the early ranks are rather weakly armoured, the Panzer II C (DAK) may unleash a barrage of armour-piercing shells with the Kampfwagenkanone (KwK) 30 L/55 20 mm autocannon, crippling most opponent tanks with a single ammunition clip. The Panzer II C (DAK) could be acquired for free during the 2017 "German Unity Day" event.

General info

Survivability and armour

Armourfront / side / back
Hull20 / 14 / 14
Turret14 / 14 / 14
Crew3 people
Visibility69 %

The Pz.II C has (on the surface) decent frontal armour, with 35 mm for the front plate with a section of heavily sloped 30 mm armour on the glacis, then a sloped lower glacis that has 35 mm as well. The side, rear, and hull roof armour are a paltry 15 mm, including the turret sides. The front turret face is 30 mm that do not overlap with the 30 mm thick gun mantlet well so it will be rare, if not impossible, for a chance at relying on a 60 mm overlapping area to deflect rounds.

Generally speaking, the Pz.II C does not have enough armour to defend itself unless fighting from an extreme range (which most early-ranked tanks can't reasonably do well), facing SPAA vehicles that are only using high-explosive shells or facing against some early-ranked French tanks.

Put shortly - do everything to ensure that the Pz.II C does not get hit, because even one well placed shot in the crew compartment will likely knock the Pz.II C out.

Armour type:

  • Rolled homogeneous armour
Armour Front (Slope angle) Sides Rear Roof
Hull 20 + 14.5 mm (6°) Upper plate
14.5 mm (74°) Upper glacis
20 mm (33°) Lower glacis
14.5 mm 14.5 mm (6°) Upper plates
10 mm (61°) Lower glacis
14.5 mm (16°) Front glacis
15 mm Crew compartment
14.5 mm Rear
10 mm (9°) Engine access panel
5 mm Vents
Turret 20 + 14.5 mm (cylindrical) Turret front
14.5 + 14.5 mm (cylindrical) Gun mantlet
14.5 mm (21°) 15 mm (24°) 10 mm (15°) Front
10 mm Rear
Cupola 15 mm (cylindrical) 10 mm

Notes:

  • Suspension wheels and torsion bars are 10 mm thick while tracks are 15 mm thick.
  • Mudguards are 4 mm thick.
  • Belly armour is 5 mm thick.

Mobility

Speedforward / back
AB49 / 10 km/h
RB and SB44 / 9 km/h
Number of gears6 forward
1 back
Weight9.1 t
Engine power
AB267 hp
RB and SB140 hp
Power-to-weight ratio
AB29.3 hp/t
RB and SB15.4 hp/t
Game Mode Max Speed (km/h) Weight (tons) Engine power (horsepower) Power-to-weight ratio (hp/ton)
Forward Reverse Stock Upgraded Stock Upgraded
Arcade 49 10 9.1 217 267 23.85 29.34
Realistic 44 9 124 140 13.63 15.38

Mobility-wise, the Pz.II C is actually better than most of its peers, but the BT series tanks and M3 Stuarts will still outpace it quite easily. Regardless, the Pz.II C can get around the battlefield quite respectably, and the vehicle's power-to-weight ratio makes it easy to go up steep inclines than larger, heavier vehicles. However, the Pz.II C is not going to outrun a pursuing enemy team, so locating good cover is immensely useful for its survival.

Modifications and economy

Repair cost
AB328 Sl icon.png
RB174 Sl icon.png
SB74 Sl icon.png
Total cost of modifications4 620 Rp icon.png
465 Sl icon.png
Crew training150 Sl icon.png
Experts1 000 Sl icon.png
Aces20 Ge icon.png
Research Aces145 000 Rp icon.png
Reward for battleAB / RB / SB
Talisman.png 2 × 20 / 20 / 20 % Sl icon.png
Talisman.png 2 × 75 / 75 / 75 % Rp icon.png
Modifications
Mobility Protection Firepower
Mods new tank traks.png
Tracks
Research:
600 Rp icon.png
Cost:
60 Sl icon.png
60 Ge icon.png
Mods new tank suspension.png
Suspension
Mods new tank break.png
Brake System
Research:
410 Rp icon.png
Cost:
40 Sl icon.png
40 Ge icon.png
Mods new tank filter.png
Filters
Mods new tank transmission.png
Transmission
Mods new tank engine.png
Engine
Mods tank tool kit.png
Improved Parts
Mods extinguisher.png
Improved FPE
Mods tank reinforcement ger.png
Crew Replenishment
Mods new tank horizontal aiming.png
Horizontal Drive
Research:
600 Rp icon.png
Cost:
60 Sl icon.png
60 Ge icon.png
Mods tank cannon.png
Adjustment of Fire
Research:
410 Rp icon.png
Cost:
40 Sl icon.png
40 Ge icon.png
Mods tank ammo.png
20mm_kwk_30_AP_ammo_pack
Research:
410 Rp icon.png
Cost:
40 Sl icon.png
40 Ge icon.png
Mods new tank vertical aiming.png
Elevation Mechanism
Research:
750 Rp icon.png
Cost:
75 Sl icon.png
75 Ge icon.png
Mods art support.png
Artillery Support
Research:
720 Rp icon.png
Cost:
75 Sl icon.png
70 Ge icon.png
Mods tank ammo.png
20mm_kwk_30_APCR_ammo_pack
Research:
720 Rp icon.png
Cost:
75 Sl icon.png
70 Ge icon.png

Armaments

Main armament

Shoulder stabilizer
Reduces the swing of the gun in one plane while moving
Ammunition180 rounds
Belt capacity10 rounds
Reloadbasic crew → aces
7.8 → 6.0 s
Fire rate280 shots/min
Vertical guidance-9° / 20°
Main article: KwK30 (20 mm)

The main armament of the Pz.II C is the 20 mm KwK30 automatic cannon. With the ability to access HVAP capable of penetrating 48 mm at point blank range, combined with its magazine-loaded rapid fire, the 20 mm can puncture through most enemy armour at this battle rating range like it is fabric.

The biggest problem with the 20 mm autocannon is the 10 round magazines combined with a 7.8 s stock reload time, meaning that the tank may successfully take out two or three enemy tanks with controlled bursts, but is likely to be taken out during the reload. Another problem to consider is in the powerful HVAP ammunition, in that its impressive penetration statistics can make the gun reach out to about 200-300 m, but the penetrative power drops off rapidly after that due to velocity drop, even more so than the standard PzGr round.

20 mm KwK30 Turret rotation speed (°/s) Reloading rate (seconds)
Mode Capacity (Belt) Fire rate Vertical Horizontal Stabilizer Stock Upgraded Full Expert Aced Stock Full Expert Aced
Arcade 180 (10) 280 -9°/+20° ±180° Vertical 13.33 18.45 22.40 24.77 26.35 7.80 6.90 6.36 6.00
Realistic 8.33 9.80 11.90 13.16 14.00

Ammunition

  • Default: API-T · HEFI-T* - The belt composition means that 50% of the shells (HEFI-T*) are useless against tanks. However, this belt is reliable against open-topped or thin-skinned vehicles like SPAA vehicles. Since there are no dedicated high-explosive shells for the selection, having one belt of this in reserve does not hurt for those situations.
  • PzGr: API-T - This belt offers a good transition from the Default to the PzGr 40 belt. The round offers decent damage against lightly armoured tanks, especially at close range. Due to lack of high-explosive filler, however, it is better to focus on the PzGr 40 belt to maximize penetration power.
  • PzGr 40: HVAP-T - Probably the best belt with the best penetrating shell for the vehicle. While the damage effects post-penetration can be quite poor, the rapid fire from the autocannon can mitigate this problem by following up quickly with another penetrating shot. In close combat, these shells should be used against modules and crew member to make the most of each shell. Against angled armour, however, the HVAP ammo may not be very effective. Unlike the Flakpanzer 1 and Flakpanzer 38, this belt is still 100% HVAP.

Penetration statistics
Ammunition Penetration @ 0° Angle of Attack (mm)
10 m 100 m 500 m 1,000 m 1,500 m 2,000 m
HEFI-T* 5 4 3 2 2 2
API-T 37 34 23 14 9 6
HVAP-T 48 45 31 20 13 8
Shell details
Ammunition Velocity
(m/s)
Projectile
mass (kg)
Fuse delay
(m)
Fuse sensitivity
(mm)
Explosive mass
(TNT equivalent) (g)
Ricochet
0% 50% 100%
HEFI-T* 900 0.12 0.1 0.1 10.2 79° 80° 81°
API-T 800 0.15 - - - 47° 60° 65°
HVAP-T 1,050 0.1 - - - 66° 70° 72°

Ammo racks

Ammo racks of the Pz.II C (DAK)
Full
ammo
1st
rack empty
2nd
rack empty
3rd
rack empty
Visual
discrepancy
18 11 (+7) (+11) (+17) No

Notes:

  • Ammunition is modeled as 18 magazines of 10 rounds.
  • Racks disappear after you've fired all magazines in the rack.
  • Right flank empty: 11 (+7) magazines.

Machine guns

Ammunition1 800 rounds
Belt capacity150 rounds
Reloadbasic crew → aces
10.4 → 8.0 s
Fire rate900 shots/min
Main article: MG34 (7.92 mm)

Mounted opposite to the 20 mm autocannon is the MG 34, which is loaded with a 50-round belt with an AP-I/AP-I/AP-T ammo pattern. With 13 mm of maximum penetration at point blank range, this MG's high rate of fire will make short work of unarmoured vehicles like truck-based SPAA, as well as exposed enemy crewmen.

7.92 mm MG34
Mount Capacity (Belt) Fire rate Vertical Horizontal
Coaxial 1,800 (150) 900 N/A N/A

Usage in battles

The main key to success with this vehicle is to drive aggressively, trying to get shots at relatively close range (100-300 m or even less). Aiming for the enemy's weak spots, it is often possible to set your opponent on fire, allowing the Pz.II to take on vehicles beyond its battle rating.

Where possible, try to use the terrain to remain hull down. Even the smallest undulations are quite often enough to mask your hull, allowing you to take quick shots with minimal risk. However closing the distance quickly with your opponent is really the only way to reliably destroy the enemy, as your armour is not enough to bounce a shot in a close-quarters fight.

Alternatively, the Pz.II C can be played as a support vehicle, a second line tank, to say the least, to assist more armoured allies when pushing the cap. Use short bursts (2-4 rounds ideally) to disable enemy vehicles by targeting weak points like their transmission or turret crew, then use the remaining ammo to take out the rest of the enemy crew, or let friendly tankers take them out for assists. The Pz.II C lacks the mobility to disengage and run from tanks like the M3 Stuarts or BT series tanks, but if their transmission, driver, or tracks are taken out, they will be temporarily immobilized and the Pz.II C player has bought themselves time to scurry back to friendly lines, where more powerful guns and numbers can be brought to counter the enemy.

Also, as a light tank with decent speed and low profile, the Pz.II C can act as a spotter (unfortunately without the use of the scout mechanics) to locate enemy tanks for allies to prioritize and hit with guns, artillery, or airstrikes.

The biggest threat to the Pz.II C on the battlefield are tanks that have very good armour and firepower at the expense of their mobility. The Valentine, FCM.36, and Matilda are examples of tanks that will easily deflect even 20 mm PzGr 40 shots, either due to their impressive frontal hull and turret armour, or just because they are so slow that the Pz.II C will engage them at ranges that render the shell penetration power ineffective. If one of these tanks are spotted trundling along in the distance, do not bother taking the shot because the 20 mm are unlikely able to do even cosmetic damages, while at the same time drawing their attention and revealing the Pz.II C's position due to the shell tracers.

Generally speaking, if the target is about the size of a coin when looking at it on max zoom in the gunner's sight, it is too far for effective fire and should not be engaged.

A more advanced method of playing this is to use it like an autoloading gun from higher BRs - fire only one or two shots per click at a given time. This helps avoid spraying uselessly at bigger, more stubborn targets.

Pros and cons

Pros:

  • Decent frontal armour: when angled it can be immune to common opponents like the BT-5, BT-7, M3A1 and A13
  • Overall superior firepower: autocannon shoots rapidly, resulting in denser fire, and with the PzGr 40 belt it can penetrate any tank, including the B1 bis when aiming correctly
  • Fast top speed and good agility makes it a great flanker, it can easily out-manoeuvre slower tanks like T-26 or H.35
  • Curved turret armour of 30 mm plus -10 degrees gun depression allows it to hull-down on hills easily
  • Small width means it can manoeuvre through or hide in narrow passages in urban maps, allowing it to ambush or flank unexpectedly
  • Low profile makes it easy to hide behind bushes or cover
  • In Simulator mode, friendly fire is less likely due to the very distinct shape and profile
  • Shoulder stabilizer allows the Panzer to shoot while moving

Cons:

  • Only performs well at close quarters combat, as both the AP and HVAP penetration drop below 30 mm past 500 m, making it struggle to penetrate common opponents such as the M3/M5 Stuart and B1 bis
  • Magazine-loaded armament means there is lengthy downtime for reloading where you are vulnerable
  • Survivability is still inadequate: unsloped armour plus closely-packed crew of 3 means it is very vulnerable to T-26, BT-5 or M8 Scott which all have explosive AP
  • Although top speed is good, it is still slower than other light tanks like the infamous BT-5, M8 Greyhound and M3/M5

History

Development

In 1934, the development of the new German tanks, which would be the Panzer III and Panzer IV, was falling behind schedule despite an urgent need for tanks. As a stopgap solution until the designs was finalized, the Germany Army submitted a request for a new tank, giving the responsibility of designing to Krupp, MAN, Henschel, and Daimler-Benz.

The product was a design that is based off the German Panzer I light tank, but was larger with the addition of an extra bogie wheel and had a 20 mm autocannon as its main armament. The finished tank was designated the Panzer II and production was to start in 1935 but did not start delivering tanks until 18 months later. At this time, it was in a low rate production status by 1936 in the Panzer II Ausf. C variant. In the 1940s, the Panzer II was upgraded to the Panzer II Ausf. F, which entered into production in 1941 with increased armour and a torsion bar suspension system. A total of 524 Ausf. F were produced between March 1941 to December 1942.

The Panzer II Ausf. F had a 35 mm front armour and 20 mm side armour compared to the 14 mm all-around armour on the Ausf. C. The 20 mm autocannon on the turret was the same, based off the 20 mm FlaK 30 then in use with a rate of fire of 600 rpm from a 10-round magazine. The tank also came with a coaxial machine gun as well. The turret was hand cranked by the commander, who doubled as the gunner of the tanks. The crew of the Panzer II consist of three people, the driver, commander, and loader who doubled as a radio operator. The Panzer II Ausf. C could reach a speed of 53 km/h (33 mph) with its torsion-bar suspension

Combat usage

The Panzer II would serve in the initial stages of World War II in the Battle of Poland, France, and Operation Barbarossa as Germany's most numerous tank (By May 1940, there were about a thousand Panzer Is and IIs, but only 381 Panzer III and 290 Panzer IVs). The Panzer II also saw service in the German Afrika Korps (Deutsches Afrikakorps, "DAK") during the Northern Africa campaign. By 1941, it was clear that the Panzer II was starting to become obsolete, and with the increasing quantity of Panzer IIIs and IVs, the Panzer II was relegated to reconnaissance duties when going against the Allies.

Despite the up-armouring in the different Panzer II variants, the Panzer II could still be penetrated by the most towed anti-tank weapon in service at the time, leaving the crew at risk to enemy fire. By 1942, it was largely removed from front lines and production ceased by 1943. The turrets of these obsolete tanks were used as gun turrets on defensive bunkers on the Atlantic Wall, and the chassis stayed in use for other purposes, such as a self-propelled gun and tank destroyer in the Wespe and Marder II respectively.


Archive of the in-game description

Some of the Pz.Kpfw IIs were sent to Africa, where they were used by the German Afrika Korps (DAK). In Africa they were given secondary tasks such as guard duty and scouting. The tank is shown with desert camouflage and the famous symbol of the African Corps, the palm tree.


Media

Skins
Sights
Images

See also

Related development
  • Pz.II C - The equivalent tech tree variant
  • Pz.II F - A later Panzer II variant
Other vehicles of similar configuration and role

External links


Germany light tanks
Pz.II  Pz.II C · Pz.II C (DAK) · Pz.II C TD · Pz.II F · Pz.Sfl.Ic
Sd.Kfz.234  Sd.Kfz.234/1 · Sd.Kfz.234/2 · Sd.Kfz.234/2 TD
Marder  Marder A1- · Marder 1A3 · Begleitpanzer 57 · DF105
  PUMA
Wheeled  Sd.Kfz.221 (s.Pz.B.41) · Class 3 (P) · Radkampfwagen 90
Other  Ru 251 · SPz 12-3 LGS
Argentina  TAM · TAM 2C · TAM 2IP · JaPz.K A2
Czechoslovakia  Pz.35(t) · Pz.38(t) A · Pz.38(t) F · Pz.38(t) n.A. · Sd.Kfz. 140/1
France  Pz.Sp.Wg.P204(f) KwK
Lithuania  Vilkas
USA  leKPz M41
USSR  SPz BMP-1

Germany premium ground vehicles
Light tanks  Pz.II C (DAK) · Pz.Sfl.Ic · Pz.Sp.Wg.P204(f) KwK · Sd.Kfz. 140/1 · Sd.Kfz.234/1 · Ru 251 · SPz 12-3 LGS · TAM 2IP
Medium tanks  Nb.Fz. · Pz.III N · Pz.Bef.Wg.IV J · ▀M4 748 (a) · ▀T 34 747 (r) · Ersatz M10
  mKPz M47 G · Turm III · Leopard A1A1 (L/44) · Leopard 2 (PzBtl 123)
Heavy tanks  ▀Pz.Kpfw. Churchill · ▀KV-IB · ▀KW I C 756 (r) · ▀KW II 754 (r)
  VK 45.01 (P) · ␠Tiger · Pz.Bef.Wg.VI P · Tiger II (H) Sla.16
Tank destroyers  Sd.Kfz.234/3 · Sd.Kfz.234/4 · Sd.Kfz.251/10 · Sd.Kfz.251/22 · 15 cm Pz.W.42
  Brummbär · Panzer IV/70(A) · VFW · Bfw. Jagdpanther G1 · Elefant · 38 cm Sturmmörser