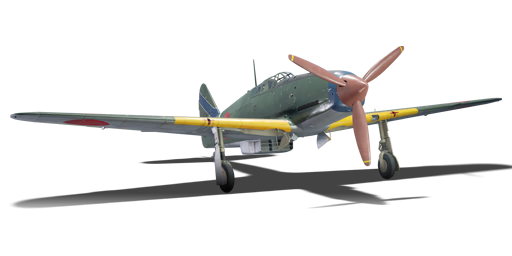
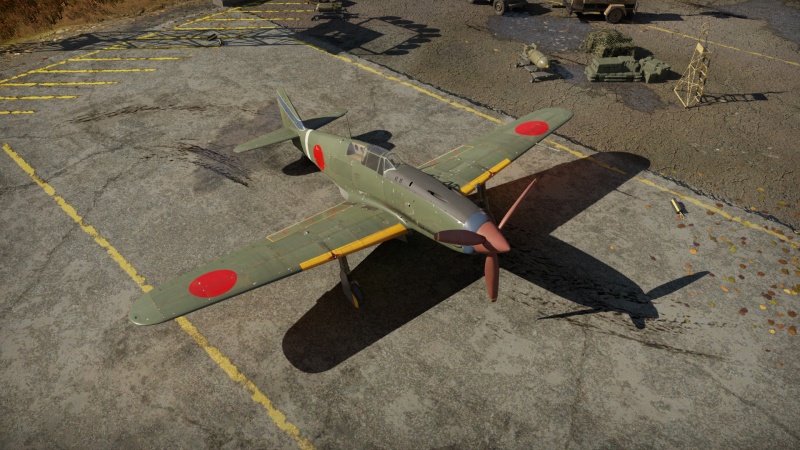
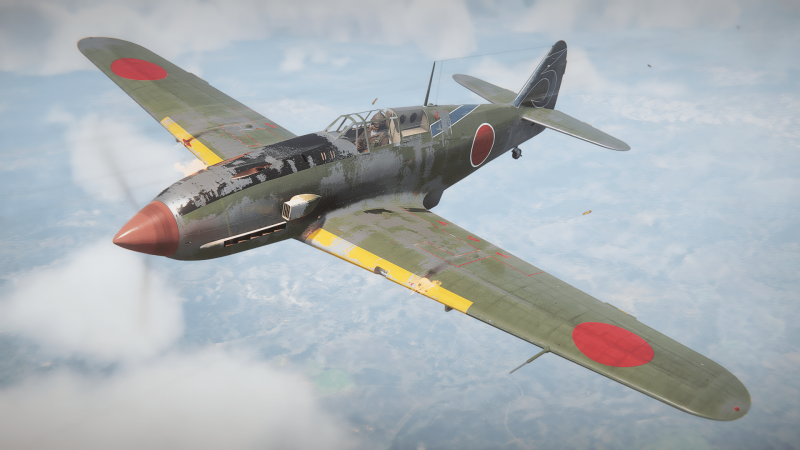
Ki-61-II Otsu Kai
| This page is about the Japanese fighter Ki-61-II Otsu Kai. For other versions, see Ki-61 (Family). |
Contents
Description
The Ki-61-II Otsu Kai is a rank III Japanese fighter with a battle rating of 4.7 (AB/RB/SB). It was introduced in Update 1.59 "Flaming Arrows".
General info
Flight performance
| Characteristics | Max Speed (km/h at 6,000 m) |
Max altitude (metres) |
Turn time (seconds) |
Rate of climb (metres/second) |
Take-off run (metres) | |||
|---|---|---|---|---|---|---|---|---|
| AB | RB | AB | RB | AB | RB | |||
| Stock | 605 | 587 | 11000 | 21.1 | 21.7 | 9.9 | 9.9 | 550 |
| Upgraded | 649 | 625 | 19.2 | 20.0 | 16.4 | 12.8 | ||
Details
| Features | ||||
|---|---|---|---|---|
| Combat flaps | Take-off flaps | Landing flaps | Air brakes | Arrestor gear |
| ✓ | ✓ | ✓ | X | X |
| Limits | ||||||
|---|---|---|---|---|---|---|
| Wings (km/h) | Gear (km/h) | Flaps (km/h) | Max Static G | |||
| Combat | Take-off | Landing | + | - | ||
| 850 | 330 | 292 | 282 | 230 | ~13 | ~6 |
| Optimal velocities (km/h) | |||
|---|---|---|---|
| Ailerons | Rudder | Elevators | Radiator |
| < 360 | < 350 | < 460 | > 323 |
Survivability and armour
There is limited armour for the pilot, but only from the rear. The engine and part of the liquid cooling system is located in the nose, and the fuel tanks and part of the liquid cooling system are located beneath the pilot's seat and in the wing roots. The factors make the pilot very exposed except for the armour protection behind the pilot's seat. The modules are all very exposed as well. Overall, the protection can not be relied upon from any direction.
- 13 mm - Behind pilot's seat
- Self-sealing fuel tanks
Modifications and economy
Armaments
Offensive armament
The Ki-61-II Otsu Kai is armed with:
- 2 x 20 mm Ho-5 cannons, nose-mounted (200 rpg = 400 total)
- 2 x 12.7 mm Ho-103 machine guns, wing-mounted (250 rpg = 500 total)
Suspended armament
The Ki-61-II Otsu Kai can be outfitted with the following ordnance:
- Without load
- 2 x 50 kg Army Type 94 GPHE bombs (100 kg total)
- 2 x 100 kg Army Type 94 GPHE bombs (200 kg total)
- 2 x 250 kg Army Type 92 GPHE bombs (500 kg total)
Usage in battles
Describe the tactics of playing in the aircraft, the features of using aircraft in a team and advice on tactics. Refrain from creating a "guide" - do not impose a single point of view, but instead, give the reader food for thought. Examine the most dangerous enemies and give recommendations on fighting them. If necessary, note the specifics of the game in different modes (AB, RB, SB).
Simulator
In Sim, the Ki-61 can be used in BnZ fighting, turn fighting, intercepting and some ground pounding. The Ki-61 is overall a pretty friendly plane to fly. It is quite fast, handles nicely at all speeds, has decent visibility especially over the nose, climbs great and has good armament. However its main disadvantage is the weak protection.
Before taking off, bring at least 30 minutes of fuel for longer patrol time. If you are not using MEC, use around 95% throttle when cruising below 3,000 m since the engine will slowly heat up at full throttle. But full throttle is fine at higher altitudes.
Only elevator trim is available, so when the stick is at its deadzone, the Ki-61 will roll and yaw to the left side. Therefore you always need to pull the stick to the right which can get a bit annoying. Usually, a trim of around -7% is enough. But when carrying the 2 x 250 kg bombload, no negative trim is needed.
For dogfighting, it is always safer to enter with an altitude advantage. Most dogfights in sim happen below 3,000 m so the Ki-61 can easily climb up to that altitude. As mentioned in the description, its climb rate is actually great, don't get misled by the stat card. Once at an advantageous height, boom & zoom the enemies. The Ki-61 can easily accelerate to more than 550 km/h in a dive which is decently fast but requires more precise manoeuvres to get the correct lead, since the faster you go the smaller the shooting window is. A successful pass will usually cripple the enemy. Aside from BnZ, the Ki-61 is also excellent at turn fighting - with the appropriate opponent, of course. Except a few dedicated turn fighters, the Ki-61 can out-turn and get on most opponents' tail with combat flaps deployed. Note: do not turn with Spitfires or Zeros, you will never out-turn them. If you see a plane with a streamlined inline engine and large, elliptical wings (Spitfire) or something with rounded wingtips and stabiliser tips, a radial engine and a pointy tail (A6M), try some defensive manoeuvres like barrel rolls or disengage by diving towards a nearby friendly airfield. Note that the Ki-61's roll rate is very average so avoid manoeuvres like scissors.
When intercepting planes, it is crucial to know what the target is, because most targets can easily damage you in return. If it is a bomber/attacker with decent defensive firepower or great turret coverage then you might want to disengage after some attempts if you don't want to die. From the hard-hitting M2 Browning to the fast-firing MG 15, any gun can critically damage the Ki-61 especially on the engine, fuel tanks, and pilot which can always lead to a later crash. Before attacking try to get an altitude advantage and perform deflection shots. To maximise the damage it is better to aim for their wings and engines, as the fuselage usually soaks up quite some bullets. Only fire when the bomber passes in front of your guns. This short window might seem inadequate to do anything, but the 2 x 20 mm & 2 x 12.7 mm armament can easily down a bomber with 1-3 passes. Do not follow behind a bomber's 6 unless you are sure that its tail gunners are unconscious. Chasing behind a bomber makes yourself pretty much stationary for the tail gunners, and you will be showered with bullets.
For ground pounding, the best loadout is the 2 x 250 kg bombs. With an extra 500 kg of weight attached outside, the Ki-61 handles much clumsier during take offs, especially on the roll axis. Longer distance is needed before lifting off. Dive at a shallow angle to approach the target, try to get as close as possible but avoid crashing into the ground. When the target fills up about 1/3 in the gunsight and the gunsight slices just above the target, drop the bombs and immediately pull up. It is best to set separate keybinds for firing MG and cannons as wasting precious cannon rounds can be fatal. The 2 MGs perform well in killing trucks, AA guns and artilleries as they have plenty of ammo. However, constantly watch your surrounding, especially your high 6 for any incoming enemies.
Enemies worth noting:
- Me 264 - This giant is one of the few bombers who get air spawns in Sim, so it usually flies higher than you think. On top of this, the Me 264 is armed with large calibre MG and cannons all over it, therefore tailing a 264 is basically suicide unless all of their gunners are knocked out. You can treat the 264 almost like a B-29 or B-17 as they are very similar in both design and defensive capabilities. It is best to head-on the 264 if you can as you can easily knock out the pilots due to its glazed nose while also taking minimal damage. However the bomber lacks a ventral turret on its belly, making it easy to deal damage from below, but be wary of the downwards facing rear 20 mm cannon near the tail. The safest way to attack is from a higher altitude, dive at an oblique angle and focus fire on the wings and nose. Never engage if you have no altitude advantage.
- B-17, Ju 88, IL-2, etc. - These aircraft have either powerful defensive guns, for example the B-17, or wide gun coverage such as the Ju 88. The most threatening one, the B-17, is fairly easy to distinguish. It has a passenger plane-like fuselage, 4 radial engines extending forwards from the wings and a huge tail fin. Focus your fire on the engines and constantly swing sideways to avoid getting hit. A few hits from the M2 Browning is a guaranteed death. The Ju 88, on the other hand, has great underside gun coverage so attacking from below isn't a very good option. Try engaging from the sides and concentrate the fire on the front half of it, as that is where all the vital components are located. Again, engaging any of these with no altitude advantage is not recommended.
- A6M, Spitfire, etc. - If you see them on your tail try outrunning them by diving at around -40 degrees. The Ki-61 still remains responsive handling at 600 km/h, but its speed retention is not the best, meaning it will start to lose speed quickly and the enemy might catch up. If you are near a friendly airfield, great. If not, then hope for the best and run towards the friendly side. Don't forget to pitch up and down a little to mess up their aim, the early Spitfires and A6M only have a 60-round drum per cannon which will run out fairly fast. The leftover 7.7 mm machine guns will not be as destructive.
Manual Engine Control
| MEC elements | ||||||
|---|---|---|---|---|---|---|
| Mixer | Pitch | Radiator | Supercharger | Turbocharger | ||
| Oil | Water | Type | ||||
| Not controllable | Controllable Not auto controlled |
Controllable Not auto controlled |
Controllable Not auto controlled |
Separate | Not controllable 1 gear |
Not controllable |
Pros and cons
Pros:
- Good turn
- Good energy retention when manoeuvring
- Lower wing loading than its Allied opponents, allowing smart use of vertical manoeuvres at medium altitude
- Easy to learn MEC with
- Can reach >500km/h IAS at sea level and with good use of MEC
- Near-infinite WEP with MEC
- Quite average in all aspects as a fighter
Cons:
- Doesn't climb very fast
- Overheats quickly without MEC
- Ailerons compress seriously above 550km/h
- Faces many superior planes in an uptier - weaknesses of the enemies must be exploited to defeat them
History
Describe the history of the creation and combat usage of the aircraft in more detail than in the introduction. If the historical reference turns out to be too long, take it to a separate article, taking a link to the article about the vehicle and adding a block "/History" (example: https://wiki.warthunder.com/(Vehicle-name)/History) and add a link to it here using the main template. Be sure to reference text and sources by using <ref></ref>, as well as adding them at the end of the article with <references />. This section may also include the vehicle's dev blog entry (if applicable) and the in-game encyclopedia description (under === In-game description ===, also if applicable).
Media
- Skins
See also
Links to the articles on the War Thunder Wiki that you think will be useful for the reader, for example:
- reference to the series of the aircraft;
- links to approximate analogues of other nations and research trees.
External links
| Kawasaki Aircraft Industries (川崎航空機工業株式会社) | |
|---|---|
| Biplane Fighters | Ki-10-I · Ki-10-I C · Ki-10-II · Ki-10-II C |
| Fighters | Ki-61-I ko · Ki-61-I otsu · Ki-61-I hei · Tada's Ki-61-I hei · Ki-61-I tei · Ki-61-II Otsu Kai |
| Ki-100 · Ki-100-II | |
| Interceptors | Ki-45 ko · Ki-45 otsu · Ki-45 hei · Ki-45 tei |
| Ki-96 | |
| Ki-102 otsu | |
| Ki-108 Kai | |
| Bombers | Ki-32 |
| Ki-48-II otsu | |
| Captured | ␗Ki-45 hei/tei · ␗Ki-61-I otsu · ▃Ki-61-Ib |
| See also | Kawasaki Shipyard Co. |
| Japan fighters | |
|---|---|
| Navy | |
| Carrier-based fighter | |
| A5M | A5M4 · Hagiri's A5M4 |
| A6M | A6M2 mod. 11 · A6M2 · A6M3 · A6M3 mod. 22 · A6M3 mod. 22Ko · A6M5 · A6M5 Ko · A6M5 otsu · A6M5 Hei · A6M6c |
| A7He | A7He1* |
| A7M | A7M1 (NK9H) · A7M2 |
| Land-based Fighter | |
| J2M | J2M2 · J2M3 · J2M4 Kai · J2M5 · J2M5 (30 mm) |
| J6K | J6K1 |
| J7W | J7W1 |
| N1K-J | N1K1-Ja · N1K2-J · N1K2-Ja |
| Fighter seaplane | |
| N1K | N1K1 |
| A6M-N | A6M2-N |
| Army | |
| Ki-10 | Ki-10-I · Ki-10-I C · Ki-10-II · Ki-10-II C |
| Ki-27 | Ki-27 otsu · Ki-27 otsu Tachiarai |
| Ki-43 | Ki-43-I · Ki-43-II · Ki-43-III otsu |
| Ki-44 | Ki-44-I · Ki-44-I 34 · Ki-44-II otsu · Ki-44-II hei |
| Ki-61 | Ki-61-I ko · Ki-61-I otsu · Ki-61-I hei · Tada's Ki-61-I hei · Ki-61-I tei · Ki-61-II Otsu Kai |
| Ki-84 | Ki-84 ko · Ki-84 otsu · Ki-84 hei |
| Ki-87 | Ki-87 |
| Ki-94 | Ki-94-II |
| Ki-100 | Ki-100 · Ki-100-II |
| Other countries | ▅F4U-1A · ▅P-51C-11-NT · ▅Bf 109 E-7 · ▅Fw 190 A-5 |
| *Imported designation of the He 112 (A6M was in development - A7M would take A7 designation after the cancelation of the A7He) | |


