Difference between revisions of "Merkava Mk.2B (USA)"
(Added the m413 APFSDS ammo to the table) (Tag: Visual edit) |
(→Survivability and armour) (Tag: Visual edit) |
||
| (35 intermediate revisions by 12 users not shown) | |||
| Line 1: | Line 1: | ||
| − | |||
| − | |||
| − | |||
| − | |||
| − | |||
{{Specs-Card | {{Specs-Card | ||
|code=us_merkava_mk_2b_late | |code=us_merkava_mk_2b_late | ||
| − | |||
|market=Merkava Mk.2B (USA) | |market=Merkava Mk.2B (USA) | ||
| + | }} | ||
| + | {{About | ||
| + | | about = American medium tank '''{{PAGENAME}}''' | ||
| + | | usage = other version | ||
| + | | link = Merkava Mk.1 (USA) | ||
}} | }} | ||
== Description == | == Description == | ||
<!-- ''In the description, the first part should be about the history of the creation and combat usage of the vehicle, as well as its key features. In the second part, tell the reader about the ground vehicle in the game. Insert a screenshot of the vehicle, so that if the novice player does not remember the vehicle by name, he will immediately understand what kind of vehicle the article is talking about.'' --> | <!-- ''In the description, the first part should be about the history of the creation and combat usage of the vehicle, as well as its key features. In the second part, tell the reader about the ground vehicle in the game. Insert a screenshot of the vehicle, so that if the novice player does not remember the vehicle by name, he will immediately understand what kind of vehicle the article is talking about.'' --> | ||
| + | [[File:GarageImage_{{PAGENAME}}.jpg|420px|thumb|left]] | ||
| + | {{Break}} | ||
The '''{{Specs|name}}''' is a gift rank {{Specs|rank}} American medium tank {{Battle-rating}}. It was introduced during [[Update 1.95 "Northern Wind"]] as a reward for [[wt:en/news/6521-special-operation-f-r-o-s-t-en|Operation F.R.O.S.T]]. | The '''{{Specs|name}}''' is a gift rank {{Specs|rank}} American medium tank {{Battle-rating}}. It was introduced during [[Update 1.95 "Northern Wind"]] as a reward for [[wt:en/news/6521-special-operation-f-r-o-s-t-en|Operation F.R.O.S.T]]. | ||
== General info == | == General info == | ||
=== Survivability and armour === | === Survivability and armour === | ||
| − | + | To start off, the frontal armor on the Merkava 2B is great, and is comparable or better than tanks of similar BR, and the frontal turret especially. If somebody is hoping to have a shot penetrate through the turret when they are facing a Merkava frontally, there is a very good chance they are out of luck and it will not go through. This does not mean that the Merkava is frontally invincible, however. The lower front plates are weak, even if they are stronger than the upper ones in pure armor thickness, the effective one is way lower. However, the lower front plate is the weakness of most tanks anyways. Also, there are some parts of the front armor that are weak, such as a small part of the turret and the uppermost part of the frontal upper late, but being hit there, especially from long distance, is going to be luck for the enemy, so worrying about those spots is not necessary all the time. Where this tank shines though is how it fixes the lower frontal plate issue. This vehicle's secret ace is it's position of the engine. It is in front of the tank, covering most of the frontal lower plate and a decent part of the upper one as well. Thus, any hit there will certainly stop the shell coming at it, especially against HESH, HEAT, and sometimes HEAT-FS shells as well. It will also stop most of the shrapnel, protecting the crew even further. However, this also means increased risk of fires and being immobilized, so having the ability to repair your tank and put fires out is important and so is being able to do that as fast as possible. Oh, and stick to facing your enemies with the front. The side and rear armor are a joke, and in the rear of the tank, your ammunition is stored, so anyone able to aim there will get a clean way of a one-shot. That, or they will kill off most, if not all, of your crew, which is still a one-shot. | |
| − | |||
| − | |||
| − | |||
| − | |||
| − | This does not mean that the Merkava is frontally invincible, however. The lower front plates are weak | ||
| − | |||
| − | Where this tank shines though is how it fixes the lower frontal plate issue. This vehicle's secret ace is | ||
| − | |||
| − | |||
=== Mobility === | === Mobility === | ||
| − | + | ''Write about the mobility of the ground vehicle. Estimate the specific power and manoeuvrability, as well as the maximum speed forwards and backwards.'' | |
| − | |||
| − | { | + | {| class="wikitable" style="text-align:center" |
| − | + | ! rowspan="2" | Game Mode | |
| − | === | + | ! colspan="3" | Mobility characteristics |
| − | {{ | + | ! colspan="2" | Engine power (horsepower) |
| − | + | ! colspan="2" | Power-to-weight ratio (hp/ton) | |
| − | + | |- | |
| + | ! Max Speed | ||
| + | ! {{Annotation|Weight|Vehicle Weight (Tons)}} | ||
| + | ! {{Annotation|AoA Weight|Add-on Armour Weight (Tons)}} | ||
| + | ! Stock | ||
| + | ! Upgraded | ||
| + | ! Stock | ||
| + | ! Upgraded | ||
| + | |- | ||
| + | ! Arcade | ||
| + | | ___ || rowspan="2" | 63.0 || rowspan="2" | N/A || ___ || ___ || __.__ || __.__ | ||
| + | |- | ||
| + | ! {{Annotation|Realistic|Simulator uses Realistic FMs}} | ||
| + | | ___ || ___ || 963 || __.__ || 15.29 | ||
| + | |} | ||
== Armaments == | == Armaments == | ||
| − | |||
=== Main armament === | === Main armament === | ||
| − | |||
<!-- ''Give the reader information about the characteristics of the main gun. Assess its effectiveness in a battle based on the reloading speed, ballistics and the power of shells. Do not forget about the flexibility of the fire, that is how quickly the cannon can be aimed at the target, open fire on it and aim at another enemy. Add a link to the main article on the gun: <code><nowiki>{{main|Name of the weapon}}</nowiki></code>. Describe in general terms the ammunition available for the main gun. Give advice on how to use them and how to fill the ammunition storage.'' --> | <!-- ''Give the reader information about the characteristics of the main gun. Assess its effectiveness in a battle based on the reloading speed, ballistics and the power of shells. Do not forget about the flexibility of the fire, that is how quickly the cannon can be aimed at the target, open fire on it and aim at another enemy. Add a link to the main article on the gun: <code><nowiki>{{main|Name of the weapon}}</nowiki></code>. Describe in general terms the ammunition available for the main gun. Give advice on how to use them and how to fill the ammunition storage.'' --> | ||
{{main|Sharir (105 mm)}} | {{main|Sharir (105 mm)}} | ||
| − | {| class="wikitable" style="text-align:center" width=" | + | {| class="wikitable" style="text-align:center" width="70%" |
|- | |- | ||
! colspan="5" | [[Sharir (105 mm)|105 mm Sharir]] || colspan="5" | Turret rotation speed (°/s) || colspan="4" | Reloading rate (seconds) | ! colspan="5" | [[Sharir (105 mm)|105 mm Sharir]] || colspan="5" | Turret rotation speed (°/s) || colspan="4" | Reloading rate (seconds) | ||
| Line 54: | Line 57: | ||
|- | |- | ||
! ''Arcade'' | ! ''Arcade'' | ||
| − | | rowspan="2" | | + | | rowspan="2" | 62 || rowspan="2" | -8°/+20° || rowspan="2" | ±180° || rowspan="2" | Two-plane || __._ || __._ || __._ || __._ || __._ || rowspan="2" | 8.1 || rowspan="2" | __.__ || rowspan="2" | __.__ || rowspan="2" | 6.7 |
|- | |- | ||
! ''Realistic'' | ! ''Realistic'' | ||
| − | | | + | | __._ || __._ || __._ || __._ || 40.0 |
|- | |- | ||
|} | |} | ||
==== Ammunition ==== | ==== Ammunition ==== | ||
| − | {{: | + | {| class="wikitable sortable" style="text-align:center" width="70%" |
| + | ! colspan="8" | Penetration statistics | ||
| + | |- | ||
| + | ! rowspan="2" data-sort-type="text" | Ammunition | ||
| + | ! rowspan="2" | Type of<br>warhead | ||
| + | ! colspan="6" | '''Penetration @ 0° Angle of Attack (mm)''' | ||
| + | |- | ||
| + | ! 10 m !! 100 m !! 500 m !! 1,000 m !! 1,500 m !! 2,000 m | ||
| + | |- | ||
| + | | M111 || APFSDS || 337 || 335 || 330 || 322 || 314 || 306 | ||
| + | |- | ||
| + | | M152 || HEATFS || 400 || 400 || 400 || 400 || 400 || 400 | ||
| + | |- | ||
| + | | M156 || HESH || 127 || 127 || 127 || 127 || 127 || 127 | ||
| + | |- | ||
| + | |} | ||
| + | {| class="wikitable sortable" style="text-align:center" width="100%" | ||
| + | ! colspan="11" | Shell details | ||
| + | |- | ||
| + | ! rowspan="2" data-sort-type="text" | Ammunition | ||
| + | ! rowspan="2" | Type of<br>warhead | ||
| + | ! rowspan="2" | Velocity<br>(m/s) | ||
| + | ! rowspan="2" | Projectile<br>Mass (kg) | ||
| + | ! rowspan="2" | Fuse delay<br>(m) | ||
| + | ! rowspan="2" | Fuse sensitivity<br>(mm) | ||
| + | ! rowspan="2" | Explosive Mass<br>(TNT equivalent) (g) | ||
| + | ! rowspan="2" | Normalisation at 30°<br>from horizontal | ||
| + | ! colspan="3" | Ricochet | ||
| + | |- | ||
| + | ! 0% !! 50% !! 100% | ||
| + | |- | ||
| + | | M111 || APFSDS || 1,455 || 3.79 || N/A || N/A || N/A || _._° || 78° || 80° || 81° | ||
| + | |- | ||
| + | | M152 || HEATFS || 1,173 || 10.5 || N/A || 0.1 || 1,271 || +0.0° || 65° || 72° || 77° | ||
| + | |- | ||
| + | | M156 || HESH || 732 || 14.85 || 0.4 || 0.1 || 4,306 || +0.0° || 73° || 77° || 80° | ||
| + | |- | ||
| + | |} | ||
| + | |||
| + | {| class="wikitable sortable" style="text-align:center" | ||
| + | ! colspan="7" | Smoke shell characteristics | ||
| + | |- | ||
| + | ! Ammunition | ||
| + | ! Velocity<br>(m/s) | ||
| + | ! Projectile<br>Mass (kg) | ||
| + | ! Screen radius<br>(m) | ||
| + | ! Screen deploy time<br>(s) | ||
| + | ! Screen hold time<br>(s) | ||
| + | ! Explosive Mass<br>(TNT equivalent) (g) | ||
| + | |- | ||
| + | | M416 || 730 || 11.4 || 20 || 5 || 25 || 50 | ||
| + | |- | ||
| + | |} | ||
==== [[Ammo racks]] ==== | ==== [[Ammo racks]] ==== | ||
| − | [[File:Ammoracks_{{PAGENAME}}.jpg|right|thumb|x250px|[[Ammo racks]] of the {{PAGENAME}}]] | + | <!-- [[File:Ammoracks_{{PAGENAME}}.jpg|right|thumb|x250px|[[Ammo racks]] of the {{PAGENAME}}]] --> |
| − | |||
{| class="wikitable" style="text-align:center" | {| class="wikitable" style="text-align:center" | ||
|- | |- | ||
| Line 73: | Line 127: | ||
! 2nd<br>rack empty | ! 2nd<br>rack empty | ||
! 3rd<br>rack empty | ! 3rd<br>rack empty | ||
| + | ! 4th<br>rack empty | ||
| + | ! 5th<br>rack empty | ||
| + | ! 6th<br>rack empty | ||
! Visual<br>discrepancy | ! Visual<br>discrepancy | ||
|- | |- | ||
| − | | ''' | + | | '''62''' || __ ''(+__)'' || __ ''(+__)'' || __ ''(+__)'' || __ ''(+__)'' || __ ''(+__)'' || __ ''(+__)'' || __ |
|- | |- | ||
|} | |} | ||
| − | + | ==== [[Optics]] ==== | |
{| class="wikitable" style="text-align:center" | {| class="wikitable" style="text-align:center" | ||
! colspan="3" | {{PAGENAME}} Optics | ! colspan="3" | {{PAGENAME}} Optics | ||
| Line 94: | Line 151: | ||
|- | |- | ||
|} | |} | ||
| − | + | ||
=== Machine guns === | === Machine guns === | ||
| − | |||
| − | |||
| − | |||
| − | |||
<!-- ''Offensive and anti-aircraft machine guns not only allow you to fight some aircraft but also are effective against lightly armoured vehicles. Evaluate machine guns and give recommendations on its use.'' --> | <!-- ''Offensive and anti-aircraft machine guns not only allow you to fight some aircraft but also are effective against lightly armoured vehicles. Evaluate machine guns and give recommendations on its use.'' --> | ||
{{main|M2HB (12.7 mm)|FN MAG 60-40 (7.62 mm)}} | {{main|M2HB (12.7 mm)|FN MAG 60-40 (7.62 mm)}} | ||
| − | {| class="wikitable" style="text-align:center | + | {| class="wikitable" style="text-align:center" |
|- | |- | ||
! colspan="5" | [[M2HB (12.7 mm)|12.7 mm M2HB]] | ! colspan="5" | [[M2HB (12.7 mm)|12.7 mm M2HB]] | ||
|- | |- | ||
| − | ! Mount | + | ! Mount |
| + | ! Capacity<br>(Belt capacity) | ||
| + | ! Rate of fire<br>(shots/minute) | ||
| + | ! Vertical<br>guidance | ||
| + | ! Horizontal<br>guidance | ||
|- | |- | ||
| − | | Coaxial || | + | | Coaxial || 900 (200) || 576 || N/A || N/A |
|- | |- | ||
|} | |} | ||
| − | {| class="wikitable" style="text-align:center | + | {| class="wikitable" style="text-align:center" |
|- | |- | ||
! colspan="5" | [[FN MAG 60-40 (7.62 mm)|7.62 mm FN MAG 60-40]] | ! colspan="5" | [[FN MAG 60-40 (7.62 mm)|7.62 mm FN MAG 60-40]] | ||
|- | |- | ||
| − | ! Mount | + | ! Mount |
| + | ! Capacity<br>(Belt capacity) | ||
| + | ! Rate of fire<br>(shots/minute) | ||
| + | ! Vertical<br>guidance | ||
| + | ! Horizontal<br>guidance | ||
|- | |- | ||
| − | | Coaxial || | + | | Coaxial || 5,950 (200) || 600 || N/A || N/A |
|- | |- | ||
| − | | Commander's cupola || 1, | + | | Commander's cupola || 1,750 (200) || 600 || -10°/+50° || ±120° |
|- | |- | ||
| − | | Loader's cupola || 1, | + | | Loader's cupola || 1,750 (200) || 600 || -10°/+50° || ±120° |
|- | |- | ||
|} | |} | ||
== Usage in battles == | == Usage in battles == | ||
| − | + | ''Describe the tactics of playing in the vehicle, the features of using vehicles in the team and advice on tactics. Refrain from creating a "guide" - do not impose a single point of view but instead give the reader food for thought. Describe the most dangerous enemies and give recommendations on fighting them. If necessary, note the specifics of the game in different modes (AB, RB, SB).'' | |
| − | |||
=== Pros and cons === | === Pros and cons === | ||
| Line 135: | Line 195: | ||
'''Pros:''' | '''Pros:''' | ||
| − | * | + | * Armour is composed of multiple layers, giving it a good protection against HESH, HEAT and some ATGMs. |
| + | * Stock HEATFS round works well overall | ||
* Has access to a thermal sight | * Has access to a thermal sight | ||
| − | * Good mobility once spaded. Can take the capture zones with lighter vehicles | + | * Good mobility once spaded. Can take the capture zones with lighter vehicles. |
| − | * Good gun with effective choices of ammo | + | * Good gun with effective choices of ammo. |
| − | * Engine in the front gives some extra protection to the crew | + | * Engine in the front gives some extra protection to the crew. |
| − | * Low silhouette | + | * Low silhouette. |
| + | * Can't be hull broken. | ||
* Very good gun stabilization | * Very good gun stabilization | ||
* Three extra machine guns on the roof to deal with lightly armoured vehicles, helicopters and planes. (2 x 7.62 mm + 1 x 12.7 mm) | * Three extra machine guns on the roof to deal with lightly armoured vehicles, helicopters and planes. (2 x 7.62 mm + 1 x 12.7 mm) | ||
| − | |||
'''Cons:''' | '''Cons:''' | ||
| − | * | + | * Not premium (modules must be researched) |
| − | + | * Almost no protection against APFSDS which is quite common at the battle rating | |
| − | + | * Engine and a fuel tank in the front mean that fires are common | |
| − | * Almost no | ||
| − | |||
| − | * Engine | ||
* Driver has less protection than other crew members | * Driver has less protection than other crew members | ||
* All the modules being at the front means that there is no crew protection for flankers from the rear | * All the modules being at the front means that there is no crew protection for flankers from the rear | ||
| − | |||
| − | |||
== History == | == History == | ||
| − | + | ''Describe the history of the creation and combat usage of the vehicle in more detail than in the introduction. If the historical reference turns out to be too long, take it to a separate article, taking a link to the article about the vehicle and adding a block "/History" (example: <nowiki>https://wiki.warthunder.com/(Vehicle-name)/History</nowiki>) and add a link to it here using the <code>main</code> template. Be sure to reference text and sources by using <code><nowiki><ref></ref></nowiki></code>, as well as adding them at the end of the article with <code><nowiki><references /></nowiki></code>. This section may also include the vehicle's dev blog entry (if applicable) and the in-game encyclopedia description (under <code><nowiki>=== In-game description ===</nowiki></code>, also if applicable).'' | |
| − | |||
| − | |||
| − | |||
| − | |||
| − | |||
| − | |||
| − | |||
| − | |||
| − | |||
| − | |||
| − | |||
| − | |||
| − | |||
| − | |||
| − | |||
| − | |||
== Media == | == Media == | ||
| − | <!-- | + | <!--Excellent additions to the article would be video guides, screenshots from the game, and photos.--> |
| − | + | <gallery> | |
| − | |||
| − | |||
| − | |||
| − | |||
| − | |||
| − | <gallery | ||
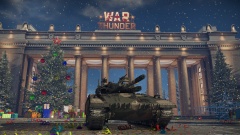
File:GarageImage Merkava Mk 2B (USA) Operation FROST.jpeg|{{PAGENAME}} in the Operation F.R.O.S.T. garage | File:GarageImage Merkava Mk 2B (USA) Operation FROST.jpeg|{{PAGENAME}} in the Operation F.R.O.S.T. garage | ||
</gallery> | </gallery> | ||
== See also == | == See also == | ||
| − | + | ''Links to the articles on the War Thunder Wiki that you think will be useful for the reader, for example:'' | |
| + | |||
* ''reference to the series of the vehicles;'' | * ''reference to the series of the vehicles;'' | ||
| − | * ''links to approximate analogues of other nations and research trees.'' | + | * ''links to approximate analogues of other nations and research trees.'' |
| − | + | == External links == | |
| + | ''Paste links to sources and external resources, such as:'' | ||
| − | |||
| − | |||
* ''topic on the official game forum;'' | * ''topic on the official game forum;'' | ||
| − | * ''other literature.'' | + | * ''encyclopedia page on the tank;'' |
| − | + | * ''other literature.'' | |
| − | |||
| − | |||
| − | |||
{{USA medium tanks}} | {{USA medium tanks}} | ||
{{Winter Event}} | {{Winter Event}} | ||
Revision as of 15:02, 21 January 2020

Contents
| This page is about the American medium tank Merkava Mk.2B (USA). For other version, see Merkava Mk.1 (USA). |
Description
.jpg)
The ▃Merkava Siman 2 Bet is a gift rank VI American medium tank
with a battle rating of 9.3 (AB/RB/SB). It was introduced during Update 1.95 "Northern Wind" as a reward for Operation F.R.O.S.T.
General info
Survivability and armour
To start off, the frontal armor on the Merkava 2B is great, and is comparable or better than tanks of similar BR, and the frontal turret especially. If somebody is hoping to have a shot penetrate through the turret when they are facing a Merkava frontally, there is a very good chance they are out of luck and it will not go through. This does not mean that the Merkava is frontally invincible, however. The lower front plates are weak, even if they are stronger than the upper ones in pure armor thickness, the effective one is way lower. However, the lower front plate is the weakness of most tanks anyways. Also, there are some parts of the front armor that are weak, such as a small part of the turret and the uppermost part of the frontal upper late, but being hit there, especially from long distance, is going to be luck for the enemy, so worrying about those spots is not necessary all the time. Where this tank shines though is how it fixes the lower frontal plate issue. This vehicle's secret ace is it's position of the engine. It is in front of the tank, covering most of the frontal lower plate and a decent part of the upper one as well. Thus, any hit there will certainly stop the shell coming at it, especially against HESH, HEAT, and sometimes HEAT-FS shells as well. It will also stop most of the shrapnel, protecting the crew even further. However, this also means increased risk of fires and being immobilized, so having the ability to repair your tank and put fires out is important and so is being able to do that as fast as possible. Oh, and stick to facing your enemies with the front. The side and rear armor are a joke, and in the rear of the tank, your ammunition is stored, so anyone able to aim there will get a clean way of a one-shot. That, or they will kill off most, if not all, of your crew, which is still a one-shot.
Mobility
Write about the mobility of the ground vehicle. Estimate the specific power and manoeuvrability, as well as the maximum speed forwards and backwards.
| Game Mode | Mobility characteristics | Engine power (horsepower) | Power-to-weight ratio (hp/ton) | ||||
|---|---|---|---|---|---|---|---|
| Max Speed | Weight | AoA Weight | Stock | Upgraded | Stock | Upgraded | |
| Arcade | ___ | 63.0 | N/A | ___ | ___ | __.__ | __.__ |
| Realistic | ___ | ___ | 963 | __.__ | 15.29 | ||
Armaments
Main armament
| 105 mm Sharir | Turret rotation speed (°/s) | Reloading rate (seconds) | |||||||||||
|---|---|---|---|---|---|---|---|---|---|---|---|---|---|
| Mode | Capacity | Vertical | Horizontal | Stabilizer | Stock | Upgraded | Full | Expert | Aced | Stock | Full | Expert | Aced |
| Arcade | 62 | -8°/+20° | ±180° | Two-plane | __._ | __._ | __._ | __._ | __._ | 8.1 | __.__ | __.__ | 6.7 |
| Realistic | __._ | __._ | __._ | __._ | 40.0 | ||||||||
Ammunition
| Penetration statistics | |||||||
|---|---|---|---|---|---|---|---|
| Ammunition | Type of warhead |
Penetration @ 0° Angle of Attack (mm) | |||||
| 10 m | 100 m | 500 m | 1,000 m | 1,500 m | 2,000 m | ||
| M111 | APFSDS | 337 | 335 | 330 | 322 | 314 | 306 |
| M152 | HEATFS | 400 | 400 | 400 | 400 | 400 | 400 |
| M156 | HESH | 127 | 127 | 127 | 127 | 127 | 127 |
| Shell details | ||||||||||
|---|---|---|---|---|---|---|---|---|---|---|
| Ammunition | Type of warhead |
Velocity (m/s) |
Projectile Mass (kg) |
Fuse delay (m) |
Fuse sensitivity (mm) |
Explosive Mass (TNT equivalent) (g) |
Normalisation at 30° from horizontal |
Ricochet | ||
| 0% | 50% | 100% | ||||||||
| M111 | APFSDS | 1,455 | 3.79 | N/A | N/A | N/A | _._° | 78° | 80° | 81° |
| M152 | HEATFS | 1,173 | 10.5 | N/A | 0.1 | 1,271 | +0.0° | 65° | 72° | 77° |
| M156 | HESH | 732 | 14.85 | 0.4 | 0.1 | 4,306 | +0.0° | 73° | 77° | 80° |
| Smoke shell characteristics | ||||||
|---|---|---|---|---|---|---|
| Ammunition | Velocity (m/s) |
Projectile Mass (kg) |
Screen radius (m) |
Screen deploy time (s) |
Screen hold time (s) |
Explosive Mass (TNT equivalent) (g) |
| M416 | 730 | 11.4 | 20 | 5 | 25 | 50 |
Ammo racks
| Full ammo |
1st rack empty |
2nd rack empty |
3rd rack empty |
4th rack empty |
5th rack empty |
6th rack empty |
Visual discrepancy |
|---|---|---|---|---|---|---|---|
| 62 | __ (+__) | __ (+__) | __ (+__) | __ (+__) | __ (+__) | __ (+__) | __ |
Optics
| Merkava Mk.2B (USA) Optics | ||
|---|---|---|
| Default magnification | Maximum magnification | |
| Main Gun optics | X7.2 | X8.0 |
| Comparable optics | ___ | |
Machine guns
| 12.7 mm M2HB | ||||
|---|---|---|---|---|
| Mount | Capacity (Belt capacity) |
Rate of fire (shots/minute) |
Vertical guidance |
Horizontal guidance |
| Coaxial | 900 (200) | 576 | N/A | N/A |
| 7.62 mm FN MAG 60-40 | ||||
|---|---|---|---|---|
| Mount | Capacity (Belt capacity) |
Rate of fire (shots/minute) |
Vertical guidance |
Horizontal guidance |
| Coaxial | 5,950 (200) | 600 | N/A | N/A |
| Commander's cupola | 1,750 (200) | 600 | -10°/+50° | ±120° |
| Loader's cupola | 1,750 (200) | 600 | -10°/+50° | ±120° |
Usage in battles
Describe the tactics of playing in the vehicle, the features of using vehicles in the team and advice on tactics. Refrain from creating a "guide" - do not impose a single point of view but instead give the reader food for thought. Describe the most dangerous enemies and give recommendations on fighting them. If necessary, note the specifics of the game in different modes (AB, RB, SB).
Pros and cons
Pros:
- Armour is composed of multiple layers, giving it a good protection against HESH, HEAT and some ATGMs.
- Stock HEATFS round works well overall
- Has access to a thermal sight
- Good mobility once spaded. Can take the capture zones with lighter vehicles.
- Good gun with effective choices of ammo.
- Engine in the front gives some extra protection to the crew.
- Low silhouette.
- Can't be hull broken.
- Very good gun stabilization
- Three extra machine guns on the roof to deal with lightly armoured vehicles, helicopters and planes. (2 x 7.62 mm + 1 x 12.7 mm)
Cons:
- Not premium (modules must be researched)
- Almost no protection against APFSDS which is quite common at the battle rating
- Engine and a fuel tank in the front mean that fires are common
- Driver has less protection than other crew members
- All the modules being at the front means that there is no crew protection for flankers from the rear
History
Describe the history of the creation and combat usage of the vehicle in more detail than in the introduction. If the historical reference turns out to be too long, take it to a separate article, taking a link to the article about the vehicle and adding a block "/History" (example: https://wiki.warthunder.com/(Vehicle-name)/History) and add a link to it here using the main template. Be sure to reference text and sources by using <ref></ref>, as well as adding them at the end of the article with <references />. This section may also include the vehicle's dev blog entry (if applicable) and the in-game encyclopedia description (under === In-game description ===, also if applicable).
Media
Merkava Mk.2B (USA) in the Operation F.R.O.S.T. garage
_Operation_FROST.jpeg)
See also
Links to the articles on the War Thunder Wiki that you think will be useful for the reader, for example:
- reference to the series of the vehicles;
- links to approximate analogues of other nations and research trees.
External links
Paste links to sources and external resources, such as:
- topic on the official game forum;
- encyclopedia page on the tank;
- other literature.
| USA medium tanks | |
|---|---|
| M2 | M2 |
| M3 | M3 Lee · ▃Grant I |
| M4 | M4 · Calliope · M4A1 · M4A1 (76) W · M4A2 · M4A2 (76) W · M4A3 (105) · M4A3 (76) W · M4/T26 |
| M26 Pershing | T20 · T25 · M26 · M26 T99 · M26E1 |
| M46/47/48 Patton | M46 · M46 "Tiger" · M47 · M48A1 · T54E1 · T54E2 |
| M60 | M60 · M60A1 (AOS) · M60A1 RISE (P) · M60A2 · M60A3 TTS · M728 CEV · 120S |
| MBT-70 | MBT-70 · XM803 |
| M1 Abrams | XM1 (Chrysler) · XM1 (GM) |
| M1 Abrams · M1 KVT · IPM1 | |
| M1A1 · M1A1 HC · M1A1 Click-Bait | |
| M1A2 Abrams · M1A2 SEP · M1A2 SEP V2 | |
| Other | T95E1 |
| Australia | M1A1 AIM |
| Canada | M4A5 |
| Israel | ▃Magach 3 (ERA) · ▃Merkava Mk.1 · ▃Merkava Mk.2B · ▃Merkava Mk.3D |
| Turkey | M60 AMBT |
