Difference between revisions of "F-105D"
m (→Survivability and armour: linked F-4E in notice) (Tag: Visual edit) |
(→Suspended armament: added descriptions, moved some parts from ordnance to the appropriate 'usage in battles' section.) |
||
| Line 147: | Line 147: | ||
* Without load (clean, no pylons) | * Without load (clean, no pylons) | ||
| − | '''Air to Air:''' | + | '''Air-to-Air Missiles:''' |
<div class="toccolours mw-collapsible mw-collapsed" style="width:1100px; overflow:auto;"> | <div class="toccolours mw-collapsible mw-collapsed" style="width:1100px; overflow:auto;"> | ||
Click '''Expand''' to show | Click '''Expand''' to show | ||
<div class="mw-collapsible-content"> | <div class="mw-collapsible-content"> | ||
| − | |||
* 4 x AIM-9B Sidewinder missiles | * 4 x AIM-9B Sidewinder missiles | ||
* 4 x AIM-9E Sidewinder missiles | * 4 x AIM-9E Sidewinder missiles | ||
| − | |||
</div> | </div> | ||
</div> | </div> | ||
| − | '''Air | + | '''Air-To-Ground Missiles:''' |
<div class="toccolours mw-collapsible mw-collapsed" style="width:1100px; overflow:auto;"> | <div class="toccolours mw-collapsible mw-collapsed" style="width:1100px; overflow:auto;"> | ||
Click '''Expand''' to show | Click '''Expand''' to show | ||
<div class="mw-collapsible-content"> | <div class="mw-collapsible-content"> | ||
| − | |||
* 4 x AGM-12B Bullpup missiles | * 4 x AGM-12B Bullpup missiles | ||
* 2 x AGM-12B Bullpup missiles + 32 x countermeasures | * 2 x AGM-12B Bullpup missiles + 32 x countermeasures | ||
| Line 170: | Line 167: | ||
* 8 x 750 lb M117 cone 45 bombs + 2 x AGM-12C Bullpup missiles (6,000 lb total) | * 8 x 750 lb M117 cone 45 bombs + 2 x AGM-12C Bullpup missiles (6,000 lb total) | ||
* 6 x 750 lb M117 cone 45 bombs + 2 x AGM-12C Bullpup missiles + 32 x countermeasures (4,500 lb total) | * 6 x 750 lb M117 cone 45 bombs + 2 x AGM-12C Bullpup missiles + 32 x countermeasures (4,500 lb total) | ||
| − | |||
| − | |||
* 9 x 1,000 lb LDGP Mk 83 bombs + 2 x AGM-12B Bullpup missiles (9,000 lb total) | * 9 x 1,000 lb LDGP Mk 83 bombs + 2 x AGM-12B Bullpup missiles (9,000 lb total) | ||
* 5 x 1,000 lb LDGP Mk 83 bombs + 2 x AGM-12C Bullpup missiles (5,000 lb total) | * 5 x 1,000 lb LDGP Mk 83 bombs + 2 x AGM-12C Bullpup missiles (5,000 lb total) | ||
* 3 x 1,000 lb LDGP Mk 83 bombs + 2 x AGM-12C Bullpup missiles + 32 x countermeasures (3,000 lb total) | * 3 x 1,000 lb LDGP Mk 83 bombs + 2 x AGM-12C Bullpup missiles + 32 x countermeasures (3,000 lb total) | ||
| + | </div> | ||
| + | </div> | ||
| + | '''Rockets:''' | ||
| + | |||
| + | <div class="toccolours mw-collapsible mw-collapsed" style="width:1100px; overflow:auto;"> | ||
| + | Click '''Expand''' to show | ||
| + | <div class="mw-collapsible-content"> | ||
| + | * 76 x FFAR Mighty Mouse rockets | ||
| + | * 38 x FFAR Mighty Mouse rockets + 32 x countermeasures | ||
</div> | </div> | ||
</div> | </div> | ||
| + | |||
'''Bombs:''' | '''Bombs:''' | ||
| Line 183: | Line 188: | ||
Click '''Expand''' to show | Click '''Expand''' to show | ||
<div class="mw-collapsible-content"> | <div class="mw-collapsible-content"> | ||
| − | |||
* 14 x 500 lb LDGP Mk 82 bombs (7,000 lb total) | * 14 x 500 lb LDGP Mk 82 bombs (7,000 lb total) | ||
* 14 x 500 lb LDGP Mk 82 bombs + 32 x countermeasures (7,000 lb total) | * 14 x 500 lb LDGP Mk 82 bombs + 32 x countermeasures (7,000 lb total) | ||
| Line 199: | Line 203: | ||
* 3 x 3,000 lb M118 bombs (9,000 lb total) | * 3 x 3,000 lb M118 bombs (9,000 lb total) | ||
* 3 x 3,000 lb M118 bombs + 32 x countermeasures (9,000 lb total) | * 3 x 3,000 lb M118 bombs + 32 x countermeasures (9,000 lb total) | ||
| − | |||
</div> | </div> | ||
</div> | </div> | ||
| Line 207: | Line 210: | ||
Click '''Expand''' to show | Click '''Expand''' to show | ||
<div class="mw-collapsible-content"> | <div class="mw-collapsible-content"> | ||
| − | |||
* 6 x 750 lb M117 cone 45 bombs + 2 x AGM-12C Bullpup missiles + 4 x AIM-9B Sidewinder missiles (4,500 lb total) | * 6 x 750 lb M117 cone 45 bombs + 2 x AGM-12C Bullpup missiles + 4 x AIM-9B Sidewinder missiles (4,500 lb total) | ||
* 6 x 750 lb M117 cone 45 bombs + 2 x AGM-12C Bullpup missiles + 4 x AIM-9E Sidewinder missiles (4,500 lb total) | * 6 x 750 lb M117 cone 45 bombs + 2 x AGM-12C Bullpup missiles + 4 x AIM-9E Sidewinder missiles (4,500 lb total) | ||
| Line 231: | Line 233: | ||
* 3 x 3,000 lb M118 bombs + 4 x AIM-9B Sidewinder missiles (9,000 lb total) | * 3 x 3,000 lb M118 bombs + 4 x AIM-9B Sidewinder missiles (9,000 lb total) | ||
* 3 x 3,000 lb M118 bombs + 4 x AIM-9E Sidewinder missiles (9,000 lb total) | * 3 x 3,000 lb M118 bombs + 4 x AIM-9E Sidewinder missiles (9,000 lb total) | ||
| + | </div> | ||
| + | </div> | ||
| − | + | The F-105 carries a range of bombs, but the payloads an F-105 pilot will likely most often use are: | |
| − | |||
| − | * 16 x 750 lb M117 cone 45 bombs (12,000 lb total) | + | * 16 x 750 lb M117 cone 45 bombs (12,000 lb total) This payload is best for bombing bases. It takes seven M117 bombs to destroy a base at 9.7, and with 16 bombs, dropping in 5 pairs of 2 and 6 individual drops, an F-105 can easily pickle off four pairs of bombs (8 total) before using the remaining ones to destroy another base, lighting the afterburner, and heading for home. |
| − | * 14 x 750 lb M117 cone 45 bombs + 4 x AIM-9E Sidewinder missiles (10,500 lb total) | + | * 14 x 750 lb M117 cone 45 bombs + 4 x AIM-9E Sidewinder missiles (10,500 lb total) This payload is one of the best for bombing bases and then switching into an Air to Air role. The AIM-9E missiles are capable against aircraft that are slow, and useful for causing faster aircraft to maneuver to avoid missiles, forcing them to lose speed and giving you a chance to close the gap. |
| − | * 6 x 750 lb M117 cone 45 bombs + 2 x 3,000 lb M118 bombs + 4 x AIM-9E Sidewinder missiles (10,500 lb total) | + | * 6 x 750 lb M117 cone 45 bombs + 2 x 3,000 lb M118 bombs + 4 x AIM-9E Sidewinder missiles (10,500 lb total) One of the single most effective payloads, this may be used as a substitute for the above payload if a pilot dislikes having to pickle off eight bombs individually, as now, with a single push of a button, two M118s come sliding off the rails. These two bombs combined are more than enough for a base, but are also effective in their own right as Capture-point clearing bombs, or for destroying aircraft staying on the airfield near the end of a match. Campers beware! |
| − | * 6 x 750 lb M117 cone 45 bombs + 2 x AGM-12C Bullpup missiles + 4 x AIM-9E Sidewinder missiles (4,500 lb total) | + | * 6 x 750 lb M117 cone 45 bombs + 2 x AGM-12C Bullpup missiles + 4 x AIM-9E Sidewinder missiles (4,500 lb total) Two heavy-duty bullpups and four sidewinders make for a powerful punch against both ground and air targets. The M117s are there merely as additional ordnance, and may be jettisoned where necessary for a cleaner aircraft, or used against enemy targets. |
| − | |||
Note that nowhere in these payloads are any provisions for the LDGP Mark 82 500lbs bombs provided stock, the LDGP Mark 83 1000lb bomb, or the AGM-12B/sidewinder combinations. This is because the M117s make the Mark 83 effectively redundant, as they carry nearly 210 kilograms of TNT equivalent- the F-105 can carry more of these bombs, and while at first, the Mk 83's additional 66 kilograms of TNT equivalent (for a total of 276kg per thousand-pound bomb) seem like an improvement, the M117 has nearly identical fragment dispersion/vehicle kill radii, as well as only 7mm less armour penetration. Coupled with the aircraft's ballistic computer for precision-bombing, experienced pilots shouldn't need the extra explosive mass to secure a kill, and since on a single hardpoint, the F-105 carries more M117s than Mark 83s (4-6 as opposed to 3 for the Mark 83), even novice pilots may find it easier to use the M117, since they have more M117s to drop. Pilots will also find it easier to acquire the M117 than the Mark 83 on this aircraft, as M117s are available as a Tier I modification, while Mark 83s are in Tier II, and the Thunderchief has far more Tier II modifications that should take a higher priority over the Mark 83, such as the booster or AIM-9B upgrade. | Note that nowhere in these payloads are any provisions for the LDGP Mark 82 500lbs bombs provided stock, the LDGP Mark 83 1000lb bomb, or the AGM-12B/sidewinder combinations. This is because the M117s make the Mark 83 effectively redundant, as they carry nearly 210 kilograms of TNT equivalent- the F-105 can carry more of these bombs, and while at first, the Mk 83's additional 66 kilograms of TNT equivalent (for a total of 276kg per thousand-pound bomb) seem like an improvement, the M117 has nearly identical fragment dispersion/vehicle kill radii, as well as only 7mm less armour penetration. Coupled with the aircraft's ballistic computer for precision-bombing, experienced pilots shouldn't need the extra explosive mass to secure a kill, and since on a single hardpoint, the F-105 carries more M117s than Mark 83s (4-6 as opposed to 3 for the Mark 83), even novice pilots may find it easier to use the M117, since they have more M117s to drop. Pilots will also find it easier to acquire the M117 than the Mark 83 on this aircraft, as M117s are available as a Tier I modification, while Mark 83s are in Tier II, and the Thunderchief has far more Tier II modifications that should take a higher priority over the Mark 83, such as the booster or AIM-9B upgrade. | ||
Chaff is not advisable for the F-105D. At this battle rating, the F-105 faces mostly IR missiles, and given its flight performance, pilots must rely on maneuvering alone to defeat the [[AIM-9B|AIM-9Bs]], [[AIM-9E|AIM-9Es]], [[R-3S|R-3Ss]], [[AIM-9G|AIM-9Gs]] that are typical to planes around the 8.7-9.7 BR range, as well as the occasional [[R-60|R-60s]], [[AIM-9J|AIM-9Js]]/[[Rb24|Rb 24Js]], and rare [[AIM-7C Sparrow|AIM-7C,]] [[AIM-7D]] and [[AIM-7E]] sparrows that it can face from time to time. All of these missiles can be defeated with appropriate maneuvering and avoidance of enemy aircraft, making chaff pods entirely redundant, and at the moment, just something that takes up more space on a hard point that could be used by a bomb, missile, or rocket pod. However, in Ground RB, chaff may be useful in temporarily spoofing early missile and gun AAA. However, no AAA at that BR is entirely radar-based, and most radar-based SPAAGs use their radar to determine only a target solution rather than guide any sort of weapon. For instance, the most common anti-aircraft missile systems in Ground RB- the [[Roland 1]], [[Type 93]], [[Ozelot]], [[2S6]] and [[ADATS]]- all use either IR guidance or a form of Semi-Active beam-riding guidance that completely ignores chaff. | Chaff is not advisable for the F-105D. At this battle rating, the F-105 faces mostly IR missiles, and given its flight performance, pilots must rely on maneuvering alone to defeat the [[AIM-9B|AIM-9Bs]], [[AIM-9E|AIM-9Es]], [[R-3S|R-3Ss]], [[AIM-9G|AIM-9Gs]] that are typical to planes around the 8.7-9.7 BR range, as well as the occasional [[R-60|R-60s]], [[AIM-9J|AIM-9Js]]/[[Rb24|Rb 24Js]], and rare [[AIM-7C Sparrow|AIM-7C,]] [[AIM-7D]] and [[AIM-7E]] sparrows that it can face from time to time. All of these missiles can be defeated with appropriate maneuvering and avoidance of enemy aircraft, making chaff pods entirely redundant, and at the moment, just something that takes up more space on a hard point that could be used by a bomb, missile, or rocket pod. However, in Ground RB, chaff may be useful in temporarily spoofing early missile and gun AAA. However, no AAA at that BR is entirely radar-based, and most radar-based SPAAGs use their radar to determine only a target solution rather than guide any sort of weapon. For instance, the most common anti-aircraft missile systems in Ground RB- the [[Roland 1]], [[Type 93]], [[Ozelot]], [[2S6]] and [[ADATS]]- all use either IR guidance or a form of Semi-Active beam-riding guidance that completely ignores chaff. | ||
| + | |||
| + | Four AGM-12Bs is the maximum amount of guided ordnance that the F-105D can carry, if a pilot requires a lot of guided missiles to take out tanks in Ground RB. However, due to the ballistic computer, it is often better to take bombs instead, since you can drop from higher up and on different flight profiles where enemy tanks and SPAAs do not expect air attack. | ||
| + | |||
| + | The Mighty Mouse FFARs that it recieves are effective, but slightly underpowered compared to the Zunis, S-8s, S-24s, S-25s and 13,5cm m/70 [[A-4E Early|other]] [[Su-7BKL|similar]] [[AJ37|aircraft]] in and around its battle rating recieve. However, at the moment, the LAU-3s cannot be used with AIM-9Es, bombs, or any other payloads outside of either on their own or with chaff. This makes bringing FFARs a sub-par option compared to other ordnance options already available for the F-105D Thunderchief. | ||
== Usage in battles == | == Usage in battles == | ||
<!-- ''Describe the tactics of playing in the aircraft, the features of using aircraft in a team and advice on tactics. Refrain from creating a "guide" - do not impose a single point of view, but instead, give the reader food for thought. Examine the most dangerous enemies and give recommendations on fighting them. If necessary, note the specifics of the game in different modes (AB, RB, SB).'' --> | <!-- ''Describe the tactics of playing in the aircraft, the features of using aircraft in a team and advice on tactics. Refrain from creating a "guide" - do not impose a single point of view, but instead, give the reader food for thought. Examine the most dangerous enemies and give recommendations on fighting them. If necessary, note the specifics of the game in different modes (AB, RB, SB).'' --> | ||
''Describe the tactics of playing in the aircraft, the features of using aircraft in a team and advice on tactics. Refrain from creating a "guide" - do not impose a single point of view, but instead, give the reader food for thought. Examine the most dangerous enemies and give recommendations on fighting them. If necessary, note the specifics of the game in different modes (AB, RB, SB).'' | ''Describe the tactics of playing in the aircraft, the features of using aircraft in a team and advice on tactics. Refrain from creating a "guide" - do not impose a single point of view, but instead, give the reader food for thought. Examine the most dangerous enemies and give recommendations on fighting them. If necessary, note the specifics of the game in different modes (AB, RB, SB).'' | ||
| + | |||
| + | '''Usage against Ground Targets''' | ||
| + | |||
| + | While the F-105 can carry up to four air-to-ground guided missiles, it can only do this with four AGM-12Bs. This load is hardly optimal, particularly since with the ballistic computer, bombs might be far more effective anyhow, and you get AGM-12Cs anyway- but only two of them. Keep in mind, however, that with this payload, you cannot carry AIM-9Es for self-defense, nor chaff for spoofing radar. While still able to kill ground targets, this payload's effectiveness is sometimes questionable in the face of the other payloads this versatile aircraft is capable of carrying. When carrying AIM-9Es or chaff pods, the amount of air-to-ground missiles that the aircraft is able to carry drops to two. The aircraft can only carry two AGM-12s and AIM-9Es with bombs anyway, meaning that using combined loads of AGM-12Bs and missiles/chaff is entirely moot once AGM-12Cs are unlocked and available to the player. The F-105 lacks any fire-and-forget air-to-ground ordnance, as well as any kind of good stand-off ordnance to use against SPAAs. This means that aircraft is vulnerable to radar-guided gun AAA as well as enemy surface-to-air missiles, since novice pilots will have to fly low in order to use the bombs, the AGM-12s require constant attention to hit moving targets, and the aircraft lacks any sort of standoff ordnance to use against AAA while staying at an appreciable distance away. | ||
| + | |||
| + | The F-105 is equipped with a full range of ballistic computer functionality, including a '''Constantly Computed Impact Point''' function for bombs and rockets that shows the pilot where a bomb will fall when dropped, and a '''Constantly Computed Release Point''' function that uses the powerful onboard radar system to paint a target on the ground, and it gives the pilot an alert when "release authority" is handed over at a point where if the bomb is dropped, the projectile will hit the target selected. The CCRP system is effective at any altitude, but requires the pilot to have good timing and knowledge of the system being used. The CCIP system is also useable from most altitudes, but is most effective in dives below 1000 metres above ground level, meaning that the pilot will have to fly low, exposing themselves to enemy fire as a result. While this is not usually a problem in Air RB, in Ground RB, where ground-based Short-Range Air Defense (SHORAD) is present, the aircraft is particularly vulnerable to radar-assisted Gun AAA, enemy IR/Beam-riding SAMs and even enemy machine-guns and main cannons. | ||
| + | |||
| + | Despite this vulnerability, the aircraft is extremely tough and survivable. | ||
=== Pros and cons === | === Pros and cons === | ||
| Line 257: | Line 271: | ||
* High speed and energy retention for Boom & Zoom tactics | * High speed and energy retention for Boom & Zoom tactics | ||
| + | * Good dogfighter at high speeds with a surprising amount of pull | ||
| + | * Good acceleration | ||
* Effective control authority at speeds in excess of ~700km/h | * Effective control authority at speeds in excess of ~700km/h | ||
| − | * Excellent takeoff flaps that may be used during combat | + | * Excellent takeoff flaps with a high rip speed (~823km/h) that may be used during combat |
| − | * High pull at | + | * High pull at speeds of ~1000km/h (12G-14G) |
* Excellent M61 Vulcan cannon with large ammo pool | * Excellent M61 Vulcan cannon with large ammo pool | ||
* Excellent range of payloads | * Excellent range of payloads | ||
| Line 272: | Line 288: | ||
* Lacks armour | * Lacks armour | ||
* Easily set ablaze from the side and rear | * Easily set ablaze from the side and rear | ||
| + | * Acceleration is middling compared to other aircraft; take care not to lose too much speed | ||
| + | * Bad low speed handling | ||
* Tail control easily disabled by missiles or gunfire | * Tail control easily disabled by missiles or gunfire | ||
* Large target while turning | * Large target while turning | ||
Revision as of 13:12, 21 December 2021

Contents
Description
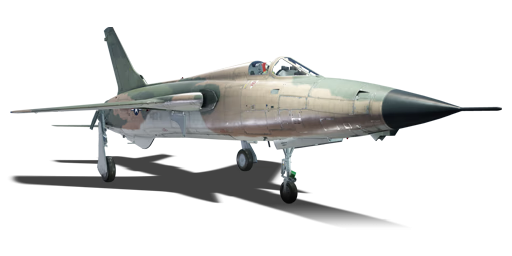
The Republic F-105D Thunderchief is a rank VII American strike aiicraft with a battle rating of 10.7 (AB), 10.0 (RB), and 9.7 (SB). It was introduced in Update "Winged Lions". Like its contemporaries, the Su-7 family, the F-105 is a strike aircraft designed for ordnance delivery at high speeds at low altitude, and its design reflects this, with powerful acceleration, excellent control authority at high speeds, good roll rate, and plentiful choices in bomb options, as well as a full range of ballistic computer programming, including CCIP for Rockets, Bombs and Cannons, plus a CCRP function that uses its surprisingly capable AN/ASG-19 radar. While it lacks a true "lock" function, the gun has a radar-ranging gunsight as well as a Search and IFF function that allows it to at least see targets in front and above it to a relatively high degree of efficiency at ranges of up to 37 kilometers, giving it a valuable asset in avoiding enemies as it completely lacks any sort of countermeasures save for chaff. However, it does not have any flares, making it vulnerable to IR missiles that are prevalent at the BR, offset by the aforementioned roll rate and control authority, meaning that it can easily outroll or outmaneuver any air to air missile in-game up to the R.550, which can only be outmaneuvered with range and assuming that the Magic's booster has shut off.
This aircraft was designed in real life by Republic Aviation as a nuclear strike aircraft, and it performs best roaring through valleys and over hills at low altitude, reaching speeds of almost mach 1.2 when clean, and mach 1.05 with a full load of sixteen 750-pound M117 bombs. It also has the capability to pull surprisingly high Gs and turn tighter than expected for an attack aircraft, managing turns of 12-13Gs with empty bomb racks and 4 sidewinders or 13-14G clean with 12 minutes of fuel left in the tank at 1000km/h. These are fairly standard conditions when turning away from a base to head home for more ordnance, or while tussling with MiGs over the battlefield.
General info
Flight performance
Describe how the aircraft behaves in the air. Speed, manoeuvrability, acceleration and allowable loads - these are the most important characteristics of the vehicle.
| Characteristics | Max Speed (km/h at 10,668 m) |
Max altitude (metres) |
Turn time (seconds) |
Rate of climb (metres/second) |
Take-off run (metres) | |||
|---|---|---|---|---|---|---|---|---|
| AB | RB | AB | RB | AB | RB | |||
| Stock | 2,129 | 2,102 | 12192 | 28.5 | 29.5 | 149.3 | 141.5 | 1,050 |
| Upgraded | 2,206 | 2,167 | 27.5 | 28.0 | 202.8 | 175.0 | ||
Details
| Features | |||||
|---|---|---|---|---|---|
| Combat flaps | Take-off flaps | Landing flaps | Air brakes | Arrestor gear | Drogue chute |
| X | ✓ | ✓ | ✓ | X | ✓ |
| Limits | ||||||
|---|---|---|---|---|---|---|
| Wings (km/h) | Gear (km/h) | Flaps (km/h) | Max Static G | |||
| Combat | Take-off | Landing | + | - | ||
| 0 | 546 | 2,350 | 827 | 444 | ~12 | ~5 |
| Optimal velocities (km/h) | |||
|---|---|---|---|
| Ailerons | Rudder | Elevators | Radiator |
| < 720 | < 950 | < 800 | N/A |
Engine performance
| Engine | Aircraft mass | |||||
|---|---|---|---|---|---|---|
| Engine name | Number | Basic mass | Wing loading (full fuel) | |||
| J75-P-19W | 1 | _,___ kg | ___ kg/m2 | |||
| Engine characteristics | Mass with fuel (no weapons load) | Max Takeoff Weight | ||||
| Weight | Type | _m fuel | __m fuel | __m fuel | ||
| 2699 kg | Jet | _,___ kg | _,___ kg | _,___ kg | _,___ kg | |
| Maximum engine thrust @ 0 m (RB/SB) | Thrust to weight ratio @ 0 m (___%/WEP) | |||||
| Condition | 100% | WEP | _m fuel | __m fuel | __m fuel | MTOW |
| Stationary | 7060 kgf | 11060 kgf | _.__ | _.__ | _.__ | _.__ |
| Optimal | ___ kgf (_ km/h) |
~13309 kgf (1109 km/h) |
_.__ | _.__ | _.__ | _.__ |
Survivability and armour
| IMPORTANT: This aircraft cannot carry flares. The countermeasure pods are AN/ALE-38/41 Chaff dispensers, which, unlike modern countermeasures pods or USN countermeasure systems, use neither a common calibre nor dispenser system as flares. The F-105 was never equipped with the AN/ALE-40 combined Chaff/Flare suite used on the F-4E, nor the AN/ALE-29 chaff dispenser used on the A-4 Skyhawks and A-7 Corsairs. |
Examine the survivability of the aircraft. Note how vulnerable the structure is and how secure the pilot is, whether the fuel tanks are armoured, etc. Describe the armour, if there is any, and also mention the vulnerability of other critical aircraft systems.
- 12.7mm armour plate behind the pilot.
The F-105, like the Su-7, is extremely survivable. Often, cannon bursts from the rear that "kill" the plane will destroy the engine and disable the tail control, but the wings, fuselage and tail assembly will all stay attached. Due to its large size, smaller missiles such as R-60 have an extremely slim chance to detonate even after you appear to have "dodged" it, since the proximity fuze is still live after the missile loses lock. The aircraft can lose a wingtip and a tail fin, but still make it home to base. The aircraft has a chance to put out fires in its spinal fuel tanks, but due to their position above the engine, if the rear one gets set on fire, the engine will likely also burn down. However, the F-105 is good at gliding home and back to base even when the engine is down, or after sustaining heavy damage. The pilot lacks protection from the front and sides, and the aircraft lacks any sort of protection for fuel tanks, engine, control cables or control surfaces, unlike its well-armoured stablemate, the A-7.
Modifications and economy
| Flight performance | Survivability | Weaponry | ||||||||||||||||||||||||
|---|---|---|---|---|---|---|---|---|---|---|---|---|---|---|---|---|---|---|---|---|---|---|---|---|---|---|
|
|
|
Armaments
Offensive armament
The F-105D is armed with:
- 1 x 20 mm M61A1 cannon, nose-mounted (1,028 rpg)
Suspended armament
| This aircraft has many different payloads. For convenience, the aircraft's ordnance has been split into sections. |
The F-105D can be outfitted with the following ordnance:
- Without load (clean, no pylons)
Air-to-Air Missiles:
Click Expand to show
- 4 x AIM-9B Sidewinder missiles
- 4 x AIM-9E Sidewinder missiles
Air-To-Ground Missiles:
Click Expand to show
- 4 x AGM-12B Bullpup missiles
- 2 x AGM-12B Bullpup missiles + 32 x countermeasures
- 2 x AGM-12C Bullpup missiles
- 2 x AGM-12C Bullpup missiles + 32 x countermeasures
- 14 x 750 lb M117 cone 45 bombs + 2 x AGM-12B Bullpup missiles (10,500 lb total)
- 8 x 750 lb M117 cone 45 bombs + 2 x AGM-12C Bullpup missiles (6,000 lb total)
- 6 x 750 lb M117 cone 45 bombs + 2 x AGM-12C Bullpup missiles + 32 x countermeasures (4,500 lb total)
- 9 x 1,000 lb LDGP Mk 83 bombs + 2 x AGM-12B Bullpup missiles (9,000 lb total)
- 5 x 1,000 lb LDGP Mk 83 bombs + 2 x AGM-12C Bullpup missiles (5,000 lb total)
- 3 x 1,000 lb LDGP Mk 83 bombs + 2 x AGM-12C Bullpup missiles + 32 x countermeasures (3,000 lb total)
Rockets:
Click Expand to show
- 76 x FFAR Mighty Mouse rockets
- 38 x FFAR Mighty Mouse rockets + 32 x countermeasures
Bombs:
Click Expand to show
- 14 x 500 lb LDGP Mk 82 bombs (7,000 lb total)
- 14 x 500 lb LDGP Mk 82 bombs + 32 x countermeasures (7,000 lb total)
- 14 x 750 lb M117 cone 45 bombs + 32 x countermeasures (10,500 lb total)
- 16 x 750 lb M117 cone 45 bombs (12,000 lb total)
- 6 x 750 lb M117 cone 45 bombs + 2 x 2,000 lb LDGP Mk 84 bombs + 32 x countermeasures (8,500 lb total)
- 8 x 750 lb M117 cone 45 bombs + 2 x 2,000 lb LDGP Mk 84 bombs (10,000 lb total)
- 8 x 750 lb M117 cone 45 bombs + 2 x 3,000 lb M118 bombs (12,000 lb total)
- 6 x 750 lb M117 cone 45 bombs + 2 x 3,000 lb M118 bombs + 32 x countermeasures (10,500 lb total)
- 11 x 1,000 lb LDGP Mk 83 bombs (11,000 lb total)
- 5 x 1,000 lb LDGP Mk 83 bombs + 2 x 3,000 lb M118 bombs (11,000 lb total)
- 3 x 1,000 lb LDGP Mk 83 bombs + 2 x 3,000 lb M118 bombs + 32 x countermeasures (9,000 lb total)
- 3 x 2,000 lb LDGP Mk 84 bombs (6,000 lb total)
- 3 x 2,000 lb LDGP Mk 84 bombs + 32 x countermeasures (6,000 lb total)
- 3 x 3,000 lb M118 bombs (9,000 lb total)
- 3 x 3,000 lb M118 bombs + 32 x countermeasures (9,000 lb total)
Multirole:
Click Expand to show
- 6 x 750 lb M117 cone 45 bombs + 2 x AGM-12C Bullpup missiles + 4 x AIM-9B Sidewinder missiles (4,500 lb total)
- 6 x 750 lb M117 cone 45 bombs + 2 x AGM-12C Bullpup missiles + 4 x AIM-9E Sidewinder missiles (4,500 lb total)
- 6 x 750 lb M117 cone 45 bombs + 2 x AGM-12B Bullpup missiles + 4 x AIM-9B Sidewinder missiles (4,500 lb total)
- 6 x 750 lb M117 cone 45 bombs + 2 x AGM-12B Bullpup missiles + 4 x AIM-9E Sidewinder missiles (4,500 lb total)
- 3 x 1,000 lb LDGP Mk 83 bombs + 2 x AGM-12B Bullpup missiles + 4 x AIM-9B Sidewinder missiles (3,000 lb total)
- 3 x 1,000 lb LDGP Mk 83 bombs + 2 x AGM-12B Bullpup missiles + 4 x AIM-9E Sidewinder missiles (3,000 lb total)
- 3 x 1,000 lb LDGP Mk 83 bombs + 2 x AGM-12C Bullpup missiles + 4 x AIM-9B Sidewinder missiles (3,000 lb total)
- 3 x 1,000 lb LDGP Mk 83 bombs + 2 x AGM-12C Bullpup missiles + 4 x AIM-9E Sidewinder missiles (3,000 lb total)
- 14 x 500 lb LDGP Mk 82 bombs + 2 x AIM-9B Sidewinder missiles (7,000 lb total)
- 14 x 750 lb M117 cone 45 bombs + 4 x AIM-9B Sidewinder missiles (10,500 lb total)
- 14 x 750 lb M117 cone 45 bombs + 4 x AIM-9E Sidewinder missiles (10,500 lb total)
- 6 x 750 lb M117 cone 45 bombs + 2 x 2,000 lb LDGP Mk 84 bombs + 4 x AIM-9B Sidewinder missiles (8,500 lb total)
- 6 x 750 lb M117 cone 45 bombs + 2 x 2,000 lb LDGP Mk 84 bombs + 4 x AIM-9E Sidewinder missiles (8,500 lb total)
- 6 x 750 lb M117 cone 45 bombs + 2 x 3,000 lb M118 bombs + 4 x AIM-9B Sidewinder missiles (10,500 lb total)
- 6 x 750 lb M117 cone 45 bombs + 2 x 3,000 lb M118 bombs + 4 x AIM-9E Sidewinder missiles (10,500 lb total)
- 9 x 1,000 lb LDGP Mk 83 bombs + 4 x AIM-9B Sidewinder missiles (9,000 lb total)
- 9 x 1,000 lb LDGP Mk 83 bombs + 4 x AIM-9E Sidewinder missiles (9,000 lb total)
- 3 x 1,000 lb LDGP Mk 83 bombs + 2 x 3,000 lb M118 bombs + 4 x AIM-9B Sidewinder missiles (9,000 lb total)
- 3 x 1,000 lb LDGP Mk 83 bombs + 2 x 3,000 lb M118 bombs + 4 x AIM-9E Sidewinder missiles (9,000 lb total)
- 3 x 2,000 lb LDGP Mk 84 bombs + 4 x AIM-9B Sidewinder missiles (6,000 lb total)
- 3 x 2,000 lb LDGP Mk 84 bombs + 4 x AIM-9E Sidewinder missiles (6,000 lb total)
- 3 x 3,000 lb M118 bombs + 4 x AIM-9B Sidewinder missiles (9,000 lb total)
- 3 x 3,000 lb M118 bombs + 4 x AIM-9E Sidewinder missiles (9,000 lb total)
The F-105 carries a range of bombs, but the payloads an F-105 pilot will likely most often use are:
- 16 x 750 lb M117 cone 45 bombs (12,000 lb total) This payload is best for bombing bases. It takes seven M117 bombs to destroy a base at 9.7, and with 16 bombs, dropping in 5 pairs of 2 and 6 individual drops, an F-105 can easily pickle off four pairs of bombs (8 total) before using the remaining ones to destroy another base, lighting the afterburner, and heading for home.
- 14 x 750 lb M117 cone 45 bombs + 4 x AIM-9E Sidewinder missiles (10,500 lb total) This payload is one of the best for bombing bases and then switching into an Air to Air role. The AIM-9E missiles are capable against aircraft that are slow, and useful for causing faster aircraft to maneuver to avoid missiles, forcing them to lose speed and giving you a chance to close the gap.
- 6 x 750 lb M117 cone 45 bombs + 2 x 3,000 lb M118 bombs + 4 x AIM-9E Sidewinder missiles (10,500 lb total) One of the single most effective payloads, this may be used as a substitute for the above payload if a pilot dislikes having to pickle off eight bombs individually, as now, with a single push of a button, two M118s come sliding off the rails. These two bombs combined are more than enough for a base, but are also effective in their own right as Capture-point clearing bombs, or for destroying aircraft staying on the airfield near the end of a match. Campers beware!
- 6 x 750 lb M117 cone 45 bombs + 2 x AGM-12C Bullpup missiles + 4 x AIM-9E Sidewinder missiles (4,500 lb total) Two heavy-duty bullpups and four sidewinders make for a powerful punch against both ground and air targets. The M117s are there merely as additional ordnance, and may be jettisoned where necessary for a cleaner aircraft, or used against enemy targets.
Note that nowhere in these payloads are any provisions for the LDGP Mark 82 500lbs bombs provided stock, the LDGP Mark 83 1000lb bomb, or the AGM-12B/sidewinder combinations. This is because the M117s make the Mark 83 effectively redundant, as they carry nearly 210 kilograms of TNT equivalent- the F-105 can carry more of these bombs, and while at first, the Mk 83's additional 66 kilograms of TNT equivalent (for a total of 276kg per thousand-pound bomb) seem like an improvement, the M117 has nearly identical fragment dispersion/vehicle kill radii, as well as only 7mm less armour penetration. Coupled with the aircraft's ballistic computer for precision-bombing, experienced pilots shouldn't need the extra explosive mass to secure a kill, and since on a single hardpoint, the F-105 carries more M117s than Mark 83s (4-6 as opposed to 3 for the Mark 83), even novice pilots may find it easier to use the M117, since they have more M117s to drop. Pilots will also find it easier to acquire the M117 than the Mark 83 on this aircraft, as M117s are available as a Tier I modification, while Mark 83s are in Tier II, and the Thunderchief has far more Tier II modifications that should take a higher priority over the Mark 83, such as the booster or AIM-9B upgrade.
Chaff is not advisable for the F-105D. At this battle rating, the F-105 faces mostly IR missiles, and given its flight performance, pilots must rely on maneuvering alone to defeat the AIM-9Bs, AIM-9Es, R-3Ss, AIM-9Gs that are typical to planes around the 8.7-9.7 BR range, as well as the occasional R-60s, AIM-9Js/Rb 24Js, and rare AIM-7C, AIM-7D and AIM-7E sparrows that it can face from time to time. All of these missiles can be defeated with appropriate maneuvering and avoidance of enemy aircraft, making chaff pods entirely redundant, and at the moment, just something that takes up more space on a hard point that could be used by a bomb, missile, or rocket pod. However, in Ground RB, chaff may be useful in temporarily spoofing early missile and gun AAA. However, no AAA at that BR is entirely radar-based, and most radar-based SPAAGs use their radar to determine only a target solution rather than guide any sort of weapon. For instance, the most common anti-aircraft missile systems in Ground RB- the Roland 1, Type 93, Ozelot, 2S6 and ADATS- all use either IR guidance or a form of Semi-Active beam-riding guidance that completely ignores chaff.
Four AGM-12Bs is the maximum amount of guided ordnance that the F-105D can carry, if a pilot requires a lot of guided missiles to take out tanks in Ground RB. However, due to the ballistic computer, it is often better to take bombs instead, since you can drop from higher up and on different flight profiles where enemy tanks and SPAAs do not expect air attack.
The Mighty Mouse FFARs that it recieves are effective, but slightly underpowered compared to the Zunis, S-8s, S-24s, S-25s and 13,5cm m/70 other similar aircraft in and around its battle rating recieve. However, at the moment, the LAU-3s cannot be used with AIM-9Es, bombs, or any other payloads outside of either on their own or with chaff. This makes bringing FFARs a sub-par option compared to other ordnance options already available for the F-105D Thunderchief.
Usage in battles
Describe the tactics of playing in the aircraft, the features of using aircraft in a team and advice on tactics. Refrain from creating a "guide" - do not impose a single point of view, but instead, give the reader food for thought. Examine the most dangerous enemies and give recommendations on fighting them. If necessary, note the specifics of the game in different modes (AB, RB, SB).
Usage against Ground Targets
While the F-105 can carry up to four air-to-ground guided missiles, it can only do this with four AGM-12Bs. This load is hardly optimal, particularly since with the ballistic computer, bombs might be far more effective anyhow, and you get AGM-12Cs anyway- but only two of them. Keep in mind, however, that with this payload, you cannot carry AIM-9Es for self-defense, nor chaff for spoofing radar. While still able to kill ground targets, this payload's effectiveness is sometimes questionable in the face of the other payloads this versatile aircraft is capable of carrying. When carrying AIM-9Es or chaff pods, the amount of air-to-ground missiles that the aircraft is able to carry drops to two. The aircraft can only carry two AGM-12s and AIM-9Es with bombs anyway, meaning that using combined loads of AGM-12Bs and missiles/chaff is entirely moot once AGM-12Cs are unlocked and available to the player. The F-105 lacks any fire-and-forget air-to-ground ordnance, as well as any kind of good stand-off ordnance to use against SPAAs. This means that aircraft is vulnerable to radar-guided gun AAA as well as enemy surface-to-air missiles, since novice pilots will have to fly low in order to use the bombs, the AGM-12s require constant attention to hit moving targets, and the aircraft lacks any sort of standoff ordnance to use against AAA while staying at an appreciable distance away.
The F-105 is equipped with a full range of ballistic computer functionality, including a Constantly Computed Impact Point function for bombs and rockets that shows the pilot where a bomb will fall when dropped, and a Constantly Computed Release Point function that uses the powerful onboard radar system to paint a target on the ground, and it gives the pilot an alert when "release authority" is handed over at a point where if the bomb is dropped, the projectile will hit the target selected. The CCRP system is effective at any altitude, but requires the pilot to have good timing and knowledge of the system being used. The CCIP system is also useable from most altitudes, but is most effective in dives below 1000 metres above ground level, meaning that the pilot will have to fly low, exposing themselves to enemy fire as a result. While this is not usually a problem in Air RB, in Ground RB, where ground-based Short-Range Air Defense (SHORAD) is present, the aircraft is particularly vulnerable to radar-assisted Gun AAA, enemy IR/Beam-riding SAMs and even enemy machine-guns and main cannons.
Despite this vulnerability, the aircraft is extremely tough and survivable.
Pros and cons
Summarise and briefly evaluate the vehicle in terms of its characteristics and combat effectiveness. Mark its pros and cons in the bulleted list. Try not to use more than 6 points for each of the characteristics. Avoid using categorical definitions such as "bad", "good" and the like - use substitutions with softer forms such as "inadequate" and "effective".
Pros:
- High speed and energy retention for Boom & Zoom tactics
- Good dogfighter at high speeds with a surprising amount of pull
- Good acceleration
- Effective control authority at speeds in excess of ~700km/h
- Excellent takeoff flaps with a high rip speed (~823km/h) that may be used during combat
- High pull at speeds of ~1000km/h (12G-14G)
- Excellent M61 Vulcan cannon with large ammo pool
- Excellent range of payloads
- Shrugs off damage to wings, airframe and fuselage
- Four AIM-9Es for air to air work
- Good search radar
Cons:
- Lacks armour
- Easily set ablaze from the side and rear
- Acceleration is middling compared to other aircraft; take care not to lose too much speed
- Bad low speed handling
- Tail control easily disabled by missiles or gunfire
- Large target while turning
- No flares; vulnerable to IR missiles
- Chaff pods supplant AIM-9Es and/or air-to-ground ordnance, and have a relatively low countermeasure count
- Its own IR missiles are mediocre, and do not pull hard enough or have a high enough track rate for dogfights
- Lacks advanced TV/Laser-guided missiles
- Radar lacks ACM mode, changeable FOV or changeable range, and may only be used as a rangefinder
- High minimum landing approach speed may be difficult for novice jet players
- High payload results in sluggish performance with full loads of bombs
- Extremely high fuel consumption on Afterburner; requires careful management of fuel supply on minimum or 20 minutes fuel load
History
Describe the history of the creation and combat usage of the aircraft in more detail than in the introduction. If the historical reference turns out to be too long, take it to a separate article, taking a link to the article about the vehicle and adding a block "/History" (example: https://wiki.warthunder.com/(Vehicle-name)/History) and add a link to it here using the main template. Be sure to reference text and sources by using <ref></ref>, as well as adding them at the end of the article with <references />. This section may also include the vehicle's dev blog entry (if applicable) and the in-game encyclopedia description (under === In-game description ===, also if applicable).
Media
- Videos
See also
Links to the articles on the War Thunder Wiki that you think will be useful for the reader, for example:
- reference to the series of the aircraft;
- links to approximate analogues of other nations and research trees.
External links
Paste links to sources and external resources, such as:
- topic on the official game forum;
- other literature.
| USA jet aircraft | |
|---|---|
| Fighters | |
| F-4 | F-4C Phantom II · F-4E Phantom II · F-4J Phantom II · F-4S Phantom II |
| F-5 | F-5A · F-5C · F-5E · F-20A |
| F-8 | F8U-2 · F-8E |
| F-80 | F-80A-5 · F-80C-10 |
| F-84 | F-84B-26 · F-84F · F-84G-21-RE |
| F-86 | F-86A-5 · F-86F-25 · F-86F-2 · F-86F-35 |
| F-89 | F-89B · F-89D |
| F-100 | F-100D |
| F-104 | F-104A · F-104C |
| F-14 | F-14A Early · F-14B |
| F-15 | F-15A |
| F-16 | F-16A · F-16A ADF · F-16C |
| F9F | F9F-2 · F9F-5 · F9F-8 |
| Other | P-59A · F2H-2 · F3D-1 · F3H-2 · F4D-1 · F11F-1 |
| Strike Aircraft | |
| FJ-4 | FJ-4B · FJ-4B VMF-232 |
| A-4 | A-4B · A-4E Early |
| A-6 | A-6E TRAM |
| A-7 | A-7D · A-7E · A-7K |
| AV-8 | AV-8A · AV-8C |
| A-10 | A-10A · A-10A Late |
| B-57 | B-57A · B-57B |
| F-105 | F-105D |
| F-111 | F-111A |
