Difference between revisions of "F2A-3"
(Added basic information and tables.) |
|||
| Line 2: | Line 2: | ||
== Description == | == Description == | ||
| − | ''In the description, the first part needs to be about the history of and the creation and combat usage of the aircraft, as well as its key features. In the second part, tell the reader about the aircraft in the game. Insert screenshot of the vehicle. If the novice player does not remember the vehicle by name, he will immediately understand what kind of vehicle it is talking about.'' | + | <!--''In the description, the first part needs to be about the history of and the creation and combat usage of the aircraft, as well as its key features. In the second part, tell the reader about the aircraft in the game. Insert screenshot of the vehicle. If the novice player does not remember the vehicle by name, he will immediately understand what kind of vehicle it is talking about.''--> |
| + | |||
| + | [[File:GarageImage_{{PAGENAME}}.jpg|420px|thumb|left]] | ||
| + | {{break}} | ||
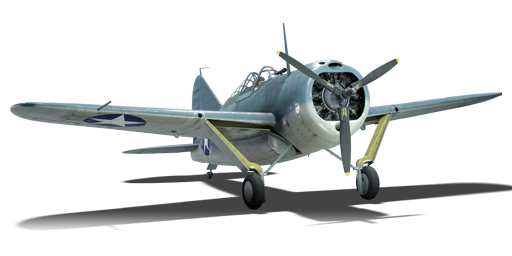
| + | The '''F2A-3 ''Buffalo''''' is a Rank I American fighter with a battle rating of 2.7 (AB/RB) and 2.3 (SB). It was in the game since the start of the Open Beta Test prior to Update 1.29. | ||
| + | |||
| + | The F2A-3 Buffalo gives pilots the first real taste of typical American fighters in War Thunder- a lumbering, well-armored beast of a fighter that is well armed and has decent performance capabilities. Indeed, the second Buffalo in War Thunder is a heavy aircraft for its rank, signifying that its turning ability is underwhelming against the sharp turners it meets, especially regarding its relatively low BR- it will face low-rank [[A6M2 Reisen|Zeroes]] as well as more nimble German Bf 109's. Due to its 4 machine guns the F2A-3 Buffalo is not very good in dogfight with British or German aircraft. | ||
== General info == | == General info == | ||
=== Flight Performance === | === Flight Performance === | ||
| − | ''Describe how the aircraft behaves in the air. Maximum speed, maneuverability, speed and allowable loads - these are the most important characteristics of the vehicle.'' | + | <!--''Describe how the aircraft behaves in the air. Maximum speed, maneuverability, speed and allowable loads - these are the most important characteristics of the vehicle.''--> |
| + | {| class="wikitable" style="text-align:center" | ||
| + | |- | ||
| + | ! colspan="8" | Characteristics | ||
| + | |- | ||
| + | ! colspan="8" | ''Stock'' | ||
| + | |- | ||
| + | ! colspan="2" | Max Speed<br>(km/h at 4,492 m) | ||
| + | ! rowspan="2" | Max altitude<br>(meters) | ||
| + | ! colspan="2" | Turn time<br>(seconds) | ||
| + | ! colspan="2" | Rate of climb<br>(meters/second) | ||
| + | ! rowspan="2" |Take-off run<br>(meters) | ||
| + | |- | ||
| + | ! AB | ||
| + | ! RB | ||
| + | ! AB | ||
| + | ! RB | ||
| + | ! AB | ||
| + | ! RB | ||
| + | |- | ||
| + | | 494 || 477 || 10,424 || 18.9 || 19.3 || 11.3 || 13.1 || 200 | ||
| + | |- | ||
| + | ! colspan="8" | ''Upgraded'' | ||
| + | |- | ||
| + | ! colspan="2" | Max Speed<br>(km/h at 4,492 m) | ||
| + | ! rowspan="2" |Max altitude (meters) | ||
| + | ! colspan="2" | Turn time (seconds) | ||
| + | ! colspan="2" | Rate of climb<br>(meters/second) | ||
| + | ! rowspan="2" |Take-off run (meters) | ||
| + | |- | ||
| + | ! AB | ||
| + | ! RB | ||
| + | ! AB | ||
| + | ! RB | ||
| + | ! AB | ||
| + | ! RB | ||
| + | |- | ||
| + | | 547 || 518 || 10,424 || 16.4 || 17.6 || 23.9 || 16.4 || 200 | ||
| + | |- | ||
| + | |} | ||
| + | |||
| + | ====Details==== | ||
| + | {| class="wikitable" style="text-align:center" | ||
| + | |- | ||
| + | ! colspan="5" | Features | ||
| + | |- | ||
| + | ! Combat flap | ||
| + | ! Take-off flap | ||
| + | ! Landing flap | ||
| + | ! Air brakes | ||
| + | ! Arrestor gear | ||
| + | |- | ||
| + | | ✓ || ✓ || ✓ || ✓ || X <!-- ✓ --> | ||
| + | |- | ||
| + | |} | ||
| + | |||
| + | {| class="wikitable" style="text-align:center" | ||
| + | |- | ||
| + | ! colspan="5" | Limits | ||
| + | |- | ||
| + | ! rowspan="2" | Wing-break speed<br>(km/h) | ||
| + | ! rowspan="2" | Gear limit<br>(km/h) | ||
| + | ! rowspan="2" | Combat flap<br> (km/h) | ||
| + | ! colspan="2" | Max Static G | ||
| + | |- | ||
| + | ! + | ||
| + | ! - | ||
| + | |- | ||
| + | | 761 || 720 || 460 || ~18 || ~7 | ||
| + | |- | ||
| + | |} | ||
| + | |||
| + | {| class="wikitable" style="text-align:center" | ||
| + | |- | ||
| + | ! colspan="4" | Optimal velocities | ||
| + | |- | ||
| + | ! Ailerons<br>(km/h) | ||
| + | ! Rudder<br>(km/h) | ||
| + | ! Elevators<br>(km/h) | ||
| + | ! Radiator<br>(km/h) | ||
| + | |- | ||
| + | | < 465 || < 400 || < 500 || > 250 | ||
| + | |- | ||
| + | |} | ||
| + | |||
| + | {| class="wikitable" style="text-align:center" | ||
| + | |- | ||
| + | ! colspan="3" | Compressor (RB/SB) | ||
| + | |- | ||
| + | ! colspan="3" | Setting 1 | ||
| + | |- | ||
| + | ! Optimal altitude | ||
| + | ! 100% Engine power | ||
| + | ! WEP Engine power | ||
| + | |- | ||
| + | | 700 m || 1,010 hp || 1,192 hp | ||
| + | |- | ||
| + | ! colspan="3" | Setting 2 | ||
| + | |- | ||
| + | ! Optimal altitude | ||
| + | ! 100% Engine power | ||
| + | ! WEP Engine power | ||
| + | |- | ||
| + | | 3,700 m || 930 hp || 1,097 hp | ||
| + | |- | ||
| + | <!--! colspan="3" | Setting 3 | ||
| + | |- | ||
| + | ! Optimal altitude | ||
| + | ! 100% Engine power | ||
| + | ! WEP Engine power | ||
| + | |- | ||
| + | | ?,??? m || ?,??? hp || ?,??? hp | ||
| + | |- --> | ||
| + | |} | ||
=== Survivability and armour === | === Survivability and armour === | ||
| − | ''Examine the survivability of the aircraft. Note how vulnerable the structure is and how secure the pilot is, whether the fuel tanks are armoured. Describe the armour, if there is any, also mention the vulnerability of other critical aircraft systems.'' | + | <!--''Examine the survivability of the aircraft. Note how vulnerable the structure is and how secure the pilot is, whether the fuel tanks are armoured. Describe the armour, if there is any, also mention the vulnerability of other critical aircraft systems.''--> |
| + | * No armour plating | ||
| + | * No armour glazing | ||
| + | * Critical components located at front of aircraft (fuel, pilot, engine, controls) | ||
| + | * More fuel tanks located in wings near fuselage | ||
== Armaments == | == Armaments == | ||
=== Offensive armament === | === Offensive armament === | ||
| − | ''Describe the offensive armament of the aircraft, if any. Describe how effective the cannons and machine guns are in a battle, and also what belts or drums are better to use. If there is no offensive weaponry, delete this subsection.'' | + | <!--''Describe the offensive armament of the aircraft, if any. Describe how effective the cannons and machine guns are in a battle, and also what belts or drums are better to use. If there is no offensive weaponry, delete this subsection.''--> |
| + | {{main|Browning M2 (12.7 mm)}} | ||
| + | |||
| + | The '''''{{PAGENAME}}''''' is armed with: | ||
| + | |||
| + | * 2 x 12.7 mm Browning M2 machine gun, nose-mounted (250 rpg = 500 total) | ||
| + | * 2 x 12.7 mm Browning M2 machine gun, nose-mounted (400 rpg = 800 total) | ||
=== Suspended armament === | === Suspended armament === | ||
| − | ''Describe the aircraft's suspended armament: additional cannons under the wings, bombs, rockets and torpedoes. This section is especially important for bombers and attackers. If there is no suspended weaponry remove this subsection.'' | + | <!--''Describe the aircraft's suspended armament: additional cannons under the wings, bombs, rockets and torpedoes. This section is especially important for bombers and attackers. If there is no suspended weaponry remove this subsection.''--> |
| + | {{main|Bombs}} | ||
| + | The '''''{{PAGENAME}}''''' can be configured for: | ||
| + | |||
| + | * Without load | ||
| + | * 2 x 100 lb AN-M30A1 bombs (200 lb total) | ||
| + | <!-- | ||
=== Defensive armament === | === Defensive armament === | ||
''Defensive armament with turret machine guns or cannons, crewed by gunners. Examine the number of gunners and what belts or drums are better to use. If defensive weaponry is not available remove this subsection.'' | ''Defensive armament with turret machine guns or cannons, crewed by gunners. Examine the number of gunners and what belts or drums are better to use. If defensive weaponry is not available remove this subsection.'' | ||
| + | --> | ||
| + | == Usage in the battles == | ||
| + | <!--''Describe the tactics of playing in an aircraft, the features of using vehicles in a team and advice on tactics. Refrain from creating a "guide" - do not impose a single point of view but give the reader food for thought. Examine the most dangerous enemies and give recommendations on fighting them. If necessary, note the specifics of the game in different modes (AB, RB, SB).''--> | ||
| + | The characteristics of the F2A-3 means that it's pilots shouldn't try to turn-fight their opponents and that they should also strictly maintain their energy. However, this weight and energy retention ability means that any Buffalo pilot that cares to climb high- 3,000-4,000 m - will be able to combat opponents with relative ease. However, they should be wary of adept climbers (such as [[Bf_109|Bf 109s]] and the US's own [[P-47D-25|P-47]], at least in Arcade) as they are more than a match for the F2A's climb rate. In a dive, the Buffalo can rapidly catch up to virtually anything it faces, and, when it does, a battery of 4 x .50 calibre machine guns will make short work of any target, save well-armored bombers such as the [[B-25J-1 Mitchell|B-25]] or [[Ju 88 A-4|Ju 88]], which an F2A pilot will probably rarely meet. | ||
| + | |||
| + | Discipline is a vital trait needed to master this plane. If you are used to simply engaging with the first opponent you find and turn-fighting, the F2A is not for you, as is much of the US fighter line. The recommended tactic to use with the F2A is Boom & Zoom. At the beginning of the battle, it is vital to climb- not climbing reduces your energy capabilities drastically due to the low level flight speed of the F2A- climbing significantly exacerbates performance of the F2A due to its weight and diving capabilities. After attempting a diving engagement on an enemy, whether successful or not, one should always pull out of the engagement shortly after the first attacking pass, as not to waste speed and/or altitude (a.k.a. [[Energy fighting|energy]]). | ||
| − | + | Four M2 Browning .50 MGs are plenty for a 2.7 BR plane- the heavy bullets rip through almost all fighters at this rank. Omni and Stealth rounds are the most effective belts- the Stealth being especially effective due to the M8 API bullets which allow F2A pilots to easily set your opponents afire. Against bombers, the capabilities of the M2s are greatly reduced- aiming for engines is the most effective way to combat a bomber. You should always use the boom and zoom tactic as it suites well for Japanese fighters at its rank. However, Japanese fighters will out turn you. | |
| − | + | ||
| + | ===Manual Engine Control=== | ||
| + | {| class="wikitable" style="text-align:center" | ||
| + | |- | ||
| + | ! colspan="7" | MEC elements | ||
| + | |- | ||
| + | ! rowspan="2" |Mixer | ||
| + | ! rowspan="2" |Pitch | ||
| + | ! colspan="3" |Radiator | ||
| + | ! rowspan="2" |Supercharger | ||
| + | ! rowspan="2" |Turbocharger | ||
| + | |- | ||
| + | ! Oil | ||
| + | ! Water | ||
| + | ! Type | ||
| + | |- | ||
| + | | Controllable || rowspan="2" | Not controllable || rowspan="2" | Not controllable || rowspan="2" | Not controllable || rowspan="2" | Separate || rowspan="2" | Not ontrollable || rowspan="2" | Not controllable | ||
| + | |- | ||
| + | |} | ||
| + | |||
| + | ===Modules=== | ||
| + | {| class="wikitable" | ||
| + | !colspan = "1"| Tier | ||
| + | !colspan = "2"| Flight performance | ||
| + | !colspan = "1"| Survivability | ||
| + | !colspan = "1"| Weaponry | ||
| + | |- | ||
| + | | I | ||
| + | | Fuselage Repair | ||
| + | | Radiator | ||
| + | | | ||
| + | | Offensive 12 mm | ||
| + | |- | ||
| + | | II | ||
| + | | | ||
| + | | Compressor | ||
| + | | Airframe | ||
| + | | New 12 mm MGs | ||
| + | |- | ||
| + | | III | ||
| + | | Wings Repair | ||
| + | | Engine | ||
| + | | | ||
| + | | Mk.41 | ||
| + | |- | ||
| + | | IV | ||
| + | | | ||
| + | | Engine Injection | ||
| + | | Cover | ||
| + | | | ||
| + | |- | ||
| + | |} | ||
=== Pros and cons === | === Pros and cons === | ||
| − | ''Summarize and briefly evaluate the vehicle in terms of its characteristics and combat effectiveness. Mark its pros and cons in the bulleted list. Do not use more than 6 points for each of the characteristics. Avoid using categorical definitions such as "bad", "good" and the like - they have a substitution in the form of softer "inadequate", "effective".'' | + | <!--''Summarize and briefly evaluate the vehicle in terms of its characteristics and combat effectiveness. Mark its pros and cons in the bulleted list. Do not use more than 6 points for each of the characteristics. Avoid using categorical definitions such as "bad", "good" and the like - they have a substitution in the form of softer "inadequate", "effective".''--> |
'''Pros:''' | '''Pros:''' | ||
| − | * | + | * Good dive rate |
| + | * Good top dive speed | ||
| + | * Great armament | ||
| + | * Good energy retention | ||
| + | * Tail hook for carrier landings | ||
'''Cons:''' | '''Cons:''' | ||
| − | * | + | * Poor acceleration and climb |
| + | * Vulnerable fuel tanks (very prone to explosions) | ||
| + | * Below average turning rate | ||
| + | * Poor level flight speed | ||
| + | * Not the best armament | ||
== History == | == History == | ||
| Line 43: | Line 243: | ||
* ''reference to the series of the aircraft;'' | * ''reference to the series of the aircraft;'' | ||
* ''links to approximate analogues of other nations and research trees.'' | * ''links to approximate analogues of other nations and research trees.'' | ||
| − | ''ETC.'' | + | <!--''ETC.''--> |
== Sources == | == Sources == | ||
| Line 50: | Line 250: | ||
* ''page on aircraft encyclopedia;'' | * ''page on aircraft encyclopedia;'' | ||
* ''other literature.'' | * ''other literature.'' | ||
| + | |||
| + | {{USA fighters}} | ||
Revision as of 21:27, 23 November 2018
Contents
Description

The F2A-3 Buffalo is a Rank I American fighter with a battle rating of 2.7 (AB/RB) and 2.3 (SB). It was in the game since the start of the Open Beta Test prior to Update 1.29.
The F2A-3 Buffalo gives pilots the first real taste of typical American fighters in War Thunder- a lumbering, well-armored beast of a fighter that is well armed and has decent performance capabilities. Indeed, the second Buffalo in War Thunder is a heavy aircraft for its rank, signifying that its turning ability is underwhelming against the sharp turners it meets, especially regarding its relatively low BR- it will face low-rank Zeroes as well as more nimble German Bf 109's. Due to its 4 machine guns the F2A-3 Buffalo is not very good in dogfight with British or German aircraft.
General info
Flight Performance
| Characteristics | |||||||
|---|---|---|---|---|---|---|---|
| Stock | |||||||
| Max Speed (km/h at 4,492 m) |
Max altitude (meters) |
Turn time (seconds) |
Rate of climb (meters/second) |
Take-off run (meters) | |||
| AB | RB | AB | RB | AB | RB | ||
| 494 | 477 | 10,424 | 18.9 | 19.3 | 11.3 | 13.1 | 200 |
| Upgraded | |||||||
| Max Speed (km/h at 4,492 m) |
Max altitude (meters) | Turn time (seconds) | Rate of climb (meters/second) |
Take-off run (meters) | |||
| AB | RB | AB | RB | AB | RB | ||
| 547 | 518 | 10,424 | 16.4 | 17.6 | 23.9 | 16.4 | 200 |
Details
| Features | ||||
|---|---|---|---|---|
| Combat flap | Take-off flap | Landing flap | Air brakes | Arrestor gear |
| ✓ | ✓ | ✓ | ✓ | X |
| Limits | ||||
|---|---|---|---|---|
| Wing-break speed (km/h) |
Gear limit (km/h) |
Combat flap (km/h) |
Max Static G | |
| + | - | |||
| 761 | 720 | 460 | ~18 | ~7 |
| Optimal velocities | |||
|---|---|---|---|
| Ailerons (km/h) |
Rudder (km/h) |
Elevators (km/h) |
Radiator (km/h) |
| < 465 | < 400 | < 500 | > 250 |
| Compressor (RB/SB) | ||
|---|---|---|
| Setting 1 | ||
| Optimal altitude | 100% Engine power | WEP Engine power |
| 700 m | 1,010 hp | 1,192 hp |
| Setting 2 | ||
| Optimal altitude | 100% Engine power | WEP Engine power |
| 3,700 m | 930 hp | 1,097 hp |
Survivability and armour
- No armour plating
- No armour glazing
- Critical components located at front of aircraft (fuel, pilot, engine, controls)
- More fuel tanks located in wings near fuselage
Armaments
Offensive armament
The F2A-3 is armed with:
- 2 x 12.7 mm Browning M2 machine gun, nose-mounted (250 rpg = 500 total)
- 2 x 12.7 mm Browning M2 machine gun, nose-mounted (400 rpg = 800 total)
Suspended armament
The F2A-3 can be configured for:
- Without load
- 2 x 100 lb AN-M30A1 bombs (200 lb total)
Usage in the battles
The characteristics of the F2A-3 means that it's pilots shouldn't try to turn-fight their opponents and that they should also strictly maintain their energy. However, this weight and energy retention ability means that any Buffalo pilot that cares to climb high- 3,000-4,000 m - will be able to combat opponents with relative ease. However, they should be wary of adept climbers (such as Bf 109s and the US's own P-47, at least in Arcade) as they are more than a match for the F2A's climb rate. In a dive, the Buffalo can rapidly catch up to virtually anything it faces, and, when it does, a battery of 4 x .50 calibre machine guns will make short work of any target, save well-armored bombers such as the B-25 or Ju 88, which an F2A pilot will probably rarely meet.
Discipline is a vital trait needed to master this plane. If you are used to simply engaging with the first opponent you find and turn-fighting, the F2A is not for you, as is much of the US fighter line. The recommended tactic to use with the F2A is Boom & Zoom. At the beginning of the battle, it is vital to climb- not climbing reduces your energy capabilities drastically due to the low level flight speed of the F2A- climbing significantly exacerbates performance of the F2A due to its weight and diving capabilities. After attempting a diving engagement on an enemy, whether successful or not, one should always pull out of the engagement shortly after the first attacking pass, as not to waste speed and/or altitude (a.k.a. energy).
Four M2 Browning .50 MGs are plenty for a 2.7 BR plane- the heavy bullets rip through almost all fighters at this rank. Omni and Stealth rounds are the most effective belts- the Stealth being especially effective due to the M8 API bullets which allow F2A pilots to easily set your opponents afire. Against bombers, the capabilities of the M2s are greatly reduced- aiming for engines is the most effective way to combat a bomber. You should always use the boom and zoom tactic as it suites well for Japanese fighters at its rank. However, Japanese fighters will out turn you.
Manual Engine Control
| MEC elements | ||||||
|---|---|---|---|---|---|---|
| Mixer | Pitch | Radiator | Supercharger | Turbocharger | ||
| Oil | Water | Type | ||||
| Controllable | Not controllable | Not controllable | Not controllable | Separate | Not ontrollable | Not controllable |
Modules
| Tier | Flight performance | Survivability | Weaponry | |
|---|---|---|---|---|
| I | Fuselage Repair | Radiator | Offensive 12 mm | |
| II | Compressor | Airframe | New 12 mm MGs | |
| III | Wings Repair | Engine | Mk.41 | |
| IV | Engine Injection | Cover | ||
Pros and cons
Pros:
- Good dive rate
- Good top dive speed
- Great armament
- Good energy retention
- Tail hook for carrier landings
Cons:
- Poor acceleration and climb
- Vulnerable fuel tanks (very prone to explosions)
- Below average turning rate
- Poor level flight speed
- Not the best armament
History
Describe the history of the creation and combat usage of the aircraft in more detail than in the introduction. If the historical reference turns out to be too big, take it to a separate article, taking a link to an article about the vehicle and adding a block "/ historical reference" (example: https://wiki.warthunder.com/Name-vehicles/historical reference) and add a link to it here using the main template. Be sure to include links to sources at the end of the article.
Media
An excellent addition to the article will be video guides, as well as screenshots from the game and photos.
Read also
Links to the articles on the War Thunder Wiki that you think will be useful for the reader, for example,
- reference to the series of the aircraft;
- links to approximate analogues of other nations and research trees.
Sources
Paste links to sources and external resources, such as:
- topic on the official game forum;
- page on aircraft encyclopedia;
- other literature.
| USA fighters | |
|---|---|
| P-26 Peashooter | P-26A-33 · P-26A-34 · P-26A-34 M2 · P-26B-35 |
| P-36 Hawk | P-36A · Rasmussen's P-36A · P-36C · ○P-36C · P-36G |
| P-39 Airacobra | P-400 · P-39N-0 · P-39Q-5 |
| P-40 | P-40C · P-40E-1 · P-40E-1 TD · P-40F-10 |
| P-43 Lancer | P-43A-1 |
| P-47 Thunderbolt | P-47D-22-RE · P-47D-25 · P-47D-28 · P-47M-1-RE · ⋠P-47M-1-RE · P-47N-15 |
| P-51 Mustang | P-51 · P-51A (Thunder League) · P-51C-10 · P-51D-5 · P-51D-10 · P-51D-20-NA · P-51D-30 · P-51H-5-NA |
| P-63 Kingcobra | P-63A-5 · P-63A-10 · P-63C-5 · ␠Kingcobra |
| Prototypes | XP-55 |
| F2A Buffalo | F2A-1 · Thach's F2A-1 · F2A-3 |
| BF2C | BF2C-1 |
| F3F | F3F-2 · Galer's F3F-2 |
| F4F Wildcat | F4F-3 · F4F-4 |
| F4U Corsair | F4U-1A · F4U-1A (USMC) · F4U-1D · F4U-1C · F4U-4 · F4U-4B · F4U-4B VMF-214 · F2G-1 |
| F6F Hellcat | F6F-5 · F6F-5N |
| F8F Bearcat | F8F-1 · F8F-1B |
| Other countries | ▃Ki-43-II · ▃Ki-61-Ib · ▃A6M2 · ▃Bf 109 F-4 · ▃Fw 190 A-8 · ▃Spitfire LF Mk IXc |
