F6F-5N

From War Thunder Wiki
Jump to: navigation, search
RANK 4 FRANCE
Somua SM PACK
This page is about the American naval fighter F6F-5N. For the French version, see F6F-5N (France). For other versions, see F6F (Family).
F6F-5N
f6f-5n.png
GarageImage F6F-5N.jpg
ArtImage F6F-5N.jpg
360://https://wiki.warthunder.com/images/1/17/Cockpit_f6f-5n.jpg
F6F-5N
Research:33 000 Specs-Card-Exp.png
Purchase:105 000 Specs-Card-Lion.png
Show in game

Description

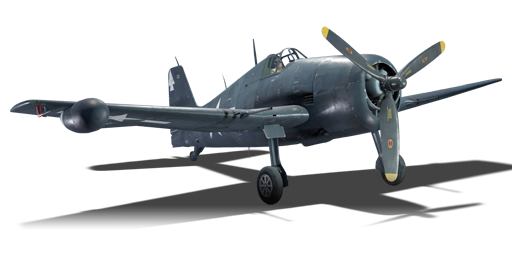
The F6F-5N was built to be a night fighter from the regular F6F-5. A Westinghouse AN/APS-6 radar was fitted to the right wing that served well in very low visibility conditions. The main differences between the 5 and 5N were the ability of the 5N to carry two 20 mm cannons and four 12.7 mm machine guns and the addition of the radar. Other than that, the F6F-5N was virtually identical to the F6F-5. The F6F-5N also had the same 2,000 hp Wright R-2800-10W engine found in the F6F-5. Because it was basically the same aircraft, the F6F–5N did have worse performance due to the added drag and weight of the radar and cannons. Nonetheless, the ability to comfortably carry out night patrols and missions was worth the performance hit.

The F6F-5N Hellcat was introduced in Update 1.65 "Way of the Samurai". The F6F-5N's main differences between the F6F-5 are the weaponry changes and the addition of the radar. The addition of two 20 mm cannons is a big step up due to the sheer stopping power of the 20 mm rounds. With high-explosive rounds, players can easily take down enemy fighters and bombers. The F6F-5N also retains the ground ordnance loadout of the F6F-5 which is ample with a mix of bombs, rockets, and even torpedoes. On the other hand, the Hellcat has less than stellar flight performance. It struggles in vertical manoeuvres and in sustained turns. However, it does have favourable high-speed characteristics and has an excellent structural limit of 803 km/h (501.9 mph).

General info

Flight performance

Arrestor gear
Accelerates braking by grabbing the brake cable on the deck of the aircraft carrier
Max speed
at 5 730 m629 km/h
Turn time21 s
Max altitude11 000 m
EnginePratt & Whitney R-2800-10w
TypeRadial
Cooling systemAir
Take-off weight7 t

The main drawback of this fighter is the powerful but often overloaded engine. This means that after all the weight added with the twin 20 mm cannons, radar, and payload, the plane becomes much slower compared to the previous F6F-5 in US service. This may be an indication to avoid engaging in air supremacy battles with other more dedicated air superiority fighters. Instead, these variants excel at ground strike and interception, leaving the pure fighter role to other more fast and agile fighters.

Once spaded, the F6F-5N feels similar to the F6F-5, but all of the main flight characteristics are slightly reduced, such as the top speed, rate of climb, and turn rate. When equipping payloads is a good idea to avoid extended combat, this is due to the fact the plane gets even slower and less manoeuvrable. American pilots should consider learning (MEC) manual engine controls to boost flight performance. Its details are explained below!

Characteristics Max Speed
(km/h at 5,730 m)
Max altitude
(metres)
Turn time
(seconds)
Rate of climb
(metres/second)
Take-off run
(metres)
AB RB AB RB AB RB
Stock 602 582 11000 22.2 23.1 8.1 8.1 239
Upgraded 661 629 19.8 21.0 16.7 11.8

Details

Features
Combat flaps Take-off flaps Landing flaps Air brakes Arrestor gear
X
Limits
Wings (km/h) Gear (km/h) Flaps (km/h) Max Static G
Combat Take-off Landing + -
803 375 487 458 310 ~12 ~5
Optimal velocities (km/h)
Ailerons Rudder Elevators Radiator
< 432 < 420 < 420 > 420

Survivability and armour

Crew1 person
Speed of destruction
Structural0 km/h
Gear375 km/h
A page from the F63/F6F pilots manual detailing protective angles against enemy weapons.
  • 3 mm steel - below the engine and above cooling system
  • 6.35 mm steel - behind the pilot
  • 38 mm bulletproof glass - armoured windscreen

The F6F-5N is a considerably robust and armoured aircraft, a usual trait of American-made fighters. This armour will enable pilots to survive several hits if they end up tailed by some more agile enemy aircraft; like the Japanese Ki-61-II Otsu Kai or the Bf 109 G-2/trop. Nonetheless, avoid being targeted and attacked!

The F6F-5N can take a lot of hits and the armour will be there to provide an important defence to the pilot against 7.62 mm up to some long-range 20 mm HE shells. But the airframe and the wide wing spars will start to weaken after heavy enemy damage, thus also compromising the flight performance and ultimately leading to the breakdown of the aircraft itself.

American pilots can take advantage of the adequate armoured glass, the armour around the nose, and the engine for head-on attacks or low bombing runs. To increase survivability, pilots should attempt to engage frontally the more agile enemies. There is the majority of the armour, along with all the heavy machine guns and powerful cannons. Contrary to holding from behind, where the average top speed and turn rate won't provide the F6F-5N with any major advantage.

Modifications and economy

Repair costBasic → Reference
AB1 202 → 1 530 Sl icon.png
RB2 615 → 3 328 Sl icon.png
SB3 830 → 4 875 Sl icon.png
Total cost of modifications29 700 Rp icon.png
57 700 Sl icon.png
Talisman cost1 200 Ge icon.png
Crew training30 000 Sl icon.png
Experts105 000 Sl icon.png
Aces590 Ge icon.png
Research Aces360 000 Rp icon.png
Reward for battleAB / RB / SB
70 / 160 / 340 % Sl icon.png
148 / 148 / 148 % Rp icon.png
Modifications
Flight performance Survivability Weaponry
Mods aerodinamic fuse.png
Fuselage repair
Research:
1 500 Rp icon.png
Cost:
2 900 Sl icon.png
155 Ge icon.png
Mods radiator.png
Radiator
Research:
1 500 Rp icon.png
Cost:
2 900 Sl icon.png
155 Ge icon.png
Mods armor frame.png
Airframe
Research:
1 300 Rp icon.png
Cost:
2 500 Sl icon.png
135 Ge icon.png
Mods compressor.png
Compressor
Research:
1 300 Rp icon.png
Cost:
2 500 Sl icon.png
135 Ge icon.png
Mods aerodinamic wing.png
Wings repair
Research:
1 900 Rp icon.png
Cost:
3 700 Sl icon.png
200 Ge icon.png
Mods new engine.png
Engine
Research:
1 900 Rp icon.png
Cost:
3 700 Sl icon.png
200 Ge icon.png
Mods armor cover.png
Cover
Research:
2 400 Rp icon.png
Cost:
4 700 Sl icon.png
250 Ge icon.png
Mods metanol.png
Engine injection
Research:
2 400 Rp icon.png
Cost:
4 700 Sl icon.png
250 Ge icon.png
Mods ammo.png
bmg50_belt_pack
Research:
1 500 Rp icon.png
Cost:
2 900 Sl icon.png
155 Ge icon.png
Mod arrow 0.png
Mods pilon torpedo.png
ITC mk.III
Research:
1 500 Rp icon.png
Cost:
2 900 Sl icon.png
155 Ge icon.png
Mods weapon.png
bmg50_new_gun
Research:
1 300 Rp icon.png
Cost:
2 500 Sl icon.png
135 Ge icon.png
Mods pilon rocket.png
FRC mk.2
Research:
1 300 Rp icon.png
Cost:
2 500 Sl icon.png
135 Ge icon.png
Mod arrow 0.png
Mods pilon bomb.png
500 LB
Research:
1 300 Rp icon.png
Cost:
2 500 Sl icon.png
135 Ge icon.png
Mod arrow 1.png
Mods ammo.png
anm2_belt_pack
Research:
1 900 Rp icon.png
Cost:
3 700 Sl icon.png
200 Ge icon.png
Mod arrow 0.png
Mods pilon rocket.png
LFRC mk.12
Research:
1 900 Rp icon.png
Cost:
3 700 Sl icon.png
200 Ge icon.png
Mods weapon.png
anm2_new_gun
Research:
2 400 Rp icon.png
Cost:
4 700 Sl icon.png
250 Ge icon.png
Mods pilon bomb.png
FLBC mk.1
Research:
2 400 Rp icon.png
Cost:
4 700 Sl icon.png
250 Ge icon.png

A slow F6F is a certainly doomed F6F. Attempt to go for some flight performance modules and then some weaponry modules. This will help to keep research while not suffering from a below-average aircraft. The additional payload can bring more research points, depending on the pilot's favourite role and gamemode with the aircraft.

Payload modules unlock the following:

  • ITC mk.III: One torpedo
  • FRC mk.2: Six HVAR rockets
  • LFRC mk.12: Two Tiny Tims
  • FLBC mk.1: Two 1,000 lb AN-M65A1 bombs

Armaments

In the offensive department, the F6F-5N is devastating!

There are a plethora of choices on armaments that truly bring a lot of power to the US pilots. The 20 mm cannons and 12.7 mm machine guns are capable of devastating, if not destroying, light and medium tanks, even from the sides. This is accompanying the already lethal available explosive payloads.

Offensive armament

The F6F-5N is armed with:

  • 2 x 20 mm AN/M2 cannons, wing-mounted (231 rpg = 462 total)
  • 4 x 12.7 mm M2 Browning machine guns, wing-mounted (400 rpg = 1,600 total)

The familiar American M2 Browning provides quick-firing, adequate damage, and high penetration capacities. Not many aircraft can withstand a prolonged burst from these machine guns. However, they lack the fast, decisive punch of a large-calibre cannon. This could lead to the F6F-5N often staying in combat more than it should; something detrimental to its survival.

  • The Ground targets belt is notably good to bypass the enemy's armour plates and also good for head-ons attacks. Works for some medium tanks, armoured cars and light tanks. (Side or top armour)
  • The Tracers belt is handy to burst your enemies into flames. Mainly, the light and nimble planes with poor durability.

In this variant, the F6F-5N also receives two new powerful 20 mm AN/M2 cannons.

The 20 mm AN/M2 cannons will dramatically increase the firepower and lethality of the F6F. Their penetration and decent fire rate enable pilots to utilize them proactively during air combats. The good ammo count also extends their time on combat if the pilot has trigger discipline. The penetration of these cannons allows the F6F-5N to perform in a strike fighter role against soft-skinned ground vehicles. Various tanks on rank IV don't have enough top-turret protection for stopping this cannon.

Suspended armament

The F6F-5N can be outfitted with the following ordnance:

1 2 3 4 5 6 7 8 9
Hardpoints F6F-5.png
500 lb AN-M64A1 bombs 1 1
1,000 lb AN-M65A1 bombs 1 1
HVAR rockets 1 1 1 1 1 1
Tiny Tim rockets 1 1
2,216 lb Mk.13-6 Case torpedoes 1
Maximum permissible loadout weight: 1,814 kg
Maximum permissible weight imbalance: 680 kg
Default weapon presets
  • Without load
  • 6 x HVAR rockets
  • 2 x Tiny Tim rockets
  • 2 x 500 lb AN-M64A1 bombs (1,000 lb total)
  • 2 x 1,000 lb AN-M65A1 bombs (2,000 lb total)
  • 1 x 2,216 lb Mk.13-6 Case torpedo

Usage in battles

Once a good understanding of the abilities and inabilities of the F6F-5N is gained, players can use this plane on all game modes without major trouble.

The F6F-5N was a versatile fighter during World War II and it proves this with both the capabilities of the airframe along with the varied ordnance it can carry. The powerful weapons that the F6F-5N has on-board can make short work of enemy aircraft and some ground targets, and the sizeable amount of suspended weapons allows the aircraft to be used in support roles when attacking critical ground targets. In addition, employment of the radar can make the F6F-5N a deadly fighter in night combat or in adverse weather condition

Realistic battles

Air battles

The principle of playing with the F6F-5N is to keep your speed, always. This F6F-5N has a powerful engine and a relatively heavy airframe, which allows it to perform well in diving and manoeuvring attacks. Against aircraft that are less manoeuvrable or are unable to maintain speed during combat the F6F-5N can easily take them out. When fighting lighter and more nimble enemies, it pays to be cautious and not commit into a fight without having superior energy to escape if it becomes necessary. The F6F-5N can also meet opponents way faster than him; some planes reaching up to 700 km/h while the F6F stays around the 629 km/h at level flight.

It is here when the Manual Engine Controls provide the pilot with a meaningful increase in performance. That leads to utilizing the altitude to survive, as this plane is heavy and won't perform excellently on low-level dogfights with tight turns. The way of the F6F is to go low, do the work then climb back to the safer territory; achievable because of the powerful supercharged engine.

Ground battles

The F6F is a well-fitted strike/night fighter. Nonetheless, the rather small battlefields on tank battles can become a big safety concern. If situational awareness is lost, pilots are likely to be engaged by surprise. To avoid this, American pilots should consider the following roles:

Air defence/Interception

There will usually be some enemy air force incoming to the combat zone; fighters, strike fighters, or even bombers. With an anticipated climb and the highly useful radar, the F6F-5N can take the control of the battle. Avoid any additional payload because now the relevant job is to defend ground forces and pester enemy aviation. Once in the air, check the immediate surroundings (check six first) also with the help of the radar, then proceed to gain altitude. This altitude is key to counter any faster or more agile enemy arriving to combat.

Once a target has been spotted, pilots must remember this might not be the only enemy plane arriving. Planning must be made to perform dive attacks against them and retreat again to altitude. The Hellcat loves these dives, so pilots can confidently approach to their preys, let the guns roar, then leave.

The Hellcat can't be shot down if it can't be seen. Consider using a combination of machine guns' stealth belt to range and lead the shots. Once the stealth fire reaches the target (hit marks), rapidly fire the cannons. This is useful because it helps to engage a plane without the noticeable tracers and generally provides a fast elimination because of the powerful cannons. Oftentimes, the enemy will react too late. A recommended convergence for this role is 600-300 m. This is of course, always to pilot's discretion.

Ground strike

A more closer-to-action role; it will use the payloads available to annihilate enemy armoured forces. This role is very dependent on allied aerial superiority, so pay attention to the air before spawning heavily loaded.

The Hellcat will be in great danger during these attacks. It will fly below the coming enemy aircraft, so time is key. Drop the bombs first since they are the heaviest yet deadliest ordnance. Then resort to your rockets, heavy machine-guns and cannons if necessary. The combination of 2 x 1,000 lb AN-M65A1 bombs + 6 x HVAR rockets proves to be more than suitable for the task. Pilots can also go for the Tiny Tim rockets when powerful and directed firepower is needed. Pilots can freely choose individual payloads situationally and performance-wise.

Once the ordnance has been dropped, pilots are highly advised to return to base for rearming. Staying around patrolling the air is not the duty; this is because the Hellcat will often meet a lot of powerful enemies that outmatch it on speed and turn-time. Only those highly skilled and confident pilots can attempt to stay around dogfighting their way out.

Equipping ground target belt on both the cannons and machine-guns allows the Hellcat to destroy even more armour, resembling a true attack aircraft. A recommended convergence to attack with the mounted guns is 600-800 m because it provides sufficient distance to fire safely.

The Tiny Tims can even be used to finish off an enemy base that has very little health remaining.

Naval battles

The F6F is an extremely capable naval fighter. The immense naval maps really suit him well. The armament of the Hellcat allows engaging many ships or boats. Larger ships as destroyers or cruisers will have a hard time seeing how this almost unstoppable plane dives straight to them; knowing the danger of torpedoes, bombs or the formidable Tiny Tim rockets.

Returning to base for more payload is a possibility, but on some large maps, it might be wiser to remain nearby allied shipping into a fighter role.

Similarly to ground battles, the F6F can turn into an interception and naval striking role.

Naval strike

An utmost task is to destroy enemy ships. The F6F-5N just like the earlier F6F-5 is packed with lots of payloads option. The HVAR rockets and the Tiny Tim rockets are notably useful for long-distance salvoes; this is beneficial if the pilot does not want to risk the aircraft. The F6F-5N can carry a single Mk.13/44 torpedo which will prove deadly against any naval enemy. Using it effectively requires planning ahead of time, as simply charging straight at a ship will likely end up in a lost aircraft. Working around terrain such as islands and hills to sneak in close and dropping the torpedo at the latest possible time can result in a sunken ship and a living aircraft.

All the payloads the F6F-5N can carry are able to be used against naval targets, but they can place the aircraft into dangerous situations when attacking ships.

With the bombs, the pilot can perform several naval tactics for bombing:

  • Skip bombing
  • Toss bombing
  • Glide bombing
  • Dive bombing

Skip Bombing/Top-mast bombing

This is the lowest flying to the sea. Pilots are advised to fly as low and fast as possible, in a tactic is known as sea-skimming. Pilots must maintain top speed all the time (Remember MEC). This speed will be crucial to later allow the bomb to bounce like a rock in the water. Once a target is spotted, the pilot must find a good attack angle, where the Hellcat can close in, bounce the bombs and then retreat in a safe direction. Is equally important the bomb fuzing. Set a time around 4-6s.

This tactic is highly useful when the map's geography provides natural or solid cover. Using mountains, valleys or even allied ships to cover your harmful intentions.

Toss bombing

Here the Hellcat will fly higher from the target ship (600-900 m). The intention is not to fly over it but obtain enough speed before reaching it so when closing at high speed, the Hellcat will pitch the plane's nose in the sky, releasing the bombs during this manoeuvre and back in the opposite direction.

The bombs will follow a parabolic trajectory and drop near or in the target.

Glide bombing

This is a high altitude (2,000-3,500 m) approach in which the Hellcat will dive for its target in a not very steep attacking angle (shouldn't be more than 45° angle). This tactic offers more controls since it is not needed to pull up as hard when compared to a full 90° dive-bombing. Time the drop, the moving of the ship and keep in mind the desired exit altitude. During this shallow dive, the plane must gather enough speed to exit the danger zone immediately.

The Hellcat can withstand some outstanding 800 km/h, so do not exceed that limit.

Dive bombing

This is another high altitude approach in which you will need to enter the target's ship airspace, endure any anti-aircraft fire and perform a 90-75° pitch down aiming to the trajectory of the targeted ship. Due to the lack of any air brakes, this tactic is dangerous. Pilots should time their drop and exit the dive before it becomes too late for the F6F. This tactic offers the advantage of being one of the most precise bombings, especially against battleships. But is one of the riskier since it also exposes you to anti-aircraft fire during the dive.

Pilots are encouraged to practice these bombings and to choose wisely during different combat situations.

Msg-info.png Coordinate aerial attacks with allied aircraft; many ships possess dozens of AA guns aiming right at you!

Air defence/Interception

Here the use of radar is remarkably important. Just like in real life, it helps the pilot with navigation and enemy early detection. Use it to anticipate targets and intercept them before they reach allied ships. On encounter mode and enduring confrontation, this is highly regarded due to the immensity of airspace and the vulnerable formation of cargo ships. Be the guarding eye for those merchant ships!

Pilots should fly really high; away from ships' computerized artillery predictors and flak fire. Speed and altitude are the first means of defence, so if attacked at such altitudes, pilots can choose to go into steep dive towards allied vessels or an allied base. Otherwise, they can rely on air manoeuvres. A good understanding of the enemy aircraft is beneficial to understand what to do.

Arcade battles

Here the Hellcat will only feel more powerful and faster but beware, the enemy planes too. The flight characteristics are well suited for smart dogfights and baiting. Firing with the guns become even more precise and lethal. Quite a lot of entertainment.

Air battles

The F6F can produce havoc on ground strike modes with the constant reload of bombs and rockets. They are useful to interdict enemy forces advancing to airfields. The 1,000 lb bombs have a devastating effect on ships and hardened structures, and especially on vehicles which are clustered in a compact area. Use your superior payloads to destroy them with ease while your team fights for the airfield. The agility of the aircraft makes it ideal to outfit rockets, which can be dropped if not needed.

The larger Tiny Tim rockets will pack a huge punch against heavily armoured vehicles or static defenses (such as heavy tanks or pillboxes) and ships. On ground strike/frontline mode, make those a priority target to help the team. HVAR rockets work best when reserved for lighter armoured vehicles some hardened concrete structures and bombers.

Oppositely, the Hellcat can be played without bombs and really high in the sky. Baiting enemies into a vertical stall then diving for them.

Naval battles

The Hellcat can serve both as a low-level fighter bomber and a high altitude fighter. With the bombsight allowing the F6F to predict the bomb drop, pilots can use that to top-attack big ships from really high altitudes (3-4 km). Diving then climbing back, the constant bombing will eventually land a fatal blow to enemy shipping.

Low-level fly is also effective while torpedoing or rocketing enemy shipping. Keep in mind the dangerous anti-air defences and the enemy fighter planes.

Radars

Main article: AN/APS-6
A page from the F6F Hellcat Pilot's Manual showing the differences found in the F6F-5N cockpit, with the radio altimeter indicator and radar scope being pointed out.
The F6F-5N is equipped with an AN/APS-6 search and tracking radar. The radar is mounted in a pod under the right wing tip.

During the night, the radar becomes an invaluable tool to seek out and destroy enemy aircraft. It is best to position the aircraft where targets can be detected from the side or rear aspect which allows the F6F-5N to follow them and shoot them down. Take note of the limited range of the radar and that targets may only be visible up to a few kilometers away. A helpful range setting for the radar is the 9.25 km (5.75 mi) scan distance, as further options can make it difficult to properly find and chase down targets. When moving in closer, switching to the 1.85 km (1.15 mi) scan distance can make it easier to stay on a target from behind as well as transition to the radar track mode.

AN/APS-6 - Target Detection Radar
Maximum
Detection
Range
Guaranteed
Detection
Range
Max Azimuth
Scan Angle
Max Elevation
Scan Angle
60,000 m
(theoretical)
7,200 m ±60° ±60°
AN/APS-6 - Target Tracking Radar
Maximum
Tracking
Range
Minimum
Tracking
Range
Azimuth Tracking
Angle
Elevation Tracking
Angle
1,000 m 150 m ±15° ±15°

Manual Engine Control

MEC elements
Mixer Pitch Radiator Supercharger Turbocharger
Oil Water Type
Not controllable Controllable
Not auto controlled
Controllable
Not auto controlled
Controllable
Not auto controlled
Separate Controllable
3 gears
Not controllable

It is highly rewarding to learn and constantly apply MEC during Simulator and Realistic battles. The main instruments beneficial for the F6F are: propeller pitch, radiators, and superchargers.

  • The propeller pitch will enable the F6F to reach higher top speeds. This is vital during pursuits or diving away; something in which the F6F is great at. They also provide increased thrust/lift and less speed when needed; for example during vertical slow speed dogfights
  • The radiators lets the F6F cool down the engine and components during hot weather maps. While if closed, they reduce aerodynamic drag and increase the top speed. Watch out, prolonged closing of the radiators leads to overheating and ultimately, to engine damage.
  • Superchargers are an important piece of the MEC (even more for American planes), they will let the F6F reach superior high altitudes with a decent amount of speed even when fully loaded. They should only be used while climbing not during low altitude flights. Stage 1 is activated by default, stage 2 should be activated around 3-4 km of altitude. Stage 3 should be activated above 5-6 km of altitude. The hotter the temperature, the sooner this should be activated. If cold, it should be activated later at these altitudes. Pilots should maintain their eyes out to confirm their input affects performance positively and not negatively.

Once in combat, some pilots can choose whether to keep controlling everything manually and multitask, or they can set things back to automatic mode. Having manual control of the engine while on battle allows controlling the plane for the exact needs and desired pilot's tactics. While on auto mode, the pilot can focus efficiently only on the work outside the cabin without additional workload.

Pros and cons

Pros:

  • Great variety of weapons for any map and mode; aerial combat, ground attack and maps with naval ships
  • Decent manoeuvrability
  • Has a search and tracking radar with an excellent range
  • Capable of operating from an aircraft carrier
  • Competent high-altitude performance (3 Stage supercharger)
  • High durability and efficient armour protection for the engine and the pilot

Cons:

  • Poor climb rate
  • All manoeuvrability is drastically decreased by payloads
  • Not as energy-efficient in a climb as other American aircraft (such as the P-47)
  • Overall worse fighter performance than F6F-5; playstyle varies
  • Hopelessly outmatched on speed by enemy planes on the same BR, as the Bf 109 (Family)
  • Turn rate is significantly higher than enemies it faces

History

USS Ticonderoga (CV-14). Grumman F6F "Hellcat" fighters prepare to take off for strikes against targets in Manila Bay. The two leading planes are F6F-5N night fighters, with wing-mounted radar.

The F6F-5N was a modification of the standard F6F-5 for use as a night fighter. This variant became available on the final phase of World war II (1944-1945). The United States' Marines and US NAVY used these variants along the F6F-5 in the Pacific Theater on a wide variety of roles such as air interception, ground strike and night patrolling.

Msg-info.png The F6F-5N was the highest produced US night fighter during WWII; exactly, 1,600 built

Technical specifications

The F6F-5N was a modification of the standard F6F-5 for use as a night fighter. These aircraft were fitted with additional equipment in the form of a radio altimeter and radar. The Westinghouse AN/APS-6 radar was installed on the starboard wing of the F6F-5N, with units being completed in middle and late 1944. The APS-6 served as a method to search and destroy hostile aircraft in conditions with zero visibility, with data being displayed in a standard B-scope view of the target azimuth on the x-axis and target range on the y-axis. Aside from target search and tracking, the APS-6 could also be used in a navigation role by tracking a radar emitter or beacon with a search range of up to 100 miles.[1]

Due to the simplifications from the earlier AN/APS-4 radar, the APS-6 was small enough to be installed in single-engine aircraft which allowed for independent action among night fighters. Another feature of the F6F-5N was the Type GR-1 automatic pilot, which gave pilots the ability to maintain a stable flight attitude with minimal input.

Just as with the F6F-5, the -5N used the Pratt & Whitney R-2800-10W and had provisions to used a mixed armament of 2 x 20 mm M2 cannons and 4 x .50 cal Browning machine guns. The F6F-5N is noted as being one of the better American night fighters during World War II and was chosen to be a night fighter over other aircraft such as the F4U Corsair.[1]

World War II Service

U.S. Marine Corps Grumman F6F-5N Hellcats of Marine Night Fighting Squadron 541 (VMF(N)-541) take off from Peleliu, in 1944.

The F6F-5N performed as an improved version of the F6F-5. It was widely used on defensive patrols over bases within the range of Japanese bombers and during night patrols guarding the Pacific's shipping routes.

One of the undeniably uses of the F6F-5N was by the Marine Night Fighting Squadron 541 (VMF(N)-541) also known as the Bat-eye Squadron.

This squadron performed dozens of missions and night patrols over the whole Pacific; notably during the Philippines campaign. It was during the beginning of the campaign (October 1944) where they flew the 602 miles from their base on Peleliu in the Palau Islands. Their first mission provided cover for U.S. Navy PT-boats operating in the Surigao Strait.

The called presence of the Marines F6F-5N fighters was to provide necessary support against the weakened but still-resisting Japanese forces. One of their first tasks was to provide airstrikes over the Leyte Gulf during the climactic Battle of Leyte Gulf. Over these times, the foul weather and tropical storms complicated the air wars but even through that, Japanese bombers performed bombings damaging the ongoing operations. The Japanese night fighter, Nakajima Ki-43 Hayabusa known as "Oscar" by the Americans, also proved to be a serious threat. This was because it turned to be too fast for the available Army's P-61 Black Widow night fighters. Swift one-way dives by Japanese fighters performing Kamikaze attacks were also a concern.

Around November, the general MacArthur ordered a switch. The F6F-5N of the Bat-eye squadron were to be transferred to Leyte where their high top-speed and good high-altitude performance was needed. It was here where the Marines saw combat against many enemies, both from Japanese Navy and Army air forces, even facing head-to-head versus the "Zero" themselves; Japanese forces commanded by the Vice Admiral, Shigeru Fukudome.

The Hellcats proved to be extremely effective due to many experiences at Peleliu. Around December, the Bat-eye squadron of Hellcats was busy performing dawn and even daylight patrols, ensuring safety to ships under their care. Achieving 12 air victories on a single day, (12 Dec) during the Battle of Ormoc Bay.

Lieutenant Paul Martinelli recollects:

Quote icon.png

During our brief deployment to the Philippines, we were constantly tasked with protecting our troops and ships. Early on the morning of December 12th, we took off in total darkness in what we figured would be another routine patrol. The division was led by Captain Thomson and during the early part of the patrol, one of our pilots developed engine trouble and returned to base." "That left three of us, and a few minutes later we were informed by radio that Japanese bombers were approaching the convoy of our Naval re-supply ships which were located off the southwest coast of Leyte. They were very vulnerable because the ships had only minimal anti-aircraft protection. We dropped our external fuel tanks and proceeded to the area. We quickly spotted the formation which consisted of about fifteen planes and they were below us, in the process of diving down on our ships. At that time, we heard our controller vector our other division toward the action.

As soon as we saw the Jap planes, our 3-ship formation formed up into single file so each pilot could concentrate on a bogey to attack. We plowed into them and some were either in the process of pulling out of their dives or had their noses down in the midst of their bomb runs. I had already charged my six .50 cal guns and switched on my gun sight, illuminating it on the small, flat, extra thick protective glass that was situated directly in front of my cockpit Plexiglas. All of the enemy aircraft appeared to be single-engine types (either Zeros or Vals).

I focused on the nearest enemy plane which was a Zero. He had spotted me and made an effort to turn sharp to evade my rapid closure. Using water injection, I overtook him before he could execute any effective evasive moves. I was easily able to turn inside of the Zero gradually narrowing the angle to where I thought I had him. I kept fire one." was already at a low altitude over the water. Strangely, when he got down to about 1,500 feet, he suddenly performed a slow barrel roll to the left. Such a manoeuvre would reduce his speed, allowing me to move closer to the range of my guns. Seconds later, he did another roll and by this time, I was close enough to fire a burst. I hit him before he had completed his roll and my rounds probably struck the pilot because his plane, now down to about 500 feet, did a descending roll to the left and plunged into the water. I made a low pass and saw no debris or fire.

By the end of December 1944, the Army considered Leyte was efficiently in its control, thus the campaign to recapture the Philippines shifted into a second phase. At this time, VMF(N)-541 was released to return on 11 January 1945 to Peleliu.

Despite numerous adverse conditions and setbacks, such as foul weather, precarious airfields and many long-serving hours in days and night; two years after its Philippine operations, the Hellcat squadron received the Army's Distinguished Unit Citation, the only Marine aviation unit to be so honoured during the war:

Quote icon.png

The Marine Night Fighter Squadron 541 is cited for extraordinary performance of duty in action against the enemy at Leyte, Philippine Islands, from 3 to 15 December 1944. During a critical period in the fight for the control of the Philippine Islands, the pilots and ground crews of this unit signally distinguished themselves by the intrepidity and unyielding determination with which they overcame exceptionally adverse weather conditions and operational difficulties engendered by lack of facilities and incomplete radar directional coverage.

Their superb airmanship and daring resourcefulness displayed in outstanding night patrol and interception work, which forestalled destruction of airfield facilities, and in the completeness of cover provided for numerous vital convoys and Patrol Torpedo boat patrols, effectively thwarted enemy attempts to prevent consolidation and further expansion of the foothold gained by United States forces in the Philippines.

Achieving a record unparalleled at that time, the unit, composed of but 15 aircraft and 22 pilots, flew 136 sorties totalling 298.6 combat hours, destroyed 18 enemy aircraft in aerial combat without unit loss or damage, and on numerous occasions pitted consummate skill and accuracy against overwhelming numerically superior enemy strength. The extraordinary performance of the air and ground personnel of the Marine Fighter Squadron 541 in overcoming the greatest of aerial hazards and maintenance difficulties reflects the highest credit on themselves and the military service of the United States.

BY ORDER OF THE SECRETARY OF WAR
Dwight D. Eisenhower
Chief of Staff

A Grumman F6F-5N Hellcat night fighter assigned to the Naval Air Station Jacksonville, Florida (USA), in 1944/45.

Post-war use

As the United States started to focus on Jet fighter technologies. The Hellcats in the US navy service outlasted pretty much entirely as the night-fighter variant; most of the other Hellcats variants became target tugs or controlled drones loaded with explosives. The Hellcat F6F-5N variant survived this decommissioning because it proved to be superior on flight performance to the newer F8F-2N night fighter. The F6F-5N was also sold to France.

Consequently, the F6F-5N remained in US service up to the Korean war in 1950, where it got replaced by the F4U-5N to fill the night fighter role.

Media

Skins
Images
Videos

See also

Shared operational history during World War II

Similar variants of this aircraft

Related development

External links

References

Citations
  1. 1.0 1.1 "The AN/APS-6 Aircraft Radar" in Westinghouse in World War 2: Radio and X-ray Divsions, Westinghouse Electric & Mfg.Co., Inc, 1946.
Bibliography
  • Aircraft Carriers: A History of Carrier Aviation and Its Influence on World Events, Volume II: 1946-2006, Norman Polmar, 2007
  • And A Few Marines - Marines in the Liberation of the Philippines, PCN 19000314300, Captain John C. Chapin, USMCR (Ret), 2002


Grumman Aircraft Engineering Corporation
Fighters 
F3F  F3F-2 · Galer's F3F-2
F4F Wildcat  F4F-3 · F4F-4
XF5F Skyrocket  XF5F · XP-50
F6F Hellcat  F6F-5 · F6F-5N
F7F Tigercat  F7F-1 · F7F-3
F8F Bearcat  F8F-1 · F8F-1B
Jet Fighters 
F9F Panther/Cougar  F9F-2 · F9F-5 · F9F-8
F-11 Tiger  F11F-1
F-14 Tomcat  F-14A Early · F-14B
Jet Strike Aircraft 
A-6 Intruder  A-6E TRAM
Bombers  TBF-1C
Export  ▄Martlet Mk IV · ▄F6F-5 · ▄F6F-5N · ▄F8F-1B · ▄Avenger Mk II · ▄Hellcat Mk II

USA fighters
P-26 Peashooter  P-26A-33 · P-26A-34 · P-26A-34 M2 · P-26B-35
P-36 Hawk  P-36A · Rasmussen's P-36A · P-36C · ○P-36C · P-36G
P-39 Airacobra  P-400 · P-39N-0 · P-39Q-5
P-40  P-40C · P-40E-1 · P-40E-1 TD · P-40F-10
P-43 Lancer  P-43A-1
P-47 Thunderbolt  P-47D-22-RE · P-47D-25 · P-47D-28 · P-47M-1-RE · ⋠P-47M-1-RE · P-47N-15
P-51 Mustang  P-51 · P-51A (Thunder League) · P-51C-10 · P-51D-5 · P-51D-10 · P-51D-20-NA · P-51D-30 · P-51H-5-NA
P-63 Kingcobra  P-63A-5 · P-63A-10 · P-63C-5 · ␠Kingcobra
Prototypes  XP-55
F2A Buffalo  F2A-1 · Thach's F2A-1 · F2A-3
BF2C  BF2C-1
F3F  F3F-2 · Galer's F3F-2
F4F Wildcat  F4F-3 · F4F-4
F4U Corsair  F4U-1A · F4U-1A (USMC) · F4U-1D · F4U-1C · F4U-4 · F4U-4B · F4U-4B VMF-214 · F2G-1
F6F Hellcat  F6F-5 · F6F-5N
F8F Bearcat  F8F-1 · F8F-1B
Other countries  ▃Ki-43-II · ▃Ki-61-Ib · ▃A6M2 · ▃Bf 109 F-4 · ▃Fw 190 A-8 · ▃Spitfire LF Mk IXc