Difference between revisions of "F-84G-31-RE (China)"
Colok76286 (talk | contribs) (→Flight performance: Added values) |
Isaac_Victor (talk | contribs) m (→Operational procedure on some aerial realistic maps) (Tag: Visual edit) |
||
| (15 intermediate revisions by 3 users not shown) | |||
| Line 19: | Line 19: | ||
{{Specs-Avia-Flight}} | {{Specs-Avia-Flight}} | ||
<!-- ''Describe how the aircraft behaves in the air. Speed, manoeuvrability, acceleration and allowable loads - these are the most important characteristics of the vehicle.'' --> | <!-- ''Describe how the aircraft behaves in the air. Speed, manoeuvrability, acceleration and allowable loads - these are the most important characteristics of the vehicle.'' --> | ||
| − | |||
{| class="wikitable" style="text-align:center" width="70%" | {| class="wikitable" style="text-align:center" width="70%" | ||
| Line 61: | Line 60: | ||
! Combat !! Take-off !! Landing !! + !! - | ! Combat !! Take-off !! Landing !! + !! - | ||
|- | |- | ||
| − | | {{Specs|destruction|body}} || {{Specs|destruction|gear}} || | + | | {{Specs|destruction|body}} || {{Specs|destruction|gear}} || 527 || 499 || 350 || ~11 || ~5 |
|- | |- | ||
|} | |} | ||
| Line 71: | Line 70: | ||
! Ailerons !! Rudder !! Elevators !! Radiator | ! Ailerons !! Rudder !! Elevators !! Radiator | ||
|- | |- | ||
| − | | < | + | | < 530 || < 600 || < 690 || - |
|- | |- | ||
|} | |} | ||
| Line 84: | Line 83: | ||
! colspan="2" | {{Annotation|Basic mass|Mass of the aircraft with pilot and engine oil, but no fuel or weapons load}} || colspan="2" | Wing loading (full fuel) | ! colspan="2" | {{Annotation|Basic mass|Mass of the aircraft with pilot and engine oil, but no fuel or weapons load}} || colspan="2" | Wing loading (full fuel) | ||
|- | |- | ||
| − | | colspan="2" | | + | | colspan="2" | Allison J35-A-29 || 1 |
| − | | colspan="2" | | + | | colspan="2" | 5,572 kg || colspan="2" | 284 kg/m<sup>2</sup> |
|- | |- | ||
! colspan="3" | Engine characteristics | ! colspan="3" | Engine characteristics | ||
| Line 91: | Line 90: | ||
|- | |- | ||
! Weight (each) || colspan="2" | Type | ! Weight (each) || colspan="2" | Type | ||
| − | ! | + | ! 8m fuel || 20m fuel || 27m fuel |
|- | |- | ||
| − | | | + | | 1,050 kg || colspan="2" | Axial-flow turbojet |
| − | | | + | | 5,963 kg || 6,529 kg || 6,875 kg || 9,541 kg |
|- | |- | ||
! colspan="3" | {{Annotation|Maximum engine thrust @ 0 m (RB/SB)|The maximum thrust produced by each engine, while mounted in the aircraft. NOTE: Thrust varies significantly depending on speed & altitude.}} | ! colspan="3" | {{Annotation|Maximum engine thrust @ 0 m (RB/SB)|The maximum thrust produced by each engine, while mounted in the aircraft. NOTE: Thrust varies significantly depending on speed & altitude.}} | ||
| − | ! colspan="4" | Thrust to weight ratio @ 0 m ( | + | ! colspan="4" | Thrust to weight ratio @ 0 m (100%) |
|- | |- | ||
| − | ! Condition || 100% || | + | ! Condition || 100% || WEP |
| − | ! | + | ! 8m fuel || 20m fuel || 27m fuel || MGW |
|- | |- | ||
| − | | ''Stationary'' || | + | | ''Stationary'' || 2,300 kgf || - |
| − | | | + | | 0.39 || 0.35 || 0.33 || 0.24 |
|- | |- | ||
| − | | ''Optimal'' || | + | | ''Optimal'' || 2,300 kgf<br>(0 km/h) || - |
| − | | | + | | 0.39 || 0.35 || 0.33 || 0.24 |
|- | |- | ||
|} | |} | ||
| Line 133: | Line 132: | ||
{{Specs-Avia-Suspended}} | {{Specs-Avia-Suspended}} | ||
<!-- ''Describe the aircraft's suspended armament: additional cannons under the wings, bombs, rockets and torpedoes. This section is especially important for bombers and attackers. If there is no suspended weaponry remove this subsection.'' --> | <!-- ''Describe the aircraft's suspended armament: additional cannons under the wings, bombs, rockets and torpedoes. This section is especially important for bombers and attackers. If there is no suspended weaponry remove this subsection.'' --> | ||
| − | |||
| − | |||
| − | The '''''{{PAGENAME}}''''' can be outfitted with the following ordnance | + | The '''''{{PAGENAME}}''''' can be outfitted with the following ordnance: |
| − | |||
| − | |||
| − | |||
| − | |||
| − | |||
| − | |||
| − | |||
| − | |||
| − | |||
| − | |||
| − | |||
{| class="wikitable" style="text-align:center" width="100%" | {| class="wikitable" style="text-align:center" width="100%" | ||
|- | |- | ||
| Line 154: | Line 140: | ||
| rowspan="8" width="30%" | <div class="ttx-image">[[File:Hardpoints_F-84G-21-RE_(Italy).png]]</div> | | rowspan="8" width="30%" | <div class="ttx-image">[[File:Hardpoints_F-84G-21-RE_(Italy).png]]</div> | ||
|- | |- | ||
| − | ! 100 lb AN-M30A1 bombs | + | ! [[AN-M30A1 (100 lb)|100 lb AN-M30A1]] bombs |
| || || || 1 || 1 || || || | | || || || 1 || 1 || || || | ||
|- | |- | ||
| − | ! 250 lb AN-M57 bombs | + | ! [[AN-M57 (250 lb)|250 lb AN-M57]] bombs |
| || || || 1 || 1 || || || | | || || || 1 || 1 || || || | ||
|- | |- | ||
| − | ! 500 lb AN-M64A1 bombs | + | ! [[AN-M64A1 (500 lb)|500 lb AN-M64A1]] bombs |
| || || || 1 || 1 || || || | | || || || 1 || 1 || || || | ||
|- | |- | ||
| − | ! 1,000 lb AN-M65A1 bombs | + | ! [[AN-M65A1 (1,000 lb)|1,000 lb AN-M65A1]] bombs |
| || || || 1 || 1 || || || | | || || || 1 || 1 || || || | ||
|- | |- | ||
| − | ! HVAR rockets | + | ! [[HVAR]] rockets |
| 6 || 3 || 3 || 4 || 4 || 3 || 3 || 6 | | 6 || 3 || 3 || 4 || 4 || 3 || 3 || 6 | ||
|- | |- | ||
| − | ! Tiny Tim rockets | + | ! [[Tiny Tim]] rockets |
| || || || 1 || 1 || || || | | || || || 1 || 1 || || || | ||
|- | |- | ||
| Line 175: | Line 161: | ||
|- | |- | ||
|} | |} | ||
| + | |||
| + | {{Navigation-Start|Default weapon presets}} | ||
| + | {{Navigation-First-Simple-Line}} | ||
| + | |||
| + | * Without load | ||
| + | * 12 x HVAR rockets | ||
| + | * 32 x HVAR rockets | ||
| + | * 2 x Tiny Tim rockets | ||
| + | * 2 x 100 lb AN-M30A1 bombs (200 lb total) | ||
| + | * 2 x 250 lb AN-M57 bombs (500 lb total) | ||
| + | * 2 x 500 lb AN-M64A1 bombs (1,000 lb total) | ||
| + | * 2 x 1,000 lb AN-M65A1 bombs (2,000 lb total) | ||
| + | * 24 x HVAR rockets + 2 x 500 lb AN-M64A1 bombs (1,000 lb total) | ||
| + | {{Navigation-End}} | ||
== Usage in battles == | == Usage in battles == | ||
<!-- ''Describe the tactics of playing in the aircraft, the features of using aircraft in a team and advice on tactics. Refrain from creating a "guide" - do not impose a single point of view, but instead, give the reader food for thought. Examine the most dangerous enemies and give recommendations on fighting them. If necessary, note the specifics of the game in different modes (AB, RB, SB).'' --> | <!-- ''Describe the tactics of playing in the aircraft, the features of using aircraft in a team and advice on tactics. Refrain from creating a "guide" - do not impose a single point of view, but instead, give the reader food for thought. Examine the most dangerous enemies and give recommendations on fighting them. If necessary, note the specifics of the game in different modes (AB, RB, SB).'' --> | ||
| − | '' | + | |
| + | === Realistic Battle === | ||
| + | Like many others in the game, this F-84 is a ground attack aircraft, with air respawn in realistic aerial matches and a series of weapons designed to perform this function. | ||
| + | |||
| + | === Use of Weaponry === | ||
| + | |||
| + | ==== Nose Armament ==== | ||
| + | The caliber of the nose weapons, the famous .50 M3 Browning, are very accurate and have a very high rate of fire with a considerable amount of ammunition. These characteristics make it considerably effective for air combat at his battle rate. However, when attacking land vehicles, it's important to note that the ammunition's penetration is not very effective. Even if it penetrates, it often doesn't cause significant damage to the vehicle's internal parts. This can be improved by using incendiary tracer ammunition. Even in Tank RB, I recommend always using tracer ammunition. It consists of incendiary rounds with 'ok' penetration for ground targets. The tracer ammunition can penetrate much of the engine protection of ground vehicles and cause fires, which can be devastating in War Thunder. | ||
| + | |||
| + | Additionally, tracer ammunition performs well in dogfigths , aiding in aiming and causing fires in planes. It also has enough penetration to kill pilots in head-on engagements, even those with armored glass. Since we are discussing aerial combat, I recommend using short bursts instead of holding down the mouse button. Click as if you were using a semi-automatic weapon. Only fire a longer burst when you are sure you won't miss and want to deal significant damage at once. This will save ammunition and can often cause enough damage to take down the target with just a few shots, especially due to the chance of causing a fire. | ||
| + | |||
| + | ==== Secondary Armament ==== | ||
| + | In air matches, I recommend customizing your payload with 1000-pound bombs and HVARs mounted at the wingtips (located at hardpoints 1 and 8 as per the wiki). Once the match begins, ejecting the HVARs from the wings. While they are mainly there to remove the external fuel tank from the wings, the 24 HVAR pack significantly increases the plane's drag, affecting performance more than the 1000lbs bombs themselves. This could make it challenging for you to maneuver effectively in combat. Therefore, during aerial engagements, it's advisable to eject these rockets. Its recommend sticking with the 1000lbs bombs as they can help you earn extra points in matches without significantly affecting the plane's performance. Since you start the match flying at a considerable speed and altitude, the addition of these bombs should not pose a significant hindrance. | ||
| + | |||
| + | === How and which bots to destroy in air RB === | ||
| + | Although in tank mode machine guns cause little damage to player tanks, in aerial matches they can be very effective for ground attacks, especially if the player knows how to manage ammunition, choose targets, and attack them effectively. Here's how to attack them: | ||
| + | |||
| + | * '''Howitzer''': Fire a short burst of 10 to 20 rounds directly at the cannon. If you hit it, it should be disabled. If you find it difficult to hit with a single burst, try firing 2 to 3 short bursts in succession. This may use up more ammunition, but it can be effective for neutralizing the target. | ||
| + | * '''Light Pillbox''': Try hitting them with bursts of up to 40 shots, aiming directly at the window if you're approaching from the front, or at the door if you're coming from behind. Light pillboxes can endure quite a bit of damage, but targeting these spots often leads to faster destruction, requiring less firepower. | ||
| + | * '''Pillbox''': If you don't have bombs, I suggest avoiding trying to destroy them. | ||
| + | * '''Patrol Boat''': Try to fire a burst of about 50 shots at the bridges, if there are many of these vessels together consider dropping a 1000 pound bomb. | ||
| + | * '''BTR-152''': Fire short bursts of 10 to 20 shots at the front, directly over the engine. This can cause fires, and the bots in air mode never extinguish fires. | ||
| + | * '''AAA (no crew/module modeling)''': With short bursts(10~20 rounds), you can destroy them from practically any distance, but be careful with the sandbags that may exist around them. | ||
| + | * '''PT-76-57''': Try hitting them with a short burst directly on the side, perpendicular to side of the tank, just below the turret, from a distance of max 800 m . With tracer ammunition, you can penetrate the armor, killing the gunner and commander and disabling the vehicle. | ||
| + | * '''Studebaker Trucks''': You have the option to shoot at the front of the vehicle, destroying the engine and causing fires from practically any distance you feel confident. Alternatively, you can try to kill the driver and the passenger, which will disable the vehicle. | ||
| + | * '''Medium/Heavy tanks(no crew/module modeling)''': It is recommended to skip these vehicles or reserve them for later. These vehicles can be destroyed with .50 caliber machine guns, but you need to be at a short distance, about 400m, for the shots to start causing damage. With a jet like the F-84, this will be difficult to control due to its considerable speed. Additionally, reducing your speed is not advisable because, as an older jet, it takes a long time to regain speed, leaving you exposed to enemy players who can easily destroy you. | ||
| + | * '''AAA truck(no crew/module modeling)''': They are very good targets to destroy. With short bursts(10~20 rounds), you can destroy them from practically any distance. Just be careful with the server's latency, as it can cause them to show strange zigzag movements. | ||
| + | * '''T-44-100''': I suggest avoiding attempting to destroy this vehicle. It has more armor than the others mentioned, and even if you manage to set the engine on fire, you'll likely need to significantly reduce the plane's speed to make high-angled attacks to penetrate the armor above the motor. It simply isn't worth becoming such a vulnerable target. Another way is to use bombs. | ||
| + | * '''Air bots''': Planes don't have much mystery, but I recommend always trying to use short bursts to shoot them down. | ||
| + | |||
| + | === Operational procedure on some aerial realistic maps === | ||
| + | As already mentioned, it is a ground attack plane, and even with the upcoming [[Update "Seek & Destroy"|Seek and Destroy]] update, it will continue to have air respawn. However, since it is a BR 7.7 rank 5 aircraft, it will face several enemies and allies that are higher BR and rank 6. These higher-ranked ground attack aircraft will not have air respawn and will not perform much better. Therefore, this situation provides an excellent advantage for this F-84. You will be in a privileged position, allowing you to attack ground targets before your enemies even arrive in combat. This will provide you with RP points and a significant ticket advantage for your team, making it easier to farm with some peace of mind. | ||
| + | |||
| + | With 1800 incendiary tracer rounds of .50 caliber ammunition, you can allocate some for ground attacks and some for Air Combat. Initially, it may be difficult to manage this and execute effective ground attacks, as you will likely miss many shots. However, as you play, it will naturally become easier. Furthermore, with good performance, you can conduct effective aerial combat using just 400-500 rounds of .50 ammunition, and with good combat experience at this battle rating, you can take down 2 to 3 aircraft before reload. | ||
| + | |||
| + | And attention, its sugest the plane is configured with a payload of '''24x HVAR and 2x 1000lbs bombs and arround 11 min fuel'''. Additionally, note that the HVAR rockets are '''ejected right after respawn''' to maintain the plane's performance and remove the fuel tanks from the wingtips. You don't need to worry about fuel, as 11 minutes is usually enough to finish the match or even go back to airfield to reload your weapons. | ||
| + | |||
| + | Speaking more about aerodromes, you will notice that on practically all the maps at his Battle Rate, your team will have two aerodromes: one with an improvised and shorter runway, which lacks anti-air defenses, and another with a longer runway equipped with extensive anti-air defenses provided by Rolands and some anti-air cannons. With the aforementioned configuration, this plane cannot take off from the short runway, so the game must respawn you flying after reloading, which can be an interesting advantage. | ||
| + | |||
| + | Additionally, note that on the long runway, you will need to use it almost entirely to take off, and on some maps, you will have to use a takeoff flap. Given all this, if you are safe, it is recommended to rearm on the short runway just to leave the aerodrome flying, without the need for a lengthy takeoff. | ||
| + | |||
| + | So simplifying everything above into points: | ||
| + | |||
| + | * '''Fuel Management''': 11 minutes of fuel is generally enough for your missions. Return to base if needed. | ||
| + | * '''Aerodrome Strategy''': Use the shorter runway for quick takeoffs when safe. Be aware that the longer runway offers better anti-air defense. | ||
| + | * '''Interception Awareness''': Always stay vigilant for enemy fighters, especially after completing ground attacks. Make quick decisions on whether to engage or evade based on your situational awareness. | ||
| + | * '''Thunderer Medal Strategy''': To secure the Thunderer medal, ensure you destroy the most ground targets on your team. Aim for 12 to 17 targets to be confident in achieving this. | ||
=== Pros and cons === | === Pros and cons === | ||
<!-- ''Summarise and briefly evaluate the vehicle in terms of its characteristics and combat effectiveness. Mark its pros and cons in the bulleted list. Try not to use more than 6 points for each of the characteristics. Avoid using categorical definitions such as "bad", "good" and the like - use substitutions with softer forms such as "inadequate" and "effective".'' --> | <!-- ''Summarise and briefly evaluate the vehicle in terms of its characteristics and combat effectiveness. Mark its pros and cons in the bulleted list. Try not to use more than 6 points for each of the characteristics. Avoid using categorical definitions such as "bad", "good" and the like - use substitutions with softer forms such as "inadequate" and "effective".'' --> | ||
| − | |||
'''Pros:''' | '''Pros:''' | ||
| Line 202: | Line 247: | ||
<!-- ''Describe the history of the creation and combat usage of the aircraft in more detail than in the introduction. If the historical reference turns out to be too long, take it to a separate article, taking a link to the article about the vehicle and adding a block "/History" (example: <nowiki>https://wiki.warthunder.com/(Vehicle-name)/History</nowiki>) and add a link to it here using the <code>main</code> template. Be sure to reference text and sources by using <code><nowiki><ref></ref></nowiki></code>, as well as adding them at the end of the article with <code><nowiki><references /></nowiki></code>. This section may also include the vehicle's dev blog entry (if applicable) and the in-game encyclopedia description (under <code><nowiki>=== In-game description ===</nowiki></code>, also if applicable).'' -->'''See also: [[F-84G-21-RE (China)|F-84G-21-RE in ROCAF service]]''' | <!-- ''Describe the history of the creation and combat usage of the aircraft in more detail than in the introduction. If the historical reference turns out to be too long, take it to a separate article, taking a link to the article about the vehicle and adding a block "/History" (example: <nowiki>https://wiki.warthunder.com/(Vehicle-name)/History</nowiki>) and add a link to it here using the <code>main</code> template. Be sure to reference text and sources by using <code><nowiki><ref></ref></nowiki></code>, as well as adding them at the end of the article with <code><nowiki><references /></nowiki></code>. This section may also include the vehicle's dev blog entry (if applicable) and the in-game encyclopedia description (under <code><nowiki>=== In-game description ===</nowiki></code>, also if applicable).'' -->'''See also: [[F-84G-21-RE (China)|F-84G-21-RE in ROCAF service]]''' | ||
| − | The delivery of this F-84G-31-RE was the No. 070 of the Thunder Tiger Aerobatics Team (雷虎特技小組) with a registration number of '''F-84070/52-8392''', due to the lack of further records of this batches of F-84G from both USAF and ROCAF, the fate of this jet is unknown; but likely been decommissioned and scrapped by the last user of this jet.<ref>https://rexkuang326.pixnet.net/blog/post/349307047 The only known image of 070's existence</ref> | + | The delivery of this F-84G-31-RE was the No. 070 of the Thunder Tiger Aerobatics Team (雷虎特技小組) with a registration number of '''F-84070/52-8392''', due to the lack of further records of this batches of F-84G from both USAF and ROCAF, the fate of this jet is unknown; but likely been decommissioned and scrapped by the last user of this jet.<ref>https://rexkuang326.pixnet.net/blog/post/349307047 The only known image of 070's existence</ref>* |
== Media == | == Media == | ||
<!-- ''Excellent additions to the article would be video guides, screenshots from the game, and photos.'' --> | <!-- ''Excellent additions to the article would be video guides, screenshots from the game, and photos.'' --> | ||
| − | + | ||
| + | ;Skins | ||
| + | |||
| + | * [https://live.warthunder.com/feed/camouflages/?vehicle=f-84g-31-re_china Skins and camouflages for the {{PAGENAME}} from live.warthunder.com.] | ||
== See also == | == See also == | ||
| Line 212: | Line 260: | ||
* ''reference to the series of the aircraft;'' | * ''reference to the series of the aircraft;'' | ||
* ''links to approximate analogues of other nations and research trees.'' --> | * ''links to approximate analogues of other nations and research trees.'' --> | ||
| − | |||
| − | + | ;Related development | |
| − | * | + | |
| + | * [[F-84 (Family)]] | ||
== External links == | == External links == | ||
| Line 225: | Line 273: | ||
<references /> | <references /> | ||
| + | {{AirManufacturer Republic}} | ||
{{China jet aircraft}} | {{China jet aircraft}} | ||
{{China premium aircraft}} | {{China premium aircraft}} | ||
Latest revision as of 01:38, 23 June 2024
| This page is about the premium strike aircraft F-84G-31-RE (China). For other versions, see F-84 (Family). |
.jpg)
Contents
Description
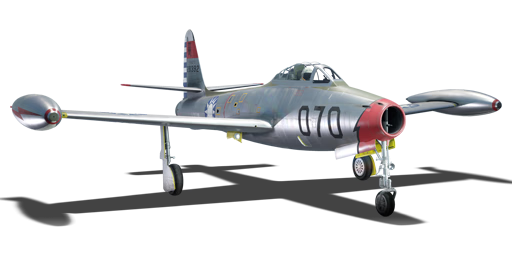
The ␗F-84G-31-RE Thunderjet, known to ROCAF as the 雷霆式 (lit. the Thunderbolt type), was among one of the F-84G series delivered to ROCAF and also being the very last production straight wing F-84. These jets served ROCAF as the gap-filler before new jets were aided and during its 7 years of service, the G series scored a victory over MiGs which were considered to be undefeatable by F-84.
Introduced in Update "Sky Guardians", the jet is mostly identical to the early series of F-84G in ROCAF service other than the delivery and its "block number" at 31; while it might not fit the name of being a fighter due to its conservative designs and underpowered engine (in terms of later jet engines), the air-to-ground ordinances for the jet is rather valuable to the Chinese tech tree which PLAAF happened to lack such jets at its tier. With the premium boost of the jet, players can train themselves for jet ground-attack operations without the assistance of ballistic computers for future jets while earning extra research points and silver lions.
General info
Flight performance
| Characteristics | Max speed (km/h at 0 m - sea level) |
Max altitude (metres) |
Turn time (seconds) |
Rate of climb (metres/second) |
Take-off run (metres) | |||
|---|---|---|---|---|---|---|---|---|
| AB | RB | AB | RB | AB | RB | |||
| Stock | 976 | 971 | 12500 | 29.0 | 30.4 | 30.8 | 29.2 | 3,000 |
| Upgraded | 994 | 985 | 27.2 | 28.0 | 42.1 | 36.2 | ||
Details
| Features | |||||
|---|---|---|---|---|---|
| Combat flaps | Take-off flaps | Landing flaps | Air brakes | Arrestor gear | Drogue chute |
| ✓ | ✓ | ✓ | ✓ | X | X |
| Limits | ||||||
|---|---|---|---|---|---|---|
| Wings (km/h) | Gear (km/h) | Flaps (km/h) | Max Static G | |||
| Combat | Take-off | Landing | + | - | ||
| 1044.75 | 320 | 527 | 499 | 350 | ~11 | ~5 |
| Optimal velocities (km/h) | |||
|---|---|---|---|
| Ailerons | Rudder | Elevators | Radiator |
| < 530 | < 600 | < 690 | - |
Engine performance
| Engine | Aircraft mass | |||||
|---|---|---|---|---|---|---|
| Engine name | Number | Basic mass | Wing loading (full fuel) | |||
| Allison J35-A-29 | 1 | 5,572 kg | 284 kg/m2 | |||
| Engine characteristics | Mass with fuel (no weapons load) | Max Gross Weight | ||||
| Weight (each) | Type | 8m fuel | 20m fuel | 27m fuel | ||
| 1,050 kg | Axial-flow turbojet | 5,963 kg | 6,529 kg | 6,875 kg | 9,541 kg | |
| Maximum engine thrust @ 0 m (RB/SB) | Thrust to weight ratio @ 0 m (100%) | |||||
| Condition | 100% | WEP | 8m fuel | 20m fuel | 27m fuel | MGW |
| Stationary | 2,300 kgf | - | 0.39 | 0.35 | 0.33 | 0.24 |
| Optimal | 2,300 kgf (0 km/h) |
- | 0.39 | 0.35 | 0.33 | 0.24 |
Survivability and armour
Examine the survivability of the aircraft. Note how vulnerable the structure is and how secure the pilot is, whether the fuel tanks are armoured, etc. Describe the armour, if there is any, and also mention the vulnerability of other critical aircraft systems.
Modifications and economy
| Flight performance | Survivability | Weaponry | ||||||||||||||||||||||||
|---|---|---|---|---|---|---|---|---|---|---|---|---|---|---|---|---|---|---|---|---|---|---|---|---|---|---|
|
|
|
Armaments
Offensive armament
The F-84G-31-RE (China) is armed with:
- 4 x 12.7 mm M3 Browning machine guns, nose-mounted (300 rpg = 1,200 total)
- 2 x 12.7 mm M3 Browning machine guns, wing-mounted (300 rpg = 600 total)
Suspended armament
The F-84G-31-RE (China) can be outfitted with the following ordnance:
| 1 | 2 | 3 | 4 | 5 | 6 | 7 | 8 | .png) | |
|---|---|---|---|---|---|---|---|---|---|
| 100 lb AN-M30A1 bombs | 1 | 1 | |||||||
| 250 lb AN-M57 bombs | 1 | 1 | |||||||
| 500 lb AN-M64A1 bombs | 1 | 1 | |||||||
| 1,000 lb AN-M65A1 bombs | 1 | 1 | |||||||
| HVAR rockets | 6 | 3 | 3 | 4 | 4 | 3 | 3 | 6 | |
| Tiny Tim rockets | 1 | 1 | |||||||
| Maximum permissible weight imbalance: 900 kg | |||||||||
| Default weapon presets | |
|---|---|
| |
Usage in battles
Realistic Battle
Like many others in the game, this F-84 is a ground attack aircraft, with air respawn in realistic aerial matches and a series of weapons designed to perform this function.
Use of Weaponry
Nose Armament
The caliber of the nose weapons, the famous .50 M3 Browning, are very accurate and have a very high rate of fire with a considerable amount of ammunition. These characteristics make it considerably effective for air combat at his battle rate. However, when attacking land vehicles, it's important to note that the ammunition's penetration is not very effective. Even if it penetrates, it often doesn't cause significant damage to the vehicle's internal parts. This can be improved by using incendiary tracer ammunition. Even in Tank RB, I recommend always using tracer ammunition. It consists of incendiary rounds with 'ok' penetration for ground targets. The tracer ammunition can penetrate much of the engine protection of ground vehicles and cause fires, which can be devastating in War Thunder.
Additionally, tracer ammunition performs well in dogfigths , aiding in aiming and causing fires in planes. It also has enough penetration to kill pilots in head-on engagements, even those with armored glass. Since we are discussing aerial combat, I recommend using short bursts instead of holding down the mouse button. Click as if you were using a semi-automatic weapon. Only fire a longer burst when you are sure you won't miss and want to deal significant damage at once. This will save ammunition and can often cause enough damage to take down the target with just a few shots, especially due to the chance of causing a fire.
Secondary Armament
In air matches, I recommend customizing your payload with 1000-pound bombs and HVARs mounted at the wingtips (located at hardpoints 1 and 8 as per the wiki). Once the match begins, ejecting the HVARs from the wings. While they are mainly there to remove the external fuel tank from the wings, the 24 HVAR pack significantly increases the plane's drag, affecting performance more than the 1000lbs bombs themselves. This could make it challenging for you to maneuver effectively in combat. Therefore, during aerial engagements, it's advisable to eject these rockets. Its recommend sticking with the 1000lbs bombs as they can help you earn extra points in matches without significantly affecting the plane's performance. Since you start the match flying at a considerable speed and altitude, the addition of these bombs should not pose a significant hindrance.
How and which bots to destroy in air RB
Although in tank mode machine guns cause little damage to player tanks, in aerial matches they can be very effective for ground attacks, especially if the player knows how to manage ammunition, choose targets, and attack them effectively. Here's how to attack them:
- Howitzer: Fire a short burst of 10 to 20 rounds directly at the cannon. If you hit it, it should be disabled. If you find it difficult to hit with a single burst, try firing 2 to 3 short bursts in succession. This may use up more ammunition, but it can be effective for neutralizing the target.
- Light Pillbox: Try hitting them with bursts of up to 40 shots, aiming directly at the window if you're approaching from the front, or at the door if you're coming from behind. Light pillboxes can endure quite a bit of damage, but targeting these spots often leads to faster destruction, requiring less firepower.
- Pillbox: If you don't have bombs, I suggest avoiding trying to destroy them.
- Patrol Boat: Try to fire a burst of about 50 shots at the bridges, if there are many of these vessels together consider dropping a 1000 pound bomb.
- BTR-152: Fire short bursts of 10 to 20 shots at the front, directly over the engine. This can cause fires, and the bots in air mode never extinguish fires.
- AAA (no crew/module modeling): With short bursts(10~20 rounds), you can destroy them from practically any distance, but be careful with the sandbags that may exist around them.
- PT-76-57: Try hitting them with a short burst directly on the side, perpendicular to side of the tank, just below the turret, from a distance of max 800 m . With tracer ammunition, you can penetrate the armor, killing the gunner and commander and disabling the vehicle.
- Studebaker Trucks: You have the option to shoot at the front of the vehicle, destroying the engine and causing fires from practically any distance you feel confident. Alternatively, you can try to kill the driver and the passenger, which will disable the vehicle.
- Medium/Heavy tanks(no crew/module modeling): It is recommended to skip these vehicles or reserve them for later. These vehicles can be destroyed with .50 caliber machine guns, but you need to be at a short distance, about 400m, for the shots to start causing damage. With a jet like the F-84, this will be difficult to control due to its considerable speed. Additionally, reducing your speed is not advisable because, as an older jet, it takes a long time to regain speed, leaving you exposed to enemy players who can easily destroy you.
- AAA truck(no crew/module modeling): They are very good targets to destroy. With short bursts(10~20 rounds), you can destroy them from practically any distance. Just be careful with the server's latency, as it can cause them to show strange zigzag movements.
- T-44-100: I suggest avoiding attempting to destroy this vehicle. It has more armor than the others mentioned, and even if you manage to set the engine on fire, you'll likely need to significantly reduce the plane's speed to make high-angled attacks to penetrate the armor above the motor. It simply isn't worth becoming such a vulnerable target. Another way is to use bombs.
- Air bots: Planes don't have much mystery, but I recommend always trying to use short bursts to shoot them down.
Operational procedure on some aerial realistic maps
As already mentioned, it is a ground attack plane, and even with the upcoming Seek and Destroy update, it will continue to have air respawn. However, since it is a BR 7.7 rank 5 aircraft, it will face several enemies and allies that are higher BR and rank 6. These higher-ranked ground attack aircraft will not have air respawn and will not perform much better. Therefore, this situation provides an excellent advantage for this F-84. You will be in a privileged position, allowing you to attack ground targets before your enemies even arrive in combat. This will provide you with RP points and a significant ticket advantage for your team, making it easier to farm with some peace of mind.
With 1800 incendiary tracer rounds of .50 caliber ammunition, you can allocate some for ground attacks and some for Air Combat. Initially, it may be difficult to manage this and execute effective ground attacks, as you will likely miss many shots. However, as you play, it will naturally become easier. Furthermore, with good performance, you can conduct effective aerial combat using just 400-500 rounds of .50 ammunition, and with good combat experience at this battle rating, you can take down 2 to 3 aircraft before reload.
And attention, its sugest the plane is configured with a payload of 24x HVAR and 2x 1000lbs bombs and arround 11 min fuel. Additionally, note that the HVAR rockets are ejected right after respawn to maintain the plane's performance and remove the fuel tanks from the wingtips. You don't need to worry about fuel, as 11 minutes is usually enough to finish the match or even go back to airfield to reload your weapons.
Speaking more about aerodromes, you will notice that on practically all the maps at his Battle Rate, your team will have two aerodromes: one with an improvised and shorter runway, which lacks anti-air defenses, and another with a longer runway equipped with extensive anti-air defenses provided by Rolands and some anti-air cannons. With the aforementioned configuration, this plane cannot take off from the short runway, so the game must respawn you flying after reloading, which can be an interesting advantage.
Additionally, note that on the long runway, you will need to use it almost entirely to take off, and on some maps, you will have to use a takeoff flap. Given all this, if you are safe, it is recommended to rearm on the short runway just to leave the aerodrome flying, without the need for a lengthy takeoff.
So simplifying everything above into points:
- Fuel Management: 11 minutes of fuel is generally enough for your missions. Return to base if needed.
- Aerodrome Strategy: Use the shorter runway for quick takeoffs when safe. Be aware that the longer runway offers better anti-air defense.
- Interception Awareness: Always stay vigilant for enemy fighters, especially after completing ground attacks. Make quick decisions on whether to engage or evade based on your situational awareness.
- Thunderer Medal Strategy: To secure the Thunderer medal, ensure you destroy the most ground targets on your team. Aim for 12 to 17 targets to be confident in achieving this.
Pros and cons
Pros:
- Beginner-friendly centre-mounted machine guns with great trajectory, bullet velocity, and ammo count, unlike a MiG-15
- Has various bombs and rockets for ground attack
- Fast dive acceleration and speed
- Has a gyro gunsight
Cons:
- Poor turning ability and roll rate comparing to something like F-86
- Bleeds speed severely when manoeuvring
- Machine guns lack damage, requiring prolonged hits on target
- Mediocre acceleration
- Long takeoff distance
History
See also: F-84G-21-RE in ROCAF service
The delivery of this F-84G-31-RE was the No. 070 of the Thunder Tiger Aerobatics Team (雷虎特技小組) with a registration number of F-84070/52-8392, due to the lack of further records of this batches of F-84G from both USAF and ROCAF, the fate of this jet is unknown; but likely been decommissioned and scrapped by the last user of this jet.[1]*
Media
- Skins
See also
- Related development
External links
References
- ↑ https://rexkuang326.pixnet.net/blog/post/349307047 The only known image of 070's existence
| Republic Aviation Corporation | |
|---|---|
| Fighters | P-43A-1 |
| P-47D-22-RE · P-47D-25 · P-47D-28 · P-47M-1-RE · ⋠P-47M-1-RE · P-47N-15 | |
| Jet Aircraft | F-84B-26 · F-84F · F-84G-21-RE |
| F-105D | |
| Export | J9 Early* |
| ␗P-43A-1 | |
| ▄Thunderbolt Mk.1 · ▄P-47D-22-RE · ␗P-47D-23-RA · ▂P-47D-27 · ␗P-47D-30 · ▄P-47D-30 · ␗F-47N-25-RE | |
| ◄F-84F · ▄F-84F (Italy) · ▄F-84F (France) · F-84F IAF · F-84F | |
| ␗F-84G-21-RE · ▄F-84G-21-RE · ▄F-84G-26-RE · ␗F-84G-31-RE | |
| Captured | ▀P-47D-16-RE · ▀P-47D |
| *The company was named "Seversky Aircraft Company" before being renamed in 1939 | |
| China jet aircraft | |
|---|---|
| Fighters | J-2 · J-4 · J-6A · J-7II · J-7D · J-7E · J-8B · J-8F · J-10A · J-11 · J-11A |
| Strike aircraft | Q-5 early · Q-5A · Q-5L · A-5C · JH-7A |
| Bombers | H-5 |
| American | ␗F-84G-21-RE · ␗F-84G-31-RE · ␗F-86F-30 · ␗F-86F-40 · ␗F-100A · ␗F-100F · ␗F-104A · ␗F-104G · ␗F-5A · ␗F-5E · ␗F-16A MLU |
| Soviet | ␗MiG-9 · ␗MiG-9 (l) |
| North Korea | Shenyang F-5 |
| Pakistan | JF-17 |
| China premium aircraft | |
|---|---|
| Fighters | ␗A6M2 · D.510C · ␗F-47N-25-RE · H-81A-2 · Hawk III · ␗Ki-45 hei/tei · ␗Ki-84 ko · ␗P-51C-11-NT |
| Jet fighters | Shenyang F-5 · J-7D |
| Strike aircraft | A-5C · ␗F-84G-31-RE |
