Difference between revisions of "Challenger 2 OES"
Inceptor57 (talk | contribs) (→Description) |
(→Survivability and armour) (Tag: Visual edit) |
||
| (8 intermediate revisions by 4 users not shown) | |||
| Line 1: | Line 1: | ||
| + | {{About | ||
| + | | about = premium British medium tank '''{{PAGENAME}}''' | ||
| + | | usage = other versions | ||
| + | | link = Challenger 2 (Family) | ||
| + | }} | ||
{{Specs-Card | {{Specs-Card | ||
|code=uk_challenger_2_megatron | |code=uk_challenger_2_megatron | ||
| Line 13: | Line 18: | ||
=== Survivability and armour === | === Survivability and armour === | ||
{{Specs-Tank-Armour}} | {{Specs-Tank-Armour}} | ||
| − | <!-- ''Describe armour protection. Note the most well protected and key weak areas. Appreciate the layout of modules as well as the number and location of crew members. Is the level of armour protection sufficient, is the placement of modules helpful for survival in combat? If necessary use a visual template to indicate the most secure and weak zones of the armour.'' --> | + | <!-- ''Describe armour protection. Note the most well protected and key weak areas. Appreciate the layout of modules as well as the number and location of crew members. Is the level of armour protection sufficient, is the placement of modules helpful for survival in combat? If necessary use a visual template to indicate the most secure and weak zones of the armour.'' -->'''The Challenger 2 OES, like its predecessors, is renowned for its exceptional armor protection. The tank features Chobham armor, which is one of the most advanced armor technologies, providing substantial protection against a variety of anti-tank weapons.''' |
| − | '' | + | |
| + | ==== '''Armor Layout''' ==== | ||
| + | |||
| + | * '''Frontal Armor: The Challenger 2's frontal armor is its strongest aspect, capable of withstanding direct hits from most contemporary anti-tank rounds. The turret front and glacis plate are particularly well protected.''' | ||
| + | * '''Side and Rear Armor: While the sides are robust, especially compared to earlier tank models, they are still vulnerable to modern anti-tank weapons if exposed. The rear armor is the weakest point, susceptible to all forms of anti-tank weaponry.''' | ||
| − | ''' | + | ==== '''Key Weak Areas''' ==== |
| + | |||
| + | * '''Lower Glacis: This area remains a common weak point in many tanks, including the Challenger 2. Hits here can potentially disable the tank or damage internal components.''' | ||
| + | * '''Rear: The engine and less protected rear aspects make it vulnerable, especially in urban combat scenarios where flanking is possible.''' | ||
| + | * '''Roof: The roof is thinner compared to the frontal and side armor, making it vulnerable to top-attack weapons.''' | ||
| + | |||
| + | ==== '''Crew and Module Layout''' ==== | ||
| + | '''The Challenger 2 typically houses a crew of four: the commander, gunner, loader, and driver.''' | ||
| + | |||
| + | * '''Driver: Located at the front of the hull, slightly offset to the left.''' | ||
| + | * '''Commander and Gunner: Positioned in the turret with the commander behind and to the right of the gunner.''' | ||
| + | * '''Loader: Also in the turret, positioned on the left side.''' | ||
| + | |||
| + | '''The placement of these crew members, along with critical modules like the ammunition storage and fuel tanks, is strategic. Ammunition is often stored in blow-out compartments to minimize the risk of catastrophic damage if the tank is penetrated.''' | ||
| + | |||
| + | ==== '''Evaluation of Protection''' ==== | ||
| + | |||
| + | * '''Level of Armor Protection: The Challenger 2’s armor is highly effective against traditional ballistic threats and offers good resistance against improvised explosive devices and mines. However, the tank's protection against newer anti-tank guided missiles and top-attack munitions is a concern that needs continuous upgrades, such as active protection systems.''' | ||
| + | * '''Placement of Modules: The design includes several survivability features, such as the separation and armoring of ammunition storage. This layout helps improve crew survival in the event of a penetration by isolating the explosion to specific compartments.''' | ||
| + | |||
| + | '''type:''' <!-- The types of armour present on the vehicle and their general locations --> | ||
<!-- Example: * Rolled homogeneous armour (Front, Side, Rear, Hull roof) | <!-- Example: * Rolled homogeneous armour (Front, Side, Rear, Hull roof) | ||
* Cast homogeneous armour (Turret, Transmission area) --> | * Cast homogeneous armour (Turret, Transmission area) --> | ||
| Line 40: | Line 69: | ||
''Write about the mobility of the ground vehicle. Estimate the specific power and manoeuvrability, as well as the maximum speed forwards and backwards.'' | ''Write about the mobility of the ground vehicle. Estimate the specific power and manoeuvrability, as well as the maximum speed forwards and backwards.'' | ||
| − | {{tankMobility}} | + | {{tankMobility|abMinHp=1,886|rbMinHp=1,076}} |
=== Modifications and economy === | === Modifications and economy === | ||
| Line 50: | Line 79: | ||
{{Specs-Tank-Weapon|1}} | {{Specs-Tank-Weapon|1}} | ||
<!-- ''Give the reader information about the characteristics of the main gun. Assess its effectiveness in a battle based on the reloading speed, ballistics and the power of shells. Do not forget about the flexibility of the fire, that is how quickly the cannon can be aimed at the target, open fire on it and aim at another enemy. Add a link to the main article on the gun: <code><nowiki>{{main|Name of the weapon}}</nowiki></code>. Describe in general terms the ammunition available for the main gun. Give advice on how to use them and how to fill the ammunition storage.'' --> | <!-- ''Give the reader information about the characteristics of the main gun. Assess its effectiveness in a battle based on the reloading speed, ballistics and the power of shells. Do not forget about the flexibility of the fire, that is how quickly the cannon can be aimed at the target, open fire on it and aim at another enemy. Add a link to the main article on the gun: <code><nowiki>{{main|Name of the weapon}}</nowiki></code>. Describe in general terms the ammunition available for the main gun. Give advice on how to use them and how to fill the ammunition storage.'' --> | ||
| − | {{main|L30A1 (120 mm)}} | + | {{main|L30A1 (120 mm)}}The Challenger 2 OES is equipped with the L30A1 120mm rifled gun. This artillery piece is noted for its distinctive rifling, which enhances the accuracy and stability of its ammunition. |
| + | |||
| + | Reloading Speed: The L30A1 has a slower reloading speed compared to modern smoothbore guns found on other main battle tanks. This can affect its ability to deliver rapid successive shots. | ||
| + | |||
| + | Ballistics: The rifled design aids in maintaining a tighter spin on the fired shells, improving their trajectory and accuracy over long distances. | ||
| + | |||
| + | Power of Shells: The gun fires a variety of shells including armor-piercing fin-stabilized discarding sabot (APFSDS), high-explosive squash head (HESH), and more. These shells are capable of penetrating modern armor and inflicting significant damage. | ||
| + | |||
| + | Flexibility of Fire: The gun mount and turret provide reasonable agility in targeting. However, the overall speed at which the gun can switch targets and fire is moderated by its mechanical loading system. | ||
| + | |||
| + | Ammunition Types and Usage | ||
| + | |||
| + | The L30A1 uses several types of ammunition: | ||
| − | + | APFSDS: Ideal for engaging modern armored vehicles at long distances. | |
| + | |||
| + | HESH: Effective against lighter armored vehicles and for causing internal spalling on heavier armor. | ||
| + | |||
| + | Smoke rounds: Useful for creating smoke screens to cover movements or obscure vision. | ||
| + | |||
| + | Advice on Ammunition Storage and Usage | ||
| + | |||
| + | Ammunition Storage: It is advisable to carry a balanced mix of APFSDS and HESH shells based on the mission profile, with a few smoke rounds for tactical flexibility. | ||
| + | |||
| + | Usage Tips: Utilize APFSDS rounds for long-range engagements against heavily armored targets. Switch to HESH for closer encounters or against buildings and lighter armored vehicles to maximize damage. | ||
| + | |||
| + | ''.'' | ||
{| class="wikitable" style="text-align:center" width="100%" | {| class="wikitable" style="text-align:center" width="100%" | ||
| Line 63: | Line 116: | ||
|- | |- | ||
! ''Arcade'' | ! ''Arcade'' | ||
| − | | rowspan="2" | | + | | rowspan="2" | 49 || rowspan="2" | -10°/+20° || rowspan="2" | ±180° || rowspan="2" | Two-plane || 29.5 || 40.8 || 49.6 || 54.9 || 58.4 || rowspan="2" | 6.50 || rowspan="2" | 5.75 || rowspan="2" | 5.30 || rowspan="2" | 5.00 |
|- | |- | ||
! ''Realistic'' | ! ''Realistic'' | ||
| − | | | + | | 18.4 || 21.7 || 26.4 || 29.2 || 31.0 |
|- | |- | ||
|} | |} | ||
| Line 87: | Line 140: | ||
! Visual<br>discrepancy | ! Visual<br>discrepancy | ||
|- | |- | ||
| − | | ''' | + | | '''49''' || __ ''(+__)'' || __ ''(+__)'' || __ ''(+__)'' || __ ''(+__)'' || __ ''(+__)'' || __ ''(+__)'' || __ |
|- | |- | ||
|} | |} | ||
| Line 105: | Line 158: | ||
! Mount !! Capacity (Belt) !! Fire rate !! Vertical !! Horizontal | ! Mount !! Capacity (Belt) !! Fire rate !! Vertical !! Horizontal | ||
|- | |- | ||
| − | | || | + | | Pintle || 1,000 (200) || 575 || -10°/+50° || ±180° |
|- | |- | ||
|} | |} | ||
| Line 114: | Line 167: | ||
! Mount !! Capacity (Belt) !! Fire rate !! Vertical !! Horizontal | ! Mount !! Capacity (Belt) !! Fire rate !! Vertical !! Horizontal | ||
|- | |- | ||
| − | | || | + | | Coaxial || 2,000 (2,000) || 600 || - || - |
|- | |- | ||
|} | |} | ||
| Line 124: | Line 177: | ||
=== Pros and cons === | === Pros and cons === | ||
<!-- ''Summarise and briefly evaluate the vehicle in terms of its characteristics and combat effectiveness. Mark its pros and cons in a bulleted list. Try not to use more than 6 points for each of the characteristics. Avoid using categorical definitions such as "bad", "good" and the like - use substitutions with softer forms such as "inadequate" and "effective".'' --> | <!-- ''Summarise and briefly evaluate the vehicle in terms of its characteristics and combat effectiveness. Mark its pros and cons in a bulleted list. Try not to use more than 6 points for each of the characteristics. Avoid using categorical definitions such as "bad", "good" and the like - use substitutions with softer forms such as "inadequate" and "effective".'' --> | ||
| − | |||
'''Pros:''' | '''Pros:''' | ||
| Line 130: | Line 182: | ||
* Retains pros from previous challenger 2: | * Retains pros from previous challenger 2: | ||
** Impressive chemical protection on the front and sides | ** Impressive chemical protection on the front and sides | ||
| − | ** | + | ** Impressive kinetic protection on either side of the cannon breech, allowing for efficient hull down combat |
| − | ** Access to unique and powerful | + | ** Access to unique and powerful HESH round |
| − | ** Very accurate L30A1 120 mm gun, can even fire | + | ** Very accurate L30A1 120 mm gun, can even fire HESH accurately at a range of several kilometres |
** Fast reload | ** Fast reload | ||
* Roof mounted machine gun has access to thermal and can be used as a makeshift CITV for scouting (but not firing, unfortunately) | * Roof mounted machine gun has access to thermal and can be used as a makeshift CITV for scouting (but not firing, unfortunately) | ||
| − | * Access to | + | * Access to 12.7 mm machine gun, a rare luxury on British tanks |
* Since it is a premium tank, its RP and SL gains are doubled and it can research any British tanks currently in the game | * Since it is a premium tank, its RP and SL gains are doubled and it can research any British tanks currently in the game | ||
| Line 142: | Line 194: | ||
* The jammer is useless in-game and begs other tanks to scout it out or use HE on it | * The jammer is useless in-game and begs other tanks to scout it out or use HE on it | ||
* Heaviest MBT in the game with a very poor hp/ton ratio; very poor acceleration | * Heaviest MBT in the game with a very poor hp/ton ratio; very poor acceleration | ||
| − | * | + | * Slow turret traverse speed for the BR |
* Very poor steering, turning is slow and costs a great deal of speed, which takes a long time to regain | * Very poor steering, turning is slow and costs a great deal of speed, which takes a long time to regain | ||
| − | * In most situations, can only reach around | + | * In most situations, can only reach around 40 km/h (25 mph) |
* Also retains weaknesses of previous challenger 2 models: | * Also retains weaknesses of previous challenger 2 models: | ||
** Same ammunition options as the previous Challengers | ** Same ammunition options as the previous Challengers | ||
| − | ** | + | ** Frontal armour is weak at the lower frontal plate, drivers port, and cannon breech |
** L27A1 has low penetration compared to other top rank NATO ammunition, however reload speed does compensate for this | ** L27A1 has low penetration compared to other top rank NATO ammunition, however reload speed does compensate for this | ||
** Cannot maintain the short reload time after the first-stage ammo rack (4 rounds) has been depleted | ** Cannot maintain the short reload time after the first-stage ammo rack (4 rounds) has been depleted | ||
| Line 157: | Line 209: | ||
== Media == | == Media == | ||
<!-- ''Excellent additions to the article would be video guides, screenshots from the game, and photos.'' --> | <!-- ''Excellent additions to the article would be video guides, screenshots from the game, and photos.'' --> | ||
| − | + | ||
| + | ;Skins | ||
| + | |||
| + | * [https://live.warthunder.com/feed/camouflages/?vehicle=uk_challenger_2_megatron Skins and camouflages for the {{PAGENAME}} from live.warthunder.com.] | ||
== See also == | == See also == | ||
| Line 163: | Line 218: | ||
* ''reference to the series of the vehicles;'' | * ''reference to the series of the vehicles;'' | ||
* ''links to approximate analogues of other nations and research trees.'' --> | * ''links to approximate analogues of other nations and research trees.'' --> | ||
| − | |||
| − | + | ;Related development | |
| − | * | + | |
| + | * [[Challenger 2 (Family)]] | ||
== External links == | == External links == | ||
Latest revision as of 12:50, 2 May 2024
| This page is about the premium British medium tank Challenger 2 OES. For other versions, see Challenger 2 (Family). |

Contents
Description
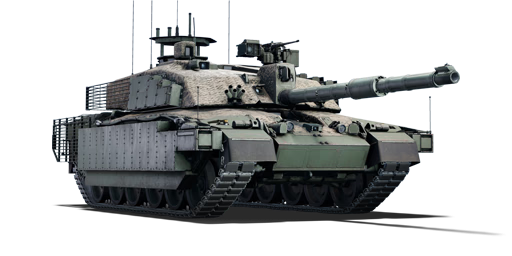
The Challenger 2 OES is a modification for the tank made to improve its survivability in high intensity battles. With the introduction of ERA blocks covering the sides and front of the vehicle, this protection is meant to deal specially against RPGs and ATGMs in urban combat. The vehicle also received updated protection against IEDs. The upgrade started development based on the Challenger 2 TES, which is almost identical, this upgrade was created as a response to the asymmetric warfare scenario of Iraq 2002, in which IEDs and urban combat doomed many NATO tanks due to their poor protection on the sides. The US developed a similar upgrade with the TUSK ERA package for their M1 Abram tanks.
Introduced in Update "Air Superiority", the Challenger 2 OES is very similar to other Challenger 2 tanks. However the increased weight due to the ERA and added composite screens does not include an upgraded engine, which means that the mobility of the Challenger 2 OES is mediocre when compared to earlier Challenger 2s. However, this comes with increased protection against both APFSDS projectiles and ATGMs, the ERA and composite screens are enough to increase the protection against other tanks in critical areas, while they also increase the chances of enemy ATGMs not penetrating the vehicle on the sides of the tank and the turret. However the weak spot in the lower front plate is still present so take that into consideration and hide your hull whenever possible.
General info
Survivability and armour
The Challenger 2 OES, like its predecessors, is renowned for its exceptional armor protection. The tank features Chobham armor, which is one of the most advanced armor technologies, providing substantial protection against a variety of anti-tank weapons.
Armor Layout
- Frontal Armor: The Challenger 2's frontal armor is its strongest aspect, capable of withstanding direct hits from most contemporary anti-tank rounds. The turret front and glacis plate are particularly well protected.
- Side and Rear Armor: While the sides are robust, especially compared to earlier tank models, they are still vulnerable to modern anti-tank weapons if exposed. The rear armor is the weakest point, susceptible to all forms of anti-tank weaponry.
Key Weak Areas
- Lower Glacis: This area remains a common weak point in many tanks, including the Challenger 2. Hits here can potentially disable the tank or damage internal components.
- Rear: The engine and less protected rear aspects make it vulnerable, especially in urban combat scenarios where flanking is possible.
- Roof: The roof is thinner compared to the frontal and side armor, making it vulnerable to top-attack weapons.
Crew and Module Layout
The Challenger 2 typically houses a crew of four: the commander, gunner, loader, and driver.
- Driver: Located at the front of the hull, slightly offset to the left.
- Commander and Gunner: Positioned in the turret with the commander behind and to the right of the gunner.
- Loader: Also in the turret, positioned on the left side.
The placement of these crew members, along with critical modules like the ammunition storage and fuel tanks, is strategic. Ammunition is often stored in blow-out compartments to minimize the risk of catastrophic damage if the tank is penetrated.
Evaluation of Protection
- Level of Armor Protection: The Challenger 2’s armor is highly effective against traditional ballistic threats and offers good resistance against improvised explosive devices and mines. However, the tank's protection against newer anti-tank guided missiles and top-attack munitions is a concern that needs continuous upgrades, such as active protection systems.
- Placement of Modules: The design includes several survivability features, such as the separation and armoring of ammunition storage. This layout helps improve crew survival in the event of a penetration by isolating the explosion to specific compartments.
type:
| Armour | Front (Slope angle) | Sides | Rear | Roof |
|---|---|---|---|---|
| Hull | ___ mm | ___ mm Top ___ mm Bottom |
___ mm | ___ - ___ mm |
| Turret | ___ - ___ mm Turret front ___ mm Gun mantlet |
___ - ___ mm | ___ - ___ mm | ___ - ___ mm |
| Cupola | ___ mm | ___ mm | ___ mm | ___ mm |
Notes:
Mobility
Write about the mobility of the ground vehicle. Estimate the specific power and manoeuvrability, as well as the maximum speed forwards and backwards.
| Game Mode | Max Speed (km/h) | Weight (tons) | Engine power (horsepower) | Power-to-weight ratio (hp/ton) | |||
|---|---|---|---|---|---|---|---|
| Forward | Reverse | Stock | Upgraded | Stock | Upgraded | ||
| Arcade | 66 | 42 | 74.8 | 1,886 | 2,322 | 25.21 | 31.04 |
| Realistic | 60 | 38 | 1,076 | 1,217 | 14.39 | 16.27 | |
Modifications and economy
| Mobility | Protection | Firepower | ||||||||||||||||||||||||
|---|---|---|---|---|---|---|---|---|---|---|---|---|---|---|---|---|---|---|---|---|---|---|---|---|---|---|
|
|
|
Armaments
Main armament
Reloading Speed: The L30A1 has a slower reloading speed compared to modern smoothbore guns found on other main battle tanks. This can affect its ability to deliver rapid successive shots.
Ballistics: The rifled design aids in maintaining a tighter spin on the fired shells, improving their trajectory and accuracy over long distances.
Power of Shells: The gun fires a variety of shells including armor-piercing fin-stabilized discarding sabot (APFSDS), high-explosive squash head (HESH), and more. These shells are capable of penetrating modern armor and inflicting significant damage.
Flexibility of Fire: The gun mount and turret provide reasonable agility in targeting. However, the overall speed at which the gun can switch targets and fire is moderated by its mechanical loading system.
Ammunition Types and Usage
The L30A1 uses several types of ammunition:
APFSDS: Ideal for engaging modern armored vehicles at long distances.
HESH: Effective against lighter armored vehicles and for causing internal spalling on heavier armor.
Smoke rounds: Useful for creating smoke screens to cover movements or obscure vision.
Advice on Ammunition Storage and Usage
Ammunition Storage: It is advisable to carry a balanced mix of APFSDS and HESH shells based on the mission profile, with a few smoke rounds for tactical flexibility.
Usage Tips: Utilize APFSDS rounds for long-range engagements against heavily armored targets. Switch to HESH for closer encounters or against buildings and lighter armored vehicles to maximize damage.
.
| 120 mm L30A1 | Turret rotation speed (°/s) | Reloading rate (seconds) | |||||||||||
|---|---|---|---|---|---|---|---|---|---|---|---|---|---|
| Mode | Capacity | Vertical | Horizontal | Stabilizer | Stock | Upgraded | Full | Expert | Aced | Stock | Full | Expert | Aced |
| Arcade | 49 | -10°/+20° | ±180° | Two-plane | 29.5 | 40.8 | 49.6 | 54.9 | 58.4 | 6.50 | 5.75 | 5.30 | 5.00 |
| Realistic | 18.4 | 21.7 | 26.4 | 29.2 | 31.0 | ||||||||
Ammunition
| Penetration statistics | |||||||
|---|---|---|---|---|---|---|---|
| Ammunition | Type of warhead |
Penetration @ 0° Angle of Attack (mm) | |||||
| 10 m | 100 m | 500 m | 1,000 m | 1,500 m | 2,000 m | ||
| Shot L23A1 | APFSDS | 396 | 394 | 387 | 376 | 367 | 357 |
| Shell L31A7 | HESH | 152 | 152 | 152 | 152 | 152 | 152 |
| L26 | APFSDS | 493 | 491 | 487 | 481 | 474 | 468 |
| L27A1 | APFSDS | 564 | 562 | 557 | 551 | 545 | 538 |
| Shell details | ||||||||||||
|---|---|---|---|---|---|---|---|---|---|---|---|---|
| Ammunition | Type of warhead |
Velocity (m/s) |
Projectile mass (kg) |
Fuse delay (m) |
Fuse sensitivity (mm) |
Explosive mass (TNT equivalent) (kg) |
Ricochet | |||||
| 0% | 50% | 100% | ||||||||||
| Shot L23A1 | APFSDS | 1,535 | 3.89 | - | - | - | 78° | 80° | 81° | |||
| Shell L31A7 | HESH | 670 | 17.34 | 0.1 | 4 | 6.53 | 73° | 77° | 80° | |||
| L26 | APFSDS | 1,650 | 4.3 | - | - | - | 78° | 80° | 81° | |||
| L27A1 | APFSDS | 1,650 | 4.3 | - | - | - | 78° | 80° | 81° | |||
| Smoke shell characteristics | ||||||
|---|---|---|---|---|---|---|
| Ammunition | Velocity (m/s) |
Projectile mass (kg) |
Screen radius (m) |
Screen deploy time (s) |
Screen hold time (s) |
Explosive mass (TNT equivalent) (g) |
| L34 | 670 | 17.1 | 20 | 5 | 25 | 50 |
Ammo racks
| Full ammo |
1st rack empty |
2nd rack empty |
3rd rack empty |
4th rack empty |
5th rack empty |
6th rack empty |
Visual discrepancy |
|---|---|---|---|---|---|---|---|
| 49 | __ (+__) | __ (+__) | __ (+__) | __ (+__) | __ (+__) | __ (+__) | __ |
Machine guns
Offensive and anti-aircraft machine guns not only allow you to fight some aircraft but also are effective against lightly armoured vehicles. Evaluate machine guns and give recommendations on its use.
| 12.7 mm M2HB | ||||
|---|---|---|---|---|
| Mount | Capacity (Belt) | Fire rate | Vertical | Horizontal |
| Pintle | 1,000 (200) | 575 | -10°/+50° | ±180° |
| 7.62 mm L94A1 | ||||
|---|---|---|---|---|
| Mount | Capacity (Belt) | Fire rate | Vertical | Horizontal |
| Coaxial | 2,000 (2,000) | 600 | - | - |
Usage in battles
Describe the tactics of playing in the vehicle, the features of using vehicles in the team and advice on tactics. Refrain from creating a "guide" - do not impose a single point of view but instead give the reader food for thought. Describe the most dangerous enemies and give recommendations on fighting them. If necessary, note the specifics of the game in different modes (AB, RB, SB).
Pros and cons
Pros:
- Retains pros from previous challenger 2:
- Impressive chemical protection on the front and sides
- Impressive kinetic protection on either side of the cannon breech, allowing for efficient hull down combat
- Access to unique and powerful HESH round
- Very accurate L30A1 120 mm gun, can even fire HESH accurately at a range of several kilometres
- Fast reload
- Roof mounted machine gun has access to thermal and can be used as a makeshift CITV for scouting (but not firing, unfortunately)
- Access to 12.7 mm machine gun, a rare luxury on British tanks
- Since it is a premium tank, its RP and SL gains are doubled and it can research any British tanks currently in the game
Cons:
- The jammer is useless in-game and begs other tanks to scout it out or use HE on it
- Heaviest MBT in the game with a very poor hp/ton ratio; very poor acceleration
- Slow turret traverse speed for the BR
- Very poor steering, turning is slow and costs a great deal of speed, which takes a long time to regain
- In most situations, can only reach around 40 km/h (25 mph)
- Also retains weaknesses of previous challenger 2 models:
- Same ammunition options as the previous Challengers
- Frontal armour is weak at the lower frontal plate, drivers port, and cannon breech
- L27A1 has low penetration compared to other top rank NATO ammunition, however reload speed does compensate for this
- Cannot maintain the short reload time after the first-stage ammo rack (4 rounds) has been depleted
History
Describe the history of the creation and combat usage of the vehicle in more detail than in the introduction. If the historical reference turns out to be too long, take it to a separate article, taking a link to the article about the vehicle and adding a block "/History" (example: https://wiki.warthunder.com/(Vehicle-name)/History) and add a link to it here using the main template. Be sure to reference text and sources by using <ref></ref>, as well as adding them at the end of the article with <references />. This section may also include the vehicle's dev blog entry (if applicable) and the in-game encyclopedia description (under === In-game description ===, also if applicable).
Media
- Skins
See also
- Related development
External links
Paste links to sources and external resources, such as:
- topic on the official game forum;
- other literature.
| Britain medium tanks | |
|---|---|
| Valentine | Valentine I · Valentine IX · Valentine XI |
| Cromwell | Cromwell I · Cromwell V · Cromwell V (RP-3) |
| Cromwell derivatives | Challenger · Avenger · Comet I · Comet I "Iron Duke IV" · Charioteer Mk VII |
| Centurion | Centurion Mk 1 · Centurion Mk.2 · Centurion Mk 3 · Centurion Mk.5 AVRE · Centurion Mk 10 · Centurion Action X · FV4202 |
| Vickers MBT | Vickers Mk.1 · Vickers Mk.3 · Vickers Mk.7 |
| Chieftain | Chieftain Mk 3 · Chieftain Mk 5 · Chieftain Mk 10 |
| Challenger 1 | Challenger Mk.2 · Challenger Mk.3 · Challenger DS |
| Challenger 2 | Challenger 2 · Challenger 2 (2F) · Challenger 2 TES · Challenger 2 OES · Challenger 2E · Challenger 2 Black Night |
| Challenger 3 | Challenger 3 TD |
| Australia | A.C.I · A.C.IV · Centurion Mk.5/1 |
| South Africa | Olifant Mk.1A · Olifant Mk.2 · TTD |
| India | Vijayanta · Bhishma TWMP |
| Israel | ▄Sho't Kal Dalet |
| Jordan | Khalid |
| Sweden | ▄Strv 81 (RB 52) |
| USA | Grant I · Sherman II · Sherman Firefly · Sherman IC "Trzyniec" |
| Britain premium ground vehicles | |
|---|---|
| Light tanks | A13 Mk I (3rd R.T.R.) · A13 Mk II 1939 · AEC Mk II · Crusader "The Saint" · Rooikat 105 |
| Medium tanks | A.C.I · Grant I · Cromwell V (RP-3) · Sherman IC "Trzyniec" · A.C.IV · Comet I "Iron Duke IV" |
| Centurion Mk.2 · ▄Strv 81 (RB 52) · Centurion Mk.5 AVRE · Centurion Mk.5/1 · ▄Sho't Kal Dalet · Centurion Action X | |
| Vijayanta · Khalid · Challenger DS · Challenger 2 OES | |
| Heavy tanks | Independent · Matilda Hedgehog · Excelsior · TOG II · Churchill Crocodile · Black Prince |
| Tank destroyers | Alecto I · Achilles (65 Rg.) · QF 3.7 Ram |
- Ground vehicles
- Britain ground vehicles
- Seventh rank ground vehicles
- Premium ground vehicles
- Medium tanks
- Ground vehicles with explosive reactive armour
- Ground vehicles with composite armour
- Ground vehicles with smoke grenades
- Ground vehicles with engine smoke generating system
- Ground vehicles with night vision device
- Ground vehicles with thermal sight
- Ground vehicles with gun stabilizer
