Vickers Mk.3
| This page is about the British medium tank Vickers Mk.3. For other versions, see Vickers MBT (Family). |
Contents
Description
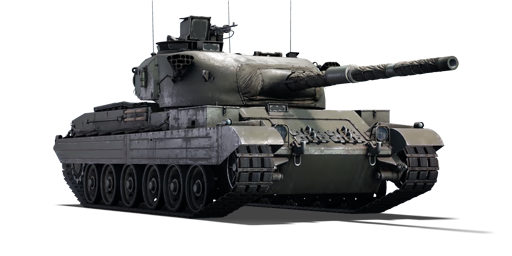
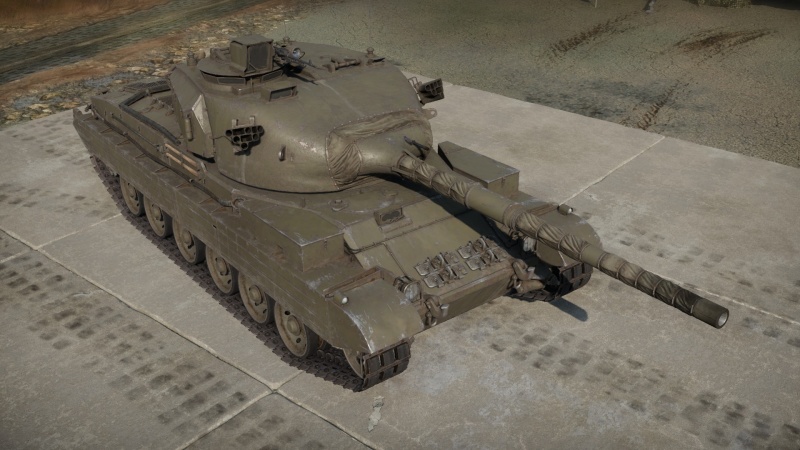
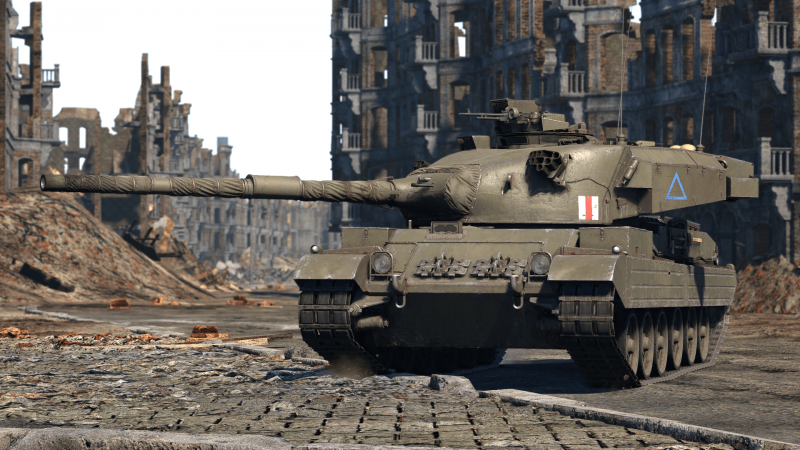
The Vickers Battle Tank Mk.3 was a British main battle tank, developed from the previous Vickers MBT Mk.1 and Mk.2. It was the last tank made by Vickers that saw export sales. The main difference between the Vickers Mk.1 and Mk.3 is the turret, where the Mk.3 featured a cast turret front welded to an armoured body, as well as a cast mantlet offering better protection compared to the flat one found on Mk.1. The Mk.3 also had increased depression from -7° at Mk.1 to -10° for Mk.3. For increased accuracy, a laser range finder from the Chieftain was added, as the 12.7 mm ranging machine gun was deemed inadequate for the ranges the tank was supposed to engage targets from. The ammo stowage of the Mk-3 was also bigger compared to the Mk.1, with space for additional six rounds for a total of 50. In 1977, Kenya was the first country to order the Vickers Mk.3, with 76 tanks and 7 armoured recovery vehicles based on the Vickers chassis. Between 1981 and 1990, Nigeria ordered another 136 tanks and 12 ARV together with 26 bridge laying tanks. The last customer to order the Vickers Mk.3 was Tanzania, with 4 ARV delivered in 1989. All countries that ordered the tank still have it in service to this day.
The Vickers Mk.3 was introduced in Update "Direct Hit". Unlike its predecessor, the Vickers Mk.1, the Mk.3 offers better ballistic protection in the turret, as well as better gun depression allowing for easier hull-down positioning. Unlike the Mk.1, the Mk.3 gains access to the M456 HEATFS shell, offering 400 mm CE penetration at all ranges against targets where APDS would shatter or not penetrate. The Mk.3 also offers slightly better mobility due to the 720 hp engine compared to the 608 hp engine found in the Mk.1 while the weight increased only by 600 kg. The Mk.3 also offers higher magnification optics compared to the Mk.1 although with fixed 10.0x zoom.
General info
Survivability and armour
The hull armour is weak and cannot be relied upon at this battle rating, while the turret can bounce some poorly shot shells due to its sharp angles towards its side. Getting to a hull down position and utilizing the tank's ability to retreat when a shot is fired or received is necessary to prevent getting shot and damaged. The turret houses 3 of the 4 crew members, meaning that a good shot (unless protected by the gun breech) will knock out all 3 crew members and send this vehicle back to the hangar.
Armour type:
| Armour | Front (Slope angle) | Sides | Rear | Roof |
|---|---|---|---|---|
| Hull | ___ mm | ___ mm Top ___ mm Bottom |
___ mm | ___ - ___ mm |
| Turret | ___ - ___ mm Turret front ___ mm Gun mantlet |
___ - ___ mm | ___ - ___ mm | ___ - ___ mm |
| Cupola | ___ mm | ___ mm | ___ mm | ___ mm |
Notes:
Mobility
| Game Mode | Max Speed (km/h) | Weight (tons) | Engine power (horsepower) | Power-to-weight ratio (hp/ton) | |||
|---|---|---|---|---|---|---|---|
| Forward | Reverse | Stock | Upgraded | Stock | Upgraded | ||
| Arcade | 56 | 13 | 38.7 | 1,116 | 1,374 | 28.84 | 35.5 |
| Realistic | 50 | 12 | 637 | 720 | 16.46 | 18.6 | |
Modifications and economy
Armaments
Main armament
| 105 mm Royal Ordnance L7A1 | Turret rotation speed (°/s) | Reloading rate (seconds) | |||||||||||
|---|---|---|---|---|---|---|---|---|---|---|---|---|---|
| Mode | Capacity | Vertical | Horizontal | Stabilizer | Stock | Upgraded | Full | Expert | Aced | Stock | Full | Expert | Aced |
| Arcade | 50 | -10°/+20° | ±180° | Two-plane | 26.4 | 36.5 | 44.3 | 49.0 | 52.1 | 8.71 | 7.70 | 7.10 | 6.70 |
| Realistic | 16.5 | 19.4 | 23.5 | 26.0 | 27.7 | ||||||||
Ammunition
| Penetration statistics | |||||||
|---|---|---|---|---|---|---|---|
| Ammunition | Type of warhead |
Penetration @ 0° Angle of Attack (mm) | |||||
| 10 m | 100 m | 500 m | 1,000 m | 1,500 m | 2,000 m | ||
| M728 | APDS | 265 | 263 | 252 | 240 | 228 | 216 |
| Shell L35 | HESH | 127 | 127 | 127 | 127 | 127 | 127 |
| M456 | HEATFS | 400 | 400 | 400 | 400 | 400 | 400 |
| Shell details | ||||||||||||
|---|---|---|---|---|---|---|---|---|---|---|---|---|
| Ammunition | Type of warhead |
Velocity (m/s) |
Projectile mass (kg) |
Fuse delay (m) |
Fuse sensitivity (mm) |
Explosive mass (TNT equivalent) (kg) |
Ricochet | |||||
| 0% | 50% | 100% | ||||||||||
| M728 | APDS | 1,426 | 4.53 | - | - | - | 75° | 78° | 80° | |||
| Shell L35 | HESH | 720 | 11.4 | 0.1 | 4 | 3.15 | 73° | 77° | 80° | |||
| M456 | HEATFS | 1,174 | 10.5 | 0.05 | 0.1 | 1.27 | 65° | 72° | 77° | |||
Ammo racks

| Full ammo |
1st rack empty |
2nd rack empty |
3rd rack empty |
4th rack empty |
Visual discrepancy |
|---|---|---|---|---|---|
| 50 | 39 (+11) | 35 (+15) | 10 (+40) | 1 (+49) | No |
Notes:
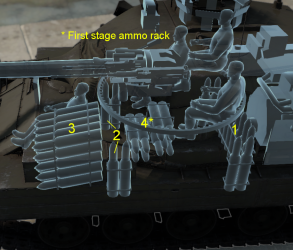
- Shells are modeled individually and disappear after having been shot or loaded.
- Racks 1 and 2 deplete from left to right.
- Rack 4 is a first stage ammo rack. It totals 9 shells and gets filled first when loading up the tank.
- This rack is also emptied early: the rack depletion order at full capacity is: 4 - 1 - 2 - 3.
- Simply not firing when the gun is loaded will move ammo from racks 1-3 into rack 4. Firing will interrupt the restocking of the ready racks.
Additional armament
| 12.7 mm L21A1 | ||||
|---|---|---|---|---|
| Mount | Capacity (Belt) | Fire rate | Vertical | Horizontal |
| Coaxial | 1,000 (3) | 300 | N/A | N/A |
Machine guns
| 7.62 mm FN MAG 60-40 | ||||
|---|---|---|---|---|
| Mount | Capacity (Belt) | Fire rate | Vertical | Horizontal |
| Pintle | 2,000 (200) | 600 | -10°/+50° | ±120° |
| 7.62 mm L3A1 | ||||
|---|---|---|---|---|
| Mount | Capacity (Belt) | Fire rate | Vertical | Horizontal |
| Coaxial | 3,000 (250) | 500 | N/A | N/A |
Usage in battles
There are multiple ways to play this tank. The most common way is utilising your good acceleration and speed to get into key sniping points on the map. Here the use of your laser rangefinder can help you snipe up to 2 km effectively. For this role, APDS is recommended due to its higher velocity than the HEATFS shell and yet still have decent penetration. Use your first shot to make the enemy tank immobile and then finish them off as it is highly unlikely they shall be able to locate you at a distance, find the proper range (unless they they happen to also have laser rangefinders which is more likely in a uptier battle) and then shoot you. To snipe, it is also advised to go hull-down and use the 10* of gun depression to reduce the amount of area exposed to enemy fire. Although not comparable to other tanks at its BR, the reverse speed of 11 km/h is still decent to get out of sticky situations.
The Vickers Mk.3 can also be used in CQC and urban fighting maps as it has good mobility and turret traverse to be able to react to an enemy in different directions. The commander's machine gun on top of the turret can be used to mark targets for friendly players as well as be able to deter incoming planes or damage them.
A mixture of APDS and HEATFS shells are good as the APDS can reliably damage an enemy tank upon penetration due to its better post-penetration damage than the HEATFS shell. The HEATFS shell can be used in scenarios such as an uptier where the APDS shell may be too lacking for penetrating much better armoured tanks and MBTs
- Notable enemies and how to engage them
- T-55: The UFP can be penetrated by the APDS shell. It is best to shoot the right side of this tanks when head-on as it will incapacitate the driver, gunner and commander, leading to the tank's destruction. Although the left side where the ammo and fuel is stored is still a viable option, it is inconsistent and may not cause the tank to get destroyed.
- M48/M60: The UFP can bounce the APDS shell when at shot at irregular angles, it is recommended to use the HEATFS shell or attempt to hit its ammo by shooting the LFP with APDS
- Leopard A1A1: Similar to all NATO tanks, the left side of the weak front hull can be shot and knock out 3 crew members, resulting in a death or aim for the lower hull side on the left to hit the ammo storage area.
- How to counter the Vickers Mk.3
- Aim for the left side of the hull in a head on to defeat the driver, gunner and commander.
- Aim for the lower left side to detonate the frontal ammo storage.
Pros and cons
Pros:
- Good mobility, including good reverse speed
- Equipped with a laser rangefinder
- Gun depression angle of -10°
- Gunsight with 10x zoom
- Access to a HEATFS shell
- Stock APDS shell retains good penetration at an angle
Cons:
- Poor and unreliable armour
- 10x zoom can be impractical while aiming at close targets
- The large ammo rack in the front is still present
- Small-calibre machine guns don't offer much penetration and the rangefinding 12.7 mm MG fires only tracer bullets that have low penetration power
History
Describe the history of the creation and combat usage of the vehicle in more detail than in the introduction. If the historical reference turns out to be too long, take it to a separate article, taking a link to the article about the vehicle and adding a block "/History" (example: https://wiki.warthunder.com/(Vehicle-name)/History) and add a link to it here using the main template. Be sure to reference text and sources by using <ref></ref>, as well as adding them at the end of the article with <references />. This section may also include the vehicle's dev blog entry (if applicable) and the in-game encyclopedia description (under === In-game description ===, also if applicable).
Media
- Skins
See also
Links to the articles on the War Thunder Wiki that you think will be useful for the reader, for example:
- reference to the series of the vehicles;
- links to approximate analogues of other nations and research trees.
External links
| Vickers-Armstrongs Limited | |
|---|---|
| Ships | |
| Tribal-class | HMS Eskimo · HMCS Haida |
| Invincible-class | HMS Invincible* |
| Kongō-class | IJN Kongo** |
| Tanks | |
| Light Tanks | VFM5*** · Vickers Mk.11*** |
| Light Tank Mk VI | Light AA Mk I |
| Light Tank Mk VII | Tetrarch I |
| Light Tank Mk VIII | Alecto I |
| Tank, Infantry, Valentine | Valentine I · Valentine IX · Valentine XI · Archer |
| Vickers MBT | Vickers Mk.1 · Vickers Mk.3 · Vickers Mk.7*** |
| Heavy Tanks | Independent**** |
| Export | ▂МК-IX "Valentine" · Vickers Mk.E**** |
| See also | Vickers-Armstrongs Aircraft Limited |
| *Previously Armstrong Whitworth | |
| **Built for Japan | |
| ***Vickers Defence Systems | |
| ****Previously Vickers Limited | |
| Britain medium tanks | |
|---|---|
| Valentine | Valentine I · Valentine IX · Valentine XI |
| Cromwell | Cromwell I · Cromwell V · Cromwell V (RP-3) |
| Cromwell derivatives | Challenger · Avenger · Comet I · Comet I "Iron Duke IV" · Charioteer Mk VII |
| Centurion | Centurion Mk 1 · Centurion Mk.2 · Centurion Mk 3 · Centurion Mk.5 AVRE · Centurion Mk 10 · Centurion Action X · FV4202 |
| Vickers MBT | Vickers Mk.1 · Vickers Mk.3 · Vickers Mk.7 |
| Chieftain | Chieftain Mk 3 · Chieftain Mk 5 · Chieftain Mk 10 |
| Challenger 1 | Challenger Mk.2 · Challenger Mk.3 · Challenger DS |
| Challenger 2 | Challenger 2 · Challenger 2 (2F) · Challenger 2 TES · Challenger 2 OES · Challenger 2E · Challenger 2 Black Night |
| Challenger 3 | Challenger 3 TD |
| Australia | A.C.I · A.C.IV · Centurion Mk.5/1 |
| South Africa | Olifant Mk.1A · Olifant Mk.2 · TTD |
| India | Vijayanta · Bhishma TWMP |
| Israel | ▄Sho't Kal Dalet |
| Jordan | Khalid |
| Sweden | ▄Strv 81 (RB 52) |
| USA | Grant I · Sherman II · Sherman Firefly · Sherman IC "Trzyniec" |


