Difference between pages "IS-7" and "Bf 109 K-4"
(Edits.) |
(Updated Youtube gallery with template.) |
||
| Line 1: | Line 1: | ||
| − | {{Specs-Card | + | {{Specs-Card|code=bf-109k-4}} |
| − | | | + | {{About |
| − | | | + | | about = German fighter '''{{PAGENAME}}''' |
| + | | usage = other uses | ||
| + | | link = Bf 109 (Family) | ||
}} | }} | ||
== Description == | == Description == | ||
| − | <!--''In the description, the first part needs to be about the history of the creation and combat usage of the | + | <!--''In the description, the first part needs to be about the history of and the creation and combat usage of the aircraft, as well as its key features. In the second part, tell the reader about the aircraft in the game. Insert a screenshot of the vehicle. If the novice player does not remember the vehicle by name, he will immediately understand what kind of vehicle it is talking about.''--> |
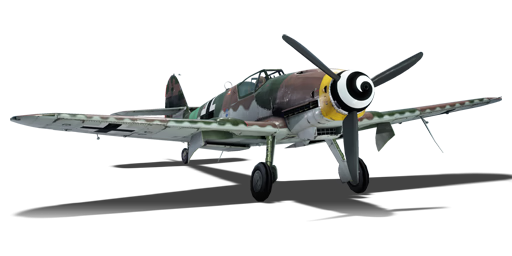
| − | [[File: | + | [[File:GarageImage_Bf109K4.jpg|420px|thumb|left]] |
{{break}} | {{break}} | ||
| − | The '''{{Specs|name}}''' is a | + | The '''{{Specs|name}}''' is a rank {{Specs|rank}} German fighter {{Battle-rating}}. It has been in the game since the start of the Open Beta Test prior to Update 1.29. The K-4 is the pinnacle of the famed [[Bf_109_(Disambiguation)|109 series]]. The `'''K'''urfürst´ frame is the last iteration and was focused on ease of production rather than performance, yet it features the best power to weight ratio and acceleration of any 109, turning this machine into a beast. However, the age of the design is reflected in its poor high-speed characteristics. |
| − | + | Use the plane's outstanding climb rate and keep speed. Energy fighting tactics should be this plane's primary mode of fighting. It has good acceleration when using WEP. This grants the machine reasonable zoom climbing abilities. If chased, dodge away from the enemy with fancy manoeuvers without losing too much speed. In Realistic Battles, try to do a climbing spiral, but be sure to be in a higher energy state than the enemy! A miscalculation and the foe will have the opportunity for an easy deflection shot. | |
| − | The | + | However, there are also downsides. The top speed can be reached quickly, yet the plane is not fast when stock. While it does have an edge in agility, it has bad low-speed manoeuvrability. Furthermore, foes will not usually engage in manoeuvering combat, rendering any manoeuvrability advantage moot. |
| − | + | K-4 can outmanoeuvre these planes at medium speeds (<450 IAS/kph): [[P-51]] (all types), [[P-47D-28|P-47D]], [[Typhoon_Mk_Ib/L|Typhoons]] and the [[La-9]]. However, it will have a hard time dealing with other late Rank IV aircraft, especially Spitfires. It is highly recommended to use rudder during rolls as this increases the roll rate dramatically. This is useful if when trying to force an overshoot or when avoiding shots. | |
| − | |||
| − | |||
| − | |||
| − | |||
== General info == | == General info == | ||
| − | === | + | === Flight Performance === |
| − | <!--''Describe | + | <!--''Describe how the aircraft behaves in the air. Maximum speed, maneuverability, speed and allowable loads - these are the most important characteristics of the vehicle.''--> |
| − | + | {| class="wikitable" style="text-align:center" | |
| − | + | |- | |
| − | + | ! colspan="8" | Characteristics | |
| − | + | |- | |
| − | + | ! colspan="8" | ''Stock'' | |
| − | + | |- | |
| − | + | ! colspan="2" | Max Speed<br>(km/h at 6,000 m) | |
| − | + | ! rowspan="2" | Max altitude<br>(meters) | |
| − | + | ! colspan="2" | Turn time<br>(seconds) | |
| − | + | ! colspan="2" | Rate of climb<br>(meters/second) | |
| − | + | ! rowspan="2" |Take-off run<br>(meters) | |
| − | + | |- | |
| − | + | ! AB | |
| − | + | ! RB | |
| − | + | ! AB | |
| − | + | ! RB | |
| − | + | ! AB | |
| + | ! RB | ||
| + | |- | ||
| + | | 685 || 666 || 12,800 || 20.3 || 21.2 || 18.2 || 18.2 || 333 | ||
|- | |- | ||
| − | ! | + | ! colspan="8" | ''Upgraded'' |
|- | |- | ||
| − | | | + | ! colspan="2" | Max Speed<br>(km/h at 6,000 m) |
| + | ! rowspan="2" |Max altitude (meters) | ||
| + | ! colspan="2" | Turn time (seconds) | ||
| + | ! colspan="2" | Rate of climb<br>(meters/second) | ||
| + | ! rowspan="2" |Take-off run (meters) | ||
|- | |- | ||
| − | + | ! AB | |
| + | ! RB | ||
| + | ! AB | ||
| + | ! RB | ||
| + | ! AB | ||
| + | ! RB | ||
|- | |- | ||
| − | | | + | |761||720|| 12,800 ||18.1||18.9||32.3||23.9|| 333 |
|- | |- | ||
|} | |} | ||
| − | |||
| − | + | ====Details==== | |
| − | + | {| class="wikitable" style="text-align:center" | |
| − | === | + | |- |
| − | + | ! colspan="5" | Features | |
| − | {| class="wikitable" style="text-align:center" | ||
| − | |||
| − | |||
| − | ! colspan=" | ||
| − | |||
|- | |- | ||
| − | ! | + | ! Combat flap |
| − | ! | + | ! Take-off flap |
| − | ! | + | ! Landing flap |
| − | ! | + | ! Air brakes |
| − | ! | + | ! Arrestor gear |
| − | |||
| − | |||
|- | |- | ||
| − | + | | ✓ || ✓ || ✓ || X || X <!-- ✓ --> | |
| − | | | ||
|- | |- | ||
| − | |||
| − | |||
|} | |} | ||
| − | + | {| class="wikitable" style="text-align:center" | |
| − | |||
| − | |||
| − | |||
| − | {| class="wikitable" style="text-align:center | ||
|- | |- | ||
| − | ! colspan="5" | | + | ! colspan="5" | Limits |
|- | |- | ||
| − | ! | + | ! rowspan="2" | Wing-break speed<br>(km/h) |
| − | ! | + | ! rowspan="2" | Gear limit<br>(km/h) |
| − | ! | + | ! rowspan="2" | Combat flap<br> (km/h) |
| − | ! | + | ! colspan="2" | Max Static G |
| − | |||
| − | |||
| − | |||
| − | |||
| − | |||
| − | |||
| − | |||
| − | |||
| − | |||
| − | |||
|- | |- | ||
| − | ! | + | ! + |
| − | + | ! - | |
|- | |- | ||
| − | + | | 790 || 450 || 520 || ~17 || ~10 | |
| − | | | ||
|- | |- | ||
|} | |} | ||
| − | + | {| class="wikitable" style="text-align:center" | |
| − | {| class="wikitable | ||
| − | |||
|- | |- | ||
| − | + | ! colspan="4" | Optimal velocities | |
| − | |||
| − | ! colspan=" | ||
|- | |- | ||
| − | ! | + | ! Ailerons<br>(km/h) |
| − | ! | + | ! Rudder<br>(km/h) |
| − | ! | + | ! Elevators<br>(km/h) |
| − | ! | + | ! Radiator<br>(km/h) |
| − | |||
| − | |||
|- | |- | ||
| − | | | + | | < 390 || < 390 || < 470 || > 250 |
|- | |- | ||
| − | |||
| − | |||
|} | |} | ||
| − | {| class="wikitable | + | |
| − | ! colspan=" | + | {| class="wikitable" style="text-align:center" |
| + | |- | ||
| + | ! colspan="3" | Compressor (RB/SB) | ||
| + | |- | ||
| + | ! colspan="3" | Setting 1 | ||
| + | |- | ||
| + | ! Optimal altitude | ||
| + | ! 100% Engine power | ||
| + | ! WEP Engine power | ||
|- | |- | ||
| − | + | | 6,900 m || 1,250 hp || 1,775 hp | |
| − | |||
| − | |||
| − | |||
| − | |||
| − | |||
| − | |||
| − | |||
| − | |||
| − | |||
| − | |||
|- | |- | ||
| − | ! | + | <!--! colspan="3" | Setting 2 |
| − | ! | ||
| − | |||
|- | |- | ||
| − | + | ! Optimal altitude | |
| + | ! 100% Engine power | ||
| + | ! WEP Engine power | ||
|- | |- | ||
| − | | | + | | ?,??? m || ?,??? hp || ?,??? hp |
| − | |||
| − | |||
| − | |||
| − | |||
| − | |||
|- | |- | ||
| − | ! | + | ! colspan="3" | Setting 3 |
| − | |||
| − | |||
| − | |||
| − | |||
| − | |||
| − | |||
| − | |||
|- | |- | ||
| − | + | ! Optimal altitude | |
| + | ! 100% Engine power | ||
| + | ! WEP Engine power | ||
|- | |- | ||
| + | | ?,??? m || ?,??? hp || ?,??? hp | ||
| + | |- --> | ||
|} | |} | ||
| − | === | + | === Survivability and armour === |
| − | <!--'' | + | ''Examine the survivability of the aircraft. Note how vulnerable the structure is and how secure the pilot is, whether the fuel tanks are armoured. Describe the armour, if there is any, also mention the vulnerability of other critical aircraft systems.'' |
| − | {{main| | + | |
| + | == Armaments == | ||
| + | === Offensive armament === | ||
| + | <!--''Describe the offensive armament of the aircraft, if any. Describe how effective the cannons and machine guns are in a battle, and also what belts or drums are better to use. If there is no offensive weaponry, delete this subsection.''--> | ||
| + | {{main|MK 108 (30 mm)|MG 151/20 (20 mm)|MG 131 (13 mm)}} | ||
| + | |||
| + | The Bf 109 K-4 is armed with: | ||
| + | |||
| + | * A choice between a 30 mm MK 108 or a 20 mm MG 151 cannon: | ||
| + | ** 1 x 30 mm MK 108 cannon, nose-mounted (65 rpg) | ||
| + | ** 1 x 20 mm MG 151 cannon, nose-mounted (200 rpg) | ||
| + | * 2 x 13 mm MG 131 machine guns, nose-mounted (300 rpg = 600 total) | ||
| + | |||
| + | === Suspended armament === | ||
| + | <!--''Describe the aircraft's suspended armament: additional cannons under the wings, bombs, rockets and torpedoes. This section is especially important for bombers and attackers. If there is no suspended weaponry remove this subsection.''--> | ||
| + | {{main|MG 151/20 (20 mm)}} | ||
| + | |||
| + | The Bf 109 K-4 can be outfitted with the following: | ||
| + | |||
| + | * 2 x 20 mm MG 151 cannons, wing-mounted (135 RPG = 270 total) | ||
| + | |||
| + | == Usage in battles == | ||
| + | <!--''Describe the tactics of playing in an aircraft, the features of using vehicles in a team and advice on tactics. Refrain from creating a "guide" - do not impose a single point of view, but give the reader food for thought. Examine the most dangerous enemies and give recommendations on fighting them. If necessary, note the specifics of the game in different modes (AB, RB, SB).''--> | ||
| + | [[File:Cockpit_Bf109k4.jpg|thumbnail|right|The Bf 109 K-4's instrument panel.]] | ||
| + | The MK 108 is a double-edged sword: Nicknamed by the allies for its characteristic sound, the `''Jackhammer''´ lives true to its name. Slow but powerful. Its '''main purpose''': Demolition of heavy objects, such as flying fortresses such as the B-17G.<br />However, its '''common''' '''purpose''' in War Thunder remains to hunt fighter planes. The cannon's rate of fire is extremely low, making it good for conserving ammo, but bad for deflection shots. Furthermore, the minengeschoß-shells are slow- very slow. One must either become very good at leading the shells, or close the distance. Kills are generally done from 300 meters away, if not closer. On the plus side, the damage is equivalent to most 37 mm cannons upon hitting. Tip: In order to better learn and understand the cannon's trajectory, do not fire in conjunction with the machine guns. | ||
| + | |||
| + | The two additional machine guns are best fired alone. The MG 131 features HE shells (named IAI in-game) as the ''Tracer belt''. Yet they are only highly effective in Simulator battles, where they will deal good damage to control surface areas, causing inexperienced pilots to lose control. In Arcade and Realistic battles however, the instructor will dampen any such effects. Here, the damage-based ''Stealth'' and ''Fighter'' belts fare better. | ||
| − | {| class="wikitable" style="text-align:center | + | The plane should be equip one of two load-outs: with either the single 30 mm cannon or 2 x 20 mm cannons. The single 30 mm is very capable of taking out 2-3 bombers and the low muzzle velocity matters less due to the large targets. The 3 x 20 mm cannons are very capable of taking out fighters due to the high shell density and and sheer damage output. A single 20 mm does not deal enough damage and the 30 mm with gunpods is rather ineffective due to the differing muzzle velocities of the 30 mm and 20 mm cannons. |
| + | |||
| + | ===Manual Engine Control=== | ||
| + | {| class="wikitable" style="text-align:center" | ||
|- | |- | ||
| − | ! colspan=" | + | ! colspan="7" | MEC elements |
|- | |- | ||
| − | ! | + | ! rowspan="2" |Mixer |
| − | ! | + | ! rowspan="2" |Pitch |
| − | ! | + | ! colspan="3" |Radiator |
| − | ! | + | ! rowspan="2" |Supercharger |
| − | ! | + | ! rowspan="2" |Turbocharger |
| − | |||
|- | |- | ||
| − | + | ! Oil | |
| + | ! Water | ||
| + | ! Type | ||
|- | |- | ||
| − | | | + | | Controllable || rowspan="2" | Not controllable || rowspan="2" | Not controllable || rowspan="2" | Not controllable || rowspan="2" | Separate || rowspan="2" | Not ontrollable || rowspan="2" | Not controllable |
|- | |- | ||
|} | |} | ||
| − | {| class="wikitable" | + | ===Modules=== |
| − | + | {| class="wikitable" | |
| − | ! colspan=" | + | ! Tier |
| + | ! colspan="2" |Flight performance | ||
| + | ! Survivability | ||
| + | ! colspan="2" |Weaponry | ||
|- | |- | ||
| − | + | | I | |
| − | + | | Fuselage repair||Radiator | |
| − | + | | | |
| − | + | | Offensive 13 mm||MG.151/20 cannon | |
| − | |||
| − | |||
|- | |- | ||
| − | | | + | | II |
| + | | ||Compressor | ||
| + | | Airframe | ||
| + | | New 13 mm MGs||R4 modification | ||
|- | |- | ||
| − | | | + | | III |
| + | | Wings repair||Engine | ||
| + | | | ||
| + | | Offensive 30 mm||Offensive 20 mm | ||
|- | |- | ||
| − | | | + | | IV |
| + | | ||Engine injection | ||
| + | | Cover | ||
| + | | New 30 mm cannons||New 20 mm cannons | ||
|- | |- | ||
|} | |} | ||
| − | + | The true acceleration power of the plane is only achieved very late into the grind. Specifically, the Tier 4 ''Engine injection'' modification provides a significant boost and is a top priority. On the way there, all engine upgrades should be taken. | |
| − | + | 13 mm Belts are helpful for removing tracer rounds. The 20 mm gunpods with belts and the gun upgrade are viable choices but engine injection remains a priority. | |
| − | The | ||
| − | + | === Pros and cons === | |
| + | <!--''Summarize and briefly evaluate the vehicle in terms of its characteristics and combat effectiveness. Mark its pros and cons in the bulleted list. Try not to use more than 6 points for each of the characteristics. Avoid using categorical definitions such as "bad", "good" and the like - they have a substitution in the form of softer "inadequate", "effective".''--> | ||
| − | |||
| − | |||
| − | |||
| − | |||
| − | |||
| − | |||
| − | |||
| − | |||
| − | |||
| − | |||
| − | |||
| − | |||
| − | |||
| − | |||
| − | |||
| − | |||
| − | |||
| − | |||
| − | |||
| − | |||
'''Pros:''' | '''Pros:''' | ||
| − | * | + | * Very powerful engine when using WEP, providing excellent acceleration and climb rate |
| − | * | + | * MEC can extend its climb rate and top speed in RB/SB |
| − | * | + | * Nose mounted weaponry |
| − | * | + | * Good performance at medium altitude |
| − | * | + | * Good firepower for killing bombers |
| − | * | + | * Can carry additional armament |
| − | * | + | * Performance on par with Griffon Spitfires (even better when fully upgraded) |
| − | * | + | * 30 mm cannon will destroy anything that it hits |
| − | * | + | * Can research nose-mounted 20 mm MG 151 cannon |
| − | * | + | * Exceptional high-speed manoeuvrability |
| − | |||
'''Cons:''' | '''Cons:''' | ||
| − | * | + | * Low cannon ammunition count for the 30 mm MK 108 cannon and the 13 mm MG 131 machine guns |
| − | + | * Low velocity 30 mm shell with a high drop, resulting in a VERY large lead angle on targets in turn leading to poor dogfight performance due to having to pull extreme turns to get guns on target | |
| − | + | * Flimsy frame, prone to react heavily to damage | |
| − | * | + | * Very heavy and slow to fly without WEP when stock |
| − | * | + | * Stock 13 mm machine gun belts consist solely out of tracers. They alert the enemy aware of your presence, make aiming the 30 mm impossible, and do nothing else |
| − | * | + | * Fighters with lower top speeds but better low altitude performances (such as Russia's La-7 fighters) will find it quite easy to run you down if you are at a low energy state |
| − | * | + | * Very slow deploying flaps |
| − | |||
| − | * | ||
| − | |||
== History == | == History == | ||
| − | <!--''Describe the history of the creation and combat usage of the | + | <!--''Describe the history of the creation and combat usage of the aircraft in more detail than in the introduction. If the historical reference turns out to be too big, take it to a separate article, taking a link to an article about the vehicle and adding a block "/ History" (example: <nowiki>https://wiki.warthunder.com/(Vehicle-name)/History</nowiki>) and add a link to it here using the <code>main</code> template. Be sure to reference text and sources by using <code><nowiki><ref></nowiki></code>, as well as adding them at the end of the article.''--> |
| − | The | + | The Bf 109 K-4 was one of Kurfurst Bf 109 series, Kurfurst was the last series of 109 before war's end. The K series was the most upgraded and most expensive 109 and with war coming to an end not many were built. Work on the K series began in the spring of 1943 and prototype was ready by autumn of the same year. The series began production in August 1944 with the K-4 but due to changes to the design and delays with the new DB605D engine, the K-4 was the only one to be mass produced. Externally, the Kurfurst series had changes in radio equipment location hatch. A filler point for the fuselage fuel tank, and with removal of the D/F loop, were the main external differences to other Bf109 series. The landing gear also had doors that closed up the bottom completely and armament was the Motorkanone 108 (30 mm) , 2 x MG 131 (13 mm), with additional 2 gun pods of MG 151 (20 mm). Payloads included a 500 kg bomb or on rare occasion Wfr.Gr.21 Rockets (21 cm). Due to limited resources many of the variants didn't enter production. |
| + | |||
| + | Variants: | ||
| + | |||
| + | *R I ETC 501/IX b or Schloß 503belly bomb rack, fusing equipment for fitting a 250 kg (550 lb) or 500 kg (1,100 lb) bomb | ||
| + | *R III Schloß 503A-1 rack for one fuselage drop tank (300 L/80 US gal). | ||
| + | *R IV BSK 16 gun-camera in the left wing between nose ribs 3 and 4. | ||
| + | *R VI two 20 mm Mauser MG 151/20 under wing gun pods with 135 rpg. | ||
| + | *K-0 Pre-production aircraft, powered by a DB 605DM engine | ||
| + | *K-2 proposed version without pressurized cockpit | ||
| + | *K-4 only serial production version without pressurized cockpit, powered by a DB 605DM (early pdn) or DB/DC engine | ||
| + | *K-6 proposed heavy fighter version, as K-4 with reinforced wings holding two additional 30 mm MK 108 cannons and additional armour | ||
| + | *K-8 proposed reconnaissance version, equipment similar to G-8 | ||
| + | *K-10 proposed version, similar to K-6, MK 103 M engine cannon instead of MK 108 | ||
| + | *K-12 proposed version, dual-seat trainer similar to G-12 | ||
| + | *K-14 proposed version, similar to K-6, powered by a DB 605L engine | ||
| − | + | === In-game description === | |
| + | "The Messerschmitt Bf 109 was a single-seat monoplane fighter used by the Luftwaffe before and during WWII. It was used as a fighter, interceptor, high-altitude interceptor, fighter-bomber and reconnaissance aircraft. | ||
| − | + | The Bf 109K ""Kurfuerst"" was the last mass-produced variant of the Bf 109 family. It first reached front-line units in September 1944 (or early 1945, according to other data). The fighter was powered by the Daimler-Benz DB 605 DCM engine and had more powerful armament, with some variants equipped with two 15mm or three 30mm cannon." | |
== Media == | == Media == | ||
| − | + | <!--''An excellent addition to the article will be video guides, as well as screenshots from the game and photos.''--> | |
| − | + | {{Youtube-gallery|xMZo89CWWuA|How to use propeller pitch technique}} | |
| − | <!-- | ||
| − | |||
| − | |||
| − | |||
| − | |||
| − | |||
| − | | | ||
| − | |} | ||
| − | |||
== See also == | == See also == | ||
''Links to the articles on the War Thunder Wiki that you think will be useful for the reader, for example:'' | ''Links to the articles on the War Thunder Wiki that you think will be useful for the reader, for example:'' | ||
| − | * ''reference to the series of the | + | * ''reference to the series of the aircraft;'' |
* ''links to approximate analogues of other nations and research trees.'' | * ''links to approximate analogues of other nations and research trees.'' | ||
== External links == | == External links == | ||
| − | + | ''Paste links to sources and external resources, such as:'' | |
| + | |||
* ''topic on the official game forum;'' | * ''topic on the official game forum;'' | ||
| − | * ''encyclopedia page on | + | * ''encyclopedia page on aircraft;'' |
| − | * ''other literature.'' | + | * ''other literature.'' |
| − | |||
| − | |||
| − | {{ | + | {{Germany fighters}} |
Revision as of 01:56, 18 October 2019
Contents
| This page is about the German fighter Bf 109 K-4. For other uses, see Bf 109 (Family). |
Description

The Bf 109 K-4 is a rank IV German fighter
with a battle rating of 6.3 (AB) and 5.7 (RB/SB). It has been in the game since the start of the Open Beta Test prior to Update 1.29. The K-4 is the pinnacle of the famed 109 series. The `Kurfürst´ frame is the last iteration and was focused on ease of production rather than performance, yet it features the best power to weight ratio and acceleration of any 109, turning this machine into a beast. However, the age of the design is reflected in its poor high-speed characteristics.
Use the plane's outstanding climb rate and keep speed. Energy fighting tactics should be this plane's primary mode of fighting. It has good acceleration when using WEP. This grants the machine reasonable zoom climbing abilities. If chased, dodge away from the enemy with fancy manoeuvers without losing too much speed. In Realistic Battles, try to do a climbing spiral, but be sure to be in a higher energy state than the enemy! A miscalculation and the foe will have the opportunity for an easy deflection shot.
However, there are also downsides. The top speed can be reached quickly, yet the plane is not fast when stock. While it does have an edge in agility, it has bad low-speed manoeuvrability. Furthermore, foes will not usually engage in manoeuvering combat, rendering any manoeuvrability advantage moot.
K-4 can outmanoeuvre these planes at medium speeds (<450 IAS/kph): P-51 (all types), P-47D, Typhoons and the La-9. However, it will have a hard time dealing with other late Rank IV aircraft, especially Spitfires. It is highly recommended to use rudder during rolls as this increases the roll rate dramatically. This is useful if when trying to force an overshoot or when avoiding shots.
General info
Flight Performance
| Characteristics | |||||||
|---|---|---|---|---|---|---|---|
| Stock | |||||||
| Max Speed (km/h at 6,000 m) |
Max altitude (meters) |
Turn time (seconds) |
Rate of climb (meters/second) |
Take-off run (meters) | |||
| AB | RB | AB | RB | AB | RB | ||
| 685 | 666 | 12,800 | 20.3 | 21.2 | 18.2 | 18.2 | 333 |
| Upgraded | |||||||
| Max Speed (km/h at 6,000 m) |
Max altitude (meters) | Turn time (seconds) | Rate of climb (meters/second) |
Take-off run (meters) | |||
| AB | RB | AB | RB | AB | RB | ||
| 761 | 720 | 12,800 | 18.1 | 18.9 | 32.3 | 23.9 | 333 |
Details
| Features | ||||
|---|---|---|---|---|
| Combat flap | Take-off flap | Landing flap | Air brakes | Arrestor gear |
| ✓ | ✓ | ✓ | X | X |
| Limits | ||||
|---|---|---|---|---|
| Wing-break speed (km/h) |
Gear limit (km/h) |
Combat flap (km/h) |
Max Static G | |
| + | - | |||
| 790 | 450 | 520 | ~17 | ~10 |
| Optimal velocities | |||
|---|---|---|---|
| Ailerons (km/h) |
Rudder (km/h) |
Elevators (km/h) |
Radiator (km/h) |
| < 390 | < 390 | < 470 | > 250 |
| Compressor (RB/SB) | ||
|---|---|---|
| Setting 1 | ||
| Optimal altitude | 100% Engine power | WEP Engine power |
| 6,900 m | 1,250 hp | 1,775 hp |
Survivability and armour
Examine the survivability of the aircraft. Note how vulnerable the structure is and how secure the pilot is, whether the fuel tanks are armoured. Describe the armour, if there is any, also mention the vulnerability of other critical aircraft systems.
Armaments
Offensive armament
The Bf 109 K-4 is armed with:
- A choice between a 30 mm MK 108 or a 20 mm MG 151 cannon:
- 1 x 30 mm MK 108 cannon, nose-mounted (65 rpg)
- 1 x 20 mm MG 151 cannon, nose-mounted (200 rpg)
- 2 x 13 mm MG 131 machine guns, nose-mounted (300 rpg = 600 total)
Suspended armament
The Bf 109 K-4 can be outfitted with the following:
- 2 x 20 mm MG 151 cannons, wing-mounted (135 RPG = 270 total)
Usage in battles

The MK 108 is a double-edged sword: Nicknamed by the allies for its characteristic sound, the `Jackhammer´ lives true to its name. Slow but powerful. Its main purpose: Demolition of heavy objects, such as flying fortresses such as the B-17G.
However, its common purpose in War Thunder remains to hunt fighter planes. The cannon's rate of fire is extremely low, making it good for conserving ammo, but bad for deflection shots. Furthermore, the minengeschoß-shells are slow- very slow. One must either become very good at leading the shells, or close the distance. Kills are generally done from 300 meters away, if not closer. On the plus side, the damage is equivalent to most 37 mm cannons upon hitting. Tip: In order to better learn and understand the cannon's trajectory, do not fire in conjunction with the machine guns.
The two additional machine guns are best fired alone. The MG 131 features HE shells (named IAI in-game) as the Tracer belt. Yet they are only highly effective in Simulator battles, where they will deal good damage to control surface areas, causing inexperienced pilots to lose control. In Arcade and Realistic battles however, the instructor will dampen any such effects. Here, the damage-based Stealth and Fighter belts fare better.
The plane should be equip one of two load-outs: with either the single 30 mm cannon or 2 x 20 mm cannons. The single 30 mm is very capable of taking out 2-3 bombers and the low muzzle velocity matters less due to the large targets. The 3 x 20 mm cannons are very capable of taking out fighters due to the high shell density and and sheer damage output. A single 20 mm does not deal enough damage and the 30 mm with gunpods is rather ineffective due to the differing muzzle velocities of the 30 mm and 20 mm cannons.
Manual Engine Control
| MEC elements | ||||||
|---|---|---|---|---|---|---|
| Mixer | Pitch | Radiator | Supercharger | Turbocharger | ||
| Oil | Water | Type | ||||
| Controllable | Not controllable | Not controllable | Not controllable | Separate | Not ontrollable | Not controllable |
Modules
| Tier | Flight performance | Survivability | Weaponry | ||
|---|---|---|---|---|---|
| I | Fuselage repair | Radiator | Offensive 13 mm | MG.151/20 cannon | |
| II | Compressor | Airframe | New 13 mm MGs | R4 modification | |
| III | Wings repair | Engine | Offensive 30 mm | Offensive 20 mm | |
| IV | Engine injection | Cover | New 30 mm cannons | New 20 mm cannons | |
The true acceleration power of the plane is only achieved very late into the grind. Specifically, the Tier 4 Engine injection modification provides a significant boost and is a top priority. On the way there, all engine upgrades should be taken. 13 mm Belts are helpful for removing tracer rounds. The 20 mm gunpods with belts and the gun upgrade are viable choices but engine injection remains a priority.
Pros and cons
Pros:
- Very powerful engine when using WEP, providing excellent acceleration and climb rate
- MEC can extend its climb rate and top speed in RB/SB
- Nose mounted weaponry
- Good performance at medium altitude
- Good firepower for killing bombers
- Can carry additional armament
- Performance on par with Griffon Spitfires (even better when fully upgraded)
- 30 mm cannon will destroy anything that it hits
- Can research nose-mounted 20 mm MG 151 cannon
- Exceptional high-speed manoeuvrability
Cons:
- Low cannon ammunition count for the 30 mm MK 108 cannon and the 13 mm MG 131 machine guns
- Low velocity 30 mm shell with a high drop, resulting in a VERY large lead angle on targets in turn leading to poor dogfight performance due to having to pull extreme turns to get guns on target
- Flimsy frame, prone to react heavily to damage
- Very heavy and slow to fly without WEP when stock
- Stock 13 mm machine gun belts consist solely out of tracers. They alert the enemy aware of your presence, make aiming the 30 mm impossible, and do nothing else
- Fighters with lower top speeds but better low altitude performances (such as Russia's La-7 fighters) will find it quite easy to run you down if you are at a low energy state
- Very slow deploying flaps
History
The Bf 109 K-4 was one of Kurfurst Bf 109 series, Kurfurst was the last series of 109 before war's end. The K series was the most upgraded and most expensive 109 and with war coming to an end not many were built. Work on the K series began in the spring of 1943 and prototype was ready by autumn of the same year. The series began production in August 1944 with the K-4 but due to changes to the design and delays with the new DB605D engine, the K-4 was the only one to be mass produced. Externally, the Kurfurst series had changes in radio equipment location hatch. A filler point for the fuselage fuel tank, and with removal of the D/F loop, were the main external differences to other Bf109 series. The landing gear also had doors that closed up the bottom completely and armament was the Motorkanone 108 (30 mm) , 2 x MG 131 (13 mm), with additional 2 gun pods of MG 151 (20 mm). Payloads included a 500 kg bomb or on rare occasion Wfr.Gr.21 Rockets (21 cm). Due to limited resources many of the variants didn't enter production.
Variants:
- R I ETC 501/IX b or Schloß 503belly bomb rack, fusing equipment for fitting a 250 kg (550 lb) or 500 kg (1,100 lb) bomb
- R III Schloß 503A-1 rack for one fuselage drop tank (300 L/80 US gal).
- R IV BSK 16 gun-camera in the left wing between nose ribs 3 and 4.
- R VI two 20 mm Mauser MG 151/20 under wing gun pods with 135 rpg.
- K-0 Pre-production aircraft, powered by a DB 605DM engine
- K-2 proposed version without pressurized cockpit
- K-4 only serial production version without pressurized cockpit, powered by a DB 605DM (early pdn) or DB/DC engine
- K-6 proposed heavy fighter version, as K-4 with reinforced wings holding two additional 30 mm MK 108 cannons and additional armour
- K-8 proposed reconnaissance version, equipment similar to G-8
- K-10 proposed version, similar to K-6, MK 103 M engine cannon instead of MK 108
- K-12 proposed version, dual-seat trainer similar to G-12
- K-14 proposed version, similar to K-6, powered by a DB 605L engine
In-game description
"The Messerschmitt Bf 109 was a single-seat monoplane fighter used by the Luftwaffe before and during WWII. It was used as a fighter, interceptor, high-altitude interceptor, fighter-bomber and reconnaissance aircraft.
The Bf 109K ""Kurfuerst"" was the last mass-produced variant of the Bf 109 family. It first reached front-line units in September 1944 (or early 1945, according to other data). The fighter was powered by the Daimler-Benz DB 605 DCM engine and had more powerful armament, with some variants equipped with two 15mm or three 30mm cannon."
Media
See also
Links to the articles on the War Thunder Wiki that you think will be useful for the reader, for example:
- reference to the series of the aircraft;
- links to approximate analogues of other nations and research trees.
External links
Paste links to sources and external resources, such as:
- topic on the official game forum;
- encyclopedia page on aircraft;
- other literature.
| Germany fighters | |
|---|---|
| Heinkel | |
| He 51 | He 51 A-1 · He 51 B-1 · He 51 B-2/H · He 51 C-1 · He 51 C-1/L |
| He 100 | He 100 D-1 |
| He 112 | He 112 A-0 · He 112 B-0 · He 112 B-1/U2 · He 112 B-2/U2 · He 112 V-5 |
| Messerschmitt | |
| Bf 109 (Jumo) | Flegel's Bf 109 A · Bf 109 B-1 · Bf 109 C-1 |
| Bf 109 (DB-601) | Bf 109 E-1 · Bf 109 E-3 · Bf 109 E-4 · Bf 109 E-7/U2 · Bf 109 F-1 · Bf 109 F-2 · Bf 109 F-4 · Bf 109 F-4/trop |
| Bf 109 (DB-605) | Bf 109 G-2/trop · Bf 109 G-2 · Bf 109 G-6 · Bf 109 G-10 · Bf 109 G-14 · Bf 109 K-4 |
| Focke-Wulf | |
| Fw 190 (early) | Fw 190 A-1 · Fw 190 A-4 · Fw 190 A-5 · Fw 190 A-5 · Fw 190 A-5/U2 · Fw 190 A-5/U14 · Fw 190 A-8 · Fw 190 C |
| Fw 190 (late) | Fw 190 D-9 · Fw 190 D-12 · Fw 190 D-13 |
| Ta 152 | Ta 152 C-3 · Ta 152 H-1 |
| Blohm & Voss | |
| BV 155 | BV 155 B-1 |
| Foreign: | |
| USA | ▀P-47D-16-RE · ▀P-47D |
| USSR | ▀La-5FN · ▀Yak-1B |
| Britain | ▀Tempest Mk V |
| Italy | ▀CR.42 · ▀Marcolin's C.R.42 CN · ▀G.50 serie 2 · ▀G.50 AS serie 7 · ▀C. 200 serie 3 · ▀C. 200 serie 7 · ▀C. 202 |
| Finland | ▀Hawk H-75A-2 |
