Difference between revisions of "Leopard 2 PL"
m (changed leclerc aiming zone was "Literally penetrable anywhere by APFSDS" but with armor analysis and test i changed it to be more accurate) (Tag: Visual edit) |
(→Pros and cons) (Tag: Visual edit) |
||
| (13 intermediate revisions by 10 users not shown) | |||
| Line 11: | Line 11: | ||
== Description == | == Description == | ||
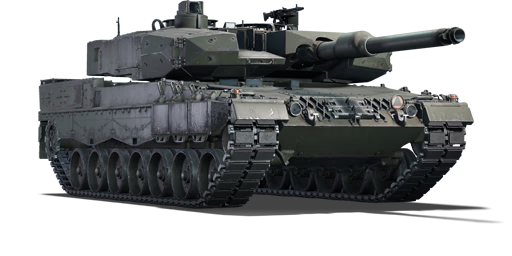
<!-- ''In the description, the first part should be about the history of the creation and combat usage of the vehicle, as well as its key features. In the second part, tell the reader about the ground vehicle in the game. Insert a screenshot of the vehicle, so that if the novice player does not remember the vehicle by name, he will immediately understand what kind of vehicle the article is talking about.'' --> | <!-- ''In the description, the first part should be about the history of the creation and combat usage of the vehicle, as well as its key features. In the second part, tell the reader about the ground vehicle in the game. Insert a screenshot of the vehicle, so that if the novice player does not remember the vehicle by name, he will immediately understand what kind of vehicle the article is talking about.'' --> | ||
| − | The ''' | + | The '''{{Specs|name}}''' is a squadron rank {{Specs|rank}} German medium tank {{Battle-rating}}. It was introduced in [[Update "Ixwa Strike"]]. |
| − | |||
| − | |||
== General info == | == General info == | ||
=== Survivability and armour === | === Survivability and armour === | ||
{{Specs-Tank-Armour}} | {{Specs-Tank-Armour}} | ||
| − | <!-- ''Describe armour protection. Note the most well protected and key weak areas. Appreciate the layout of modules as well as the number and location of crew members. Is the level of armour protection sufficient, is the placement of modules helpful for survival in combat? If necessary use a visual template to indicate the most secure and weak zones of the armour.'' -->The Leopard 2PL features the strongest turret for the Leopard 2 series in game so far | + | <!-- ''Describe armour protection. Note the most well protected and key weak areas. Appreciate the layout of modules as well as the number and location of crew members. Is the level of armour protection sufficient, is the placement of modules helpful for survival in combat? If necessary use a visual template to indicate the most secure and weak zones of the armour.'' --> |
| + | [[File:Leopard 2PL Heat vs gps.png|thumb|Due to volumetric armour, HEATFS rounds are not able to penetrate the GPS]] | ||
| + | [[File:Leopard 2PL Dart vs gps.png|thumb|APFSDS dart is able to penetrate the Gunner Primary Sight taking out both gunner and commander. However the add-on armour reduces the chances of killing them both in a single shot.]] | ||
| + | |||
| + | The Leopard 2PL features the strongest and most armoured turret for the Leopard 2 series tanks seen in game so far. It features a stronger turret armour compared to all the Leopard 2 seen in game but has no add-on hull protection as the [[Strv 122A]] and the [[Strv 122B PLSS]]. This version is based on the 2A4 series, and so features the same problems with the hull armour, barely enough to stop rounds seen in game. However, it completely removes the armour issues from the turret. At first sight, the GPS (Gunner Primary Sight) can be seen as the main weak point since it is the same weak spot the 2A4 has. However, taking into consideration the new armour package, hitting the GPS makes is far harder without hitting add-on armour first. As seen in the image, the GPS is mostly safe from HEATFS and other chemical shells due to the volumetric armour, meaning they will either prematurely explode, or simply not be able to penetrate the 500+ mm of protection offered by the add-on armour package. However, for sub-calibre rounds like APFSDS, the composite armour offers less protection. As seen in the Leopard 2A4, any hit to the GPS means both gunner and commander will be knocked out. However, chances of hitting the GPS in the exact place for it to disable both crew members is reduced immensely thanks to the add-on armour. Most of the time, any hit to the GPS will result in the knock-out of the commander only with partial damage to the gunner. As seen in picture, the area highlighted is the place in which both the gunner and commander can be killed with a single shot (more specifically the lower section of the rectangular optic in the GPS). | ||
| + | |||
| + | [[File:Leopard 2PL HEAT-FS vs turret sides.png|thumb|MILAN ATGM is unable to penetrate the turret sides.]] | ||
| + | [[File:Leopard 2PL DM53 vs add-on.png|left|thumb|346x346px|DM53 round is unable to penetrate the add-on armour.]] | ||
| − | The 2PL is also able to withstand more than one hit | + | The 2PL is also the first tank in game to be able to withstand more than one hit of CL3143, DM53 and 9M119 to the turret. Previous Leopards (specifically the 2A5 and 2A6 including the Strv 122) can withstand 9M119 to the turret. However, the wedge panels of these tanks are exploded with a single hit, which means the turret is exposed to further enemy fire. This changes with the 2PL. Due to the fact that the armoured add-on package is a permanent part of the tank, it is able to withstand up to 4 9M119 hits and continuous firing of the CL3143 and DM53 at any ranges. Despite this, all of them are able to penetrate the gun mantlet with no issues at all. However, for your enemies it is rather tricky to achieve this since if they are aiming at the turret's front, you can also kill them as well. Moving to turret's add-on side armour, it is able to withstand all types of HEATFS and chemical shells seen in game. However, the armour protection is increased gradually as we move to the turret front. The first section of the side armour (the one covering the smoke launchers) is relatively weak and is able to be penetrated by all ammunition seen at this battle rating. The second section (covering the first half of the sides of the crew compartments) is able to withstand all HEATFS in game and [[MILAN]] ATGM (meaning is able to withstand up to 580 mm of penetration). The third section of the side armour (covering the second half of the crew compartment) is able to withstand all penetration up to 800 mm of CE (Chemical). When we talk about KE (Kinetic) protection, the side armour offers little to no protection whatsoever, and can be penetrated by nearly all high-calibre weapons at its battle rating. |
'''Armour type:''' <!-- The types of armour present on the vehicle and their general locations --> | '''Armour type:''' <!-- The types of armour present on the vehicle and their general locations --> | ||
| Line 55: | Line 60: | ||
<!-- ''Write about the mobility of the ground vehicle. Estimate the specific power and manoeuvrability, as well as the maximum speed forwards and backwards.'' --> | <!-- ''Write about the mobility of the ground vehicle. Estimate the specific power and manoeuvrability, as well as the maximum speed forwards and backwards.'' --> | ||
| − | The Leopard 2PL features | + | The Leopard 2PL features a similar mobility to the rest of the Leopard 2 series (with exception of 2K). Has no particular upgrade or drawback compared to 2A4, 2A5 or 2A6. It should be noted, as the rest of Leopard 2 series, it features a relatively low acceleration in neutral steering. |
{{tankMobility|abMinHp=2,032|rbMinHp=1,327}} | {{tankMobility|abMinHp=2,032|rbMinHp=1,327}} | ||
| Line 68: | Line 73: | ||
<!-- ''Give the reader information about the characteristics of the main gun. Assess its effectiveness in a battle based on the reloading speed, ballistics and the power of shells. Do not forget about the flexibility of the fire, that is how quickly the cannon can be aimed at the target, open fire on it and aim at another enemy. Add a link to the main article on the gun: <code><nowiki>{{main|Name of the weapon}}</nowiki></code>. Describe in general terms the ammunition available for the main gun. Give advice on how to use them and how to fill the ammunition storage.'' --> | <!-- ''Give the reader information about the characteristics of the main gun. Assess its effectiveness in a battle based on the reloading speed, ballistics and the power of shells. Do not forget about the flexibility of the fire, that is how quickly the cannon can be aimed at the target, open fire on it and aim at another enemy. Add a link to the main article on the gun: <code><nowiki>{{main|Name of the weapon}}</nowiki></code>. Describe in general terms the ammunition available for the main gun. Give advice on how to use them and how to fill the ammunition storage.'' --> | ||
| − | The Leopard 2PL is fitted with the powerful Rh120 L/44 120 mm, a gun that has been | + | The Leopard 2PL is fitted with the powerful Rh120 L/44 120 mm gun, a gun that has been seen since the Leopard 2K. This gun features the same ballistics of the Leopard 2A4 and 2A5 using the same darts, meaning the gun handling is the same and it should not be a hassle when firing. |
{| class="wikitable" style="text-align:center" width="100%" | {| class="wikitable" style="text-align:center" width="100%" | ||
| Line 87: | Line 92: | ||
==== Ammunition ==== | ==== Ammunition ==== | ||
| − | The 2PL has access to all the ammunition seen in | + | The 2PL has access to all the ammunition seen in Leopard 2 series past 2A4 with exception of DM53. It has access to a unique round, DM11, proximity fuze HE shell. All are capable rounds which are not new and have same handling. |
| − | '''DM12A1; HEATFS''' - The DM12A1 is the first round the 2PL has access to, | + | '''DM12A1; HEATFS''' - The DM12A1 is the first round the 2PL has access to, it can be considered a mediocre round as most of the enemies which will be faced will be able to withstand it due to composite armour. However, it is particularly useful when facing light armoured vehicles which are prompt to get overpressurised (SPAA, light tanks, etc) and useful when facing enemy helicopters as it has enough explosive mass and flight speed to be competitive as last resort. As a hollow charge, it is prompt to detonate mid air due to trees, bushes and fences. This makes the round difficult to use when in long range engagements as some field elements may not be rendered. |
| − | '''DM33 & DM43; APFSDS''' - The 2PL has access to 2 types of APFSDS: DM33 and DM43, | + | '''DM33 & DM43; APFSDS''' - The 2PL has access to 2 types of APFSDS: the DM33 and DM43. The DM33 is a decent round with decent penetration and stopping power. While it lacks penetration to frontally penetrate some MBTs, it is enough to hit and cause critical damage in weak spots and side shots. DM43 however has much more penetration, and can typically penetrate all tanks from all sides. |
| − | '''DM11; HE''' - DM11 is a new HE- | + | '''DM11; HE''' - The DM11 is the a new HE-VT proxy shell for germany. It is pretty much useless against non lightly armoured vehicles (even 20 mm roofs will stop the spalling if an air explosion is done) but can be devastating against helicopters as there will be no need for direct hit in order to cause critical damage. The round has to fly at least 400 m to arm the fuse. It has a trigger radius of 10m. |
{{:Rh120 L/44 (120 mm)/Ammunition|DM12A1, DM11, DM33, DM43}} | {{:Rh120 L/44 (120 mm)/Ammunition|DM12A1, DM11, DM33, DM43}} | ||
| Line 137: | Line 142: | ||
<!-- ''Describe the tactics of playing in the vehicle, the features of using vehicles in the team and advice on tactics. Refrain from creating a "guide" - do not impose a single point of view but instead give the reader food for thought. Describe the most dangerous enemies and give recommendations on fighting them. If necessary, note the specifics of the game in different modes (AB, RB, SB).'' --> | <!-- ''Describe the tactics of playing in the vehicle, the features of using vehicles in the team and advice on tactics. Refrain from creating a "guide" - do not impose a single point of view but instead give the reader food for thought. Describe the most dangerous enemies and give recommendations on fighting them. If necessary, note the specifics of the game in different modes (AB, RB, SB).'' --> | ||
| − | The 2PL playstyle is identical to the 2A4 and subsequent German MBTs. | + | The 2PL playstyle is identical to the 2A4 (and also subsequent German MBTs). One of the key differences between the 2PL over the rest is the stronger turret armour. In terms of armament, the 2PL has the powerful Rh120 L/44 which German tankers are already familiar with. |
'''Enemies worth noting:''' | '''Enemies worth noting:''' | ||
| − | *[[M1 Abrams (Family)|M1 Abrams]]: | + | *[[M1 Abrams (Family)|M1 Abrams]]: Turret frontal plates are very strong, ensure an angle within 45° when using DM33. |
| − | *[[Strv 121]]: | + | *[[Leopard 2A4]]/[[Strv 121]]: UFP and turret frontal plates can be penetrated by DM33. |
| − | *[[Strv 122A]]/[[Strv 122B PLSS]]: | + | *[[Leopard 2A5]]/[[Leopard 2A6]]: UFP and turret frontal plates can be penetrated by DM33. Turret wedges should be blown out first in order to penetrate the turret frontal plate. |
| − | *[[Leclerc]]/[[Leclerc S2]]: | + | *[[Strv 122A]]/[[Strv 122B PLSS]]: UFP impenetrable by DM33 unless MEXAS armour package is destroyed. Turret wedges should be blown out first in order to penetrate the turret frontal plate. |
| − | *[[Challenger 2]]: | + | *[[Leclerc]]/[[Leclerc S2]]: Leclerc front is impenetrable by all rounds unless shots are made entirely into the lower half of the LFP, DM43 is advised. |
| + | *[[Challenger 2]]: Front impenetrable by all rounds unless shots are made to driver's port. | ||
=== Pros and cons === | === Pros and cons === | ||
| Line 153: | Line 159: | ||
* Good turret armour | * Good turret armour | ||
| − | * | + | * Good gun |
| − | * | + | * Good mobility, due to its powerful engine |
| − | * | + | * Has access to the DM11 HE-TF round that can counter helicopters |
| − | * Has access to | + | * Has access to 2nd generation thermals for both the gunner and commander |
'''Cons:''' | '''Cons:''' | ||
| − | * | + | * Nearly no gun mantlet armour |
| − | * | + | * Hull armour is also not so good, is based on the Leopard 2A4 |
| − | * | + | * Gunner Primary Sight is a big weak spot |
| − | * | + | * Slow reload compared to other top tier MBTs |
== History == | == History == | ||
| Line 181: | Line 187: | ||
;Images | ;Images | ||
<gallery mode="packed" heights="150"> | <gallery mode="packed" heights="150"> | ||
| − | File:Leopard 2 PL WTWallpaper 01.jpg | + | File:Leopard 2 PL WTWallpaper 01.jpg| |
| − | File:Leopard 2 PL WTWallpaper 02.jpg | + | File:Leopard 2 PL WTWallpaper 02.jpg| |
| − | File:Leopard 2 PL WTWallpaper 03.jpg | + | File:Leopard 2 PL WTWallpaper 03.jpg| |
| − | File:Leopard 2 PL WTWallpaper 04.jpg | + | File:Leopard 2 PL WTWallpaper 04.jpg| |
| − | File:Leopard 2 PL WTWallpaper 05.jpg | + | File:Leopard 2 PL WTWallpaper 05.jpg| |
| − | File:Leopard 2 PL WTWallpaper 06.jpg | + | File:Leopard 2 PL WTWallpaper 06.jpg| |
</gallery> | </gallery> | ||
Revision as of 17:28, 30 April 2023
| This page is about the German medium tank Leopard 2 PL. For other versions, see Leopard 2 (Family). |


Contents
Description
The Leopard 2 PL is a squadron rank VIII German medium tank with a battle rating of 11.3 (AB/RB/SB). It was introduced in Update "Ixwa Strike".
General info
Survivability and armour


The Leopard 2PL features the strongest and most armoured turret for the Leopard 2 series tanks seen in game so far. It features a stronger turret armour compared to all the Leopard 2 seen in game but has no add-on hull protection as the Strv 122A and the Strv 122B PLSS. This version is based on the 2A4 series, and so features the same problems with the hull armour, barely enough to stop rounds seen in game. However, it completely removes the armour issues from the turret. At first sight, the GPS (Gunner Primary Sight) can be seen as the main weak point since it is the same weak spot the 2A4 has. However, taking into consideration the new armour package, hitting the GPS makes is far harder without hitting add-on armour first. As seen in the image, the GPS is mostly safe from HEATFS and other chemical shells due to the volumetric armour, meaning they will either prematurely explode, or simply not be able to penetrate the 500+ mm of protection offered by the add-on armour package. However, for sub-calibre rounds like APFSDS, the composite armour offers less protection. As seen in the Leopard 2A4, any hit to the GPS means both gunner and commander will be knocked out. However, chances of hitting the GPS in the exact place for it to disable both crew members is reduced immensely thanks to the add-on armour. Most of the time, any hit to the GPS will result in the knock-out of the commander only with partial damage to the gunner. As seen in picture, the area highlighted is the place in which both the gunner and commander can be killed with a single shot (more specifically the lower section of the rectangular optic in the GPS).


The 2PL is also the first tank in game to be able to withstand more than one hit of CL3143, DM53 and 9M119 to the turret. Previous Leopards (specifically the 2A5 and 2A6 including the Strv 122) can withstand 9M119 to the turret. However, the wedge panels of these tanks are exploded with a single hit, which means the turret is exposed to further enemy fire. This changes with the 2PL. Due to the fact that the armoured add-on package is a permanent part of the tank, it is able to withstand up to 4 9M119 hits and continuous firing of the CL3143 and DM53 at any ranges. Despite this, all of them are able to penetrate the gun mantlet with no issues at all. However, for your enemies it is rather tricky to achieve this since if they are aiming at the turret's front, you can also kill them as well. Moving to turret's add-on side armour, it is able to withstand all types of HEATFS and chemical shells seen in game. However, the armour protection is increased gradually as we move to the turret front. The first section of the side armour (the one covering the smoke launchers) is relatively weak and is able to be penetrated by all ammunition seen at this battle rating. The second section (covering the first half of the sides of the crew compartments) is able to withstand all HEATFS in game and MILAN ATGM (meaning is able to withstand up to 580 mm of penetration). The third section of the side armour (covering the second half of the crew compartment) is able to withstand all penetration up to 800 mm of CE (Chemical). When we talk about KE (Kinetic) protection, the side armour offers little to no protection whatsoever, and can be penetrated by nearly all high-calibre weapons at its battle rating.
Armour type:
| Armour | Front (Slope angle) | Sides | Rear | Roof |
|---|---|---|---|---|
| Hull | Composite Armour Upper Glacis 35 mm (53°) |
20 mm Top 35 mm Bottom |
20 mm | 20 - 35 mm |
| Turret | 35 mm Turret front 35 mm Gun mantlet Variable thickness add-on armour |
15 - 35 mm 300 mm Composite Screen Variable thickness add-on armour |
25 mm | 20 mm |
| Composite armour | Front | Sides |
|---|---|---|
| Hull | Upper+Lower glacis 400 mm Kinetic 600 mm Chemical |
N/A |
| Turret | Turret cheeks 1010 mm Kinetic 1,520 mm Chemical Gun mantlet (Center) 478 - 615 mm Kinetic 730- 1,400 mm Chemical Gun mantlet (Outer) 524 - 915 mm Kinetic 535 - 1,520 mm Chemical |
Side armour 260 mm Kinetic 230 - 600 mm Chemical |
Notes:
- Upper hull and Lower rear hull overlap (10 + 20 mm thick)
- Upper mantlet add-on and Mantlet armour overlap (30 + 400 mm thick)
- Holes in the engine deck are covered by 8 mm of mesh
Mobility
The Leopard 2PL features a similar mobility to the rest of the Leopard 2 series (with exception of 2K). Has no particular upgrade or drawback compared to 2A4, 2A5 or 2A6. It should be noted, as the rest of Leopard 2 series, it features a relatively low acceleration in neutral steering.
| Game Mode | Max Speed (km/h) | Weight (tons) | Engine power (horsepower) | Power-to-weight ratio (hp/ton) | |||
|---|---|---|---|---|---|---|---|
| Forward | Reverse | Stock | Upgraded | Stock | Upgraded | ||
| Arcade | 76 | 35 | 59.2 | 2,032 | 2,862 | 34.32 | 48.34 |
| Realistic | 69 | 31 | 1,327 | 1,500 | 22.42 | 25.34 | |
Modifications and economy
| Mobility | Protection | Firepower | ||||||||||||||||||||||||
|---|---|---|---|---|---|---|---|---|---|---|---|---|---|---|---|---|---|---|---|---|---|---|---|---|---|---|
|
|
|
Armaments
Main armament
The Leopard 2PL is fitted with the powerful Rh120 L/44 120 mm gun, a gun that has been seen since the Leopard 2K. This gun features the same ballistics of the Leopard 2A4 and 2A5 using the same darts, meaning the gun handling is the same and it should not be a hassle when firing.
| 120 mm Rh120 L/44 | Turret rotation speed (°/s) | Reloading rate (seconds) | |||||||||||
|---|---|---|---|---|---|---|---|---|---|---|---|---|---|
| Mode | Capacity | Vertical | Horizontal | Stabilizer | Stock | Upgraded | Full | Expert | Aced | Stock | Full | Expert | Aced |
| Arcade | 42 | -9°/+20° | ±180° | Two-plane | 38.1 | 52.7 | 64.0 | 70.8 | 75.3 | 7.80 | 6.90 | 6.36 | 6.00 |
| Realistic | 23.8 | 28.0 | 34.0 | 37.6 | 40.0 | ||||||||
Ammunition
The 2PL has access to all the ammunition seen in Leopard 2 series past 2A4 with exception of DM53. It has access to a unique round, DM11, proximity fuze HE shell. All are capable rounds which are not new and have same handling.
DM12A1; HEATFS - The DM12A1 is the first round the 2PL has access to, it can be considered a mediocre round as most of the enemies which will be faced will be able to withstand it due to composite armour. However, it is particularly useful when facing light armoured vehicles which are prompt to get overpressurised (SPAA, light tanks, etc) and useful when facing enemy helicopters as it has enough explosive mass and flight speed to be competitive as last resort. As a hollow charge, it is prompt to detonate mid air due to trees, bushes and fences. This makes the round difficult to use when in long range engagements as some field elements may not be rendered.
DM33 & DM43; APFSDS - The 2PL has access to 2 types of APFSDS: the DM33 and DM43. The DM33 is a decent round with decent penetration and stopping power. While it lacks penetration to frontally penetrate some MBTs, it is enough to hit and cause critical damage in weak spots and side shots. DM43 however has much more penetration, and can typically penetrate all tanks from all sides.
DM11; HE - The DM11 is the a new HE-VT proxy shell for germany. It is pretty much useless against non lightly armoured vehicles (even 20 mm roofs will stop the spalling if an air explosion is done) but can be devastating against helicopters as there will be no need for direct hit in order to cause critical damage. The round has to fly at least 400 m to arm the fuse. It has a trigger radius of 10m.
| Penetration statistics | |||||||
|---|---|---|---|---|---|---|---|
| Ammunition | Type of warhead |
Penetration @ 0° Angle of Attack (mm) | |||||
| 10 m | 100 m | 500 m | 1,000 m | 1,500 m | 2,000 m | ||
| DM12A1 | HEATFS | 480 | 480 | 480 | 480 | 480 | 480 |
| DM11 | HE-TF | 37 | 37 | 37 | 37 | 37 | 37 |
| DM33 | APFSDS | 481 | 478 | 470 | 461 | 450 | 440 |
| DM43 | APFSDS | 536 | 534 | 528 | 521 | 514 | 507 |
| Shell details | ||||||||||||
|---|---|---|---|---|---|---|---|---|---|---|---|---|
| Ammunition | Type of warhead |
Velocity (m/s) |
Projectile mass (kg) |
Fuse delay (m) |
Fuse sensitivity (mm) |
Explosive mass (TNT equivalent) (kg) |
Ricochet | |||||
| 0% | 50% | 100% | ||||||||||
| DM12A1 | HEATFS | 1,140 | 13.5 | 0.05 | 0.1 | 2.15 | 65° | 72° | 77° | |||
| DM11 | HE-TF | 970 | 19 | 0.3 | 0.1 | 3.93 | 79° | 80° | 81° | |||
| DM33 | APFSDS | 1,640 | 4.3 | - | - | - | 78° | 80° | 81° | |||
| DM43 | APFSDS | 1,660 | 4.3 | - | - | - | 78° | 80° | 81° | |||
Ammo racks

| Full ammo |
1st rack empty |
2nd rack empty |
Visual discrepancy |
|---|---|---|---|
| 42 | 16 (+26) | 1 (+41) | No |
Notes:
- Shells are modeled individually and disappear after having been loaded.
- Rack 2 is a first stage ammo rack. It totals 15 shells and gets filled first when loading up the tank.
- This rack is also emptied early: the rack depletion order at full capacity is 2 - 1.
- If you pack 16 (+26) shells, it will keep the frontal hull rack empty.
- Simply not firing when the gun is loaded will move ammo from rack 1 into rack 2. Firing will interrupt the restocking of the ready racks.
Machine guns
| 7.62 mm MG3A1 | ||||
|---|---|---|---|---|
| Mount | Capacity (Belt) | Fire rate | Vertical | Horizontal |
| Coaxial | 4,500 (1,000) | 1,200 | N/A | N/A |
| Pintle | 2,000 (1,000) | 1,200 | -8°/+20° | ±120° |
Usage in battles
The 2PL playstyle is identical to the 2A4 (and also subsequent German MBTs). One of the key differences between the 2PL over the rest is the stronger turret armour. In terms of armament, the 2PL has the powerful Rh120 L/44 which German tankers are already familiar with.
Enemies worth noting:
- M1 Abrams: Turret frontal plates are very strong, ensure an angle within 45° when using DM33.
- Leopard 2A4/Strv 121: UFP and turret frontal plates can be penetrated by DM33.
- Leopard 2A5/Leopard 2A6: UFP and turret frontal plates can be penetrated by DM33. Turret wedges should be blown out first in order to penetrate the turret frontal plate.
- Strv 122A/Strv 122B PLSS: UFP impenetrable by DM33 unless MEXAS armour package is destroyed. Turret wedges should be blown out first in order to penetrate the turret frontal plate.
- Leclerc/Leclerc S2: Leclerc front is impenetrable by all rounds unless shots are made entirely into the lower half of the LFP, DM43 is advised.
- Challenger 2: Front impenetrable by all rounds unless shots are made to driver's port.
Pros and cons
Pros:
- Good turret armour
- Good gun
- Good mobility, due to its powerful engine
- Has access to the DM11 HE-TF round that can counter helicopters
- Has access to 2nd generation thermals for both the gunner and commander
Cons:
- Nearly no gun mantlet armour
- Hull armour is also not so good, is based on the Leopard 2A4
- Gunner Primary Sight is a big weak spot
- Slow reload compared to other top tier MBTs
History
Devblog
The Leopard 2PL is an ongoing joint project for the modernization of the Leopard 2A4 tanks in service with the Polish army, currently being carried out by the German company Rheinmetall AG and the Polish state-owned Polska Grupa Zbrojeniowa. The aim of the program is to improve the combat efficiency of the elderly Leopards to 3rd generation plus level main battle tanks.
The main areas of modernization are improving the tank's protection and firepower. The Leopard 2PL has additional modular turret armour (forehead and sides), enhanced protection of the gun mantlet. On the turret's rear, massive boxes appeared, which under some circumstances can work as spaced armour for protection against HEAT shells. The L44 cannon remains the same, but the upgraded fire control system has modern thermal imaging equipment and is adapted for firing more powerful rounds. Since the power plant and chassis of the Leopard 2A4 remained unchanged, the additional protection of the hull had to be abandoned, as the weight of the tank approached 60 tons. In total, 128 Leopard 2A4's in service are to be upgraded under the Leopard 2PL program.
Media
- Skins
- Images


See also
External links
- [Development] Squadron vehicles: Leopard 2PL: Polish cavalry
- [Defence24.com] Leopard 2PL Programme Showcased. Modernization Package For The Polish Main Battle Tanks.
| Germany medium tanks | |
|---|---|
| Pz.III | Pz.III B · Pz.III E · Pz.III F · Pz.III J · Pz.III J1 · Pz.III J1 TD · Pz.III L · Pz.III M · Pz.III N |
| Pz.IV | Pz.IV C · Pz.IV E · Pz.IV F1 · Pz.IV F2 · Pz.IV G · Pz.IV H · Pz.IV J · Pz.Bef.Wg.IV J |
| Pz.V | VK 3002 (M) · Panther A · Panther D · Panther F · Panther G · Ersatz M10 · Panther II |
| M48 upgrades | M48A2 G A2 · M48 Super |
| Leopard 1 | Leopard I · Leopard A1A1 · Leopard A1A1 (L/44) · Leopard 1A5 · C2A1 · Turm III |
| Leopard 2 | PT-16/T14 mod. · Leopard 2K · Leopard 2AV |
| Leopard 2A4 · Leopard 2 (PzBtl 123) · Leopard 2 PL · Leopard 2A5 · Leopard 2 PSO · Leopard 2A6 · Leopard 2A7V | |
| Trophies | ▀M4 748 (a) · ▀T 34 747 (r) |
| Other | Nb.Fz. · KPz-70 |
| USA | mKPz M47 G · M48A2 C |
| USSR | ◊T-72M1 |
| Squadron ground vehicles | |
|---|---|
| USA | M901 · M1A1 AIM |
| Germany | Leopard 2 PL |
| USSR | BMP-2M · T-80UK |
| Britain | Bhishma TWMP |
| China | Object 122MT "MC" |
| Sweden | T 80 U |
| Israel | Magach 6B Gal |
