Tiger H1

From War Thunder Wiki
Jump to: navigation, search
Rank VI USSR | Premium | Golden Eagles
Su-25K Pack
This page is about the German heavy tank Tiger H1. For other versions, see Tiger I (Family).
Tiger H1
germ_pzkpfw_vi_ausf_h1_tiger.png
GarageImage Tiger H1.jpg
ArtImage Tiger H1.png
Tiger H1
AB RB SB
5.7 5.7 5.7
Class:
Research:33 000 Specs-Card-Exp.png
Purchase:105 000 Specs-Card-Lion.png
Show in game

Description

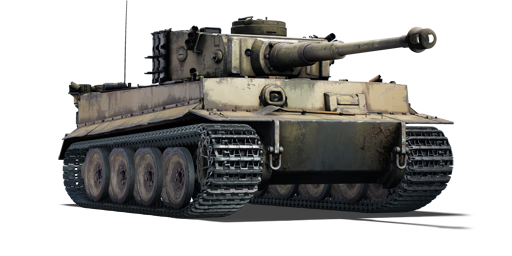
The Panzerkampfwagen VI Ausführung H1 (Tiger H1) is the first (early-production) variant of the Tiger I heavy tank family, designed and built by Henschel and used by the German Army during World War II. It offered the German Army its first armoured fighting vehicle equipped with the 88 mm Kampfwagenkanone (KwK) 36 tank gun, developed from the 88 mm Flugabwehrkanone (FlaK) 36 anti-aircraft gun. Henschel and Ferdinand Porsche were ordered on May 26, 1941, to submit proposals for a 45-ton heavy tank that would be available by June 1942. Porsche developed an improved version of its VK 30.01 (P) prototype (which was originally intended to compete for the Panther contract), while Henschel developed two prototypes: the VK 45.01 (H) H1 with an 8.8 cm KwK36 L/56 tank gun and the VK 45.01 (H) H2 with a 7.5 cm KwK42 L/70 tank gun. The Henschel VK 45.01 (H) H1 prototype was accepted after evaluation, primarily because the Porsche VK 45.01 (P) prototype design used a petrol-electric transmission system that required large amounts of copper for the manufacture of its electrical drivetrain components, a strategic war material of which Germany had limited supplies. Early Tiger H1s with the Krupp-designed turret featured a high commander cupola. Later in the war, the design was modified, resulting in the Tiger E, which had a new dome-shaped cast-armour commander's cupola and a ring installed on the commander's cupola to accommodate the mounting of an anti-aircraft light machine gun. There are additionally five S-Mine dischargers on the hull-roof, three on the left side and two on the right. Two Feifel air cleaner units designed for dusty environments are located on the hull's back. Between August 1942 and August 1944, a total of 1,347 units were constructed. The Tiger I was phased out of production after August 1944 in favour of the Tiger II.

Introduced in the Closed Beta Test for Ground Forces before Update 1.41, the Tiger H1 was the German Army's first truly heavy tank during World War II, due mostly to combat experience against the French and British Matilda heavy tanks, which demonstrated that the German Army needed better armed and armoured tanks. Within 2,500 metres, Tiger H1 had higher penetration than the 75 mm KwK40 L/43 on the Sturmgeschütz IIIs and Panzer IVs but poorer penetration than the 75 mm KwK42 L/70 on the Panthers. At longer ranges, the 88 mm KwK36 L/56 performed better in terms of penetration and accuracy. The Tiger H1, capable of fighting any adversary at any range, is a true marvel of German engineering during World War II and will undoubtedly reward players well.

General info

Survivability and armour

Smoke grenades
Creation of a smoke screen in front of the vehicle
Armourfront / side / back
Hull102 / 82 / 82
Turret100 / 82 / 82
Crew5 people
Visibility112 %
The ideal angling of hull armour on Tiger H1 for maximum effective armour all-around

One may feel the need to charge head-on into battle, blaring that 88 mm gun as shells bounce off the front armour while the Schachtellaufwerk suspension system runs over the ground; this is a short-lived strategy.

The Tiger H1 should be played more like a bulky medium tank rather than a heavy tank despite its status, supporting allies from the sideline or from a distance rather than leading directly from the front. This is due to the poor armour arrangement, most of the thickness of the tank is concentrated on the front face of the tank and leaves the sides exposed, especially since this model of tiger has a 'boxier' design. This is even more important to remember as ammunition is stowed along the sides the tank, protected by the inferior side armor. One must remain a distance, exploit the 88 mm long-distance power, and maintain a diamond-shape compound angling to maximize armour thickness against the trailing enemy shells that will inevitably come towards the Tiger's way.

The Tiger H1 is equipped with 12 smoke grenades that can help cover the vehicle while it escapes or repairs. Smoke grenades discharge in 2 salvos of 6 (3 to each side of the turret) covering a 120° sector 10 m in front of the vehicle. The grenades deploy smoke in 4 seconds and last 25 seconds. Both salvos are separated by a 1-minute reload time.

The commander cupola is tall and weak: this can lead APHE shells to detonate inside, knocking out at best the loader or even the commander, loader, and gunner.

Armour type:

  • Rolled homogeneous armour
  • Cast homogeneous armour (Gun mantlet, Cupola)
Armour Front (Slope angle) Sides Rear (Slope angle) Roof
Hull 102 mm (9°) Front plate
62 mm (80°) Front glacis
102 mm (25°) Lower glacis
82 mm Top
62 mm Bottom
82 mm (9°) 26 mm
Turret 100 mm Turret front
90 - 200 mm Gun mantlet
82 mm 82 mm 26 mm
Cupola 80 mm (cylindrical) 26 mm

Notes:

  • Turret front covered by gun mantlet has variable thickness depending on exact place, ranging from 90 to 200 mm of armour.
  • Turret side (about 1/3) is covered by attached tracks, adding additional 30 mm of armour.
  • While the hull side of the tank is 82 mm, the side where the suspension is located is only 62 mm thick so be aware of this weak point.
  • On paper, the best angle is roughly 38.8° with armour all-round being from the front 130 mm.

Mobility

Speedforward / back
AB48 / 9 km/h
RB and SB45 / 9 km/h
Number of gears8 forward
4 back
Weight57.3 t
Engine power
AB1 240 hp
RB and SB650 hp
Power-to-weight ratio
AB21.6 hp/t
RB and SB11.3 hp/t
Game Mode Max Speed (km/h) Weight (tons) Engine power (horsepower) Power-to-weight ratio (hp/ton)
Forward Reverse Stock Upgraded Stock Upgraded
Arcade 48 9 57.3 839 1,240 14.64 21.64
Realistic 45 9 575 650 10.03 11.34

Speed is not the strong suit of the Tiger H1. While the Tiger H1 can generate speed on flat surfaces, it does this very slowly. When stopping, do not expect a burst of power when moving from a complete stop. Like most heavy tanks, the Tiger H1 does not take well to hills. Inclines can quickly bog down the heavy Tiger HI, so try to avoid then when ever possible. However, when on a hill, the Tiger H1 can use the hill's decline to your advantage to build up speed quickly in order to get across open areas.

Modifications and economy

Repair costBasic → Reference
AB1 506 → 1 954 Sl icon.png
RB1 635 → 2 122 Sl icon.png
SB2 265 → 2 939 Sl icon.png
Total cost of modifications29 700 Rp icon.png
57 700 Sl icon.png
Talisman cost1 200 Ge icon.png
Crew training30 000 Sl icon.png
Experts105 000 Sl icon.png
Aces470 Ge icon.png
Research Aces360 000 Rp icon.png
Reward for battleAB / RB / SB
80 / 130 / 140 % Sl icon.png
148 / 148 / 148 % Rp icon.png
Modifications
Mobility Protection Firepower
Mods new tank traks.png
Tracks
Research:
1 500 Rp icon.png
Cost:
2 900 Sl icon.png
110 Ge icon.png
Mods new tank suspension.png
Suspension
Research:
1 300 Rp icon.png
Cost:
2 500 Sl icon.png
95 Ge icon.png
Mods new tank break.png
Brake System
Research:
1 300 Rp icon.png
Cost:
2 500 Sl icon.png
95 Ge icon.png
Mods new tank filter.png
Filters
Research:
1 900 Rp icon.png
Cost:
3 700 Sl icon.png
140 Ge icon.png
Mods new tank transmission.png
Transmission
Research:
4 800 Rp icon.png
Cost:
9 400 Sl icon.png
350 Ge icon.png
Mods new tank engine.png
Engine
Research:
4 800 Rp icon.png
Cost:
9 400 Sl icon.png
350 Ge icon.png
Mods tank tool kit.png
Improved Parts
Research:
1 500 Rp icon.png
Cost:
2 900 Sl icon.png
110 Ge icon.png
Mods extinguisher.png
Improved FPE
Research:
1 300 Rp icon.png
Cost:
2 500 Sl icon.png
95 Ge icon.png
Mods tank reinforcement ger.png
Crew Replenishment
Research:
1 900 Rp icon.png
Cost:
3 700 Sl icon.png
140 Ge icon.png
Mods new tank horizontal aiming.png
Horizontal Drive
Research:
1 500 Rp icon.png
Cost:
2 900 Sl icon.png
110 Ge icon.png
Mods tank ammo.png
88mm_ger_kwk36_Pzgr_APCBC_ammo_pack
Research:
1 500 Rp icon.png
Cost:
2 900 Sl icon.png
110 Ge icon.png
Mods tank cannon.png
Adjustment of Fire
Research:
1 300 Rp icon.png
Cost:
2 500 Sl icon.png
95 Ge icon.png
Mods tank ammo.png
88mm_kwk_36_43_HEAT_ammo_pack
Research:
1 300 Rp icon.png
Cost:
2 500 Sl icon.png
95 Ge icon.png
Mods new tank vertical aiming.png
Elevation Mechanism
Research:
1 900 Rp icon.png
Cost:
3 700 Sl icon.png
140 Ge icon.png
Mods smoke screen.png
Smoke grenade
Research:
1 900 Rp icon.png
Cost:
3 700 Sl icon.png
140 Ge icon.png

For Tier I modifications obtained the vital "Parts" and "Horizontal Drive" modifications as the former will give the Tiger the ability to repair and the latter will provide a much-needed boost to the Tiger's slow turret traverse rate.

Armaments

Main armament

Ammunition92 rounds
Reloadbasic crew → aces
9.6 → 7.4 s
Vertical guidance-8° / 16°
Main article: KwK36 (88 mm)
88 mm KwK36 Turret rotation speed (°/s) Reloading rate (seconds)
Mode Capacity Vertical Horizontal Stabilizer Stock Upgraded Full Expert Aced Stock Full Expert Aced
Arcade 92 -8°/+16° ±180° N/A 9.71 13.44 16.32 18.05 19.20 9.62 8.51 7.84 7.40
Realistic 7.10 8.40 10.20 11.30 12.00

Ammunition

  • PzGr 39: The go-to shell for all Tiger H1 drivers as this is arguably the best. It will do incredible damage to any tank shot by it, except SPAA, or any extremely thin armoured vehicles. Heavier tanks like the IS-1, IS-2, or American heavy tanks are able to resist the round at longer ranges, but well-placed shots from close range or sides will do the job. All other medium and light tanks will be history as soon as this shell make contact with them. This shell, however, will almost always over-penetrate all but the most armoured SPAA vehicles, so it is best to use HE or machine gun fire on thin-skinned vehicles.
  • PzGr : This shell is also very useful. It has very similar characteristics as PzGr 39, but sacrifices some penetration for about 150% more Explosive Filler, meaning even more damage than already powerful PzGr 39. It is recommended to carry some of these shells and use them regularly, as the penetration is still enough to deal with most targets (at least when being down-tiered), and switch to PzGr 39 when shooting targets far away, or those that are heavily armoured.
  • Hl.Gr. 39: On paper the HEAT rounds don't bring anything new to the table, however they can be used as a substitute for the HE shells due to the greater explosive mass and still gives a fighting chance if caught with pants down.
  • Sprgr. L/4.5: The HE shell is completely ineffective against all but SPAA or the AI artillery on the Kursk and Ash River maps, and the machine gun mounted on the Tiger has proven quite capable of dealing with these. Keep a small supply of this shell on hand if planning to flank the enemy and take out their SPAA or artillery, but avoid them for everything else.

Penetration statistics
Ammunition Type of
warhead
Penetration @ 0° Angle of Attack (mm)
10 m 100 m 500 m 1,000 m 1,500 m 2,000 m
PzGr 39 APCBC 165 162 151 139 127 117
Pzgr. APCBC 153 151 140 128 116 106
Hl.Gr 39 HEAT 110 110 110 110 110 110
Sprgr. L/4.5 HE 18 18 17 15 14 12
Shell details
Ammunition Type of
warhead
Velocity
(m/s)
Projectile
mass (kg)
Fuse delay
(m)
Fuse sensitivity
(mm)
Explosive mass
(TNT equivalent) (g)
Ricochet
0% 50% 100%
PzGr 39 APCBC 773 10.2 1.2 14 108.8 48° 63° 71°
Pzgr. APCBC 810 9.5 1.2 14 215.04 48° 63° 71°
Hl.Gr 39 HEAT 600 7.64 0 0.3 1,100 62° 69° 73°
Sprgr. L/4.5 HE 820 9 0.2 0.1 698 79° 80° 81°

Ammo racks

Full
ammo
1st
rack empty
2nd
rack empty
3rd
rack empty
4th
rack empty
5th
rack empty
6th
rack empty
7th
rack empty
8th
rack empty
9th
rack empty
10th
rack empty
Visual
discrepancy
92 76 (+16) 60 (+32) 44 (+48) 28 (+64) 24 (+68) 20 (+72) 16 (+76) 12 (+80) (+86) (+92) No
Ammo racks of the Tiger H1

Notes:

  • As they are modeled by sets of 2, shells disappear from the rack only after you fire both shells in the set
  • Large sides empty: 28 (+64) shells.

Machine guns

Ammunition4 350 rounds
Belt capacity150 rounds
Reloadbasic crew → aces
10.4 → 8.0 s
Fire rate900 shots/min
Main article: MG34 (7.92 mm)
7.92 mm MG34
Mount Capacity (Belt) Fire rate Vertical Horizontal
Coaxial 4,350 (150) 900 N/A N/A

Usage in battles

The main role of the Tiger tank was to eliminate enemy tanks at a far range, similar to behaving like a sniping tank, or a Tank Destroyer. Nonetheless, the Tiger can excel at brawling with other tanks at medium, even possibly against two Panther tanks to close range and escape undamaged. It's recommended to not stay in one place for too long or risk getting outflanked, spotted, or bombed.

While guns like the Soviet 85 mm cannon can easily penetrate the Tiger at close range, the Tiger can stay nearly invulnerable at long range. The 88 can take out any tank on Rank 3 at any combat range but may have problems with the IS-1's 120 mm front armour at some ranges. When having to close in a bit, it is generally advisable to angle the hull to the sides by about 30°, improving the armour rating enough that it can keep away 85 mm shells very well, even at closer ranges. The Tiger H1 is still vulnerable to the SU-152s howitzer and its HE shell at any range. So whenever encountering these heavy-calibre vehicles, it should be prioritized and eliminated first.

The Tiger's hull has many flat areas that can be easily penetrated. To maximize the angles and thus the protection, the tank should be angled about 40º to either side. An easy way of angling your tank is to make sure the corner of the hull is pointed at the enemy. The side armour is strong enough for such angling, and is flat as well. The turret is more complicated. It features many pieces of armour that overlap and such, and as such will either be exceptionally strong or be penetrated easily. As such, avoid relying on the turret to absorb shells. On the other hand, opponents will also try to avoid hitting the turret, as there is a chance to not penetrate.

Mobility-wise the Tiger H1 is pretty good for a heavy tank. It is much faster than a KV-1 and about as equally fast as the IS-1, although medium tanks like the T-34-85 can easily outmanoeuvre all three at close range. Try to use the Tiger's mobility to keep a distance rather than for closing in on a target. Don't be afraid to use the speed to fall back if necessary as the Tiger cannot survive close range engagements on open terrain vs. mediums, due to the slow turret and the vulnerability to the 85 mm guns on Soviet medium tanks.

The Tiger has a very bad turret traverse, it is recommended to get the "Turret Drive" traverse modification as fast as possible. Even then, the Tiger will have to turn the tank in the direction of the traverse to make the most of the time to quickly engage a target. What makes this worse is the smoke grenade launchers in the hull, which would interfere with the gun depression at certain turret angles. This, together with very exposed ammo racks on both sides (though one side can be emptied by reducing the ammo stowage) means that facing multiple enemies at once is almost a certain end to the Tiger tank. The best option is to take cover from one tank and fire on the other.

As far as ammo is concerned, the default PzGr 39 will be the standard AP rounds many players will use. The second AP round available, the Pzgr., is also a good round to use against the enemy as the shell contains more explosive filler than the default, but suffers from a lower penetration value compared to the PzGr 39. The HEAT rounds offer consistent penetration at all ranges including more than 2,000 m. However, they provide less damage upon penetration. HEAT rounds usually are usually not used as the primary ammunition type for this sole reason. Upgrading the tank should mainly be dedicated to turret traverse, hull traverse (as this is needed even with the turret traverse upgrade) and engine upgrades. The Tiger's 88 has massive destructive power. Unlike the other German tank of its rank, all armed with 75 mm guns, the Tiger can easily knock out all the mediums like the T-34s, M4 Shermans with a single shot, and still be a threat against heavy tanks like the IS-1s. If it doesn't destroy a tank in one hit, most of the enemy crew will be wounded or incapacitated. The best place to aim with the 88 is either at the gunner's side of the enemy turret to incapacitate an enemy's firepower, or between the driver and the gunner which would usually wound or knock out most of the enemy crew at once. Attacking from the side also presents a good shot opportunity, as the best shot placement is right below the turret on the hull where most of the tank ammunition are stored, giving a big chance for an ammo-rack explosion.

When driving the Tiger, plan ahead on where it will drive. Even with engine and track modifications, the Tiger H1 is still a heavy tank and a 90 degree or more turn will almost always mean an immediate standstill as the tank try to make the change in movement. Even small adjustments can knock the speed down a bit. Thus, knowing the terrain and destination is of the utmost importance to preserve its mobility to its fullest extent.

The Tiger H1 is also best used on the flanks of the current maps, as these are usually more open and allow good use of its armour and excellent gun. The centre of the map would seem more logical as there are a lot of enemies, but as has already been established a Tiger taking fire from multiple directions won't last long. Going in a flank and taking down light and medium tanks is an easy task for this beast, and thus a flank can be easily secured if the Tiger H1 is driven carefully. Then, work the Tiger H1 into the enemy sides and rear of the main force in the centre, doing much more damage than if the Tiger faced the force head-on because a shot to the side and rear will set most enemies alight if not outright exploding the ammunition. Able to destroy vehicles in one hit, the Tiger can quickly jump from target to target and eliminate a good number of enemies in its lifespan.

The Tiger H1 is very effective at long range, and should be used accordingly. Players should try to avoid point blank fights with other tanks, since this will often result in the vulnerable sides being exposed. As a sniper or flanker, the tank is wonderful and as long as its sides are not exposed, it will last a long time.

There will be many hard eggs to crack such as the IS- Series, T-34 Series, American Jumbos, and several other tanks that will give the Tiger H1 trouble.

  • The Russians have many tanks at the BR able to handle the Tiger H1 easily. The main tank at this BR is the T-34-85's. While it may have very thin armour and is easy to penetrate it is easy to angle and the T-34 is a franking machine, it will drive circles around the Tiger so it needs to be destroyed quick. The IS- Heavy tanks are the second worst nightmare situation. Thick armour and a huge gun. If the IS tank is not destroyed first, it will definitely destroy the Tiger.
  • The American Jumbos are similar to the T-34. The 75 mm variant would have trouble to penetrate the Tiger's armour at long ranges, but caution needs to be exercised when they are armed with a 76 mm gun.
  • The Japanese tanks all have very thin armour that the 88 mm gun can easily penetrate through with no problem, but their guns at this BR all have enough penetration to deal with the Tiger H1 if it gets a hit on.

Against the Tiger H1:

Light tank: when dealing with a Tiger I, you must utilise your superior speed and agility to your advantage, to compensate for your weak firepower. If your penetration is less than 100 mm, then manoeuvre to the Tiger's side as that is where you can destroy it. The upper part of the hull side is 80 mm thick, without any angling, meaning that light tanks such as M24 can reliably penetrate there. Even the reserve BT-5 can punch through that armour section, though guns with less post-penetration damage will have to shoot several times to ensure that all crew are knocked out. The lower section of the hull side is only 60 mm, meaning that even if the player does not have a high tier light tank and can only use low tier tanks like the M3A3 Stuart, that area can still be penetrated. The Tiger's turret turns slowly, but still be careful to move out of its gun's way. Facing a Tiger I is a hard job because it can penetrate most places on your light tank so a frontal strike against it has a high chance of failing.

Medium tank: with a medium tank, you can more confidently target the Tiger's frontal weak spots. Medium tanks such as M4A3 (76) W, T-34-85, and Sherman Firefly can all pierce through the Tiger's frontal hull armour when it is not angling. The turret armour is way harder to penetrate as it has some complex bulges, leading to the shells being absorbed. However, an experienced Tiger commander will angle its hull, stacking up the effective thickness to more than ~130 mm thus making it immune to all the above medium tanks. Now, if you cannot flank, aim for the commander's cupola. An explosive-packed shell through there will knock out ~1-3 crew in the turret. If the gunner is knocked out, wait for around 12 seconds for it to replenish a new gunner, then shoot at the cupola again. You can also try breaking the gun barrel, since the muzzle brake is quite large and therefore easier to catch onto shells, damaging the barrel. Note, it is better to avoid shooting at the lower front plate as the transmission behind it will absorb all incoming shells for the crew. Throughout this whole process, the player should be very careful not to get hit as the 88 mm cannon is very potent against most tanks.

Heavy tank/tank destroyer: with a more powerful cannon and perhaps better armour, the player can finally duel the Tiger I with relative ease. For a heavy tank or tank destroyer who sacrifices mobility and/or armour just for superior firepower (e.g. IS-2, ISU-122), a Tiger H1 can be penetrated in the hull even if it is angling. Still, do not shoot at the turret and lower front plate where the shells tend to do no damage. Also, try aiming for armour plates that are free of any obstruction, because vehicles who can easily penetrate the Tiger usually have a large calibre gun, their large shells will be bounced or lose penetration should the shell edge impact anything. For example, if you shoot at a Tiger who is facing you, target the dead center of the upper front plate where there is nothing but armour, instead of aiming right next to the driver's port where the armour blocks sticking out will absorb the shell.

SPAA: anti-aircraft guns at this BR cannot really penetrate the Tiger I's armour effectively, but thanks to their fast-firing autocannons SPAAs are great for breaking the Tiger's gun barrel and tracks, assisting your teammates in destroying it. If no supporting fire is near, drop an artillery strike after immobilising the Tiger. Some SPAAs (e.g. Phòng không T-34, M42) have access to AP shells, any shell with more than 60 mm penetration is adequate to penetrate the lower side of the hull. Other than this area, the minimum thickness is 80 mm which is hard for any SPAA. This is an advantage of the Tiger I, although its flat armour performs poorly against heavier cannons, its all-round armour protection is fairly effective against low-penetrating vehicles like SPAAs.

Pros and cons

Pros:

  • The gun mantlet, MG port and driver's port are particularly hard to penetrate due to their complex, varying shape and thickness
  • Decent cannon with adequate accuracy and a range of shells to choose. Stock shell has great penetration and damage, and can knock out common opponents easily with a single shot (e.g. T-34-85, M4A2 (76) W, IS-1, M6A1). Has another AP that sacrifices a bit penetration for more TNT
  • One of the fastest heavy tanks with its top speed of 45 km/h, meaning it can get to some positions quickly alongside friendly medium tanks.
  • The box-like hull shape gives the ability to angle. When angling the hull at around 40° and placing yourself far from the enemies (at least 500 m away) the Tiger H1 can resist common tanks like the 76 mm Shermans, T-34-85s and M36
  • Good reverse speed and hull traverse allows it to quickly angle for deflecting shells
  • -8° gun depression works well in most hilly terrain
  • The rear is surprisingly hard to penetrate, partially due to the slightly-angled armour and partly due to the large exhaust pipes which seem to deflect shells
  • The strong gun makes it easy to destroy most opponents at the its battle rating with a single shot, even M4A3E2 Jumbo, as long as you carefully aim for the machine gun port
  • The tank is equipped with smoke grenades, which can help escape an undesirable situation alive

Cons:

  • Weak and vertical armour protection. If not angling the Tiger H1 can get destroyed easily by the T-34-85 or 76 mm Sherman. Even if the Tiger H1 is angling, the IS-2 can still knock it out with a single shot easily
  • The upper front plate is extremely vulnerable if it is not angled. It will be penetrated by any vehicle at its BR
  • Struggles to penetrate heavy targets frontally like the M4A3E2, M26 and IS-2 (1944)
  • Rather slow acceleration limits its short range manoeuvrability
  • Slow turret traverse makes it hard to respond to flankers quickly. The M18 GMC is very common at this BR
  • Ammo storage at the hull sides are very easy to explode when hit
  • Commander's cupola is tall and easy to penetrate
  • Is a big and tall target, easy to get spotted and shot at
  • S-Mine dischargers on the hull limits gun depression in certain areas
  • Tracks are rather loud so enemies will most times hear you and will be alert, so surprise attacks will be difficult

History

Development

The Tiger I heavy tank was arguably the most infamous tank of World War II. The design for this tank began as early as January 1937 when Henschel & Sohn worked on a large "breakthrough" called the "Durchbruchwagen" that weighed about 30 tons on request by the German military.[1] The request was modified over time for more armour and better gun that increased the weight to 36 tons, but this project was dropped in 1938 in favour of the better prototypes VK 30.01(H) and VK 36.01(H). These new prototypes were the start of the usage of the Schachtellaufwerk wheel arrangements, but these also never passed prototype stages and were both cancelled in 1942.

During the development of the prototypes above, the German invasion of France showed that the Allied tanks such as the Somua, Char B1, and Matilda II were impervious to their current anti-tank weaponry and a need for better armoured and armed tanks was emphasized. So on May 26, 1941, Henschel and Porsche were asked to submit designs for a 45-ton heavy tank that was to be ready for demonstration by June 1942. During their development in June 1941, Germany initiated Operation Barbarossa against the Soviet Union and was shocked by appearance of the T-34 and KV-1 tanks that were invulnerable to all but the most potent anti-tank weapon in German inventory, one of which was the 88 mm KwK36 cannon. The potency of the 88 mm cannon against the heavily armoured tanks that the Germans faced had Hitler ordered that the heavy tank design undertaken by Henschel and Porsche to utilize the 88 mm as its main armament instead of a 75 mm cannon.

The designs of the tank were finalized and ready for demonstration on April 20, 1942, Hitler's birthday, and showed the VK 45.01(H) and the VK 45.01 (P). The demonstration and subsequent evaluations on the two designs determined that the Henschel variant was superior to the Porsche variant, proving more reliable, more mobile, and more easily produced than the Porsche. This caused the Henschel variant to be adopted as the Panzerkampfwagen VI Tiger and production started in August 1942. The Porsche variant had many chassis produced as Ferdinand Porsche thought the design would win, so the chassis was instead used in the Ferdinand tank destroyer.

Design

What perhaps made the Tiger I so unique in tank development and German doctrine is a change of focus between the three characteristics of the tank; with more emphasis to firepower and armour than to mobility. The Tiger I contained the large 88 mm KwK36 cannon which was very accurate and powerful, being able to penetrate every Allied armour present at its introduction. The armour on the Tiger I was also one of the greatest at the time, with an astounding 102 mm of armour on the front hull armour, 82 mm on the side superstructure and rear, and 120 mm on the gun mantlet. The armour was vertical faced so no sloping benefits were present like on the Panther. All these armour thicknesses proved invulnerable to most Allied anti-tank weaponry at the time, requiring more creative methods in a shot placement to disable the tank. The mobility, while taken with less emphasis in the development, was still respectable at the time as the tank weighed about 57 metric tons, about 20 tons more than other country's main tanks, yet is able to keep up a speed of 38 km/h (Maximum speed was 45 km/h, but an engine governor was installed to preserve the engine life).

The tank utilized a torsion-bar suspension system in a Schachtellaufwerk overlapping pattern, making the Tiger one of the first German tank design to use the pattern. While the design gave the Tiger I great flotation due to the use of a wider track for lower ground pressure, it had disadvantages in environment and maintenance. In the Eastern Front, mud and other foreign objects could be jammed in between the overlapping wheels, which would freeze in the winter and jam the wheels; the overlapping wheels also were a hassle to change out, in order to replace one wheel in the inside of the suspension, it requires the removal of at least nine other wheels in order to access it. The first 250 Tiger tanks used a Maybach V-12 HL210 engine with 650 hp before switching over to the more powerful Maybach V-12 HL230 engine with 700 hp. The engine proved adequate in propelling the tank but was still considered underpowered for the tank weight.

The Tiger I, as innovative as it is to tank warfare, was a strain on German war production. The tank was over-engineered, taking much more man-hour and materials for its worth as a war machine. Cost-wise, two Panzer IVs or four StuG IIIs can be built for the cost of one Tiger I. The tank was also expensive to maintain and took lots of fuel to run. These attributed to the low number of only 1,354 Tiger Is produced from 1942 to August 1944.[1]

Variants

There are three main production Tiger I variants known today, the "early-production", "mid-production", and "late-production" models. The Early-production model, designated as the Panzerkampfwagen VI Ausf. H, were the first few batches and are distinguished by their drum-style cupola with an over-swinging hatch. The model also had two vehicle lights on the front side of the tank and dished steel wheels with rubber tyres. The Mid-production featured Zimmerit paste and a side-swinging cupola with accommodation for a machine gun mounted on the cupola. The vehicle light was also changed to just one placed right in the front of the hull armour. The mid-production was also redesignated in May 1943 as the Panzerkampfwagen VI Ausf. E. Late-production models featured the removal of the Zimmerit paste as there was an assumed flaw with it, and the overlapping wheels were instead made into interleaving with full-steel road wheels as well, in a manner similar to the Tiger II.

Other specialized variants of the Tiger I was produced as well. A small number of demolition carrier models were field-made in Italy, where it had its main gun replaced by a crane to carry demolition to clear minefields or destroy obstacles. The demolition carrier version was interpreted by Allied intelligence as a BergeTiger, an armoured recovery vehicle, though it is not known if it ever saw service in this role. Another specialized variant produced in 1944 in some numbers was the Sturmtiger, an heavy assault gun with a 38 cm rocket launcher made from a depth charge. 19 of these were made and saw use in all fronts, though its most noteworthy combat action was in the Warsaw Uprising.

Combat usage

In its introduction, Hitler ordered the new Tigers to be used in the Leningrad siege in September 1942. However, as the faults of the tank were still not yet fully ironed out at this stage, the mechanical unreliability and the unsuitable terrain caused one of the Tiger Is to be stuck in the swamps and abandoned by its users. This example was then captured by the Red Army and tipped off the Allies of the development of the new Tiger tanks and so developments in countermeasures began. In North Africa, the Tigers saw the first action against the Western Allies in Tunisia in December 1942. Its impact there left an impression on the Allied armour forces, but its myth as an invulnerable tank was shattered when two Tigers were taken out by the British 6-pounder anti-tank guns. The total loss in that campaign was seven Tigers by February 1943.

Once mass-numbers of Tiger Is were available, they were employed in heavy tank battalions that were to be deployed in breakthrough operations or counter-attacks. Field experience with the Tiger showed that the Tiger's heavyweight proved a nuisance in operational mobility, an example being that small bridges were unable to support the Tiger tank's weight. An attempt to remedy this was to use a snorkel device so the tank could ford rivers as deep as four metres, however, this system was phased out of later production models for cost-savings. The Tiger suffered reliability problems in all of its service life that impeded its effectiveness and its high fuel usage limited its combat operations. Armour recovery of the vehicle was also terrible as three heavy recovery half-tracks were required to tow the tank away, causing a strain on the German support line to keep the Tiger tanks in running order. Despite that, the Tiger I proved superior in terms of armour and armament against the Allies and created massive losses among their armoured forces, causing many soldiers to keep an eye out for the infamous "Tigers".

The impact the Tiger had on the battlefield as the superior tank at its introduction created fame to the commanders and crew operating this tank, further fueling the Tiger's reputation in the war as a killing machine. Some Tiger units were able to achieve kill ratios up to 10:1, and some even higher. Some notable Tiger aces known were Kurt Knispel (168 tank kills), Otto Carius (150+), Johannes Bölter (139+), and Michael Wittmann (138).

However, as the war progressed and the impact of the Tiger's surprise in Kursk and Italy has dissolved, Allied developments gave forth more capable tanks able to defeat the Tiger I tanks. The Soviets solution was to up-gun their T-34s with an 85 mm gun to make the T-34-85, and the Western Allies with the 76 mm and 17-pounders on the M4 Sherman and Firefly respectively. The Tiger went as an highly-invulnerable tank design into a simple heavy tank as the war went on, and it was replaced by the more powerful and more heavily armoured Tiger II in 1944. Despite its replacement, many Tiger I models still saw use up until the end of World War II.

Survivors

Due to the low number of Tiger Is created during the war (1,354, compared to Panzer IV's 8,550 and the M4 Sherman's ~50,000), very few intact Tiger I pieces are left in the world. Today, only seven tanks in various conditions are existent in the world. The most famous of these is the Tiger 131, captured by the British in Tunisia in April 1943, when the crew abandoned the tank due to a 6-pounder shot from a Churchill tank jamming the gun mantlet and turret ring, causing it to be unable to aim. The intact sample is also famous for being the only fully operational Tiger I in the world due to a reconstruction effort by the Bovington Tank Museum in the 1990s. However, the Tiger 131 does not run on its original Maybach HL210 engine, as it was taken out to be used as a separate display; rather, it uses the HL230, which was mostly used for the Tiger II. It is still there as a display and remains the museum's most popular exhibit.


Archive of the in-game description

Work on the creation of a heavy tank began in 1937. Only after the attack on the USSR were the tactical and technical requirements needed for this new war machine met. The tank was designed by the Henschel company, led by Erwin Aders.

Production was handled by Henschel and Weggman factories, which made about 450 tanks from July 1942 to August 1943.

The first 495 vehicles included equipment that enabled the crossing of water obstacles up to 4 metres deep. Beginning with the 251st tank, the Maybach HL 230 P30 engine (600 hp) was replaced with a Maybach HL 230 P45 (700 hp). The Tiger was armed with an 88 mm 8,8 cm KwK36 L/56 gun, which was a tank version of the famous Flak 18/36 anti-aircraft gun. In the spring and summer of 1943, the tank received smoke grenade launchers and mortars for launching anti-personnel mines.

The Pz.Kpfw. VI Tiger entered service with heavy tank battalions. The tanks were first used in the fall of 1942, on the Leningrad front, in the 502nd heavy tank battalion. In December 1942, in North Africa, Tigers entered service with the 501st battalion.

The first tanks which arrived often broke, owing to the haste with which they were put into mass production. The vehicle was very heavy, with low manoeuvrability. It consumed 10 liters of fuel every 1 km. A full fuel tank, 567 liters, was enough for only two and a half hours of combat work, which was one of the tank's major drawbacks. But this was all compensated for by the battle machine's simplicity and ease of operation. Tank operators who served in Tigers were constantly praising its transmission and steering. The tank's armour also gave the crew a high chance of surviving battle, even if the tank was disabled.


Media

Skins
Sights
Videos

See also

Related development

External links

References

  1. 1.0 1.1 Anthony Tucker-Jones. Images Of War Special: Tiger I & Tiger II Great Britain: Pen & Sword Military, 2013


Germany heavy tanks
Tiger 1 (Henschel)  Tiger H1 · Tiger E · ␠Tiger
Tiger 1 (Porsche)  VK 45.01 (P) · Pz.Bef.Wg.VI P
Tiger 2  Tiger II (P) · Tiger II (H) · Tiger II (H) Sla.16 · Tiger II (10.5 cm Kw.K)
Super heavy tanks  Maus · E-100
Trophies 
Great Britain  ▀Pz.Kpfw. Churchill
USSR  ▀KV-IB · ▀KW I C 756 (r) · ▀KW II 754 (r)