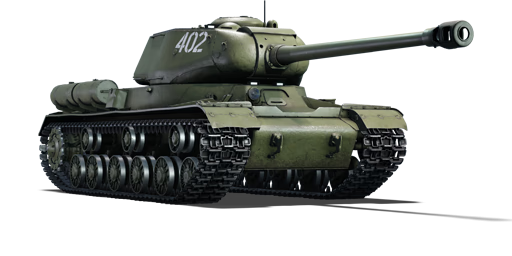
IS-2 No.402
| This page is about the Chinese heavy tank IS-2 No.402. For other versions, see IS-2 (Family). |

Contents
Description
The IS-2 No.402 is a special IS-2 heavy tank of historical significance during the Chinese People's Volunteer Army's participation in the Korean War. In November 1951, the IS-2 No.402 took part in the Battle of Ma Liangshan against enemy fortifications. Given the battlefield's rough terrain, the Chinese heavy artillery could not effectively engage the enemy fortifications. The IS-2 No.402 was used as an assault gun, engaging and destroying enemy fortifications with high-explosive shells. In that battle, the IS-2 No.402 destroyed 6 enemy fortifications (British), boosting the morale of the19th Infantry Division it was supporting. The second-class medal of merit was awarded to all crew members.
Introduced in Update 1.95 "Northern Wind" during the Lunar New Year Sale 2020, this premium vehicle, which is identical to the IS-2, has thick frontal armour and a large-calibre anti-tank gun. It is capable of engaging and eliminating any enemy tanks at its rank in a single shot. One thing to keep in mind when playing the IS-2 No.402 is to avoid angling the tank towards the opponent, as the hull side cheek armour is substantially weaker.
General info
Survivability and armour

The IS-2 has sufficient armour, but will not protect from the guns of its rank. The frontal plate has 120 mm of armour plating, which will not stop anything the IS-2 faces, making slight angle adjustments paramount survivability essential. However, due to a tendency for the driver's viewport to literally absorb the round, most players will not aim here. The LFP has a value of 100 mm angled at 27 degrees, and will not bounce any shots. Since behind the LFP is the driver and the 2 main fuel tanks, a penetrating round will have catastrophic results for the IS-2 No.402. The side armour is 90 mm, and observing the front of the tank, it has a noticeable curvature to it. When viewed from the front, the 90 mm of armour will deflect or absorb a high number of shots contrary to the 120 mm plate. Angling with large adjustments will cause the IS-2 No.402 to render this part useless and make the tank extremely vulnerable. The frontal turret armour is 100 mm with a distinctive "cheek" construction. As with any "cheek" construction, the lower part may act as a shot trap and the middle may absorb shots, but it is more than likely to fail against high-penetration guns.
Armour type:
- Cast homogeneous armour (Turret, Hull front, Hull side)
- Rolled homogeneous armour (Hull roof, Engine deck side & rear, Turret roof, Gun mantlet)
| Armour | Front | Sides | Rear | Roof |
|---|---|---|---|---|
| Hull | 120 mm (27-34°) Driver's port 60 mm (74°) Front glacis 100 mm (28-36°) Lower glacis |
90 - 100 mm (9-25°) Top 90 mm Bottom |
60 mm (49-50°) Top 60 mm (38°) Bottom |
30 mm |
| Turret | 100 mm (7-72°) Turret front 100 mm (5-60°) Gun mantlet |
100 mm (12-22°) | 100 mm (5-35°) | 30 mm |
| Cupola | 90 mm | 90 mm | 90 mm | 30 mm |
Notes:
- Suspension wheels are 20 mm thick while tracks are 30 mm thick.
Mobility
| Game Mode | Max Speed (km/h) | Weight (tons) | Engine power (horsepower) | Power-to-weight ratio (hp/ton) | |||
|---|---|---|---|---|---|---|---|
| Forward | Reverse | Stock | Upgraded | Stock | Upgraded | ||
| Arcade | 40 | 16 | 46 | 671 | 992 | 14.59 | 21.57 |
| Realistic | 38 | 15 | 460 | 520 | 10 | 11.3 | |
Modifications and economy
| Mobility | Protection | Firepower | ||||||||||||||||||||
|---|---|---|---|---|---|---|---|---|---|---|---|---|---|---|---|---|---|---|---|---|---|---|
|
|
|
Armaments
Main armament
Many players find it hard to get used to similar Soviet cannons mainly due to their absurdly long reload. This can be caused by inaccurate aiming, resulting in the shell missing or not penetrating, so the player have to wait for half a minute to reload, which is of course frustrating. Players can overcome this by practising shooting and getting used to the ballistics, to make most if not every shell count. Once one is able to consistently knock out opponents with a single shot, the reload will not seem as long, since it generally takes quite a few minutes before the next target shows up.
Ammunition-wise, the best ammo is of course the BR-471B. The added ballistic cap can really make a difference when shooting angled armour. For example shooting at the UFP of an angling M4A3E2 with BR-471 might not penetrate, however with a BR-471B it will decrease the compound angle at which the shell impacts the armour for quite a bit, therefore easily pierce through. This can be the difference between getting a kill or getting killed. If you want to save silver lions, you can bring a mix of the two shells. The BR-471 works great as well.
The last aspect to overcome is the painful gun depression. Make sure to fight on flat ground so you do not have to aim down. Even if you fight in an urban environment, be careful in the streets, since some curbsides lift up one of your tracks and may prevent you from aiming at an opponent.
| 122 mm D-25T | Turret rotation speed (°/s) | Reloading rate (seconds) | |||||||||||
|---|---|---|---|---|---|---|---|---|---|---|---|---|---|
| Mode | Capacity | Vertical | Horizontal | Stabilizer | Stock | Upgraded | Full | Expert | Aced | Stock | Full | Expert | Aced |
| Arcade | 28 | -3°/+20° | ±180° | N/A | 11.3 | 15.7 | 19.0 | 21.1 | 22.4 | 27.04 | 23.92 | 22.05 | 20.80 |
| Realistic | 8.3 | 9.8 | 11.9 | 13.2 | 14.0 | ||||||||
Ammunition
| Penetration statistics | |||||||
|---|---|---|---|---|---|---|---|
| Ammunition | Type of warhead |
Penetration @ 0° Angle of Attack (mm) | |||||
| 10 m | 100 m | 500 m | 1,000 m | 1,500 m | 2,000 m | ||
| BR-471 | APHE | 205 | 201 | 182 | 161 | 143 | 127 |
| BR-471B | APHEBC | 205 | 203 | 192 | 178 | 166 | 155 |
| OF-471 | HE | 37 | 37 | 37 | 37 | 37 | 37 |
| Shell details | ||||||||||||
|---|---|---|---|---|---|---|---|---|---|---|---|---|
| Ammunition | Type of warhead |
Velocity (m/s) |
Projectile mass (kg) |
Fuse delay (m) |
Fuse sensitivity (mm) |
Explosive mass (TNT equivalent) (g) |
Ricochet | |||||
| 0% | 50% | 100% | ||||||||||
| BR-471 | APHE | 795 | 25 | 1.2 | 19 | 246.4 | 47° | 60° | 65° | |||
| BR-471B | APHEBC | 795 | 25 | 1.2 | 19 | 246.4 | 48° | 63° | 71° | |||
| OF-471 | HE | 795 | 25 | 0 | 0.1 | 3,600 | 79° | 80° | 81° | |||
Ammo racks

| Full ammo |
Ammo part |
1st rack empty |
2nd rack empty |
3rd rack empty |
4th rack empty |
5th rack empty |
6th rack empty |
Visual discrepancy |
|---|---|---|---|---|---|---|---|---|
| 28 | Projectiles Propellants |
13 (+15) 27 (+1) |
1 (+27) 24 (+4) |
N/A 21 (+7) |
N/A 11 (+17) |
N/A 6 (+22) |
N/A 1 (+27) |
No |
Notes:
- The IS-2 No.402 uses two-piece ammunition, composed of projectiles (yellow) and propellant bags (orange). Both have separate racks.
- Shells are modeled individually and disappear after having been shot or loaded.
- Centre floor rack emptied: 11 (+17) shells.
Machine guns
| 7.62 mm DT | ||||
|---|---|---|---|---|
| Mount | Capacity (Belt) | Fire rate | Vertical | Horizontal |
| Coaxial | 1,890 (63) | 600 | N/A | N/A |
Usage in battles
As the tank's design purpose suggests, the IS-2 is a heavy tank built with an emphasis on engaging hostile armoured vehicles as well as a breakthrough tank. The tanks heavy armour retains the similar properties of its IS-1 and previous KV line of battle-tanks but introduces some sloped armour on the front plate and turret mantlet. Differing from its IS-1 predecessor, the IS-2 comes equipped with the large 122 mm D-25T gun and a slightly more armoured but elongated turret. Although powerful, the D-25T main cannon of the IS-2 is encumbered by a slow reload time, mimicking that of the Soviet Tank-Destroyer line of vehicles at around the mid-20 seconds. Nevertheless, this vehicle with its powerful cannon and shell will commonly destroy almost all but the most heavily armoured vehicles with a single shot, behaving similarly to the older KV-2 predecessor, albeit with half the time required for reloading. At the tank's BR, the armour of the IS-2 no longer stands up to much punishment with the advent of opponents with more powerful weaponry, and caution should be taken. Close-quarters combat and brawling against more than one target at a time is highly discouraged due to the long reload speed unless the tank operator is trapped and situation requires this as an absolute necessity. Alternatively, if escorted and accompanied by other friendly tanks, the IS-2 can be supplemented and perform better in dire close-quarters situations.
If you are to apply bushes onto the IS-2, consider putting most of them on upper frontal hull and the curved sides next to it. This is because that quite some opponents will automatically target the curved armour, knowing that area is a common weak spot when the IS is angling. By covering up the hull front and the curves, the IS's frontal hull will now look flatter, somewhat resembling the hull of an IS-2 1944. This will cause some confusion and delay the enemy's reaction & aiming time, as they now cannot directly see where your curved armour is, gifting you a few precious seconds before they open fire. For any leftover bushes, the turret front and the lower front plate are also good spots to put them on.
General Gameplay
Arcade Battles
In Arcade, the IS-2 proves to be quite mobile when fully upgraded. This can be used effectively to get into superior positions to engage enemies early in the match when they haven't yet set-up camp in well-covered positions and/or presented their strongest armour. Thus, it's easy to gain a kill at the start of the match, if you are comfortable with the 122 mm gun.
Close quarters combat proves even more deadly in Arcade Battles because all opposing vehicles will be able to easily overrun a single IS-2, especially after it has shot and is now waiting through its long reload (> the 20s). Hence why it's advised to use your improved reverse speed to quickly disengage after shooting and retreating towards your teammates, who will likely be able to return fire. If the map forces you to fight in close quarters, attempt to get into a position where your teammates can cover your sides, while you can face forwards and clear the road. If the map allows, you can try taking 5 rounds of ammunition and camp at a capture point (usually one that's given to your team) to snipe all enemies that enter your line of sight while reducing your chances of blowing up at the first incoming shot.
In rare cases, it's possible to rush with the IS-2 and surprise lighter vehicles at a contested capture point in the early stages of a game. This strategy relies on the capture point being unpopular and being lucky to face only one enemy vehicle at a time. Some light tanks are unable to penetrate the IS-2 frontally, especially if they are from a much lower rank (e.g. BT-7, the Puma or the R3), so that's an added benefit of being a decently mobile heavy tank. If successful, the IS-2 can then flank to other objectives or advance to the enemy spawn to destroy another enemy or two. You shouldn't expect a lot of easy targets with this strategy, because it exposes your tank to potentially a lot of enemy fire.
Realistic Battles
In Realistic, the IS-2 begins to feel like a heavy tank. Its mobility is heavily reduced and its speed is outmatched by practically everything, mostly due to poor acceleration off-roads. However, this should be used as an advantage to gauge where the enemies are set-up, by looking where your teammates are killed from. You can then decide to return fire, although sometimes opponents don't show themselves until later in the match, in which case you should stay passive and try to remain behind your team's front lines.
Due to generally increased map size in Realistic, you will have to get comfortable with the bullet drop. There is an added benefit to that because the following IS-3 and IS-4M mount the same gun (as does T-44-122 and KV-122, if you have them), and T-10M has similar bullet drop. Now, the IS-2 performs decently well at longer ranges, but it will cost you a lot if you miss or don't penetrate, because the reload is so long. Often, you will need to rely on the rangefinder, the teammates or map knowledge to gauge how high you need to shoot, so it might be a great idea to take out another vehicle first (such as the T-44 or T-34-85) remember the distance and then take the IS-2 out. However, on larger maps, it is generally a better idea to take out other vehicles.
A more reliable strategy for the IS-2 is to camp nearby an objective and pick off any enemies who pose a threat. Just make sure to find a flat spot with cover, because your poor gun depression and long reload will be your death in hilly or open areas. It's also a good idea to target heavy enemies, because they are easier to hit, and also will likely pose a larger threat to your general team (e.g. the Ferdinand, the Ho-Ri or the Tiger II (H)).
General Tactics
Although classified as a heavy tank and an upgraded improved design over the KV predecessor, the IS-2's armour will no longer hold up to its more common and heavier opponents of its battle rating. Compared with other vehicles such as the new German Tiger II, American heavy T-series tanks; most of which can easily deflect even the most powerful shots of the IS-2 unless targeted specifically and known weak spots. Because of this, it is recommended to always travel and fight in groups of two or more vehicles. The slow and difficult in the manoeuvring of the vehicle (especially in confined spaces) will more than once place the IS-2 in significant danger. It is recommended to field the IS-2 into a fire-support role, peeking over the shoulder of friendly, more heavier vehicles and firing a shot against the opposition in tandem.
Another significant note of this vehicle is the IS-2's considerably fast reverse rate, the highest of its rank and battle rating for the nation's faction inherited from its IS-1 predecessor, topping at 17 km/h. During situations where engagement is expected, an unorthodox strategy can be utilized where the operator of the IS-2 tank repositions the vehicle 90 degrees and drive in reverse with the rear-facing towards the enemy. By driving in reverse this way, the engine blocks make a crude yet somewhat effective shield to protect the more delicate crew members. As the fuel tanks are mostly stored at the front on the left and right side of the driver's station, the risk of fire and fuel-tank explosion is reduced significantly (but not completely eliminated) and thus, the tank is able to resist even the most powerful of shots. Be aware that more experienced players may attempt to instead fire at the more exposed turret of the IS tank and instantly knocking out the crew with a common APHE penetrating shell in this way.
Despite the overall below-average protection for a heavy tank, the IS-2 can actually act as a shell magnet without being penetrated, and take shots to protect weaker teammates.. The IS-2 can take advantage of the tactic of "side-scraping" thanks to its sturdily thick side armour and fast reverse speed. First find some solid cover and hide the IS-2's frontal area behind it, then point the rear hull outside a bit so you can reverse and peek the back half of the hull out, at an angle that is overall parallel from the direction of incoming shots. Now what the enemy should see is a part of your hull side forming a very small angle of incidence. Due to the fact that not a lot tankers know this tactic, they will usually take the bait and fire at your side armour. If they do not take the bait, wiggle around a bit to pretend that you are distracted. The shell will either hit the side armour and ricochet away, or damage the track but not break it. This way, you can safely lure the enemy to fire first, then poke out and finish them with your powerful cannon. However, do note that in an uptier, there will be vehicles equipped with HEAT/HEATFS shells (e.g. ST-A1, M56, T114, Type 60) that can easily penetrate your side regardless of how hard you angle. So if you know they are present, do not use this tactic. Your engine/fuel tank will get damaged. Rather, wait until they fire at a teammate or are distracted. Another factor to take into account is the curved armour connecting the front and the side, it will increase the incidence angle of enemy shells, resulting in you being penetrated, so do not expose too much of the side.
In regards to shells, the D-25T cannon is also equipped with a powerful high-explosive (HE) shell. Firing a HE shell with precise aim directly underneath the chassis of enemy vehicles where the armour, like on the top of the vehicle if thin, can cripple or instantly destroy said enemy vehicles with the overpressure damage mechanics. In rare instances, the HE shell of the D-25T is so powerful to the point two or more medium or heavy tanks close to each other can be destroyed with a single exploding HE Shell. Alternatively, the powerful armour-piercing capability of the D-25T cannon's APHE rounds has also been documented to pierce two or three light-armoured targets without exploding.
Specific enemies worth noting
German Tiger IIs, Panthers will be common encounters at the IS-2's BR, combined with the more threatening and heavier American T-Series tanks such as the T34 and M26. At this BR, more powerful British Tanks such as the Centurions will be encountered. As previously specified above, The IS-2 no longer retains its armour advantage at this BR unlike its IS-1 predecessor and thus, it is important to identify and fire on targets first before they do. In this rank, Tanks such as the Panthers, Tiger II and similar vehicles will be present with sloped armour, strong enough to even withstand the might of the 122mm Shells of the D-25T gun. A common design flaw, however, is the turret of said vehicles, commonly being mostly blunt and flat and easy to penetrate. A patient and well placed aim and shot against these surfaces will destroy the target with no more than a single shot. Be aware that most opposition vehicles at this rank have the lower calibre and puncturing power than the D-25T of the IS-2, but come with an improved reload speed, a reload speed commonly faster than the IS-2. Japanese line of tanks at the same rank as the IS-2 is of little concern; their poor armour and armaments at the same rank will render them relatively easy to destroy.

An important note when engaging tanks, especially Tiger I's, is that, with the implementation of volumetric shells, you can no longer expect your shells to pierce through small openings or right past an obstacle. The large 122 mm calibre of your shells will result in it catching on an armour plate's edge very often, losing all of its penetration. For example, a Tiger I has some edges that can absorb your shell unexpectedly, despite having flat armour. Thus you must always make sure that where you are aiming at is absolutely free of obstruction, or it may result in a non-penetration or a ricochet. This can be seen in the diagram to the right.
Another specific enemy vehicle worth noting is the German Ferdinand tank destroyer. Most new players in Rank IV battles fielding the IS-2 may commonly mistake the front armour of the Ferdinand as appearing as thin as similar-looking tank destroyers such the Nashorn and are commonly caught unaware that almost the entire front of the Ferdinand consists entirely of heavy 100 mm and 200 mm plate armour, the largest being the fighting compartment located behind the driving compartment. Due to it being such a large target, many players including both IS-2 users and other vehicle type users alike will be tempted into firing at that portion expecting easy wins, only for almost all shots to be absorbed, even the powerful shells of the D-25T. It is recommended to avoid engaging the Ferdinand or ignore it entirely. If the opportunity arises, Ferdinand's weaker side and rear armour should be targeted (80 mm). In Realistic Battles, the Jagdtiger is a similarly tough nut to crack. The effective thickness of its front varies between 220 and 250 mm and thus can resist any shell the IS-2 fires. So, it is not recommended to engage it frontally, with the only dangerous option being disabling its gun barrel. Shoot at its side or rear, the BR-471B shell is recommended as its great overmatching ability allows you to fire with some angle and still penetrate, maximising the chance of success. Although it has a spacious interior, its crew will still be knocked out by a single 122 mm APHEBC.
When firing at extremely light-armoured targets such as the M19, aim for where the crew is located as the fuze on the 122 mm rounds tend to not set off when going through thin plates of armour, so if it hits an empty area the over-penetrations will cause no damage. These vehicles may then return fire and immobilise/disarm the IS-2, which is dangerous. However, an over-penetration through a crew compartment can usually knock out 1 to 3 crew members.
Against the IS-2 No.402
Light tank/SPAA: in a light tank, the best weak spot of the IS-2 is probably the commander's cupola. It is not angled and has a thickness of 90 mm. Common light tanks such as the M24 or Sd.Kfz.234/2 can easily penetrate, and in the M24's case, the explosives will knock out everyone in the turret, destroying the IS-2. The hull side armour, while also being 90 mm thick, may be harder to penetrate because the shell has a chance to catch on the track/wheels, thus losing its penetration. An SPAA can quickly break the IS-2's large and wide tracks to immobilise it, or go for the gun barrel to disarm it. Then, either call an artillery strike on it or call for teammates. Light tanks and SPAA are generally quite mobile, so if the IS-2 notices you before you can take your shot, poke out a little from time to time, the IS-2's slow aiming will give them a hard time tracking your agile vehicle and they will be confused on whether you will poke out.
Medium tank: poke out only when the IS-2 is reloading, repairing its weapon or is distracted (although there is a small possibility that its shell will bounce). Common cannons on medium tanks (e.g. Sherman Firefly, Panther A, M4A3 (76) W, etc) will easily penetrate the flat section of the curved gun mantlet/turret cheeks, but you must aim carefully. When the IS-2 is facing you, do not shoot at the outmost section of the turret as the shell will certainly bounce. Also avoid the crack between the gun mantlet and the turret, it tends to absorb lots of shells. The hull is much easier to penetrate, if the IS-2 is not angling target the driver's port or the lower front plate, an explosive shell will knock out all the crew. When it is angling, fire at the curved armour between the driver's port and the side. If you are equipped with a stabiliser, use it to your advantage by scraping back and forth and expose a small part of your turret from the cover, the IS-2's slow aiming drive makes it awkward to aim at moving targets up close.
Heavy tank/tank destroyer: the IS-2's armour becomes obsolete against an equally powerful heavy tank or tank destroyer. Vehicles such as Tiger II (H), M4A3E2 (76) W, Jagdpanther, etc will usually easily penetrate the IS-2 regardless of distance and angle. Again, target its hull where possible as the turret has a chance to absorb your shells. Note that the IS-2 can also penetrate your armour with relative ease, so do not poke out to shoot if an IS-2 is aiming at where you will come out. This generally indicates that it is loaded and knows your presence. However if your armour simply outmatches the IS-2's penetration (e.g. Ho-Ri, Ferdinand, Jagdtiger, etc) you can confidentally take its punch and return fire.
Pros and cons
Pros:
- Extremely powerful 122 mm gun. Can easily destroy any tank with a single shot
- The top 122 mm APHE shell has good overmatching mechanics. Can go through the upper plate of the Panther past 500 m fairly easily
- The gunner has a decent set of optics with 4x magnification
- Upper plate is as tough as the Tiger II's upper plate. Basically immune to anything that isn't HEAT or APDS
- Has good mobility and a high top speed for a heavy
- Very fast reverse speed at 15 km/h allows you to retreat from danger quickly
- Is a good flanker and ambushing tank thanks to its good top speed, armour, and massive gun
- Repositioning of fuel tanks reduces chances of fires
- Players proficient with the KV-2 and Soviet heavy tank destroyers will feel comfortable with the IS-2
Cons:
- Terrible reload speed. Getting into brawls with contemporary heavies like the Tiger II is ill-advised
- Has some serious weak spots on the turret and the hull
- Horrible gun depression. Hill fighting is nearly impossible without exposing the entire tank
- Has a massive, flat, and weakly armoured lower plate. All 5.0 and up tanks can slice right through
- Very small crew compartment. Any APHE shell that pens it will likely knock out everyone in the tank
- Can't effectively side scrape due to its hull cheeks
- Poor manoeuvrability, very bad hull traverse speed, often needing forward acceleration before turning
- Slow turret traverse speed makes it vulnerable to surprise flankers
History
Little information about the No.402 IS-2 can be found. It is believed that this IS-2 tank belongs to the 1st Division of Volunteer Tank Division, and participated in the Ma Liangshan defensive counterattack in November 1951. In the battle, the No.402 IS-2 won awards for continuously destroying many (believed to be around 6) United Nation fortifications. The crew members were awarded the collective second-class merit. It is speculated that it may be the 1st Battalion and 2nd Company of the 3rd Regiment of Tanks of the Division ("Tanshan Model Company for Fortification Fighting"), which was assigned to the 191st Division of the 64th Army to participate in the counterattack.
Media
- Skins
See also
Links to the articles on the War Thunder Wiki that you think will be useful for the reader, for example:
- reference to the series of the vehicles;
- links to approximate analogues of other nations and research trees.
External links
Paste links to sources and external resources, such as:
- topic on the official game forum;
- other literature.
| Chelyabinsk Tractor Plant (Челябинский тракторный завод) | |
|---|---|
| IFVs | |
| BMP-1 | BMP-1 |
| Heavy Tanks | |
| KV | KV-85 · KV-122 |
| IS-1/2 | IS-1 · IS-2 · IS-2 (1944) · IS-2 "Revenge" · IS-2 No.321 |
| T-10 | T-10A · T-10M |
| Other IS Tanks | IS-3 · IS-4M |
| Tank Destroyers | |
| KV Derivatives | SU-152 |
| IS Derivatives | ISU-152 · ISU-122 · ISU-122S · Object 268 |
| Export | |
| IS-2 | ␗IS-2 · IS-2 No.402 · ␗IS-2 (1944) |
| ISU | ␗ISU-152 · ␗ISU-122 |
| IFVs | SPz BMP-1 |
| See Also | Leningrad Kirov Plant |
| China heavy tanks | |
|---|---|
| USSR | ␗IS-2 · IS-2 No.402 · ␗IS-2 (1944) |
| China premium ground vehicles | |
|---|---|
| Light tanks | T-26 No.531 · ␗M3A3 (1st PTG) · ␗M41A3 · M64 · WMA301 |
| Medium tanks | ␗M4A4 (1st PTG) · T-34-85 No.215 · Т-62 №545 · ZTZ59A · Type 69-IIa · T-69 II G · ZTZ96A (P) |
| Heavy tanks | IS-2 No.402 |
