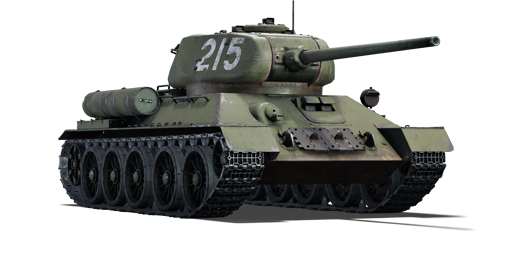
T-34-85 No.215
| This page is about the premium Chinese medium tank T-34-85 No.215. For other versions, see T-34 (Family). |

Contents
Description
The T-34-85 No.215 is a special T-34-85 (S-53) medium tank of historical significance during the Chinese People's Volunteer Army's participation in the Korean War. The T-34-85 No.215 took part in the Battle of Pork Chop Hill, also known as the Battle of Seokhyeon-dong Northern Hill (石岘洞北山战斗) in July 1953, against the 1st Brigade, 7th Infantry Division. The T-34-85 No.215 accidentally drove into muddy terrain while spotting a U.S. tank column at 1,400 metres while travelling at night. The crew immediately camouflaged the tank to avoid aerial reconnaissance by U.S. planes and successfully ambushed 3 U.S. tanks the next day, destroying 2 and seriously damaging 1. During the retreat, it exchanged fire with a few pursuing tanks, destroying two additional U.S. tanks. Throughout the Korean War, the tank crew of the T-34-85 No.215 destroyed 5 tanks, 9 mortars, 1 military vehicle, 26 enemy bunkers, 1 tunnel, and 1 command post. It also successfully provided infantry support in 7 combat operations. The Chinese Army awarded the prestigious title "People's Hero Tank (人民英雄坦克)" to the T-34-85 No.215 tank in appreciation of its significant military achievements, and all crew members were given the first-class merit award. The decommissioned T-34-85 No.215 tank is now on exhibit in the Military Museum of the Chinese People's Revolution (中国人民革命军事博物馆) for public viewing.
Introduced in Update 1.95 "Northern Wind" during the 2020 Lunar New Year Sale, this unique historical premium vehicle, which is identical in performance to the T-34-85 (S-53), has significantly increased firepower over the previous T-34 (1943), thanks to the 85 mm Zavod imeni Stalina (ZiS) S-53 anti-tank gun. The sloped armour provides adequate protection, but players should not rely on it to exchange fire with enemy tanks because most adversaries at this rank will easily penetrate this tank. It lacks a turret roof-mounted heavy machine gun as compared to American tanks. However, this is included in the T-34-85 Gai (improved) version of the T-34-85 (S-53).
General info
Survivability and armour
The armour layout of the T-34-85 No.215 is virtually identical to the T-34-85. The hull armour, while well angled, is very thin for its rank and can be penetrated by nearly any tank cannon. Creative use of angling can still lead to the occasional bounce. The 90 mm thick turret is also thin for its rank, but the good sloping on the sides can also lead to bounces with some luck.
The T-34-85 has very poor survivability due to the fact that all 5 crew members are packed close to each other. A hull penetration will likely knock out all of them. However, inexperienced players that face this tank will often shoot the lower hull part of the driver hatch, which is infamous for being surprisingly resilient.
Any enemy vehicle around the T-34-85's BR bracket can destroy it if it can get a solid shot on the hull armour. Beware when exposing hull when coming out to take a shot on an enemy, someone is bound to be watching for the T-34-85 and they won't be afraid to plant a shell into the 45 mm hull armour.
Armour type:
- Rolled homogeneous armour (Hull, Turret roof)
- Cast homogeneous armour (Turret, Cupola, Driver's hatch, Machine gun port)
| Armour | Front (Slope angle) | Sides | Rear | Roof |
|---|---|---|---|---|
| Hull | 45 mm (60°) Front glacis 45 mm (60°) Lower glacis 75 mm (60°) Driver's hatch 65 mm (30°) Machine gun port |
45 mm (39-40°) Top 45 mm Bottom |
45 mm (47-49°) Top 45 mm (46°) Bottom |
20 mm |
| Turret | 90 mm (1-69°) Turret front 90 + 40 mm (8-61°) Gun mantlet |
75 mm (19-22°) Front 2/3rd 52 mm (13-19°) Rear 1/3rd |
52 mm (9°) | 20 mm |
| Cupola | 90 mm | 90 mm | 90 mm | 20 mm |
Notes:
- The gun mantlet has 90 mm in front with additional small and thin 40 mm plates on the sides of the gun.
- Suspensions wheels are 20 mm thick and tracks are 18 mm thick
Mobility
The T-34-85 No.215 has excellent mobility for a medium tank, as expected of a T-34. It can reach high speeds both on and off-road thanks to its wide tracks. The reverse speed is not exactly great, but it is significantly better than those of comparable Shermans, Panthers, and early T-34s (76 mm, 57 mm variants).
| Game Mode | Max Speed (km/h) | Weight (tons) | Engine power (horsepower) | Power-to-weight ratio (hp/ton) | ||||
|---|---|---|---|---|---|---|---|---|
| Forward | Reverse | Stock | AoA | Stock | Upgraded | Stock | Upgraded | |
| Arcade | 62 | 10 | 32 | 0.2 | 775 | 954 | 24.22 | 29.63 |
| Realistic | 55 | 9 | 442 | 500 | 13.81 | 15.53 | ||
Modifications and economy
| Mobility | Protection | Firepower | ||||||||||||||||||||
|---|---|---|---|---|---|---|---|---|---|---|---|---|---|---|---|---|---|---|---|---|---|---|
|
|
|
Armaments
Main armament
The T-34-85 No.215 is equipped with the fantastic ZiS-S-53 cannon, with penetration of about 145 mm on the close range with the stock BR365K round. This might not be enough to fight Tiger IIs frontally, but it works perfectly with other tanks, which are less armoured or you can engage them from the side. There are a variety of shells for the player to choose from, further enhancing the cannon's firepower. The reload time is not the fastest, but given its excellent knock-out ability, the T-34 can finish off one enemy with a single shell thus not needing to worry too much about the reload. Turret rotates fairly fast, at around 20°/s on average, allowing the T-34 to quickly switch targets without traversing the hull too much.
The downsides are, the shell drop over long distances is quite significant, combined with the poor gunsight magnification (only 3.5x) it is hard to aim and hit distant targets, so it is best to engage targets at medium to close range (0-800 m). The gun depression is like on many other soviet (based) vehicles which is quite poor, with only 5° there are no hull-down manoeuvres possible. Also, without any stabiliser, the gun wobbles a lot when the tank is on the move. When the T-34 comes to a sudden stop, it still takes around 2 seconds for the gun to become completely stable which is a disadvantage against stabilised WW2 tanks such as any M4 Sherman.
| 85 mm ZIS-S-53 | Turret rotation speed (°/s) | Reloading rate (seconds) | |||||||||||
|---|---|---|---|---|---|---|---|---|---|---|---|---|---|
| Mode | Capacity | Vertical | Horizontal | Stabilizer | Stock | Upgraded | Full | Expert | Aced | Stock | Full | Expert | Aced |
| Arcade | 60 | -5°/+22° | ±180° | N/A | 23.8 | 32.9 | 40.0 | 44.2 | 47.1 | 9.6 | 8.5 | 7.8 | 7.4 |
| Realistic | 14.9 | 17.5 | 21.3 | 23.5 | 25.0 | ||||||||
Ammunition
The stock round is the BR-365K, it has a very good post-penetration damage with its explosive filler. The second round, the BR-365A, has an improved penetration against sloped armour. This makes it more effective than the BR-365K when shooting at angling M4A3E2's and Panthers. It also has a bigger explosive filler, which increases the post-penetration effect dramatically. An APCR shot is also available with a higher penetration, but keep in mind that it does not perform well against sloped armour and has very poor post-penetration damage. The O-365K HE shell performs pretty well against trucks & half-tracks.
| Penetration statistics | |||||||
|---|---|---|---|---|---|---|---|
| Ammunition | Type of warhead |
Penetration @ 0° Angle of Attack (mm) | |||||
| 10 m | 100 m | 500 m | 1,000 m | 1,500 m | 2,000 m | ||
| BR-365K | APHE | 148 | 143 | 126 | 106 | 90 | 77 |
| BR-365A | APHEBC | 135 | 133 | 124 | 114 | 104 | 95 |
| BR-365P | APCR | 195 | 187 | 154 | 122 | 96 | 76 |
| O-365K | HE | 19 | 18 | 17 | 16 | 15 | 14 |
| Shell details | ||||||||||||
|---|---|---|---|---|---|---|---|---|---|---|---|---|
| Ammunition | Type of warhead |
Velocity (m/s) |
Projectile mass (kg) |
Fuse delay (m) |
Fuse sensitivity (mm) |
Explosive mass (TNT equivalent) (g) |
Ricochet | |||||
| 0% | 50% | 100% | ||||||||||
| BR-365K | APHE | 792 | 9.2 | 1.2 | 14 | 77 | 47° | 60° | 65° | |||
| BR-365A | APHEBC | 792 | 9.2 | 1.2 | 14 | 164 | 48° | 63° | 71° | |||
| BR-365P | APCR | 1,050 | 4.99 | - | - | - | 66° | 70° | 72° | |||
| O-365K | HE | 785 | 9.54 | 0.2 | 0.1 | 741 | 79° | 80° | 81° | |||
Ammo racks

| Full ammo |
1st rack empty |
2nd rack empty |
3rd rack empty |
4th rack empty |
5th rack empty |
6th rack empty |
|---|---|---|---|---|---|---|
| 60 | 57 (+3) | 55 (+5) | 54 (+6) | 48 (+12) | 43 (+17) | 37 (+23) |
| 7th rack empty |
8th rack empty |
9th rack empty |
10th rack empty |
11th rack empty |
Visual discrepancy |
|
| 31 (+29) | 25 (+35) | 19 (+41) | 17 (+43) | 1 (+59) | No |
Notes:
- Shells are modeled individually and disappear after having been shot or loaded.
- Rack 11 is a first stage ammo rack. It totals 16 shells and gets filled first when loading up the tank.
- This rack is also emptied early: the rack depletion order at full capacity is: 11 - 1 - 2 - etc. until 10.
- If you pack 17 (+43) shells, it will keep the hull empty of ammo.
- Simply not firing when the gun is loaded will move ammo from racks 1 to 10 into rack 11. Firing will interrupt the restocking of the ready racks.
Machine guns
The 7.62 mm DT machine gun is quite ineffective in most scenarios due to its poor penetration. It can only disable completely exposed crews on vehicles like a M16. When it comes to lightly armoured tanks (e.g. M18, Sd.Kfz.234/2) this MG will struggle to pierce their thin armour plates.
| 7.62 mm DT | ||||
|---|---|---|---|---|
| Mount | Capacity (Belt) | Fire rate | Vertical | Horizontal |
| Coaxial | 1,890 (63) | 600 | N/A | N/A |
Usage in battles
The T-34-85's best playstyle is that of a flanker. Due to its high mobility, fast turret traverse, and a capable cannon with excellent post-penetration damage, the T-34-85 fills this role perfectly. Since the turret is so tall, it makes combat behind low obstacles difficult, as the turret segment above the main gun is visible. The T-34-85's other playstyle can be as a support tank, by keeping up with more protected vehicles like the IS-2 and supplement firepower while their heavy armament reloads.
The T-34-85 would not make a very suitable short-range brawler though even with the 85 mm gun as the gun has a rather tedious reload for the specific playstyle and the T-34-57's armour is very poor at its BR. With that, the T-34-85 would tend to be able to fire one shot at a close enemy before it gets taken out by other enemies nearby. However, it is understandable that the situation is unavoidable, so it is recommended to stay steady by firing one shot at an unsuspecting enemy at close range before retreating to reload, evading enemy shots.
While the T-34-85 No.215 is a fairly well-rounded tank, its poor armour and high speed mean that one should play it more like a light tank than a medium. The gun is very lethal but the penetration is not particularly good, so it is better to flank and go for side shots, which can instantly knock out all but the largest and most spacious opponents. During frontal engagements, Tiger Is should be shot in the flat portions of the hull (avoiding the driver's port), Panthers should be shot in the turret (in the less curved portion of the mantlet) or possibly in the lower glacis, and non-Jumbo Shermans can generally be shot anywhere. The Tiger II (P) is only vulnerable in a small portion of the turret cheeks and the Tiger II (H) is essentially frontally immune, so for these kinds of targets, circle around to get a good look at the hull sides and let the slope modifiers take care of the rest. Watch out for American tanks like the M4A3 (76) W and T25, as they have vertical stabilizers and can often shoot first if they are aware of you.
Tactics
In AB, you should play this tank like any other T-34. Push because you have a pretty well-rounded tank and will generally be able to adapt to whatever situation that develops. The AB meta generally favors more heavily armed and armoured tanks due to the presence of markers making flanking and ambushes more difficult, so play carefully and take advantage of your high mobility.
In RB, play this tank offensively yet carefully. Use your speed and keep up with your teammates, or alternatively play it like a light tank and go on long flanks. If one decides to use the T-34 as a main battle tank, it's advisable to hide the hull as well as possible which has the weakest armour. Unfortunately, most heavy tanks like the Tiger II are nearly invulnerable from the front, but many mediums and even Cold War MBTs can still be destroyed. At this rank bracket, however, its speed, turret location, and poor armour push it towards a flanking role, away from the 1940-43 main battle comfort zone. The gun is still very potent, and the ammunition often knocks out nearly the entire crew, but the increases in armour of enemy vehicles necessitate learning their weak spots. The gun is generally accurate and most shells retain their velocity even into far ranges: at 1,000 m a Tiger I can be destroyed with a frontal hit.
In SB, play this tank very cautiously because the optics aren't that good and most of the time you will face tanks from pretty far distances. Panthers generally have better optics than you so try to avoid encounters with Panthers or Tigers.
- Enemies worth noting
Panther A, Panther D, Tiger II (P) - The Panthers are one of the most common tanks around BR 5.7, and they pose a great threat with their deadly long 75 mm cannon, thick frontal armour and adequate speed. You want to avoid engaging them at long range as the T-34 has only x3.5 scope magnification, making long-range shooting super hard. Engage the Panthers within 500 m and avoid shooting their frontal hull. Their biggest weak spot is the gun mantlet, which is only 100 mm thick and has a flat part in the middle. That is where you want to aim at, the T-34's APHE has sufficient damage to instantly destroy the Panther even from its turret. The second weak spot is the sides, which more often than not instantly destroys the vehicle. Generally, APHE is enough to deal with the Panthers, and no APCR is needed. The APHE shell loves to chew through the Panther's thin side armour, even if it's angled.
For the Tiger II (P), aim at the vertical area of the frontal turret which is also 100 mm. The best tactic is still to flank it, however.
Tiger H1, Tiger E - The Tiger's weak spots are the opposite with the Panthers. Their hull is unsloped and rather thin, while the gun mantlet is weirdly shaped and can absorb quite some shells. The best engaging range remains the same, within 500 m. If the Tiger is angling, aim at the turret ring to disable the gunner and destroy the turret traverse, or aim at the hull side below the side skirt, which is only 60 mm. If it is not angling, aim between the driver's vision port and the MG for an instant kill. Avoid shooting at these two parts as they tend to bounce/absorb shells. For the Tiger E, don't shoot at the lower glacis as there will be add-on tracks installed there, making it harder to penetrate.
Ho-Ri Production - In a frontal engagement, APCR is required as the APHE shells don't have enough penetration. With APCR loaded, aim at the further sides of the fighting compartment, away from the gun, because the further from the gun, the thinner the armour gets, with the thinnest part being around 160 mm unsloped. Penetrating there will knock out its loader, gunner or commander, or detonate the ammo. Of course, the best way is still side-shooting with APHE.
Panzer IV/70(V), Jagdpanzer 38(t) - These small tank destroyers with their well-angled frontal armour can be quite a problem from a distance. With APHE, you can disable their transmission by shooting at their lower glacis. Now if you can, flank them. The 85 mm APHE does a great job at penetrating sloped, thin armour, so you don't have to get to their absolute sides. For the Pz IV/70, you can also aim at the downward part of the gun mantlet since the shell might ricochet downwards into the hull, knocking out every crew member. The Jagdpanzer 38(t) doesn't have this problem, so side-shooting is required to destroy it effectively.
M4A3E2 Jumbo - This is another common enemy. It is recommended to use the BR-365A, the one with less penetration but more explosive filler. The reason is that it is better at penetrating sloped armour, which the Jumbo has. With that shell, you can easily destroy an M4A3E2 who's not angling. If it is, aim at the hull side just above the tracks, or load APCR and shoot straight at its gun mantlet. Against a 75 mm M4A3E2, you can relax a bit as it will struggle to penetrate your armour, but your cupola is a rather large weak spot and a shot through there can knock out the T-34. Be more careful with the M4A3E2 76 W, as they can easily pierce through your armour.
Pros and cons
Pros:
- Excellent gun with adequate penetration, destructive damage and good reload rate
- 56 km/h top speed and great manoeuvrability allows it to reposition easily
- 5-man crew increases survivability
- Access to BR-365P APCR to effectively penetrate tough tanks up close (M4A3E2s, Tigers & Panthers)
- Has two types of AP for players to choose: BR-365K with higher penetration but less TNT, and BR-365A with less penetration but plenty of TNT
- Similar playstyle with the previous T-34s which is beginner-friendly
- Fast turret traverse to easily deal with targets from multiple directions
- Sloped hull and round frontal turret might bounce small calibre shells when angled
Cons:
- Armour is fairly useless in its BR
- 5 degrees gun depression is below average
- A bit below average penetration with standard ammo
- High profile, hard to hide the turret under low cover
- Awkward to place bushes on upper front hull due to the obstruction of MG port and driver's optics
- "215" numbering makes the tank slightly easier to spot
History
T-34-85 in China
The Soviet Union sold numerous T-34-85 tanks along with other vehicles to the People's Republic of China in the early 1950s since the new nation had few and often obsolete tanks (Chi-Ha Kai, LVT(A), SU-76M, etc) in its inventory after the conclusion of the Chinese Civil War. The T-34s saw limited deployments with the People's Liberation Army during the Korean War. The history of the tank afterwards has been the subject of debate; according to some sources the PRC attempted and possibly succeeded at creating a local copy of the T-34 under a "Type 58" designation, and according to others this was never a goal, no such tanks ever existed, and only efforts to maintain and repair the T-34s were carried out. Regardless the T-34s were soon superseded by the far superior Type 59, a licensed copy of the Soviet T-54A. However, stocks of T-34s remained in the PLA inventory for a long period of time before domestic tanks were available in sufficient quantity.
T-34-85 No.215
The T-34-85 No.215 is a Soviet-made T-34-85 tank used by the Chinese People's Volunteer Army during the Korean War. It has been venerated in Chinese media with an impressive service record. There were 5 crew members, including the commander Yang Aru, the gunner Xu Zhiqiang, the driver Chen Wenkui, the loader Shi Fengshan, and the radio operator Xu Shide.
In July 1953, the Chinese People's Volunteers began the summer counterattack. On a high ground in the North Mountain of Shiyandong, three US M46 tanks seriously threatened the position of the Volunteer Army. Yang Aru, the commander of the 2nd platoon as well as the commander of T-34-85 No.215, was tasked with destroying the Pattons. His superiors instructed him to destroy the 3 enemy tanks at 346 Heights before 9:30 pm on July 8, and cooperate with the infantry to fight for the North mountain of Seokhyeon-dong.
At the time, the No.215 tank and its two compatriots were all T-34-85 tanks produced by the Soviet Union in World War II. On a technical level, the T-34s were heavily outmatched by the M46 Pattons in almost all parameters, having significantly lighter armour and armament.
On the night of the 7th, Yang Aru was ordered to lead 3 tanks, including his No.215, to the front line. It was during the rainy season in Korea, and pouring rain at night filled many shell craters with stagnant water. At a distance of around 1,200 m from the enemy, the No.215 tank got stuck in a muddy crater, blocking the way of the following 2 tanks. The crew members quickly jumped out of the vehicle and dug, hoping to get the tank free, but the chunk of 32-ton metal remained motionless in the mud. Yang Aru reported the situation to the command post. After learning the situation No.215 was in, the command post still issued an order to fight even if it was stuck in mud, since the three US M46 tanks posed a great threat to the counterattack forces and must be eliminated well before the start of the counterattack. After receiving the order, Yang and his crews immediately decided that the two tanks at the back would return first, and the No.215 tank alone would undertake this difficult task. At the time it was getting dark, and the night became the best camouflage. The crew members gathered plants and twigs, and concealed the No.215 like a small hill with this vegetation and mud. The crews hid around the T-34 and carefully observed the three US tanks.
After dawn and during the next day, the US tanks did not notice the T-34-85 No.215. At dusk, as the 3 M46 tanks appeared at the 346 Heights, Yang gave off command to fire at the US tanks. The leading M46 was shot and set aflame, with the second M46 also being hit. Now the position of the No.215 was exposed, and US artillery bombardment soon began. Some sources state that the No.215 then revved its engine aloud, and gradually decreased the throttle until the engine stopped again, pretending that their tank was retreating away which allowed them to avoid getting hit by US fire. The T-34-85 No.215 insisted on fighting for 3 days and 3 nights, and eventually, using 44 shells, destroyed 2 US Army M46 tanks, 12 bunkers, 3 machine gun positions, and 3 artillery pieces. They cooperated with the infantry to successfully capture the North Mountain of Shixian-dong.
As a whole, the No.215 T-34 was credited with destroying 5 tanks (plus 1 damaged), 26 bunkers, 9 mortars, 1 command posts, and 3 armoured transport vehicles. It successfully completed seven combat missions with infantry. For this reason, the headquarters of the PVA awarded No.215 the honourable title of "People's Hero Tank", and all crew members received a collective special service.
Many of the famous tales of the early People's Republic of China, like the similar story of the "Gongchen" Chi-Ha tank, are rather fantastical and there is debate about how historically accurate the story of No.215 is as presented by official sources. There is little reason to doubt that it indeed served in Korea and the tank and crew were awarded for distinguished service. The specifics of its exploits are questionable: for example, its kill count of M46 Pattons is not corroborated by US loss reports. While it is possible that the lost Pattons were not recorded, it is also very possible that No.215's exploits were exaggerated. A reserved view of the tank could be one of a Korean War veteran with a memorable propaganda story behind it and a symbol of an intense chapter of Chinese history.
The tank is still on display in the Military Museum of the Chinese People's Revolution in Beijing, China.
Media
- Skins
- Videos
See also
- Other T-34-85 variants
External links
| China medium tanks | |
|---|---|
| ZTZ59 | Type 59 · ZTZ59A · ZTZ59D1 |
| ZTZ69 | Type 69 · Type 69-IIa · T-69 II G |
| ZTZ88/96 | ZTZ88A · ZTZ88B |
| ZTZ96 · ZTZ96A · ZTZ96A (P) | |
| ZTZ99 | ZTZ99-II · ZTZ99-III |
| ZTZ99A | ZTZ99A · WZ1001(E) LCT |
| Export series | MBT-2000 · VT4A1 |
| ROC | CM11 |
| Other | Т-34-85 Gai · Object 122MT "MC" |
| Japan | ␗Chi-Ha · ␗Chi-Ha Kai |
| USA | ␗M4A4 · ␗M4A4 (1st PTG) · ␗M4A1 (75) W · ␗M48A1 · ␗M60A3 TTS |
| USSR | ␗T-34 (1943) · ␗Т-34-85 (S-53) · T-34-85 No.215 · Т-62 №545 |
| China premium ground vehicles | |
|---|---|
| Light tanks | T-26 No.531 · ␗M3A3 (1st PTG) · ␗M41A3 · M64 · WMA301 |
| Medium tanks | ␗M4A4 (1st PTG) · T-34-85 No.215 · Т-62 №545 · ZTZ59A · Type 69-IIa · T-69 II G · ZTZ96A (P) |
| Heavy tanks | IS-2 No.402 |
