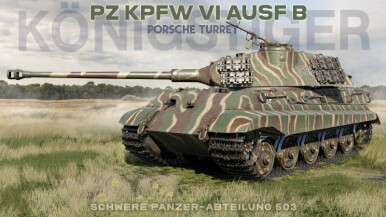
Tiger II (P)

From War Thunder Wiki
Jump to: navigation, search
VTOL | Rank 5 USA
AV-8A Harrier Pack
This page is about the German heavy tank Tiger II (P). For other variants, see Tiger II (Family).
Tiger II (P)
germ_pzkpfw_vi_ausf_b_tiger_iip.png
GarageImage Tiger II (P).jpg
ArtImage Tiger II (P).png
Tiger II (P)
AB RB SB
6.7 6.7 6.7
Class:
Research:63 000 Specs-Card-Exp.png
Purchase:200 000 Specs-Card-Lion.png
Show in game

Description

The Pz.Kpfw. VI Ausf. B (P) (Sd.Kfz. Index: Sd.Kfz. 182) is a rank IV German heavy tank with a battle rating of 6.7 (AB/RB/SB). It was introduced during the Closed Beta Test for Ground Forces before Update 1.41.

The Tiger II (P) remains one of the more potent foes a player could face in the Rank IV battles.

The Tiger II's cannon can maintain a very nice penetration even at long ranges (1,200 m-1,800 m) while American and Soviet cannons usually cannot keep such high penetration over distance, so they prefer 700 m or less engagements where their guns will most likely destroy you in the first hit, so get used to long range engagements. Being comfortable with kilometre long shots is a must in this tank. At 800 m you should still be within a safe distance (depending on what you are facing) but going under that is getting into the Allied guns' effective range.

Difference between the Tiger II (H) and the Tiger II (P) turrets
The "Henschel" turret is slightly more resistant since it has a flat but thick plate in the front and a more effective gun mantlet. The "Porsche" turret is less armoured (100 mm instead of 185 mm on the Henschel turret) , has an exposed turret ring and a shot trap that can and will deflect shells to the weaker upper plate of the chassis. Commander's cupola on the "Henschel" turret is also thicker (150 mm, opposed to 100 mm on "Porsche" turret). Other than that both tanks are identical, but for obvious reasons the "Henschel" turret is more popular than the "Porsche" turret. The initial design is often misleadingly called the "Porsche" turret due to the belief that it was designed by Porsche for their prototype; in fact it was the initial Krupp design for both prototypes.

General info

Survivability and armour

Smoke grenades
Creation of a smoke screen in front of the vehicle
Armourfront / side / back
Hull100 / 80 / 80
Turret100 / 80 / 80
Crew5 people
Visibility125 %

Armour type:

  • Rolled homogeneous armour
  • Cast homogeneous armour (Gun mantlet, Cupola, Turret front)
Armour Front (Slope angle) Sides (Slope angle) Rear (Slope angle) Roof
Hull 150 mm (50°) Front glacis
100 mm (50°) Lower glacis
80 mm (25-26°) Top
80 + 5 mm Bottom
80 mm (28°) 40 mm
Turret 100 mm (17-57°) Turret front
120 mm Gun mantlet
82 mm (28-29°) 80 mm (30°)
25 mm Turret underside
40 mm
Cupola 100 mm 100 mm 100 mm 40 mm

Notes:

  • Turret front armour is only 100 mm thick, but it is rounded, with varying angles (between 0-55°). Middle part is unangled and is the weakest part of the turret.
  • Turret has some major flaws, like a shot trap, and exposed, vulnerable turret ring (80-100 mm thick and no angle at all).
  • Commander's cupola on top of the turret is 100 mm thick, but quite well angled.
  • Lower glacis is only 100 mm thick, but it is not a weak spot (over 200 mm effective angled).
  • Machine gun port could be marked as close-range weak spot. Although most of it is still 150 mm thick, the angling is much worse. But targeting the turret is preferable.

Mobility

Speedforward / back
AB45 / 12 km/h
RB and SB42 / 12 km/h
Number of gears8 forward
4 back
Weight68.0 t
Engine power
AB1 336 hp
RB and SB700 hp
Power-to-weight ratio
AB19.6 hp/t
RB and SB10.3 hp/t
Game Mode Max Speed (km/h) Weight (tons) Engine power (horsepower) Power-to-weight ratio (hp/ton)
Forward Reverse Stock Upgraded Stock Upgraded
Arcade 45 12 68 904 1113 13.29 16.37
Realistic 42 12 619 700 9.1 10.29

Modifications and economy

Repair costBasic → Reference
AB4 195 → 5 445 Sl icon.png
RB4 311 → 5 595 Sl icon.png
SB6 106 → 7 925 Sl icon.png
Total cost of modifications52 900 Rp icon.png
90 900 Sl icon.png
Talisman cost1 700 Ge icon.png
Crew training57 000 Sl icon.png
Experts200 000 Sl icon.png
Aces800 Ge icon.png
Research Aces520 000 Rp icon.png
Reward for battleAB / RB / SB
130 / 190 / 210 % Sl icon.png
172 / 172 / 172 % Rp icon.png
Modifications
Mobility Protection Firepower
Mods new tank traks.png
Tracks
Research:
3 500 Rp icon.png
Cost:
6 000 Sl icon.png
185 Ge icon.png
Mods new tank suspension.png
Suspension
Research:
2 400 Rp icon.png
Cost:
4 100 Sl icon.png
125 Ge icon.png
Mods new tank break.png
Brake System
Research:
2 400 Rp icon.png
Cost:
4 100 Sl icon.png
125 Ge icon.png
Mods new tank filter.png
Filters
Research:
4 400 Rp icon.png
Cost:
7 600 Sl icon.png
230 Ge icon.png
Mods new tank transmission.png
Transmission
Research:
4 300 Rp icon.png
Cost:
7 400 Sl icon.png
230 Ge icon.png
Mods new tank engine.png
Engine
Research:
4 300 Rp icon.png
Cost:
7 400 Sl icon.png
230 Ge icon.png
Mods tank tool kit.png
Improved Parts
Research:
3 500 Rp icon.png
Cost:
6 000 Sl icon.png
185 Ge icon.png
Mods extinguisher.png
Improved FPE
Research:
2 400 Rp icon.png
Cost:
4 100 Sl icon.png
125 Ge icon.png
Mods tank reinforcement ger.png
Crew Replenishment
Research:
4 400 Rp icon.png
Cost:
7 600 Sl icon.png
230 Ge icon.png
Mods new tank horizontal aiming.png
Horizontal Drive
Research:
3 500 Rp icon.png
Cost:
6 000 Sl icon.png
185 Ge icon.png
Mods tank cannon.png
Adjustment of Fire
Research:
2 400 Rp icon.png
Cost:
4 100 Sl icon.png
125 Ge icon.png
Mods tank ammo.png
88mm_kwk_36_43_HEAT_ammo_pack
Research:
2 400 Rp icon.png
Cost:
4 100 Sl icon.png
125 Ge icon.png
Mods new tank vertical aiming.png
Elevation Mechanism
Research:
4 400 Rp icon.png
Cost:
7 600 Sl icon.png
230 Ge icon.png
Mods tank ammo.png
88mm_kwk_36_43_APCR_ammo_pack
Research:
4 300 Rp icon.png
Cost:
7 400 Sl icon.png
230 Ge icon.png
Mods smoke screen.png
Smoke grenade
Research:
4 300 Rp icon.png
Cost:
7 400 Sl icon.png
230 Ge icon.png

Armaments

Main armament

Ammunition70 rounds
First-order22 rounds
Reloadbasic crew → aces
9.7 → 7.5 s
Vertical guidance-8° / 15°
Main article: KwK43 (88 mm)
88 mm KwK43 Turret rotation speed (°/s) Reloading rate (seconds)
Mode Capacity Vertical Horizontal Stabilizer Stock Upgraded Full Expert Aced Stock Full Expert Aced
Arcade 70 -8°/+15° ±180° N/A 15.4 21.3 25.8 28.6 30.4 9.75 8.63 7.95 7.50
Realistic 11.3 13.3 16.1 17.9 19.0

Ammunition

Penetration statistics
Ammunition Type of
warhead
Penetration @ 0° Angle of Attack (mm)
10 m 100 m 500 m 1,000 m 1,500 m 2,000 m
PzGr 39/43 APCBC 237 234 222 207 193 180
PzGr 40/43 APCR 279 273 252 227 205 185
Hl.Gr 39 HEAT 110 110 110 110 110 110
Sprgr.43 HE 19 19 17 16 14 14
Shell details
Ammunition Type of
warhead
Velocity
(m/s)
Projectile
mass (kg)
Fuse delay
(m)
Fuse sensitivity
(mm)
Explosive mass
(TNT equivalent) (g)
Ricochet
0% 50% 100%
PzGr 39/43 APCBC 1,000 10.16 1.2 14 108.8 48° 63° 71°
PzGr 40/43 APCR 1,130 7.3 - - - 66° 70° 72°
Hl.Gr 39 HEAT 600 7.64 0 0.3 1,100 62° 69° 73°
Sprgr.43 HE 820 9.4 0.2 0.1 1,000 79° 80° 81°

Ammo racks

Full
ammo
1st
rack empty
2nd
rack empty
3rd
rack empty
4th
rack empty
5th
rack empty
6th
rack empty
7th
rack empty
8th
rack empty
Visual
discrepancy
70 65 (+5) 59 (+11) 48 (+22) 37 (+33) 30 (+40) 23 (+47) 12 (+58) (+69) No
Ammo racks of the Tiger II (P)

Notes:

  • Recommended ammo load is 23 to keep the hull empty and both ready racks full.
  • Ammo racks 7 and 8 are ready racks, and takes priority in being filled at the beginning of the battle, then fills 1 through 6 in that order.
  • Full reload speed will be realized as long as ammo exists in either ready rack. If both ready racks are empty, a penalty to reload speed will occur.
  • Simply not firing the main gun when it is loaded will load ammo from racks 1-6 into 8 then 7, as long as there is ammo in racks 1-6. Firing the main gun will interrupt the loading of the ready racks.
  • Thanks to the ready rack feature found on this tank, the first and second ammo racks found in the back of the turret will always be full of ammo, making it the prime target for enemy tankers who are looking to detonate your ammo rack. Even solid shots like APCR and APDS that commonly pierce your front turret can make their way to the rear of the turret, potentially hitting the ready rack and can cause a critical hit to become a deadly one.

Machine guns

Ammunition3 000 rounds
Belt capacity150 rounds
Reloadbasic crew → aces
10.4 → 8.0 s
Fire rate900 shots/min
Ammunition2 100 rounds
Belt capacity150 rounds
Reloadbasic crew → aces
10.4 → 8.0 s
Fire rate900 shots/min
Main article: MG34 (7.92 mm)
7.92 mm MG34
Mount Capacity (Belt) Fire rate Vertical Horizontal
Coaxial 3,000 (150) 900 N/A N/A
Pintle 2,000 (150) 900 -10°/+25° -55°/+160°

Usage in battles

General playstyle

The Tiger II is best used as a sniper (mainly due to its powerful gun); but when needed it can provide direct support for advancing units.

When used as a sniper, it is best that you find a position with a good overview of the battlefield. Keep your tank positioned directly towards the enemy and keep an eye out for any medium tanks trying to flank you (Tiger II has great frontal armour, do not be afraid to use it. However, keep in mind that the lower plate offers less protection and penetrations can easily cause fires due to the positioning of mechanical parts). It is best that you find cover behind a solid object and slightly rotate your vehicle e.g.: rotate your tank about 10-15 degrees from the enemy (your turret too). Positioning, combined with distance, can easily give you effective armour greater than 300 mm. When "sniping" it is best to wait for the enemy to expose their weak points, fire a steady, accurate shot and retreat to a safe position. Wait for your reload to be completed and slowly show your frontal plate (most of the players will engage even though the chances of penetration are low); once the enemy has fired, you can take your time and engage the tank while they reload.

Using the Tiger II to advance and to support the front line can be rather tricky. While this tank offers great firepower and superior frontal armour, you'll notice that it is hard to fight in urban areas. In situations like this, you will quickly realize that the high weight and sheer size of the tank can cause major problems. Almost any tank that is faster will easily outmanoeuvre the Tiger II and destroy it. To avoid this, it is best to stay in the back (not too far from your team), keeping your tank positioned at an angle and using "peek-a-boo" techniques. You should always look for a position that can protect you during the assault of small tanks, such as "U" shaped buildings where you can easily retreat and protect your weak points.

You have to find a tactic that suits your playstyle best; these are simple tips that should help you get started.

It is not a medium tank nor a tank destroyer:
This is a very heavy tank with an engine meant for a tank half its weight, so it moves slow and turns slow. It is not as reliable for close range combat as a medium tank and if you try brawl with it more than necessary you will find yourself quickly flanked by faster, more agile tanks and destroyed with side/rear shots. Also, soviet 122 mm guns don't have the best penetration but if that shell gets into your tank you will not survive, and under 500 m, it is going to get in.

This does not mean you should stay put in a single spot, or camp a location like a tank destroyer (which are designed to camp): you have mobility, so keep moving or you will attract a lot of attention, only to find out too late that someone took his sweet time to travel 1.5km to your position to deliver you a shell to the side.

Tactics

Know the specs

Know the gun and ammo:
Knowing what your gun and ammunition are capable of is very important; this translates into knowing what kind of ammo to use in every situation against any enemy tank.

Like most German tanks, the stock APCBC (PzGr 39/43) is a good all-around shell, effective at close and long range with good penetration and good fragmentation, it will be the one you will be using the most. For close range combat with very heavily armoured tanks you will need APCR shells (PzGr 40/43), its high penetration value at close range can be a threat even to tanks in an uptier, but remember it is a solid shell with no explosive charge, so you will need to aim carefully for crew and vital components which means you will need to know where these are located exactly.

The recommended ammo ratio is 2/3 (two thirds) of APCBC and 1/3 (one third) of APCR.

In arcade battles ranging is quite easy since the game does it for you, in realistic and simulator however you do not have this advantage. Trying to "eyeball it" after 800 m can be incredibly tricky in these game modes, but something you might not know is that your sights provide you with all the tools you need to land a shot on your first try on a target that can be as far as 2,800 m (2.8km). You just need to follow the formula: Target size in metres / mil number x 1,000 = target range

Your "target size" is the length or the width (depending on what side you are facing) of your target, the mils are displayed in your sights on the horizontal axis, you divide these 2 numbers and multiply the result by 1,000 and you will get the exact distance in metres. Then you just have to adjust your aim using the vertical axis of your sights (that displays the bullet drop) and take the shot. If your numbers were correct, you will land the shot dead on.

Know your enemy and know yourself:
This applies to all tanks in all honesty, you need to spend some time looking at the armour of any tank you might encounter and learning where possible weak spots are located and under what conditions (angle, distance) you can actually score a good hit; yes, the gun is extremely good, but don't expect miracles, aim it right and it will serve you right.

Learning your enemies' reload rates, vital components and crew locations is also very important; if you learn where their ammunition is stored, you will be creating fireworks during the whole game.

Take care of reading about your enemy's different ammo options, remember that just looking at the penetration values under the short description is not enough, since most tanks will have better options when it comes to ammunition. Learn under what conditions (angle, distance) your tank is safe from all the available ammo for these certain tanks, then take measures to protect yourself.

Positioning

Hide your noble parts:
Taking cover is very important for the Tiger II; if you happen to find a position where a piece of rubble covers your lower frontal hull plate you have just made yourself near indestructible from the front. You can also use some low profile friendly tank destroyers, however having enough clearance to shoot is important, so not all tank destroyers are suitable cover.

If you try to move ahead in the face of an enemy you will end with a dead transmission, a fire and possibly some knocked out crew members, or just destroyed.
Explore the map, find places where craters, depressions in the ground, soft hills, rubble, rocks or artificial obstacles (such as trenches) will cover you while letting you shoot over it; the Tiger II has very nice gun depression, use it to your advantage.
Remember that destructible environmental objects (like brick walls, fences, and even trees) will protect you from a single HEAT or HE shell hit, but nothing else, and you should not rely on it to cover your sides or as anything else than visual cover.
Taking cover behind large rocks, hills, buildings or even ally heavy tanks while you perform repairs or reload can be very useful.

Long range combat

Tiger II+long distance =/= immortal:
An enemy that knows what he's doing will not engage you at distance with regular armour penetrating rounds, high calibre HEAT and HE rounds will very likely end your existence with a big boom if it manages to hit you.

A KV-2 or an ISU-152 shooting a 152 mm HE shell will most likely destroy you on the first hit, the sheer size of the shell makes it extremely harmful to your tank at all distances, the vehicles capable of destroying your tank with HE rounds are however, most of the time, not very well armoured; Not armoured enough for your gun, at the very least, so you should be able to take them out at ease if you manage to shoot first. Large-calibre HEAT ammo is also unaffected by distance and if it penetrates it can cause heavy damage to your tank.

Remember a 122 mm HE round hit can also cause you heavy damage or complete destruction.

Teamplay

Don't be an easy-going loner, be a paranoid team-player:
Lone heavy tanks are dead heavy tanks, while on a game make sure to have some medium/light tank support to cover your sides and rear, you will be the one absorbing shots they cannot take and they will mop up whatever tries to come from the side (that will be, most of the time, medium or light tanks) and even if they can not take it out, they will warn you about it and you will be able to respond in time. If you can't get medium/light tank support, get yourself another heavy tank to support you, you know what's scarier than a Tiger II? Two of them.

Having support will give you peace of mind while shooting and let you concentrate on your target instead of being looking around you every 5 seconds like a paranoid, but then again, being paranoid is not a bad thing while driving this tank.

If you saw something rolling around and don't know what it is, assume the worst and act accordingly, if it happened to be an A.I T-26 you can laugh about it, but if you ignore it and it happened to be an enemy flanking wave you will regret it, since it will not only cost you your tank, it might cost you the game.

Close quarters combat

While in close range, play it smart and always angle your tank. But not your turret:
Sometimes you have to get in close to the combat zone for many reasons, one of them being Urban combat where the abundance of cover denies you of very long range shooting. If you see yourself forced to close quarters combat (that is under 700 m) you need to play smart, be mobile but take your time to wait for the enemy where they might be coming from, communicate enemy positions to your allies and have them communicate any enemy contacts back so you can set up ambushes and flanking manoeuvres.

While in urban combat, long straight roads are a bane to the Tiger's health, look both sides before crossing and remember that your tank is capable of being the one delivering a penetrating blow, this allow for some long range shooting at certain locations. You might also find yourself suddenly in front of an enemy tank while turning around a corner, in this case a Tiger I would angle itself to maximize its effective armour thickness since it has flat armour, the Tiger II has the heavy armour of a Tiger I and the sloped armour of a Panther, so angling is usually unnecessary, but at this close range you will be easily destroyed from the front so you want to angle a bit so you have an increase in your effective armour thickness and this might save you from a shot in the lower frontal hull plate.

Do not angle your turret, your turret is not specially strong from the front, in fact the front of the turret is an all times favorite target for everyone and you'll get shot there a lot but it is far better to face the enemy directly since the plates on the side of the turret are very thin.

Being a fast and accurate shooter also helps while in close range, at this rank anything hitting you from under 500 m will most likely destroy you, but you will also be able to penetrate anything so make sure to be the first one to shoot and make sure it lands where it hurts.

The stock Tiger II guide

Driving a recently unlocked tank is always difficult; the gun accuracy is terrible and the inability to repair in combat is extremely frustrating... but nothing is worse than the feeling impotence when watching your tank burn away even after defeating the enemy that caused the fire. In general the vehicle will underperform when stock, so don't say "I hate it" before you unlock all the modifications.

Only true effort can unlock the necessary modifications to remedy this or by utilising golden eagles. But let's assume you have more important things to buy with your golden eagles.

Remember three very important points:

  1. You can not repair anything else than your tracks.
  2. Once you catch a fire, it is game over.
  3. All your research points should be prioritized into the Parts modifications. This modifications is number one priority.

Before entering the game make sure that you are researching parts and not Tracks or anything else, the ability to repair in combat is essential and will make your life far easier. But hey, if you don't have that modification yet, here are a few tips:

  1. Stay in or close by the capture circles.
    Did you know that you can repair and replenish your ammo storage at the capture circles? No? Well, now you know it. Use this knowledge to your advantage.
    If you get your gunshot, you can repair without the Parts modification by stopping your tank inside the capture zone. If you get your transmission or engine shot, and somehow you don't catch fire and happen to be near a capture zone, you can ask one of your allies to tow you to the capture zone. Remember that you must press the acceleration key (default: W) when someone is towing you, you won't move but it will unlock your brakes making you easy to move.
  2. Don't catch fire.
    Don't, just don't. If you do it is game over, make sure to make as much damage as possible if you happen to catch fire.
  3. Sniping will depend largely on luck.
    With a stock tank your accuracy will be terrible, so you will be forced to close quarters most of the time. Unlocking the modules that improve your accuracy will allow you to achieve 2,000 m long shots at ease so they should be your number 3 priority after Parts and FPE.
  4. Play smart.
    If you use your tank in a smart way, take precautions and take advantage of its capabilities while keeping its limits in mind, you should not need to repair during a game at all
  5. Be helpful and merciful to your allies
    Saw someone flip their tank? It reminds you of a turtle upside down struggling to set itself right, doesn't it? Funny, huh? Did you know that in nature, If a turtle flips and cannot right itself it dies slowly in desperation, an agony that can take several days? Not so funny anymore, huh?
    Laugh out load, if you want when you see it, yes it is funny, but don't abandon the poor turtle to its fate, if you happen to be nearby, by all means please help the person in need for a friendly tow. The lesson here is: if you want help, be helpful.
    If you want people to flip you over when you are upside down or pull you out of a trench, or pull your transmission-less self to a capture point so you can repair, do the same for others.
Performance in a 0.0 to 10.0 scale:
  • 3.0/10 Rusher: Trying to get to the capture point before a T-44 or a Panther? Keep dreaming. This is a slow slumbering beast that will struggle to achieve 40 km/h even on a flat road, struggle to achieve 30 km/h on flat cross country, struggle to achieve 20 km/h on rough cross country and struggle to achieve 8km/h up a steep hill (that is, if you can climb it at all). Its engine was meant for a tank half its weight and size, so expect a slow tank.
  • 4.5/10 Brawler: Its heavyweight, limited acceleration and high profile make it unsuitable for highly mobile close quarter battles, if the tank is on its own it will get easily flanked and destroyed by faster medium/light tanks better suited for these battles and most Allied tanks prefer close quarters while engaging the Tiger II, so it quickly becomes a turkey hunt. However, its great gun and heavy frontal armour add to its survivability and if the operator has medium tank support it can become a foothold for the team.
  • 6.0/10 Flanker: Again, its high profile and low acceleration don't make it the best tank to flank and a medium tank is better suited for this, but it has a fairly good top speed (even if it takes a long time and a flat road to achieve it), it's comparatively fast for a heavy tank, its heavy armour gives it extra survivability in case of a counter attack and if it manages to position itself on the enemy's flank, it can quickly destroy them.
  • 7.4/10 Adamant: Its heavy frontal armour will often serve as a shield to your lighter allies, you will be capable of taking heavy hits and shrug off impacts that most medium tanks cannot take, it has some flaws and weak spots in the frontal armour that the enemy will take advantage of, but with some angling and planning this can be mitigated. Its side armour is, however, very weak.
  • 7.6/10 Sniper: Distance is this tank's friend, its gun has a very long effective range and its armour becomes impervious to most enemy weapons at long ranges, but not all of them and it is not by any means a tank destroyer which will have the upper hand over the Tiger II at very long ranges.
  • 9.0/10 Ambusher: Be it sitting still at the end of a street or waiting in the river while the enemy approaches the bridge, this tank will shoot 3 times or more before the enemy even realize what hit them, but you need to be accurate to be deathly and having support and/or a place to fall back to or a hull-down position is essential for an ambush.

Specific enemies worth noting

US Army vehicles

The Tigers' common enemies are going to be the M26 Pershing, an agile american medium tank with a 90 mm gun that can pierce some holes in your frontal armour from a medium range and can get in your flank in no time, but however has relatively low armour; the T32, a heavier version of the Pershing with an impenetrable mantlet and night invulnerable upper glacis, and a far nastier version of that 90 mm gun; the premium T28, american tank destroyer with incredibly strong frontal armour and a gun far superior to the Tiger II's (shoot the cupolas), the premium M26E1 and the premium M46 "Tiger" American tanks which have very similar guns to the Tiger II.

A further nuisance is the M41A1 Bulldog. While it will mostly only fire sub-calibre shells, these are a danger up to 1,000 m to the frontal turret armour. Experienced light tank drivers will try to flank the Tiger to get shots into the exposed hull ammo racks, the APDS shot usually setting these off with one shot, unlike the APCR the Bulldog also carries. If you are stuck in close quarters, try to get a shot off as fast as possible in order to immobilise or destroy it.

T95: Use your tank to either outflank this enemy or put a few well aimed shots into the cupolas. Watch out for its traverse speed, as the Doom-turtle is shockingly fast to turn on the spot.

T29: Very good gun, penetrations are very deadly. Surprisingly resistant despite its weak hull armour, multiple shots will be necessary if you don't have a lucky shot. From the front, if you have the patience and finesse, a shot into the turret front to the right of the gun mantlet will most likely result in an ammo rack.

Red Army vehicles

The IS-2 (1944) is a Soviet heavy tank with a large 122 mm cannon which you want to avoid. Both HE and APHE shells of the 122 mm cannon pose a threat and the turret armour can be quite trollish, often either bouncing shots or sometimes eating them up.

Succeeding the T-34-85 is the T-44, a sneakier and more armoured version of the former. It retains the excellent mobility while gaining better manoeuvrability and hull armour. Luckily it retains the 85 mm, which however is quite enough to reliably deal with the Tiger's sides. Deal with them quickly before you need to turn the turret and expose you tank's weak side to the enemy. Like with the IS-2 the best place to shoot the T-44 is the turret and lower glacis, the T-44 also inheriting the bouncy turret, so aim well!

SU-100: Fast, mobile and armed with a gun rivaling that of your own tank, this tank destroyer is not to be underestimated. It can punch holes through your turret with ease. Fortunately they have little yet well angled armour, thus SU-100 drivers will often angle their armour to create areas of high angle equivalent to auto-bounce zones. In such cases aim for the less angled portion, side or front.

All three variants of the ISU series are big boxy targets with very nasty guns, yet are sluggish and have no angled armour. Look and sneeze at them, however often enough they will wait in ambush situations, so be prepared!

T-54 is rare but will still pop up in matches. If you have the time against them at close range, shoot at the turret front. At medium distances, you will need APCR or a very lucky shot.

British vehicles

British vehicles are some of the first to get APDS (The first being the A34 Comet at BR 5.3), and are therefore very dangerous due to their high penetration. The Tiger II will commonly face tanks like the FV4202 and Charioteer Mk VII which have the 84 mm 20-pdr gun. They can punch straight through your turret cheeks at long range with great accuracy. You may also face tanks like the A39 Tortoise, which is a very difficult penetrate from the front. It has thick, sloped armour and a high penetrating 94 mm 32-pdr gun. At long range even your powerful 88 mm will struggle to take one out. Additionally, the FV4005 poses a direct threat with its 183 mm QF L4A1 canon capable of knocking you out with a hit almost anywhere due to its massive explosive mass. Luckily, most British medium tanks do not have explosive filler in their rounds. They will easily be able to take out your gunners/commander, but will struggle to incapacitate the driver from the front. This will give you the chance to use the tank's decent reverse speed to make your escape.

The worst enemy is yourself

This is true in a literal and figurative way if you keep telling yourself that you can't do it you won't do it. This tank is not easy to operate and it can be frustrating at times but it is a very good tank once you start using it properly and keep its limits and weaknesses in mind.

In the literal way, yes, your worst possible enemy is another Panzerkampfwagen Tiger Ausf. B. They know the tank from the inside out just like you, long range and even taking cover won't help you since they have that same amazing gun and they know exactly where to hit, besides, when talking about distance: if you can hurt it, it can hurt you, and if it can't hurt you, you can't hurt it.

A Tiger II vs Tiger II fight usually ends in less than 25 seconds, sometimes lasting as little as 2 seconds using 2 shells or less to achieve the destruction of one of them. Sometimes you will find yourself exchanging shells for a whole game.

The only effective way to face a Tiger II with a Tiger II is to hit first and making sure the hit has a crippling effect on its firing capability (hitting the turret from the front for example, taking out the gunner and commander and possibly hitting ammo). If you happen to get hit like this from a Tiger II your only hope is to get to cover in less than 10 seconds (weapon reload time with an expert crew, maxed out loader and commander is 10.6 seconds) and run away to a safe location to repair since these hits will most likely destroy your turret ring and cannon breech.

You will be engaging the Tiger II with your Tiger II in arcade games for the most part, but also in realistic/simulator squadron battles where it is a very popular tank. Remember to read "how to destroy a Tiger II" below, there are more tips available on this topic there.

Counter-tactics

Colour-frames showing the viability of targets on the Königstiger.

A Tiger II is a formidable enemy when it's used correctly by its operator, but it's by no means indestructible under any conditions.

The first thing you want to do is deny the Tiger II of the advantage of its gun by getting as close as possible while keeping clear of its cannon (the closer you get, the better the penetration values for you and the Tiger II) most Tiger II operators will avoid getting flanked at all costs so you might find yourself forced to face one from the front. The biggest weak spot is the lower frontal hull plate, it's sloped but only 100 mm thick and behind it lies the transmission that likes to catch fire and create nasty shrapnel when destroyed, the shrapnel will fly inwards and if your shell is large enough they will take out the entire crew. However, this shot will most likely only leave the Tiger II unable to move for a minute and make his operator quite angry (at you) while his gun remains perfectly operational and before you have a chance reload you will most likely receive a very accurate shot from an irritated Tiger II operator.

The lower frontal plate is a good place to hit but it should be a second option, with this tank, you need to disable that gun as soon as possible, the turret is a very reliable target at close range, even with HEAT ammo you should be able to deliver a shot that will disable its firing capability for long enough for you to reload and shoot again. Using your best AP round for this is recommended since the frontal turret has a fairly thick (but flat) plate, if nothing else works try APCR.

Using high calibre HE rounds is also effective. The cupola is probably the best place to hit with a HE shell, since the explosion will deflect into the thin upper plate and destroy everything inside. It is not easy to hit, but if you manage to hit the cupola it's very unlikely it survives.

The Tiger II is very vulnerable to "Circling attacks", that means, running around it in circles and harass it with side shots. Its turret can turn quite fast (especially in arcade mode) but most medium tanks are fast enough to outrun it.

If you somehow manage to see an enemy Tiger II from the side, try to land a shot in the middle of the hull, near of the turret (not on the turret, the upper part of the hull), there's a good chance there will be ammo there, and if there isn't, you will either knock out the tank by taking out many crew members or cripple it heavily

Pros and cons

Pros:

  • Upper glacis plate is extraordinarily tough. Don't expect anything but APDS or HEAT to get through it
  • With its very high muzzle velocity, accuracy, penetration, post-penetration damage, and fire rate, the 88 mm KwK43 cannon loaded with PzGr 39/43 is arguably the best gun at Rank IV
  • One can argue that the KwK43 is in fact a better overall cannon than the 105 mm cannon on the 10.5 Tiger II. While it doesn't have the post-penetration damage of the 105 mm, the KwK43 has nearly double the rate of fire, nearly the same penetration, and is still an APHE round
  • PzGr 40/43 shells have extremely high muzzle velocity and armour penetration values at all ranges
  • Turret is highly sloped and can cause some shots to bounce
  • Good tank for one to master the Tiger II(H) while grinding its modules
  • Despite its massive weight of 68 tons, the Tiger II P actually has a high top speed. You'll be right behind the medium tanks when when going into battle
  • Provides a good learning curve for later German heavy tanks

Cons:

  • While being sloped, the turret is this tanks biggest weakness. The armour thickness is underwhelming at best. There are even some Rank 2 tanks whose cannon are powerful enough to go right through the front of the turret face
  • Unlike most tanks in the game, going hull down is not a valid tactic in this tank.
  • If the tank is loaded with anything more than 48 rounds, the back of the turret will have ammunition in it. This can prove to be a fatal mistake
  • Angling the turret doesn't always work
  • This is a massive heavy tank. So unless you're going at the tanks top speed, don't expect to pull of any quick U-turns to deal with an unexpected threat
  • Large fuel tanks can cause frequent fires
  • With the very low damage and penetration of the HEAT shells, they are essentially pointless to ever take into battle
  • Tanks with APDS and HEAT/HEATFS, which are becoming increasingly common at its rank, can penetrate the frontal mantlet most of the time, only lower calibre guns can be stopped
  • Rarely, if a shell strikes the lower portion of where the barrel and gun mantlet meet, the shell or shell fragments can ricochet off through the turret ring into the crew compartment, crippling or even destroying the vehicle.
  • Turret cheeks are very weak and will rarely bounce shots

History

Development

Just before the Tiger I entered service in 1942, work has already begun for its successor. In 1937, Henschel was ordered to develop a heavy tank design, with Porsche following suit in 1939. Porsche developed their new heavy tank off of the failed VK 4501 (P), churning out two models designated VK 4502 (P) named Type 180 and 181. The Type 180 had its turret mounted centrally while 181 had the turret mounted on the rear with the engine in the center (akin to the Ferdinand tank destroyer layout). Both designs used the same components of the VK 4501 (P) and both designs were visually similar except for the turret locations and some mechanical parts, but these two designs never passed wooden prototypes.

Henschel, on the other hand, used a more conventional design in their tank layout, but the end result look no way similar to their previous heavy tank design Tiger I. The VK 4503 (H) as designated by them resembled a Panther tank layout, with the transmission in the front along with the driving compartment, the turret in the center, and the engine in the rear. The design used many components from the Panther and the Panther II in order to standardize production. The suspension system was also different from anything produced at the time, though still using a torsion-bar suspension, the wheels were arranged only in the overlapping method, no interleaving. This new Schachtellaufwerk design simplified maintenance and increased production by using less wheels than interleaved (only 9 each side) and with full-steel wheels that the later Tiger I models used to save rubber. The first wooden mock-up of the design was presented on October 20, 1943 to Hitler, to which it was approved for further development as the Panzerkampfwagen Tiger Ausf. B, or just Tiger II and Tiger B for short. The Henschel variant was more advantageous than the Porsche variant for being developed faster and has a faster production rate, thus it was destined to be approved for service. The Henschel design began production in the Henschel plant at Kassal and the first 3 working prototypes were churned out in December 1943. Full-scale production began on January 1944 and continued all the way until March 1945. Due to the late introduction and the amount of resources needed to construct the heavy tanks, only about 482 production models were produced in this time period, considerably less than its predecessor, Tiger I.

Design

The Tiger II is just massive in size. Weighing in at 68.5 tons, it is the heaviest tank to see service in World War II, beaten out as heaviest serving vehicle by the Jagdtiger, which weighs 71.7 tons. The Tiger II front armour is 150 mm thick, and this is without sloping, with which it would be more than 200 mm thick effective. The thick front glacis armour was never penetrated by any Allied tank throughout the entire war. The side and rear armour is still 80 mm, which presents a weaker target, but still very well armoured at longer ranges. The gun on the Tiger II was the famous 8.8 cm KwK43, which could defeat all Allied armour in World War II. The gun is sighted by the gunner with a "Turmzielfernrohr 9b/1" monocular sight that allows two magnifications, 2.5x and 5x. In practice, the gun is able to hit a target under 1 km away 100% of the time.

The turret on this Tiger II is the prototype turret model by Krupp, colloquially known as the "Porsche" turret (hence the "P" in the name). This turret model presented some design flaws: the curved front of the turret was not as thick as the rest of the hull and thus was penetrable and the curved form created a shot trap deflecting incoming shells into the hull's roof. The commander's cupola was also protruding.

The turret is powered and could rotate under two settings, high and low. In low, the turret could be rotated a full 360 degrees in 60 seconds, and the same in 19 seconds at high. Though the engine could allow the turret to traverse in 10 seconds in full power, but this was not recommended to avoid straining the engine. The turret traverse is powered by pedals or a lever by the gunner and is fine enough with these methods that small adjustments with the manual traverse hand wheels are not necessary.

The Tiger II was still propelled by the V-12 Maybach HL230 gasoline engine, which powered the lighter Panther and Tiger I. The increased weight of the tank made the engine underpowered, requiring extra care to make sure the engine does not fail. Despite that, the tank was capable of reaching a maximum speed of 41.5 km/h, making the Tiger II quite agile for its weight. However, the Tiger II consumes exorbitant amount of fuel and requires extensive maintenance to keep running, which impedes its combat effectiveness in the whole strategic viewpoint as it only had an operational range of about 120 km on cross country terrain. The heavyweight also causes multiple mechanical issues in the tank, the drive train is overburdened as it was intended for a lighter vehicle and multiple breakdowns were experienced in early Tiger II models. Though, these issues were ironed out over time with improvements, but still persist due to lack of supplies to maintain the tanks.

Combat usage

The Tiger II is organized into heavy tank battalions (Schwere Panzer Abteilungen) in the Wehrmacht and SS units, who first received them by February 1944. A standard battalion would have 45 Tiger IIs, with three in command and 14 in each of the three companies. A total of 14 battalions were employed during World War II in the Heer and SS, 11 assigned to the Heers and 3 to the SS. The original role of heavy tank battalions was to engage, breakthrough and destroy enemy armour on the offensive, but the changing war situation saw their role relegated to the defensive. The Tiger II's first recorded combat action was in the 1st Company of 503rd Heavy Panzer Battalion in Normandy in July 1944, fighting back the Canadians during their offensive in Operation Atlantic, three Tiger IIs were lost, two from combat and one from becoming irrecoverable after falling into a bomb crater. However, by the end of the Normandy Campaign, all of the Tiger IIs in the 503rd were lost. The 501st Heavy Panzer Battalion had the Tiger II see first action in the Eastern Front on August 1944, where it resisted the Soviet Lvov-Sandomierz Offensive. It was here on the road to Oględów in August 12, 1944 that an ambush by a few T-34-85s destroyed three Tiger IIs easily and some more disabled. The destroyed Tiger IIs were attributed to ammunition explosions. Due to this incident, it was ordered that the crew do not store the cannon ammunition in the turret, though the enforcement of this order varies between units. Still, 16 Tiger IIs in the 501st became disabled or destroyed in a span of more than two weeks.

The Tiger II also played a part in Operation Panzerfaust, where the 503rd Battalion was stationed in Hungary to ensure it stayed in the Axis Alliance. These tanks stayed for 166 days and claimed a large number of Soviet vehicle kills for the loss of 25 Tiger IIs. The Tiger II continued to see action in most of the offensive and defensive actions in the last few months of World War II, such as in the Ardennes Offensive in December 1944, the Soviet Vistula-Oder and East Prussian Offensives in January 1945, and the German Lake Balaton Offensive in March 1945, Battle of the Seelow Heights in April 1945, and the Battle of Berlin that lasted until VE Day.

Tiger II's performance in battle was quite favourable in firepower and achieved a disproportionate kill-loss ratio. The 503rd SS Battalion claimed 500 kills for the loss of 45 Tiger IIs in the time span of January to April 1945. However, most of the Tiger II's losses were due to mechanical breakdowns or lack of fuel, so the crew abandoned these tanks and destroyed them to avoid enemy capture. Ultimately, however, while these tanks proved a menace in the battlefield, its overall strategic effect to the war is negligible like its predecessor due to the low number available.

Survivors

Today, there are 10 Tiger IIs in varying conditions left in the world. The most well known is the one at Musée des Blindés museum at Samur, France. This Tiger II is the only working version left in the world, this variant has the "Henschel" turret attached. Other notable places around the world that have the Tiger II is at the Bovington Tank Museum at England (which has a Porsche and a Henschel variant), Kubinka Tank Museum at Russia, and the (future) National Armor and Cavalry Museum in America.


Archive of the in-game description

In August 1942, the companies Nibelungenwerke, led by Ferdinand Porsche, and Henschel & Sohn AG, under the direction of Erwin Aders, received technical specifications for a tank with thicker armour than the Tiger I, placed at the same large angles of inclination as that on the T-34.

After testing, Porsche's prototype was rejected. However, by this point, 50 turrets had already been produced for the model. It was decided that these turrets would be used to equip the first 50 tanks with Henschel's hull design, which had equipment for underwater traversing. Porsche's turrets had a streamlined shape, and the commander's cupola was accommodated by a curved bulge on the turret's side. The turret's frontal armour had a thickness of 107 mm. All Tiger II(P) tanks had anti-magnetic Zimmerit paste applied on their vertical surfaces.

The first set of tanks, new vehicles with the Porsche turrets received on March 14, 1944, became the 316th company of the Panzer Lehr. Five tanks fought with the Panzer Lehr on the Western Front. The remaining tanks were received by the 503rd heavy tank battalion, which fought on the Western Front until 1944. After this, the two still-intact Tiger II(P) tanks fought in the battalion's battles on the Eastern Front during the autumn and winter of 1944–1945.

Thick armour plates, positioned at high angles of inclination, provided the tank very high protection against the majority of the anti-tank weapons of the time. However, the vehicle's high weight and lack of engine power caused the Tiger II to have low ride quality and overall low reliability. A serious drawback of the Porsche turret was its streamlined front, which was prone to making projectiles ricochet into the roof of the tank's hull.

The major opponent of the Tiger II(P) on the Western Front was enemy aircraft. Also, many vehicles were lost as a result of mechanical failure.


Media

Skins
Sights
Videos

See also

External links


Germany heavy tanks
Tiger 1 (Henschel)  Tiger H1 · Tiger E · ␠Tiger
Tiger 1 (Porsche)  VK 45.01 (P) · Pz.Bef.Wg.VI P
Tiger 2  Tiger II (P) · Tiger II (H) · Tiger II (H) Sla.16 · Tiger II (10.5 cm Kw.K)
Super heavy tanks  Maus · E-100
Trophies 
Great Britain  ▀Pz.Kpfw. Churchill
USSR  ▀KV-IB · ▀KW I C 756 (r) · ▀KW II 754 (r)