Difference between revisions of "BI"
Yay5379@live (talk | contribs) (Added the history of the BI-1 Project.) (Tag: Visual edit) |
Colok76286 (talk | contribs) |
||
| (41 intermediate revisions by 18 users not shown) | |||
| Line 1: | Line 1: | ||
{{Specs-Card | {{Specs-Card | ||
|code=bi | |code=bi | ||
| + | |images={{Specs-Card-Image|GarageImage_{{PAGENAME}}.jpg}} | ||
|market=items_BI (USSR) | |market=items_BI (USSR) | ||
}} | }} | ||
| Line 6: | Line 7: | ||
== Description == | == Description == | ||
<!-- ''In the description, the first part should be about the history of and the creation and combat usage of the aircraft, as well as its key features. In the second part, tell the reader about the aircraft in the game. Insert a screenshot of the vehicle, so that if the novice player does not remember the vehicle by name, he will immediately understand what kind of vehicle the article is talking about.'' --> | <!-- ''In the description, the first part should be about the history of and the creation and combat usage of the aircraft, as well as its key features. In the second part, tell the reader about the aircraft in the game. Insert a screenshot of the vehicle, so that if the novice player does not remember the vehicle by name, he will immediately understand what kind of vehicle the article is talking about.'' --> | ||
| − | + | The '''{{Specs|name}}''' is a gift rank {{Specs|rank}} Soviet jet fighter {{Battle-rating}}. It was introduced during [[Update "Raining Fire"]] as a reward for the [[wt:en/news/6878-event-wargame-strategist-en|2020 Wargame "Strategist" event]], and is currently available for sale on the Marketplace. | |
| − | + | ||
| − | The '''{{Specs|name}}''' is a gift rank {{Specs|rank}} Soviet jet fighter {{Battle-rating}}. It was introduced during [[Update "Raining Fire"]] as a reward for the [[wt:en/news/6878-event-wargame-strategist-en|2020 Wargame "Strategist" event]], and is currently available for sale on the Marketplace. | + | Nicknamed the "Devil's Broomstick", the Bereznyak-Isayev BI was one of the world's first rocket-powered fighter aircraft. Envisaged as a short-range point interceptor, it features extremely high acceleration and climb rate, in return for extremely limited fuel. |
== General info == | == General info == | ||
=== Flight performance === | === Flight performance === | ||
| + | {{Specs-Avia-Flight}} | ||
<!-- ''Describe how the aircraft behaves in the air. Speed, manoeuvrability, acceleration and allowable loads - these are the most important characteristics of the vehicle.'' --> | <!-- ''Describe how the aircraft behaves in the air. Speed, manoeuvrability, acceleration and allowable loads - these are the most important characteristics of the vehicle.'' --> | ||
{| class="wikitable" style="text-align:center" width="70%" | {| class="wikitable" style="text-align:center" width="70%" | ||
! rowspan="2" | Characteristics | ! rowspan="2" | Characteristics | ||
| − | ! colspan="2" | Max Speed<br>(km/h at | + | ! colspan="2" | Max Speed<br>(km/h at 2,000 m) |
! rowspan="2" | Max altitude<br>(metres) | ! rowspan="2" | Max altitude<br>(metres) | ||
! colspan="2" | Turn time<br>(seconds) | ! colspan="2" | Turn time<br>(seconds) | ||
| Line 25: | Line 27: | ||
|- | |- | ||
! Stock | ! Stock | ||
| − | | | + | | 791 || 786 || rowspan="2" | {{Specs|ceiling}} || 23.2 || 23.2 || 84.7 || 79.1 || rowspan="2" | 300 |
|- | |- | ||
! Upgraded | ! Upgraded | ||
| − | |807|| | + | |807||799||22.8||23.0||116.6||100.0 |
|- | |- | ||
|} | |} | ||
| + | |||
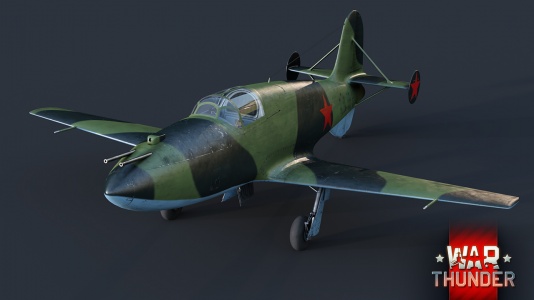
| + | [[File:BI Wiki Image 3.jpg|thumb|The BI taking off.]] | ||
==== Details ==== | ==== Details ==== | ||
| Line 104: | Line 108: | ||
=== Survivability and armour === | === Survivability and armour === | ||
| + | {{Specs-Avia-Armour}} | ||
<!-- ''Examine the survivability of the aircraft. Note how vulnerable the structure is and how secure the pilot is, whether the fuel tanks are armoured, etc. Describe the armour, if there is any, and also mention the vulnerability of other critical aircraft systems.'' --> | <!-- ''Examine the survivability of the aircraft. Note how vulnerable the structure is and how secure the pilot is, whether the fuel tanks are armoured, etc. Describe the armour, if there is any, and also mention the vulnerability of other critical aircraft systems.'' --> | ||
| Line 112: | Line 117: | ||
<nowiki>*</nowiki>The fuel tanks are cylinder-shaped, not rectangular, like most planes' fuel tanks, allowing for more fuel tanks. | <nowiki>*</nowiki>The fuel tanks are cylinder-shaped, not rectangular, like most planes' fuel tanks, allowing for more fuel tanks. | ||
| + | |||
| + | === Modifications and economy === | ||
| + | {{Specs-Economy}} | ||
== Armaments == | == Armaments == | ||
| + | {{Specs-Avia-Armaments}} | ||
| + | [[File:BI Wiki Image 1.jpg|thumb|BI after using its two cannons to down a Ar 234.]] | ||
| + | |||
=== Offensive armament === | === Offensive armament === | ||
| + | {{Specs-Avia-Offensive}} | ||
<!-- ''Describe the offensive armament of the aircraft, if any. Describe how effective the cannons and machine guns are in a battle, and also what belts or drums are better to use. If there is no offensive weaponry, delete this subsection.'' --> | <!-- ''Describe the offensive armament of the aircraft, if any. Describe how effective the cannons and machine guns are in a battle, and also what belts or drums are better to use. If there is no offensive weaponry, delete this subsection.'' --> | ||
{{main|ShVAK (20 mm)}} | {{main|ShVAK (20 mm)}} | ||
| Line 124: | Line 136: | ||
== Usage in battles == | == Usage in battles == | ||
<!-- ''Describe the tactics of playing in the aircraft, the features of using aircraft in a team and advice on tactics. Refrain from creating a "guide" - do not impose a single point of view, but instead, give the reader food for thought. Examine the most dangerous enemies and give recommendations on fighting them. If necessary, note the specifics of the game in different modes (AB, RB, SB).'' --> | <!-- ''Describe the tactics of playing in the aircraft, the features of using aircraft in a team and advice on tactics. Refrain from creating a "guide" - do not impose a single point of view, but instead, give the reader food for thought. Examine the most dangerous enemies and give recommendations on fighting them. If necessary, note the specifics of the game in different modes (AB, RB, SB).'' --> | ||
| − | ==== | + | ====Fuel management ==== |
| − | + | Managing your fuel will allow your endurance to increase from 1 minute 57 seconds to over 13 minutes, only use the fuel you need to use. | |
| − | To get the longest endurance out of | + | To get the longest endurance out of its limited fuel amount, climb from the airfield at an angle of 70-80 degrees, at full throttle and as you hit 3,000 m, change the angle of the attack and throttle back to 30%. Adjust your climb angle to make sure that both speed and altitude continue increasing. This will allow you to travel to 5,000+ m without burning too much of your precious rocket fuel, you will need this for later in the battle. Once you have hit 5,000 m, throttle back to 14% and continue to climb and adjust your climb angle again to roughly 16 degrees. You can continue to climb at this angle until you see it fit not to do so. |
| − | When you hit the altitude you like, you can throttle back to 0% and just glide, with only minor adjustments to the throttle to | + | When you hit the altitude you like, you can throttle back to 0% and just glide, with only minor adjustments to the throttle to stay in level flight. |
==== Descending ==== | ==== Descending ==== | ||
| + | The key to descending without locking up and crashing is to not point your nose straight down. Unlike other aircraft, the BI is able to gain a lot of speed even in a little descent. When the BI starts going over 700 km/h, pull up slowly and slow back down. When you push the nose back down, push the rudder all the way to the left or right. If you aren't losing speed fast enough, shift the plane 45 degrees to the left and right, with full rudder movements. This will slow you down. | ||
| − | + | Due to the BI being able to go over 900 km/h with ease and locking up at Mach 0.76, descending from height from 5,000 m needs to be carefully calculated based on the battle conditions in the match. If you descend to fast, due to a high angle of attack, you will lock up and crash into the ground, because you will be unable to pull out in time. | |
| − | + | A high angle of attack for a descent is around -70 degrees, even using the ruder and shifting the BI to the left and right will not be enough. | |
| − | A | + | A good angle of attack to descend is around -30 to -60, the steeper the angle faster you will go. When you descend keep your throttle at 0%, only when you are pulling out of the dive at the very end, after losing speed, they should be opened carefully. |
| − | + | ==== Engaging in combat ==== | |
| + | [[File:BI Wiki Image 4.jpg|thumb|Cockpit of the BI.]] | ||
| + | The BI is similar to the [[Me 163 B]] - small amounts of fuel and ammo (low flight endurance) but with astonishing performance, being able to climb 80 degrees vertically. As such it excels in the interceptor role, climbing at a extremely high rate of up to 116.4 m/s in AB and 100 m/s in RB. Able to shoot down bombers and fighter bombers before exhausting the fuel supply and landing again. Don't be fooled by its acceleration into thinking it has a high top speed - the wings and elevators will lock up at Mach 0.76, making any manoeuvres impossible. Flying full throttle at 8,000 m will see you rip your wings off in level flight. | ||
| − | + | If engaged by an opponent, do not try to outrun them, instead use your manoeuvrability and acceleration to turn fight, your speed and small size are your greatest strengths. The BI only has 90 rounds of ammo, 45 rounds per gun. This is not a lot of ammo, so take care to make every shot count. | |
| − | |||
| − | |||
=====Engaging fighters===== | =====Engaging fighters===== | ||
| − | Fighting fighters in combat, aim for the wings and tail, aiming for wings with the limited ammo which the BI has will cause the wing fuel tanks to catch on fire. Aiming for the tail, will see that the tail gets cut clean from the fuselage, unlike a bomber a fighter is smaller and | + | Fighting fighters in combat, aim for the wings and tail, aiming for wings with the limited ammo which the BI has will cause the wing fuel tanks to catch on fire. Aiming for the tail, will see that the tail gets cut clean from the fuselage, unlike a bomber a fighter is smaller and has less space for fired ammo to miss critical elements. |
| − | + | If the enemy fighter notices you attempting to sneak up on them, they will bank left or right, do not follow them in the turn, the BI cannot turn fight without losing its advantageous speed. Instead, disengage, throttle up, climb and come back around for another pass. | |
=====Engaging Bombers===== | =====Engaging Bombers===== | ||
| − | Fighting bombers, aim for the wings and engines, aiming for the fuselage | + | Fighting bombers, aim for the wings and engines, aiming for the fuselage is unlikely to cause any critical hits unless you can hit the flight deck. Aiming for the wings increases the odds of hitting a wing spar and seeing the wing get ripped off with a short salvo. Aiming for engines will knock them out and possibly set fires inside of the wing-installed fuel tanks. The larger area with more critical elements increase the odds of doing critical damage with the limited rounds which you have. |
| − | Do not stay behind the enemy bomber, their gunners will hit your rocket fuel tanks and will see the BI set on fire. If | + | Do not stay behind the enemy bomber, their gunners will hit your rocket fuel tanks and will see the BI set on fire. If this occurs, break off the attack and dive as fast as you can, this will put the fire out. Then head back to the airfield and repair, and refuel. |
| − | ==== Landing ==== | + | ==== Landing ==== |
| − | To land the | + | To land the BI, you should keep about 5 to 10 seconds of fuel in case you need to go around due to a missed approach. When on approach, you will need to lose speed fast, which it can do. This is due to the BI not using the sleek low profile aerodynamic wings, as you find on other jets. However, to do this, you must reduce the speed down to under 420 km/h or your gear will be ripped off making the odds of crashing on landing very high. |
| − | To land the BI, flip the plane on | + | To land the BI, flip the plane on its side, use the rudder during the turns to help cause more fiction with the air, which will start reducing its speed. Due to the shape of the BI which features great glider aerodynamics, it is able to fly at high speeds and keep the momentum even without any throttle being active. As soon as the BI touches the ground, apply the breaks and turn the rudder hard left and right to help slow it down. |
| − | Landing on short runways | + | Landing on short runways should be avoided or risk crashing at the end, the reason for this if you come into fast or high the BI will bounce, it will bounce to 150 m or more. Ideally you should head back to the main airfield which has the long landing strip to land on. |
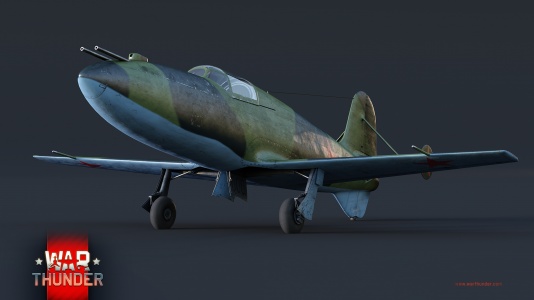
| − | + | [[File:BI Wiki Image 2.jpg|thumb|BI attacking an enemy jet bomber.]] | |
| − | |||
| − | |||
| − | |||
| − | |||
| − | |||
| − | | | ||
| − | |||
| − | |||
| − | |||
| − | |||
| − | |||
| − | |||
| − | |||
| − | |||
| − | |||
| − | |||
| − | |||
| − | |||
| − | |||
| − | |||
| − | |||
| − | |||
| − | |||
| − | |||
| − | |||
| − | |||
| − | |||
=== Pros and cons === | === Pros and cons === | ||
| Line 196: | Line 182: | ||
'''Pros:''' | '''Pros:''' | ||
| − | * Amazing acceleration | + | * Amazing acceleration |
| − | * Great roll rate | + | * Great roll rate |
| − | * Excellent | + | * Excellent manoeuvrability |
| − | + | * Incredible climb rate; can climb at a whopping 70° when spaded | |
| − | * Incredible climb rate | + | * Very small size makes successfully hitting it troublesome |
| − | |||
| − | * Very small size | ||
'''Cons:''' | '''Cons:''' | ||
| − | * Not very well armoured | + | * Not very well armoured |
* Only has landing flaps | * Only has landing flaps | ||
* Can reach rip speed (Mach 0.81) while travelling in a straight line | * Can reach rip speed (Mach 0.81) while travelling in a straight line | ||
| − | * Very hard to pull out of a dive | + | * Very hard to pull out of a dive due to its great speed |
| − | * Maximum fuel load is only 1 minute and 57 seconds | + | * Maximum fuel load is only 1 minute and 57 seconds |
| − | * | + | * Very limited armament, only two ShVAK cannons with 45 rounds each |
== History == | == History == | ||
<!-- ''Describe the history of the creation and combat usage of the aircraft in more detail than in the introduction. If the historical reference turns out to be too long, take it to a separate article, taking a link to the article about the vehicle and adding a block "/History" (example: <nowiki>https://wiki.warthunder.com/(Vehicle-name)/History</nowiki>) and add a link to it here using the <code>main</code> template. Be sure to reference text and sources by using <code><nowiki><ref></ref></nowiki></code>, as well as adding them at the end of the article with <code><nowiki><references /></nowiki></code>. This section may also include the vehicle's dev blog entry (if applicable) and the in-game encyclopedia description (under <code><nowiki>=== In-game description ===</nowiki></code>, also if applicable).'' --> | <!-- ''Describe the history of the creation and combat usage of the aircraft in more detail than in the introduction. If the historical reference turns out to be too long, take it to a separate article, taking a link to the article about the vehicle and adding a block "/History" (example: <nowiki>https://wiki.warthunder.com/(Vehicle-name)/History</nowiki>) and add a link to it here using the <code>main</code> template. Be sure to reference text and sources by using <code><nowiki><ref></ref></nowiki></code>, as well as adding them at the end of the article with <code><nowiki><references /></nowiki></code>. This section may also include the vehicle's dev blog entry (if applicable) and the in-game encyclopedia description (under <code><nowiki>=== In-game description ===</nowiki></code>, also if applicable).'' --> | ||
| − | + | Test Flight Log: | |
| − | + | {| class="wikitable" | |
| − | + | !Date | |
| − | + | !Place | |
| − | + | !Pilot | |
| − | + | !Issues | |
| − | + | |- | |
| − | + | |October, 1941 | |
| − | + | | Lake Bilimbay | |
| − | + | |Grigory Yakovlevich Bakhchivandzhi | |
| − | + | |None | |
| − | + | |- | |
| − | + | |April, 1942 | |
| + | |Koltsove Airfield | ||
| + | |Grigory Yakovlevich Bakhchivandzhi | ||
| + | |None | ||
| + | |- | ||
| + | |May 15th, 1942 19:02 (UTC) | ||
| + | |Koltsove Airfield | ||
| + | |Grigory Yakovlevich Bakhchivandzhi | ||
| + | |Aircraft was damaged because of a hard landing and the pilot was injured. | ||
| + | |- | ||
| + | |March 27th, 1943 | ||
| + | |Koltsove Airfield | ||
| + | |Grigory Yakovlevich Bakhchivandzhi | ||
| + | |Aircraft crashed and was severely damaged so the test flights were discontinued. | ||
| + | |} | ||
| − | + | === [[wt:en/news/6873-development-crafting-event-strategist-bereznyak-isayev-en|Devblog]] === | |
| + | In the early 1940's, the OKB-293 aircraft design bureau began working on a new rocket-propelled aircraft design. The aircraft promised excellent performance figures, although at the expense of range due to the limitations of rocket engines at the time. After the invasion of the Soviet Union in June 1941, the design was seen as a potential short-range interceptor design to protect vital Soviet land installations from air raids. Thus, the project was approved for further development work and testing. | ||
| − | + | Development of the aircraft continued, with several prototypes being made and test flown. However, rapid advancements in aviation technology, especially the appearance of the jet engine, during the war outpaced the development of the BI. Therefore, the aircraft never left the prototype stage and didn't take part in active combat. Instead the aircraft's development served more as a testbed for Soviet rocket propulsion research, with the insights gained being later used for other projects during the Cold War. | |
| − | |||
| − | |||
| − | |||
| − | |||
| − | |||
| − | |||
== Media == | == Media == | ||
| Line 245: | Line 238: | ||
;Skins | ;Skins | ||
| − | * [https://live.warthunder.com/feed/camouflages/? | + | * [https://live.warthunder.com/feed/camouflages/?vehicle=bi Skins and camouflages for the {{PAGENAME}} from live.warthunder.com.] |
| + | |||
| + | ;Images | ||
| + | <gallery mode="packed" caption="BI Devblog Images" heights="200"> | ||
| + | File:BI WTWallpaper 001.jpg| | ||
| + | File:BI WTWallpaper 002.jpg| | ||
| + | File:BI WTWallpaper 003.jpg| | ||
| + | File:BI WTWallpaper 004.jpg| | ||
| + | File:BI WTWallpaper 005.jpg| | ||
| + | File:BI WTWallpaper 006.jpg| | ||
| + | </gallery> | ||
;Videos | ;Videos | ||
| − | {{Youtube-gallery|INb9VjLxKf0|'''Most unusual aircraft''' discusses the {{PAGENAME}} at 3:44 - ''War Thunder Official Channel''|WP9ouDTV81Q|'''A {{PAGENAME}}... to fly''' - ''Napalmratte''|llVOukVt1A4|'''The Shooting Range #218''' - ''Metal Beasts'' section at 00:28 discusses the {{PAGENAME}}.}} | + | {{Youtube-gallery|2NgpHefq0hc|'''Rocket Planes''' discusses the {{PAGENAME}} at 00:40 - ''War Thunder Official Channel''|INb9VjLxKf0|'''Most unusual aircraft''' discusses the {{PAGENAME}} at 3:44 - ''War Thunder Official Channel''|WP9ouDTV81Q|'''A {{PAGENAME}}... to fly''' - ''Napalmratte''|llVOukVt1A4|'''The Shooting Range #218''' - ''Metal Beasts'' section at 00:28 discusses the {{PAGENAME}}.|Xbo38TOUWy4|'''🅱️i video''' - ''Rulo6000''}} |
== See also == | == See also == | ||
| Line 262: | Line 265: | ||
<!-- ''Paste links to sources and external resources, such as:'' | <!-- ''Paste links to sources and external resources, such as:'' | ||
* ''topic on the official game forum;'' | * ''topic on the official game forum;'' | ||
| − | |||
* ''other literature.'' --> | * ''other literature.'' --> | ||
| − | * [[wt:en/news/6873-development-crafting-event-strategist-bereznyak-isayev-en|[Devblog] Crafting Event | + | * [[wt:en/news/6873-development-crafting-event-strategist-bereznyak-isayev-en|[Devblog] Crafting Event "Strategist": Bereznyak-Isayev]] |
| + | * [[wikipedia:Bereznyak-Isayev_BI-1|[Wikipedia] Bereznyak-Isayev BI-1]] | ||
{{USSR jet aircraft}} | {{USSR jet aircraft}} | ||
Revision as of 19:17, 23 May 2023

Contents
Description
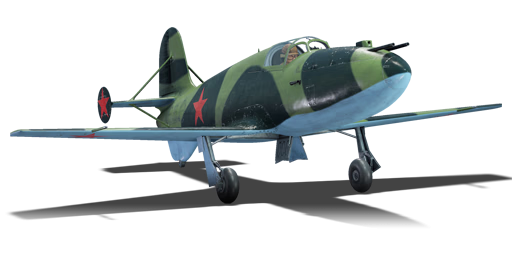
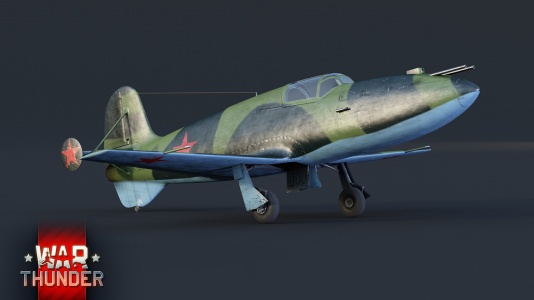
The BI is a gift rank V Soviet jet fighter with a battle rating of 6.7 (AB/RB) and 6.3 (SB). It was introduced during Update "Raining Fire" as a reward for the 2020 Wargame "Strategist" event, and is currently available for sale on the Marketplace.
Nicknamed the "Devil's Broomstick", the Bereznyak-Isayev BI was one of the world's first rocket-powered fighter aircraft. Envisaged as a short-range point interceptor, it features extremely high acceleration and climb rate, in return for extremely limited fuel.
General info
Flight performance
| Characteristics | Max Speed (km/h at 2,000 m) |
Max altitude (metres) |
Turn time (seconds) |
Rate of climb (metres/second) |
Take-off run (metres) | |||
|---|---|---|---|---|---|---|---|---|
| AB | RB | AB | RB | AB | RB | |||
| Stock | 791 | 786 | 12000 | 23.2 | 23.2 | 84.7 | 79.1 | 300 |
| Upgraded | 807 | 799 | 22.8 | 23.0 | 116.6 | 100.0 | ||

Details
| Features | |||||
|---|---|---|---|---|---|
| Combat flaps | Take-off flaps | Landing flaps | Air brakes | Arrestor gear | Drogue chute |
| X | X | ✓ | X | X | X |
| Limits | ||||||
|---|---|---|---|---|---|---|
| Wings (km/h) | Gear (km/h) | Flaps (km/h) | Max Static G | |||
| Combat | Take-off | Landing | + | - | ||
| 920 | 420 | N/A | N/A | 320 | ~9 | ~3 |
| Optimal velocities (km/h) | |||
|---|---|---|---|
| Ailerons | Rudder | Elevators | Radiator |
| < 400 | < 410 | < 550 | N/A |
Engine performance
| Engine | Aircraft mass | ||||
|---|---|---|---|---|---|
| Engine name | Number | Basic Mass | Wing loading (full fuel) | ||
| Isaev D-1a | 1 | 924 kg | 233 kg/m2 | ||
| Engine characteristics | Mass with fuel (no weapons load) | Max Takeoff Weight | |||
| Weight (each) | Type | 0m fuel | 1m fuel | ||
| 300 kg | Liquid-fuel rocket | 1,134 kg | 1,629 kg | 1,650 kg | |
| Maximum engine thrust @ 0 m (RB / SB) | Thrust to weight ratio @ 0 m (100%) | ||||
| Condition | 100% | WEP | 0m fuel | 1m fuel | MTOW |
| Stationary | 1,121 kgf | N/A | 0.99 | 0.69 | 0.68 |
| Optimal | 1,121 kgf (any speed) |
N/A | 0.99 | 0.69 | 0.68 |
Survivability and armour
- 5.5 mm steel behind the pilot.
- 5.5 mm steel plate installed in the nose.
- 64 mm bulletproof glass in front of pilot
- Self-sealing fuel tanks* (7 under the cannon barrels, 8 behind pilot, 3 in rear fuselage)
*The fuel tanks are cylinder-shaped, not rectangular, like most planes' fuel tanks, allowing for more fuel tanks.
Modifications and economy
| Flight performance | Survivability | Weaponry | ||||||||||||
|---|---|---|---|---|---|---|---|---|---|---|---|---|---|---|
|
|
|
Armaments

Offensive armament
The BI is armed with:
- 2 x 20 mm ShVAK cannons, nose-mounted (45 rpg = 90 total)
Usage in battles
Fuel management
Managing your fuel will allow your endurance to increase from 1 minute 57 seconds to over 13 minutes, only use the fuel you need to use.
To get the longest endurance out of its limited fuel amount, climb from the airfield at an angle of 70-80 degrees, at full throttle and as you hit 3,000 m, change the angle of the attack and throttle back to 30%. Adjust your climb angle to make sure that both speed and altitude continue increasing. This will allow you to travel to 5,000+ m without burning too much of your precious rocket fuel, you will need this for later in the battle. Once you have hit 5,000 m, throttle back to 14% and continue to climb and adjust your climb angle again to roughly 16 degrees. You can continue to climb at this angle until you see it fit not to do so.
When you hit the altitude you like, you can throttle back to 0% and just glide, with only minor adjustments to the throttle to stay in level flight.
Descending
The key to descending without locking up and crashing is to not point your nose straight down. Unlike other aircraft, the BI is able to gain a lot of speed even in a little descent. When the BI starts going over 700 km/h, pull up slowly and slow back down. When you push the nose back down, push the rudder all the way to the left or right. If you aren't losing speed fast enough, shift the plane 45 degrees to the left and right, with full rudder movements. This will slow you down.
Due to the BI being able to go over 900 km/h with ease and locking up at Mach 0.76, descending from height from 5,000 m needs to be carefully calculated based on the battle conditions in the match. If you descend to fast, due to a high angle of attack, you will lock up and crash into the ground, because you will be unable to pull out in time.
A high angle of attack for a descent is around -70 degrees, even using the ruder and shifting the BI to the left and right will not be enough.
A good angle of attack to descend is around -30 to -60, the steeper the angle faster you will go. When you descend keep your throttle at 0%, only when you are pulling out of the dive at the very end, after losing speed, they should be opened carefully.
Engaging in combat

The BI is similar to the Me 163 B - small amounts of fuel and ammo (low flight endurance) but with astonishing performance, being able to climb 80 degrees vertically. As such it excels in the interceptor role, climbing at a extremely high rate of up to 116.4 m/s in AB and 100 m/s in RB. Able to shoot down bombers and fighter bombers before exhausting the fuel supply and landing again. Don't be fooled by its acceleration into thinking it has a high top speed - the wings and elevators will lock up at Mach 0.76, making any manoeuvres impossible. Flying full throttle at 8,000 m will see you rip your wings off in level flight.
If engaged by an opponent, do not try to outrun them, instead use your manoeuvrability and acceleration to turn fight, your speed and small size are your greatest strengths. The BI only has 90 rounds of ammo, 45 rounds per gun. This is not a lot of ammo, so take care to make every shot count.
Engaging fighters
Fighting fighters in combat, aim for the wings and tail, aiming for wings with the limited ammo which the BI has will cause the wing fuel tanks to catch on fire. Aiming for the tail, will see that the tail gets cut clean from the fuselage, unlike a bomber a fighter is smaller and has less space for fired ammo to miss critical elements.
If the enemy fighter notices you attempting to sneak up on them, they will bank left or right, do not follow them in the turn, the BI cannot turn fight without losing its advantageous speed. Instead, disengage, throttle up, climb and come back around for another pass.
Engaging Bombers
Fighting bombers, aim for the wings and engines, aiming for the fuselage is unlikely to cause any critical hits unless you can hit the flight deck. Aiming for the wings increases the odds of hitting a wing spar and seeing the wing get ripped off with a short salvo. Aiming for engines will knock them out and possibly set fires inside of the wing-installed fuel tanks. The larger area with more critical elements increase the odds of doing critical damage with the limited rounds which you have.
Do not stay behind the enemy bomber, their gunners will hit your rocket fuel tanks and will see the BI set on fire. If this occurs, break off the attack and dive as fast as you can, this will put the fire out. Then head back to the airfield and repair, and refuel.
Landing
To land the BI, you should keep about 5 to 10 seconds of fuel in case you need to go around due to a missed approach. When on approach, you will need to lose speed fast, which it can do. This is due to the BI not using the sleek low profile aerodynamic wings, as you find on other jets. However, to do this, you must reduce the speed down to under 420 km/h or your gear will be ripped off making the odds of crashing on landing very high.
To land the BI, flip the plane on its side, use the rudder during the turns to help cause more fiction with the air, which will start reducing its speed. Due to the shape of the BI which features great glider aerodynamics, it is able to fly at high speeds and keep the momentum even without any throttle being active. As soon as the BI touches the ground, apply the breaks and turn the rudder hard left and right to help slow it down.
Landing on short runways should be avoided or risk crashing at the end, the reason for this if you come into fast or high the BI will bounce, it will bounce to 150 m or more. Ideally you should head back to the main airfield which has the long landing strip to land on.

Pros and cons
Pros:
- Amazing acceleration
- Great roll rate
- Excellent manoeuvrability
- Incredible climb rate; can climb at a whopping 70° when spaded
- Very small size makes successfully hitting it troublesome
Cons:
- Not very well armoured
- Only has landing flaps
- Can reach rip speed (Mach 0.81) while travelling in a straight line
- Very hard to pull out of a dive due to its great speed
- Maximum fuel load is only 1 minute and 57 seconds
- Very limited armament, only two ShVAK cannons with 45 rounds each
History
Test Flight Log:
| Date | Place | Pilot | Issues |
|---|---|---|---|
| October, 1941 | Lake Bilimbay | Grigory Yakovlevich Bakhchivandzhi | None |
| April, 1942 | Koltsove Airfield | Grigory Yakovlevich Bakhchivandzhi | None |
| May 15th, 1942 19:02 (UTC) | Koltsove Airfield | Grigory Yakovlevich Bakhchivandzhi | Aircraft was damaged because of a hard landing and the pilot was injured. |
| March 27th, 1943 | Koltsove Airfield | Grigory Yakovlevich Bakhchivandzhi | Aircraft crashed and was severely damaged so the test flights were discontinued. |
Devblog
In the early 1940's, the OKB-293 aircraft design bureau began working on a new rocket-propelled aircraft design. The aircraft promised excellent performance figures, although at the expense of range due to the limitations of rocket engines at the time. After the invasion of the Soviet Union in June 1941, the design was seen as a potential short-range interceptor design to protect vital Soviet land installations from air raids. Thus, the project was approved for further development work and testing.
Development of the aircraft continued, with several prototypes being made and test flown. However, rapid advancements in aviation technology, especially the appearance of the jet engine, during the war outpaced the development of the BI. Therefore, the aircraft never left the prototype stage and didn't take part in active combat. Instead the aircraft's development served more as a testbed for Soviet rocket propulsion research, with the insights gained being later used for other projects during the Cold War.
Media
- Skins
- Images
- BI Devblog Images


- Videos
See also
Links to the articles on the War Thunder Wiki that you think will be useful for the reader, for example:
- reference to the series of the aircraft;
- links to approximate analogues of other nations and research trees.
External links
| USSR jet aircraft | |
|---|---|
| Bereznyak-Isayev | BI |
| Yakovlev | Yak-15 · Yak-15P · Yak-17 · Yak-23 · Yak-28B · Yak-30D · Yak-38 · Yak-38M · Yak-141 |
| Mikoyan-Gurevich | MiG-9 · MiG-9 (l) · MiG-15 · MiG-15bis · MiG-15bis ISH · MiG-17 · MiG-17AS · MiG-19PT |
| MiG-21F-13 · MiG-21PFM · MiG-21S (R-13-300) · MiG-21SMT · MiG-21bis | |
| MiG-23M · MiG-23ML · MiG-23MLD · MiG-27M · MiG-27K | |
| MiG-29 · MiG-29SMT | |
| Lavochkin | La-174 · La-15 · La-200 |
| Sukhoi | Su-9 · Su-11 |
| Su-7B · Su-7BKL · Su-7BMK · Su-17M2 · Su-17M4 · Su-22M3 | |
| Su-25 · Su-25BM · Su-25K · Su-25T · Su-25SM3 · Su-39 | |
| Su-27 | |
| Ilyushin | IL-28 · IL-28Sh |
| Tupolev | Tu-14T |
