Difference between revisions of "F-80C-10"
Colok76286 (talk | contribs) (Edits) |
(Always keep your energy high, and avoid dogfights at all costs!) |
||
| (40 intermediate revisions by 17 users not shown) | |||
| Line 1: | Line 1: | ||
| − | + | {{Specs-Card|code=f-80}} | |
| − | |||
| − | |||
| − | |||
| − | |||
| − | {{Specs-Card | ||
| − | |code=f-80 | ||
| − | |||
| − | |||
| − | }} | ||
== Description == | == Description == | ||
| − | <!-- ''In the description, the first part | + | <!--''In the description, the first part needs to be about the history of and the creation and combat usage of the aircraft, as well as its key features. In the second part, tell the reader about the aircraft in the game. Insert screenshot of the vehicle. If the novice player does not remember the vehicle by name, he will immediately understand what kind of vehicle it is talking about.''--> |
| − | |||
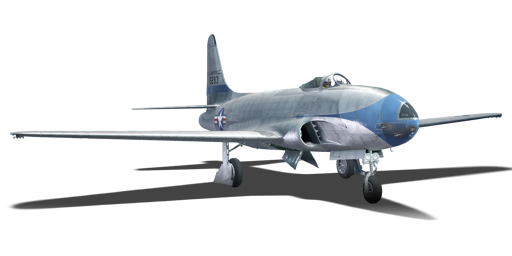
| − | + | [[File:GarageImage_{{PAGENAME}}.jpg|420px|thumb|left]] | |
| + | {{break}} | ||
| + | The '''{{Specs|name}}''' is a Rank {{Specs|rank}} American jet fighter {{Battle-rating|2}}. It is found under the F-80 bracket, immediately after the F-80A-5. | ||
| + | |||
| + | The greatest performance upgrade from the A-5 to the C-10 is that the C-10 comes with WEP. This additional power significantly increases acceleration, allowing you to match that of the British Meteor series. It also allows for a last-resort method to escape if you happen to get jumped on. | ||
| + | With the WEP comes with fuel management. If you opt for maximum performance by selecting 9 minutes of fuel, you will run out of fuel quickly if you choose to WEP for the entire match. | ||
| + | |||
| + | Like most American props and tech P-80A, your best option to attack is Boom and Zoom. At the start of the match, fly out towards the edge of the map. Make light climbs at 2.5 degrees to 1000ft and dive down to sea level to convert it into speed. Rinse and repeat until you have reached 350kt, the zoom climb at 30 degrees. Once you have slowed down to 250kt, continue to climb at a solid 15-20 degrees. Optimally, you should have between 11000-15000ft depending on how high the highest enemy is, before turning in towards the area of conflict (continue to climb or maintain altitude). Only once you have selected a target should you dive and make your pass. Always keep your energy high, whether it be speed or altitude. Your greatest advantage is speed, as the P-80 is faster than almost every other jet at its tier. | ||
| + | Defensive flying and rolling scissors is an option with the hydraulic boosters upgrade, however, you risk losing too much energy, and your attacker may choose to break off and try again while you are struggling to maintain lift. | ||
| + | |||
| + | If you are given an awkward firing angle (eg: you are directly vertical to your enemy and must pull 10G+ to line up a shot) or you fail to kill on your first pass, slowly pull your aircraft back up into a straight vertical climb to recover as much altitude as possible. If you persist on killing your target, you risk crashing into the ground from control stiffening or getting killed by another enemy because you are losing your energy in a dogfight. | ||
== General info == | == General info == | ||
| − | === Flight | + | === Flight Performance === |
| − | + | <!--''Describe how the aircraft behaves in the air. Maximum speed, maneuverability, speed and allowable loads - these are the most important characteristics of the vehicle.''--> | |
| − | <!-- ''Describe how the aircraft behaves in the air. | + | {| class="wikitable" style="text-align:center" |
| − | + | |- | |
| − | {| class="wikitable" style="text-align:center" | + | ! colspan="8" | Characteristics |
| − | ! | + | |- |
| − | ! colspan="2" | Max Speed<br>(km/h at | + | ! colspan="8" | ''Stock'' |
| − | ! rowspan="2" | Max altitude<br>( | + | |- |
| + | ! colspan="2" | Max Speed<br>(km/h at sea level) | ||
| + | ! rowspan="2" | Max altitude<br>(meters) | ||
! colspan="2" | Turn time<br>(seconds) | ! colspan="2" | Turn time<br>(seconds) | ||
| − | ! colspan="2" | Rate of climb<br>( | + | ! colspan="2" | Rate of climb<br>(meters/second) |
| − | ! rowspan="2" | Take-off run<br>( | + | ! rowspan="2" |Take-off run<br>(meters) |
| + | |- | ||
| + | ! AB | ||
| + | ! RB | ||
| + | ! AB | ||
| + | ! RB | ||
| + | ! AB | ||
| + | ! RB | ||
| + | |- | ||
| + | | 891 || 884 || {{Specs|ceiling}} || 24.4 || 25.6 || 18.9 || 17.7 || 850 | ||
| + | |- | ||
| + | ! colspan="8" | ''Upgraded'' | ||
|- | |- | ||
| − | ! | + | ! colspan="2" | Max Speed<br>(km/h at sea level) |
| + | ! rowspan="2" |Max altitude (meters) | ||
| + | ! colspan="2" | Turn time (seconds) | ||
| + | ! colspan="2" | Rate of climb<br>(meters/second) | ||
| + | ! rowspan="2" |Take-off run (meters) | ||
|- | |- | ||
| − | ! | + | ! AB |
| − | + | ! RB | |
| + | ! AB | ||
| + | ! RB | ||
| + | ! AB | ||
| + | ! RB | ||
|- | |- | ||
| − | + | | 915 || 903 || {{Specs|ceiling}} || 23.7 || 24.0 || 32.2 || 25.2 || 850 | |
| − | | 915 || 903 || 23.7 || 24.0 || 32.2 || 25.2 | ||
|- | |- | ||
|} | |} | ||
| − | ==== Details ==== | + | ====Details==== |
| − | {| class="wikitable" style="text-align:center | + | {| class="wikitable" style="text-align:center" |
|- | |- | ||
| − | ! colspan=" | + | ! colspan="5" | Features |
|- | |- | ||
| − | ! Combat | + | ! Combat flap |
| + | ! Take-off flap | ||
| + | ! Landing flap | ||
| + | ! Air brakes | ||
| + | ! Arrestor gear | ||
|- | |- | ||
| − | | ✓ || ✓ || ✓ || ✓ | + | | ✓ || ✓ || ✓ || ✓ || X <!-- ✓ --> |
|- | |- | ||
|} | |} | ||
| − | {| class="wikitable" style="text-align:center | + | {| class="wikitable" style="text-align:center" |
|- | |- | ||
| − | ! colspan=" | + | ! colspan="5" | Limits |
|- | |- | ||
| − | ! rowspan="2" | | + | ! rowspan="2" | Wing-break speed<br>(km/h) |
| − | ! rowspan="2" | Gear (km/h) | + | ! rowspan="2" | Gear limit<br>(km/h) |
| − | ! | + | ! rowspan="2" | Combat flap<br> (km/h) |
! colspan="2" | Max Static G | ! colspan="2" | Max Static G | ||
|- | |- | ||
| − | + | ! + | |
| + | ! - | ||
|- | |- | ||
| − | | {{Specs| | + | | {{Specs|разрушение|конструкции}} || {{Specs|разрушение|шасси}} || ??? || ~11 || ~4.5 |
|- | |- | ||
|} | |} | ||
| Line 67: | Line 92: | ||
{| class="wikitable" style="text-align:center" | {| class="wikitable" style="text-align:center" | ||
|- | |- | ||
| − | ! colspan="4" | Optimal velocities | + | ! colspan="4" | Optimal velocities |
|- | |- | ||
| − | ! Ailerons | + | ! Ailerons<br>(km/h) |
| + | ! Rudder<br>(km/h) | ||
| + | ! Elevators<br>(km/h) | ||
| + | ! Radiator<br>(km/h) | ||
|- | |- | ||
| − | | < | + | | < ??? || < ??? || < ??? || > ??? |
|- | |- | ||
|} | |} | ||
| − | |||
{| class="wikitable" style="text-align:center" | {| class="wikitable" style="text-align:center" | ||
|- | |- | ||
| − | ! colspan="3" | | + | ! colspan="3" | Compressor (RB/SB) |
| − | |||
| − | |||
| − | |||
| − | |||
|- | |- | ||
| − | + | ! colspan="3" | Setting 1 | |
| − | |||
|- | |- | ||
| − | ! | + | ! Optimal altitude |
| − | ! | + | ! 100% Engine power |
| + | ! WEP Engine power | ||
|- | |- | ||
| − | + | | 0 m || 2,086 kgf || 2,450 kgf | |
| − | |||
|- | |- | ||
| − | + | <!--! colspan="3" | Setting 2 | |
| − | |||
|- | |- | ||
| − | ! | + | ! Optimal altitude |
| − | ! | + | ! 100% Engine power |
| + | ! WEP Engine power | ||
|- | |- | ||
| − | + | | ?,??? m || ?,??? hp || ?,??? hp | |
| − | |||
|- | |- | ||
| − | | | + | ! colspan="3" | Setting 3 |
| − | |||
|- | |- | ||
| − | + | ! Optimal altitude | |
| − | + | ! 100% Engine power | |
| + | ! WEP Engine power | ||
|- | |- | ||
| + | | ?,??? m || ?,??? hp || ?,??? hp | ||
| + | |- --> | ||
|} | |} | ||
=== Survivability and armour === | === Survivability and armour === | ||
| − | + | <!--''Examine the survivability of the aircraft. Note how vulnerable the structure is and how secure the pilot is, whether the fuel tanks are armoured. Describe the armour, if there is any, also mention the vulnerability of other critical aircraft systems.''--> | |
| − | <!-- ''Examine the survivability of the aircraft. Note how vulnerable the structure is and how secure the pilot is, whether the fuel tanks are armoured | ||
| − | * | + | * No armour plating |
| − | * | + | * No armour glazing |
| − | * | + | * Critical components located at front of aircraft (fuel, pilot, engine, controls) |
| − | + | * More fuel tanks located in wings near fuselage | |
| − | |||
| − | |||
| − | |||
== Armaments == | == Armaments == | ||
| − | |||
=== Offensive armament === | === Offensive armament === | ||
| − | + | <!--''Describe the offensive armament of the aircraft, if any. Describe how effective the cannons and machine guns are in a battle, and also what belts or drums are better to use. If there is no offensive weaponry, delete this subsection.'' | |
| − | <!-- ''Describe the offensive armament of the aircraft, if any. Describe how effective the cannons and machine guns are in a battle, and also what belts or drums are better to use. If there is no offensive weaponry, delete this subsection.'' | + | {{main|MAC 1934 (7.5 mm)}} |
| − | {{main| | ||
The '''''{{PAGENAME}}''''' is armed with: | The '''''{{PAGENAME}}''''' is armed with: | ||
| − | * | + | * 4 x 7.5 mm [[MAC 1934 (7.5 mm)|MAC 1934]] machine guns (300 rpg = 1,200 total) |
| + | --> | ||
| + | <!--=== Suspended armament === | ||
| + | ''Describe the aircraft's suspended armament: additional cannons under the wings, bombs, rockets and torpedoes. This section is especially important for bombers and attackers. If there is no suspended weaponry remove this subsection.''--> | ||
| + | ''Main article: '''[[:Category:Suspended armaments|Bombs]]'''''--> | ||
| + | <!-- | ||
| + | === Defensive armament === | ||
| + | ''Defensive armament with turret machine guns or cannons, crewed by gunners. Examine the number of gunners and what belts or drums are better to use. If defensive weaponry is not available remove this subsection.'' | ||
| + | --> | ||
| + | == Usage in the battles == | ||
| + | <!--''Describe the tactics of playing in an aircraft, the features of using vehicles in a team and advice on tactics. Refrain from creating a "guide" - do not impose a single point of view but give the reader food for thought. Examine the most dangerous enemies and give recommendations on fighting them. If necessary, note the specifics of the game in different modes (AB, RB, SB).''--> | ||
| − | === | + | ===Manual Engine Control=== |
| − | + | {| class="wikitable" style="text-align:center" | |
| − | |||
| − | |||
| − | |||
| − | |||
| − | {| class="wikitable" style="text-align:center | ||
|- | |- | ||
| − | ! | + | ! colspan="7" | MEC elements |
| − | |||
|- | |- | ||
| − | ! | + | ! rowspan="2" |Mixer |
| − | | || | | + | ! rowspan="2" |Pitch |
| + | ! colspan="3" |Radiator | ||
| + | ! rowspan="2" |Supercharger | ||
| + | ! rowspan="2" |Turbocharger | ||
|- | |- | ||
| − | ! | + | ! Oil |
| − | + | ! Water | |
| + | ! Type | ||
|- | |- | ||
| − | + | | Controllable || rowspan="2" | Not controllable || rowspan="2" | Not controllable || rowspan="2" | Not controllable || rowspan="2" | Separate || rowspan="2" | Not ontrollable || rowspan="2" | Not controllable | |
| − | | | ||
|- | |- | ||
| − | + | |} | |
| − | | 1 || 1 || | + | |
| + | ===Modules=== | ||
| + | {| class="wikitable" | ||
| + | ! colspan="1" | Tier | ||
| + | ! colspan="2" | Flight performance | ||
| + | ! colspan="1" | Survivability | ||
| + | ! colspan="2" | Weaponry | ||
|- | |- | ||
| − | + | | I | |
| − | | || | | + | | Fuselage Repair |
| + | | Compressor | ||
| + | | Airframe | ||
| + | | Offensive 12 mm | ||
| + | | | ||
|- | |- | ||
| − | | | + | | II |
| + | | New Boosters | ||
| + | | | ||
| + | | | ||
| + | | | ||
| + | |FRC mk.2 | ||
| + | |- | ||
| + | | III | ||
| + | | Wings Repair | ||
| + | | Engine | ||
| + | | Cover | ||
| + | | New 12 mm MGs | ||
| + | | | ||
| + | |- | ||
| + | | IV | ||
| + | | G-suit | ||
| + | | | ||
| + | | | ||
| + | | | ||
| + | |FLBC mk.1 | ||
|- | |- | ||
|} | |} | ||
| − | |||
| − | |||
| − | |||
| − | |||
| − | |||
| − | |||
| − | |||
| − | |||
| − | |||
| − | |||
| − | |||
| − | |||
| − | |||
| − | |||
| − | |||
| − | |||
| − | |||
| − | |||
| − | |||
| − | |||
| − | |||
| − | |||
=== Pros and cons === | === Pros and cons === | ||
| − | <!-- '' | + | <!--''Summarize and briefly evaluate the vehicle in terms of its characteristics and combat effectiveness. Mark its pros and cons in the bulleted list. Do not use more than 6 points for each of the characteristics. Avoid using categorical definitions such as "bad", "good" and the like - they have a substitution in the form of softer "inadequate", "effective".''--> |
'''Pros:''' | '''Pros:''' | ||
| − | * | + | * |
| − | |||
| − | |||
| − | |||
'''Cons:''' | '''Cons:''' | ||
| − | * | + | * |
| − | |||
| − | |||
| − | |||
| − | |||
| − | |||
== History == | == History == | ||
| − | + | ''Describe the history of the creation and combat usage of the aircraft in more detail than in the introduction. If the historical reference turns out to be too big, take it to a separate article, taking a link to an article about the vehicle and adding a block "/ historical reference" (example: https://wiki.warthunder.com/Name-vehicles/historical reference) and add a link to it here using the <code>main</code> template. Be sure to include links to sources at the end of the article.'' | |
| − | |||
| − | |||
| − | |||
| − | |||
| − | |||
| − | |||
| − | |||
| − | |||
| − | |||
| − | |||
| − | |||
| − | |||
| − | |||
| − | |||
| − | |||
| − | |||
| − | |||
| − | |||
| − | |||
| − | |||
| − | |||
| − | |||
| − | |||
== Media == | == Media == | ||
| − | + | ''An excellent addition to the article will be video guides, as well as screenshots from the game and photos.'' | |
| − | + | == Read also == | |
| + | ''Links to the articles on the War Thunder Wiki that you think will be useful for the reader, for example,'' | ||
| − | |||
| − | |||
| − | |||
| − | |||
| − | |||
| − | |||
| − | |||
* ''reference to the series of the aircraft;'' | * ''reference to the series of the aircraft;'' | ||
| − | * ''links to approximate analogues of other nations and research trees.'' --> | + | * ''links to approximate analogues of other nations and research trees.'' |
| + | <!--''ETC.''--> | ||
| − | + | == Sources == | |
| + | ''Paste links to sources and external resources, such as:'' | ||
| − | |||
| − | |||
| − | |||
| − | |||
* ''topic on the official game forum;'' | * ''topic on the official game forum;'' | ||
| − | * ''other literature.'' | + | * ''page on aircraft encyclopedia;'' |
| − | + | * ''other literature.'' | |
| − | |||
| − | + | {{USA jet aircrafts}} | |
| − | {{USA jet | ||
Revision as of 16:00, 19 February 2019
Contents
Description

The F-80C-10 Shooting Star is a Rank V American jet fighter
with a battle rating of 7.7 (AB/RB) and 7.3 (SB). It is found under the F-80 bracket, immediately after the F-80A-5.
The greatest performance upgrade from the A-5 to the C-10 is that the C-10 comes with WEP. This additional power significantly increases acceleration, allowing you to match that of the British Meteor series. It also allows for a last-resort method to escape if you happen to get jumped on. With the WEP comes with fuel management. If you opt for maximum performance by selecting 9 minutes of fuel, you will run out of fuel quickly if you choose to WEP for the entire match.
Like most American props and tech P-80A, your best option to attack is Boom and Zoom. At the start of the match, fly out towards the edge of the map. Make light climbs at 2.5 degrees to 1000ft and dive down to sea level to convert it into speed. Rinse and repeat until you have reached 350kt, the zoom climb at 30 degrees. Once you have slowed down to 250kt, continue to climb at a solid 15-20 degrees. Optimally, you should have between 11000-15000ft depending on how high the highest enemy is, before turning in towards the area of conflict (continue to climb or maintain altitude). Only once you have selected a target should you dive and make your pass. Always keep your energy high, whether it be speed or altitude. Your greatest advantage is speed, as the P-80 is faster than almost every other jet at its tier. Defensive flying and rolling scissors is an option with the hydraulic boosters upgrade, however, you risk losing too much energy, and your attacker may choose to break off and try again while you are struggling to maintain lift.
If you are given an awkward firing angle (eg: you are directly vertical to your enemy and must pull 10G+ to line up a shot) or you fail to kill on your first pass, slowly pull your aircraft back up into a straight vertical climb to recover as much altitude as possible. If you persist on killing your target, you risk crashing into the ground from control stiffening or getting killed by another enemy because you are losing your energy in a dogfight.
General info
Flight Performance
| Characteristics | |||||||
|---|---|---|---|---|---|---|---|
| Stock | |||||||
| Max Speed (km/h at sea level) |
Max altitude (meters) |
Turn time (seconds) |
Rate of climb (meters/second) |
Take-off run (meters) | |||
| AB | RB | AB | RB | AB | RB | ||
| 891 | 884 | 12500 | 24.4 | 25.6 | 18.9 | 17.7 | 850 |
| Upgraded | |||||||
| Max Speed (km/h at sea level) |
Max altitude (meters) | Turn time (seconds) | Rate of climb (meters/second) |
Take-off run (meters) | |||
| AB | RB | AB | RB | AB | RB | ||
| 915 | 903 | 12500 | 23.7 | 24.0 | 32.2 | 25.2 | 850 |
Details
| Features | ||||
|---|---|---|---|---|
| Combat flap | Take-off flap | Landing flap | Air brakes | Arrestor gear |
| ✓ | ✓ | ✓ | ✓ | X |
| Limits | ||||
|---|---|---|---|---|
| Wing-break speed (km/h) |
Gear limit (km/h) |
Combat flap (km/h) |
Max Static G | |
| + | - | |||
| 990 | 380 | ??? | ~11 | ~4.5 |
| Optimal velocities | |||
|---|---|---|---|
| Ailerons (km/h) |
Rudder (km/h) |
Elevators (km/h) |
Radiator (km/h) |
| < ??? | < ??? | < ??? | > ??? |
| Compressor (RB/SB) | ||
|---|---|---|
| Setting 1 | ||
| Optimal altitude | 100% Engine power | WEP Engine power |
| 0 m | 2,086 kgf | 2,450 kgf |
Survivability and armour
- No armour plating
- No armour glazing
- Critical components located at front of aircraft (fuel, pilot, engine, controls)
- More fuel tanks located in wings near fuselage
Armaments
Offensive armament
Main article: Bombs-->
Usage in the battles
Manual Engine Control
| MEC elements | ||||||
|---|---|---|---|---|---|---|
| Mixer | Pitch | Radiator | Supercharger | Turbocharger | ||
| Oil | Water | Type | ||||
| Controllable | Not controllable | Not controllable | Not controllable | Separate | Not ontrollable | Not controllable |
Modules
| Tier | Flight performance | Survivability | Weaponry | ||
|---|---|---|---|---|---|
| I | Fuselage Repair | Compressor | Airframe | Offensive 12 mm | |
| II | New Boosters | FRC mk.2 | |||
| III | Wings Repair | Engine | Cover | New 12 mm MGs | |
| IV | G-suit | FLBC mk.1 | |||
Pros and cons
Pros:
Cons:
History
Describe the history of the creation and combat usage of the aircraft in more detail than in the introduction. If the historical reference turns out to be too big, take it to a separate article, taking a link to an article about the vehicle and adding a block "/ historical reference" (example: https://wiki.warthunder.com/Name-vehicles/historical reference) and add a link to it here using the main template. Be sure to include links to sources at the end of the article.
Media
An excellent addition to the article will be video guides, as well as screenshots from the game and photos.
Read also
Links to the articles on the War Thunder Wiki that you think will be useful for the reader, for example,
- reference to the series of the aircraft;
- links to approximate analogues of other nations and research trees.
Sources
Paste links to sources and external resources, such as:
- topic on the official game forum;
- page on aircraft encyclopedia;
- other literature.
| USA jet aircraft | |
|---|---|
| Fighters | |
| F-4 | F-4C Phantom II · F-4E Phantom II · F-4J Phantom II · F-4S Phantom II |
| F-5 | F-5A · F-5C · F-5E · F-20A |
| F-8 | F8U-2 · F-8E |
| F-80 | F-80A-5 · F-80C-10 |
| F-84 | F-84B-26 · F-84F · F-84G-21-RE |
| F-86 | F-86A-5 · F-86F-25 · F-86F-2 · F-86F-35 |
| F-89 | F-89B · F-89D |
| F-100 | F-100D |
| F-104 | F-104A · F-104C |
| F-14 | F-14A Early · F-14B |
| F-15 | F-15A |
| F-16 | F-16A · F-16A ADF · F-16C |
| F9F | F9F-2 · F9F-5 · F9F-8 |
| Other | P-59A · F2H-2 · F3D-1 · F3H-2 · F4D-1 · F11F-1 |
| Strike Aircraft | |
| FJ-4 | FJ-4B · FJ-4B VMF-232 |
| A-4 | A-4B · A-4E Early |
| A-6 | A-6E TRAM |
| A-7 | A-7D · A-7E · A-7K |
| AV-8 | AV-8A · AV-8C |
| A-10 | A-10A · A-10A Late |
| B-57 | B-57A · B-57B |
| F-105 | F-105D |
| F-111 | F-111A |
