Tetrarch I


Contents
Description
Development for this tank started in 1937 by Vickers-Armstrongs privately as the Light Tank Mk VII and nicknamed the Purdah. The trials tested the tank's ability to act as a "light cruiser", but this failed as the A13 cruiser was much better at the task. Thus, it was suggested that the Mk VII be tested as a light tank instead and production to be started for the trials. The Tetrarch was first issued in November 1940 to the 1st and 6th Armoured Division, the 1st had lost most of their equipment in the Battle of France and the 6th was a newly formed unit. While these units were sent to North Africa, the defects in the engine cooling system forced the Tetrarchs to stay behind, until they were taken out of armoured divisions due to the "light tank" concept becoming obsolete. Most of the Tetrarchs were shipped overseas and the Soviet Union compared their role to that of the T-70 light tank, they were mainly used for reconnaissance and for airborne operations.
It was introduced in Update 1.55 "Royal Armour" along with the initial British ground tree. A light tank with a 2-pounder, it fits the British light line of a fast tank with a powerful gun but weak armour. The Tetrarch plays like any other Rank I vehicle in the game. Zip around with high speed to the destination and get a first shot off on the enemy tank (preferably the gunner). The 2-pounder can penetrate most enemy tanks at close range and the 40 mm shells can cause a decent amount of shrapnel that can damage most of the internals at the area of the penetration. The mobility is great with the adequate horsepower to propel the 7 ton tank around. The armour is barely adequate for Rank I, with its flat surfaces encouraging penetration with the cramped interiors making one-hit destruction a worrying situation for the Tetrarch.
General info
Survivability and armour
The armour of the Tetrarch I is of a typical light tank style. Topping at 16 mm on the front of the hull and turret, its frontal armour is insufficient to stop heavy MG bullets. It can only resist rifle-calibre MG bullets or shrapnel, which significantly decreases its protection in any engagements. The side and rear armour is worse, at 14 and 10 mm respectively. This means that even rifle-calibre MG have a chance of penetrating it when close enough. Thus you should avoid absolutely every vehicle, including the seemingly harmless ones like GAZ-AAA (4M). The roof thickness of 4 to 7 mm is also not enough to stop aircraft bullets from above. Overall the armour values of the Tetrarch I is very poor and should never be relied upon.
Given the thin armour, any penetrating rounds will easily damage the interior. The 3 crew members of the Tetrarch are very closely packed, and can be knocked out easily by a frontal penetration, regardless of whether the round has explosive fillers. The thin armour also means that the crew is vulnerable to overpressure damage. Vehicles like the Ho-Ro or even the M8 HMC can trigger a devastating overpressure easily.
The Tetrarch I does get 2 smoke grenades which can be used to create chances for escape.
Armour type:
- Rolled homogeneous armour
- Cast homogeneous armour (Gun mantlet)
| Armour | Front | Sides | Rear | Roof |
|---|---|---|---|---|
| Hull | 16 mm (15°) Driver's port 16 mm (2°) Front plate 10 mm (72°) Front glacis 16 mm (19-43°) Lower glacis |
14 mm (0-1°) | 10 mm (22-51°) | 7 mm (79-88°) |
| Turret | 14 mm (18°) Turret front 16 mm (10-80°) Gun mantlet |
14 mm (13-15°) | 10 mm (2°) | 4 mm |
Notes:
- Suspension wheels and tracks are 15 mm thick.
- A little glimpse of the 4 mm roof can be seen from the front. A well placed HE round will penetrate and result in a knock-out.
Mobility
The Tetrarch I makes up for its lack of protection with a wonderful mobility. It is quite a light tank and has a 165 hp engine powering it, giving it a rather high power-to-weight ratio, meaning great acceleration across all types of terrains. It can reach its top speed of ~65 km/h quite quickly on hard surfaces like concrete road or grass plain. The off-road speed is also not disappointing, being around ~40 km/h on mountainous terrains. The brakes are effective too and can stop the vehicle properly at high speed. With this speed, the Tetrarch can get to crucial locations very quickly at the start of the match alongisde other fast vehicles from both teams, which is beneficial to cap a point and/or set up ambushes on a chokepoint.
However, just like most of the WW2 tanks, the Tetrarch suffers from a slow reverse speed of only -7 km/h, which will not be able to reverse you out of danger in time. Its hull traverse also feels "sticky", both turning on the move and when stationary will be quite slow when comparing to light tanks like the BT-5. This and the slow reverse prevent the Tetrarch I from manoeuvring freely in confined environments like urban maps, limiting its mobility.
| Game Mode | Max Speed (km/h) | Weight (tons) | Engine power (horsepower) | Power-to-weight ratio (hp/ton) | |||
|---|---|---|---|---|---|---|---|
| Forward | Reverse | Stock | Upgraded | Stock | Upgraded | ||
| Arcade | 75 | 7 | 7.6 | 256 | 315 | 33.68 | 41.45 |
| Realistic | 67 | 7 | 146 | 165 | 19.21 | 21.71 | |
Modifications and economy
| Mobility | Protection | Firepower | ||||||||||||||||||||
|---|---|---|---|---|---|---|---|---|---|---|---|---|---|---|---|---|---|---|---|---|---|---|
|
|
|
- The "Parts" and "FPE" modifications are important, even if this tank has poor survivability.
- Since the turret traverse is dangerously slow for a light tank, one might want to research the "Horizontal Drive" first to get that extra few degrees of rotation.
- Then, unlocking "Tracks" can give you a little bit smoother hull traverse.
- The rest depends on your choice: if you want a gorilla warfare playstyle and need to constantly be moving, then research the mobility modifications first; if you hate the solid round, research the APHE and maybe the rest of the firepower modifications too. A few good matches should get you enough XP to unlock all modifications.
Armaments
Main armament
The Tetrarch is armed with a 40 mm QF 2pdr cannon. The cannon has a fast reload rate of ~3 seconds thanks to its small calibre, allowing it to quickly fire off follow-up shots to finish an enemy. The vertical gun traverse is excellent: -15° gun depression and +25° elevation, meaning it can fit almost any hilly terrain with ease.
It also has access to a shoulder stabiliser that works when the tank is under ~7 km/h, which can be a huge advantage in allowing the Tetrarch to target and fire first. You can use the "battle" cruise gear to drive at this speed. Although lots of early war tanks also has this device which counters your advantage to some extent, it is still a nice addition to have on the battlefield.
The gunsight zoom of 3.5x is average in this era, so the Tetrarch can only view targets at medium to close ranges clearly. Long range targeting is still doable, though much harder and you usually have to squint.
The biggest drawback of the Tetrarch I's firepower is the painful turret traverse. Rotating at ~5°/s, this speed is far from enough to allow the Tetrarch to respond to surprise attacks in time. Usually you will have to traverse the entire tank to compensate for the slow turret rotation, but the hull traverse is also not fantastic. If you know the general directions of enemies, it is better to rotate the turret to those directions before targets even appear, to avoid not having enough time to get your gun on them. The substandard turret rotation also makes engagements with fast vehicles (e.g. BT-5, AS 42, etc) very dangerous as the Tetrarch will almost certainly struggle to keep up with those fast moving targets.
| 40 mm QF 2-pounder | Turret rotation speed (°/s) | Reloading rate (seconds) | |||||||||||
|---|---|---|---|---|---|---|---|---|---|---|---|---|---|
| Mode | Capacity | Vertical | Horizontal | Stabilizer | Stock | Upgraded | Full | Expert | Aced | Stock | Full | Expert | Aced |
| Arcade | 50 | -15°/+25° | ±180° | Shoulder | 6.7 | 9.2 | 11.2 | 12.4 | 13.2 | 3.64 | 3.22 | 2.97 | 2.80 |
| Realistic | 4.2 | 4.9 | 6.0 | 6.6 | 7.0 | ||||||||
Ammunition
- The default round is the Shot Mk.1 AP/T. This shell has a maximum penetration of 72 mm which is generally enough to frontally penetrate most if not all tanks at this BR. The trajectory is average. Its post-penetration effect is mediocre since it is a solid round, and it might only knock out tanks that are very cramped with a single shot, like the BT series, the M22, etc. For large targets like the LVT, this shot will struggle a lot. You might even have to target the crew members one by one.
- The researchable Shot Mk.IXB APCBC/T has the highest penetration, at a maximum of 89 mm. This makes it useful against heavy opponents like the B1 if you take the Tetrarch to a higher BR. The shell can only penetrate effectively with minimum or no angling from the target armour plate, any slopes tend to result in non-penetrations or ricochets.
- The researchable Shell Mk.1 AP/T is perhaps the best choice, since it has an explosive filler. Its maximum penetration of 66 mm is adequate to frontally penetrate all light and medium vehicle within common combat range (0-600 m), and the explosive filler can do a great job at knocking out most if not all crew within the enemy vehicle. However against better armoured tanks (e.g. Ka-Chi) or large tanks (e.g. LVT(A)) the shell will start losing effectiveness and will not be able to take them out with a single shot or even effectively penetrate them.
- The Shot Mk.1 APHV/T is an average ammunition, with alright penetration. Its only advantage is the faster velocity, at 853 m/s. This makes it a little better at shooting moving targets.
| Penetration statistics | |||||||
|---|---|---|---|---|---|---|---|
| Ammunition | Type of warhead |
Penetration @ 0° Angle of Attack (mm) | |||||
| 10 m | 100 m | 500 m | 1,000 m | 1,500 m | 2,000 m | ||
| Shot Mk.1 AP/T | AP | 72 | 68 | 52 | 37 | 27 | 19 |
| Shot Mk.IXB APCBC/T | APCBC | 89 | 86 | 77 | 66 | 57 | 50 |
| Shot Mk.1 APHV/T | AP | 80 | 75 | 58 | 41 | 30 | 21 |
| Shell Mk.1 AP/T | APHE | 66 | 62 | 49 | 36 | 26 | 20 |
| Shell details | ||||||||||||
|---|---|---|---|---|---|---|---|---|---|---|---|---|
| Ammunition | Type of warhead |
Velocity (m/s) |
Projectile mass (kg) |
Fuse delay (m) |
Fuse sensitivity (mm) |
Explosive mass (TNT equivalent) (g) |
Ricochet | |||||
| 0% | 50% | 100% | ||||||||||
| Shot Mk.1 AP/T | AP | 792 | 1.08 | - | - | - | 47° | 60° | 65° | |||
| Shot Mk.IXB APCBC/T | APCBC | 792 | 1.24 | - | - | - | 48° | 63° | 71° | |||
| Shot Mk.1 APHV/T | AP | 853 | 1.08 | - | - | - | 47° | 60° | 65° | |||
| Shell Mk.1 AP/T | APHE | 792 | 1.08 | 1.2 | 9 | 20.9 | 47° | 60° | 65° | |||
Ammo racks

| Full ammo |
1st rack empty |
2nd rack empty |
3rd rack empty |
4th rack empty |
Visual discrepancy |
|---|---|---|---|---|---|
| 50 | 38 (+12) | 25 (+25) | 13 (+37) | 1 (+49) | No |
Optics
| Tetrarch I Optics | ||
|---|---|---|
| Default magnification | Maximum magnification | |
| Main Gun optics | x1.8 | x3.5 |
| Comparable optics | AMR.35 ZT3 | |
Machine guns
| 7.92 mm BESA | ||||
|---|---|---|---|---|
| Mount | Capacity (Belt) | Fire rate | Vertical | Horizontal |
| Coaxial | 2,025 (225) | 600 | N/A | N/A |
Usage in battles
This tank is all about mobility: it can nearly go anywhere fast, surprising the enemy. Being one of the smallest vehicles in game, the Tetrarch will be able to roll through the thinnest passages at high speed. Its short hull enables it to cross hilly woods and rocky ground without ditching. On gear 1, it can climb any hill, as long as it sticks to the ground, thus reaching advantageous spots from where it can snipe using its good gun depression, showing only its tiny turret. Although, it is recommended to change position often since anyone knowing where the Tetrarch is can pin it down easily (remember that the Tetrarch only have 3 crew members and thin armour). Consider flanking with this vehicle since it has such a good speed but beware the Tetrarch's slow turret slewing rate, so pre-aim the cannon in the expected direction of the enemy.
Target isolated enemies since the 2-pounder gun does not have significant post-penetration damage. Shoot the gunner first to disable it from returning fire, then, stop it from moving by shooting the driver, engine or transmission. Et voilà ! then, disable every crewmen one by one. Make sure to shoot at the gunner's and driver's position every 3-4 shots since it takes roughly 15 seconds to replace them.
Use the Tetrarch's awesome off-road mobility and climbing to get into an unusual position behind enemy lines, fire a few shot and disappear in the shadows. If the Tetrarch gets spotted before finishing an enemy, flee: staying alive is more important than destroying someone, finish the enemy off later, when they have forgotten about the Tetrarch's presence.
Otherwise, anyone playing the Tetrarch should get back behind friendly lines if two or more enemies are approaching since its cannon can only take down enemies one by one, patiently shooting down each crewman.
Enemies worth noting:
As with any tank equipped with the QF 2-pounder, little post-penetration damage makes large and crowded tanks a nightmare, thus, LVT(A)(1), T-28 and the less common T-35 should be avoided, although the Tetrarch's APHE shell can be rather quite effective against these vehicles. The fast rate of fire is also helpful to pinpoint their crew members one by one.
- M3/M5: the Stuart series light tank have equally fast top speed both on road and off road, meaning they can rush a cap point or relocate just as swiftly as you can. They also have way faster turret traverse, allowing them to deal with close quarter combat much more efficiently, making them deadlier. Although their gun calibre is smaller at 37 mm, they can still cripple or knock you out with a single shot due to your cramped crew. They have a bouncy upper hull glacis and a sturdy gun mantlet, so avoid shooting there. Your APHE shell can frontally penetrate and cripple or knock them out in return. Try using your stabiliser to shoot first.
- AS 42: this is a small and fast Italian SPAA car armed with a 20 mm autocannon. The gun has no problem piercing your thin armour from any angle, and the fast rate of fire means that it can quickly wipe out all your crew. Since it is small and fast, it can be challenging to target it given the Tetrarch I's extremely poor turret rotation. Rotate the hull to aim faster, and spray MG bullets towards it between reloads.
- Ka-Chi: this amphibious Japanese tank can be quite strong. It has 50 mm frontal armour which can defeat most of the Tetrarch I's rounds when at a distance and/or angling. It also has spaced armour on the hull sides, and most noticeably the additional floaters at the hull front and back. The floaters will act as very effective spaced armour, absorbing HEAT, HE and even kinetic rounds. The Ka-Chi has 7 crew spread out inside, meaning it is pretty impossible to one-shot it using APHE. It is not advised to engage it from a distance, since the hull is quite thick especially with the floaters. To avoid the large hull and target the weaker turret it is best to get close, preferably within 400 m. The Tetrarch I's APHE can easily take out the Ka-Chi's turret crew. Only shoot when it is distracted or reloading though, as its 47 mm APHE can undoubtedly penetrate and knock out all 3 crew members in the Tetrarch at any range and angle.
Pros and cons
Pros:
- Powerful gun with piercing shells and fast reload
- Awesome mobility: high top speed, great acceleration, and good climbing ability
- Vertical stabilizer available for the 2-pounder, an advantage in CQC
- Small profile, is harder to get spotted and hit
- Large gun depression of -15 degrees
- 2 smoke grenade launchers
Cons:
- Rather slow turret traverse
- High speed often makes the vehicle hard to control
- Low survivability: incredibly thin armour, low crew count, and is vulnerable to overpressure or even ramming damage
- Terrible reverse speed
- High shell dispersion at longer ranges
- Short hull, has difficulty crossing ditches/trenches
History
Development
Development for this tank started in 1937 by Vickers-Armstrongs privately as the Light Tank Mk VII and nicknamed the Purdah.[1]. The intention was for the tank to be sold to either the British Army or foreign countries as the latest light tank of the company. Its predecessor, the Mk VIB Light Tank, was considered insufficient in firepower, armed with only machine guns. The new design would use the new 2-pounder gun along with a coaxial machine gun. The Mk VII design was finished around 1938, and the British War Office (government administrating the British Army) took up the design for trials in May 1938 that lasted until June. The trials tested the Mk VII's ability to act as a "light cruiser", but this failed as the A13 cruiser was much better at the task. Thus, it was suggested that the Mk VII be tested as a light tank instead and production to be started for the trials. During the trials, the War Office gave the Mk VII the specification number A17 for identification and was put into limited production in November 1938 with a few design changes. It was initially known as the "Purdah" from its standardization date, but in September 22, 1941, the Mk VII Light Tank also received the name Tetrarch as part of an order to distinguish tanks by chosen names.
Demand for the tank fluctuated depending on the War Office demand for the tank. In July 1938, the first order came for 70 tanks, then 100, then 120 in November, then back to 70 in July 1940. This order then jumped back to 100, then finally settled on 220 after Metropolitan Cammell Carriage and Wagon, a part of Vickers-Armstrong, had enough armour plating to create that many tanks. Production was suppose to start in July 1940, but was delayed due to many factors, especially with World War II now on full swing against Germany. Light tank also soon fell out of War Office use after the poor performance they showed in the Battle of France, so military production was focused on the infantry and cruiser tanks rather than light tanks. Bombing raids by the Luftwaffe in the Blitz also disrupted the production of the tanks when the factories intended for their production were targeted. These delays due to waning military interest, the pressure of war, and enemy attacks caused only a small number of Tetrarch light tanks to be produced, with 177 units produced from 1938 to 1942.[1]
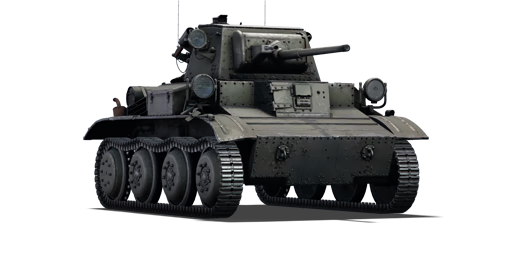
Design
The Tetrarch featured armour only about 16 mm thick and the whole design weighed about 7.6 tonnes. The vehicle moved on a eight road wheel (four on each side) suspension system and there were no other driver or idler wheel present. The engine powering the vehicle was a 165 hp Meadows Type 30 engine that can propel the vehicle up to a speed of 64 km/h. The vehicle functions on a steering mechanism and mechanical system taken from earlier Vickers tanks, the unique steering mechanism allowed for turning by bending the tracks on each side of the tank rather than by braking a set of track, but the latter was still involved when making sharper turns and low speed turns.[1]
However, the Tetrarch presented many faults in its design during its time with the British military. The small size of the tank only allowed a crew of three for the tank to operate, making it a very cramped and the crew overworked. Also, the Tetrarch's cooling system was faulty, enough so that the Tetrarch was an unsuitable tank for the North Africa campaign due to the hot climate at the area.
Combat usage
The Tetrarch was first issued in November 1940 to the 1st and 6th Armoured Division, the 1st had lost most of their equipment in the Battle of France and the 6th was a newly formed unit. While these units were sent to North Africa, the defects in the engine cooling system forced the Tetrarchs to stay behind, until they were taken out of armoured divisions due to the "light tank" concept becoming obsolete, though they were still used as training vehicles.
The Tetrarchs still saw use overseas as part of the Lend-Lease program, and 20 were supplied to the Soviet Union in 1942 to fight back the invading German Army. In the cold Russian weather, it was noted that the cooling problem was still present and the cold also caused damages to the tank's suspension and tracks. The vehicle was well-liked for its handling, manoeuvrability, and speed, plus was compatible with low-octane fuel the Soviets used in their diesel-powered tanks. The Soviets compared the Tetrarch's capabilities to their T-70 light tank and employed the Tetrarch in the same roles. Some were used for training, other as propaganda purposes, and combat, with a notable event where two were assigned to the 132nd Separated Tank Battalion in September 1943. Both Tetrarchs were destroyed in combat.
Back to the British, in mid-1941, the Tetrarch was still integrated in the Royal Armoured Corps as part of tank squadrons that would be sent to overseas operations. The three Special Service Squadrons exist as "A", "B", and "C"; "A" and "B" were armed with the older Mk VI light tank and the Valentine tank, but the "C" squadron was equipped with 12 Tetrarchs in its ranks. These squadrons were first used in Freetown, West Africa in order to ensure Spain does not enter the conflict on Germany's side, then the squadrons were withdrawn to Operation Ironclad, the invasion of Madagascar. Six Tetrarchs were deployed alongside Valentines in "B" Special Service Squadron, which took elements of "B" and "C" squadron. The invasion commenced on May 5, 1942 and "B" Squadron encountered difficulty after a Tetrarch became stuck in the beach after coming loose from a landing craft. The Tetrarch and Valentine were still able to assist the infantry after that delay, but the rocky terrain in the region made tank manoeuvring difficult. After two days of combat, the forces on the island formally surrendered, the losses experienced by the squadron were 8 tanks knocked out, with only four tanks (1 Valentine and 3 Tetrarchs) left functional.
After Operation Ironclad, the Tetrarchs were shifted in their roles to become part of the airborne forces after War Office and the Army decided that the light tanks of the day were not capable of competing against other tanks. It was in mid-1941 when the Airborne forces decided to use gliders as part of their landing equipment and the General Aircraft Hamilcar glider can carry one Tetrarch tank and its crew in the storage compartment. By 1942, the War Office had redesignated the Tetrarch as an "airborne" tank and the essential unit with the Tetrarch on hand was the "C" Squadron, converted into an independent tank unit and brought to the airborne forces in June 1942. Though intentionally in 1st Airborne Division and primed for the invasion of Sicily, not enough gliders for the Tetrarchs were available so they were left behind, the "C" squadron was transferred to 6th Airborne Division in April 1943. The squadron was expanded into a regiment by bringing in more light tanks and other reconnaissance vehicles, the regiment has at least 21 Tetrarchs on hand in its three squadrons in May 1944, some modified with a 76.2 mm howitzer for close support (CS) and others retaining the 2-pounder that has Littlejohn adaptors that increased its penetration capabilities. A consistent problem for the airborne forces was the low number of tanks available to them; with only 50 available Tetrarchs reported in December 1942, the demand could not be met, thus a new airborne tank design must be made to fill this demand, which the specifications was sent to the United States for manufacturing.
The next British operation using the Tetrarch was Operation Tonga, which was an airborne operation that took place alongside D-Day with the objective to capture two bridges over the Caen Canal and Orne River. This began in June 5, 1944 with only parachute brigades landing first to clear anti-glider obstacles on the landing zones, which then allowed the gliders to land on the next day, carrying the tanks with them. As they landed, the tank force of about twenty tanks became depleted by four tanks from glider incidents, the remaining Tetrarchs still operational were ordered to link-up with 8th Parachute Battalion to preform reconnaissance. The general notion with the Tetrarch was for it to avoid any contact with German armour as even the most typical German unit like the Panzer III can destroy the Tetrarch, so the tank was relegated to infantry support. By August 1944, the majority of the Tetrarchs in the squadron were replaced with Cromwells and only three Tetrarchs remained with the Headquarters troop of the Regiment.
Operation Tonga was the last World War II conflict involving the Tetrarch, and it was replaced by the M22 Locust in October 1944. Though declared obsolete in January 1946, the Tetrarchs stayed with a few units like the 3rd Hussars until 1949.[1] The Tetrarch in every military branch, even in training exercises, were formally removed from service by 1950.
Media
- Skins
- Videos
See also
- Other vehicles of similar configuration and role
External links
References
| Vickers-Armstrongs Limited | |
|---|---|
| Ships | |
| Tribal-class | HMS Eskimo · HMCS Haida |
| Invincible-class | HMS Invincible* |
| Kongō-class | IJN Kongo** |
| Tanks | |
| Light Tanks | VFM5*** · Vickers Mk.11*** |
| Light Tank Mk VI | Light AA Mk I |
| Light Tank Mk VII | Tetrarch I |
| Light Tank Mk VIII | Alecto I |
| Tank, Infantry, Valentine | Valentine I · Valentine IX · Valentine XI · Archer |
| Vickers MBT | Vickers Mk.1 · Vickers Mk.3 · Vickers Mk.7*** |
| Heavy Tanks | Independent**** |
| Export | ▂МК-IX "Valentine" · Vickers Mk.E**** |
| See also | Vickers-Armstrongs Aircraft Limited |
| *Previously Armstrong Whitworth | |
| **Built for Japan | |
| ***Vickers Defence Systems | |
| ****Previously Vickers Limited | |
| Britain light tanks | |
|---|---|
| A13 | A13 Mk I · A13 Mk I (3rd R.T.R.) · A13 Mk II · A13 Mk II 1939 |
| A15 | Crusader II · Crusader "The Saint" · Crusader III |
| A17 | Tetrarch I |
| IFV | Warrior · Desert Warrior (Kuwait) |
| Wheeled | Daimler Mk II · AEC Mk II · Fox · Vickers Mk.11 |
| Other | VFM5 |
| South Africa | |
| SARC | SARC MkIVa · SARC MkVI (2pdr) · SARC MkVI (6pdr) |
| Ratel | Ratel 90 · Ratel 20 |
| Rooikat | Rooikat Mk.1D · Rooikat 105 · Rooikat MTTD |
| Other | Concept 3 · Eland 90 Mk.7 |
| USA | Stuart I · Stuart III |
