
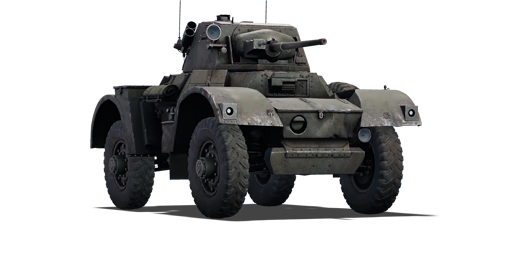


The excellent performance of the turretless Daimler Scout Car led people to suggest that a larger armoured car version with a turret be built as well. The Daimler was similar in design but also introduced a rear-facing wheel for the commander to use in an emergency. The same turret used for the Tetrarch was employed by the Daimler. Most of their use was during the Africa Campaign, where armoured cars were crucial in the vast distances of the dessert, in situations where mobility was often more important than raw power. The tank was Britain's main reconnaissance vehicle during this time period, while it was also the heaviest of all the armoured cars fitted by the British.
It was introduced in Update 1.71 "New E.R.A.". A QF 2-pounder on 4x4 wheels, this vehicle is made to support infantry in a way similar to the cavalry. It is not made to withstand heavy fire. Notably, its wheeled configuration means the car does not fire well when on the move, and it will turn in an arc. Meanwhile, its good reverse speed could possibly save the car as long as the move happens before the enemy shoots. The Daimler is recognisable from other armoured cars by its hexagonal hull centre and its short length. It has 4 mm boxes scattered across the hull and a spare tire on the left side. Besides the main armament, it is equipped with a coaxial BESA machine gun (same MG as higher rank British vehicles), a decent gun to shower open-topped SPGs with lead.
| Ammunition | Type | Armor penetration (mm) at a distance: | |||||
|---|---|---|---|---|---|---|---|
| 10 m | 100 m | 500 m | 1000 m | 1500 m | 2000 m | ||
| AP | 72 | 68 | 52 | 37 | 27 | 19 | |
| APCBC | 89 | 86 | 77 | 66 | 57 | 50 | |
| AP | 80 | 75 | 58 | 41 | 30 | 21 | |
| APHE | 66 | 62 | 49 | 36 | 26 | 19 | |
| Belt | Belt filling | Armor penetration (mm) at a distance: | |||||
|---|---|---|---|---|---|---|---|
| 10 m | 100 m | 500 m | 1000 m | 1500 m | 2000 m | ||
| AP-I/AP-I/AP-T | 9 | 8 | 6 | 3 | 0 | 0 | |

Mobility | |
|---|---|
Protection |
|---|
Firepower | |
|---|---|
