Difference between revisions of "Ar 234 C-3"
Colok76286 (talk | contribs) |
FADESHADOW (talk | contribs) m (→Pros and cons) (Tag: Visual edit) |
||
| (69 intermediate revisions by 21 users not shown) | |||
| Line 1: | Line 1: | ||
| − | {{ | + | {{Specs-Card|code=arado-234c-3}} |
| − | |about | + | {{Notice|''This page is about the aircraft '''{{PAGENAME}}'''. For the other version, see [[Ar 234 B-2]]''}} |
| − | |||
| − | |||
| − | |||
| − | |||
| − | |||
| − | |||
| − | }} | ||
| − | |||
== Description == | == Description == | ||
| − | <!-- ''In the description, the first part | + | <!--''In the description, the first part needs to be about the history of and the creation and combat usage of the aircraft, as well as its key features. In the second part, tell the reader about the aircraft in the game. Insert a screenshot of the vehicle. If the novice player does not remember the vehicle by name, he will immediately understand what kind of vehicle it is talking about.''--> |
| − | |||
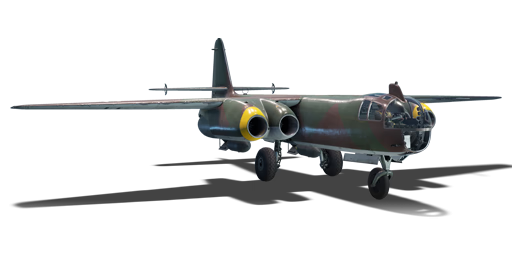
| − | The ''' | + | [[File:GarageImage_Ar234C3.jpg|420px|thumb|left]] |
| + | {{break}} | ||
| + | The '''Arado Ar 234 C-3''' is a Rank V German jet bomber with a battle rating of 6.7 (AB) and 7.0 (RB/SB). It was introduced in [[Update_1.49_"Weapons_of_Victory"|Update 1.70.1945 "Weapons of Victory"]]. | ||
== General info == | == General info == | ||
| − | === Flight | + | === Flight Performance === |
| − | + | <!--''Describe how the aircraft behaves in the air. Maximum speed, maneuverability, speed and allowable loads - these are the most important characteristics of the vehicle.''--> | |
| − | <!-- ''Describe how the aircraft behaves in the air. | + | {| class="wikitable" style="text-align:center" |
| − | + | |- | |
| − | + | ! colspan="8" | Characteristics | |
| − | + | |- | |
| − | + | ! colspan="8" | ''Stock'' | |
| − | + | |- | |
| − | + | ! colspan="2" | Max Speed<br>(km/h at 0 m - Sealevel) | |
| − | + | ! rowspan="2" | Max altitude<br>(meters) | |
| − | |||
| − | |||
| − | |||
| − | |||
| − | |||
| − | |||
| − | |||
| − | |||
| − | |||
| − | |||
| − | |||
| − | |||
| − | |||
| − | |||
| − | |||
| − | |||
| − | {| class="wikitable" style="text-align:center" | ||
| − | ! | ||
| − | ! colspan="2" | Max Speed<br>(km/h at 0 m - | ||
| − | ! rowspan="2" | Max altitude<br>( | ||
! colspan="2" | Turn time<br>(seconds) | ! colspan="2" | Turn time<br>(seconds) | ||
| − | ! colspan="2" | Rate of climb<br>( | + | ! colspan="2" | Rate of climb<br>(meters/second) |
| − | ! rowspan="2" | Take-off run<br>( | + | ! rowspan="2" |Take-off run<br>(meters) |
| + | |- | ||
| + | ! AB | ||
| + | ! RB | ||
| + | ! AB | ||
| + | ! RB | ||
| + | ! AB | ||
| + | ! RB | ||
| + | |- | ||
| + | | 847 || 841 || 13,000 || 30.2 || 31.0 || 23.9 || 22.4 || 1,500 | ||
| + | |- | ||
| + | ! colspan="8" | ''Upgraded'' | ||
|- | |- | ||
| − | ! | + | ! colspan="2" | Max Speed<br>(km/h at ?,000 m) |
| + | ! rowspan="2" |Max altitude (meters) | ||
| + | ! colspan="2" | Turn time (seconds) | ||
| + | ! colspan="2" | Rate of climb<br>(meters/second) | ||
| + | ! rowspan="2" |Take-off run (meters) | ||
|- | |- | ||
| − | ! | + | ! AB |
| − | + | ! RB | |
| + | ! AB | ||
| + | ! RB | ||
| + | ! AB | ||
| + | ! RB | ||
|- | |- | ||
| − | + | | ? || ? || 13,000 || ??.? || ??.? || ?.? || ?.? || 1,500 | |
| − | | | ||
|- | |- | ||
|} | |} | ||
| − | ==== Details ==== | + | ====Details==== |
| − | {| class="wikitable" style="text-align:center | + | {| class="wikitable" style="text-align:center" |
|- | |- | ||
| − | ! colspan=" | + | ! colspan="5" | Features |
|- | |- | ||
| − | ! Combat | + | ! Combat flap |
| + | ! Take-off flap | ||
| + | ! Landing flap | ||
| + | ! Air brakes | ||
| + | ! Arrestor gear | ||
|- | |- | ||
| − | | ✓ || ✓ || ✓ | + | | ✓ || ✓ || ✓ || X || X <!-- ✓ --> |
|- | |- | ||
|} | |} | ||
| − | {| class="wikitable" style="text-align:center | + | {| class="wikitable" style="text-align:center" |
|- | |- | ||
| − | ! colspan=" | + | ! colspan="5" | Limits |
|- | |- | ||
| − | ! rowspan="2" | | + | ! rowspan="2" | Wing-break speed<br>(km/h) |
| − | ! rowspan="2" | Gear (km/h) | + | ! rowspan="2" | Gear limit<br>(km/h) |
| − | ! | + | ! rowspan="2" | Combat flap<br> (km/h) |
! colspan="2" | Max Static G | ! colspan="2" | Max Static G | ||
|- | |- | ||
| − | + | ! + | |
| − | |- | + | ! - |
| − | + | |- 400 550 1,000 || ~11 ~5 | |
|- | |- | ||
|} | |} | ||
| Line 88: | Line 83: | ||
{| class="wikitable" style="text-align:center" | {| class="wikitable" style="text-align:center" | ||
|- | |- | ||
| − | ! colspan="4" | Optimal velocities | + | ! colspan="4" | Optimal velocities |
|- | |- | ||
| − | ! Ailerons | + | ! Ailerons<br>(km/h) |
| + | ! Rudder<br>(km/h) | ||
| + | ! Elevators<br>(km/h) | ||
| + | ! Radiator<br>(km/h) | ||
|- | |- | ||
| − | | < 500 || < 500 || < 650 || | + | | < 500 || < 500 || < 650 || > 250 |
|- | |- | ||
|} | |} | ||
| − | |||
{| class="wikitable" style="text-align:center" | {| class="wikitable" style="text-align:center" | ||
|- | |- | ||
| − | ! colspan="3" | | + | ! colspan="3" | Compressor (RB/SB) |
| − | |||
|- | |- | ||
| − | ! | + | ! colspan="3" | Setting 1 |
| − | |||
|- | |- | ||
| − | + | ! Optimal altitude | |
| − | + | ! 100% Engine power | |
| + | ! WEP Engine power | ||
|- | |- | ||
| − | + | | 0 m || 910 kgf || No WEP | |
| − | |||
|- | |- | ||
| − | ! | + | <!--! colspan="3" | Setting 2 |
| − | |||
|- | |- | ||
| − | + | ! Optimal altitude | |
| − | + | ! 100% Engine power | |
| + | ! WEP Engine power | ||
|- | |- | ||
| − | + | | ?,??? m || ?,??? hp || ?,??? hp | |
| − | |||
|- | |- | ||
| − | ! | + | ! colspan="3" | Setting 3 |
| − | |||
|- | |- | ||
| − | + | ! Optimal altitude | |
| − | + | ! 100% Engine power | |
| − | + | ! WEP Engine power | |
| − | |||
| − | |||
|- | |- | ||
| + | | ?,??? m || ?,??? hp || ?,??? hp | ||
| + | |- --> | ||
|} | |} | ||
=== Survivability and armour === | === Survivability and armour === | ||
| − | + | <!--''Examine the survivability of the aircraft. Note how vulnerable the structure is and how secure the pilot is, whether the fuel tanks are armoured. Describe the armour, if there is any, also mention the vulnerability of other critical aircraft systems.''--> | |
| − | <!-- ''Examine the survivability of the aircraft. Note how vulnerable the structure is and how secure the pilot is, whether the fuel tanks are armoured | ||
| − | * No armour | + | * No armour plating |
| − | * | + | * No armour glazing |
| − | + | * Critical components located at front of aircraft (fuel, pilot, engine, controls) | |
| − | + | * More fuel tanks located in wings near fuselage | |
| − | |||
== Armaments == | == Armaments == | ||
| − | |||
=== Offensive armament === | === Offensive armament === | ||
| − | + | <!--''Describe the offensive armament of the aircraft, if any. Describe how effective the cannons and machine guns are in a battle, and also what belts or drums are better to use. If there is no offensive weaponry, delete this subsection.''--> | |
| − | <!-- ''Describe the offensive armament of the aircraft, if any. Describe how effective the cannons and machine guns are in a battle, and also what belts or drums are better to use. If there is no offensive weaponry, delete this subsection.'' --> | + | {{main|MG 151/20 (20 mm)}} |
| − | {{main|MG 151 (20 mm)}} | ||
The '''''{{PAGENAME}}''''' is armed with: | The '''''{{PAGENAME}}''''' is armed with: | ||
| − | * 2 x 20 mm MG 151 | + | * 2 x 20 mm MG 151/20 cannon, chin-mounted (250 rpg = 500 total) |
=== Suspended armament === | === Suspended armament === | ||
| − | + | <!--''Describe the aircraft's suspended armament: additional cannons under the wings, bombs, rockets and torpedoes. This section is especially important for bombers and attackers. If there is no suspended weaponry remove this subsection.''--> | |
| − | <!-- ''Describe the aircraft's suspended armament: additional cannons under the wings, bombs, rockets and torpedoes. This section is especially important for bombers and attackers. If there is no suspended weaponry remove this subsection.'' --> | ||
{{main|SC250JA (250 kg)|SC500K (500 kg)|SC1000L2 (1,000 kg)}} | {{main|SC250JA (250 kg)|SC500K (500 kg)|SC1000L2 (1,000 kg)}} | ||
| − | The '''''{{PAGENAME}}''''' can be outfitted with the following | + | The '''''{{PAGENAME}}''''' can be outfitted with the following ordinance: |
* 3 x 250 kg SC250JA bombs (750 kg total) | * 3 x 250 kg SC250JA bombs (750 kg total) | ||
* 3 x 500 kg SC500K bombs (1,500 kg total) | * 3 x 500 kg SC500K bombs (1,500 kg total) | ||
| − | * 1 x | + | * 1 x 1000 kg SC1000L2 bomb (1,000 kg total) |
| − | * 1 x | + | * 1 x 1000 kg SC1000L2 bomb + 2 x 250 kg SC250JA bombs (1,500 kg total) |
| + | <!-- | ||
| + | === Defensive armament === | ||
| + | ''Defensive armament with turret machine guns or cannons, crewed by gunners. Examine the number of gunners and what belts or drums are better to use. If defensive weaponry is not available remove this subsection.'' | ||
| + | --> | ||
| − | == Usage in battles == | + | == Usage in the battles == |
| − | <!-- ''Describe the tactics of playing in | + | <!--''Describe the tactics of playing in an aircraft, the features of using vehicles in a team and advice on tactics. Refrain from creating a "guide" - do not impose a single point of view but give the reader food for thought. Examine the most dangerous enemies and give recommendations on fighting them. If necessary, note the specifics of the game in different modes (AB, RB, SB).''--> |
| + | The standard bombs on the Ar 234 C-3 are 3 x 250 kg bombs and 3 x 500 kg bombs. You will have access to them even if your Arado is stock. Additionally, this variant of the Arado possesses 2 x 20 mm MG 151 cannons, so one of the best ways to use your Arado to ensure you can farm RP and SL for your modifications is: | ||
| − | + | 1- Equip the 3 x 500 kg bombs and start the match at the air spawn point. | |
| − | + | 2- On maps such as Berlin, move to one of the enemy bases and drop your 3 x 500 kg bombs. 1.5 tonnes worth of bombs are enough to destroy a base, so from there you have two options to choose from: | |
| − | + | '''2.1 - Go back to the airfield and get new bombs'''<br> | |
| − | + | If you choose go back to airfield to get new bombs, be aware that unfortunately the Arado does not have any air brakes, which is a problem as it has particularly good energy retention and some pilots may find it hard to safely land. | |
| − | 2.1 Go back to the airfield and get new bombs | ||
| − | |||
| − | If you choose | ||
When landing the Arado, decrease speed by turning before you reach the airfield (aim to be at 400 km/h or less) then align with the landing strip, activate your flaps and proceed with the landing. If using the landing gear, ensure that you are at extremely low speed before landing or that the landing strip is long enough to stop on. The Arado has extremely good energy retention and is very heavy, so it does take a long time to stop. You can land without gear, which, while obviously dangerous, offers a much better chance to stop in time on shorter landing strips. To do this, land flat on the belly and avoid allowing the wings to touch the ground before you stop moving. | When landing the Arado, decrease speed by turning before you reach the airfield (aim to be at 400 km/h or less) then align with the landing strip, activate your flaps and proceed with the landing. If using the landing gear, ensure that you are at extremely low speed before landing or that the landing strip is long enough to stop on. The Arado has extremely good energy retention and is very heavy, so it does take a long time to stop. You can land without gear, which, while obviously dangerous, offers a much better chance to stop in time on shorter landing strips. To do this, land flat on the belly and avoid allowing the wings to touch the ground before you stop moving. | ||
| − | |||
| − | Once you have dropped your bombs, you can turn your sights to enemy aircraft; the Arado C-3 is quite capable as a fighter, especially in comparison to other German BR 7.0 jets. It doesn't suffer from the same issues as the Me 262, which lacks in power and once it loses energy, often struggles to regain it, or the Ho 229, which can rip its wings very easily in high-G | + | '''2.2 - Search for enemy targets'''<br> |
| + | Once you have dropped your bombs, you can turn your sights to enemy aircraft; the Arado C-3 is quite capable as a fighter, especially in comparison to other German BR 7.0 jets. It doesn't suffer from the same issues as the Me 262, which lacks in power and once it loses energy, often struggles to regain it, or the Ho 229, which can rip its wings very easily in high-G maneuvers. With the Arado, you won't encounter these kinds of problems, providing you don't attempt to turn fight. The Arado C-3 has the best climb rate of any BR 7.0 German jet. It also possesses a roll rate to rival the Me 262, so with your 4 powerful engines, you have everything you need to take on other jets. As such, once you've finished your bombing run, turn and climb towards the battlefield, and try to maintain altitude above other jets. Once you're reasonably high, pick vulnerable targets and dive in for a pass, taking a shot at them and then moving away to retain your energy. Avoid exceeding 750km/h when stock, as past that the dive can be hard to arrest. Once all modifications have been researched, however, the aircraft gains a reasonable amount of additional leeway before you encounter issues. If everything falls apart, and you gain fighters on your tail, try to keep accelerating if possible and try to bait the enemies near your own team so they can assist you. | ||
| + | ===Manual Engine Control=== | ||
| + | {| class="wikitable" style="text-align:center" | ||
| + | |- | ||
| + | ! colspan="7" | MEC elements | ||
| + | |- | ||
| + | ! rowspan="2" |Mixer | ||
| + | ! rowspan="2" |Pitch | ||
| + | ! colspan="3" |Radiator | ||
| + | ! rowspan="2" |Supercharger | ||
| + | ! rowspan="2" |Turbocharger | ||
| + | |- | ||
| + | ! Oil | ||
| + | ! Water | ||
| + | ! Type | ||
| + | |- | ||
| + | | Controllable || rowspan="2" | Not controllable || rowspan="2" | Not controllable || rowspan="2" | Not controllable || rowspan="2" | Separate || rowspan="2" | Not ontrollable || rowspan="2" | Not controllable | ||
| + | |- | ||
| + | |} | ||
| − | + | ===Modules=== | |
| − | + | {| class="wikitable" | |
| − | + | ! Tier | |
| − | + | ! Flight performance | |
| − | + | ! Survivability | |
| + | ! Weaponry | ||
| + | |- | ||
| + | | I | ||
| + | | Fuselage Repair, Compressor | ||
| + | | | ||
| + | | | ||
| + | |- | ||
| + | | II | ||
| + | | | ||
| + | | Airframe | ||
| + | | ETC 1001 I | ||
| + | |- | ||
| + | | III | ||
| + | | Wing Repair, Engine | ||
| + | | | ||
| + | | Offensive 20 mm | ||
| + | |- | ||
| + | | IV | ||
| + | | | ||
| + | | Cover | ||
| + | | New 20 mm Cannons | ||
| + | |- | ||
| + | |} | ||
=== Pros and cons === | === Pros and cons === | ||
| − | <!-- '' | + | <!--''Summarize and briefly evaluate the vehicle in terms of its characteristics and combat effectiveness. Mark its pros and cons in the bulleted list. Do not use more than 6 points for each of the characteristics. Avoid using categorical definitions such as "bad", "good" and the like - they have a substitution in the form of softer "inadequate", "effective".''--> |
'''Pros:''' | '''Pros:''' | ||
| − | * | + | * Incredibly fast. |
| − | * Very good | + | * Very good at killing individual ground units in AB. |
| − | * | + | * Cannons provide decent air to air performance. |
| − | * | + | * Very good climb rate. |
| − | * Four engines provides the much | + | * Four engines provides the much needed speed increase from the previous model. |
| − | * | + | * Good acceleration. |
| − | * | + | * Stock payload is very versatile. |
| + | * Air spawn at 3,500 meters. | ||
| + | * Very good energy retention | ||
'''Cons:''' | '''Cons:''' | ||
| − | * | + | * While stock, is hard to recover from dives in speeds beyond 750 km/h. |
| − | + | * Pilot is usually easily killed. | |
| − | + | * Can't carry many bombs, which means that you only can destroy 1 enemy base per bomb load. | |
| − | * Pilot | + | * Doesn't have air brakes and combined with planes very good energy retention makes landing potentially very dangerous. |
| − | * | + | * No gun sight in the cockpit, you have to rely on perception to aim. |
| − | * Doesn't have air brakes | + | * Worse turn rate than the previous model. |
| − | * No | ||
== History == | == History == | ||
| − | + | ''Describe the history of the creation and combat usage of the aircraft in more detail than in the introduction. If the historical reference turns out to be too big, take it to a separate article, taking a link to an article about the vehicle and adding a block "/ historical reference" (example: https://wiki.warthunder.com/Name-vehicles/historical reference) and add a link to it here using the <code>main</code> template. Be sure to include links to sources at the end of the article.'' | |
| − | |||
| − | |||
| − | |||
== Media == | == Media == | ||
| − | + | ''An excellent addition to the article will be video guides, as well as screenshots from the game and photos.'' | |
| − | |||
| − | |||
| − | + | == Read also == | |
| − | + | ''Links to the articles on the War Thunder Wiki that you think will be useful for the reader, for example,'' | |
| − | |||
| − | |||
| − | |||
| − | = | ||
| − | ''Links to the articles on the War Thunder Wiki that you think will be useful for the reader, for example | ||
* ''reference to the series of the aircraft;'' | * ''reference to the series of the aircraft;'' | ||
* ''links to approximate analogues of other nations and research trees.'' | * ''links to approximate analogues of other nations and research trees.'' | ||
| + | <!--''ETC.''--> | ||
| + | |||
| + | == Sources == | ||
| + | ''Paste links to sources and external resources, such as:'' | ||
| − | |||
| − | |||
* ''topic on the official game forum;'' | * ''topic on the official game forum;'' | ||
| − | * ''other literature.'' | + | * ''page on aircraft encyclopedia;'' |
| − | + | * ''other literature.'' | |
| − | |||
| − | + | {{Germany jet aircrafts}} | |
| − | {{Germany jet | ||
Revision as of 11:36, 30 March 2019
Contents
| This page is about the aircraft Ar 234 C-3. For the other version, see Ar 234 B-2 |
Description

The Arado Ar 234 C-3 is a Rank V German jet bomber with a battle rating of 6.7 (AB) and 7.0 (RB/SB). It was introduced in Update 1.70.1945 "Weapons of Victory".
General info
Flight Performance
| Characteristics | |||||||
|---|---|---|---|---|---|---|---|
| Stock | |||||||
| Max Speed (km/h at 0 m - Sealevel) |
Max altitude (meters) |
Turn time (seconds) |
Rate of climb (meters/second) |
Take-off run (meters) | |||
| AB | RB | AB | RB | AB | RB | ||
| 847 | 841 | 13,000 | 30.2 | 31.0 | 23.9 | 22.4 | 1,500 |
| Upgraded | |||||||
| Max Speed (km/h at ?,000 m) |
Max altitude (meters) | Turn time (seconds) | Rate of climb (meters/second) |
Take-off run (meters) | |||
| AB | RB | AB | RB | AB | RB | ||
| ? | ? | 13,000 | ??.? | ??.? | ?.? | ?.? | 1,500 |
Details
| Features | ||||
|---|---|---|---|---|
| Combat flap | Take-off flap | Landing flap | Air brakes | Arrestor gear |
| ✓ | ✓ | ✓ | X | X |
| Limits | ||||
|---|---|---|---|---|
| Wing-break speed (km/h) |
Gear limit (km/h) |
Combat flap (km/h) |
Max Static G | |
| + | - | |||
| Optimal velocities | |||
|---|---|---|---|
| Ailerons (km/h) |
Rudder (km/h) |
Elevators (km/h) |
Radiator (km/h) |
| < 500 | < 500 | < 650 | > 250 |
| Compressor (RB/SB) | ||
|---|---|---|
| Setting 1 | ||
| Optimal altitude | 100% Engine power | WEP Engine power |
| 0 m | 910 kgf | No WEP |
Survivability and armour
- No armour plating
- No armour glazing
- Critical components located at front of aircraft (fuel, pilot, engine, controls)
- More fuel tanks located in wings near fuselage
Armaments
Offensive armament
The Ar 234 C-3 is armed with:
- 2 x 20 mm MG 151/20 cannon, chin-mounted (250 rpg = 500 total)
Suspended armament
The Ar 234 C-3 can be outfitted with the following ordinance:
- 3 x 250 kg SC250JA bombs (750 kg total)
- 3 x 500 kg SC500K bombs (1,500 kg total)
- 1 x 1000 kg SC1000L2 bomb (1,000 kg total)
- 1 x 1000 kg SC1000L2 bomb + 2 x 250 kg SC250JA bombs (1,500 kg total)
Usage in the battles
The standard bombs on the Ar 234 C-3 are 3 x 250 kg bombs and 3 x 500 kg bombs. You will have access to them even if your Arado is stock. Additionally, this variant of the Arado possesses 2 x 20 mm MG 151 cannons, so one of the best ways to use your Arado to ensure you can farm RP and SL for your modifications is:
1- Equip the 3 x 500 kg bombs and start the match at the air spawn point.
2- On maps such as Berlin, move to one of the enemy bases and drop your 3 x 500 kg bombs. 1.5 tonnes worth of bombs are enough to destroy a base, so from there you have two options to choose from:
2.1 - Go back to the airfield and get new bombs
If you choose go back to airfield to get new bombs, be aware that unfortunately the Arado does not have any air brakes, which is a problem as it has particularly good energy retention and some pilots may find it hard to safely land.
When landing the Arado, decrease speed by turning before you reach the airfield (aim to be at 400 km/h or less) then align with the landing strip, activate your flaps and proceed with the landing. If using the landing gear, ensure that you are at extremely low speed before landing or that the landing strip is long enough to stop on. The Arado has extremely good energy retention and is very heavy, so it does take a long time to stop. You can land without gear, which, while obviously dangerous, offers a much better chance to stop in time on shorter landing strips. To do this, land flat on the belly and avoid allowing the wings to touch the ground before you stop moving.
2.2 - Search for enemy targets
Once you have dropped your bombs, you can turn your sights to enemy aircraft; the Arado C-3 is quite capable as a fighter, especially in comparison to other German BR 7.0 jets. It doesn't suffer from the same issues as the Me 262, which lacks in power and once it loses energy, often struggles to regain it, or the Ho 229, which can rip its wings very easily in high-G maneuvers. With the Arado, you won't encounter these kinds of problems, providing you don't attempt to turn fight. The Arado C-3 has the best climb rate of any BR 7.0 German jet. It also possesses a roll rate to rival the Me 262, so with your 4 powerful engines, you have everything you need to take on other jets. As such, once you've finished your bombing run, turn and climb towards the battlefield, and try to maintain altitude above other jets. Once you're reasonably high, pick vulnerable targets and dive in for a pass, taking a shot at them and then moving away to retain your energy. Avoid exceeding 750km/h when stock, as past that the dive can be hard to arrest. Once all modifications have been researched, however, the aircraft gains a reasonable amount of additional leeway before you encounter issues. If everything falls apart, and you gain fighters on your tail, try to keep accelerating if possible and try to bait the enemies near your own team so they can assist you.
Manual Engine Control
| MEC elements | ||||||
|---|---|---|---|---|---|---|
| Mixer | Pitch | Radiator | Supercharger | Turbocharger | ||
| Oil | Water | Type | ||||
| Controllable | Not controllable | Not controllable | Not controllable | Separate | Not ontrollable | Not controllable |
Modules
| Tier | Flight performance | Survivability | Weaponry |
|---|---|---|---|
| I | Fuselage Repair, Compressor | ||
| II | Airframe | ETC 1001 I | |
| III | Wing Repair, Engine | Offensive 20 mm | |
| IV | Cover | New 20 mm Cannons |
Pros and cons
Pros:
- Incredibly fast.
- Very good at killing individual ground units in AB.
- Cannons provide decent air to air performance.
- Very good climb rate.
- Four engines provides the much needed speed increase from the previous model.
- Good acceleration.
- Stock payload is very versatile.
- Air spawn at 3,500 meters.
- Very good energy retention
Cons:
- While stock, is hard to recover from dives in speeds beyond 750 km/h.
- Pilot is usually easily killed.
- Can't carry many bombs, which means that you only can destroy 1 enemy base per bomb load.
- Doesn't have air brakes and combined with planes very good energy retention makes landing potentially very dangerous.
- No gun sight in the cockpit, you have to rely on perception to aim.
- Worse turn rate than the previous model.
History
Describe the history of the creation and combat usage of the aircraft in more detail than in the introduction. If the historical reference turns out to be too big, take it to a separate article, taking a link to an article about the vehicle and adding a block "/ historical reference" (example: https://wiki.warthunder.com/Name-vehicles/historical reference) and add a link to it here using the main template. Be sure to include links to sources at the end of the article.
Media
An excellent addition to the article will be video guides, as well as screenshots from the game and photos.
Read also
Links to the articles on the War Thunder Wiki that you think will be useful for the reader, for example,
- reference to the series of the aircraft;
- links to approximate analogues of other nations and research trees.
Sources
Paste links to sources and external resources, such as:
- topic on the official game forum;
- page on aircraft encyclopedia;
- other literature.
| Germany jet aircraft | |
|---|---|
| Ar 234 | Ar 234 B-2 · Ar 234 C-3 |
| He 162 | He 162 A-1 · He 162 A-2 |
| Ho 229 | Ho 229 V3 |
| Me 163 | Me 163 B · Me 163 B-0 |
| Me 262 A | Me 262 A-1a · Me 262 A-1a/Jabo · Me 262 A-1a/U1 · Me 262 A-1/U4 · Me 262 A-2a |
| Me 262 C | Me 262 C-1a · Me 262 C-2b |
| Tornado | ◄Tornado IDS WTD61 · ◄Tornado IDS MFG · ◄Tornado IDS ASSTA1 |
| West Germany | Alpha Jet A |
| USA | ◄F-84F |
| ◄CL-13A Mk 5 · ◄CL-13B Mk.6 · ◄F-86K | |
| ◄F-104G | |
| ◄F-4F Early · ◄F-4F | |
| USSR | ◊MiG-15bis |
| ◊MiG-19S | |
| ◄MiG-21 SPS-K · ◊MiG-21MF · ◊MiG-21bis-SAU · ◊MiG-21 "Lazur-M" | |
| ◊MiG-23BN · ◊MiG-23MF · ◊MiG-23MLA | |
| ◊MiG-29 · ◄MiG-29G | |
| ◊Su-22UM3K · ◊Su-22M4 | |
| ◊IL-28 | |
| Poland | ◊Lim-5P |
| Britain | ◄Sea Hawk Mk.100 · ◌Hunter F.58 (Swiss) |
| Italy | ◄G.91 R/3 · ◄G.91 R/4 |
