Difference between revisions of "Tu-2S-59"
(Added tables and basic info.) |
|||
| Line 2: | Line 2: | ||
== Description == | == Description == | ||
| − | ''In the description, the first part needs to be about the history of and the creation and combat usage of the aircraft, as well as its key features. In the second part, tell the reader about the aircraft in the game. Insert screenshot of the vehicle. If the novice player does not remember the vehicle by name, he will immediately understand what kind of vehicle it is talking about.'' | + | <!--''In the description, the first part needs to be about the history of and the creation and combat usage of the aircraft, as well as its key features. In the second part, tell the reader about the aircraft in the game. Insert screenshot of the vehicle. If the novice player does not remember the vehicle by name, he will immediately understand what kind of vehicle it is talking about.''--> |
| + | [[File:GarageImage_{{PAGENAME}}.jpg|420px|thumb|left]] | ||
| + | {{break}} | ||
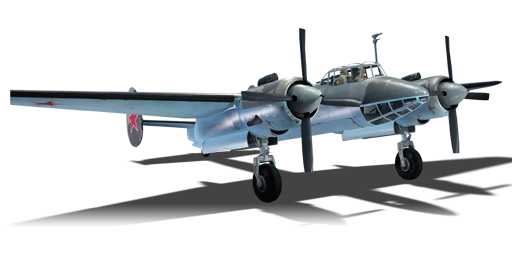
| + | The '''Tu-2S-59''' is a Rank IV Soviet medium bomber with a battle rating of 6.0 (AB), 6.3 (RB), and 6.7 (SB). It was introduced in Update 1.29. | ||
| + | |||
| + | <!--Explain the general role of the plane. (i.e. Fighters should dog fight and avoid going to a fighter-bomber role)--> | ||
| + | The Tu-2S-59 is an extremely versatile ground attacker, with a moderate payload better suited for destroying ground targets than bases. Although the tactics are different for arcade battles, in Realistic, the plane should be flown quite aggressively. It is recommended to equip the 4 x 500 kg bombs (or just two if you don't possess the upgrades yet) in order to destroy as many armored foes as you can. Additionally, equip a two-second bomb delay to allow yourself ample time to escape the blast radius. | ||
| + | |||
| + | The defining feature of the Tu-2S-59 is its single defensive 20 mm cannon in place of the 12.7 mm machine gun found on the two older models. Other than that and its increased BR, there isn't much difference between this and the older Tu-2S and Tu-2S-44. See above for battle tactics. | ||
== General info == | == General info == | ||
=== Flight Performance === | === Flight Performance === | ||
| − | ''Describe how the aircraft behaves in the air. Maximum speed, maneuverability, speed and allowable loads - these are the most important characteristics of the vehicle.'' | + | <!--''Describe how the aircraft behaves in the air. Maximum speed, maneuverability, speed and allowable loads - these are the most important characteristics of the vehicle.''--> |
| + | {| class="wikitable" style="text-align:center" | ||
| + | |- | ||
| + | ! colspan="8" | Characteristics | ||
| + | |- | ||
| + | ! colspan="8" | ''Stock'' | ||
| + | |- | ||
| + | ! colspan="2" | Max Speed<br>(km/h at 7,300 m) | ||
| + | ! rowspan="2" | Max altitude<br>(meters) | ||
| + | ! colspan="2" | Turn time<br>(seconds) | ||
| + | ! colspan="2" | Rate of climb<br>(meters/second) | ||
| + | ! rowspan="2" |Take-off run<br>(meters) | ||
| + | |- | ||
| + | ! AB | ||
| + | ! RB | ||
| + | ! AB | ||
| + | ! RB | ||
| + | ! AB | ||
| + | ! RB | ||
| + | |- | ||
| + | | ? || ? || 9,500 || ??.? || ??.? || ??.? || ??.? || 326 | ||
| + | |- | ||
| + | ! colspan="8" | ''Upgraded'' | ||
| + | |- | ||
| + | ! colspan="2" | Max Speed<br>(km/h at 7,300 m) | ||
| + | ! rowspan="2" |Max altitude (meters) | ||
| + | ! colspan="2" | Turn time (seconds) | ||
| + | ! colspan="2" | Rate of climb<br>(meters/second) | ||
| + | ! rowspan="2" |Take-off run (meters) | ||
| + | |- | ||
| + | ! AB | ||
| + | ! RB | ||
| + | ! AB | ||
| + | ! RB | ||
| + | ! AB | ||
| + | ! RB | ||
| + | |- | ||
| + | | ? || ? || 9,500 || ??.? || ??.? || ?.? || ?.? || 326 | ||
| + | |- | ||
| + | |} | ||
| + | |||
| + | ====Details==== | ||
| + | {| class="wikitable" style="text-align:center" | ||
| + | |- | ||
| + | ! colspan="5" | Features | ||
| + | |- | ||
| + | ! Combat flap | ||
| + | ! Take-off flap | ||
| + | ! Landing flap | ||
| + | ! Air brakes | ||
| + | ! Arrestor gear | ||
| + | |- | ||
| + | | ✓ || ✓ || ✓ || X || X <!-- ✓ --> | ||
| + | |- | ||
| + | |} | ||
| + | |||
| + | {| class="wikitable" style="text-align:center" | ||
| + | |- | ||
| + | ! colspan="5" | Limits | ||
| + | |- | ||
| + | ! rowspan="2" | Wing-break speed<br>(km/h) | ||
| + | ! rowspan="2" | Gear limit<br>(km/h) | ||
| + | ! rowspan="2" | Combat flap<br> (km/h) | ||
| + | ! colspan="2" | Max Static G | ||
| + | |- | ||
| + | ! + | ||
| + | ! - | ||
| + | |- | ||
| + | | 900 || 350 || 520 || ~5 || ~3 | ||
| + | |- | ||
| + | |} | ||
| + | |||
| + | {| class="wikitable" style="text-align:center" | ||
| + | |- | ||
| + | ! colspan="4" | Optimal velocities | ||
| + | |- | ||
| + | ! Ailerons<br>(km/h) | ||
| + | ! Rudder<br>(km/h) | ||
| + | ! Elevators<br>(km/h) | ||
| + | ! Radiator<br>(km/h) | ||
| + | |- | ||
| + | | < 360 || < 360 || < 440 || > 280 | ||
| + | |- | ||
| + | |} | ||
| + | |||
| + | {| class="wikitable" style="text-align:center" | ||
| + | |- | ||
| + | ! colspan="3" | Compressor (RB/SB) | ||
| + | |- | ||
| + | ! colspan="3" | Setting 1 | ||
| + | |- | ||
| + | ! Optimal altitude | ||
| + | ! 100% Engine power | ||
| + | ! WEP Engine power | ||
| + | |- | ||
| + | | 1,500 m || 3,320 hp || 3,936 hp | ||
| + | |- | ||
| + | ! colspan="3" | Setting 2 | ||
| + | |- | ||
| + | ! Optimal altitude | ||
| + | ! 100% Engine power | ||
| + | ! WEP Engine power | ||
| + | |- | ||
| + | | 4,700 m || 2,820 hp || ?,??? hp | ||
| + | |- | ||
| + | <!--! colspan="3" | Setting 3 | ||
| + | |- | ||
| + | ! Optimal altitude | ||
| + | ! 100% Engine power | ||
| + | ! WEP Engine power | ||
| + | |- | ||
| + | | ?,??? m || ?,??? hp || ?,??? hp | ||
| + | |- --> | ||
| + | |} | ||
=== Survivability and armour === | === Survivability and armour === | ||
| − | ''Examine the survivability of the aircraft. Note how vulnerable the structure is and how secure the pilot is, whether the fuel tanks are armoured. Describe the armour, if there is any, also mention the vulnerability of other critical aircraft systems.'' | + | <!--''Examine the survivability of the aircraft. Note how vulnerable the structure is and how secure the pilot is, whether the fuel tanks are armoured. Describe the armour, if there is any, also mention the vulnerability of other critical aircraft systems.''--> |
| + | * 15 mm Steel plate behind the pilot. | ||
| + | * 6 mm Steel plate to the left of cockpit dorsal gunner. | ||
| + | * 8, 15 mm Steel plates in front of the cockpit dorsal gunner. | ||
| + | * 12, 15 mm Steel plates in front of the rear dorsal gunner. | ||
| + | * 8 mm Steel plate under the ventral gunner. | ||
| + | * 12 mm Steel plate in front of the ventral gunner. | ||
== Armaments == | == Armaments == | ||
=== Offensive armament === | === Offensive armament === | ||
| − | ''Describe the offensive armament of the aircraft, if any. Describe how effective the cannons and machine guns are in a battle, and also what belts or drums are better to use. If there is no offensive weaponry, delete this subsection.'' | + | <!--''Describe the offensive armament of the aircraft, if any. Describe how effective the cannons and machine guns are in a battle, and also what belts or drums are better to use. If there is no offensive weaponry, delete this subsection.''--> |
| + | {{main|ShVAK (20 mm)}} | ||
| + | |||
| + | The '''''{{PAGENAME}}''''' is armed with: | ||
| + | |||
| + | * 2 x 20 mm ShVAK cannons, wing-mounted (150 rpg = 300 total) | ||
=== Suspended armament === | === Suspended armament === | ||
| − | ''Describe the aircraft's suspended armament: additional cannons under the wings, bombs, rockets and torpedoes. This section is especially important for bombers and attackers. If there is no suspended weaponry remove this subsection.'' | + | <!--''Describe the aircraft's suspended armament: additional cannons under the wings, bombs, rockets and torpedoes. This section is especially important for bombers and attackers. If there is no suspended weaponry remove this subsection.''--> |
| + | {{main|Bombs|Rockets}} | ||
| + | |||
| + | The '''''{{PAGENAME}}''''' can be outfitted with the following ordinance: | ||
| + | |||
| + | * 2 x 250 kg FAB-250M43 bombs (500 kg total) | ||
| + | * 9 x 100 kg FAB-100 bombs (900 kg total) | ||
| + | * 2 x 250 kg FAB-250M43 bombs + 2 x 500 kg FAB-500 bombs (1,500 kg total) | ||
| + | * 4 x 500 kg FAB-500 bombs (2,000 kg total) | ||
| + | * 2 x 500 kg FAB-500 bombs (1,000 kg total) | ||
| + | * 1 x 1,000 kg FAB-1000 (welded) bomb (1,000 kg total) | ||
| + | * 2 x 250 kg FAB-250M43 bombs + 1 x 1,000 kg FAB-1000 bomb (1,500 kg total) | ||
| + | * 2 x 500 kg FAB-500 (welded) bombs + 1 x 1,000 kg FAB-1000 bomb (2,000 kg total) | ||
=== Defensive armament === | === Defensive armament === | ||
| − | ''Defensive armament with turret machine guns or cannons, crewed by gunners. Examine the number of gunners and what belts or drums are better to use. If defensive weaponry is not available remove this subsection.'' | + | <!--''Defensive armament with turret machine guns or cannons, crewed by gunners. Examine the number of gunners and what belts or drums are better to use. If defensive weaponry is not available remove this subsection.''--> |
| + | {{main|B-20 (20 mm)|Berezin UB (12.7 mm)}} | ||
| + | |||
| + | The '''''{{PAGENAME}}''''' is defended by: | ||
| + | |||
| + | * 1 x 12.7 mm Berezin UB machine gun, cockpit dorsal turret (190 rpg) | ||
| + | * 1 x 12.7 mm Berezin UB machine gun, tail turret (350 rpg) | ||
| + | * 1 x 20 mm B-20E cannon, dorsal turret (120 rpg) | ||
== Usage in the battles == | == Usage in the battles == | ||
| − | ''Describe the tactics of playing in an aircraft, the features of using vehicles in a team and advice on tactics. Refrain from creating a "guide" - do not impose a single point of view but give the reader food for thought. Examine the most dangerous enemies and give recommendations on fighting them. If necessary, note the specifics of the game in different modes (AB, RB, SB).'' | + | <!--''Describe the tactics of playing in an aircraft, the features of using vehicles in a team and advice on tactics. Refrain from creating a "guide" - do not impose a single point of view but give the reader food for thought. Examine the most dangerous enemies and give recommendations on fighting them. If necessary, note the specifics of the game in different modes (AB, RB, SB).''--> |
| + | Once you spawn in (~ 3500 m) then locate what ground targets you want to engage. Some suggestions are: engage the targets farthest from the enemy's airfield in order to avoid detection. Attack pillboxes (light or heavy, it doesn't matter with 500 kg bombs) as these don't move. Only engage the AI tanks if there are no pillboxes, and if you do engage tanks, judge the speed of the tank column, and release your bombs where you believe the tanks will be, not where they are in that moment. | ||
| + | |||
| + | When bombing anything, note that the center of the reticle should be aimed below the target by about a centimeter (looking at the screen). This will allow the bombs maximum precision. When you release the two bombs in your bomb bay, hold your flight pattern for about 1/2 a second longer than normal to compensate for the opening of the bomb bay doors. Once you have dropped your payload, begin attacking artillery and AAA guns with your 20 mm cannons. Fire in short bursts to conserve ammo, as the more of these light targets you can destroy, the better. Never attack light pillboxes with your frontal cannons! The ammo spent attempting to destroy these (~200 rounds) isn't worth it! Always attack lighter targets, or if the situation presents itself, enemy aircraft. Once your bombs and cannon ammo are/is exhausted, then high-tail it back to your airfield. Fully upgraded, the Tu-2S-59 can maintain ~450 kph on the deck, no problem. Be careful upon landing, as the plane tends to stall at ~175 kph. Rearm, and repeat! | ||
| + | |||
| + | ====Specific enemies worth noting==== | ||
| + | <!--Some concerning vehicles to worry about if playing this plane. (i.e. Japanese fighters will out turn you)--> | ||
| + | Unfortunately for the Tu-2S-59, it has a battle rating of 6.3 . This is a double-edged sword, as on one hand, you'll have to fight enemy jets, notably the Horten 229 and the Me-262, but on the other hand, these pilots are typically experienced and won't sacrifice their altitude for a ground pounding Tu-2. However, should you find yourself engaged, here are some suggestions per plane. | ||
| + | |||
| + | Do not, engage a fighter on purpose, the following is only for defenses and survival reference | ||
| + | |||
| + | '''[[Ho_229_V3|Horten 229]]'''<br> | ||
| + | This plane is agile, fast, and deadly, possessing a pair of Mk 103 cannons. When engaged with one of these planes, force a head-on pass if he is either below or on equal altitude as you. Once the pass has concluded, and if neither of you went down in a blaze of glory, push the throttle to WEP and run. When the 229 turns to pursue, it ''will'' catch you. Use the defensive turrets at this point, as these are your only hope for making it out alive. Aim for the pilot. | ||
| + | |||
| + | '''[[Me262A-1a_Schwalbe|Me-262 A1]] and [[Me262_A-1/U4_Pulkzerstorer| Me262 A-1/U4 Pulkzerstorer]]'''<br> | ||
| + | These planes are a tough opponent. They are fast and possess better armor than the 262, so the turrets are not going to be as effective in destroying these enemies. Again, if the enemy is below or on equal altitude as you, force a head on pass and run after it ends (if able). Use the turrets, but know that these planes are designed to be bomber-hunters, and are ruthlessly efficient in their task. | ||
| + | |||
| + | '''[[P-80A-5_Shooting_Star|P-80]], [[F-80C-10ShootingStar|F-80C]] & [[F-84B-26_Thunderjet|F-84B-26 Thunderjet]]'''<br> | ||
| + | Although you'll mostly find yourself on the map of Berlin, mixed battles and alternate history is always an option. For these planes, use the same tactics. Force a head on, and then run after. Use the turrets to attack them as you retreat. | ||
| + | |||
| + | ''Late War Props (Spitfire 24, Fw-190 D13, F8F, etc.)''<br> | ||
| + | These are a somewhat rare occurrence at the BR of 6.3, however they should never be ignored. If possible, run to your base and don't commit to a head on with props, as they have a little more time to aim their shots and steady their plane. Rely mostly on the defensive turrets to save yourself if needed. | ||
| + | |||
| + | ''Player-Controlled Flak (Kugelblitz, Crusader AA, etc.)''<br> | ||
| + | These are the bane of bombers (especially medium-sized ones such as the Tu-2S-59). When you see the tracers, either aimed at you or at someone else, don't risk a dive. Circle around or find some unsuspecting flanker that is outside the cover of these AAA guns. | ||
| + | |||
| + | ====Counter-tactics==== | ||
| + | <!--What to expect, if it would be in command of the enemy and how to counter it. (i.e. They will most likely BnZ, etc.)--> | ||
| + | If confronted with an enemy Tu-2S-59, initiate a head on pass ''but then pitch up and stall their plane out.'' Additionally, you could maintain a safe altitude and utilize Boom & Zoom tactics, but it is worth noting that the Tu-2 is able to turn adequately. | ||
| + | |||
| + | ===Manual Engine Control=== | ||
| + | {| class="wikitable" style="text-align:center" | ||
| + | |- | ||
| + | ! colspan="7" | MEC elements | ||
| + | |- | ||
| + | ! rowspan="2" |Mixer | ||
| + | ! rowspan="2" |Pitch | ||
| + | ! colspan="3" |Radiator | ||
| + | ! rowspan="2" |Supercharger | ||
| + | ! rowspan="2" |Turbocharger | ||
| + | |- | ||
| + | ! Oil | ||
| + | ! Water | ||
| + | ! Type | ||
| + | |- | ||
| + | | Controllable || rowspan="2" | Not controllable || rowspan="2" | Not controllable || rowspan="2" | Not controllable || rowspan="2" | Separate || rowspan="2" | Not ontrollable || rowspan="2" | Not controllable | ||
| + | |- | ||
| + | |} | ||
| + | |||
| + | ===Modules=== | ||
| + | {| class="wikitable" | ||
| + | !colspan = "1"| Tier | ||
| + | !colspan = "2"| Flight performance | ||
| + | !colspan = "1"| Survivability | ||
| + | !colspan = "2"| Weaponry | ||
| + | |- | ||
| + | | I | ||
| + | | | ||
| + | | | ||
| + | | | ||
| + | | | ||
| + | |- | ||
| + | | II | ||
| + | | | ||
| + | | | ||
| + | | | ||
| + | | | ||
| + | |- | ||
| + | | III | ||
| + | | | ||
| + | | | ||
| + | | | ||
| + | | | ||
| + | |- | ||
| + | | IV | ||
| + | | | ||
| + | | | ||
| + | | | ||
| + | | | ||
| + | |- | ||
| + | |} | ||
=== Pros and cons === | === Pros and cons === | ||
| − | ''Summarize and briefly evaluate the vehicle in terms of its characteristics and combat effectiveness. Mark its pros and cons in the bulleted list. Do not use more than 6 points for each of the characteristics. Avoid using categorical definitions such as "bad", "good" and the like - they have a substitution in the form of softer "inadequate", "effective".'' | + | <!--''Summarize and briefly evaluate the vehicle in terms of its characteristics and combat effectiveness. Mark its pros and cons in the bulleted list. Do not use more than 6 points for each of the characteristics. Avoid using categorical definitions such as "bad", "good" and the like - they have a substitution in the form of softer "inadequate", "effective".''--> |
'''Pros:''' | '''Pros:''' | ||
| − | * | + | * Fast, for a medium bomber. High wing rip speed (over 700 kph). Useful for rushing to the combat zone before enemy fighters can reach you. |
| + | * Air spawn in RB. | ||
| + | * Very easy to land and takeoff. | ||
| + | * Decent payload. | ||
| + | * Forward-firing ShVAK cannons, can be useful in a head on engagement. | ||
| + | * Not as vulnerable as other 4-engine bombers. | ||
| + | * Twin tail design leaves little restriction on back gunners | ||
| + | * Decently agile for its size. | ||
| + | * Will guaranteed to put out fires on fuel tanks due to pressurized gas system. | ||
| + | * Very efficient in taking out individual ground targets. | ||
| + | * Individual bomb drops, very effective in tank battles. | ||
| + | * Engines can cool down even with a 100% throttle. | ||
| + | * Can pretty much WEP indefinitely. | ||
| + | * Just need to research one modification for all payload options. | ||
| + | * Cheap repair cost. | ||
| + | * Has a lot of unlockable camouflages. | ||
'''Cons:''' | '''Cons:''' | ||
| − | * | + | * High BR, meaning you're facing jets and late/post war props. |
| + | * Only two bombs when stock. | ||
| + | * Will extinguish fire but sometimes it will just burn out before the fuel tanks seal in time. | ||
| + | * Relatively small defensive armament (though it can save you if you know where to shoot). | ||
| + | * Only one pilot and is not protected by armor from the front. | ||
| + | * High-ish stall speed (175 kph. More of a pain when taking off / landing.) | ||
| + | * Although it is fast, everything else is faster. | ||
| + | * Performance starts to degrade with altitude. | ||
| + | * Low amount of cannon ammo (150 rounds per gun). | ||
| + | * Camouflages need to be unlocked by bombing bases on which it is not that effective compared to other nation's bombers. | ||
== History == | == History == | ||
| Line 43: | Line 298: | ||
* ''reference to the series of the aircraft;'' | * ''reference to the series of the aircraft;'' | ||
* ''links to approximate analogues of other nations and research trees.'' | * ''links to approximate analogues of other nations and research trees.'' | ||
| − | ''ETC.'' | + | <!--''ETC.''--> |
== Sources == | == Sources == | ||
| Line 50: | Line 305: | ||
* ''page on aircraft encyclopedia;'' | * ''page on aircraft encyclopedia;'' | ||
* ''other literature.'' | * ''other literature.'' | ||
| + | |||
| + | {{USSR bombers}} | ||
Revision as of 18:04, 20 November 2018
Contents
Description

The Tu-2S-59 is a Rank IV Soviet medium bomber with a battle rating of 6.0 (AB), 6.3 (RB), and 6.7 (SB). It was introduced in Update 1.29.
The Tu-2S-59 is an extremely versatile ground attacker, with a moderate payload better suited for destroying ground targets than bases. Although the tactics are different for arcade battles, in Realistic, the plane should be flown quite aggressively. It is recommended to equip the 4 x 500 kg bombs (or just two if you don't possess the upgrades yet) in order to destroy as many armored foes as you can. Additionally, equip a two-second bomb delay to allow yourself ample time to escape the blast radius.
The defining feature of the Tu-2S-59 is its single defensive 20 mm cannon in place of the 12.7 mm machine gun found on the two older models. Other than that and its increased BR, there isn't much difference between this and the older Tu-2S and Tu-2S-44. See above for battle tactics.
General info
Flight Performance
| Characteristics | |||||||
|---|---|---|---|---|---|---|---|
| Stock | |||||||
| Max Speed (km/h at 7,300 m) |
Max altitude (meters) |
Turn time (seconds) |
Rate of climb (meters/second) |
Take-off run (meters) | |||
| AB | RB | AB | RB | AB | RB | ||
| ? | ? | 9,500 | ??.? | ??.? | ??.? | ??.? | 326 |
| Upgraded | |||||||
| Max Speed (km/h at 7,300 m) |
Max altitude (meters) | Turn time (seconds) | Rate of climb (meters/second) |
Take-off run (meters) | |||
| AB | RB | AB | RB | AB | RB | ||
| ? | ? | 9,500 | ??.? | ??.? | ?.? | ?.? | 326 |
Details
| Features | ||||
|---|---|---|---|---|
| Combat flap | Take-off flap | Landing flap | Air brakes | Arrestor gear |
| ✓ | ✓ | ✓ | X | X |
| Limits | ||||
|---|---|---|---|---|
| Wing-break speed (km/h) |
Gear limit (km/h) |
Combat flap (km/h) |
Max Static G | |
| + | - | |||
| 900 | 350 | 520 | ~5 | ~3 |
| Optimal velocities | |||
|---|---|---|---|
| Ailerons (km/h) |
Rudder (km/h) |
Elevators (km/h) |
Radiator (km/h) |
| < 360 | < 360 | < 440 | > 280 |
| Compressor (RB/SB) | ||
|---|---|---|
| Setting 1 | ||
| Optimal altitude | 100% Engine power | WEP Engine power |
| 1,500 m | 3,320 hp | 3,936 hp |
| Setting 2 | ||
| Optimal altitude | 100% Engine power | WEP Engine power |
| 4,700 m | 2,820 hp | ?,??? hp |
Survivability and armour
- 15 mm Steel plate behind the pilot.
- 6 mm Steel plate to the left of cockpit dorsal gunner.
- 8, 15 mm Steel plates in front of the cockpit dorsal gunner.
- 12, 15 mm Steel plates in front of the rear dorsal gunner.
- 8 mm Steel plate under the ventral gunner.
- 12 mm Steel plate in front of the ventral gunner.
Armaments
Offensive armament
The Tu-2S-59 is armed with:
- 2 x 20 mm ShVAK cannons, wing-mounted (150 rpg = 300 total)
Suspended armament
The Tu-2S-59 can be outfitted with the following ordinance:
- 2 x 250 kg FAB-250M43 bombs (500 kg total)
- 9 x 100 kg FAB-100 bombs (900 kg total)
- 2 x 250 kg FAB-250M43 bombs + 2 x 500 kg FAB-500 bombs (1,500 kg total)
- 4 x 500 kg FAB-500 bombs (2,000 kg total)
- 2 x 500 kg FAB-500 bombs (1,000 kg total)
- 1 x 1,000 kg FAB-1000 (welded) bomb (1,000 kg total)
- 2 x 250 kg FAB-250M43 bombs + 1 x 1,000 kg FAB-1000 bomb (1,500 kg total)
- 2 x 500 kg FAB-500 (welded) bombs + 1 x 1,000 kg FAB-1000 bomb (2,000 kg total)
Defensive armament
The Tu-2S-59 is defended by:
- 1 x 12.7 mm Berezin UB machine gun, cockpit dorsal turret (190 rpg)
- 1 x 12.7 mm Berezin UB machine gun, tail turret (350 rpg)
- 1 x 20 mm B-20E cannon, dorsal turret (120 rpg)
Usage in the battles
Once you spawn in (~ 3500 m) then locate what ground targets you want to engage. Some suggestions are: engage the targets farthest from the enemy's airfield in order to avoid detection. Attack pillboxes (light or heavy, it doesn't matter with 500 kg bombs) as these don't move. Only engage the AI tanks if there are no pillboxes, and if you do engage tanks, judge the speed of the tank column, and release your bombs where you believe the tanks will be, not where they are in that moment.
When bombing anything, note that the center of the reticle should be aimed below the target by about a centimeter (looking at the screen). This will allow the bombs maximum precision. When you release the two bombs in your bomb bay, hold your flight pattern for about 1/2 a second longer than normal to compensate for the opening of the bomb bay doors. Once you have dropped your payload, begin attacking artillery and AAA guns with your 20 mm cannons. Fire in short bursts to conserve ammo, as the more of these light targets you can destroy, the better. Never attack light pillboxes with your frontal cannons! The ammo spent attempting to destroy these (~200 rounds) isn't worth it! Always attack lighter targets, or if the situation presents itself, enemy aircraft. Once your bombs and cannon ammo are/is exhausted, then high-tail it back to your airfield. Fully upgraded, the Tu-2S-59 can maintain ~450 kph on the deck, no problem. Be careful upon landing, as the plane tends to stall at ~175 kph. Rearm, and repeat!
Specific enemies worth noting
Unfortunately for the Tu-2S-59, it has a battle rating of 6.3 . This is a double-edged sword, as on one hand, you'll have to fight enemy jets, notably the Horten 229 and the Me-262, but on the other hand, these pilots are typically experienced and won't sacrifice their altitude for a ground pounding Tu-2. However, should you find yourself engaged, here are some suggestions per plane.
Do not, engage a fighter on purpose, the following is only for defenses and survival reference
Horten 229
This plane is agile, fast, and deadly, possessing a pair of Mk 103 cannons. When engaged with one of these planes, force a head-on pass if he is either below or on equal altitude as you. Once the pass has concluded, and if neither of you went down in a blaze of glory, push the throttle to WEP and run. When the 229 turns to pursue, it will catch you. Use the defensive turrets at this point, as these are your only hope for making it out alive. Aim for the pilot.
Me-262 A1 and Me262 A-1/U4 Pulkzerstorer
These planes are a tough opponent. They are fast and possess better armor than the 262, so the turrets are not going to be as effective in destroying these enemies. Again, if the enemy is below or on equal altitude as you, force a head on pass and run after it ends (if able). Use the turrets, but know that these planes are designed to be bomber-hunters, and are ruthlessly efficient in their task.
P-80, F-80C & F-84B-26 Thunderjet
Although you'll mostly find yourself on the map of Berlin, mixed battles and alternate history is always an option. For these planes, use the same tactics. Force a head on, and then run after. Use the turrets to attack them as you retreat.
Late War Props (Spitfire 24, Fw-190 D13, F8F, etc.)
These are a somewhat rare occurrence at the BR of 6.3, however they should never be ignored. If possible, run to your base and don't commit to a head on with props, as they have a little more time to aim their shots and steady their plane. Rely mostly on the defensive turrets to save yourself if needed.
Player-Controlled Flak (Kugelblitz, Crusader AA, etc.)
These are the bane of bombers (especially medium-sized ones such as the Tu-2S-59). When you see the tracers, either aimed at you or at someone else, don't risk a dive. Circle around or find some unsuspecting flanker that is outside the cover of these AAA guns.
Counter-tactics
If confronted with an enemy Tu-2S-59, initiate a head on pass but then pitch up and stall their plane out. Additionally, you could maintain a safe altitude and utilize Boom & Zoom tactics, but it is worth noting that the Tu-2 is able to turn adequately.
Manual Engine Control
| MEC elements | ||||||
|---|---|---|---|---|---|---|
| Mixer | Pitch | Radiator | Supercharger | Turbocharger | ||
| Oil | Water | Type | ||||
| Controllable | Not controllable | Not controllable | Not controllable | Separate | Not ontrollable | Not controllable |
Modules
| Tier | Flight performance | Survivability | Weaponry | ||
|---|---|---|---|---|---|
| I | |||||
| II | |||||
| III | |||||
| IV | |||||
Pros and cons
Pros:
- Fast, for a medium bomber. High wing rip speed (over 700 kph). Useful for rushing to the combat zone before enemy fighters can reach you.
- Air spawn in RB.
- Very easy to land and takeoff.
- Decent payload.
- Forward-firing ShVAK cannons, can be useful in a head on engagement.
- Not as vulnerable as other 4-engine bombers.
- Twin tail design leaves little restriction on back gunners
- Decently agile for its size.
- Will guaranteed to put out fires on fuel tanks due to pressurized gas system.
- Very efficient in taking out individual ground targets.
- Individual bomb drops, very effective in tank battles.
- Engines can cool down even with a 100% throttle.
- Can pretty much WEP indefinitely.
- Just need to research one modification for all payload options.
- Cheap repair cost.
- Has a lot of unlockable camouflages.
Cons:
- High BR, meaning you're facing jets and late/post war props.
- Only two bombs when stock.
- Will extinguish fire but sometimes it will just burn out before the fuel tanks seal in time.
- Relatively small defensive armament (though it can save you if you know where to shoot).
- Only one pilot and is not protected by armor from the front.
- High-ish stall speed (175 kph. More of a pain when taking off / landing.)
- Although it is fast, everything else is faster.
- Performance starts to degrade with altitude.
- Low amount of cannon ammo (150 rounds per gun).
- Camouflages need to be unlocked by bombing bases on which it is not that effective compared to other nation's bombers.
History
Describe the history of the creation and combat usage of the aircraft in more detail than in the introduction. If the historical reference turns out to be too big, take it to a separate article, taking a link to an article about the vehicle and adding a block "/ historical reference" (example: https://wiki.warthunder.com/Name-vehicles/historical reference) and add a link to it here using the main template. Be sure to include links to sources at the end of the article.
Media
An excellent addition to the article will be video guides, as well as screenshots from the game and photos.
Read also
Links to the articles on the War Thunder Wiki that you think will be useful for the reader, for example,
- reference to the series of the aircraft;
- links to approximate analogues of other nations and research trees.
Sources
Paste links to sources and external resources, such as:
- topic on the official game forum;
- page on aircraft encyclopedia;
- other literature.
| USSR bombers | |
|---|---|
| SB and Ar | SB 2M-100 · SB 2M-103 · SB 2M-103 MV-3 · SB 2M-103U · SB 2M-103U MV-3 · SB 2M-105 · Ar-2 |
| Yer-2 (petrol) | Yer-2 (M-105) · Yer-2 (M-105) TAT · Yer-2 (M-105R) TAT · Yer-2 (M-105R) LU |
| Yer-2 (diesel) | Yer-2 (ACh-30B) (e) · Yer-2 (ACh-30B) (l) |
| Tu | Tu-2 · Tu-2S · Tu-2S-44 · Tu-2S-59 · Tu-4 |
| Pe | Pe-2-1 · Pe-2-31 · Pe-2-83 · Pe-2-110 · Pe-2-205 · Pe-2-359 · Pe-8 |
| IL | DB-3B · IL-4 |
| Po | Po-2 · Po-2M |
| Other | MBR-2-M-34 · TB-3M-17-32 · Yak-4 · Be-6 |
| Lend-Lease | ▂PBY-5A Catalina · ▂Hampden TB Mk I · ▂A-20G-30 · ▂B-25J-30 |
