Difference between revisions of "T95"
Colok76286 (talk | contribs) |
Colok76286 (talk | contribs) |
||
| Line 9: | Line 9: | ||
}} | }} | ||
| − | == | + | == Description == |
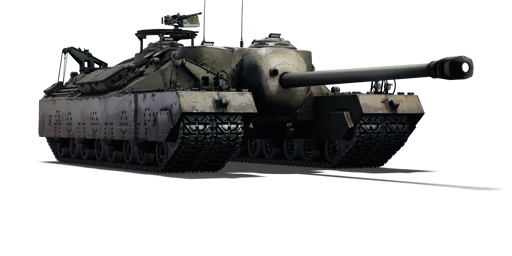
<!-- ''In the description, the first part should be about the history of the creation and combat usage of the vehicle, as well as its key features. In the second part, tell the reader about the ground vehicle in the game. Insert a screenshot of the vehicle, so that if the novice player does not remember the vehicle by name, he will immediately understand what kind of vehicle the article is talking about.'' --> | <!-- ''In the description, the first part should be about the history of the creation and combat usage of the vehicle, as well as its key features. In the second part, tell the reader about the ground vehicle in the game. Insert a screenshot of the vehicle, so that if the novice player does not remember the vehicle by name, he will immediately understand what kind of vehicle the article is talking about.'' --> | ||
| − | '''{{Specs|name}}''' | + | The '''{{Specs|name}}''' is a rank {{Specs|rank}} American tank destroyer {{Battle-rating}}. It was introduced in [[Update 1.49 "Weapons of Victory"]]. |
| − | + | The T95 is good at providing support and dragging enemy fire. Since [[Update 1.59 "Flaming Arrows"]], the T95 shares the HE-filled APCBC T13 shells, researchable at tier 1 modifications, giving it an incredible punch that puts it on par with the [[Jagdtiger]]. Using the explosive-filled T13 shell (APCBC), the T95 can dispatch almost any tank it can penetrate in one go, given that the necessary conditions of detonation are present, i.e. the penetration of 20 mm of armour and the total of 1.2 m travelled — a lucky [[ASU-85]] could endure a hit from the side without the customary fate of disastrous explosion, but these rare moments shouldn't be expected by anyone versing the T95. Anyways, the 12.7 mm machine gun does a fine job at disposing of such lightly-armoured targets when the necessity arises. | |
| − | + | The T95 was given several nicknames by the War Thunder Community: "Doom Turtle" or "Tutel". | |
| − | == | + | == General info == |
| − | === | + | === Survivability and armour === |
{{Specs-Tank-Armour}} | {{Specs-Tank-Armour}} | ||
<!-- ''Describe armour protection. Note the most well protected and key weak areas. Appreciate the layout of modules as well as the number and location of crew members. Is the level of armour protection sufficient, is the placement of modules helpful for survival in combat? If necessary use a visual template to indicate the most secure and weak zones of the armour.'' --> | <!-- ''Describe armour protection. Note the most well protected and key weak areas. Appreciate the layout of modules as well as the number and location of crew members. Is the level of armour protection sufficient, is the placement of modules helpful for survival in combat? If necessary use a visual template to indicate the most secure and weak zones of the armour.'' --> | ||
| − | T95 | + | The T95 is very well known for its amazing frontal armour, hard to penetrate for the majority of guns at its rank. Even with its great frontal armour, a few enemies can still destroy the T95 frontally by using HEAT ammo (e.g. [[M103]]: 380 mm and [[SU-122-54]]: 400 mm pen), or for any other tank starting with [[:Category:Third_rank_ground_vehicles|rank III]] by hitting the two obvious weak spots. |
| − | + | To hide the weak spots, one should try to find a spot where the cupolas are at well hidden from the enemy, either by finding a favourable slope or a high place, thus angling the vehicle to a point where only the front armour plates are in the sights of the enemy. Staying out of range (+600 m) to deny easy hits, alternatively, is a simple yet still quite effective tactic. Whenever an object such as a pillar presents itself in a combat area, the T95 driver should cleverly place the driver's cupola behind it — as with any other vehicle, proper use of the terrain is of utmost importance. | |
| − | + | This is further enhanced with good lower side armour and well angled top side armour. The sides are around 210 mm total with spaced armour in the tracks, any shot that hits it using HE-filled rounds will often explode before penetration inside occurs. | |
| − | ''' | + | '''Armour type:''' |
| − | * | + | * Rolled homogeneous armour |
| − | * | + | * Cast homogeneous armour |
{| class="wikitable" | {| class="wikitable" | ||
|- | |- | ||
| − | ! | + | ! Armour !! Front (Slope angle) !! Sides !! Rear !! Roof |
|- | |- | ||
| − | | | + | | Hull || 305 mm (0-29°) ''Front'' <br> 133.35 mm (60°) ''Lower Glacis'' || 152 mm bottom <br> 63.5 mm top|| 50.8 mm || 38.1 mm |
|- | |- | ||
| − | | | + | | Cupola || 76.2 mm || 76.2 mm || 76.2 mm || 76.2 mm |
|- | |- | ||
| − | | | + | | Additional armour || 292.1 mm ''Mantlet'' <br> 76.2 mm ''Cupolas'' <br> 76.2 mm ''track guard''|| 76.2 - 101.6 mm ''Lower track guard'' <br> 63.5 mm ''Upper outer track guard'' <br> 25.4 mm ''Upper inner track guard (drawer)''|| N/A || 38.1 mm ''Radiator cover'' |
|- | |- | ||
|} | |} | ||
| − | ''' | + | '''Notes:''' |
| − | * | + | * Engine-crew-compartment wall is 25.4 mm. |
| − | * | + | * Plenty of attached ''rolled homogeneous'' accessory with 25.4 mm. |
| − | * | + | * 25.4 mm of belly armour at quite a big height off the ground. Therefore safe from 122 mm cannons using HE between the tracks. |
| − | * 20 | + | * 20 mm of structural steel for suspension and rollers. The track section is riddled with them. |
| − | === | + | === Mobility === |
{{Specs-Tank-Mobility}} | {{Specs-Tank-Mobility}} | ||
<!-- ''Write about the mobility of the ground vehicle. Estimate the specific power and manoeuvrability, as well as the maximum speed forwards and backwards.'' --> | <!-- ''Write about the mobility of the ground vehicle. Estimate the specific power and manoeuvrability, as well as the maximum speed forwards and backwards.'' --> | ||
| − | [[File:T95 firing.jpg|thumbnail|right| | + | [[File:T95 firing.jpg|thumbnail|right|In the ruins of the Berlin map this T95 wears the "Destruction" decal, unlockable for defeating 700 enemy tanks with US ground forces.]] |
| − | + | The T95 is a very heavy and slow TD, the main purpose of which is to hold and defend a tactical position or to lead a forward push, thereby giving allied vehicles the chance to strike at the enemy, most likely distracted by the defying task of taking down the immensely armoured T95. Despite its bad top speed, the T95 has amazing traverse speed, making it quite hard for an enemy (even light tank) to flank. Though the T95 is a walking shield (aside from the two weak spots), the tank is very situational due to its slow speed. It has advantages in smaller maps with narrow corridors, such as city-based maps, while it struggles in larger maps with hilly terrain due to its poor climbing ability. | |
{{tankMobility|abMinHp=710|rbMinHp=442}} | {{tankMobility|abMinHp=710|rbMinHp=442}} | ||
| − | === | + | === Modifications and economy === |
{{Specs-Economy}} | {{Specs-Economy}} | ||
| − | + | After Parts and FPE, priority research targets for this tank should be mobility upgrades and the T13 APCBC shell. | |
| − | == | + | == Armaments == |
{{Specs-Tank-Armaments}} | {{Specs-Tank-Armaments}} | ||
| − | === | + | === Main armament === |
{{Specs-Tank-Weapon|1}} | {{Specs-Tank-Weapon|1}} | ||
<!-- ''Give the reader information about the characteristics of the main gun. Assess its effectiveness in a battle based on the reloading speed, ballistics and the power of shells. Do not forget about the flexibility of the fire, that is how quickly the cannon can be aimed at the target, open fire on it and aim at another enemy. Add a link to the main article on the gun: <code><nowiki>{{main|Name of the weapon}}</nowiki></code>. Describe in general terms the ammunition available for the main gun. Give advice on how to use them and how to fill the ammunition storage.'' --> | <!-- ''Give the reader information about the characteristics of the main gun. Assess its effectiveness in a battle based on the reloading speed, ballistics and the power of shells. Do not forget about the flexibility of the fire, that is how quickly the cannon can be aimed at the target, open fire on it and aim at another enemy. Add a link to the main article on the gun: <code><nowiki>{{main|Name of the weapon}}</nowiki></code>. Describe in general terms the ammunition available for the main gun. Give advice on how to use them and how to fill the ammunition storage.'' --> | ||
| Line 73: | Line 73: | ||
{| class="wikitable" style="text-align:center" width="100%" | {| class="wikitable" style="text-align:center" width="100%" | ||
|- | |- | ||
| − | ! colspan="5" | [[T5E1 (105 mm)|105 | + | ! colspan="5" | [[T5E1 (105 mm)|105 mm T5E1]] || colspan="5" | Turret rotation speed (°/s) || colspan="4" | Reloading rate (seconds) |
|- | |- | ||
| − | ! | + | ! Mode !! Capacity !! Vertical !! Horizontal !! Stabilizer |
| − | ! | + | ! Stock !! Upgraded !! Full !! Expert !! Aced |
| − | ! | + | ! Stock !! Full !! Expert !! Aced |
| − | ! | ||
| − | ! | ||
| − | ! | ||
|- | |- | ||
| − | ! | + | ! ''Arcade'' |
| − | | rowspan="2" | 62 || rowspan="2" | -5°/+19° || rowspan="2" | -10°/+11° || rowspan="2" | | + | | rowspan="2" | 62 || rowspan="2" | -5°/+19° || rowspan="2" | -10°/+11° || rowspan="2" | N/A ||8.8||12.2||14.8||16.4||17.4|| rowspan="2" |20.0|| rowspan="2" | 17.7 || rowspan="2" | 16.3 || rowspan="2" | 15.4 |
|- | |- | ||
| − | ! | + | ! ''Realistic'' |
|5.9||7.0|| 8.5 ||9.4|| 10.0 | |5.9||7.0|| 8.5 ||9.4|| 10.0 | ||
|- | |- | ||
|} | |} | ||
| − | ==== | + | ==== Ammunition ==== |
| − | '''T32; | + | '''T32; APBC''' - The stock shell and previously the only one ever needed, unless engaging in combat over 1,000 m distance. It features decent normalization and good penetration even at ~60°, unlike the T29E3 APCR. Only downfall is the 50% ricochet chance against ~60° angled armour plates, like the frontal plate of the [[T-54 (1947)]], which the shell would otherwise easily penetrate up to 1,000 m range ([[T-54 (1949)|mod. 1949]] & [[T-54 (1951)|mod. 1951]]). Post-penetration effects are meagre. No HE filler, therefore only spalling and direct impact cause damage. For ammo racks, the detonation chance is roughly 5-10%. A bit better for starting fires, though. Therefore focus on crew members and vital modules. |
| − | '''T29E3; | + | '''T29E3; APCR''' - The additional 50 mm penetration at all ranges looks good on paper, but a further check reveals a great disadvantage. With greater armour angles the penetration quickly drops, even past the stock APBC shot! And as angled plates become very common in era IV, this shell can just be ignored. Exemption is on ranges exceeding 1,000 m. Pack extra for expected long-range sniper duels. Additionally, the post-penetration effects are small and angle normalization does not happen upon impact. Direct hits on ammo racks have a small chance to cause an explosion like the APBC. Focus fire on crewmen and important modules! |
| − | '''T30E1; | + | '''T30E1; HE''' - Despite the calibre the HE is worse than similar calibres found on the [[Tiger II (10.5 cm Kw.K)|King Tiger's]] [[KwK L/68 (105 mm)|105 mm KwK L/68]] and the [[SU-100]]'s [[D-10S (100 mm)|100 mm D-10]] cannons, even less than on the [[M3A1 (90 mm)|90 mm M3A1]] cannon on the [[M46]]. Damage against common [[:Category:Anti-aircraft_vehicles|SPAA]] is therefore unsatisfactory and the roof mounted [[M2HB (12.7 mm)|M2HB Browning]] heavy machine gun is the better weapon of choice. |
| − | '''T13; | + | '''T13; APCBC''' - This should be the go-to ammunition with the T95, at any range. While it sacrifices some penetration (about 2 mm at many ranges when compared to the T32 APBC), it has a HE filler. This allows this shell to knock out almost anything with a single shot. It has massive post-penetration damage, and this is why the sacrifice of raw penetration is worth it. Despite the lower penetration, with proper aiming, the T13 shot can penetrate any tank it sees. When fighting King Tigers, simply aim for the turret faces (right side preferably) and lower glacis. When fighting T-44s and T-55s, aim for the turret faces, to the left and right of the gun, or the cupola if close enough to consistently hit. When fighting another heavy TD like the Jadgtiger, simply aim for the lower glacis, while it will rarely be a single-shot knock-out, it will immobilize him, and allow the leisure of finishing it off at an opportune time. Tanks like the IS-3 and T-10 are one of the greatest challenges for this shot, as their pike fronts are usually strong enough to bounce it if they are facing the T95. To defeat them aim for the area right at the top of the pike and below the gun, though this can be challenging. The cupola is again a valid target for pike front soviet heavies if close enough. To destroy an IS-6 frontally, aim for turret front, cupolas, or right under the gun where the shot can bounce down into the hull. While on paper, this shot lacks the penetration to penetrate the front of the Maus turret, it can actually penetrate it due to the armour penalty that the Maus has, which makes its armour weaker. Most other tanks can simply be shot centre of mass. |
{{:T5E1 (105 mm)/Ammunition|T32, T13, T29E3, T30E1}} | {{:T5E1 (105 mm)/Ammunition|T32, T13, T29E3, T30E1}} | ||
| Line 106: | Line 103: | ||
{| class="wikitable" style="text-align:center" | {| class="wikitable" style="text-align:center" | ||
|- | |- | ||
| − | ! | + | ! Full<br>ammo |
| − | + | ! Ammo<br>part | |
| − | ! | + | ! 1st<br>rack empty |
| − | ! | + | ! 2nd<br>rack empty |
| − | ! | + | ! 3rd<br>rack empty |
| − | ! | + | ! 4th<br>rack empty |
| − | ! | + | ! Visual<br>discrepancy |
| − | ! | ||
|- | |- | ||
| − | | '''62''' || style="text-align:right" | '' | + | | '''62''' || style="text-align:right" | ''Projectiles'' <br> ''Propellants'' || 51 ''(+11)''<br>41 ''(+21)'' || 33 ''(+29)''<br>35 ''(+27)'' || 17 ''(+45)''<br>23 ''(+39)'' || 1 ''(+61)''<br>1 ''(+61)'' || No |
|- | |- | ||
|} | |} | ||
| − | === | + | === Machine guns === |
{{Specs-Tank-Weapon|2}} | {{Specs-Tank-Weapon|2}} | ||
<!-- ''Offensive and anti-aircraft machine guns not only allow you to fight some aircraft but also are effective against lightly armoured vehicles. Evaluate machine guns and give recommendations on its use.'' --> | <!-- ''Offensive and anti-aircraft machine guns not only allow you to fight some aircraft but also are effective against lightly armoured vehicles. Evaluate machine guns and give recommendations on its use.'' --> | ||
| Line 128: | Line 124: | ||
! colspan="5" | [[M2HB (12.7 mm)|12.7 mm M2HB]] | ! colspan="5" | [[M2HB (12.7 mm)|12.7 mm M2HB]] | ||
|- | |- | ||
| − | ! | + | ! Mount !! Capacity (Belt) !! Fire rate !! Vertical !! Horizontal |
|- | |- | ||
| − | | | + | | Pintle || 1,000 (200) || 577 || -10°/+70° || ±140° |
|- | |- | ||
|} | |} | ||
| − | + | The .50 calibre machine gun is mounted on the commander's cupola and manned by the very same, this heavy machine gun allows for decent anti-air fire arcs. Fire arcs are ~300° with a small dead spot to the rear and ~80° upwards, or rather for how much the camera allows for. If used freely and without constraint, the ammo will drain quickly. Some moderation is advised, given the lack of a co-axial MG for clearing bushes and fences. Clearing obstacles is the secondary armaments primary usage. Mostly due to the cannons low mounting height. Even small fences can obstruct the sight. | |
| − | == | + | == Usage in battles == |
<!-- ''Describe the tactics of playing in the vehicle, the features of using vehicles in the team and advice on tactics. Refrain from creating a "guide" - do not impose a single point of view but instead give the reader food for thought. Describe the most dangerous enemies and give recommendations on fighting them. If necessary, note the specifics of the game in different modes (AB, RB, SB).'' --> | <!-- ''Describe the tactics of playing in the vehicle, the features of using vehicles in the team and advice on tactics. Refrain from creating a "guide" - do not impose a single point of view but instead give the reader food for thought. Describe the most dangerous enemies and give recommendations on fighting them. If necessary, note the specifics of the game in different modes (AB, RB, SB).'' --> | ||
| − | + | With this in mind let us talk about the need for speed: | |
| − | + | The Doom Turtle is very slow, the slowest vehicle in-game to be exact. | |
| − | + | For tactics, we must rather think of strategy: It may only reach one specific point through an entire match, so make sure the T95 is actually needed at that point or all that will be spent is digital gasoline. | |
| − | + | Study the map and look for choke points, places of fierce narrow fielded conflict. Points were fighting will always take place. | |
| − | + | There are two main playstyles: Support and Spearhead. Playstyle does not really change with the game modes, they can be universally used. | |
| − | + | '''Support''' | |
| − | + | The biggest problem of the Doom Turtle is the weak spots, undermining the trade-off speed for armour. However, if the T95 stays beyond decent accuracy (+500 m), or gain height advantage and use gun depression, then the weak spots are no longer accessible. Do not mistake this with a sniper role! The average range should be 400 to 800 m. Stay with the team, the T95 is their shield. Be a classic tank in RPG sense. If the situation is about to grind down and come to hold, change to the Spearhead strategy (see below). | |
| − | + | The main task is to provide fire assistance since the cannon is not made to take out tanks and features a long reload, disabling enemy tanks with engine hits is the priority. Further, draw the enemies attention to the T95. Force foes into sniper duels. Every shot at the T95 is one away from an ally. To enhance this sit in an exposed position and attack enemies with the machine gun. Make them shoot at the T95. Once using the T13 shell, the disabling shots the T32 made will turn into nasty shots with post-penetration damages. | |
| − | + | Good places to go for are where the heavy tanks would rush to fight with their armour. Or spots medium tanks use but do not hide in the cover, leave it open for the allied medium tanks. Their support is essential to enhance the T95's own slow rate of fire. Playing driving cover/pillbox is also something to consider under these circumstances. | |
| − | + | '''Spearhead''' | |
| − | [[File:T95 - putting up pressure.jpg|thumbnail| | + | [[File:T95 - putting up pressure.jpg|thumbnail|Although going this close is ill-advised, as for enemy tanks can have better reverse speeds than the T95 can drive forwards. Not to mention the cupola weak spots becomes an easy target. The T95 is putting pressure on and places the opponent under stress. Psychological effects should not be underestimated. In this case, the [[Tiger II (10.5 cm Kw.K)]] got stuck on the rubble pile and is further blocking his allied [[IS-4M]] the sight. Reversing now allows for a free shot into the Tigers transmission, locking him in place.]] |
| − | + | The following tactic goes against anything one would expect with the above and described the tank's issues. While it sounds easy, there must be put a lot of thought into it to succeed. | |
| − | + | Press and hold "W" and click "Mouse button 1" once in a while. It, in theory, will get the T95 heavily damaged or even destroyed, but in practice, a 86 tonnes vehicle is determined to steamroll everything in its path and everyone gets scared, panicked even. An example can be seen in the screenshot on the right | |
| − | + | But which place to charge through like the Light Brigade? The goal of this attack is to push the team out of camping positions and draw selected enemy fire onto the T95. Long narrow sections with decent cover left and right is good places. Other places would be on the edge of the map and come in from an angle, limiting the foes attack front to only <100°. Having on to worry about only one side armour section allows for good angling opportunities. On Poland, the northern town part in domination is a good example of this. The northern side is usually clear and south are only has got a few spots where fire can hit the side, make sure to turn south at those spots to further improve the south facing side armour via armour angling. | |
| − | + | Next step ones close enough is to capture the control point and/or keep advancing into the enemy to dig them out.Now, once the position is secured, the strategy can be changed to a Support role (see above), or go sneaky and hide around a corner. | |
| − | + | Main difference to support is the change of module targets: Gun breech and gunner are to priorities, as this close up the T95's weak spots are very easy to hit. Further keep spamming the machine gun, to cloud the foe's sight and make them focus on the T95, helping the allies (who hopefully followed) to take them out. | |
[[File:T95 EasternEurope.jpg|thumbnail|left|Although a stationary tank destroyer, this does not mean to remain immobile! Keep changing position after some shots and be aware of the surroundings — otherwise, the T95 turns into one of those craters.]] | [[File:T95 EasternEurope.jpg|thumbnail|left|Although a stationary tank destroyer, this does not mean to remain immobile! Keep changing position after some shots and be aware of the surroundings — otherwise, the T95 turns into one of those craters.]] | ||
| − | + | Sitting at an uneasy spot with 7.0 in AB and 6.7 in RB/SB, facing off Rank 5 vehicles and a variety of WW2 vehicles. All vehicles can penetrate the upper side armour and the weak spots. Therefore all medium vehicles are dangerous and their engines should be disabled ASAP. | |
| − | + | Experienced enemy players are aware of the T95's downsides: one hit weak spots, poor top speed, long reload and they will subsequently use it against the "Doom Turtle". | |
| − | + | Foes able to frontally penetrate the T95 are labelled red. As only solid shot ammo is available, specific modules must be a target. Generally: Medium tanks - Engine; Heavy tanks - Cannon breech, crew; TDs - Crew compartment, gunner; | |
| − | * | + | * Tank destroyers/<span style="color:red">☠[[SU-122-54]]</span>: Except for the Jagdtiger all TDs should be shot at their gunner position to disable at least two crewmen. |
| − | *[[IS-3]]: | + | *[[IS-3]]: Pike is difficult to get through. Try to disable the cannon, or wait for him to angle the tank wrong to shoot through the pike. Otherwise, with only 4 crewmen keep disabling them one by one. |
| − | *[[IS-4M]]: | + | *[[IS-4M]]: The drives hatch is hard to get through with the tiny hole behind the additional armour. More favourable is the lower plate. The same as for the IS-3 applies. |
| − | *T-54s & <span style="color:red">☠[[T-54 (1951)|mod.51]]</span>: | + | *T-54s & <span style="color:red">☠[[T-54 (1951)|mod.51]]</span>: All can be penetrated through the turret front (left and right of gun mantlet) from closer than 500 m. Except for the [[T-54 (1947)|mod.47]], the glacis plate may also be targeted, if it is straight pointed at the T95. Target either the engine or the ammorack + fuel tank at the front (chance to set if off is slim though). |
| − | *[[T-44]]: | + | *[[T-44]]: Turret can be very trolly, but is the best way to avoid return fire. Engine and crew are again good targets. |
| − | *[[Tiger II (H)]]: | + | *[[Tiger II (H)]]: Right turret cheek to disable the gunner, alternatively the lower glacis to get the transmission. |
| − | *[[Maus]]: | + | *[[Maus]]: Given its height, the T95's weak spot is very easy to hit. Disable the gunner via a shot in the right turret cheek. If closer than 1,000 m, retreat before he can man the cannon again. |
| − | *[[Jagdtiger]]: | + | *[[Jagdtiger]]: A tough nut, plus 250 mm of raw and sloped armour disables APBC and APCR shells. Thankfully the lower plate is a good place to shoot. Make sure to hit at a good flat angle, as the APBC likes to bounce. |
| − | *<span style="color:red">☠[[Leopard I]]</span>: | + | *<span style="color:red">☠[[Leopard I]]</span>: Shoot anywhere at the front, but do so quickly, as a good player can shoot and very quickly destroy the T95. Yet, due to the low armour thickness, the shrapnel damage inflicted is great and may even one shot it. |
| − | *<span style="color:red">☠[[M103]]</span>: | + | *<span style="color:red">☠[[M103]]</span>: Try to shoot into the turret trap (lower gun mantlet) or the turrets cheeks. Try to disable the cannon, breech and crew men. |
| − | *[[Panther F]]/[[M26]]/[[M46]]: | + | *[[Panther F]]/[[M26]]/[[M46]]: Entire front is penetrable. Shooting the upper glacis and into the engine through the fighting compartment will deal decent damage. |
| − | *<span style="color:red">☠[[M47]]</span>: | + | *<span style="color:red">☠[[M47]]</span>: Don't shoot the upper glacis, more preferably the turret. Engine and gun breech are good targets to start with |
| − | *<span style="color:red">☠[[M60]]</span>: | + | *<span style="color:red">☠[[M60]]</span>: Lots of sloped armour. Frontally, the commander's hatch can be hit quite easily, but this fight should be avoided at all costs. Basically an up-armoured Leopard. |
| − | *<span style="color:red">☠[[U-SH 405]]</span>: | + | *<span style="color:red">☠[[U-SH 405]]</span>: Easy to destroy with one shot, but extremely fast and armed with 18 rockets with 330 mm of penetration. These rockets will cut right through your armour. Do not miss your shot when engaging one of these tanks. |
| − | ==== | + | ==== Fighting Against the T95 ==== |
| − | + | When facing the T95, it is very important to know the weak spots. A major weak spot is the commander's cupola on the top left (right if facing it) of the T95. This spot can be penetrated by most guns at its BR, and if APHE or HESH is used is likely to result in the death of a few crew members. Another strategy is to disable the tracks, then flank to the side. This is probably the most viable strategy when the T95 is alone. However, if it is accompanied by team members, which it should be, then this strategy will be more difficult to pull off. It is important to disable all of the tracks, as the T95 is still able to turn with only 2 or 3 tracks intact. Once you are at its flank, however, it will be easy to take it out. Like most tanks with formidable frontal armour, it has much less armour at the sides. Also, most of the crew or ammo racks are able to be hit from the side without interference from other modules. Overall, the T95, like other turretless tank destroyers, is very formidable from the front, albeit for the weak spot on the cupola, but suffers when flanked. As stated above, however, due to the 4 tracks the T95 has a very good turning speed, which makes flanking much more risky. | |
| − | === | + | === Pros and cons === |
<!-- ''Summarise and briefly evaluate the vehicle in terms of its characteristics and combat effectiveness. Mark its pros and cons in a bulleted list. Try not to use more than 6 points for each of the characteristics. Avoid using categorical definitions such as "bad", "good" and the like - use substitutions with softer forms such as "inadequate" and "effective".'' --> | <!-- ''Summarise and briefly evaluate the vehicle in terms of its characteristics and combat effectiveness. Mark its pros and cons in a bulleted list. Try not to use more than 6 points for each of the characteristics. Avoid using categorical definitions such as "bad", "good" and the like - use substitutions with softer forms such as "inadequate" and "effective".'' --> | ||
[[File:T95 vs KingTiger Comparison.jpg|thumbnail|right|T95 and [[Tiger II (H)]] height comparison. The T95 is as tall as the Tiger's chassis and with similar hull length. The Tiger II is one of the taller vehicles.]] | [[File:T95 vs KingTiger Comparison.jpg|thumbnail|right|T95 and [[Tiger II (H)]] height comparison. The T95 is as tall as the Tiger's chassis and with similar hull length. The Tiger II is one of the taller vehicles.]] | ||
| − | ''' | + | '''Pros:''' |
| − | * | + | * Extremely tough armour: 300 mm of frontal armour, and very strong sides thanks to the massive tracks |
| − | * | + | * The T95's resilience to bombs, artillery, and large calibre HE shells rivals that of the [[Maus]] and [[E-100]] |
| − | * | + | * Massive gun mantlet |
| − | * | + | * Four sets of very strong tracks that are difficult to destroy in a single shot |
| − | * | + | * The four sets of tracks gives this tank incredible hull traverse. The reactive mobility is so good that some light tanks simply aren't fast enough to circle the T95 with out getting shot |
| − | * | + | * Mounts the same impressive 105 mm found on the [[T28]] and [[T29]], firing an extremely powerful APCBC shell |
| − | * | + | * The raw frontal armour thickness coupled with the extremely powerful gun makes this tank one of the best snipers/ breakthrough tanks in the game |
| − | * | + | * Roof-mounted .50 cal machine gun; can actually defend its self against attacking aircraft |
| − | * | + | * Extremely intimidating tank. Many players will simply avoid fighting this tank |
| − | ''' | + | '''Cons:''' |
| − | * | + | * The single slowest tank in the game, with very little potential of fleeing |
| − | * | + | * Due to the terrible top speed, some large maps force the player to become a sniper since some games will end before you even reach the objective. |
| − | * | + | * A prime target for many enemy attackers and bombers thanks to its terrible top speed |
| − | * | + | * The frontal armour still stands no chance against APDS and HEAT shells |
| − | * | + | * Gun mantlet isn't as tough as the [[Jagdtiger]]'s. Most HEAT shells and close-range APDS shots able to go through the mantlet and destroy the breech |
| − | * | + | * Despite having the same gun as the T29, it has much slower rate of fire |
| − | * | + | * The side armour above the tracks is weakly armoured and lined with ammo |
| − | * | + | * The driver can be knocked out if shots enter to the top left cupola, while the commander can die if shots enter the right cupola |
| − | * | + | * The high intimidation factor is a double edged sword. Since a portion of the enemy team will be actively trying to avoid the T95, it's not uncommon to go an entire match without firing the main gun once |
| − | * | + | * Barrel, and thus gun sight, is very low to the ground. Drivers will need to expose a large amount of the upper tank in order to bring the cannon to bear in a hull down position |
| − | == | + | == History == |
<!-- ''Describe the history of the creation and combat usage of the vehicle in more detail than in the introduction. If the historical reference turns out to be too long, take it to a separate article, taking a link to the article about the vehicle and adding a block "/History" (example: <nowiki>https://wiki.warthunder.com/(Vehicle-name)/History</nowiki>) and add a link to it here using the <code>main</code> template. Be sure to reference text and sources by using <code><nowiki><ref></ref></nowiki></code>, as well as adding them at the end of the article with <code><nowiki><references /></nowiki></code>. This section may also include the vehicle's dev blog entry (if applicable) and the in-game encyclopedia description (under <code><nowiki>=== In-game description ===</nowiki></code>, also if applicable).'' --> | <!-- ''Describe the history of the creation and combat usage of the vehicle in more detail than in the introduction. If the historical reference turns out to be too long, take it to a separate article, taking a link to the article about the vehicle and adding a block "/History" (example: <nowiki>https://wiki.warthunder.com/(Vehicle-name)/History</nowiki>) and add a link to it here using the <code>main</code> template. Be sure to reference text and sources by using <code><nowiki><ref></ref></nowiki></code>, as well as adding them at the end of the article with <code><nowiki><references /></nowiki></code>. This section may also include the vehicle's dev blog entry (if applicable) and the in-game encyclopedia description (under <code><nowiki>=== In-game description ===</nowiki></code>, also if applicable).'' --> | ||
| − | === | + | === Development === |
| − | + | Years before the invasion of Normandy, there were men among the Allied planners worrying about the heavily-defended fortification lines such as the Siegfried Line blocking the path from France to Germany. One of the proposed methods was to develop extremely heavily armoured vehicles capable of destroying any fortification it comes across and any resistance the German had. Britain and America both worked on this project in order to develop these super-heavy tanks. | |
| − | + | The American solution was a vehicle that would be called the '''T28 Heavy Tank''' and work began on such vehicle in September 1943. The initial vehicle concept called for a casemate design with a [[T5E1_(105_mm)|105 mm T5 gun]], which was evaluated to be "extremely effective at reducing heavy fortifications". The only other armament on the vehicle would be a .50 cal machine gun for use by the commander. The armour on the design was 203 mm at first, but in January 1945 the head of Ordnance worried about the effect of German APCR ammunition, and so the already significant armour was upped to an astounding 305 mm thick frontal armour, at the increase of weight to 95 tons. The vehicle's electric drive was a carryover from the [[M6A1]] and T23 tank, with the engine the same from the [[M26]] Pershing (which was the same as the [[M4A3 (76) W]]). The heavyweight with the underpowered engine allowed the T28 to reach a whopping 8 miles per hour speed. To carry this design, the vehicle had four sets of tracks, two on each side, 328 mm wide each in order to lower ground pressure. For transport, the extra set of tracks on the sides can be removed to make the vehicle thinner (4.55 m to 3.15 m) for easier transport, but raising ground pressure (0.82kg/cm<sup>2</sup> to 1.14kg/cm<sup>2</sup>) and reducing armour since the detached track sets comes with 102 mm skirt armour.<ref name="EstesHeavyTanks">Estes Kenneth W. ''Super-heavy Tanks of World War II'' Great Britain: Osprey Publishing Ltd., 2014</ref> | |
| − | + | The T28 heavy tank continued with the development and in March 1944, the U.S. Army gave it the name and also placed an order for five pilot models for testings. In March 1945, Ordnance then renamed the T28 into the '''105 mm Gun Motor Carriage T95''' due to the lack of turret for a "tank" and any regular secondary armaments. Then, in June 1946, the vehicle was renamed again to the '''Super Heavy Tank [[T28]]''' due to the United States construction of self-propelled guns being lightly armoured, in order to distinguish it as a radically different design than simply a "tank destroyer". Today, the T95 and T28 naming are both used to title this vehicle.<ref name="EstesHeavyTanks" /> | |
[[File:T28 Front Quarter.jpg|thumbnail|right|Front three-quarter view of the T28 at the Patton Museum. T28 Super Heavy Tank - no longer on exhibit as it has been prepared to move to Fort Benning GA.]] | [[File:T28 Front Quarter.jpg|thumbnail|right|Front three-quarter view of the T28 at the Patton Museum. T28 Super Heavy Tank - no longer on exhibit as it has been prepared to move to Fort Benning GA.]] | ||
| − | === | + | === Procurement and deployment === |
| − | + | The five pilot models requested by the U.S. Army had Ordnance look for a manufacturer to produce these vehicles. The war effort had made many prominent manufacturers busy with pre-existing orders. The Pacific Car and Foundry Company were then contracted to produce the design, with production starting in March 1945. The complete tank design was finished by August 1945, by this time the war had already ended in Europe three months ago. Efforts continued on the tank until the surrender of Japan in September, ending World War II. The post-war cutbacks led to the request for five tanks lowered to just two. The first T28 prototypes appeared in Aberdeen Proving Grounds on 21 December 1945, with the second arriving on 10 January 1946. These two prototype tanks went through evaluations at Aberdeen and Yuma Proving Grounds, mostly for engineering tests to check the durability of the components used. The second prototype model caught an engine fire in Yuma and had to be scrapped. The T28 project finally ended in October 1947 when development for such heavy vehicles stopped. Records on the sole T28 prototype ended afterwards, many assumed the vehicle was destroyed or scrapped.<ref name="EstesHeavyTanks" /> | |
| − | + | In 1974, the sole remaining T28/T95 prototype was found in the fields behind Fort Belvoir, Virginia by a wanderer, rumoured to be a farmer out hunting or a lieutenant conducting inventory inspection. To this day, no one is certain how the T28 tank was left abandoned in the fields or what happened during the years in absence. It was moved to the Fort Knox, Kentucky to be displayed in the Patton Museum of Cavalry and Armor. Today, its resting place is in the National Armor and Cavalry Museum in Fort Benning, Georgia.<ref name="EstesHeavyTanks" /> | |
| − | === | + | === Legacy === |
| − | + | In the end, the super heavy tanks designs made by the Americans (T28) and the British ([[Tortoise]]) only proved that such needs for tanks were unnecessary. The Siegfried Line and other such fortifications were taken out by use of the standard issued medium tanks such as the [[M4]] Shermans, proving that affordable, mass-produced vehicles could dominate the modern battlefield. The super heavy tanks were also a strain on battle operations, as one of the most pressing questions during the development of the super-heavy tanks were on just how to get the tanks across the ocean to Europe and supply them with the fuel and ammo. The only positive note that these heavy tanks provided was that it showed the true extent of American and British industrial capabilities, being able to produce these massive monsters. | |
{{break}} | {{break}} | ||
{{Navigation-Start|{{Annotation|Archive of the in-game description|An archive of the historical description of the vehicle that was presented in-game prior to Update 1.55 'Royal Armour'}}}} | {{Navigation-Start|{{Annotation|Archive of the in-game description|An archive of the historical description of the vehicle that was presented in-game prior to Update 1.55 'Royal Armour'}}}} | ||
{{Navigation-First-Simple-Line}} | {{Navigation-First-Simple-Line}} | ||
| − | + | A heavy assault tank developed on the basis of research conducted by the armament department. It was designed to break through well-fortified positions. Two models were built and underwent testing between 1945 and 1947. A new 105 mm gun was attached to the base, allowing the tank to fight against fortifications. However, the project was eventually determined to be unrealistic. | |
| − | == | + | {{Navigation-End}} |
| + | |||
| + | == Media == | ||
<!-- ''Excellent additions to the article would be video guides, screenshots from the game, and photos.'' --> | <!-- ''Excellent additions to the article would be video guides, screenshots from the game, and photos.'' --> | ||
| − | ; | + | ;Skins |
* [https://live.warthunder.com/feed/camouflages/?vehicle=us_t95 Skins and camouflages for the {{PAGENAME}} from live.warthunder.com.] | * [https://live.warthunder.com/feed/camouflages/?vehicle=us_t95 Skins and camouflages for the {{PAGENAME}} from live.warthunder.com.] | ||
| − | ; | + | ;Videos |
{{Youtube-gallery|B2woWvJK4ew|'''Top 7 most armoured vehicles''' discusses the {{PAGENAME}} at 1:04 - ''War Thunder Official Channel''|PosWOnOGkSo|'''Best experimental vehicles''' discusses the {{PAGENAME}} at 6:55 - ''War Thunder Official Channel''}} | {{Youtube-gallery|B2woWvJK4ew|'''Top 7 most armoured vehicles''' discusses the {{PAGENAME}} at 1:04 - ''War Thunder Official Channel''|PosWOnOGkSo|'''Best experimental vehicles''' discusses the {{PAGENAME}} at 6:55 - ''War Thunder Official Channel''}} | ||
| − | == | + | == See also == |
| − | '' | + | ''Links to the articles on the War Thunder Wiki that you think will be useful for the reader, for example:'' |
| − | * '' | + | * ''reference to the series of the vehicles;'' |
| − | * '' | + | * ''links to approximate analogues of other nations and research trees.'' |
| − | == | + | == External links == |
<!-- ''Paste links to sources and external resources, such as:'' | <!-- ''Paste links to sources and external resources, such as:'' | ||
* ''topic on the official game forum;'' | * ''topic on the official game forum;'' | ||
| Line 270: | Line 268: | ||
*[[wt:en/devblog/current/767/|[Devblog] T28 and T95]] | *[[wt:en/devblog/current/767/|[Devblog] T28 and T95]] | ||
| − | === | + | === References === |
<references /> | <references /> | ||
{{USA tank destroyers}} | {{USA tank destroyers}} | ||
Revision as of 13:25, 8 June 2023
| This page is about the American tank destroyer T95. For the American medium tank, see T95E1. |


Contents
Description
The 105 mm Gun Motor Carriage T95 is a rank V American tank destroyer with a battle rating of 7.3 (AB) and 7.0 (RB/SB). It was introduced in Update 1.49 "Weapons of Victory".
The T95 is good at providing support and dragging enemy fire. Since Update 1.59 "Flaming Arrows", the T95 shares the HE-filled APCBC T13 shells, researchable at tier 1 modifications, giving it an incredible punch that puts it on par with the Jagdtiger. Using the explosive-filled T13 shell (APCBC), the T95 can dispatch almost any tank it can penetrate in one go, given that the necessary conditions of detonation are present, i.e. the penetration of 20 mm of armour and the total of 1.2 m travelled — a lucky ASU-85 could endure a hit from the side without the customary fate of disastrous explosion, but these rare moments shouldn't be expected by anyone versing the T95. Anyways, the 12.7 mm machine gun does a fine job at disposing of such lightly-armoured targets when the necessity arises.
The T95 was given several nicknames by the War Thunder Community: "Doom Turtle" or "Tutel".
General info
Survivability and armour
The T95 is very well known for its amazing frontal armour, hard to penetrate for the majority of guns at its rank. Even with its great frontal armour, a few enemies can still destroy the T95 frontally by using HEAT ammo (e.g. M103: 380 mm and SU-122-54: 400 mm pen), or for any other tank starting with rank III by hitting the two obvious weak spots.
To hide the weak spots, one should try to find a spot where the cupolas are at well hidden from the enemy, either by finding a favourable slope or a high place, thus angling the vehicle to a point where only the front armour plates are in the sights of the enemy. Staying out of range (+600 m) to deny easy hits, alternatively, is a simple yet still quite effective tactic. Whenever an object such as a pillar presents itself in a combat area, the T95 driver should cleverly place the driver's cupola behind it — as with any other vehicle, proper use of the terrain is of utmost importance.
This is further enhanced with good lower side armour and well angled top side armour. The sides are around 210 mm total with spaced armour in the tracks, any shot that hits it using HE-filled rounds will often explode before penetration inside occurs.
Armour type:
- Rolled homogeneous armour
- Cast homogeneous armour
| Armour | Front (Slope angle) | Sides | Rear | Roof |
|---|---|---|---|---|
| Hull | 305 mm (0-29°) Front 133.35 mm (60°) Lower Glacis |
152 mm bottom 63.5 mm top |
50.8 mm | 38.1 mm |
| Cupola | 76.2 mm | 76.2 mm | 76.2 mm | 76.2 mm |
| Additional armour | 292.1 mm Mantlet 76.2 mm Cupolas 76.2 mm track guard |
76.2 - 101.6 mm Lower track guard 63.5 mm Upper outer track guard 25.4 mm Upper inner track guard (drawer) |
N/A | 38.1 mm Radiator cover |
Notes:
- Engine-crew-compartment wall is 25.4 mm.
- Plenty of attached rolled homogeneous accessory with 25.4 mm.
- 25.4 mm of belly armour at quite a big height off the ground. Therefore safe from 122 mm cannons using HE between the tracks.
- 20 mm of structural steel for suspension and rollers. The track section is riddled with them.
Mobility

The T95 is a very heavy and slow TD, the main purpose of which is to hold and defend a tactical position or to lead a forward push, thereby giving allied vehicles the chance to strike at the enemy, most likely distracted by the defying task of taking down the immensely armoured T95. Despite its bad top speed, the T95 has amazing traverse speed, making it quite hard for an enemy (even light tank) to flank. Though the T95 is a walking shield (aside from the two weak spots), the tank is very situational due to its slow speed. It has advantages in smaller maps with narrow corridors, such as city-based maps, while it struggles in larger maps with hilly terrain due to its poor climbing ability.
| Game Mode | Max Speed (km/h) | Weight (tons) | Engine power (horsepower) | Power-to-weight ratio (hp/ton) | |||
|---|---|---|---|---|---|---|---|
| Forward | Reverse | Stock | Upgraded | Stock | Upgraded | ||
| Arcade | 14 | 5 | 86.2 | 710 | 954 | 8.24 | 11.07 |
| Realistic | 13 | 5 | 442 | 500 | 5.13 | 5.8 | |
Modifications and economy
| Mobility | Protection | Firepower | ||||||||||||||||||||
|---|---|---|---|---|---|---|---|---|---|---|---|---|---|---|---|---|---|---|---|---|---|---|
|
|
|
After Parts and FPE, priority research targets for this tank should be mobility upgrades and the T13 APCBC shell.
Armaments
Main armament
| 105 mm T5E1 | Turret rotation speed (°/s) | Reloading rate (seconds) | |||||||||||
|---|---|---|---|---|---|---|---|---|---|---|---|---|---|
| Mode | Capacity | Vertical | Horizontal | Stabilizer | Stock | Upgraded | Full | Expert | Aced | Stock | Full | Expert | Aced |
| Arcade | 62 | -5°/+19° | -10°/+11° | N/A | 8.8 | 12.2 | 14.8 | 16.4 | 17.4 | 20.0 | 17.7 | 16.3 | 15.4 |
| Realistic | 5.9 | 7.0 | 8.5 | 9.4 | 10.0 | ||||||||
Ammunition
T32; APBC - The stock shell and previously the only one ever needed, unless engaging in combat over 1,000 m distance. It features decent normalization and good penetration even at ~60°, unlike the T29E3 APCR. Only downfall is the 50% ricochet chance against ~60° angled armour plates, like the frontal plate of the T-54 (1947), which the shell would otherwise easily penetrate up to 1,000 m range (mod. 1949 & mod. 1951). Post-penetration effects are meagre. No HE filler, therefore only spalling and direct impact cause damage. For ammo racks, the detonation chance is roughly 5-10%. A bit better for starting fires, though. Therefore focus on crew members and vital modules.
T29E3; APCR - The additional 50 mm penetration at all ranges looks good on paper, but a further check reveals a great disadvantage. With greater armour angles the penetration quickly drops, even past the stock APBC shot! And as angled plates become very common in era IV, this shell can just be ignored. Exemption is on ranges exceeding 1,000 m. Pack extra for expected long-range sniper duels. Additionally, the post-penetration effects are small and angle normalization does not happen upon impact. Direct hits on ammo racks have a small chance to cause an explosion like the APBC. Focus fire on crewmen and important modules!
T30E1; HE - Despite the calibre the HE is worse than similar calibres found on the King Tiger's 105 mm KwK L/68 and the SU-100's 100 mm D-10 cannons, even less than on the 90 mm M3A1 cannon on the M46. Damage against common SPAA is therefore unsatisfactory and the roof mounted M2HB Browning heavy machine gun is the better weapon of choice.
T13; APCBC - This should be the go-to ammunition with the T95, at any range. While it sacrifices some penetration (about 2 mm at many ranges when compared to the T32 APBC), it has a HE filler. This allows this shell to knock out almost anything with a single shot. It has massive post-penetration damage, and this is why the sacrifice of raw penetration is worth it. Despite the lower penetration, with proper aiming, the T13 shot can penetrate any tank it sees. When fighting King Tigers, simply aim for the turret faces (right side preferably) and lower glacis. When fighting T-44s and T-55s, aim for the turret faces, to the left and right of the gun, or the cupola if close enough to consistently hit. When fighting another heavy TD like the Jadgtiger, simply aim for the lower glacis, while it will rarely be a single-shot knock-out, it will immobilize him, and allow the leisure of finishing it off at an opportune time. Tanks like the IS-3 and T-10 are one of the greatest challenges for this shot, as their pike fronts are usually strong enough to bounce it if they are facing the T95. To defeat them aim for the area right at the top of the pike and below the gun, though this can be challenging. The cupola is again a valid target for pike front soviet heavies if close enough. To destroy an IS-6 frontally, aim for turret front, cupolas, or right under the gun where the shot can bounce down into the hull. While on paper, this shot lacks the penetration to penetrate the front of the Maus turret, it can actually penetrate it due to the armour penalty that the Maus has, which makes its armour weaker. Most other tanks can simply be shot centre of mass.
| Penetration statistics | |||||||
|---|---|---|---|---|---|---|---|
| Ammunition | Type of warhead |
Penetration @ 0° Angle of Attack (mm) | |||||
| 10 m | 100 m | 500 m | 1,000 m | 1,500 m | 2,000 m | ||
| T32 | APCBC | 256 | 253 | 238 | 221 | 205 | 190 |
| T13 | APCBC | 253 | 250 | 236 | 219 | 204 | 190 |
| T29E3 | APCR | 292 | 287 | 266 | 242 | 220 | 200 |
| T30E1 | HE | 27 | 27 | 25 | 23 | 21 | 20 |
| Shell details | ||||||||||||
|---|---|---|---|---|---|---|---|---|---|---|---|---|
| Ammunition | Type of warhead |
Velocity (m/s) |
Projectile mass (kg) |
Fuse delay (m) |
Fuse sensitivity (mm) |
Explosive mass (TNT equivalent) (g) |
Ricochet | |||||
| 0% | 50% | 100% | ||||||||||
| T32 | APCBC | 914 | 17.7 | - | - | - | 48° | 63° | 71° | |||
| T13 | APCBC | 899 | 18.59 | 1.2 | 19 | 177.38 | 48° | 63° | 71° | |||
| T29E3 | APCR | 1,128 | 11.2 | - | - | - | 66° | 70° | 72° | |||
| T30E1 | HE | 945 | 15.2 | 0.2 | 0.1 | 1,550 | 79° | 80° | 81° | |||
Ammo racks

| Full ammo |
Ammo part |
1st rack empty |
2nd rack empty |
3rd rack empty |
4th rack empty |
Visual discrepancy |
|---|---|---|---|---|---|---|
| 62 | Projectiles Propellants |
51 (+11) 41 (+21) |
33 (+29) 35 (+27) |
17 (+45) 23 (+39) |
1 (+61) 1 (+61) |
No |
Machine guns
| 12.7 mm M2HB | ||||
|---|---|---|---|---|
| Mount | Capacity (Belt) | Fire rate | Vertical | Horizontal |
| Pintle | 1,000 (200) | 577 | -10°/+70° | ±140° |
The .50 calibre machine gun is mounted on the commander's cupola and manned by the very same, this heavy machine gun allows for decent anti-air fire arcs. Fire arcs are ~300° with a small dead spot to the rear and ~80° upwards, or rather for how much the camera allows for. If used freely and without constraint, the ammo will drain quickly. Some moderation is advised, given the lack of a co-axial MG for clearing bushes and fences. Clearing obstacles is the secondary armaments primary usage. Mostly due to the cannons low mounting height. Even small fences can obstruct the sight.
Usage in battles
With this in mind let us talk about the need for speed:
The Doom Turtle is very slow, the slowest vehicle in-game to be exact.
For tactics, we must rather think of strategy: It may only reach one specific point through an entire match, so make sure the T95 is actually needed at that point or all that will be spent is digital gasoline.
Study the map and look for choke points, places of fierce narrow fielded conflict. Points were fighting will always take place.
There are two main playstyles: Support and Spearhead. Playstyle does not really change with the game modes, they can be universally used.
Support
The biggest problem of the Doom Turtle is the weak spots, undermining the trade-off speed for armour. However, if the T95 stays beyond decent accuracy (+500 m), or gain height advantage and use gun depression, then the weak spots are no longer accessible. Do not mistake this with a sniper role! The average range should be 400 to 800 m. Stay with the team, the T95 is their shield. Be a classic tank in RPG sense. If the situation is about to grind down and come to hold, change to the Spearhead strategy (see below).
The main task is to provide fire assistance since the cannon is not made to take out tanks and features a long reload, disabling enemy tanks with engine hits is the priority. Further, draw the enemies attention to the T95. Force foes into sniper duels. Every shot at the T95 is one away from an ally. To enhance this sit in an exposed position and attack enemies with the machine gun. Make them shoot at the T95. Once using the T13 shell, the disabling shots the T32 made will turn into nasty shots with post-penetration damages.
Good places to go for are where the heavy tanks would rush to fight with their armour. Or spots medium tanks use but do not hide in the cover, leave it open for the allied medium tanks. Their support is essential to enhance the T95's own slow rate of fire. Playing driving cover/pillbox is also something to consider under these circumstances.
Spearhead

The following tactic goes against anything one would expect with the above and described the tank's issues. While it sounds easy, there must be put a lot of thought into it to succeed.
Press and hold "W" and click "Mouse button 1" once in a while. It, in theory, will get the T95 heavily damaged or even destroyed, but in practice, a 86 tonnes vehicle is determined to steamroll everything in its path and everyone gets scared, panicked even. An example can be seen in the screenshot on the right
But which place to charge through like the Light Brigade? The goal of this attack is to push the team out of camping positions and draw selected enemy fire onto the T95. Long narrow sections with decent cover left and right is good places. Other places would be on the edge of the map and come in from an angle, limiting the foes attack front to only <100°. Having on to worry about only one side armour section allows for good angling opportunities. On Poland, the northern town part in domination is a good example of this. The northern side is usually clear and south are only has got a few spots where fire can hit the side, make sure to turn south at those spots to further improve the south facing side armour via armour angling.
Next step ones close enough is to capture the control point and/or keep advancing into the enemy to dig them out.Now, once the position is secured, the strategy can be changed to a Support role (see above), or go sneaky and hide around a corner.
Main difference to support is the change of module targets: Gun breech and gunner are to priorities, as this close up the T95's weak spots are very easy to hit. Further keep spamming the machine gun, to cloud the foe's sight and make them focus on the T95, helping the allies (who hopefully followed) to take them out.

Sitting at an uneasy spot with 7.0 in AB and 6.7 in RB/SB, facing off Rank 5 vehicles and a variety of WW2 vehicles. All vehicles can penetrate the upper side armour and the weak spots. Therefore all medium vehicles are dangerous and their engines should be disabled ASAP.
Experienced enemy players are aware of the T95's downsides: one hit weak spots, poor top speed, long reload and they will subsequently use it against the "Doom Turtle".
Foes able to frontally penetrate the T95 are labelled red. As only solid shot ammo is available, specific modules must be a target. Generally: Medium tanks - Engine; Heavy tanks - Cannon breech, crew; TDs - Crew compartment, gunner;
- Tank destroyers/☠SU-122-54: Except for the Jagdtiger all TDs should be shot at their gunner position to disable at least two crewmen.
- IS-3: Pike is difficult to get through. Try to disable the cannon, or wait for him to angle the tank wrong to shoot through the pike. Otherwise, with only 4 crewmen keep disabling them one by one.
- IS-4M: The drives hatch is hard to get through with the tiny hole behind the additional armour. More favourable is the lower plate. The same as for the IS-3 applies.
- T-54s & ☠mod.51: All can be penetrated through the turret front (left and right of gun mantlet) from closer than 500 m. Except for the mod.47, the glacis plate may also be targeted, if it is straight pointed at the T95. Target either the engine or the ammorack + fuel tank at the front (chance to set if off is slim though).
- T-44: Turret can be very trolly, but is the best way to avoid return fire. Engine and crew are again good targets.
- Tiger II (H): Right turret cheek to disable the gunner, alternatively the lower glacis to get the transmission.
- Maus: Given its height, the T95's weak spot is very easy to hit. Disable the gunner via a shot in the right turret cheek. If closer than 1,000 m, retreat before he can man the cannon again.
- Jagdtiger: A tough nut, plus 250 mm of raw and sloped armour disables APBC and APCR shells. Thankfully the lower plate is a good place to shoot. Make sure to hit at a good flat angle, as the APBC likes to bounce.
- ☠Leopard I: Shoot anywhere at the front, but do so quickly, as a good player can shoot and very quickly destroy the T95. Yet, due to the low armour thickness, the shrapnel damage inflicted is great and may even one shot it.
- ☠M103: Try to shoot into the turret trap (lower gun mantlet) or the turrets cheeks. Try to disable the cannon, breech and crew men.
- Panther F/M26/M46: Entire front is penetrable. Shooting the upper glacis and into the engine through the fighting compartment will deal decent damage.
- ☠M47: Don't shoot the upper glacis, more preferably the turret. Engine and gun breech are good targets to start with
- ☠M60: Lots of sloped armour. Frontally, the commander's hatch can be hit quite easily, but this fight should be avoided at all costs. Basically an up-armoured Leopard.
- ☠U-SH 405: Easy to destroy with one shot, but extremely fast and armed with 18 rockets with 330 mm of penetration. These rockets will cut right through your armour. Do not miss your shot when engaging one of these tanks.
Fighting Against the T95
When facing the T95, it is very important to know the weak spots. A major weak spot is the commander's cupola on the top left (right if facing it) of the T95. This spot can be penetrated by most guns at its BR, and if APHE or HESH is used is likely to result in the death of a few crew members. Another strategy is to disable the tracks, then flank to the side. This is probably the most viable strategy when the T95 is alone. However, if it is accompanied by team members, which it should be, then this strategy will be more difficult to pull off. It is important to disable all of the tracks, as the T95 is still able to turn with only 2 or 3 tracks intact. Once you are at its flank, however, it will be easy to take it out. Like most tanks with formidable frontal armour, it has much less armour at the sides. Also, most of the crew or ammo racks are able to be hit from the side without interference from other modules. Overall, the T95, like other turretless tank destroyers, is very formidable from the front, albeit for the weak spot on the cupola, but suffers when flanked. As stated above, however, due to the 4 tracks the T95 has a very good turning speed, which makes flanking much more risky.
Pros and cons

Pros:
- Extremely tough armour: 300 mm of frontal armour, and very strong sides thanks to the massive tracks
- The T95's resilience to bombs, artillery, and large calibre HE shells rivals that of the Maus and E-100
- Massive gun mantlet
- Four sets of very strong tracks that are difficult to destroy in a single shot
- The four sets of tracks gives this tank incredible hull traverse. The reactive mobility is so good that some light tanks simply aren't fast enough to circle the T95 with out getting shot
- Mounts the same impressive 105 mm found on the T28 and T29, firing an extremely powerful APCBC shell
- The raw frontal armour thickness coupled with the extremely powerful gun makes this tank one of the best snipers/ breakthrough tanks in the game
- Roof-mounted .50 cal machine gun; can actually defend its self against attacking aircraft
- Extremely intimidating tank. Many players will simply avoid fighting this tank
Cons:
- The single slowest tank in the game, with very little potential of fleeing
- Due to the terrible top speed, some large maps force the player to become a sniper since some games will end before you even reach the objective.
- A prime target for many enemy attackers and bombers thanks to its terrible top speed
- The frontal armour still stands no chance against APDS and HEAT shells
- Gun mantlet isn't as tough as the Jagdtiger's. Most HEAT shells and close-range APDS shots able to go through the mantlet and destroy the breech
- Despite having the same gun as the T29, it has much slower rate of fire
- The side armour above the tracks is weakly armoured and lined with ammo
- The driver can be knocked out if shots enter to the top left cupola, while the commander can die if shots enter the right cupola
- The high intimidation factor is a double edged sword. Since a portion of the enemy team will be actively trying to avoid the T95, it's not uncommon to go an entire match without firing the main gun once
- Barrel, and thus gun sight, is very low to the ground. Drivers will need to expose a large amount of the upper tank in order to bring the cannon to bear in a hull down position
History
Development
Years before the invasion of Normandy, there were men among the Allied planners worrying about the heavily-defended fortification lines such as the Siegfried Line blocking the path from France to Germany. One of the proposed methods was to develop extremely heavily armoured vehicles capable of destroying any fortification it comes across and any resistance the German had. Britain and America both worked on this project in order to develop these super-heavy tanks.
The American solution was a vehicle that would be called the T28 Heavy Tank and work began on such vehicle in September 1943. The initial vehicle concept called for a casemate design with a 105 mm T5 gun, which was evaluated to be "extremely effective at reducing heavy fortifications". The only other armament on the vehicle would be a .50 cal machine gun for use by the commander. The armour on the design was 203 mm at first, but in January 1945 the head of Ordnance worried about the effect of German APCR ammunition, and so the already significant armour was upped to an astounding 305 mm thick frontal armour, at the increase of weight to 95 tons. The vehicle's electric drive was a carryover from the M6A1 and T23 tank, with the engine the same from the M26 Pershing (which was the same as the M4A3 (76) W). The heavyweight with the underpowered engine allowed the T28 to reach a whopping 8 miles per hour speed. To carry this design, the vehicle had four sets of tracks, two on each side, 328 mm wide each in order to lower ground pressure. For transport, the extra set of tracks on the sides can be removed to make the vehicle thinner (4.55 m to 3.15 m) for easier transport, but raising ground pressure (0.82kg/cm2 to 1.14kg/cm2) and reducing armour since the detached track sets comes with 102 mm skirt armour.[1]
The T28 heavy tank continued with the development and in March 1944, the U.S. Army gave it the name and also placed an order for five pilot models for testings. In March 1945, Ordnance then renamed the T28 into the 105 mm Gun Motor Carriage T95 due to the lack of turret for a "tank" and any regular secondary armaments. Then, in June 1946, the vehicle was renamed again to the Super Heavy Tank T28 due to the United States construction of self-propelled guns being lightly armoured, in order to distinguish it as a radically different design than simply a "tank destroyer". Today, the T95 and T28 naming are both used to title this vehicle.[1]

Procurement and deployment
The five pilot models requested by the U.S. Army had Ordnance look for a manufacturer to produce these vehicles. The war effort had made many prominent manufacturers busy with pre-existing orders. The Pacific Car and Foundry Company were then contracted to produce the design, with production starting in March 1945. The complete tank design was finished by August 1945, by this time the war had already ended in Europe three months ago. Efforts continued on the tank until the surrender of Japan in September, ending World War II. The post-war cutbacks led to the request for five tanks lowered to just two. The first T28 prototypes appeared in Aberdeen Proving Grounds on 21 December 1945, with the second arriving on 10 January 1946. These two prototype tanks went through evaluations at Aberdeen and Yuma Proving Grounds, mostly for engineering tests to check the durability of the components used. The second prototype model caught an engine fire in Yuma and had to be scrapped. The T28 project finally ended in October 1947 when development for such heavy vehicles stopped. Records on the sole T28 prototype ended afterwards, many assumed the vehicle was destroyed or scrapped.[1]
In 1974, the sole remaining T28/T95 prototype was found in the fields behind Fort Belvoir, Virginia by a wanderer, rumoured to be a farmer out hunting or a lieutenant conducting inventory inspection. To this day, no one is certain how the T28 tank was left abandoned in the fields or what happened during the years in absence. It was moved to the Fort Knox, Kentucky to be displayed in the Patton Museum of Cavalry and Armor. Today, its resting place is in the National Armor and Cavalry Museum in Fort Benning, Georgia.[1]
Legacy
In the end, the super heavy tanks designs made by the Americans (T28) and the British (Tortoise) only proved that such needs for tanks were unnecessary. The Siegfried Line and other such fortifications were taken out by use of the standard issued medium tanks such as the M4 Shermans, proving that affordable, mass-produced vehicles could dominate the modern battlefield. The super heavy tanks were also a strain on battle operations, as one of the most pressing questions during the development of the super-heavy tanks were on just how to get the tanks across the ocean to Europe and supply them with the fuel and ammo. The only positive note that these heavy tanks provided was that it showed the true extent of American and British industrial capabilities, being able to produce these massive monsters.
| Archive of the in-game description | |
|---|---|
|
A heavy assault tank developed on the basis of research conducted by the armament department. It was designed to break through well-fortified positions. Two models were built and underwent testing between 1945 and 1947. A new 105 mm gun was attached to the base, allowing the tank to fight against fortifications. However, the project was eventually determined to be unrealistic. | |
Media
- Skins
- Videos
See also
Links to the articles on the War Thunder Wiki that you think will be useful for the reader, for example:
- reference to the series of the vehicles;
- links to approximate analogues of other nations and research trees.
External links
- WT Forum T95 Blog: "Astonishing and amazing 'Tales of the Doom turtle!' – The blog"
- [Devblog] T28 and T95
References
| USA tank destroyers | |
|---|---|
| M10 | M10 GMC |
| M36 | M36 GMC · M36B2 |
| T95 | T28 · T95 |
| M109 | M109A1 |
| ATGM | LOSAT · M901 · ADATS |
| Wheeled | M3 GMC · T55E1 |
| Other | M8 HMC · M50 · M56 |
| China | ▃LVT(A)(4) (ZIS-2) |
