Ki-83
Contents
Description
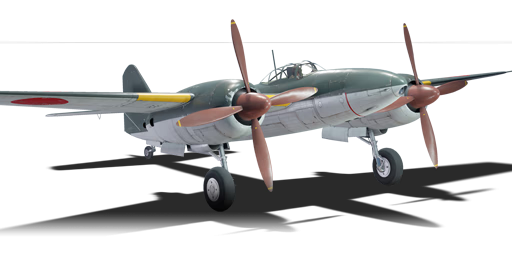
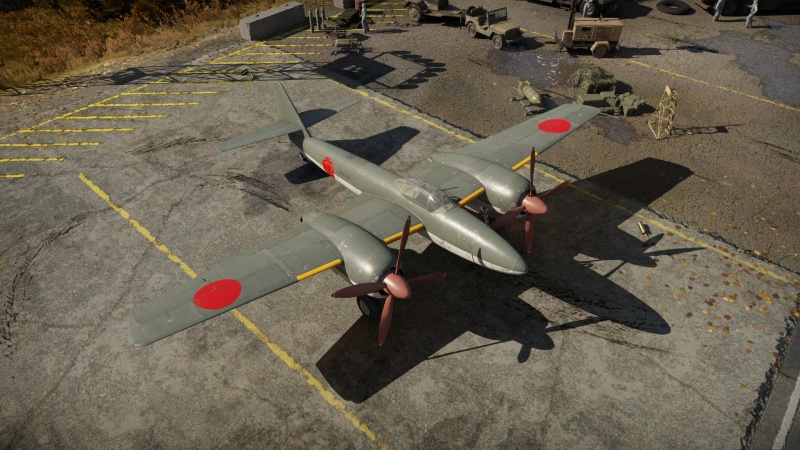
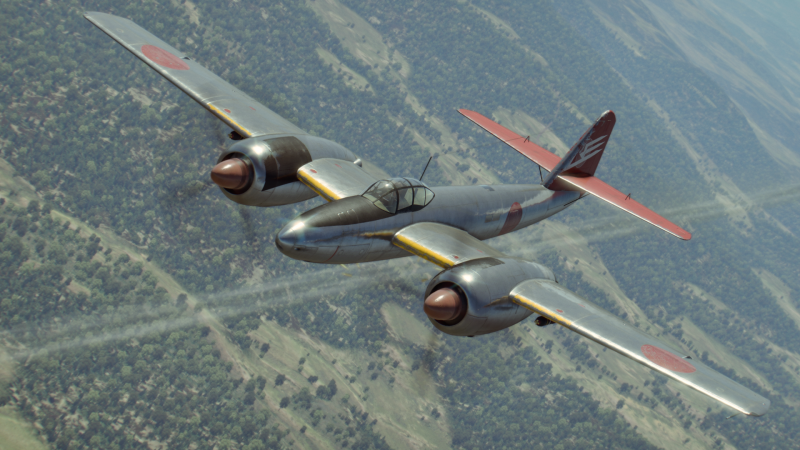
In May of 1943, a specification was sent out by the IJAAS (Imperial Japanese Army Air Service) for a long-range heavy fighter. Tomio Kubo, the designer of the successful Ki-46, and his team took the task of building a plane to meet this specification. Work on the Ki-83 began shortly after the failure of the single-engine Ki-73. The Ki-83 would have two turbocharged 18-cylinder engines each producing a sufficient 2,200 hp. The Japanese conducted test flights with four prototypes during late 1944 and early 1945, however, the bombing campaigns hampered the program. In testing, the Ki-83's sleek airframe and powerful engines could reach an impressive 32,000 feet (9,753 meters) in under 10 minutes. However, continued struggles with logistics and supplies severely hampered the Japanese war effort and the Ki-83 program as a whole. Three prototypes were reportedly destroyed and the last one was seized by America. After a performance evaluation was conducted by the U.S., it was last seen at what is now called O'Hare Airport and was unfortunately most likely scrapped.
Introduced in Update 1.57 "Battle March", the Ki-83 is an incredibly powerful twin-engine fighter. It has the best climb rate for a propeller-driven aircraft and with an air spawn, it will be one of the highest planes in a match. It also has an imposing amount of armament with two 30 mm and two 20 mm cannons mounted within the nose with an ample amount of ammunition. The Ki-83 does have access to two 50 kg bombs but they are incredibly weak and not worth the performance detriment. The Ki-83 is a very dangerous aircraft in the right hands with its immense performance, guns, and manoeuvrability.
General info
Flight performance
| Characteristics | Max Speed (km/h at 9,500 m) |
Max altitude (metres) |
Turn time (seconds) |
Rate of climb (metres/second) |
Take-off run (metres) | |||
|---|---|---|---|---|---|---|---|---|
| AB | RB | AB | RB | AB | RB | |||
| Stock | 681 | 661 | 12600 | 24.3 | 25.4 | 17.0 | 17.0 | 420 |
| Upgraded | 735 | 704 | 23.8 | 24.0 | 27.5 | 21.7 | ||
Details
| Features | ||||
|---|---|---|---|---|
| Combat flaps | Take-off flaps | Landing flaps | Air brakes | Arrestor gear |
| ✓ | ✓ | ✓ | X | X |
| Limits | ||||||
|---|---|---|---|---|---|---|
| Wings (km/h) | Gear (km/h) | Flaps (km/h) | Max Static G | |||
| Combat | Take-off | Landing | + | - | ||
| 870 | 310 | 525 | 479 | 420 | ~14 | ~5 |
| Optimal velocities (km/h) | |||
|---|---|---|---|
| Ailerons | Rudder | Elevators | Radiator |
| < 460 | < 500 | < 520 | > 330 |
Survivability and armour
- 60 mm Bulletproof glass - Armoured windscreen
- 12 mm Steel plate behind the pilot.
- 12 mm Steel plate in the nose.
- 8 mm Steel plate in the fuselage.
Modifications and economy
Armaments
Offensive armament
The Ki-83 is armed with:
- 2 x 30 mm Ho-155 cannons, nose-mounted (100 rpg = 200 total)
- 2 x 20 mm Ho-5 cannons, nose-mounted (200 rpg = 400 total)
Suspended armament
The Ki-83 can be outfitted with the following ordnance:
- Without load
- 2 x 50 kg Army Type 94 GPHE bombs (100 kg total)
Usage in battles
The Ki-83 is truly an extraordinary aeroplane, boasting an often superior climb rate, top speed, and agility versus other propeller-driven aircraft. Ideally, all three would be utilised to bring the Ki-83 it's maximum effectiveness. The favoured tactic is to use the amazing rate of climb to get above your enemies. Upon take-off, pitch up into a 25 - 30-degree climb while using WEP. Once your engines begin to overheat (typically about 3,000 m) then decrease the throttle to 95% or 100% and continue at a 15 - 20-degree angle. A good altitude to level off at is anywhere from 6,500 m and upwards, but keep in mind other planes typically don't venture past 8,000 m. Once at your desired altitude, initiate Boom & Zoom attacks on any enemy aircraft beneath you. In the dive on the enemy aircraft, consider bringing the throttle to 90% or 85% instead of using WEP the entire way down to cool the engines. Don't worry, even without WEP the Ki-83 still dives like a beast. If you miss the initial pass, fret not! Simply increase the throttle back to the WEP setting and zoom climb away. If the enemy aircraft tries to follow you, execute some evasive rolls to throw off their aim, and then pull a hammerhead (once they have stalled out) by bringing the throttle to 0% and extending the landing flaps. Once the nose is pointed at the ground, retract the flaps and push the throttle back to 100%. Often, the enemy aircraft will not have had sufficient time to recover from the stall, and your 2 x 20 mm and 2 x 30 mms will make quick work of their aeroplane.
However, sometimes you will find yourself in a situation with an enemy on your 6. Now is the time to use one of the Ki-83's most surprising strengths -- its agility. Use a mixture of pitch changes (nosing up or down) and rolls to shake off the opponent's aim if they are diving on you to force them to overshoot. If you're lucky, you may even get a firing solution on them as they zoom away. Be cautious though, the late war props and jets that you will face at this BR can often out climb you if they had the energy advantage first.
Should a situation arise in which you need to dogfight an enemy, this is not the worst plane to be in for this scenario. Combat flaps can be deployed at speeds under 525 km/h (352 mph), and landing flaps under 425 km/h (265 mph). The Ki-83 shines most in a horizontal turning fight (especially with landing flaps deployed), as a vertical turning engagement can often bleed speed too fast and leave the Ki-83 a sitting duck to a plane that is more adept at vertical manoeuvres, such as a Spitfire.
When engaging bombers, be wary of their gunners and aim for their tails (to disable elevator control) and engines (to either break their wings, set their fuel on fire, or knock out engines). If you have the opportunity to engage the bomber head-on, take it. Aim for the pilots for a quick and easy pilot snipe. Do mind that the velocity on your 30 mm guns' tracer and standard high explosive shells are very different, the tracers have a speed of 920 m/s whereas the more effective ones have only 720, so aiming your tracers a little high can have better results than trying to land the visible shells on the target. This problem can be eliminated by mounting the all-tracers belt (made up exclusively of high explosive tracer rounds), which share the same ballistic properties and cause decent damage on hit (although less than the HE-F shells). Mounting the ground targets belt (in which all shells have the same speed, although 2 out of every 3 are much less effective against aircraft, particularly at range) or even the stealth belt, which is mostly comprised of shells sharing the same low velocity and lacks the misleading tracer phenomenon.
Manual Engine Control
| MEC elements | ||||||
|---|---|---|---|---|---|---|
| Mixer | Pitch | Radiator | Supercharger | Turbocharger | ||
| Oil | Water | Type | ||||
| Controllable | Controllable Not auto controlled |
Controllable Not auto controlled |
Controllable Not auto controlled |
Separate | Controllable 2 gears |
Auto controlled |
Pros and cons
Pros:
- Very good climb-rate (excellent for a heavy fighter)
- Excellent firepower
- Great top speed at all altitudes
- Extraordinary energy retention
- High red-line speed, can go over 800 km/h in a dive
- Fast at diving
- Arguably Japan's top propeller-driven fighter
- Good firepower, featuring the Ho-155
Cons:
- Big target
- No engine armour
- Limited ammo supply for a heavy fighter
- No self-sealing fuel tanks catch fire easily and often doesn't take it out
- Engines overheat very quickly if manual engine control (MEC) is not used properly
- Loses a lot of performance once the engines are hit
- Hard to cool the engines down if they are damaged
- Below-average rate of roll
- High repair cost in RB/SB
History
The Mitsubishi Ki-83 was an experimental heavy fighter designed near the end of WWII. Though it failed to reach production status, four prototypes were built. The aircraft was designed in response to a requirement for a new heavy fighter. The design team, led by lead designer Tomio Kubo, had previously worked on the Ki-46 'Dinah' twin-engined reconnaissance aircraft.
The aircraft was to be powered by a pair of Mitsubishi Ha-43 radial engines, each producing 2,200 hp at takeoff. The aircraft was armed with a substantial armament of two 20 mm Ho-5 cannons and two 30 mm Ho-155 cannons. The aircraft had a sleek, clean fuselage that was optimized for aerodynamics. During tests, the aircraft was shown to have excellent manoeuvrability and performance for an aircraft of its size, and also experienced much less engine problems than the preceding Ki-73.
Four prototype Ki-83 aircraft were built, but the war ended before full-scale production could begin. The aircraft was virtually unknown in Allied intelligence circles, hence why the aircraft lacked a reporting name. After the war, the USAF seized all four Ki-83 airframes, which were brought back to the United States for testing. One fighter, using high-octane fuel, was able to attain 762 km/h at 7,000 m altitude. The Air Force concluded that the Ki-83 was overall an excellent heavy fighter. However, the tides had turned against Japan's favour by the time the aircraft was developed, meaning that it would never see combat service.
Media
- Skins
- Videos
See also
- Aircraft of comparable role, configuration and era
External links
| Mitsubishi Company (三菱商会) | |
|---|---|
| Fighters | A5M4 · Hagiri's A5M4 |
| A6M2 mod. 11 · A6M2 · A6M3 · A6M3 mod. 22 · A6M3 mod. 22Ko · A6M5 · A6M5 Ko · A6M5 otsu · A6M5 Hei · A6M6c | |
| A7M1 (NK9H) · A7M2 | |
| J2M2 · J2M3 · J2M4 Kai · J2M5 · J2M5 (30 mm) | |
| Hydroplanes | F1M2 |
| Interceptors | Ki-83 · Ki-109 |
| Bombers | G4M1 |
| Ki-21-Ia · Ki-21-I hei · Ki-67-I Ko · Ki-67-I otsu | |
| Jet Fighters | Ki-200 |
| Captured | ▃A6M2 · ␗A6M2 |
| See also | Mitsubishi Heavy Industries, Ltd. (Post-War) |
| Japan twin-engine fighters and strike aircraft | |
|---|---|
| Navy | |
| Land-based Fighter | |
| J1N | J1N1 |
| J5N | J5N1 |
| Army | |
| Ki-45 | Ki-45 ko · Ki-45 otsu · Ki-45 hei · Ki-45 tei |
| Ki-83 | Ki-83 |
| Ki-96 | Ki-96 |
| Ki-102 | Ki-102 otsu |
| Ki-108 | Ki-108 Kai |
| Ki-109 | Ki-109 |


