Difference between revisions of "Lancaster B Mk III"
(→Modules) (Tag: Visual edit) |
(Edits) |
||
| Line 7: | Line 7: | ||
== Description == | == Description == | ||
| − | <!--''In the description, the first part | + | <!-- ''In the description, the first part should be about the history of and the creation and combat usage of the aircraft, as well as its key features. In the second part, tell the reader about the aircraft in the game. Insert a screenshot of the vehicle, so that if the novice player does not remember the vehicle by name, he will immediately understand what kind of vehicle the article is talking about.'' --> |
| + | [[File:GarageImage_{{PAGENAME}}.jpg|420px|thumb|left]] | ||
| + | {{Break}} | ||
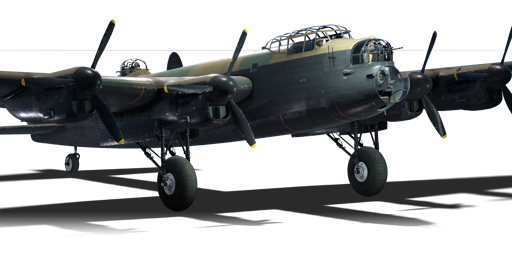
| + | The '''{{Specs|name}}''' is a rank {{Specs|rank}} British heavy bomber {{Battle-rating}}. It has been in the game since the start of the Open Beta Test prior to Update 1.27. | ||
| − | + | == General info == | |
| − | + | === Flight performance === | |
| − | + | ''Describe how the aircraft behaves in the air. Speed, manoeuvrability, acceleration and allowable loads - these are the most important characteristics of the vehicle.'' | |
| − | + | {| class="wikitable" style="text-align:center" width="70%" | |
| − | + | ! rowspan="2" | Characteristics | |
| − | |||
| − | {| class="wikitable" style="text-align:center" | ||
| − | |||
| − | |||
| − | |||
| − | ! | ||
| − | |||
! colspan="2" | Max Speed<br>(km/h at 3,048 m) | ! colspan="2" | Max Speed<br>(km/h at 3,048 m) | ||
| − | ! rowspan="2" | Max altitude<br>( | + | ! rowspan="2" | Max altitude<br>(metres) |
! colspan="2" | Turn time<br>(seconds) | ! colspan="2" | Turn time<br>(seconds) | ||
| − | ! colspan="2" | Rate of climb<br>( | + | ! colspan="2" | Rate of climb<br>(metres/second) |
| − | ! rowspan="2" |Take-off run<br>( | + | ! rowspan="2" | Take-off run<br>(metres) |
| − | |||
| − | |||
| − | |||
| − | |||
| − | |||
| − | |||
| − | |||
| − | |||
| − | |||
|- | |- | ||
| − | ! | + | ! AB !! RB !! AB !! RB !! AB !! RB |
|- | |- | ||
| − | ! | + | ! Stock |
| − | + | | 447 || 434 || rowspan="2" | {{Specs|ceiling}} || 49.2 || 50.4 || 6.9 || 6.8 || rowspan="2" | 750 | |
| − | |||
| − | |||
| − | |||
|- | |- | ||
| − | ! | + | ! Upgraded |
| − | + | | 476 || 462 || 47.0 || 48.0 || 10.4 || 8.6 | |
| − | |||
| − | |||
| − | |||
| − | |||
| − | |||
| − | |||
|- | |- | ||
|} | |} | ||
| − | ====Details==== | + | ==== Details ==== |
| − | {| class="wikitable" style="text-align:center" | + | {| class="wikitable" style="text-align:center" width="50%" |
|- | |- | ||
! colspan="5" | Features | ! colspan="5" | Features | ||
|- | |- | ||
| − | ! Combat | + | ! Combat flaps !! Take-off flaps !! Landing flaps !! Air brakes !! Arrestor gear |
| − | ! Take-off | ||
| − | ! Landing | ||
| − | ! Air brakes | ||
| − | ! Arrestor gear | ||
|- | |- | ||
| ✓ || ✓ || ✓ || X || X <!-- ✓ --> | | ✓ || ✓ || ✓ || X || X <!-- ✓ --> | ||
| Line 71: | Line 45: | ||
|} | |} | ||
| − | {| class="wikitable" style="text-align:center" | + | {| class="wikitable" style="text-align:center" width="50%" |
|- | |- | ||
| − | ! colspan=" | + | ! colspan="7" | Limits |
|- | |- | ||
| − | ! rowspan="2" | | + | ! rowspan="2" | Wings (km/h) |
| − | ! rowspan="2" | Gear | + | ! rowspan="2" | Gear (km/h) |
| − | ! | + | ! colspan="3" | Flaps (km/h) |
! colspan="2" | Max Static G | ! colspan="2" | Max Static G | ||
|- | |- | ||
| − | ! + | + | ! Combat !! Take-off !! Landing !! + !! - |
| − | ! - | ||
|- | |- | ||
| − | | {{Specs| | + | | {{Specs|destruction|body}} || {{Specs|destruction|gear}} || 440 || 338 || 282 || ~4 || ~3 |
|- | |- | ||
|} | |} | ||
| Line 89: | Line 62: | ||
{| class="wikitable" style="text-align:center" | {| class="wikitable" style="text-align:center" | ||
|- | |- | ||
| − | ! colspan="4" | Optimal velocities | + | ! colspan="4" | Optimal velocities (km/h) |
|- | |- | ||
| − | ! Ailerons | + | ! Ailerons !! Rudder !! Elevators !! Radiator |
| − | ! Rudder | ||
| − | ! Elevators | ||
| − | ! Radiator | ||
|- | |- | ||
| − | | < | + | | < 400 || < 350 || < 350 || > 350 |
|- | |- | ||
|} | |} | ||
| Line 110: | Line 80: | ||
! WEP Engine power | ! WEP Engine power | ||
|- | |- | ||
| − | | 2,000 m || 5,535 hp || 6,876 hp | + | | 2,000 m || 5,535 hp || 6,876 hp |
| − | |||
| − | |||
| − | |||
| − | |||
| − | |||
| − | |||
|- | |- | ||
| − | |||
| − | |||
| − | |||
| − | |||
| − | |||
| − | |||
| − | |||
| − | |||
| − | |||
| − | |||
|} | |} | ||
=== Survivability and armour === | === Survivability and armour === | ||
| − | <!--''Examine the survivability of the aircraft. Note how vulnerable the structure is and how secure the pilot is, whether the fuel tanks are armoured. Describe the armour, if there is any, also mention the vulnerability of other critical aircraft systems.''--> | + | <!-- ''Examine the survivability of the aircraft. Note how vulnerable the structure is and how secure the pilot is, whether the fuel tanks are armoured, etc. Describe the armour, if there is any, and also mention the vulnerability of other critical aircraft systems.'' --> |
* 8 mm Steel plates behind the pilot headrests. | * 8 mm Steel plates behind the pilot headrests. | ||
* 6.35 mm Steel plate behind the engines. | * 6.35 mm Steel plate behind the engines. | ||
| − | |||
* No armour glazing | * No armour glazing | ||
* Critical components located at the front of aircraft (fuel, pilot, engine, controls) | * Critical components located at the front of aircraft (fuel, pilot, engine, controls) | ||
| − | * More fuel tanks located in wings | + | * More fuel tanks located in wings |
== Armaments == | == Armaments == | ||
| − | |||
| − | |||
=== Suspended armament === | === Suspended armament === | ||
| − | <!--''Describe the aircraft's suspended armament: additional cannons under the wings, bombs, rockets and torpedoes. This section is especially important for bombers and attackers. If there is no suspended weaponry remove this subsection.''--> | + | <!-- ''Describe the aircraft's suspended armament: additional cannons under the wings, bombs, rockets and torpedoes. This section is especially important for bombers and attackers. If there is no suspended weaponry remove this subsection.'' --> |
| − | {{main| | + | {{main|G.P. Mk.IV (250 lb)|G.P. Mk.IV (500 lb)|M.C. 1,000 lb Mk.I (1,000 lb)|G.P. Mk.I (1,000 lb)|H.C. 4,000 lb Mk.II (4,000 lb)}} |
| − | The '''''{{PAGENAME}}''''' can be outfitted with the following | + | The '''''{{PAGENAME}}''''' can be outfitted with the following ordnance: |
| − | * 14 x G.P. | + | * 14 x 250 lb G.P. Mk.IV bombs (3,500 lb total) |
| − | * 6 x G.P. | + | * 6 x 500 lb G.P. Mk.IV bombs + 8 x 250 lb G.P. Mk.IV bombs (5,000 lb total) |
| − | * 14 x G.P. | + | * 14 x 500 lb G.P. Mk.IV bombs (7,000 lb total) |
| − | * | + | * 1 x 1,000 lb G.P. Mk.I bomb + 6 x 500 lb G.P. Mk.IV bombs + 2 x 250 lb G.P. Mk.IV bombs (4,500 lb total) |
| − | * | + | * 6 x 1,000 lb G.P. Mk.I bombs + 3 x 250 lb G.P. Mk.IV bombs (6,750 lb total) |
| − | * 14 x M.C. | + | * 14 x M.C. 1,000 lb Mk.I bombs (14,000 lb total) |
| − | * 1 x H.C. | + | * 1 x H.C. 4,000 lb Mk.II bomb + 6 x M.C. 1,000 lb Mk.I bombs + 2 x 250 lb G.P. Mk.IV bombs (10,500 lb total) |
| − | * 2 x H.C. | + | * 2 x H.C. 4,000 lb Mk.II bombs (8,000 lb total) |
=== Defensive armament === | === Defensive armament === | ||
| − | <!--''Defensive armament with turret machine guns or cannons, crewed by gunners. Examine the number of gunners and what belts or drums are better to use. If defensive weaponry is not available remove this subsection.''--> | + | <!-- ''Defensive armament with turret machine guns or cannons, crewed by gunners. Examine the number of gunners and what belts or drums are better to use. If defensive weaponry is not available, remove this subsection.'' --> |
| − | {{main|Browning | + | {{main|M2 Browning (12.7 mm)|Browning (7.7 mm)}} |
The '''''{{PAGENAME}}''''' is defended by: | The '''''{{PAGENAME}}''''' is defended by: | ||
| − | * 2 x | + | * 2 x 12.7 mm M2 Browning machine guns, tail turret (2,500 rpg = 5,000 total) |
| − | * 2 x 7.7 mm Browning machine | + | * 2 x 7.7 mm Browning machine guns, nose turret (1,000 rpg = 2,000 total) |
| − | * 2 x | + | * 2 x 7.7 mm Browning machine guns, dorsal turret (1,000 rpg = 2,000 total) |
| − | == Usage in | + | == Usage in battles == |
| − | <!--''Describe the tactics of playing in | + | <!-- ''Describe the tactics of playing in the aircraft, the features of using aircraft in a team and advice on tactics. Refrain from creating a "guide" - do not impose a single point of view, but instead, give the reader food for thought. Examine the most dangerous enemies and give recommendations on fighting them. If necessary, note the specifics of the game in different modes (AB, RB, SB).'' --> |
| + | It is best to fly the Lancaster at a high altitude, at least 4,000 m, to be able to be unhindered by fighter aircraft. Beware, the aircraft has no defensive armament on the underside of the plane allowing an easy kill for experienced pilots. Due to this, and the large bomb load of the plane, it is best to target mini-bases and airfields, as moving tank columns are extremely difficult to hit, and even static targets like pillboxes can be tricky. Its defensive armament is lacking, so it is best to avoid enemy fighters altogether rather than attempting to fend them off. If you do find yourself under attack, weaving the plane left/right and up/down can help you dodge most of the fire, while allowing your turrets to still shoot back. | ||
| − | In real life, the Lancaster was mainly used as a | + | In real life, the Lancaster was mainly used as a strategic night bomber, used in very large numbers to carpet bomb large industrial areas and cities in Germany, a role which is performed in admirably. Fighters struggled to intercept them in the dark and anti-aircraft guns would find it difficult to target them effectively, especially if they were used in large numbers. However, this role does not really fit War Thunder. You rarely come across night missions, you will probably be playing individually as opposed to in a bomber formation and the map will be swarming with enemy fighters, who will all be licking their lips at the concept of an easy bomber kill. Tie this in with poor defensive armament and not particularly impressive performance and you have a recipe for disaster. Therefore, the Lancaster suffers in War Thunder on Arcade and Realistic air battles and will be an exceptionally easy target in ground Realistic battles. If it has any advantages, it is that it the Lancaster can carry a powerful payload. With the 2 x 4,000 lb bomb load, the plane can be put into a shallow dive to quickly reach and destroy 2 mini-bases (1 bomb for each), before most enemy fighters have climbed to altitude. |
| − | ===Manual Engine Control=== | + | === Manual Engine Control === |
{| class="wikitable" style="text-align:center" | {| class="wikitable" style="text-align:center" | ||
|- | |- | ||
! colspan="7" | MEC elements | ! colspan="7" | MEC elements | ||
|- | |- | ||
| − | ! rowspan="2" |Mixer | + | ! rowspan="2" | Mixer |
| − | ! rowspan="2" |Pitch | + | ! rowspan="2" | Pitch |
| − | ! colspan="3" |Radiator | + | ! colspan="3" | Radiator |
| − | ! rowspan="2" |Supercharger | + | ! rowspan="2" | Supercharger |
| − | ! rowspan="2" |Turbocharger | + | ! rowspan="2" | Turbocharger |
|- | |- | ||
| − | ! Oil | + | ! Oil !! Water !! Type |
| − | ! Water | ||
| − | ! Type | ||
|- | |- | ||
| − | | Not controllable | | + | | Not controllable || Controllable<br>Not auto controlled || Controllable<br>Auto control available || Controllable<br>Auto control available || Separate || Controllable<br>2 gears || Not controllable |
|- | |- | ||
|} | |} | ||
| − | ===Modules=== | + | === Modules === |
{| class="wikitable" | {| class="wikitable" | ||
| − | ! | + | ! Tier |
! colspan="2" | Flight performance | ! colspan="2" | Flight performance | ||
| − | ! | + | ! Survivability |
| − | ! colspan=" | + | ! colspan="2" | Weaponry |
|- | |- | ||
| I | | I | ||
| − | | Fuselage | + | | Fuselage repair |
| Radiator | | Radiator | ||
| − | |Protective vest | + | | Protective vest |
| − | | | + | | Turret 7 mm |
| | | | ||
|- | |- | ||
| II | | II | ||
| − | | | + | | |
| Compressor | | Compressor | ||
| Airframe | | Airframe | ||
| − | | | + | | New 7 mm MGs (turret) |
| − | |AUBC No. 1 Mark II | + | | AUBC No.1 Mark II |
|- | |- | ||
| III | | III | ||
| − | | Wings | + | | Wings repair |
| Engine | | Engine | ||
| − | | | + | | |
| − | | | + | | Turret 12 mm |
| | | | ||
|- | |- | ||
| IV | | IV | ||
| − | | | + | | |
| Engine injection | | Engine injection | ||
| Cover | | Cover | ||
| − | | | + | | New 12 mm MGs (turret) |
| − | |AUBC No. 1 Mark I | + | | AUBC No.1 Mark I |
|- | |- | ||
|} | |} | ||
=== Pros and cons === | === Pros and cons === | ||
| − | <!--''Summarise and briefly evaluate the vehicle | + | <!-- ''Summarise and briefly evaluate the vehicle in terms of its characteristics and combat effectiveness. Mark its pros and cons in the bulleted list. Try not to use more than 6 points for each of the characteristics. Avoid using categorical definitions such as "bad", "good" and the like - use substitutions with softer forms such as "inadequate" and "effective".'' --> |
'''Pros:''' | '''Pros:''' | ||
| Line 240: | Line 190: | ||
* Big target | * Big target | ||
| − | * Fairly | + | * Fairly slow |
* Engine failures are common | * Engine failures are common | ||
* Wings are big and thus commonly torn off by gunfire | * Wings are big and thus commonly torn off by gunfire | ||
| − | * 7.7 mm machine gun fire won't do much against German | + | * 7.7 mm machine gun fire won't do much against German fighters |
| − | * When using gunner view the different | + | * When using gunner view, the different calibre turrets make it difficult to hit a target with both bullet streams |
| − | * Even when the turrets hit, it doesn't do any damage | + | * Even when the turrets hit, it doesn't do any damage, most fighters will knock out your engines before you can kill their engines or pilots or at all |
== History == | == History == | ||
| − | Describe the history of the creation and combat usage of the aircraft in more detail than in the introduction. If the historical reference turns out to be too | + | ''Describe the history of the creation and combat usage of the aircraft in more detail than in the introduction. If the historical reference turns out to be too long, take it to a separate article, taking a link to the article about the vehicle and adding a block "/History" (example: <nowiki>https://wiki.warthunder.com/(Vehicle-name)/History</nowiki>) and add a link to it here using the <code>main</code> template. Be sure to reference text and sources by using <code><nowiki><ref></ref></nowiki></code>, as well as adding them at the end of the article with <code><nowiki><references /></nowiki></code>. This section may also include the vehicle's dev blog entry (if applicable) and the in-game encyclopedia description (under <code><nowiki>=== In-game description ===</nowiki></code>, also if applicable).'' |
=== In-game description === | === In-game description === | ||
| − | With RAF Bomber | + | With RAF Bomber Command's focus being centred on the strategic bombing campaign against German industry, the RAF desperately required a force of heavy bombers to increase the capability provided by their medium bomber fleet. A twin engine Avro Manchester bomber was converted to be powered by four engines and first flown in January 1941. This and subsequent prototypes were deemed to be so successful that the first production variant of the new bomber, now named the Lancaster, was flown in October 1941. |
| − | The immediate success of the Lancaster Mk I (redesignated the BI in 1942) caused it to be pushed ahead in terms of production priorities. In turn, this threatened the supply of Rolls Royce Merlin engines which powered it, so alternative engines needed to be sourced. The BII was powered by Bristol Hercules engines, but this caused a drop in performance and payload. The BIII was powered by Packard Merlin engines, a license built version manufactured in the United States. Internal differences between the BI and BIII were very few; the two models had near identical technical characteristics and armament and externally the BIII had only a larger bomb | + | The immediate success of the Lancaster Mk I (redesignated the BI in 1942) caused it to be pushed ahead in terms of production priorities. In turn, this threatened the supply of Rolls Royce Merlin engines which powered it, so alternative engines needed to be sourced. The BII was powered by Bristol Hercules engines, but this caused a drop in performance and payload. The BIII was powered by Packard Merlin engines, a license built version manufactured in the United States. Internal differences between the BI and BIII were very few; the two models had near identical technical characteristics and armament and externally the BIII had only a larger bomb aimer's bubble window, but the change in designation was necessary since the different engines had different servicing requirements. |
| − | The Lancaster was first used operationally in March 1942 by No. 44 Squadron. It soon became the backbone of RAF Bomber | + | The Lancaster was first used operationally in March 1942 by No. 44 Squadron. It soon became the backbone of RAF Bomber Command's offensive against the heart of Germany, but was also used against targets all across occupied Europe. The majority of Lancaster operations took place at night, due to RAF Bomber Command's policy of night bombing whilst the bombers of the United States Army Air Force tackled targets by day. |
| − | For defence, the Lancaster had eight 0.303 inch Colt-Browning Mk.II machine guns located in three turrets: two guns were located in the nose, two in the dorsal turret, and four in the tail turret. The maximum ordinance capacity of the Lancaster was the highest of any heavy bomber in World War II: 14,000 lb (6,356 kg). Besides standard bombs, the aircraft could carry an 8,000 lb (3,632 kg) | + | For defence, the Lancaster had eight 0.303 inch Colt-Browning Mk.II machine guns located in three turrets: two guns were located in the nose, two in the dorsal turret, and four in the tail turret. The maximum ordinance capacity of the Lancaster was the highest of any heavy bomber in World War II: 14,000 lb (6,356 kg). Besides standard bombs, the aircraft could carry an 8,000 lb (3,632 kg) "blockbuster" or two 4,000 lb (1,816 kg) high-explosive "cookie" bombs. Special modifications of the bomber could carry even larger bombs, such as the 22,000 lb 'Grand Slam' bomb. The Lancaster became legendary on the night of May 17th 1943 when bombers of No 617 Squadron breached the Mohne and Eder dams in Germany with Barnes Wallis' genius 'bouncing bomb'. Lancasters of Nos 9 and 617 Squadrons also sank the German battleship 'Tirpitz' with 12,000 lb 'Tallboy' bombs, also designed by Wallis. |
A total of 3,039 BIII bombers were produced. The bomber was finally decommissioned in Great Britain in 1950, and is a serious contender to the claim of being the most capable bomber of the entire war. | A total of 3,039 BIII bombers were produced. The bomber was finally decommissioned in Great Britain in 1950, and is a serious contender to the claim of being the most capable bomber of the entire war. | ||
== Media == | == Media == | ||
| − | '' | + | ''Excellent additions to the article would be video guides, screenshots from the game, and photos.'' |
| − | |||
| − | |||
| − | |||
| + | == See also == | ||
| + | ''Links to the articles on the War Thunder Wiki that you think will be useful for the reader, for example:'' | ||
* ''reference to the series of the aircraft;'' | * ''reference to the series of the aircraft;'' | ||
* ''links to approximate analogues of other nations and research trees.'' | * ''links to approximate analogues of other nations and research trees.'' | ||
| − | |||
| − | == | + | == External links == |
''Paste links to sources and external resources, such as:'' | ''Paste links to sources and external resources, such as:'' | ||
| − | |||
* ''topic on the official game forum;'' | * ''topic on the official game forum;'' | ||
| − | * ''page on aircraft | + | * ''encyclopedia page on the aircraft;'' |
* ''other literature.'' | * ''other literature.'' | ||
{{AirManufacturer Avro}} | {{AirManufacturer Avro}} | ||
{{Britain bombers}} | {{Britain bombers}} | ||
Revision as of 11:32, 24 June 2020
Contents
| This page is about the British heavy bomber Lancaster B Mk III. For other version, see Lancaster B Mk I. |
Description

The Lancaster B Mk III is a rank IV British heavy bomber
with a battle rating of 5.0 (AB), 5.3 (RB), and 6.0 (SB). It has been in the game since the start of the Open Beta Test prior to Update 1.27.
General info
Flight performance
Describe how the aircraft behaves in the air. Speed, manoeuvrability, acceleration and allowable loads - these are the most important characteristics of the vehicle.
| Characteristics | Max Speed (km/h at 3,048 m) |
Max altitude (metres) |
Turn time (seconds) |
Rate of climb (metres/second) |
Take-off run (metres) | |||
|---|---|---|---|---|---|---|---|---|
| AB | RB | AB | RB | AB | RB | |||
| Stock | 447 | 434 | 7620 | 49.2 | 50.4 | 6.9 | 6.8 | 750 |
| Upgraded | 476 | 462 | 47.0 | 48.0 | 10.4 | 8.6 | ||
Details
| Features | ||||
|---|---|---|---|---|
| Combat flaps | Take-off flaps | Landing flaps | Air brakes | Arrestor gear |
| ✓ | ✓ | ✓ | X | X |
| Limits | ||||||
|---|---|---|---|---|---|---|
| Wings (km/h) | Gear (km/h) | Flaps (km/h) | Max Static G | |||
| Combat | Take-off | Landing | + | - | ||
| 0 | 338 | 440 | 338 | 282 | ~4 | ~3 |
| Optimal velocities (km/h) | |||
|---|---|---|---|
| Ailerons | Rudder | Elevators | Radiator |
| < 400 | < 350 | < 350 | > 350 |
| Compressor (RB/SB) | ||
|---|---|---|
| Setting 1 | ||
| Optimal altitude | 100% Engine power | WEP Engine power |
| 2,000 m | 5,535 hp | 6,876 hp |
Survivability and armour
- 8 mm Steel plates behind the pilot headrests.
- 6.35 mm Steel plate behind the engines.
- No armour glazing
- Critical components located at the front of aircraft (fuel, pilot, engine, controls)
- More fuel tanks located in wings
Armaments
Suspended armament
The Lancaster B Mk III can be outfitted with the following ordnance:
- 14 x 250 lb G.P. Mk.IV bombs (3,500 lb total)
- 6 x 500 lb G.P. Mk.IV bombs + 8 x 250 lb G.P. Mk.IV bombs (5,000 lb total)
- 14 x 500 lb G.P. Mk.IV bombs (7,000 lb total)
- 1 x 1,000 lb G.P. Mk.I bomb + 6 x 500 lb G.P. Mk.IV bombs + 2 x 250 lb G.P. Mk.IV bombs (4,500 lb total)
- 6 x 1,000 lb G.P. Mk.I bombs + 3 x 250 lb G.P. Mk.IV bombs (6,750 lb total)
- 14 x M.C. 1,000 lb Mk.I bombs (14,000 lb total)
- 1 x H.C. 4,000 lb Mk.II bomb + 6 x M.C. 1,000 lb Mk.I bombs + 2 x 250 lb G.P. Mk.IV bombs (10,500 lb total)
- 2 x H.C. 4,000 lb Mk.II bombs (8,000 lb total)
Defensive armament
The Lancaster B Mk III is defended by:
- 2 x 12.7 mm M2 Browning machine guns, tail turret (2,500 rpg = 5,000 total)
- 2 x 7.7 mm Browning machine guns, nose turret (1,000 rpg = 2,000 total)
- 2 x 7.7 mm Browning machine guns, dorsal turret (1,000 rpg = 2,000 total)
Usage in battles
It is best to fly the Lancaster at a high altitude, at least 4,000 m, to be able to be unhindered by fighter aircraft. Beware, the aircraft has no defensive armament on the underside of the plane allowing an easy kill for experienced pilots. Due to this, and the large bomb load of the plane, it is best to target mini-bases and airfields, as moving tank columns are extremely difficult to hit, and even static targets like pillboxes can be tricky. Its defensive armament is lacking, so it is best to avoid enemy fighters altogether rather than attempting to fend them off. If you do find yourself under attack, weaving the plane left/right and up/down can help you dodge most of the fire, while allowing your turrets to still shoot back.
In real life, the Lancaster was mainly used as a strategic night bomber, used in very large numbers to carpet bomb large industrial areas and cities in Germany, a role which is performed in admirably. Fighters struggled to intercept them in the dark and anti-aircraft guns would find it difficult to target them effectively, especially if they were used in large numbers. However, this role does not really fit War Thunder. You rarely come across night missions, you will probably be playing individually as opposed to in a bomber formation and the map will be swarming with enemy fighters, who will all be licking their lips at the concept of an easy bomber kill. Tie this in with poor defensive armament and not particularly impressive performance and you have a recipe for disaster. Therefore, the Lancaster suffers in War Thunder on Arcade and Realistic air battles and will be an exceptionally easy target in ground Realistic battles. If it has any advantages, it is that it the Lancaster can carry a powerful payload. With the 2 x 4,000 lb bomb load, the plane can be put into a shallow dive to quickly reach and destroy 2 mini-bases (1 bomb for each), before most enemy fighters have climbed to altitude.
Manual Engine Control
| MEC elements | ||||||
|---|---|---|---|---|---|---|
| Mixer | Pitch | Radiator | Supercharger | Turbocharger | ||
| Oil | Water | Type | ||||
| Not controllable | Controllable Not auto controlled |
Controllable Auto control available |
Controllable Auto control available |
Separate | Controllable 2 gears |
Not controllable |
Modules
| Tier | Flight performance | Survivability | Weaponry | ||
|---|---|---|---|---|---|
| I | Fuselage repair | Radiator | Protective vest | Turret 7 mm | |
| II | Compressor | Airframe | New 7 mm MGs (turret) | AUBC No.1 Mark II | |
| III | Wings repair | Engine | Turret 12 mm | ||
| IV | Engine injection | Cover | New 12 mm MGs (turret) | AUBC No.1 Mark I | |
Pros and cons
Pros:
- Great bomb-load
- Multiple engines
Cons:
- Big target
- Fairly slow
- Engine failures are common
- Wings are big and thus commonly torn off by gunfire
- 7.7 mm machine gun fire won't do much against German fighters
- When using gunner view, the different calibre turrets make it difficult to hit a target with both bullet streams
- Even when the turrets hit, it doesn't do any damage, most fighters will knock out your engines before you can kill their engines or pilots or at all
History
Describe the history of the creation and combat usage of the aircraft in more detail than in the introduction. If the historical reference turns out to be too long, take it to a separate article, taking a link to the article about the vehicle and adding a block "/History" (example: https://wiki.warthunder.com/(Vehicle-name)/History) and add a link to it here using the main template. Be sure to reference text and sources by using <ref></ref>, as well as adding them at the end of the article with <references />. This section may also include the vehicle's dev blog entry (if applicable) and the in-game encyclopedia description (under === In-game description ===, also if applicable).
In-game description
With RAF Bomber Command's focus being centred on the strategic bombing campaign against German industry, the RAF desperately required a force of heavy bombers to increase the capability provided by their medium bomber fleet. A twin engine Avro Manchester bomber was converted to be powered by four engines and first flown in January 1941. This and subsequent prototypes were deemed to be so successful that the first production variant of the new bomber, now named the Lancaster, was flown in October 1941.
The immediate success of the Lancaster Mk I (redesignated the BI in 1942) caused it to be pushed ahead in terms of production priorities. In turn, this threatened the supply of Rolls Royce Merlin engines which powered it, so alternative engines needed to be sourced. The BII was powered by Bristol Hercules engines, but this caused a drop in performance and payload. The BIII was powered by Packard Merlin engines, a license built version manufactured in the United States. Internal differences between the BI and BIII were very few; the two models had near identical technical characteristics and armament and externally the BIII had only a larger bomb aimer's bubble window, but the change in designation was necessary since the different engines had different servicing requirements.
The Lancaster was first used operationally in March 1942 by No. 44 Squadron. It soon became the backbone of RAF Bomber Command's offensive against the heart of Germany, but was also used against targets all across occupied Europe. The majority of Lancaster operations took place at night, due to RAF Bomber Command's policy of night bombing whilst the bombers of the United States Army Air Force tackled targets by day.
For defence, the Lancaster had eight 0.303 inch Colt-Browning Mk.II machine guns located in three turrets: two guns were located in the nose, two in the dorsal turret, and four in the tail turret. The maximum ordinance capacity of the Lancaster was the highest of any heavy bomber in World War II: 14,000 lb (6,356 kg). Besides standard bombs, the aircraft could carry an 8,000 lb (3,632 kg) "blockbuster" or two 4,000 lb (1,816 kg) high-explosive "cookie" bombs. Special modifications of the bomber could carry even larger bombs, such as the 22,000 lb 'Grand Slam' bomb. The Lancaster became legendary on the night of May 17th 1943 when bombers of No 617 Squadron breached the Mohne and Eder dams in Germany with Barnes Wallis' genius 'bouncing bomb'. Lancasters of Nos 9 and 617 Squadrons also sank the German battleship 'Tirpitz' with 12,000 lb 'Tallboy' bombs, also designed by Wallis.
A total of 3,039 BIII bombers were produced. The bomber was finally decommissioned in Great Britain in 1950, and is a serious contender to the claim of being the most capable bomber of the entire war.
Media
Excellent additions to the article would be video guides, screenshots from the game, and photos.
See also
Links to the articles on the War Thunder Wiki that you think will be useful for the reader, for example:
- reference to the series of the aircraft;
- links to approximate analogues of other nations and research trees.
External links
Paste links to sources and external resources, such as:
- topic on the official game forum;
- encyclopedia page on the aircraft;
- other literature.
| Avro Aircraft | |
|---|---|
| Bombers | Lancaster B Mk I · Lancaster B Mk III · Lincoln B Mk II · Shackleton MR.Mk.2 |
| Export/Licensed | Lancaster MR.7 |
| Britain bombers | |
|---|---|
| Torpedo | Swordfish Mk I · Swordfish Mk II · ▄Avenger Mk II |
| Dive | V-156-B1 |
| Hydroplanes | ▄Catalina Mk IIIa · Sunderland Mk IIIa · Sunderland Mk V |
| Light | Blenheim Mk IV · Beaufort Mk VIII · ▄Hudson Mk V · Brigand B 1 |
| Based on A20 | ▄Havoc Mk I · ▄Boston Mk I · ▄DB-7 |
| Hampden | Hampden Mk I · Hampden TB Mk I |
| Wellington | Wellington Mk Ic · Wellington Mk Ic/L · Wellington Mk III · Wellington Mk X |
| Halifax | Halifax B Mk IIIa |
| Stirling | Stirling B Mk I · Stirling B Mk III |
| Lancaster | Lancaster B Mk I · Lancaster B Mk III |
| Lincoln | Lincoln B Mk II |
| Shackleton | Shackleton MR.Mk.2 |
