Difference between revisions of "TBF-1C"
(→Suspended armament: Updated) |
(→Details) (Tag: Visual edit) |
||
| (30 intermediate revisions by 16 users not shown) | |||
| Line 1: | Line 1: | ||
| − | + | {{Specs-Card|code=tbf-1c}} | |
| − | + | {{Notice|''This page is about the aircraft '''{{PAGENAME}}'''. For other uses, see [[TBF-1_(Disambiguation)|TBF-1 (Disambiguation)]]''}} | |
| − | |||
| − | |||
| − | |||
| − | {{Specs-Card | ||
| − | |code=tbf-1c | ||
| − | |||
| − | | | ||
| − | }} | ||
| − | |||
== Description == | == Description == | ||
| − | <!-- ''In the description, the first part | + | <!--''In the description, the first part needs to be about the history of and the creation and combat usage of the aircraft, as well as its key features. In the second part, tell the reader about the aircraft in the game. Insert screenshot of the vehicle. If the novice player does not remember the vehicle by name, he will immediately understand what kind of vehicle it is talking about.''--> |
| − | |||
| − | |||
| − | |||
| − | |||
| + | [[File:GarageImage_{{PAGENAME}}.jpg|420px|thumb|left]] | ||
| + | {{break}} | ||
| + | The '''TBF-1c Avenger''' is a Rank II American naval bomber with a battle rating of 2.0 (AB), 3.0 (RB), and 2.7 (SB). It was in the game since the start of the Open Beta Test prior to Update 1.29. | ||
== General info == | == General info == | ||
| − | === Flight | + | === Flight Performance === |
| − | + | <!--''Describe how the aircraft behaves in the air. Maximum speed, maneuverability, speed and allowable loads - these are the most important characteristics of the vehicle.''--> | |
| − | <!-- ''Describe how the aircraft behaves in the air. | + | {| class="wikitable" style="text-align:center" |
| − | + | |- | |
| − | {| class="wikitable" style="text-align:center" | + | ! colspan="8" | Characteristics |
| − | ! | + | |- |
| + | ! colspan="8" | ''Stock'' | ||
| + | |- | ||
! colspan="2" | Max Speed<br>(km/h at 3,650 m) | ! colspan="2" | Max Speed<br>(km/h at 3,650 m) | ||
| − | ! rowspan="2" | Max altitude<br>( | + | ! rowspan="2" | Max altitude<br>(meters) |
! colspan="2" | Turn time<br>(seconds) | ! colspan="2" | Turn time<br>(seconds) | ||
| − | ! colspan="2" | Rate of climb<br>( | + | ! colspan="2" | Rate of climb<br>(meters/second) |
| − | ! rowspan="2" | Take-off run<br>( | + | ! rowspan="2" |Take-off run<br>(meters) |
| + | |- | ||
| + | ! AB | ||
| + | ! RB | ||
| + | ! AB | ||
| + | ! RB | ||
| + | ! AB | ||
| + | ! RB | ||
| + | |- | ||
| + | | 414 || 402 || 7,100 || 31.3 || 31.9 || 2.6 || 3.5 || 307 | ||
|- | |- | ||
| − | ! | + | ! colspan="8" | ''Upgraded'' |
| + | |- | ||
| + | ! colspan="2" | Max Speed<br>(km/h at 3,650 m) | ||
| + | ! rowspan="2" |Max altitude (meters) | ||
| + | ! colspan="2" | Turn time (seconds) | ||
| + | ! colspan="2" | Rate of climb<br>(meters/second) | ||
| + | ! rowspan="2" |Take-off run (meters) | ||
|- | |- | ||
| − | ! | + | ! AB |
| − | + | ! RB | |
| + | ! AB | ||
| + | ! RB | ||
| + | ! AB | ||
| + | ! RB | ||
|- | |- | ||
| − | + | | 449 || 432 || 7,100 || 28.7 || 30.0 || 8.4 || 5.1 || 307 | |
| − | | | ||
|- | |- | ||
|} | |} | ||
| − | ==== Details ==== | + | ====Details==== |
| − | {| class="wikitable" style="text-align:center | + | {| class="wikitable" style="text-align:center" |
|- | |- | ||
! colspan="5" | Features | ! colspan="5" | Features | ||
|- | |- | ||
| − | ! Combat | + | ! Combat flap |
| + | ! Take-off flap | ||
| + | ! Landing flap | ||
| + | ! Air brakes | ||
| + | ! Arrestor gear | ||
|- | |- | ||
| − | | X || X || ✓ || X || | + | |X||X|| ✓ ||X|| X<!-- ✓ --> |
|- | |- | ||
|} | |} | ||
| − | {| class="wikitable" style="text-align:center | + | {| class="wikitable" style="text-align:center" |
|- | |- | ||
| − | ! colspan=" | + | ! colspan="5" | Limits |
|- | |- | ||
| − | ! rowspan="2" | | + | ! rowspan="2" | Wing-break speed<br>(km/h) |
| − | ! rowspan="2" | Gear (km/h) | + | ! rowspan="2" | Gear limit<br>(km/h) |
| − | ! | + | ! rowspan="2" | Combat flap<br> (km/h) |
! colspan="2" | Max Static G | ! colspan="2" | Max Static G | ||
|- | |- | ||
| − | + | ! + | |
| + | ! - | ||
|- | |- | ||
| − | | | + | | 583 || 450 || 520 || ~5 || ~3 |
|- | |- | ||
|} | |} | ||
| Line 68: | Line 83: | ||
{| class="wikitable" style="text-align:center" | {| class="wikitable" style="text-align:center" | ||
|- | |- | ||
| − | ! colspan="4" | Optimal velocities | + | ! colspan="4" | Optimal velocities |
|- | |- | ||
| − | ! Ailerons | + | ! Ailerons<br>(km/h) |
| + | ! Rudder<br>(km/h) | ||
| + | ! Elevators<br>(km/h) | ||
| + | ! Radiator<br>(km/h) | ||
|- | |- | ||
| − | | < | + | | < 360 || < 360 || < 303 || > 220 |
|- | |- | ||
| + | |} | ||
| + | |||
| + | {| class="wikitable" style="text-align:center" | ||
| + | |- | ||
| + | ! colspan="3" | Compressor (RB/SB) | ||
| + | |- | ||
| + | ! colspan="3" | Setting 1 | ||
| + | |- | ||
| + | ! Optimal altitude | ||
| + | ! 100% Engine power | ||
| + | ! WEP Engine power | ||
| + | |- | ||
| + | | 798 m || 1,500 hp || 1,669 hp | ||
| + | |- | ||
| + | ! colspan="3" | Setting 2 | ||
| + | |- | ||
| + | ! Optimal altitude | ||
| + | ! 100% Engine power | ||
| + | ! WEP Engine power | ||
| + | |- | ||
| + | | 3,162 m || 1,350 hp || 1,502 hp | ||
| + | |- | ||
| + | <!--! colspan="3" | Setting 3 | ||
| + | |- | ||
| + | ! Optimal altitude | ||
| + | ! 100% Engine power | ||
| + | ! WEP Engine power | ||
| + | |- | ||
| + | | ?,??? m || ?,??? hp || ?,??? hp | ||
| + | |- --> | ||
|} | |} | ||
=== Survivability and armour === | === Survivability and armour === | ||
| − | + | <!--''Examine the survivability of the aircraft. Note how vulnerable the structure is and how secure the pilot is, whether the fuel tanks are armoured. Describe the armour, if there is any, also mention the vulnerability of other critical aircraft systems.''--> | |
| − | <!-- ''Examine the survivability of the aircraft. Note how vulnerable the structure is and how secure the pilot is, whether the fuel tanks are armoured | ||
| − | * 6.35 mm Steel - | + | * 6.35 mm Steel - Armor plate in the nose |
| − | * 12.7 mm Steel - | + | * 12.7 mm Steel - Armor plate behind the pilot |
| − | * 12.7 mm Steel - | + | * 12.7 mm Steel - Armor plate in dorsal gunner's seat |
| − | * 12.7 mm Steel - | + | * 12.7 mm Steel - Armor plate in front of dorsal gunner |
| − | * 12.7 mm Steel - | + | * 12.7 mm Steel - Armor plate in front of ventral gunner |
| − | * 6.35 mm Steel - | + | * 6.35 mm Steel - Armor plate under the ventral gunner |
* 40 mm Bulletproof glass in front of dorsal gunner | * 40 mm Bulletproof glass in front of dorsal gunner | ||
| − | * 0.1 mm Wood - Connecting ventral gunner's | + | * 0.1 mm Wood - Connecting ventral gunner's armor |
| − | |||
| − | |||
| − | |||
| − | |||
| − | |||
| − | |||
| − | |||
== Armaments == | == Armaments == | ||
| − | |||
=== Offensive armament === | === Offensive armament === | ||
| − | + | <!--''Describe the offensive armament of the aircraft, if any. Describe how effective the cannons and machine guns are in a battle, and also what belts or drums are better to use. If there is no offensive weaponry, delete this subsection.''--> | |
| − | <!-- ''Describe the offensive armament of the aircraft, if any. Describe how effective the cannons and machine guns are in a battle, and also what belts or drums are better to use. If there is no offensive weaponry, delete this subsection.'' --> | + | {{main|Browning M2 (12.7 mm)}} |
| − | {{main|M2 | ||
The '''''{{PAGENAME}}''''' is armed with: | The '''''{{PAGENAME}}''''' is armed with: | ||
| − | * 2 x 12.7 mm M2 | + | * 2 x 12.7 mm Browning M2 machine guns, wing-mounted (310 rpg = 620 total) |
=== Suspended armament === | === Suspended armament === | ||
| − | + | <!--Describe the aircraft's suspended armament: additional cannons under the wings, bombs, rockets and torpedoes. This section is especially important for bombers and attackers. If there is no suspended weaponry remove this subsection.''--> | |
| − | <!-- | + | {{main|AN-M64A1 (500 lb)|Mk.13|Mk.13/44}} |
| − | {{main|AN-M64A1 (500 lb) | ||
| − | |||
| − | The '''''{{PAGENAME}}''''' can be outfitted with the following | + | The '''''{{PAGENAME}}''''' can be outfitted with the following ordinance: |
* 4 x 500 lb AN-M64A1 bombs (2,000 lb total) | * 4 x 500 lb AN-M64A1 bombs (2,000 lb total) | ||
| − | * 1 x 2,216 lb Mk.13 | + | * 1 x 2,216 lb Mk. 13 torpedo (2,216 lb total) |
| − | + | * 1 x 2,216 lb Mk. 13/44 torpedo (2,216 lb total) | |
| − | |||
| − | * 1 x | ||
| − | |||
=== Defensive armament === | === Defensive armament === | ||
| − | + | <!--''Defensive armament with turret machine guns or cannons, crewed by gunners. Examine the number of gunners and what belts or drums are better to use. If defensive weaponry is not available remove this subsection.''--> | |
| − | <!-- ''Defensive armament with turret machine guns or cannons, crewed by gunners. Examine the number of gunners and what belts or drums are better to use. If defensive weaponry is not available | + | {{main|Browning M2 (12.7 mm)|Browning (7.62 mm)}} |
| − | {{main|M2 | ||
The '''''{{PAGENAME}}''''' is defended by: | The '''''{{PAGENAME}}''''' is defended by: | ||
| − | * 1 x 12.7 mm M2 | + | * 1 x 12.7 mm Browning M2 machine guns, dorsal ball turret (400 rpg) |
* 1 x 7.62 mm Browning machine gun, ventral turret (500 rpg) | * 1 x 7.62 mm Browning machine gun, ventral turret (500 rpg) | ||
| − | == Usage in battles == | + | == Usage in the battles == |
| − | <!-- ''Describe the tactics of playing in | + | <!--''Describe the tactics of playing in an aircraft, the features of using vehicles in a team and advice on tactics. Refrain from creating a "guide" - do not impose a single point of view but give the reader food for thought. Examine the most dangerous enemies and give recommendations on fighting them. If necessary, note the specifics of the game in different modes (AB, RB, SB).''--> |
| − | As with all torpedo bombers, | + | As with all torpedo bombers, maintaining low altitude, high speed, and fighter cover are all recommended. The optimal distance for launching a torpedo is 1 km from the target. Targets should be engaged from directly ahead or astern, making "leading" the target much easier. If torpedo bombing is not an option, the plane can carry bombs for attacking ground targets. |
| − | The Avenger lacks much significant | + | The Avenger lacks much significant armament, but in a pinch it can serve as a fighter. The aircraft is not particularly fast or maneuverable, but, continuing the trend among mid-tier American aircraft, is extremely durable. |
| − | Fly low and fast, head towards your target | + | Fly low and fast, head towards your target drop your ordinance and bug out. However, If there are no hostile fighters, in the area. Destroy some enemy ground installations. E.g. AA, light vehicles, landing crafts and anti-tank positions. |
| − | |||
| − | |||
| − | |||
| − | |||
| + | '''''Simulator mode procedures'''''<br> | ||
Hands-off carrier take-off (Auto engine control): Start engine, flaps: raised, elevator trim: 0%, aileron trim: 0%, rudder trim: 14% right, WEP throttle, hands off controls until you lift off the carrier. | Hands-off carrier take-off (Auto engine control): Start engine, flaps: raised, elevator trim: 0%, aileron trim: 0%, rudder trim: 14% right, WEP throttle, hands off controls until you lift off the carrier. | ||
| − | Level-type carrier landing final approach (Auto engine control): Drop any secondary weapons you may still have, make sure your alignment with the carrier and heading are good for landing, use your stick to hold an altitude of 40 m | + | Level-type carrier landing final approach (Auto engine control): Drop any secondary weapons you may still have, make sure your alignment with the carrier and heading are good for landing, use your stick to hold an altitude of 40 m/120 ft, slow down below 200 kph/125 mph/108 kt, elevator trim: 2%, aileron trim: 18%, rudder trim: 0%, after gently slowing down to 123 kph/77 mph/67 kt set throttle to about 55% (you will have to adjust throttle a lot, though), just before the carrier (less than 1 km/0.62 mi) cut throttle and reset all trim to 0%, landing should be easy after that. |
| − | + | ===Manual Engine Control=== | |
| − | === Manual Engine Control === | ||
{| class="wikitable" style="text-align:center" | {| class="wikitable" style="text-align:center" | ||
|- | |- | ||
! colspan="7" | MEC elements | ! colspan="7" | MEC elements | ||
|- | |- | ||
| − | ! rowspan="2" | Mixer | + | ! rowspan="2" |Mixer |
| − | ! rowspan="2" | Pitch | + | ! rowspan="2" |Pitch |
| − | ! colspan="3" | Radiator | + | ! colspan="3" |Radiator |
| − | ! rowspan="2" | Supercharger | + | ! rowspan="2" |Supercharger |
| − | ! rowspan="2" | Turbocharger | + | ! rowspan="2" |Turbocharger |
|- | |- | ||
| − | ! Oil | + | ! Oil |
| + | ! Water | ||
| + | ! Type | ||
|- | |- | ||
| − | | Controllable || | + | | Controllable || rowspan="2" | Not controllable || rowspan="2" | Not controllable || rowspan="2" | Not controllable || rowspan="2" | Separate || rowspan="2" | Not ontrollable || rowspan="2" | Not controllable |
|- | |- | ||
|} | |} | ||
| + | |||
| + | ===Modules=== | ||
| + | {| class="wikitable" | ||
| + | ! colspan="1" | Tier | ||
| + | ! colspan="2" | Flight performance | ||
| + | ! colspan="1" | Survivability | ||
| + | ! colspan="3" | Weaponry | ||
| + | |- | ||
| + | | I | ||
| + | | Fuselage Repair | ||
| + | | Radiator | ||
| + | | | ||
| + | | Turret 7 mm | ||
| + | | | ||
| + | | ITC mk.III | ||
| + | |- | ||
| + | | II | ||
| + | | | ||
| + | | Compressor | ||
| + | | Airframe | ||
| + | | New 7 mm MGs (turret) | ||
| + | | Offensive 12 mm | ||
| + | | | ||
| + | |- | ||
| + | | III | ||
| + | | Wings Repair | ||
| + | | Engine | ||
| + | | | ||
| + | | Turret 12 mm | ||
| + | | | ||
| + | | Improved Torpedo | ||
| + | |- | ||
| + | | IV | ||
| + | | | ||
| + | | Engine Injection | ||
| + | | Cover | ||
| + | | New 12 mm MGs (turret) | ||
| + | | New 12 mm MGs | ||
| + | | | ||
| + | |- | ||
| + | |} | ||
| + | |||
| + | * Performance is a secondary criteria for an attacker. The focus should be on improved armament, especially the upgraded torpedos make handling them much easier. The machine gun upgrades are not really needed, the normal M2 Browning does well enough. The turrets however profit and gain longer and more accurate fire. Of course performance upgrades do not hurt, ''Compressor'', ''Engine'' and ''Engine Injection'' should be essential pick-ups, the rest on the other hand can be scheduled to the end of grind. | ||
=== Pros and cons === | === Pros and cons === | ||
| − | <!-- '' | + | <!--''Summarize and briefly evaluate the vehicle in terms of its characteristics and combat effectiveness. Mark its pros and cons in the bulleted list. Do not use more than 6 points for each of the characteristics. Avoid using categorical definitions such as "bad", "good" and the like - they have a substitution in the form of softer "inadequate", "effective".''--> |
'''Pros:''' | '''Pros:''' | ||
* Robust construction | * Robust construction | ||
| − | * Adaptive secondary | + | * Adaptive secondary ordinance for different maps e.g. naval and ground based operations |
* Very good vision from pilot's seat in cockpit | * Very good vision from pilot's seat in cockpit | ||
| − | * | + | * Great stability |
* Good defensive gunner coverage | * Good defensive gunner coverage | ||
| − | |||
'''Cons:''' | '''Cons:''' | ||
| Line 182: | Line 254: | ||
* Wing mounted 12.7 mm machine guns factoring in convergence | * Wing mounted 12.7 mm machine guns factoring in convergence | ||
* Poor low altitude performance, especially when turning | * Poor low altitude performance, especially when turning | ||
| − | * | + | * Slow |
| − | * | + | * Touchy controls, tends to over-respond to small control inputs (SB) |
* Ventral gunner has little protection, easily knocked out | * Ventral gunner has little protection, easily knocked out | ||
| − | |||
| − | |||
== History == | == History == | ||
| − | <!-- ''Describe the history of the creation and combat usage of the aircraft in more detail than in the introduction. If the historical reference turns out to be too | + | <!--''Describe the history of the creation and combat usage of the aircraft in more detail than in the introduction. If the historical reference turns out to be too big, take it to a separate article, taking a link to an article about the vehicle and adding a block "/ historical reference" (example: https://wiki.warthunder.com/Name-vehicles/historical reference) and add a link to it here using the <code>main</code> template. Be sure to include links to sources at the end of the article.''--> |
| − | |||
{| class="wikitable" | {| class="wikitable" | ||
|- | |- | ||
| Line 203: | Line 272: | ||
|} | |} | ||
| − | + | '''Battle Of Midway''' - June 4, 1942.<br> | |
| − | + | First Combat mission of the TBF-1 was on June 4, 1942 at the battle of Midway. Only six TBF-1 where available, for the start of the battle they where attached to VT-8. | |
| − | '''Battle Of Midway''' - June 4, 1942 <br> | + | All apart from one, was lost. |
| − | |||
| − | |||
| − | |||
| − | |||
| − | |||
| − | |||
| − | ''' | + | '''Eastern Solomons''' - Aug. 24/25th 1942 <br> |
| − | + | Admiral Yamamoto informous naval counter-strike 24th of August. the opposing naval forces met; the US Navy had only two carriers: Saratoga (VT-8) and Enterprise (VT-3). The Imperial Japanese Navy (I.J.N) had the carriers: Shōkaku, Zuikaku and a light carrier Ryūjō By August, TBF's had been delivered to the two ships. <br> | |
| + | 26 TBF-1 avengers from the VT-3 and VT-8 where lunched. Their torpedos, helped to sink the light carrier I.J.N. Ryūjō. Seven avengers were lost. | ||
| − | + | '''Santa Cruz''' - Oct. 26, 1942<br> | |
| − | |||
| − | |||
| − | |||
| − | + | '''Guadalcanal''' - Nov, 12/13th, 1942 <br> | |
| − | + | * Sank the I.J.N. Hiei battleship (37,000 tons) - Was the last big Japanese naval attack. TBF-1's where used by Marine Scout Bombing Squadron 131 (VMSB-131) | |
| − | |||
== Media == | == Media == | ||
| − | + | ''An excellent addition to the article will be video guides, as well as screenshots from the game and photos.'' | |
| − | + | == Read also == | |
| + | ''Links to the articles on the War Thunder Wiki that you think will be useful for the reader, for example,'' | ||
| − | |||
| − | |||
| − | |||
| − | |||
* ''reference to the series of the aircraft;'' | * ''reference to the series of the aircraft;'' | ||
| − | * ''links to approximate analogues of other nations and research trees.'' --> | + | * ''links to approximate analogues of other nations and research trees.'' |
| − | + | <!--''ETC.''--> | |
| − | |||
| − | |||
| − | == | + | == Sources == |
| − | <!-- ''Paste links to sources and external resources, such as:'' | + | <!--''Paste links to sources and external resources, such as:'' |
* ''topic on the official game forum;'' | * ''topic on the official game forum;'' | ||
| − | * ''other literature.'' --> | + | * ''page on aircraft encyclopedia;'' |
| + | * ''other literature.''--> | ||
| − | * [ | + | * [https://warthunder.com/en/news/3149/current/ [Vehicle Profile<nowiki>]</nowiki> TBF-1c / Avenger Mk 1] |
| − | |||
{{USA bombers}} | {{USA bombers}} | ||
Revision as of 05:43, 13 February 2019
Contents
| This page is about the aircraft TBF-1C. For other uses, see TBF-1 (Disambiguation) |
Description

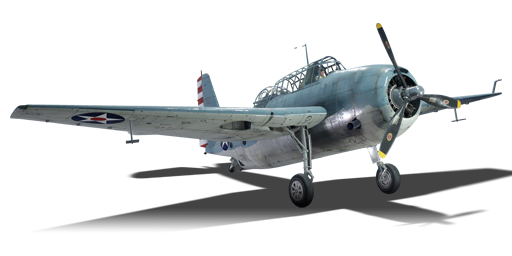
The TBF-1c Avenger is a Rank II American naval bomber with a battle rating of 2.0 (AB), 3.0 (RB), and 2.7 (SB). It was in the game since the start of the Open Beta Test prior to Update 1.29.
General info
Flight Performance
| Characteristics | |||||||
|---|---|---|---|---|---|---|---|
| Stock | |||||||
| Max Speed (km/h at 3,650 m) |
Max altitude (meters) |
Turn time (seconds) |
Rate of climb (meters/second) |
Take-off run (meters) | |||
| AB | RB | AB | RB | AB | RB | ||
| 414 | 402 | 7,100 | 31.3 | 31.9 | 2.6 | 3.5 | 307 |
| Upgraded | |||||||
| Max Speed (km/h at 3,650 m) |
Max altitude (meters) | Turn time (seconds) | Rate of climb (meters/second) |
Take-off run (meters) | |||
| AB | RB | AB | RB | AB | RB | ||
| 449 | 432 | 7,100 | 28.7 | 30.0 | 8.4 | 5.1 | 307 |
Details
| Features | ||||
|---|---|---|---|---|
| Combat flap | Take-off flap | Landing flap | Air brakes | Arrestor gear |
| X | X | ✓ | X | X |
| Limits | ||||
|---|---|---|---|---|
| Wing-break speed (km/h) |
Gear limit (km/h) |
Combat flap (km/h) |
Max Static G | |
| + | - | |||
| 583 | 450 | 520 | ~5 | ~3 |
| Optimal velocities | |||
|---|---|---|---|
| Ailerons (km/h) |
Rudder (km/h) |
Elevators (km/h) |
Radiator (km/h) |
| < 360 | < 360 | < 303 | > 220 |
| Compressor (RB/SB) | ||
|---|---|---|
| Setting 1 | ||
| Optimal altitude | 100% Engine power | WEP Engine power |
| 798 m | 1,500 hp | 1,669 hp |
| Setting 2 | ||
| Optimal altitude | 100% Engine power | WEP Engine power |
| 3,162 m | 1,350 hp | 1,502 hp |
Survivability and armour
- 6.35 mm Steel - Armor plate in the nose
- 12.7 mm Steel - Armor plate behind the pilot
- 12.7 mm Steel - Armor plate in dorsal gunner's seat
- 12.7 mm Steel - Armor plate in front of dorsal gunner
- 12.7 mm Steel - Armor plate in front of ventral gunner
- 6.35 mm Steel - Armor plate under the ventral gunner
- 40 mm Bulletproof glass in front of dorsal gunner
- 0.1 mm Wood - Connecting ventral gunner's armor
Armaments
Offensive armament
The TBF-1C is armed with:
- 2 x 12.7 mm Browning M2 machine guns, wing-mounted (310 rpg = 620 total)
Suspended armament
The TBF-1C can be outfitted with the following ordinance:
- 4 x 500 lb AN-M64A1 bombs (2,000 lb total)
- 1 x 2,216 lb Mk. 13 torpedo (2,216 lb total)
- 1 x 2,216 lb Mk. 13/44 torpedo (2,216 lb total)
Defensive armament
The TBF-1C is defended by:
- 1 x 12.7 mm Browning M2 machine guns, dorsal ball turret (400 rpg)
- 1 x 7.62 mm Browning machine gun, ventral turret (500 rpg)
Usage in the battles
As with all torpedo bombers, maintaining low altitude, high speed, and fighter cover are all recommended. The optimal distance for launching a torpedo is 1 km from the target. Targets should be engaged from directly ahead or astern, making "leading" the target much easier. If torpedo bombing is not an option, the plane can carry bombs for attacking ground targets.
The Avenger lacks much significant armament, but in a pinch it can serve as a fighter. The aircraft is not particularly fast or maneuverable, but, continuing the trend among mid-tier American aircraft, is extremely durable.
Fly low and fast, head towards your target drop your ordinance and bug out. However, If there are no hostile fighters, in the area. Destroy some enemy ground installations. E.g. AA, light vehicles, landing crafts and anti-tank positions.
Simulator mode procedures
Hands-off carrier take-off (Auto engine control): Start engine, flaps: raised, elevator trim: 0%, aileron trim: 0%, rudder trim: 14% right, WEP throttle, hands off controls until you lift off the carrier.
Level-type carrier landing final approach (Auto engine control): Drop any secondary weapons you may still have, make sure your alignment with the carrier and heading are good for landing, use your stick to hold an altitude of 40 m/120 ft, slow down below 200 kph/125 mph/108 kt, elevator trim: 2%, aileron trim: 18%, rudder trim: 0%, after gently slowing down to 123 kph/77 mph/67 kt set throttle to about 55% (you will have to adjust throttle a lot, though), just before the carrier (less than 1 km/0.62 mi) cut throttle and reset all trim to 0%, landing should be easy after that.
Manual Engine Control
| MEC elements | ||||||
|---|---|---|---|---|---|---|
| Mixer | Pitch | Radiator | Supercharger | Turbocharger | ||
| Oil | Water | Type | ||||
| Controllable | Not controllable | Not controllable | Not controllable | Separate | Not ontrollable | Not controllable |
Modules
| Tier | Flight performance | Survivability | Weaponry | |||
|---|---|---|---|---|---|---|
| I | Fuselage Repair | Radiator | Turret 7 mm | ITC mk.III | ||
| II | Compressor | Airframe | New 7 mm MGs (turret) | Offensive 12 mm | ||
| III | Wings Repair | Engine | Turret 12 mm | Improved Torpedo | ||
| IV | Engine Injection | Cover | New 12 mm MGs (turret) | New 12 mm MGs | ||
- Performance is a secondary criteria for an attacker. The focus should be on improved armament, especially the upgraded torpedos make handling them much easier. The machine gun upgrades are not really needed, the normal M2 Browning does well enough. The turrets however profit and gain longer and more accurate fire. Of course performance upgrades do not hurt, Compressor, Engine and Engine Injection should be essential pick-ups, the rest on the other hand can be scheduled to the end of grind.
Pros and cons
Pros:
- Robust construction
- Adaptive secondary ordinance for different maps e.g. naval and ground based operations
- Very good vision from pilot's seat in cockpit
- Great stability
- Good defensive gunner coverage
Cons:
- Limited bomb selection for a bomber
- Wing mounted 12.7 mm machine guns factoring in convergence
- Poor low altitude performance, especially when turning
- Slow
- Touchy controls, tends to over-respond to small control inputs (SB)
- Ventral gunner has little protection, easily knocked out
History
| Typical Monthly Production | Grumman TBF-1 |
|---|---|
| February, 1942 | 5 |
| June, 1942 | 60 |
| November, 1942 | 100 |
Battle Of Midway - June 4, 1942.
First Combat mission of the TBF-1 was on June 4, 1942 at the battle of Midway. Only six TBF-1 where available, for the start of the battle they where attached to VT-8.
All apart from one, was lost.
Eastern Solomons - Aug. 24/25th 1942
Admiral Yamamoto informous naval counter-strike 24th of August. the opposing naval forces met; the US Navy had only two carriers: Saratoga (VT-8) and Enterprise (VT-3). The Imperial Japanese Navy (I.J.N) had the carriers: Shōkaku, Zuikaku and a light carrier Ryūjō By August, TBF's had been delivered to the two ships.
26 TBF-1 avengers from the VT-3 and VT-8 where lunched. Their torpedos, helped to sink the light carrier I.J.N. Ryūjō. Seven avengers were lost.
Santa Cruz - Oct. 26, 1942
Guadalcanal - Nov, 12/13th, 1942
- Sank the I.J.N. Hiei battleship (37,000 tons) - Was the last big Japanese naval attack. TBF-1's where used by Marine Scout Bombing Squadron 131 (VMSB-131)
Media
An excellent addition to the article will be video guides, as well as screenshots from the game and photos.
Read also
Links to the articles on the War Thunder Wiki that you think will be useful for the reader, for example,
- reference to the series of the aircraft;
- links to approximate analogues of other nations and research trees.
Sources
| USA bombers | |
|---|---|
| Dive | SB2U-2 · SB2U-3 · SBD-3 · SB2C-1C · SB2C-4 |
| Torpedo | TBD-1 · PBY-5 Catalina · PBY-5A Catalina · TBF-1C · BTD-1 |
| Medium | B-10B · B-18A · B-34 · PV-2D · B-25J-1 · B-25J-20 · A-26C-45 · A-26C-45DT · B-26B |
| Heavy | B-17E · B-17E/L · B-17G-60-VE · PB4Y-2 · B-24D-25-CO · B-29A-BN |
| Hydroplanes | OS2U-1 · OS2U-3 · PBM-1 "Mariner" · PBM-3 "Mariner" |
