Difference between revisions of "M4A3 (76) W (Japan)"
(→Description) |
(→Pros and cons) (Tag: Visual edit) |
||
| (21 intermediate revisions by 8 users not shown) | |||
| Line 1: | Line 1: | ||
| + | {{Specs-Card|code=jp_m4a3e8_76w_sherman}} | ||
{{About | {{About | ||
| − | | about = medium tank '''{{PAGENAME}}''' | + | | about = Japanese medium tank '''{{PAGENAME}}''' |
| − | | | + | | and |
| − | | usage | + | | usage = similar vehicles |
| − | | link-1 = | + | | link-1 = M4A3 (76) W |
| − | + | | link-2 = M4A3 (105) | |
| − | | link-2 = | ||
| − | |||
| − | |||
| − | |||
| − | |||
}} | }} | ||
== Description == | == Description == | ||
<!-- ''In the description, the first part should be about the history of the creation and combat usage of the vehicle, as well as its key features. In the second part, tell the reader about the ground vehicle in the game. Insert a screenshot of the vehicle, so that if the novice player does not remember the vehicle by name, he will immediately understand what kind of vehicle the article is talking about.'' --> | <!-- ''In the description, the first part should be about the history of the creation and combat usage of the vehicle, as well as its key features. In the second part, tell the reader about the ground vehicle in the game. Insert a screenshot of the vehicle, so that if the novice player does not remember the vehicle by name, he will immediately understand what kind of vehicle the article is talking about.'' --> | ||
| − | The '''{{Specs|name}}''' (or just '''{{Specs|pseudonym}}''') | + | [[File:GarageImage_{{PAGENAME}}.jpg|420px|thumb|left]] |
| − | + | {{Break}} | |
| − | It was introduced along with the initial Japanese Ground Forces tree in [[Update_1.65_"Way_of_the_Samurai"|Update 1.65 "Way of the Samurai"]]. This Japanese vehicle, following the [[M24 (Japan)|M24 SDF]] in the tree line, is identical to the American [[M4A3 (76) W|M4A3 (76) W HVSS Sherman]] | + | The '''{{Specs|name}}''' (or just '''{{Specs|pseudonym}}''') is a rank {{Specs|rank}} Japanese medium tank {{Battle-rating}}. It was introduced along with the initial Japanese Ground Forces tree in [[Update_1.65_"Way_of_the_Samurai"|Update 1.65 "Way of the Samurai"]]. This Japanese vehicle, following the [[M24 (Japan)|M24 SDF]] in the tree line, is identical to the American [[M4A3 (76) W|M4A3 (76) W HVSS Sherman]]. |
== General info == | == General info == | ||
=== Survivability and armour === | === Survivability and armour === | ||
| − | |||
<!-- ''Describe armour protection. Note the most well protected and key weak areas. Appreciate the layout of modules as well as the number and location of crew members. Is the level of armour protection sufficient, is the placement of modules helpful for survival in combat? If necessary use a visual template to indicate the most secure and weak zones of the armour.'' --> | <!-- ''Describe armour protection. Note the most well protected and key weak areas. Appreciate the layout of modules as well as the number and location of crew members. Is the level of armour protection sufficient, is the placement of modules helpful for survival in combat? If necessary use a visual template to indicate the most secure and weak zones of the armour.'' --> | ||
'''Armour type:''' | '''Armour type:''' | ||
| Line 35: | Line 30: | ||
| Turret || 63.5 mm (10-62°) ''Turret front'' <br> 88.9 mm (1-74°) ''Gun mantlet'' || 63.5 mm (1-72°) || 63.5 mm (0-80°) || 25.4 mm | | Turret || 63.5 mm (10-62°) ''Turret front'' <br> 88.9 mm (1-74°) ''Gun mantlet'' || 63.5 mm (1-72°) || 63.5 mm (0-80°) || 25.4 mm | ||
|- | |- | ||
| − | | | + | ! Armour !! Sides !! Roof |
| + | |- | ||
| + | | Cupola || 63.5 mm (55-56°) || 25.4 mm | ||
|- | |- | ||
|} | |} | ||
| Line 43: | Line 40: | ||
=== Mobility === | === Mobility === | ||
| − | |||
<!-- ''Write about the mobility of the ground vehicle. Estimate the specific power and manoeuvrability, as well as the maximum speed forwards and backwards.'' --> | <!-- ''Write about the mobility of the ground vehicle. Estimate the specific power and manoeuvrability, as well as the maximum speed forwards and backwards.'' --> | ||
{{tankMobility|abMinHp=775|rbMinHp=442}} | {{tankMobility|abMinHp=775|rbMinHp=442}} | ||
| − | |||
| − | |||
| − | |||
== Armaments == | == Armaments == | ||
| − | |||
=== Main armament === | === Main armament === | ||
| − | |||
<!-- ''Give the reader information about the characteristics of the main gun. Assess its effectiveness in a battle based on the reloading speed, ballistics and the power of shells. Do not forget about the flexibility of the fire, that is how quickly the cannon can be aimed at the target, open fire on it and aim at another enemy. Add a link to the main article on the gun: <code><nowiki>{{main|Name of the weapon}}</nowiki></code>. Describe in general terms the ammunition available for the main gun. Give advice on how to use them and how to fill the ammunition storage.'' --> | <!-- ''Give the reader information about the characteristics of the main gun. Assess its effectiveness in a battle based on the reloading speed, ballistics and the power of shells. Do not forget about the flexibility of the fire, that is how quickly the cannon can be aimed at the target, open fire on it and aim at another enemy. Add a link to the main article on the gun: <code><nowiki>{{main|Name of the weapon}}</nowiki></code>. Describe in general terms the ammunition available for the main gun. Give advice on how to use them and how to fill the ammunition storage.'' --> | ||
{{main|M1 (76 mm)}} | {{main|M1 (76 mm)}} | ||
| Line 67: | Line 58: | ||
|- | |- | ||
! ''Arcade'' | ! ''Arcade'' | ||
| − | | rowspan="2" | 71 || rowspan="2" | -10°/+25° || rowspan="2" | ±180° || rowspan="2" | + | | rowspan="2" | 71 || rowspan="2" | -10°/+25° || rowspan="2" | ±180° || rowspan="2" | Vertical || 22.85 || 31.62 || 38.40 || 42.46 || 45.18 || rowspan="2" | 7.67 || rowspan="2" | 6.78 || rowspan="2" | 6.25 || rowspan="2" | 5.90 |
|- | |- | ||
! ''Realistic'' | ! ''Realistic'' | ||
| − | | | + | | 14.28 || 16.80 || 20.40 || 22.56 || 24.00 |
|- | |- | ||
|} | |} | ||
==== Ammunition ==== | ==== Ammunition ==== | ||
| − | { | + | {| class="wikitable sortable" style="text-align:center" width="100%" |
| + | ! colspan="8" | Penetration statistics | ||
| + | |- | ||
| + | ! rowspan="2" data-sort-type="text" | Ammunition | ||
| + | ! rowspan="2" | Type of<br>warhead | ||
| + | ! colspan="6" | '''Penetration @ 0° Angle of Attack (mm)''' | ||
| + | |- | ||
| + | ! 10 m !! 100 m !! 500 m !! 1,000 m !! 1,500 m !! 2,000 m | ||
| + | |- | ||
| + | | M62 shell || APCBC || 149 || 146 || 133 || 119 || 106 || 95 | ||
| + | |- | ||
| + | | M42A1 shell || HE || 7 || 7 || 7 || 7 || 7 || 7 | ||
| + | |- | ||
| + | | M79 shot || AP || 134 || 132 || 121 || 109 || 99 || 89 | ||
| + | |- | ||
| + | | M93 shot || APCR || 190 || 186 || 167 || 146 || 128 || 112 | ||
| + | |- | ||
| + | |} | ||
| + | {| class="wikitable sortable" style="text-align:center" width="100%" | ||
| + | ! colspan="10" | Shell details | ||
| + | |- | ||
| + | ! rowspan="2" data-sort-type="text" | Ammunition | ||
| + | ! rowspan="2" | Type of<br>warhead | ||
| + | ! rowspan="2" | Velocity<br>(m/s) | ||
| + | ! rowspan="2" | Projectile<br>Mass (kg) | ||
| + | ! rowspan="2" | Fuse delay<br>(m) | ||
| + | ! rowspan="2" | Fuse sensitivity<br>(mm) | ||
| + | ! rowspan="2" | Explosive Mass<br>(TNT equivalent) (g) | ||
| + | ! colspan="3" | Ricochet | ||
| + | |- | ||
| + | ! 0% !! 50% !! 100% | ||
| + | |- | ||
| + | | M62 shell || APCBC || 792 || 7.00 || 1.2 || 14.0 || 63.7 || 48° || 63° || 71° | ||
| + | |- | ||
| + | | M42A1 shell || HE || 800 || 5.84 || 0.1 || 0.5 || 390 || 79° || 80° || 81° | ||
| + | |- | ||
| + | | M79 shot || AP || 792 || 6.80 || N/A || N/A || N/A || 47° || 60° || 65° | ||
| + | |- | ||
| + | | M93 shot || APCR || 1,036 || 4.22 || N/A || N/A || N/A || 66° || 70° || 72° | ||
| + | |- | ||
| + | |} | ||
| + | {| class="wikitable" style="text-align:center" | ||
| + | ! colspan="7" | Smoke shell characteristics | ||
| + | |- | ||
| + | ! Ammunition | ||
| + | ! Velocity<br>(m/s) | ||
| + | ! Projectile<br>Mass (kg) | ||
| + | ! Screen radius<br>(m) | ||
| + | ! Screen deploy time<br>(s) | ||
| + | ! Screen hold time<br>(s) | ||
| + | ! Explosive Mass<br>(TNT equivalent) (g) | ||
| + | |- | ||
| + | | M88 || 274 || 3.44 || 13 || 5 || 20 || 50 | ||
| + | |- | ||
| + | |} | ||
==== [[Ammo racks]] ==== | ==== [[Ammo racks]] ==== | ||
| − | [[File: | + | [[File:Ammoracks_M4A1_(76)_W.png|right|thumb|x250px|[[Ammo racks]] of the {{PAGENAME}}]] |
| − | |||
{| class="wikitable" style="text-align:center" | {| class="wikitable" style="text-align:center" | ||
|- | |- | ||
| Line 86: | Line 130: | ||
! 2nd<br>rack empty | ! 2nd<br>rack empty | ||
! 3rd<br>rack empty | ! 3rd<br>rack empty | ||
| + | ! 4th<br>rack empty | ||
| + | ! 5th<br>rack empty | ||
! Visual<br>discrepancy | ! Visual<br>discrepancy | ||
|- | |- | ||
| − | | '''71''' || | + | | '''71''' || 57 ''(+14)'' || 43 ''(+28)'' || 29 ''(+42)'' || 15 ''(+56)'' || 1 ''(+70)'' || Yes |
|- | |- | ||
|} | |} | ||
| − | |||
| − | |||
| − | |||
=== Machine guns === | === Machine guns === | ||
| − | |||
| − | |||
<!-- ''Offensive and anti-aircraft machine guns not only allow you to fight some aircraft but also are effective against lightly armoured vehicles. Evaluate machine guns and give recommendations on its use.'' --> | <!-- ''Offensive and anti-aircraft machine guns not only allow you to fight some aircraft but also are effective against lightly armoured vehicles. Evaluate machine guns and give recommendations on its use.'' --> | ||
{{main|M2HB (12.7 mm)|M1919A4 (7.62 mm)}} | {{main|M2HB (12.7 mm)|M1919A4 (7.62 mm)}} | ||
| Line 122: | Line 163: | ||
== Usage in battles == | == Usage in battles == | ||
<!-- ''Describe the tactics of playing in the vehicle, the features of using vehicles in the team and advice on tactics. Refrain from creating a "guide" - do not impose a single point of view but instead give the reader food for thought. Describe the most dangerous enemies and give recommendations on fighting them. If necessary, note the specifics of the game in different modes (AB, RB, SB).'' --> | <!-- ''Describe the tactics of playing in the vehicle, the features of using vehicles in the team and advice on tactics. Refrain from creating a "guide" - do not impose a single point of view but instead give the reader food for thought. Describe the most dangerous enemies and give recommendations on fighting them. If necessary, note the specifics of the game in different modes (AB, RB, SB).'' --> | ||
| − | Playing as the M4A3 can be tricky since it features armour that can't stop most | + | Playing as the M4A3 can be tricky since it features armour that can't stop most calibers at its rank such as the German 8.8 cm or the Soviet 85 mm, including the fact that it isn't the fastest tank. The M4A3 plays more of a support role, use the powerful 76 mm to assist teammates during an advance or defense. The number one rule of this tank is to never fight alone with it, always be with a teammate and use cover when available since it will give the Sherman a great advantage. |
| + | |||
| + | === Modules === | ||
| + | {| class="wikitable" | ||
| + | ! Tier | ||
| + | ! colspan="2" | Mobility | ||
| + | ! Protection | ||
| + | ! colspan="2" | Firepower | ||
| + | |- | ||
| + | | I | ||
| + | | Tracks | ||
| + | | | ||
| + | | Parts | ||
| + | | Horizontal Drive | ||
| + | | | ||
| + | |- | ||
| + | | II | ||
| + | | Suspension | ||
| + | | Brake System | ||
| + | | FPE | ||
| + | | M79 shot | ||
| + | | Adjustment of Fire | ||
| + | |- | ||
| + | | III | ||
| + | | Filters | ||
| + | | | ||
| + | | Crew Replenishment | ||
| + | | M93 shot | ||
| + | | Elevation Mechanism | ||
| + | |- | ||
| + | | IV | ||
| + | | Transmission | ||
| + | | Engine | ||
| + | | | ||
| + | | Artillery Support | ||
| + | | M88 | ||
| + | |- | ||
| + | |} | ||
=== Pros and cons === | === Pros and cons === | ||
| Line 130: | Line 208: | ||
* Single-plane gun stabilizer | * Single-plane gun stabilizer | ||
| + | * Decent 76 mm gun | ||
* Very fast turret traverse | * Very fast turret traverse | ||
| − | * Quick reload for the | + | * Quick reload for the 76mm Gun |
* Wet ammo storage - Which reduces greatly ammo rack chances, is indicated by the "W" in its name, this also means tightly packed ammo only placed under the turret | * Wet ammo storage - Which reduces greatly ammo rack chances, is indicated by the "W" in its name, this also means tightly packed ammo only placed under the turret | ||
* Top-mounted .50 cal useful against fighters and open topped/light vehicles | * Top-mounted .50 cal useful against fighters and open topped/light vehicles | ||
* Great cross terrain performances due to larger tracks, same as the [[M4A3 (105)]] | * Great cross terrain performances due to larger tracks, same as the [[M4A3 (105)]] | ||
* Access to APCR shells | * Access to APCR shells | ||
| − | * Access to | + | * Access to Smoke shells |
'''Cons:''' | '''Cons:''' | ||
* All-around armour is very weak against most cannons | * All-around armour is very weak against most cannons | ||
| − | * 76 mm gun, while adequate when | + | * At 5.7br, the armor can't stop shells from Tigers or Panthers |
| + | * 76 mm gun, while adequate when top rank, is lacking against opponents | ||
* Tall profile, makes it a bigger target | * Tall profile, makes it a bigger target | ||
| Line 149: | Line 229: | ||
The [[M4|M4 Sherman]] has become a proven and well-respected tank design by 1944. It was highly reliable, adequately armoured, and could be produced in a very large number with a dedicated support arm to ensure that all of the ones in the field could be kept operational. It was also by 1944 that the Sherman's faults were becoming a more defining trait than its advantages, namely with the increased prevalence of German anti-tank weaponry and tanks, such as the [[Panther A|Panther]] tank. The German anti-tank abilities, ranging from rocket launchers, anti-tank guns, mines, and tank guns, all became more capable of penetrating the frontal armour or disabling the Sherman. This resulted in an increased Allied tank attrition rate of nearly double during the Normandy Campaign than that of the Allies' previous campaigns. Criticisms were raised on the Sherman's inability to destroy the heavier tanks with its [[M3 (75 mm)|75 mm gun]], the tendency of catching fire easily when a penetrating round hits an ammo stowage bin scattered in the Sherman interior, and the lack of mobility on the muddy terrain due to the track design. The first and second criticism was addressed with the [[M1 (76 mm)|high-velocity 76 mm gun]] and a "wet stowage" ammo containers, but mobility became a big issue especially once the Allied front in France reached the Siegfried Line on the border of Germany, where the ground became very muddy in the fall season. An attempt to fix this was improvising "extensions" on the tracks, but these were difficult to add and there were never enough to go around. The problem had to be addressed in the manufacturing plant and Ordnance Department set to work finding a better solution to fix the track flotation for better mobility. | The [[M4|M4 Sherman]] has become a proven and well-respected tank design by 1944. It was highly reliable, adequately armoured, and could be produced in a very large number with a dedicated support arm to ensure that all of the ones in the field could be kept operational. It was also by 1944 that the Sherman's faults were becoming a more defining trait than its advantages, namely with the increased prevalence of German anti-tank weaponry and tanks, such as the [[Panther A|Panther]] tank. The German anti-tank abilities, ranging from rocket launchers, anti-tank guns, mines, and tank guns, all became more capable of penetrating the frontal armour or disabling the Sherman. This resulted in an increased Allied tank attrition rate of nearly double during the Normandy Campaign than that of the Allies' previous campaigns. Criticisms were raised on the Sherman's inability to destroy the heavier tanks with its [[M3 (75 mm)|75 mm gun]], the tendency of catching fire easily when a penetrating round hits an ammo stowage bin scattered in the Sherman interior, and the lack of mobility on the muddy terrain due to the track design. The first and second criticism was addressed with the [[M1 (76 mm)|high-velocity 76 mm gun]] and a "wet stowage" ammo containers, but mobility became a big issue especially once the Allied front in France reached the Siegfried Line on the border of Germany, where the ground became very muddy in the fall season. An attempt to fix this was improvising "extensions" on the tracks, but these were difficult to add and there were never enough to go around. The problem had to be addressed in the manufacturing plant and Ordnance Department set to work finding a better solution to fix the track flotation for better mobility. | ||
| − | The result was to be the basis of the next generation of Sherman models. Under the ''E8'' program, new suspension was | + | The result was to be the basis of the next generation of Sherman models. Under the ''E8'' program, new suspension was trialed on the Sherman, one was the horizontal-volute suspension system (HVSS) taken from the ''[[T20]]'' program. The trials showed that the new suspension gave the Sherman a ground pressure that is even less than the heavier Panther, and this model was approved for production in March 1944, beginning in August 1944. Despite the time of production, the distance of the Atlantic Ocean between the American factories and Europe cause the delivery time of the first batch of the new models to be three months, meaning they would not see service until December 1944 the soonest. Nevertheless, the new Sherman, dubbed the '''M4A3 (76) W HVSS Sherman''' on papers and shortened as the '''M4A3E8''', was considered the best overall Sherman design with its new upgrades. |
===Design=== | ===Design=== | ||
| Line 163: | Line 243: | ||
== Media == | == Media == | ||
<!-- ''Excellent additions to the article would be video guides, screenshots from the game, and photos.'' --> | <!-- ''Excellent additions to the article would be video guides, screenshots from the game, and photos.'' --> | ||
| − | |||
| − | |||
| − | |||
;Videos | ;Videos | ||
| Line 179: | Line 256: | ||
<!-- ''Paste links to sources and external resources, such as:'' | <!-- ''Paste links to sources and external resources, such as:'' | ||
* ''topic on the official game forum;'' | * ''topic on the official game forum;'' | ||
| + | * ''encyclopedia page on the tank;'' | ||
* ''other literature.'' --> | * ''other literature.'' --> | ||
| Line 184: | Line 262: | ||
<references /> | <references /> | ||
| − | |||
{{Japan medium tanks}} | {{Japan medium tanks}} | ||
Revision as of 14:28, 4 September 2020
Contents
| This page is about the Japanese medium tank M4A3 (76) W (Japan). For similar vehicles, see M4A3 (76) W and M4A3 (105). |
Description
_W_(Japan).jpg)
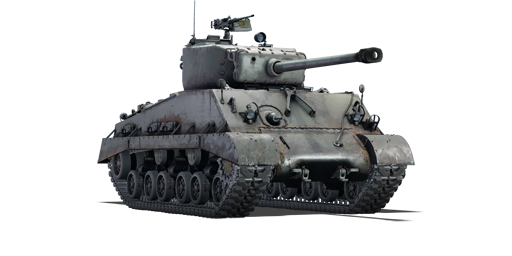
The Medium Tank M4A3 (76) W HVSS Sherman (or just ▅M4A3 (76) W) is a rank IV Japanese medium tank
with a battle rating of 5.3 (AB) and 5.7 (RB/SB). It was introduced along with the initial Japanese Ground Forces tree in Update 1.65 "Way of the Samurai". This Japanese vehicle, following the M24 SDF in the tree line, is identical to the American M4A3 (76) W HVSS Sherman.
General info
Survivability and armour
Armour type:
- Rolled homogeneous armour (Front, Side, Rear, Roof)
- Cast homogeneous armour (Turret, Gun mantlet, Transmission area)
| Armour | Front (Slope angle) | Sides | Rear | Roof |
|---|---|---|---|---|
| Hull | 63.5 mm (47°) Front glacis 63.5-107.9 mm (13-77°) Transmission housing |
38.1 mm | 38.1 mm (22°) Top 38.1 mm (13-44°) Bottom |
19.5 mm |
| Turret | 63.5 mm (10-62°) Turret front 88.9 mm (1-74°) Gun mantlet |
63.5 mm (1-72°) | 63.5 mm (0-80°) | 25.4 mm |
| Armour | Sides | Roof | ||
| Cupola | 63.5 mm (55-56°) | 25.4 mm |
Notes:
- Suspension wheels are 15 mm thick, bogies are 10 mm thick, and tracks are 20 mm thick.
Mobility
| Game Mode | Max Speed (km/h) | Weight (tons) | Engine power (horsepower) | Power-to-weight ratio (hp/ton) | |||
|---|---|---|---|---|---|---|---|
| Forward | Reverse | Stock | Upgraded | Stock | Upgraded | ||
| Arcade | 47 | 7 | 32.2 | 775 | 954 | 24.07 | 29.63 |
| Realistic | 43 | 6 | 442 | 500 | 13.73 | 15.53 | |
Armaments
Main armament
| 76 mm M1 | Turret rotation speed (°/s) | Reloading rate (seconds) | |||||||||||
|---|---|---|---|---|---|---|---|---|---|---|---|---|---|
| Mode | Capacity | Vertical | Horizontal | Stabilizer | Stock | Upgraded | Full | Expert | Aced | Stock | Full | Expert | Aced |
| Arcade | 71 | -10°/+25° | ±180° | Vertical | 22.85 | 31.62 | 38.40 | 42.46 | 45.18 | 7.67 | 6.78 | 6.25 | 5.90 |
| Realistic | 14.28 | 16.80 | 20.40 | 22.56 | 24.00 | ||||||||
Ammunition
| Penetration statistics | |||||||
|---|---|---|---|---|---|---|---|
| Ammunition | Type of warhead |
Penetration @ 0° Angle of Attack (mm) | |||||
| 10 m | 100 m | 500 m | 1,000 m | 1,500 m | 2,000 m | ||
| M62 shell | APCBC | 149 | 146 | 133 | 119 | 106 | 95 |
| M42A1 shell | HE | 7 | 7 | 7 | 7 | 7 | 7 |
| M79 shot | AP | 134 | 132 | 121 | 109 | 99 | 89 |
| M93 shot | APCR | 190 | 186 | 167 | 146 | 128 | 112 |
| Shell details | |||||||||
|---|---|---|---|---|---|---|---|---|---|
| Ammunition | Type of warhead |
Velocity (m/s) |
Projectile Mass (kg) |
Fuse delay (m) |
Fuse sensitivity (mm) |
Explosive Mass (TNT equivalent) (g) |
Ricochet | ||
| 0% | 50% | 100% | |||||||
| M62 shell | APCBC | 792 | 7.00 | 1.2 | 14.0 | 63.7 | 48° | 63° | 71° |
| M42A1 shell | HE | 800 | 5.84 | 0.1 | 0.5 | 390 | 79° | 80° | 81° |
| M79 shot | AP | 792 | 6.80 | N/A | N/A | N/A | 47° | 60° | 65° |
| M93 shot | APCR | 1,036 | 4.22 | N/A | N/A | N/A | 66° | 70° | 72° |
| Smoke shell characteristics | ||||||
|---|---|---|---|---|---|---|
| Ammunition | Velocity (m/s) |
Projectile Mass (kg) |
Screen radius (m) |
Screen deploy time (s) |
Screen hold time (s) |
Explosive Mass (TNT equivalent) (g) |
| M88 | 274 | 3.44 | 13 | 5 | 20 | 50 |
Ammo racks
_W.png)
| Full ammo |
1st rack empty |
2nd rack empty |
3rd rack empty |
4th rack empty |
5th rack empty |
Visual discrepancy |
|---|---|---|---|---|---|---|
| 71 | 57 (+14) | 43 (+28) | 29 (+42) | 15 (+56) | 1 (+70) | Yes |
Machine guns
| 12.7 mm M2HB | ||||
|---|---|---|---|---|
| Mount | Capacity (Belt) | Fire rate | Vertical | Horizontal |
| Pintle | 600 (200) | 577 | -10°/+70° | ±60° |
| 7.62 mm M1919A4 | ||||
|---|---|---|---|---|
| Mount | Capacity (Belt) | Fire rate | Vertical | Horizontal |
| Coaxial | 3,000 (250) | 500 | N/A | N/A |
Usage in battles
Playing as the M4A3 can be tricky since it features armour that can't stop most calibers at its rank such as the German 8.8 cm or the Soviet 85 mm, including the fact that it isn't the fastest tank. The M4A3 plays more of a support role, use the powerful 76 mm to assist teammates during an advance or defense. The number one rule of this tank is to never fight alone with it, always be with a teammate and use cover when available since it will give the Sherman a great advantage.
Modules
| Tier | Mobility | Protection | Firepower | ||
|---|---|---|---|---|---|
| I | Tracks | Parts | Horizontal Drive | ||
| II | Suspension | Brake System | FPE | M79 shot | Adjustment of Fire |
| III | Filters | Crew Replenishment | M93 shot | Elevation Mechanism | |
| IV | Transmission | Engine | Artillery Support | M88 | |
Pros and cons
Pros:
- Single-plane gun stabilizer
- Decent 76 mm gun
- Very fast turret traverse
- Quick reload for the 76mm Gun
- Wet ammo storage - Which reduces greatly ammo rack chances, is indicated by the "W" in its name, this also means tightly packed ammo only placed under the turret
- Top-mounted .50 cal useful against fighters and open topped/light vehicles
- Great cross terrain performances due to larger tracks, same as the M4A3 (105)
- Access to APCR shells
- Access to Smoke shells
Cons:
- All-around armour is very weak against most cannons
- At 5.7br, the armor can't stop shells from Tigers or Panthers
- 76 mm gun, while adequate when top rank, is lacking against opponents
- Tall profile, makes it a bigger target
History
Development
The M4 Sherman has become a proven and well-respected tank design by 1944. It was highly reliable, adequately armoured, and could be produced in a very large number with a dedicated support arm to ensure that all of the ones in the field could be kept operational. It was also by 1944 that the Sherman's faults were becoming a more defining trait than its advantages, namely with the increased prevalence of German anti-tank weaponry and tanks, such as the Panther tank. The German anti-tank abilities, ranging from rocket launchers, anti-tank guns, mines, and tank guns, all became more capable of penetrating the frontal armour or disabling the Sherman. This resulted in an increased Allied tank attrition rate of nearly double during the Normandy Campaign than that of the Allies' previous campaigns. Criticisms were raised on the Sherman's inability to destroy the heavier tanks with its 75 mm gun, the tendency of catching fire easily when a penetrating round hits an ammo stowage bin scattered in the Sherman interior, and the lack of mobility on the muddy terrain due to the track design. The first and second criticism was addressed with the high-velocity 76 mm gun and a "wet stowage" ammo containers, but mobility became a big issue especially once the Allied front in France reached the Siegfried Line on the border of Germany, where the ground became very muddy in the fall season. An attempt to fix this was improvising "extensions" on the tracks, but these were difficult to add and there were never enough to go around. The problem had to be addressed in the manufacturing plant and Ordnance Department set to work finding a better solution to fix the track flotation for better mobility.
The result was to be the basis of the next generation of Sherman models. Under the E8 program, new suspension was trialed on the Sherman, one was the horizontal-volute suspension system (HVSS) taken from the T20 program. The trials showed that the new suspension gave the Sherman a ground pressure that is even less than the heavier Panther, and this model was approved for production in March 1944, beginning in August 1944. Despite the time of production, the distance of the Atlantic Ocean between the American factories and Europe cause the delivery time of the first batch of the new models to be three months, meaning they would not see service until December 1944 the soonest. Nevertheless, the new Sherman, dubbed the M4A3 (76) W HVSS Sherman on papers and shortened as the M4A3E8, was considered the best overall Sherman design with its new upgrades.
Design
Aside from the enlarged T23 turret, the Sherman interior layout was largely unchanged from the original design. The driver and bow gunner still sat in the front, the three-man turret crew in the center, and the engine compartment in the back. The exterior was changed with the new horizontal-volute suspension system (HVSS), which presented a different bogie system with larger road wheels that allow the usage of a wider track for better mobility cross-country. The new suspension system helped defeat the problems the Sherman's original tracks had with sinking in the mud from poor flotation and poor traction on slippery terrain. Another advantage the HVSS gave was the ability to change out individual road wheels on the bogie rather than replace the entire bogie, easing maintenance and repairs. The suspension was also reported to be a very smooth ride in comparison with the vertical-volute suspension system (VVSS), leading tankers to nickname the tank the "Easy Eight" from the tank's experimental designation M4A3E8, with the E8 corresponding to the usage of the HVSS.
The M4A3(76)W HVSS ran on a gasoline Ford GAA V8 engine, which was the standard engine used in all M4A3 Sherman variants. The tank construction was welded and had a frontal armour plate sloping at a 47 degree angle. The (76) in the name indicated that the tank was armed with the more powerful 76 mm gun as a counter to the heavier German armour. The "W" designation on the Sherman indicated that the vehicle had the "wet stowage" feature in response to complaints that the Sherman can easily catch fire due to exploding ammunition. The "wet stowage" encased the ammo containers in a liquid mixture that would douse the flames when penetrated or block flaming shrapnels due to penetrating shots from hitting the ammunition. The containers also placed all the ammunition in the bottom center of the tank, reducing the likeliness of it being hit by a shell as the penetrating shell must go through every armour and obstacle to hit the tank center. This feature was only present after February 1944 and severely decreased the rate of Sherman fires. The "HVSS" indicated the usage of the horizontal-volute suspension system on the tank. The M4A3E8 started production in August 1944 and its production life ended around the end of World War II, probably September 1945. M4A3(76)W HVSS production consisted of 4,542 tanks out of the total 49,234 Shermans produced in its production life.
Japanese Service
In July 1st, 1954, Japan set up its post-war military force, the Japan Self-Defense Forces with the purpose of defending Japan should it come under conflict in the ongoing Cold War between America and the Soviet Union. To jump start the remilitarization, America gave the newly formed JSDF 254 M4A3E8 Shermans.[1]
The Shermans remained in use in the JSDF until the new, domestic tank design Type 61 was made in large numbers during the 1960s.
Media
- Videos
See also
Links to the articles on the War Thunder Wiki that you think will be useful for the reader, for example:
- reference to the series of the vehicles;
- links to approximate analogues of other nations and research trees.
External links
References
- ↑ Priory_of_Sion. "Sherman Use Around The World." The Sherman Tank Site. WordPress, 23 Nov. 2015. Web. 16 Dec. 2016. <http://www.theshermantank.com/tag/post-war/>.
| Japan medium tanks | |
|---|---|
| Type 97 | Chi-Ha · Chi-Ha Kai · Chi-Ha Kai TD · Chi-Ha Short Gun |
| Type 1 | Chi-He · Chi-He (5th Regiment) · Ho-I |
| Type 3 | Chi-Nu · Chi-Nu II |
| Type 4 | Chi-To · Chi-To Late |
| Type 5 | Chi-Ri II |
| Type 61 MBT | ST-A1* · ST-A2* · ST-A3* · Type 61 |
| Type 74 MBT | ST-B2* · Type 74 (C) · Type 74 (E) · Type 74 (F) · Type 74 (G) |
| Type 90 MBT | Type 90 · Type 90 (B) · Type 90B "Fuji" |
| Type 10 MBT | TKX (P)* · TKX* · Type 10 |
| Other | Ka-Chi |
| USA | ▅M4A3 (76) W · ▅M47 |
| *Prototype | |
