Difference between revisions of "Wellington Mk Ic"
(Added basic information and tables.) |
(Restored page from version archived 10-12-18.) |
||
| Line 16: | Line 16: | ||
! colspan="8" | ''Stock'' | ! colspan="8" | ''Stock'' | ||
|- | |- | ||
| − | ! colspan="2" | Max Speed<br>(km/h at | + | ! colspan="2" | Max Speed<br>(km/h at 4,572 m) |
! rowspan="2" | Max altitude<br>(meters) | ! rowspan="2" | Max altitude<br>(meters) | ||
! colspan="2" | Turn time<br>(seconds) | ! colspan="2" | Turn time<br>(seconds) | ||
| Line 22: | Line 22: | ||
! rowspan="2" |Take-off run<br>(meters) | ! rowspan="2" |Take-off run<br>(meters) | ||
|- | |- | ||
| − | ! | + | ! AB |
! RB | ! RB | ||
! AB | ! AB | ||
| Line 29: | Line 29: | ||
! RB | ! RB | ||
|- | |- | ||
| − | | | + | |361||352|| {{Specs|ceiling}} || 36.5 || 37.2 || 4.1 || 4.1 ||877 |
|- | |- | ||
! colspan="8" | ''Upgraded'' | ! colspan="8" | ''Upgraded'' | ||
|- | |- | ||
| − | ! colspan="2" | Max Speed<br>(km/h at | + | ! colspan="2" | Max Speed<br>(km/h at 4,572 m) |
! rowspan="2" |Max altitude (meters) | ! rowspan="2" |Max altitude (meters) | ||
! colspan="2" | Turn time (seconds) | ! colspan="2" | Turn time (seconds) | ||
| Line 46: | Line 46: | ||
! RB | ! RB | ||
|- | |- | ||
| − | | | + | |394||378|| {{Specs|ceiling}} ||33.6|| 35.0 ||7.9||5.3||877 |
|- | |- | ||
|} | |} | ||
| Line 61: | Line 61: | ||
! Arrestor gear | ! Arrestor gear | ||
|- | |- | ||
| − | | | + | | ✓ || ✓ || ✓ || X || X <!-- ✓ --> |
|- | |- | ||
|} | |} | ||
| Line 77: | Line 77: | ||
! - | ! - | ||
|- | |- | ||
| − | | {{Specs|разрушение|конструкции}} || {{Specs|разрушение|шасси}} || | + | | {{Specs|разрушение|конструкции}} || {{Specs|разрушение|шасси}} || 400 || ~2 || ~2 |
|- | |- | ||
|} | |} | ||
| Line 90: | Line 90: | ||
! Radiator<br>(km/h) | ! Radiator<br>(km/h) | ||
|- | |- | ||
| − | | < | + | | < 290 || < 290 || < 320 || > 280 |
|- | |- | ||
|} | |} | ||
| Line 104: | Line 104: | ||
! WEP Engine power | ! WEP Engine power | ||
|- | |- | ||
| − | | | + | | 1,448 m || 1,630 hp || 1,969 hp |
|- | |- | ||
| − | + | ! colspan="3" | Setting 2 | |
|- | |- | ||
! Optimal altitude | ! Optimal altitude | ||
| Line 112: | Line 112: | ||
! WEP Engine power | ! WEP Engine power | ||
|- | |- | ||
| − | | | + | | 4,696 m || 1,500 hp || 1,812 hp |
|- | |- | ||
| − | ! colspan="3" | Setting 3 | + | <!--! colspan="3" | Setting 3 |
|- | |- | ||
! Optimal altitude | ! Optimal altitude | ||
| Line 126: | Line 126: | ||
=== Survivability and armour === | === Survivability and armour === | ||
<!--''Examine the survivability of the aircraft. Note how vulnerable the structure is and how secure the pilot is, whether the fuel tanks are armoured. Describe the armour, if there is any, also mention the vulnerability of other critical aircraft systems.''--> | <!--''Examine the survivability of the aircraft. Note how vulnerable the structure is and how secure the pilot is, whether the fuel tanks are armoured. Describe the armour, if there is any, also mention the vulnerability of other critical aircraft systems.''--> | ||
| + | |||
* No armour plating | * No armour plating | ||
* No armour glazing | * No armour glazing | ||
| − | * Critical components located | + | * Critical components located in the wings of aircraft (fuel, engine, controls) |
| − | |||
== Armaments == | == Armaments == | ||
| − | === Offensive armament === | + | <!--=== Offensive armament === |
| − | + | ''Describe the offensive armament of the aircraft, if any. Describe how effective the cannons and machine guns are in a battle, and also what belts or drums are better to use. If there is no offensive weaponry, delete this subsection.'' | |
{{main|MAC 1934 (7.5 mm)}} | {{main|MAC 1934 (7.5 mm)}} | ||
| Line 140: | Line 140: | ||
* 4 x 7.5 mm [[MAC 1934 (7.5 mm)|MAC 1934]] machine guns (300 rpg = 1,200 total) | * 4 x 7.5 mm [[MAC 1934 (7.5 mm)|MAC 1934]] machine guns (300 rpg = 1,200 total) | ||
--> | --> | ||
| − | + | === Suspended armament === | |
| − | ''Describe the aircraft's suspended armament: additional cannons under the wings, bombs, rockets and torpedoes. This section is especially important for bombers and attackers. If there is no suspended weaponry remove this subsection.''--> | + | <!--''Describe the aircraft's suspended armament: additional cannons under the wings, bombs, rockets and torpedoes. This section is especially important for bombers and attackers. If there is no suspended weaponry remove this subsection.''--> |
| − | + | {{main|:Category:Suspended armaments|l1=Suspended armaments}} | |
| − | + | ||
| + | The '''''{{PAGENAME}}''''' can be outfitted with the following ordinance" | ||
| + | |||
| + | * 10 x G.P. 250 lb Mk.IV bombs | ||
| + | * 18 x G.P. 250 lb Mk.IV bombs | ||
| + | * 9 x G.P. 500 lb Mk.IV bombs | ||
| + | * 6 x G.P. 250 lb Mk.IV bombs + 2 x 1,000 lb AN-M65A1 bombs | ||
| + | * 2 x 18 inch Mark XII torpedoes | ||
| + | * 1 x H.C. 4,000 lb Mk.II bomb | ||
| + | |||
=== Defensive armament === | === Defensive armament === | ||
| − | ''Defensive armament with turret machine guns or cannons, crewed by gunners. Examine the number of gunners and what belts or drums are better to use. If defensive weaponry is not available | + | <!--''Defensive armament with turret machine guns or cannons, crewed by gunners. Examine the number of gunners and what belts or drums are better to use. If defensive weaponry is not available remove this subsection.''--> |
| − | --> | + | |
| + | {{main|Browning .303 (7.7 mm)|Vickers K (7.7 mm)}} | ||
| + | |||
| + | The '''''{{PAGENAME}}''''' is defended by: | ||
| + | |||
| + | * x 7.7 mm Browning machine gun, nose turret (1,200 RPG = 2,400 total) | ||
| + | * 2 x 7.7 mm Browning machine gun, tail turret (2,000 RPG = 4,000 total) | ||
| + | * 1 x 7.7 mm Vickers K machine gun, 2 x beam turret (2,500 RPG = 5,000 total) | ||
| + | |||
== Usage in the battles == | == Usage in the battles == | ||
<!--''Describe the tactics of playing in an aircraft, the features of using vehicles in a team and advice on tactics. Refrain from creating a "guide" - do not impose a single point of view but give the reader food for thought. Examine the most dangerous enemies and give recommendations on fighting them. If necessary, note the specifics of the game in different modes (AB, RB, SB).''--> | <!--''Describe the tactics of playing in an aircraft, the features of using vehicles in a team and advice on tactics. Refrain from creating a "guide" - do not impose a single point of view but give the reader food for thought. Examine the most dangerous enemies and give recommendations on fighting them. If necessary, note the specifics of the game in different modes (AB, RB, SB).''--> | ||
| + | Wellingtons are great Rank 2 turret platforms, wide arcs and stable flight, and except for engine fire are rugged. If your flight controls are shot out, adjustment of engine power will allow stable flight and more opportunities to fight back. Just remember it has only .303 (7mm) mg’s so it is more luck to earn kill with them. | ||
| + | |||
| + | As with all bomber, crew training with at least “Expert Qualification” is important for profitable missions. | ||
| + | |||
| + | Both the UK Wellington and German Mk I’s ("Jelly Well") are identical, the only difference being the UK Mk.1c/Late model was move beam (side) turrets from above the wing to behind it. | ||
| + | |||
| + | ==== Tactics ==== | ||
| + | In AB the winning tactic is to climb high and do base bombing with 500’s “from orbit”; it helps to have escorts. | ||
| + | |||
| + | In RB you air start so you have the advantage to trade altitude for airspeed and bomb ground targets and retreat before ground starting enemy fighters arrive, however be close to friendlies to intercept chasers. | ||
| + | |||
| + | ==== Counter-tactics ==== | ||
| + | If you are attacking a Wellington, focus on its engines, they are relatively easy to set on fire. While you should not worry too much about the turret, do not hang around either, as an attack from dead 6 is still dangerous. | ||
===Manual Engine Control=== | ===Manual Engine Control=== | ||
| Line 165: | Line 195: | ||
! Type | ! Type | ||
|- | |- | ||
| − | | | + | | Not controllable || rowspan="2" | Controllable || rowspan="2" | Not controllable || rowspan="2" | Controllable || rowspan="2" | Combined || rowspan="2" | Controllable || rowspan="2" | Not controllable |
|- | |- | ||
|} | |} | ||
| Line 171: | Line 201: | ||
===Modules=== | ===Modules=== | ||
{| class="wikitable" | {| class="wikitable" | ||
| − | !colspan = "1"| Tier | + | ! colspan="1" | Tier |
| − | !colspan = "2"| Flight performance | + | ! colspan="2" | Flight performance |
| − | !colspan = "1"| Survivability | + | ! colspan="1" | Survivability |
| − | !colspan = "2"| Weaponry | + | ! colspan="2" | Weaponry |
|- | |- | ||
| I | | I | ||
| Line 201: | Line 231: | ||
|- | |- | ||
|} | |} | ||
| + | The default bomb load is a meagre 10x 250lb (117 kg) so upgrading to 18x 250 or 9x 500 “pounders” (500lb (226 kg) should be task number one. in order: Unlock the Turret 7mm ammo first, then the TC mk.I (torpedo) rack, and then the LBC mk.I. Unlocking the 7mm ammo access “Universal” AP-I load as one works up to the bomb rack for 18x 250 or 9x 500. After that you can pursue your choice of upgrades. | ||
| + | |||
| + | Upgrades to the turret should also be considered. The different belts do not have a considerable effect, but the upgraded turrets allow for a longer rate of fire. Very important for the small rifle calibre machine guns. | ||
| + | |||
| + | However, speed and climb rate is also a necessity and the unlocks help the sluggish Wellington a lot. The decision should depend on the pilots flying style. When rushing in better armament will help in the retreat, but the better performance will aid even more to get to friendly zones. | ||
| + | |||
| + | The sneaky approach on the other hand relies less on speed, but on surviving the random combat encounters. Turret upgrades are here the way to go. | ||
=== Pros and cons === | === Pros and cons === | ||
| Line 206: | Line 243: | ||
'''Pros:''' | '''Pros:''' | ||
| − | * | + | * Excellent payload - 4,500lbs at max. |
| + | * Versatile payload options. | ||
| + | * Devastating to enemy bases/airfields when faces no opposition. | ||
| + | * Excellent turret coverage. | ||
| + | * Very powerful torpedoes, two are enough to sink an aircraft carrier. | ||
| + | * Access to the devastating 4000 lb bomb. | ||
| + | * The aircraft can take a beating thanks to the cross hatched air frame. | ||
'''Cons:''' | '''Cons:''' | ||
| − | * | + | * Defensive turrets are easy to take out. |
| + | * Defensive armament is poor. | ||
| + | * Extremely slow all-around mobility. | ||
| + | * Easy prey for high altitude fighters/try to get near 6000m where very little opposition is found. | ||
| + | * Having a fighter with good weaponry on your six usually means death. | ||
| + | * The crew cannot take a beating thanks to there being no armour. The cockpit is particularly vulnerable. | ||
== History == | == History == | ||
| − | + | <!-- Describe the history of the creation and combat usage of the aircraft in more detail than in the introduction. If the historical reference turns out to be too big, take it to a separate article, taking a link to an article about the vehicle and adding a block "/ historical reference" (example: https://wiki.warthunder.com/Name-vehicles/historical reference) and add a link to it here using the main template. Be sure to include links to sources at the end of the article. --> | |
| + | Performance wise the Willington was not notably remarkable, its strength lay on the inside. Devised by one of the greatest innovative thinkers in history, Sir Barnes Neville Wallis devised a geodesic (geodetic) structure resulting in an exceptionally strong airframe. Together with Reginald Kirshaw "Rex" Pierson they designed their record making “Vickers Wellesley” opening the way for the “Wellington” and larger “Warwick”. With high aspect ratio wing and spacious fuselage it proved capable of handling a myriad of missions including early airborne radar and robust enough enough to absorb severe damage and fly home. Although the bomb bay configuration limited bomb size its payload was slightly more than the Heinkel He-111H-3 and with greater range. It is also one of the first aircraft to have a powered turret in the extreme tail with a very wide arc; however it still was inadequate to defend itself against attacking fighters and early models lacked self sealing fuel tanks. Still, this aircraft was admired by crews and affectionately called “Wimpy” after Popeye’s hamburger loving friend and sidekick who's full name is J. Wellington Wimpy. Over 11,000 made it equipped many RAF squadrons including those comprised of foreign crews like the Polish (4 squadrons), New Zealand (No. 75), and Czech (No, 311) one of which was captured by Germans who used it for intelligence and training. “Viking”, a passenger transport variant, became the world's first pure jet transport prototype aircraft in 1948. | ||
== Media == | == Media == | ||
| Line 219: | Line 268: | ||
== Read also == | == Read also == | ||
''Links to the articles on the War Thunder Wiki that you think will be useful for the reader, for example,'' | ''Links to the articles on the War Thunder Wiki that you think will be useful for the reader, for example,'' | ||
| + | |||
* ''reference to the series of the aircraft;'' | * ''reference to the series of the aircraft;'' | ||
* ''links to approximate analogues of other nations and research trees.'' | * ''links to approximate analogues of other nations and research trees.'' | ||
| Line 225: | Line 275: | ||
== Sources == | == Sources == | ||
''Paste links to sources and external resources, such as:'' | ''Paste links to sources and external resources, such as:'' | ||
| + | |||
* ''topic on the official game forum;'' | * ''topic on the official game forum;'' | ||
* ''page on aircraft encyclopedia;'' | * ''page on aircraft encyclopedia;'' | ||
Revision as of 18:33, 10 February 2019
Contents
| This page is about the aircraft Wellington Mk Ic. For other uses, see Wellington (Disambiguation) |
Description

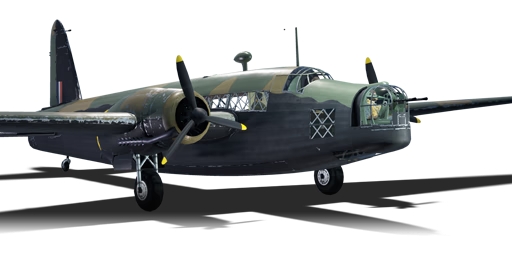
The Wellington Mk Ic is a Rank II British bomber
with a battle rating of 2.0 (AB), 2.3 (RB), and 2.7 (SB). This aircraft has been in the game since the start of the Open Beta Test prior to Update 1.29.
General info
Flight Performance
| Characteristics | |||||||
|---|---|---|---|---|---|---|---|
| Stock | |||||||
| Max Speed (km/h at 4,572 m) |
Max altitude (meters) |
Turn time (seconds) |
Rate of climb (meters/second) |
Take-off run (meters) | |||
| AB | RB | AB | RB | AB | RB | ||
| 361 | 352 | 6500 | 36.5 | 37.2 | 4.1 | 4.1 | 877 |
| Upgraded | |||||||
| Max Speed (km/h at 4,572 m) |
Max altitude (meters) | Turn time (seconds) | Rate of climb (meters/second) |
Take-off run (meters) | |||
| AB | RB | AB | RB | AB | RB | ||
| 394 | 378 | 6500 | 33.6 | 35.0 | 7.9 | 5.3 | 877 |
Details
| Features | ||||
|---|---|---|---|---|
| Combat flap | Take-off flap | Landing flap | Air brakes | Arrestor gear |
| ✓ | ✓ | ✓ | X | X |
| Limits | ||||
|---|---|---|---|---|
| Wing-break speed (km/h) |
Gear limit (km/h) |
Combat flap (km/h) |
Max Static G | |
| + | - | |||
| 530 | 264 | 400 | ~2 | ~2 |
| Optimal velocities | |||
|---|---|---|---|
| Ailerons (km/h) |
Rudder (km/h) |
Elevators (km/h) |
Radiator (km/h) |
| < 290 | < 290 | < 320 | > 280 |
| Compressor (RB/SB) | ||
|---|---|---|
| Setting 1 | ||
| Optimal altitude | 100% Engine power | WEP Engine power |
| 1,448 m | 1,630 hp | 1,969 hp |
| Setting 2 | ||
| Optimal altitude | 100% Engine power | WEP Engine power |
| 4,696 m | 1,500 hp | 1,812 hp |
Survivability and armour
- No armour plating
- No armour glazing
- Critical components located in the wings of aircraft (fuel, engine, controls)
Armaments
Suspended armament
The Wellington Mk Ic can be outfitted with the following ordinance"
- 10 x G.P. 250 lb Mk.IV bombs
- 18 x G.P. 250 lb Mk.IV bombs
- 9 x G.P. 500 lb Mk.IV bombs
- 6 x G.P. 250 lb Mk.IV bombs + 2 x 1,000 lb AN-M65A1 bombs
- 2 x 18 inch Mark XII torpedoes
- 1 x H.C. 4,000 lb Mk.II bomb
Defensive armament
The Wellington Mk Ic is defended by:
- x 7.7 mm Browning machine gun, nose turret (1,200 RPG = 2,400 total)
- 2 x 7.7 mm Browning machine gun, tail turret (2,000 RPG = 4,000 total)
- 1 x 7.7 mm Vickers K machine gun, 2 x beam turret (2,500 RPG = 5,000 total)
Usage in the battles
Wellingtons are great Rank 2 turret platforms, wide arcs and stable flight, and except for engine fire are rugged. If your flight controls are shot out, adjustment of engine power will allow stable flight and more opportunities to fight back. Just remember it has only .303 (7mm) mg’s so it is more luck to earn kill with them.
As with all bomber, crew training with at least “Expert Qualification” is important for profitable missions.
Both the UK Wellington and German Mk I’s ("Jelly Well") are identical, the only difference being the UK Mk.1c/Late model was move beam (side) turrets from above the wing to behind it.
Tactics
In AB the winning tactic is to climb high and do base bombing with 500’s “from orbit”; it helps to have escorts.
In RB you air start so you have the advantage to trade altitude for airspeed and bomb ground targets and retreat before ground starting enemy fighters arrive, however be close to friendlies to intercept chasers.
Counter-tactics
If you are attacking a Wellington, focus on its engines, they are relatively easy to set on fire. While you should not worry too much about the turret, do not hang around either, as an attack from dead 6 is still dangerous.
Manual Engine Control
| MEC elements | ||||||
|---|---|---|---|---|---|---|
| Mixer | Pitch | Radiator | Supercharger | Turbocharger | ||
| Oil | Water | Type | ||||
| Not controllable | Controllable | Not controllable | Controllable | Combined | Controllable | Not controllable |
Modules
| Tier | Flight performance | Survivability | Weaponry | ||
|---|---|---|---|---|---|
| I | Fuselage Repair | Radiator | |||
| II | Compressor | Airframe | |||
| III | Wings Repair | Engine | |||
| IV | Engine Injection | Cover | |||
The default bomb load is a meagre 10x 250lb (117 kg) so upgrading to 18x 250 or 9x 500 “pounders” (500lb (226 kg) should be task number one. in order: Unlock the Turret 7mm ammo first, then the TC mk.I (torpedo) rack, and then the LBC mk.I. Unlocking the 7mm ammo access “Universal” AP-I load as one works up to the bomb rack for 18x 250 or 9x 500. After that you can pursue your choice of upgrades.
Upgrades to the turret should also be considered. The different belts do not have a considerable effect, but the upgraded turrets allow for a longer rate of fire. Very important for the small rifle calibre machine guns.
However, speed and climb rate is also a necessity and the unlocks help the sluggish Wellington a lot. The decision should depend on the pilots flying style. When rushing in better armament will help in the retreat, but the better performance will aid even more to get to friendly zones.
The sneaky approach on the other hand relies less on speed, but on surviving the random combat encounters. Turret upgrades are here the way to go.
Pros and cons
Pros:
- Excellent payload - 4,500lbs at max.
- Versatile payload options.
- Devastating to enemy bases/airfields when faces no opposition.
- Excellent turret coverage.
- Very powerful torpedoes, two are enough to sink an aircraft carrier.
- Access to the devastating 4000 lb bomb.
- The aircraft can take a beating thanks to the cross hatched air frame.
Cons:
- Defensive turrets are easy to take out.
- Defensive armament is poor.
- Extremely slow all-around mobility.
- Easy prey for high altitude fighters/try to get near 6000m where very little opposition is found.
- Having a fighter with good weaponry on your six usually means death.
- The crew cannot take a beating thanks to there being no armour. The cockpit is particularly vulnerable.
History
Performance wise the Willington was not notably remarkable, its strength lay on the inside. Devised by one of the greatest innovative thinkers in history, Sir Barnes Neville Wallis devised a geodesic (geodetic) structure resulting in an exceptionally strong airframe. Together with Reginald Kirshaw "Rex" Pierson they designed their record making “Vickers Wellesley” opening the way for the “Wellington” and larger “Warwick”. With high aspect ratio wing and spacious fuselage it proved capable of handling a myriad of missions including early airborne radar and robust enough enough to absorb severe damage and fly home. Although the bomb bay configuration limited bomb size its payload was slightly more than the Heinkel He-111H-3 and with greater range. It is also one of the first aircraft to have a powered turret in the extreme tail with a very wide arc; however it still was inadequate to defend itself against attacking fighters and early models lacked self sealing fuel tanks. Still, this aircraft was admired by crews and affectionately called “Wimpy” after Popeye’s hamburger loving friend and sidekick who's full name is J. Wellington Wimpy. Over 11,000 made it equipped many RAF squadrons including those comprised of foreign crews like the Polish (4 squadrons), New Zealand (No. 75), and Czech (No, 311) one of which was captured by Germans who used it for intelligence and training. “Viking”, a passenger transport variant, became the world's first pure jet transport prototype aircraft in 1948.
Media
An excellent addition to the article will be video guides, as well as screenshots from the game and photos.
Read also
Links to the articles on the War Thunder Wiki that you think will be useful for the reader, for example,
- reference to the series of the aircraft;
- links to approximate analogues of other nations and research trees.
Sources
Paste links to sources and external resources, such as:
- topic on the official game forum;
- page on aircraft encyclopedia;
- other literature.
| Britain bombers | |
|---|---|
| Torpedo | Swordfish Mk I · Swordfish Mk II · ▄Avenger Mk II |
| Dive | V-156-B1 |
| Hydroplanes | ▄Catalina Mk IIIa · Sunderland Mk IIIa · Sunderland Mk V |
| Light | Blenheim Mk IV · Beaufort Mk VIII · ▄Hudson Mk V · Brigand B 1 |
| Based on A20 | ▄Havoc Mk I · ▄Boston Mk I · ▄DB-7 |
| Hampden | Hampden Mk I · Hampden TB Mk I |
| Wellington | Wellington Mk Ic · Wellington Mk Ic/L · Wellington Mk III · Wellington Mk X |
| Halifax | Halifax B Mk IIIa |
| Stirling | Stirling B Mk I · Stirling B Mk III |
| Lancaster | Lancaster B Mk I · Lancaster B Mk III |
| Lincoln | Lincoln B Mk II |
| Shackleton | Shackleton MR.Mk.2 |
