Difference between revisions of "Type 90"
m (→Survivability and armour: ~removed grammar error) (Tag: Visual edit) |
|||
| (6 intermediate revisions by 3 users not shown) | |||
| Line 2: | Line 2: | ||
== Description == | == Description == | ||
| − | ''In the description, the first part needs to be about the history of the creation and combat usage of the vehicle, as well as its key features. In the second part, tell the reader about the ground vehicle in the game. Insert the screenshot of the vehicle. If the novice player does not remember the vehicle by name, they will immediately understand what kind of vehicle it is talking about.'' | + | <!--''In the description, the first part needs to be about the history of the creation and combat usage of the vehicle, as well as its key features. In the second part, tell the reader about the ground vehicle in the game. Insert the screenshot of the vehicle. If the novice player does not remember the vehicle by name, they will immediately understand what kind of vehicle it is talking about.''--> |
| + | [[File:GarageImage_{{PAGENAME}}.jpg|420px|thumb|left]] | ||
| + | {{Break}} | ||
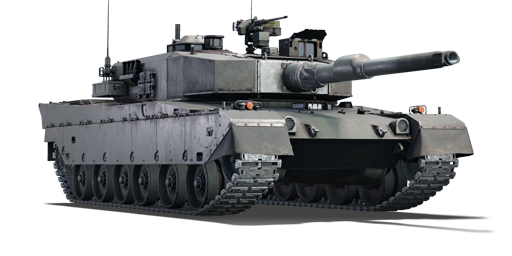
| + | The '''{{Specs|name}}''' is a Rank {{Specs|rank}} Japanese medium tank {{Battle-rating}}. It was introduced in [[Update 1.79 "Project X"]]. | ||
== General info == | == General info == | ||
=== Survivability and armour === | === Survivability and armour === | ||
| − | + | <!--Describe armour protection. Note the most well protected and key weak areas. Appreciate the layout of modules as well as the number and location of crew members. Is the level of armour protection sufficient, is the placement of modules helpful for survival in combat? | |
| − | + | If necessary use a visual template to indicate the most secure and weak zones of the armour.--> | |
| + | |||
| + | The Type 90, although similar in design to the Leopard 2A4, does not boast the same superb survivability. Due to the three man crew, it is in your best interests to avoid getting hit if at all. Since there are more weak spots than areas that are protected, you only need to keep in mind that the sides of the frontal turret will block most shots if angled at 10 degrees. The turret ring is very vulnerable, susceptible to penetration by 30mm AP or APDS rounds and gives way to both commander and gunner. | ||
=== Mobility === | === Mobility === | ||
| Line 15: | Line 20: | ||
== Armaments == | == Armaments == | ||
=== Main armament === | === Main armament === | ||
| − | ''Give the reader information about the characteristics of the main gun. Assess its effectiveness in a battle based on the reloading speed, ballistics and the power of shells. Do not forget about the | + | <!--''Give the reader information about the characteristics of the main gun. Assess its effectiveness in a battle based on the reloading speed, ballistics and the power of shells. Do not forget about the flexibility of the fire, that is how quickly the cannon can be aimed at the target, open fire on it and aim at another enemy. Add a link to the main article on the gun: <code><nowiki>{{main|Name of the weapon}}</nowiki></code>. Describe in general terms the ammunition available for the main gun. Give advice on how to use them and how to fill the ammunition storage.''--> |
| + | {{main|Type 90 (120 mm)|l1=Type 90 L/44 (120 mm)}} | ||
| + | |||
| + | {| class="wikitable" style="text-align:center" | ||
| + | |- | ||
| + | ! colspan="6" | [[Type 90 (120 mm)|120 mm Type 90 L/44]] | ||
| + | |- | ||
| + | ! colspan="3" rowspan="1" style="width:5em" |Capacity | ||
| + | ! rowspan="1" | Vertical <br> guidance | ||
| + | ! rowspan="1" | Horizontal <br> guidance | ||
| + | ! rowspan="1" | Stabilizer | ||
| + | |- | ||
| + | | colspan="3" | 42 || -7°/+10° || ±180° || Two-plane | ||
| + | |- | ||
| + | ! colspan="6" | Turret rotation speed (°/s) | ||
| + | |- | ||
| + | ! style="width:4em" |Mode | ||
| + | ! style="width:4em" |Stock | ||
| + | ! style="width:4em" |Upgraded | ||
| + | ! style="width:4em" |Prior + Full crew | ||
| + | ! style="width:4em" |Prior + Expert qualif. | ||
| + | ! style="width:4em" |Prior + Ace qualif. | ||
| + | |- | ||
| + | | ''Arcade'' || 28.6 || __.__ || __.__ || __.__ || __.__ | ||
| + | |- | ||
| + | | ''Realistic'' || 17.9 || __.__ || __.__ || __.__ || __.__ | ||
| + | |- | ||
| + | ! colspan="4" | Reloading rate (seconds) | ||
| + | |- | ||
| + | ! colspan="1" style="width:4em" |Stock | ||
| + | ! colspan="1" style="width:4em" |Prior + Full crew | ||
| + | ! colspan="1" style="width:4em" |Prior + Expert qualif. | ||
| + | ! colspan="1" style="width:4em" |Prior + Ace qualif. | ||
| + | |- | ||
| + | | 5.00 || 5.00 || 5.00 || 5.00 | ||
| + | |- | ||
| + | |} | ||
| + | |||
| + | ===== Ammunition ===== | ||
| + | {| class="wikitable sortable" style="text-align:center" width="100%" | ||
| + | ! colspan="8" | Penetration statistics | ||
| + | |- | ||
| + | ! rowspan="2" data-sort-type="text" | Ammunition | ||
| + | ! rowspan="2" class="unsortable" | Type of <br /> warhead | ||
| + | ! colspan="6" | '''Penetration''' '''''in mm''''' '''@ 0° Angle of Attack''' | ||
| + | |- | ||
| + | ! 10m | ||
| + | ! 100m | ||
| + | ! 500m | ||
| + | ! 1000m | ||
| + | ! 1500m | ||
| + | ! 2000m | ||
| + | |- | ||
| + | | JM33 || APFSDS || 540 || 530 || 520 || 500 || 480 || 460 | ||
| + | |- | ||
| + | | JM12A1 || HEATFS || 650 || 650 || 650 || 650 || 650 || 650 | ||
| + | |- | ||
| + | |} | ||
| + | {| class="wikitable sortable" style="text-align:center" width="100%" | ||
| + | ! colspan="11" | Shell details | ||
| + | |- | ||
| + | ! rowspan="2" data-sort-type="text" | Ammunition | ||
| + | ! rowspan="2" class="unsortable" | Type of <br /> warhead | ||
| + | ! rowspan="2" |Velocity <br /> in m/s | ||
| + | ! rowspan="2" |Projectile<br />Mass in kg | ||
| + | ! rowspan="2" | ''Fuse delay'' | ||
| + | ''in m:'' | ||
| + | ! rowspan="2" | ''Fuse sensitivity'' | ||
| + | ''in mm:'' | ||
| + | ! rowspan="2" | ''Explosive Mass in g<br /> (TNT equivalent):'' | ||
| + | ! rowspan="2" | ''Normalization At 30° <br> from horizontal:'' | ||
| + | ! colspan="3" | ''Ricochet:'' | ||
| + | |- | ||
| + | ! 0% | ||
| + | ! 50% | ||
| + | ! 100% | ||
| + | |- | ||
| + | | JM33 || APFSDS || 1,640 || 4.3 || N/A || N/A || N/A || ° || 78° || 80° || 81° | ||
| + | |- | ||
| + | | JM12A1 || HEATFS || 1,140 || 13.5 || 0.0 || 0.1 || 1,640 || ° || 65° || 72° || 75° | ||
| + | |- | ||
| + | |} | ||
| − | === | + | ===== [[Ammo racks|Ammo racks]] ===== |
| − | '' | + | {| class="wikitable sortable" style="text-align:center" |
| + | |- | ||
| + | ! class="wikitable unsortable" |Full<br /> ammo | ||
| + | ! class="wikitable unsortable" |1st<br /> rack empty | ||
| + | ! class="wikitable unsortable" |2nd<br /> rack empty | ||
| + | ! class="wikitable unsortable" |3rd<br /> rack empty | ||
| + | ! class="wikitable unsortable" |4th<br /> rack empty | ||
| + | ! class="wikitable unsortable" |5th<br /> rack empty | ||
| + | ! class="wikitable unsortable" |6th<br /> rack empty | ||
| + | ! class="wikitable unsortable" width="10%" |Recommendations | ||
| + | ! class="wikitable unsortable" |Visual<br /> discrepancy | ||
| + | |- | ||
| + | || '''42''' || XX ''(X+)'' || ''(+)'' || ''(+)'' || ''(+)'' || ''(+)'' || ''(+)'' || style="text-align:left" | Hull empty: (18) || style="text-align:left" | no | ||
| + | |- | ||
| + | |} | ||
=== Machine guns === | === Machine guns === | ||
| − | ''Offensive and anti-aircraft machine guns not only allow you to fight some aircraft, but also are effective against lightly armoured vehicles. Evaluate machine guns and give recommendations on its use.'' | + | <!--''Offensive and anti-aircraft machine guns not only allow you to fight some aircraft, but also are effective against lightly armoured vehicles. Evaluate machine guns and give recommendations on its use.''--> |
| + | {{main|Browning M2HB (12.7 mm)|Type 74 (7.62 mm)}} | ||
| − | == Usage in | + | {| class="wikitable" style="text-align:center" |
| − | + | |- | |
| + | ! colspan="7" | [[Browning M2HB (12.7 mm)|12.7 mm M2HB]] | ||
| + | |- | ||
| + | ! colspan="7" | ''Pintle mount'' | ||
| + | |- | ||
| + | ! colspan="4" rowspan="1" style="width:5em" |Capacity (Belt capacity) | ||
| + | ! rowspan="1" | Fire rate <br> (shots/minute) | ||
| + | ! rowspan="1" | Vertical <br> guidance | ||
| + | ! rowspan="1" | Horizontal <br> guidance | ||
| + | |- | ||
| + | | colspan="4" | 1,000 (200) || 577 || -8°/+40° || ±120° | ||
| + | |- | ||
| + | |} | ||
| + | {| class="wikitable" style="text-align:center" | ||
| + | |- | ||
| + | ! colspan="7" | [[Type 74 (7.62 mm)|7.62 mm Type 74]] | ||
| + | |- | ||
| + | ! colspan="7" | ''Coaxial mount'' | ||
| + | |- | ||
| + | ! colspan="4" rowspan="1" style="width:5em" |Capacity (Belt capacity) | ||
| + | ! rowspan="1" | Fire rate <br> (shots/minute) | ||
| + | ! rowspan="1" | Vertical <br> guidance | ||
| + | ! rowspan="1" | Horizontal <br> guidance | ||
| + | |- | ||
| + | | colspan="4" | 4,500 (250) || 500 || N/A || N/A | ||
| + | |- | ||
| + | |} | ||
| + | |||
| + | == Usage in battles == | ||
| + | <!--Describe the tactics of playing in the vehicle, the features of using vehicles in the team and advice on tactics. Refrain from creating a "guide" - do not impose a single point of view but give the reader food for thought. Describe the most dangerous enemies and give recommendations on fighting them. If necessary, note the specifics of the game in different modes (AB, RB, SB).--> | ||
| + | |||
| + | In realistic battles, the Type 90 continues the traditional Japanese roles of fire support, sniping, and flanking. You can use this vehicle to rush down the center of the map with its speed allowing it to quickly engage and disengage enemies, negating the downsides of the subpar armor by simply not being hit. With a five second reload time for the cannon, and a high-penetration round, it should only take 5-15 seconds to finish of an enemy tank. Through utilizing the terrain by using suspension to hide the chassis when peeking, and angling armor in a way to force enemies to hit your armored turret, the Type 90 can be a very powerful glass cannon in a battle. | ||
| + | |||
| + | ===Modules=== | ||
| + | {| class="wikitable" | ||
| + | ! Tier | ||
| + | ! colspan="2" |Mobility | ||
| + | ! Protection | ||
| + | ! colspan="3" |Firepower | ||
| + | |- | ||
| + | | I | ||
| + | | Tracks|| | ||
| + | | Parts | ||
| + | | Horizontal Drive|||| | ||
| + | |- | ||
| + | | II | ||
| + | | Suspension||Brake System | ||
| + | | FPE | ||
| + | | Adjustment of Fire|||| | ||
| + | |- | ||
| + | | III | ||
| + | | Filters|| | ||
| + | | Crew Replenishment | ||
| + | | Elevation mechanism||Smoke grenade|| | ||
| + | |- | ||
| + | | IV | ||
| + | | Transmission||Engine | ||
| + | | | ||
| + | | Artillery Support||JM33||Laser rangefinder | ||
| + | |- | ||
| + | |} | ||
=== Pros and cons === | === Pros and cons === | ||
| − | ''Summarize and briefly evaluate the vehicle in terms of its characteristics and combat effectiveness. Mark its pros and cons in a bulleted list. | + | <!--''Summarize and briefly evaluate the vehicle in terms of its characteristics and combat effectiveness. Mark its pros and cons in a bulleted list. Try not to use more than 6 points for each of the characteristics. Avoid using categorical definitions such as "bad", "good" and the like - they have a substitution in the form of softer "inadequate", "effective".''--> |
| + | '''Pros:''' | ||
| − | + | *Really good composite armour | |
| − | * | + | *Best APFSDS shell in the entire game, able to penetrate all tanks from far range |
| + | *5 second autoloader and best reload speed combined with the best shell in the perfect turret | ||
| + | *Great mobility | ||
| + | *Great acceleration for both forward and reverse speed | ||
| + | *A bit smaller than the [[Leopard 2A4]], giving it a lower profile | ||
'''Cons:''' | '''Cons:''' | ||
| − | * | + | |
| + | *Lacks composite armour on lower front armour plate, plus combined with the presence of shells in the front of the tank, a direct hit will quickly take it out | ||
| + | *[[Hydropneumatic suspension]] adjustment takes time and requires the tank to be stationary | ||
| + | *Lower general survivability than the Leopard 2A4 due to the crew of 3; one good hit and the tank is out | ||
== History == | == History == | ||
| − | ''Describe the history of the creation and combat usage of the ground vehicle in more detail than in the introduction. If the historical reference turns out to be too big, take it to a separate article, taking a link to an article about the vehicle and adding a block "/ | + | <!--''Describe the history of the creation and combat usage of the ground vehicle in more detail than in the introduction. If the historical reference turns out to be too big, take it to a separate article, taking a link to an article about the vehicle and adding a block "/ History" (example: <nowiki>https://wiki.warthunder.com/(Vehicle-name)/History</nowiki>) and add a link to it here using the <code>main</code> template. Be sure to reference text and sources by using <code><ref></code>, as well as adding them at the end of the article.''--> |
| + | Development of the Type 90 began almost immediately after the introduction of the Type 74 into service, with the Japanese High Command already looking for a superior replacement. A central aspect of the new machine would have to be the ability to take on and defeat the new Soviet T-72 main battle tank. With that in mind, Japanese engineers began working on a prototype design, which would see completion in 1980. Two prototypes of this initial design were built, tested and improved upon between 1980 - 1986. | ||
| + | |||
| + | Testing resumed in 1986 with a second batch of four prototype vehicles, featuring a number of improvements over the initial two. The most significant change included the replacement of a Japanese-made 120mm smoothbore gun with the established Rheinmetall 120 L/44, most notably used by the M1A1 Abrams and Leopard 2 at the time. The decision to change the gun from a domestic one to a licence-built alternative most likely came as a measure to reduce production costs. However, unlike the MBTs of western armies, the designers of the Type 90 opted to equip the tank with an autoloading mechanism, making it the only production vehicle that did so in combination with the Rh 120 cannon. Further testing and army trials of these prototypes was conducted during the late 80s before the Japanese army formally introduced the tank into service in 1990 as the Type 90. Production of the Type 90 began in 1990 and continued until 2009, with 341 vehicles made. | ||
| + | |||
| + | ''- From [https://warthunder.com/en/news/5499-development-type-90-the-lightweight-heavy-hitter-en Devblog]'' | ||
== Media == | == Media == | ||
| − | ''An excellent addition to the article will be video guides, as well as screenshots from the game and photos.'' | + | <!--''An excellent addition to the article will be video guides, as well as screenshots from the game and photos.''--> |
| + | [https://live.warthunder.com/feed/camouflages/?vehicleCountry=japan&vehicleType=tank&vehicleClass=medium_tank&vehicle=jp_type_90 '''Skins''' and '''camouflages''' for the Type 90 from live.warthunder.com.] | ||
| + | |||
| + | == See also == | ||
| + | ''Links to the articles on the War Thunder Wiki that you think will be useful for the reader, for example:'' | ||
| − | |||
| − | |||
* ''reference to the series of the vehicles;'' | * ''reference to the series of the vehicles;'' | ||
* ''links to approximate analogues of other nations and research trees.'' | * ''links to approximate analogues of other nations and research trees.'' | ||
| − | |||
| − | == | + | == External links == |
| − | ''Paste links to sources and external resources, such as:'' | + | <!--''Paste links to sources and external resources, such as:'' |
* ''topic on the official game forum;'' | * ''topic on the official game forum;'' | ||
| − | * ''page on | + | * ''encyclopedia page on tank;'' |
| − | * ''other literature.'' | + | * ''other literature.''--> |
| + | |||
| + | * [https://warthunder.com/en/news/5499-development-type-90-the-lightweight-heavy-hitter-en [Devblog<nowiki>]</nowiki> Type 90: The Lightweight Heavy Hitter] | ||
| + | |||
| + | {{Japan medium tanks}} | ||
Revision as of 14:51, 10 April 2019
Contents
Description

The Type 90 is a Rank VII Japanese medium tank
with a battle rating of 11.0 (AB/RB/SB). It was introduced in Update 1.79 "Project X".
General info
Survivability and armour
The Type 90, although similar in design to the Leopard 2A4, does not boast the same superb survivability. Due to the three man crew, it is in your best interests to avoid getting hit if at all. Since there are more weak spots than areas that are protected, you only need to keep in mind that the sides of the frontal turret will block most shots if angled at 10 degrees. The turret ring is very vulnerable, susceptible to penetration by 30mm AP or APDS rounds and gives way to both commander and gunner.
Mobility
Write about the mobility of the ground vehicle. Estimate the specific power and maneuverability as well as the maximum speed forward and backward.
Armaments
Main armament
| 120 mm Type 90 L/44 | |||||
|---|---|---|---|---|---|
| Capacity | Vertical guidance |
Horizontal guidance |
Stabilizer | ||
| 42 | -7°/+10° | ±180° | Two-plane | ||
| Turret rotation speed (°/s) | |||||
| Mode | Stock | Upgraded | Prior + Full crew | Prior + Expert qualif. | Prior + Ace qualif. |
| Arcade | 28.6 | __.__ | __.__ | __.__ | __.__ |
| Realistic | 17.9 | __.__ | __.__ | __.__ | __.__ |
| Reloading rate (seconds) | |||||
| Stock | Prior + Full crew | Prior + Expert qualif. | Prior + Ace qualif. | ||
| 5.00 | 5.00 | 5.00 | 5.00 | ||
Ammunition
| Penetration statistics | |||||||
|---|---|---|---|---|---|---|---|
| Ammunition | Type of warhead |
Penetration in mm @ 0° Angle of Attack | |||||
| 10m | 100m | 500m | 1000m | 1500m | 2000m | ||
| JM33 | APFSDS | 540 | 530 | 520 | 500 | 480 | 460 |
| JM12A1 | HEATFS | 650 | 650 | 650 | 650 | 650 | 650 |
| Shell details | ||||||||||
|---|---|---|---|---|---|---|---|---|---|---|
| Ammunition | Type of warhead |
Velocity in m/s |
Projectile Mass in kg |
Fuse delay
in m: |
Fuse sensitivity
in mm: |
Explosive Mass in g (TNT equivalent): |
Normalization At 30° from horizontal: |
Ricochet: | ||
| 0% | 50% | 100% | ||||||||
| JM33 | APFSDS | 1,640 | 4.3 | N/A | N/A | N/A | ° | 78° | 80° | 81° |
| JM12A1 | HEATFS | 1,140 | 13.5 | 0.0 | 0.1 | 1,640 | ° | 65° | 72° | 75° |
Ammo racks
| Full ammo |
1st rack empty |
2nd rack empty |
3rd rack empty |
4th rack empty |
5th rack empty |
6th rack empty |
Recommendations | Visual discrepancy |
|---|---|---|---|---|---|---|---|---|
| 42 | XX (X+) | (+) | (+) | (+) | (+) | (+) | Hull empty: (18) | no |
Machine guns
| 12.7 mm M2HB | ||||||
|---|---|---|---|---|---|---|
| Pintle mount | ||||||
| Capacity (Belt capacity) | Fire rate (shots/minute) |
Vertical guidance |
Horizontal guidance | |||
| 1,000 (200) | 577 | -8°/+40° | ±120° | |||
| 7.62 mm Type 74 | ||||||
|---|---|---|---|---|---|---|
| Coaxial mount | ||||||
| Capacity (Belt capacity) | Fire rate (shots/minute) |
Vertical guidance |
Horizontal guidance | |||
| 4,500 (250) | 500 | N/A | N/A | |||
Usage in battles
In realistic battles, the Type 90 continues the traditional Japanese roles of fire support, sniping, and flanking. You can use this vehicle to rush down the center of the map with its speed allowing it to quickly engage and disengage enemies, negating the downsides of the subpar armor by simply not being hit. With a five second reload time for the cannon, and a high-penetration round, it should only take 5-15 seconds to finish of an enemy tank. Through utilizing the terrain by using suspension to hide the chassis when peeking, and angling armor in a way to force enemies to hit your armored turret, the Type 90 can be a very powerful glass cannon in a battle.
Modules
| Tier | Mobility | Protection | Firepower | |||
|---|---|---|---|---|---|---|
| I | Tracks | Parts | Horizontal Drive | |||
| II | Suspension | Brake System | FPE | Adjustment of Fire | ||
| III | Filters | Crew Replenishment | Elevation mechanism | Smoke grenade | ||
| IV | Transmission | Engine | Artillery Support | JM33 | Laser rangefinder | |
Pros and cons
Pros:
- Really good composite armour
- Best APFSDS shell in the entire game, able to penetrate all tanks from far range
- 5 second autoloader and best reload speed combined with the best shell in the perfect turret
- Great mobility
- Great acceleration for both forward and reverse speed
- A bit smaller than the Leopard 2A4, giving it a lower profile
Cons:
- Lacks composite armour on lower front armour plate, plus combined with the presence of shells in the front of the tank, a direct hit will quickly take it out
- Hydropneumatic suspension adjustment takes time and requires the tank to be stationary
- Lower general survivability than the Leopard 2A4 due to the crew of 3; one good hit and the tank is out
History
Development of the Type 90 began almost immediately after the introduction of the Type 74 into service, with the Japanese High Command already looking for a superior replacement. A central aspect of the new machine would have to be the ability to take on and defeat the new Soviet T-72 main battle tank. With that in mind, Japanese engineers began working on a prototype design, which would see completion in 1980. Two prototypes of this initial design were built, tested and improved upon between 1980 - 1986.
Testing resumed in 1986 with a second batch of four prototype vehicles, featuring a number of improvements over the initial two. The most significant change included the replacement of a Japanese-made 120mm smoothbore gun with the established Rheinmetall 120 L/44, most notably used by the M1A1 Abrams and Leopard 2 at the time. The decision to change the gun from a domestic one to a licence-built alternative most likely came as a measure to reduce production costs. However, unlike the MBTs of western armies, the designers of the Type 90 opted to equip the tank with an autoloading mechanism, making it the only production vehicle that did so in combination with the Rh 120 cannon. Further testing and army trials of these prototypes was conducted during the late 80s before the Japanese army formally introduced the tank into service in 1990 as the Type 90. Production of the Type 90 began in 1990 and continued until 2009, with 341 vehicles made.
- From Devblog
Media
Skins and camouflages for the Type 90 from live.warthunder.com.
See also
Links to the articles on the War Thunder Wiki that you think will be useful for the reader, for example:
- reference to the series of the vehicles;
- links to approximate analogues of other nations and research trees.
External links
| Japan medium tanks | |
|---|---|
| Type 97 | Chi-Ha · Chi-Ha Kai · Chi-Ha Kai TD · Chi-Ha Short Gun |
| Type 1 | Chi-He · Chi-He (5th Regiment) · Ho-I |
| Type 3 | Chi-Nu · Chi-Nu II |
| Type 4 | Chi-To · Chi-To Late |
| Type 5 | Chi-Ri II |
| Type 61 MBT | ST-A1* · ST-A2* · ST-A3* · Type 61 |
| Type 74 MBT | ST-B2* · Type 74 (C) · Type 74 (E) · Type 74 (F) · Type 74 (G) |
| Type 90 MBT | Type 90 · Type 90 (B) · Type 90 (B) "Fuji" |
| Type 10 MBT | TKX (P)* · TKX* · Type 10 |
| Other | Ka-Chi |
| USA | ▅M4A3 (76) W · ▅M47 |
| *Prototype | |
