Difference between revisions of "Conqueror"
(→Ammunition: Updated) |
bangerland (talk | contribs) (rewrote some text as it wasn't concrete enough i feel like. I can't sort the pro/con much, i don't really know what would be more or less important, it all seems equal.) |
||
| (16 intermediate revisions by 8 users not shown) | |||
| Line 1: | Line 1: | ||
{{Specs-Card | {{Specs-Card | ||
|code=uk_conqueror_mk_2 | |code=uk_conqueror_mk_2 | ||
| − | |images={{Specs-Card-Image|GarageImage_{{PAGENAME}}.jpg|GarageImage_{{PAGENAME}}_AddArmour.jpg}} | + | |images={{Specs-Card-Image|GarageImage_{{PAGENAME}}.jpg|GarageImage_{{PAGENAME}}_AddArmour.jpg|ArtImage_{{PAGENAME}}.png|ArtImage2_{{PAGENAME}}.png}} |
}} | }} | ||
== Description == | == Description == | ||
<!-- ''In the description, the first part should be about the history of the creation and combat usage of the vehicle, as well as its key features. In the second part, tell the reader about the ground vehicle in the game. Insert a screenshot of the vehicle, so that if the novice player does not remember the vehicle by name, he will immediately understand what kind of vehicle the article is talking about.'' --> | <!-- ''In the description, the first part should be about the history of the creation and combat usage of the vehicle, as well as its key features. In the second part, tell the reader about the ground vehicle in the game. Insert a screenshot of the vehicle, so that if the novice player does not remember the vehicle by name, he will immediately understand what kind of vehicle the article is talking about.'' --> | ||
| − | + | Following the reveal of the [[IS-3]] during the 1945 Victory Parade through Berlin, the British realised the need for a new heavily armed and heavily armoured tank. Plans were drawn to create a "Universal Tank" hull, which would then be able to mount a variety of different armaments to suit a range of roles. The heaviest of this set of planned vehicles was the '''Conqueror''', armed with a 120 mm gun inspired by and developed alongside that of the American [[M103]], designed to be able to face down any Soviet threats and provide long-range anti-tank support for the existing [[Centurion (Family)|Centurion]]. | |
| − | + | By 1950, the new hull and chassis were nearing completion, while the gun and turret were still under development. Thus, a project to mount the turret of the [[Centurion Mk 3]] was spawned, in order to ease the development process and train crews on the new hull, resulting in the [[Caernarvon]]. 1951 saw completion of the new gun and its acceptance into service, while the turret was still being finalised; plans for a stop-gap carriage for the new gun resulted in the Centurion hull-based [[Conway]]. Prototypes were complete by 1952, and the tank itself finally entered service in 1955, being sent immediately to armoured regiments stationed in West Germany. Both the Conqueror and Centurion were ultimately replaced by the [[Chieftain (Family)|Chieftain]] in 1966. | |
| − | + | Introduced in [[Update 1.55 "Royal Armour"]] along with the initial British ground tree, the Conqueror deviates from most earlier British designs, favouring firepower and armour. With an extremely powerful main cannon, solid armour protection, and surprising (but still rather lacking) manoeuvrability for such a heavy vehicle, the Conqueror proves to be a highly effective sniper and support tank, able to crack open heavily armoured targets from long ranges. Making use of its strong armour and gun stabiliser allows it to also be put to good use in close-range brawls, although the subpar mobility and long reload can limit the vehicle in this aspect. | |
== General info == | == General info == | ||
| Line 16: | Line 16: | ||
{{Specs-Tank-Armour}} | {{Specs-Tank-Armour}} | ||
<!-- ''Describe armour protection. Note the most well protected and key weak areas. Appreciate the layout of modules as well as the number and location of crew members. Is the level of armour protection sufficient, is the placement of modules helpful for survival in combat? If necessary use a visual template to indicate the most secure and weak zones of the armour.'' --> | <!-- ''Describe armour protection. Note the most well protected and key weak areas. Appreciate the layout of modules as well as the number and location of crew members. Is the level of armour protection sufficient, is the placement of modules helpful for survival in combat? If necessary use a visual template to indicate the most secure and weak zones of the armour.'' --> | ||
| − | [[File:Conqueror trapshot mantlet .png|thumb|400x400px|A basic weak spot of the Conqueror; the gun mantlet. The area is hit because of Conqueror's poor depression. It can be targeted by large-calibre HE, APDS and Sabot shells. - | + | [[File:Conqueror trapshot mantlet .png|thumb|400x400px|A basic weak spot of the Conqueror; the gun mantlet. The area is hit because of Conqueror's poor depression. It can be targeted by large-calibre HE, APDS and Sabot shells. - The shown camouflage is known as 'Phalanx', part of the "Night Vision" chest.]] |
| − | The Conqueror utilises the same hull as the Caernarvon does, with respectable frontal armour capable of shrugging off rounds from many adversaries. Unfortunately, this hull suffers from similarly weak side and rear armour - and as such angling | + | The Conqueror utilises the same hull as the Caernarvon does, with respectable frontal armour capable of shrugging off rounds from many adversaries, particularly effective against the APHE. Unfortunately, this hull suffers from similarly weak side and rear armour - and as such angling the vehicle can prove extremely dangerous if it exposes the side too much. The hull is not strong enough to block direct APDS attack and if the commander plans to use this tank in general melee range, only 8 shells should be taken, as otherwise it is exceedingly easy for opponents of higher rank to ammo rack the tank. |
| − | |||
| − | The | + | The Conqueror replaces the Caernarvon's Centurion-based turret with a fresh design, providing much better crew spacing and protection. The turret is not without its weaknesses, however; the commander's cupola protrudes quite significantly and APHE or HESH shells may disable internal turret components or crew members. There is also a weak section directly behind the mantlet at the top of the turret, penetration of which will disable crew or the breech/horizontal turret drive. Hull roof directly behind the main armour (next to turret ring) also has only 18 mm of RHA. Direct hits of strong ATGM or high calibre HE shells on these weakspots can cause overpressure damage and destroy the tank outright. |
| − | The Conqueror has a researchable add-on armour package which improves the vehicle's survivability to HEAT rounds and by a small amount to kinetic rounds.<ref name="dtic" /> | + | Trap shots are possible, it is likely to get shot with a high-calibre HE, capable of damaging the tank by hitting the base of the turret and exploding into the driver and/or ammo rack just below it. Unlike with similar tank [[M103]] though, for most heavy tanks HE can only penetrate the driver hatch on the right side or damage the gun breech on a good hit. SPG calibre HE (like 152 mm of [[Object 268]]) will definitely destroy the roof armour, resulting in a knock-out. Non-HE shells are less likely to ricochet and do significant internal damage like this, but it is still possible to push them into the tank. |
| + | |||
| + | The frontal track guards are also very vulnerable at particular angles and can be exploited even when sides are not exposed to instantly destroy the tank using nearly any gun, like with [[Churchill Mk VII]]. The more realistic scenario, however, is high-calibre HESH hitting the ground next to them and setting the tank on fire or outright destroying it. Fortunately, most tanks which are capable of this and are going out of their way to use HESH instead of HEAT are British and can only be your opponent in AB, in RB the likelihood of receiving such hit is greatly reduced. | ||
| + | |||
| + | The Conqueror has a researchable add-on armour package for turret and the upper frontal plate, which improves the vehicle's survivability to HEAT and HESH rounds and by a small amount to kinetic rounds.<ref name="dtic" /> With it, the Conqueror becomes relatively resistant to HEAT ammunition, smaller HEAT ammunition used by light tanks such as [[BMP-1]] or [[M551]] will have issue harming the Conqueror when hull-down. The UFP panel protects the turret ammo rack almost entirely and will generally prevent normal APDS from instantly exploding the ammunition, but it may still fail to block HEAT-FS, modern APFSDS, or high calibre shots. The panels do not protect from direct attacks on the area around the gun breech, which will remain fairly vulnerable to anything. | ||
'''Armour type:''' | '''Armour type:''' | ||
* Rolled homogeneous armour | * Rolled homogeneous armour | ||
| − | * Cast homogeneous armour ( | + | * Cast homogeneous armour (turret) |
* Structural steel (Side skirts) | * Structural steel (Side skirts) | ||
| Line 34: | Line 37: | ||
! Armour !! Front !! Sides !! Rear !! Roof | ! Armour !! Front !! Sides !! Rear !! Roof | ||
|- | |- | ||
| − | | Hull || 130 + 20 mm (59°) ''Front glacis'' <br> 76 mm (44°) ''Lower glacis'' || 51 + 6 mm || 38 mm ''Top'' <br> 20 mm (60°) ''Bottom'' || 44 mm ''Front'' <br> 17 mm ''Crew hatch'' <br | + | | Hull || 130 + 20 mm (59°) ''Front glacis'' <br> 76 mm (44°) ''Lower glacis'' || 51 + 6 mm || 38 mm ''Top'' <br> 20 mm (60°) ''Bottom'' || 44 mm ''Front'' <br> 17 mm ''Crew hatch'' <br> 17 mm ''Rear'' |
|- | |- | ||
| Turret || 152-313 mm (0-68°) ''Turret front'' <br> 89-200 mm (0-78°) ''Gun mantlet'' || 89-233 mm (1-48°) || 50 mm (1-34°) || 51 mm <br> 31 mm ''Square area near gun'' <br> 17 mm ''Crew hatches'' | | Turret || 152-313 mm (0-68°) ''Turret front'' <br> 89-200 mm (0-78°) ''Gun mantlet'' || 89-233 mm (1-48°) || 50 mm (1-34°) || 51 mm <br> 31 mm ''Square area near gun'' <br> 17 mm ''Crew hatches'' | ||
| Line 69: | Line 72: | ||
{{main|Ordnance QF Tk. L1A2 (120 mm)}} | {{main|Ordnance QF Tk. L1A2 (120 mm)}} | ||
| − | The 120 mm L1A2 is a powerful gun, derived from the M58 mounted on the M103 heavy tank. Unlike the M103's selection of HEAT or AP, the Conqueror instead utilises HESH and APDS ammunition, and again unlike the M103, mounts a two-plane stabiliser | + | The 120 mm L1A2 is a powerful gun, derived from the M58 mounted on the M103 heavy tank. Unlike the M103's selection of HEAT or AP, the Conqueror instead utilises HESH and APDS ammunition, and again unlike the M103, mounts a two-plane stabiliser. |
| − | Despite | + | The L1A2 exhibits excellent accuracy and long-range performance, although due to the sub-par post-penetration effects of APDS in some cases multiple rounds are required to secure a knock-out, particularly at range where critical components or ammunition is less reliably hit. At ranges below 500 m, the gun will obliterate almost any tank and can directly ammo rack even monster tanks such as [[IS-4M]], forcing some enemies to reconsider their plans. |
| + | |||
| + | Despite shortcomings, such as occasional "shell shattered", the Conqueror performs admirably as a sniper, covering capture points or thoroughfares, and should primarily rely on APDS with careful thought as to placement. It's important to remember that the Conqueror has a reasonably long reload of 19.4 seconds at base; and as such careful consideration should be made as to what to prioritise disabling first. Sometimes enemies intentionally avoid being targeted by APDS and then HESH may prove useful against lighter vehicles or in cases where a target's side armour is exposed, but otherwise is should not be relied on for anything besides pure luck. | ||
{| class="wikitable" style="text-align:center" width="100%" | {| class="wikitable" style="text-align:center" width="100%" | ||
| Line 90: | Line 95: | ||
==== Ammunition ==== | ==== Ammunition ==== | ||
| − | { | + | {{:Ordnance QF Tk. L1A2 (120 mm)/Ammunition|Shot L1G, Shell L1TK}} |
| − | |||
| − | |||
| − | |||
| − | |||
| − | |||
| − | |||
| − | |||
| − | |||
| − | |||
| − | |||
| − | |||
| − | |||
| − | |||
| − | |||
| − | |||
| − | |||
| − | |||
| − | |||
| − | |||
| − | |||
| − | |||
| − | |||
| − | |||
| − | |||
| − | |||
| − | |||
| − | |||
| − | | Shot L1G | ||
| − | |||
| − | |||
| − | |||
| − | |||
==== [[Ammo racks]] ==== | ==== [[Ammo racks]] ==== | ||
| − | + | <!-- '''Last updated: 2.19.0.76''' --> | |
| − | <!-- '''Last updated:''' --> | ||
{| class="wikitable" style="text-align:center" | {| class="wikitable" style="text-align:center" | ||
|- | |- | ||
! Full<br>ammo | ! Full<br>ammo | ||
| + | ! Ammo<br>type | ||
! 1st<br>rack empty | ! 1st<br>rack empty | ||
! 2nd<br>rack empty | ! 2nd<br>rack empty | ||
| Line 136: | Line 109: | ||
! 5th<br>rack empty | ! 5th<br>rack empty | ||
! 6th<br>rack empty | ! 6th<br>rack empty | ||
| + | ! 7th<br>rack empty | ||
| + | ! 8th<br>rack empty | ||
| + | ! 9th<br>rack empty | ||
! Visual<br>discrepancy | ! Visual<br>discrepancy | ||
|- | |- | ||
| − | | '''35''' || 31 ''(+4)'' || | + | | rowspan="2" | '''35''' || Projectiles || 34 ''(+1)'' || 31 ''(+4)'' || 29 ''(+6)'' || 27 ''(+8)'' || 23 ''(+12)'' || 22 ''(+13)'' || 17 ''(+18)'' || 9 ''(+26)'' || 1 ''(+34)'' || rowspan="2" | No |
| + | |- | ||
| + | | Propellants || 35 ''(+0)'' || 34 ''(+1)'' || 33 ''(+2)'' || 32 ''(+3)'' || 23 ''(+12)'' || 9 ''(+26)'' || 1 (''+34)'' || N/A || N/A | ||
|- | |- | ||
|} | |} | ||
| + | [[File:Ammoracks_{{PAGENAME}}.png|right|thumb|x250px|[[Ammo racks]] of the {{PAGENAME}}]] | ||
| + | '''Notes''': | ||
| − | + | * The first propellant rack contains only a single charge of propellant, so even when bringing a full load of 35 rounds this rack will always be empty as the first round loaded into the gun upon spawn. | |
| + | * It is advised to take 22 rounds into combat if you wish to maximise available sniper shots but remove the propellant charges racked just beside the driver if considering the weak spot that is the lower front plate of the Conqueror. | ||
| + | * The propellant portion of the ready rack is comprised of a single charge rack and a seven-charge rack. As these spaces make up the 8 round ready rack ammo count they are considered as a single rack for the purposes of deciding how much ammo to take. However if a player were to take only 7 rounds the single rack to the left of the loader would be empty of a charge. | ||
=== Machine guns === | === Machine guns === | ||
| Line 150: | Line 132: | ||
{{main|L3A1 (7.62 mm)}} | {{main|L3A1 (7.62 mm)}} | ||
| − | The Conqueror sports two machine guns, one of which is pintle mounted and may prove itself a deterrent to some close air support. The machine guns may on occasion prove useful for destroying incoming ATGMs, given a bit of luck. | + | The Conqueror sports two machine guns, one of which is pintle-mounted and may prove itself a deterrent to some close air support. The machine guns may on occasion prove useful for destroying incoming ATGMs, given a bit of luck. |
{| class="wikitable" style="text-align:center" width="50%" | {| class="wikitable" style="text-align:center" width="50%" | ||
| Line 167: | Line 149: | ||
<!-- ''Describe the tactics of playing in the vehicle, the features of using vehicles in the team and advice on tactics. Refrain from creating a "guide" - do not impose a single point of view but instead give the reader food for thought. Describe the most dangerous enemies and give recommendations on fighting them. If necessary, note the specifics of the game in different modes (AB, RB, SB).'' --> | <!-- ''Describe the tactics of playing in the vehicle, the features of using vehicles in the team and advice on tactics. Refrain from creating a "guide" - do not impose a single point of view but instead give the reader food for thought. Describe the most dangerous enemies and give recommendations on fighting them. If necessary, note the specifics of the game in different modes (AB, RB, SB).'' --> | ||
| − | The Conqueror can be effectively played as a sniper | + | Conqueror is best used against Soviet and American tanks, which other tanks in your lineup might struggle against. It can shrug off their popular ammunition and dish out instant punishment. While driving this heavy tank may feel like driving an actual battleship, it should not be played in a brawling role if at all possible, as it will easily be flanked and disposed of by the side armour plates. Much like all heavy tanks, it becomes increasingly obsolete with the introduction of APFSDS. |
| + | |||
| + | The Conqueror can be effectively played as a sniper (kind of like Conway) or as a steady breakthrough tank (providing the vehicle's slow reload and weak lower front plate are considered). Regardless of whom they are fighting, commanders are advised to remain on these roles: | ||
'''Sniper Role''' | '''Sniper Role''' | ||
| − | When used in a sniper role, the Conqueror should utilise extreme ranges with some form of cover available, in case the situation goes awry. | + | When used in a sniper role, the Conqueror should utilise extreme ranges with some form of cover available, in case the situation goes awry. Sniping may be a bit boring, but the tank has somewhat better optics than the Conway (the commander sight has X10 zoom) and with decent aim there is no point in putting yourself in danger by going too close. |
| − | Remember the rangefinder and if possible find locations that cover the hull of the Conqueror. | + | You can take more ammunition in this role, but maintain awareness for light flanking vehicles or enemy sniping vehicles on off-angles that may be able to disable the Conqueror through side armour. Play conservatively, avoid wasting shots (and thus having to wait for the long reload time), avoid exposing the hull where possible. |
| + | |||
| + | Remember about the rangefinder and if possible find locations that cover both the hull and the turret of the Conqueror, but allow to poke the cupola out. This allows to rangefind enemy tanks via commander sight, then pull the tank up and quickly snipe enemy with a fully stabilised gun, then back off. If someone is being extra annoying by destroying your gun breech or by firing an ATGM at you every time you try to pull up, you can try to drop HESH right on their roof, if they are far enough. | ||
'''Breakthrough Role''' | '''Breakthrough Role''' | ||
| − | The Conqueror may be utilised in a breakthrough role, although it should be played conservatively with allies and with a level of map awareness at all times | + | The Conqueror may be utilised in a breakthrough role, although it should be played conservatively with allies and with a level of map awareness at all times. |
| − | As usual, keep in mind that the vehicle's sides and lower front plate are particularly vulnerable and exposing either to enemy fire will often result in the Conqueror's destruction. If the advance seems to be failing, or the Conqueror is on risk to be flanked | + | The stabilised gun allows the Conqueror to comfortably fire on the move, should anyone try to annoy you. Even if you were too late, the commander can also override the gun control should the gunner be hit, so enemy will only have a second to run away. this gives the tank a distinct advantage over most targets it will face at close range, with the ability to reliably hit targets without waiting for the suspension sway to subside or having to learn special techniques, or even having to pay too much attention to the surroundings. |
| + | |||
| + | The vehicle's slow reload means that calculated shots are a requirement, and wasting any round may have dire consequences. This is further punctuated by flaws in hull armour, limiting the tank to carry only 8 shots in ammo rack. Still, almost no armour is able to block high calibre APDS at up to 500 m range, so try to study popular enemy tanks and find out where their mandatory ammo racks are located to always deliver lethal shots. | ||
| + | |||
| + | As usual, keep in mind that the vehicle's sides and lower front plate are particularly vulnerable and exposing either to enemy fire will often result in the Conqueror's destruction. If the advance seems to be failing, or the Conqueror is on risk to be flanked, remember about the good reverse speed - this, along with smoke cover, will grant second chances, as enemies will struggle to target your weakspots when they are completely blind. | ||
| + | |||
| + | Breakthrough strategy is most efficient when playing in a team with other heavy tanks - Conqueror can easily countersnipe (or at least scare away) dangerous enemy tanks in a long range encounter and will stomp on most medium and even some heavy tanks that like to corner camp due to its heavy armour and instant kill potential at a point blank range. When fully upgraded, it also doesn't care much about some annoying light tanks like the [[BMP-1]], unless those score a lucky ammo rack hit with their ATGM. In turn, other heavies can provide much needed utility - German [[Tiger II (Family)|Tiger II]] and French [[AMX-50 (Family)|AMX-50]] can follow right behind you and wipe out remaining opponents that try to fire on you with their fast firing guns, while Soviet [[IS-4M]] and American [[T32 Heavy Tank (Family)|T32]] can take attention away from you when you slip up, machine gun reconnaisance cars that will try to bully you and will in general annihilate tanks that managed to stay alive. | ||
=== Pros and cons === | === Pros and cons === | ||
| Line 186: | Line 178: | ||
'''Pros:''' | '''Pros:''' | ||
| − | * APDS round is extremely powerful and accurate, | + | * APDS round is extremely powerful and accurate, can penetrate even some of the heaviest armour at close range |
* HESH ammo may have surprising results, and can prove particularly effective against light or side armour | * HESH ammo may have surprising results, and can prove particularly effective against light or side armour | ||
| − | * The L1A2 cannon is fully two-plane stabilised, allowing it to be fired accurately on the move | + | * The L1A2 cannon is fully two-plane stabilised, allowing it to be fired accurately on the move or when camping on a hill |
| + | * Conqueror has commander override: a knocked out gunner will not prevent the player from firing and sniping is easier while tank commander is still present due to having strong commander optics | ||
| + | * Turret and upper front plate are very sloped and armoured, with few weak points | ||
| + | ** Add-on armour offers even more frontal protection in the form of spaced armour to the turret cheeks and upper plate | ||
| + | ** Well-spaced crew make the vehicle unlikely to be affected by crew knock-out in a single hit | ||
| + | * Reasonably good mobility despite weight and huge gun | ||
| + | * Optical rangefinder allows for accurate distance measuring | ||
| + | * Reasonable reverse speed allows the Conqueror to peek shots effectively | ||
* Coaxial machine gun has ballistic performance similar to the HESH round and may be used for ranging | * Coaxial machine gun has ballistic performance similar to the HESH round and may be used for ranging | ||
| − | |||
| − | |||
| − | |||
| − | |||
| − | |||
'''Cons:''' | '''Cons:''' | ||
| + | * Flawed armour profile - particularly weak side armour and lower front plate will be commonly targeted areas | ||
| + | ** Can't carry a lot of ammunition as otherwise it becomes too easy to destroy | ||
| + | * The APDS penetration at angles above 45 degrees is significantly reduced | ||
* HESH is not reliable against any vehicle with semi-decent armour; requires high skills and knowledge of the enemy | * HESH is not reliable against any vehicle with semi-decent armour; requires high skills and knowledge of the enemy | ||
| − | * Long reload time (19.4 second base) for British standards, although relatively standard for calibre | + | * Long reload time (19.4 second base) for British standards, although relatively standard for the calibre |
| − | * Only | + | * Only rifle-calibre machine guns |
| − | * | + | * Has a lot of weakspots vulnerable to heavy tank HE, accessible from just about any direction by knowledgeable enemies |
| − | * Only 17 mm of protection on the wide engine deck will be targeted by planes | + | * Only 17 mm of protection on the wide engine deck will be targeted by planes, should they fail to bomb the tank |
| − | * Top speed is limited at only 34 km/h; it faces really mobile enemies such as the [[Leopard (Family)| | + | * Top speed is limited at only 34 km/h; it faces really mobile enemies such as the [[Leopard 1 (Family)|Leopard Is]] |
| − | * | + | * Large cupola can be exploited by APHE ammunition and is in general easy to hit, so commander often dies before becoming useful |
| − | |||
== History == | == History == | ||
| Line 213: | Line 209: | ||
In 1944, General Staff started a project called ''A45 Infantry Support Tank'', which started around the same time as the development of the [[Centurion Mk 1|A41 Centurion]] cruiser tank. This project, after the war, was redesignated from a typical "Infantry Tank" and instead focused on a new role of a "Universal Tank" design in the form of the FV 200 series. The "Universal Tank" concept was to design a vehicle that would have a mobility comparable to that of cruiser tanks, but with the armour and firepower of heavy tanks. The FV 200 series designation was adopted and was to serve as a line of vehicles that used the same hull and chassis in different roles like armour recovery vehicles and self-propelled guns. The first tank of this series was to be the FV 201, which would be 55 tons and use the 20-pounder gun. | In 1944, General Staff started a project called ''A45 Infantry Support Tank'', which started around the same time as the development of the [[Centurion Mk 1|A41 Centurion]] cruiser tank. This project, after the war, was redesignated from a typical "Infantry Tank" and instead focused on a new role of a "Universal Tank" design in the form of the FV 200 series. The "Universal Tank" concept was to design a vehicle that would have a mobility comparable to that of cruiser tanks, but with the armour and firepower of heavy tanks. The FV 200 series designation was adopted and was to serve as a line of vehicles that used the same hull and chassis in different roles like armour recovery vehicles and self-propelled guns. The first tank of this series was to be the FV 201, which would be 55 tons and use the 20-pounder gun. | ||
| − | In 1949, a new requirement for the project called for the use of a 120 mm gun, possibly in response to the reveal of the Soviet [[IS-3]] heavy tank in the Berlin Victory Parade in 1945. This new requirement would delay the initial deadlines for the tank as no gun of that | + | In 1949, a new requirement for the project called for the use of a 120 mm gun, possibly in response to the reveal of the Soviet [[IS-3]] heavy tank in the Berlin Victory Parade in 1945. This new requirement would delay the initial deadlines for the tank as no gun of that calibre had been developed yet. As a interim development before such a gun could be made, the FV 201 hull was mounted with a turret from the Centurion tank and this created the FV 221 [[Caernarvon]], with Mark I for a 17-pounder armament and a Mark II for a 20-pounder armament. However, the success of the lighter Centurion tank made the Caernarvon unsuitable in a "Main Battle Tank" role. Further development on the Caernarvon, with emphasis on the armour and armament, would develop the '''FV 214 Conqueror''' tanks, some were straight up conversions of Caernarvon Mark IIs. About 185 Conquerors were produced in Mk.1 and Mk.2 variants from 1955 to 1959. |
===Design=== | ===Design=== | ||
The FV 214 Conqueror, also known as the "Tank, Heavy No. 1, 120 mm Gun, Conqueror", was intended to provide a mobile, long-range anti-tank support for the lighter and more numerous Centurion tanks stationed in Germany. As a response to the heavy [[IS-3]] tank in Soviet service, the tank's armament and armour is taken up and beyond extreme to typical NATO armour development. The armour, with a frontal plate of about seven inches (178 mm), made the tank one of the most protected tanks stationed in West Germany. The abundance of armour made the tank heavy, weighing 64 tons, and this impeded the tank's top speed and made it mechanically unreliable. However, the tank was very mobile in cross-country terrain, seen as equal as the lighter and faster Centurion tank. | The FV 214 Conqueror, also known as the "Tank, Heavy No. 1, 120 mm Gun, Conqueror", was intended to provide a mobile, long-range anti-tank support for the lighter and more numerous Centurion tanks stationed in Germany. As a response to the heavy [[IS-3]] tank in Soviet service, the tank's armament and armour is taken up and beyond extreme to typical NATO armour development. The armour, with a frontal plate of about seven inches (178 mm), made the tank one of the most protected tanks stationed in West Germany. The abundance of armour made the tank heavy, weighing 64 tons, and this impeded the tank's top speed and made it mechanically unreliable. However, the tank was very mobile in cross-country terrain, seen as equal as the lighter and faster Centurion tank. | ||
| − | The gun was the very large 120 mm cannon, the largest | + | The gun was the very large 120 mm cannon, the largest calibre tank gun available when it was introduced. The gun was American-developed, the same 120 mm cannon that would arm the [[M103|M103]] heavy tank. The gun uses a two-piece ammunition and the tank allowed for a ammo stowage of 35 rounds. Another notable feature of the Conqueror aside from its large cannon and thick armour was the unique and rotatable commander's cupola. In the cupola was the Conqueror's fire control system and had many features that made it ahead of its time. Being able to be rotated independent from the turret, plus with a coincidence rangefinder, the commander could align the cupola to a target, measure its range, and direct the gunner to the designated target. While the gunner located and engage the target, the commander could go and find a different target to designate and range. |
===Usage=== | ===Usage=== | ||
| Line 228: | Line 224: | ||
;Skins | ;Skins | ||
| − | * [https://live.warthunder.com/feed/camouflages/? | + | * [https://live.warthunder.com/feed/camouflages/?vehicle=uk_conqueror_mk_2 Skins and camouflages for the {{PAGENAME}} from live.warthunder.com.] |
;Videos | ;Videos | ||
| − | {{Youtube-gallery|gR3JPNt0iPw|'''Heavyweight brits''' discusses the {{PAGENAME}} at 6:21 - ''War Thunder Official Channel''|94S5XQwnX2I|'''The Shooting Range #108''' - ''Metal Beasts'' section at 00:28 discusses the {{PAGENAME}}.}} | + | {{Youtube-gallery|gR3JPNt0iPw|'''Heavyweight brits''' discusses the {{PAGENAME}} at 6:21 - ''War Thunder Official Channel''|94S5XQwnX2I|'''The Shooting Range #108''' - ''Metal Beasts'' section at 00:28 discusses the {{PAGENAME}}.|JmaDhygkvDg|'''Tank Chats #145 <nowiki>| Conqueror |</nowiki> The Tank Museum''' - ''The Tank Museum''}} |
== See also == | == See also == | ||
| Line 238: | Line 234: | ||
* ''links to approximate analogues of other nations and research trees.'' --> | * ''links to approximate analogues of other nations and research trees.'' --> | ||
| − | + | ;Related Development | |
| − | |||
| − | |||
| − | |||
| − | |||
| − | |||
| − | |||
| − | |||
* [[Caernarvon]] | * [[Caernarvon]] | ||
* [[Conway]] | * [[Conway]] | ||
| − | + | ;Shared operational history | |
* [[Centurion Mk 10]] | * [[Centurion Mk 10]] | ||
* [[Caernarvon]] | * [[Caernarvon]] | ||
| − | + | ;Analogues of other nations | |
| − | * [[ | + | * [[IS-7]] |
| + | * [[IS-4M]] | ||
| + | * [[T-10M]] / [[T-10A]] | ||
| + | * [[M103]] | ||
== External links == | == External links == | ||
<!-- ''Paste links to sources and external resources, such as:'' | <!-- ''Paste links to sources and external resources, such as:'' | ||
* ''topic on the official game forum;'' | * ''topic on the official game forum;'' | ||
| − | |||
* ''other literature.'' --> | * ''other literature.'' --> | ||
Latest revision as of 18:00, 17 June 2024


Contents
Description
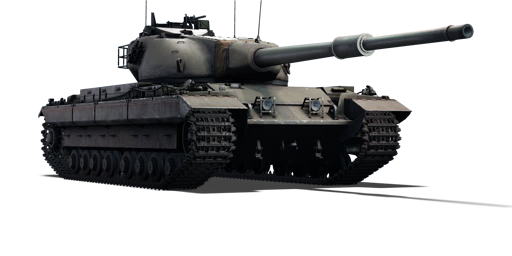
Following the reveal of the IS-3 during the 1945 Victory Parade through Berlin, the British realised the need for a new heavily armed and heavily armoured tank. Plans were drawn to create a "Universal Tank" hull, which would then be able to mount a variety of different armaments to suit a range of roles. The heaviest of this set of planned vehicles was the Conqueror, armed with a 120 mm gun inspired by and developed alongside that of the American M103, designed to be able to face down any Soviet threats and provide long-range anti-tank support for the existing Centurion.
By 1950, the new hull and chassis were nearing completion, while the gun and turret were still under development. Thus, a project to mount the turret of the Centurion Mk 3 was spawned, in order to ease the development process and train crews on the new hull, resulting in the Caernarvon. 1951 saw completion of the new gun and its acceptance into service, while the turret was still being finalised; plans for a stop-gap carriage for the new gun resulted in the Centurion hull-based Conway. Prototypes were complete by 1952, and the tank itself finally entered service in 1955, being sent immediately to armoured regiments stationed in West Germany. Both the Conqueror and Centurion were ultimately replaced by the Chieftain in 1966.
Introduced in Update 1.55 "Royal Armour" along with the initial British ground tree, the Conqueror deviates from most earlier British designs, favouring firepower and armour. With an extremely powerful main cannon, solid armour protection, and surprising (but still rather lacking) manoeuvrability for such a heavy vehicle, the Conqueror proves to be a highly effective sniper and support tank, able to crack open heavily armoured targets from long ranges. Making use of its strong armour and gun stabiliser allows it to also be put to good use in close-range brawls, although the subpar mobility and long reload can limit the vehicle in this aspect.
General info
Survivability and armour

The Conqueror utilises the same hull as the Caernarvon does, with respectable frontal armour capable of shrugging off rounds from many adversaries, particularly effective against the APHE. Unfortunately, this hull suffers from similarly weak side and rear armour - and as such angling the vehicle can prove extremely dangerous if it exposes the side too much. The hull is not strong enough to block direct APDS attack and if the commander plans to use this tank in general melee range, only 8 shells should be taken, as otherwise it is exceedingly easy for opponents of higher rank to ammo rack the tank.
The Conqueror replaces the Caernarvon's Centurion-based turret with a fresh design, providing much better crew spacing and protection. The turret is not without its weaknesses, however; the commander's cupola protrudes quite significantly and APHE or HESH shells may disable internal turret components or crew members. There is also a weak section directly behind the mantlet at the top of the turret, penetration of which will disable crew or the breech/horizontal turret drive. Hull roof directly behind the main armour (next to turret ring) also has only 18 mm of RHA. Direct hits of strong ATGM or high calibre HE shells on these weakspots can cause overpressure damage and destroy the tank outright.
Trap shots are possible, it is likely to get shot with a high-calibre HE, capable of damaging the tank by hitting the base of the turret and exploding into the driver and/or ammo rack just below it. Unlike with similar tank M103 though, for most heavy tanks HE can only penetrate the driver hatch on the right side or damage the gun breech on a good hit. SPG calibre HE (like 152 mm of Object 268) will definitely destroy the roof armour, resulting in a knock-out. Non-HE shells are less likely to ricochet and do significant internal damage like this, but it is still possible to push them into the tank.
The frontal track guards are also very vulnerable at particular angles and can be exploited even when sides are not exposed to instantly destroy the tank using nearly any gun, like with Churchill Mk VII. The more realistic scenario, however, is high-calibre HESH hitting the ground next to them and setting the tank on fire or outright destroying it. Fortunately, most tanks which are capable of this and are going out of their way to use HESH instead of HEAT are British and can only be your opponent in AB, in RB the likelihood of receiving such hit is greatly reduced.
The Conqueror has a researchable add-on armour package for turret and the upper frontal plate, which improves the vehicle's survivability to HEAT and HESH rounds and by a small amount to kinetic rounds.[1] With it, the Conqueror becomes relatively resistant to HEAT ammunition, smaller HEAT ammunition used by light tanks such as BMP-1 or M551 will have issue harming the Conqueror when hull-down. The UFP panel protects the turret ammo rack almost entirely and will generally prevent normal APDS from instantly exploding the ammunition, but it may still fail to block HEAT-FS, modern APFSDS, or high calibre shots. The panels do not protect from direct attacks on the area around the gun breech, which will remain fairly vulnerable to anything.
Armour type:
- Rolled homogeneous armour
- Cast homogeneous armour (turret)
- Structural steel (Side skirts)
| Armour | Front | Sides | Rear | Roof |
|---|---|---|---|---|
| Hull | 130 + 20 mm (59°) Front glacis 76 mm (44°) Lower glacis |
51 + 6 mm | 38 mm Top 20 mm (60°) Bottom |
44 mm Front 17 mm Crew hatch 17 mm Rear |
| Turret | 152-313 mm (0-68°) Turret front 89-200 mm (0-78°) Gun mantlet |
89-233 mm (1-48°) | 50 mm (1-34°) | 51 mm 31 mm Square area near gun 17 mm Crew hatches |
| Armour | Front | Rear | Roof | |
| Cupola | 203 mm (0-17°) | 70 mm (12-14°) | 51 mm 17 mm Crew hatch |
Notes:
- Suspension wheels and bogies are 20 mm thick while tracks are 30 mm thick.
- Front of turret vary in armour thickness, from 152 mm to 313 mm, but it is all very sloped due to turret design.
- The front of the turret roof has an additional armour plate of 31 mm in thickness.
Mobility
| Game Mode | Max Speed (km/h) | Weight (tons) | Engine power (horsepower) | Power-to-weight ratio (hp/ton) | ||||
|---|---|---|---|---|---|---|---|---|
| Forward | Reverse | Stock | AoA | Stock | Upgraded | Stock | Upgraded | |
| Arcade | 37 | 13 | 64.9 | 1.1 | 1,046 | 1,545 | 16.12 | 23.41 |
| Realistic | 35 | 12 | 716 | 810 | 11.03 | 12.27 | ||
The Conqueror has reasonable mobility, despite its weight, thanks to a powerful engine and favourable gearbox ratios. It does suffer from a somewhat limited top speed of 34 km/h, however it reaches this speed fairly easily on-road and on smooth off-road surfaces. The vehicle has surprisingly responsive hull traverse due to the engine power and neutral steering capability. The Conqueror has a reasonable reverse speed for a British vehicle, however it shouldn't be relied on too heavily.
When the add-on armour package is researched and equipped, the vehicle's weight will increase by 1.1 tonnes, resulting in a minor decrease in mobility.
Modifications and economy
| Mobility | Protection | Firepower | ||||||||||||||||||||
|---|---|---|---|---|---|---|---|---|---|---|---|---|---|---|---|---|---|---|---|---|---|---|
|
|
|
Armaments
Main armament
The 120 mm L1A2 is a powerful gun, derived from the M58 mounted on the M103 heavy tank. Unlike the M103's selection of HEAT or AP, the Conqueror instead utilises HESH and APDS ammunition, and again unlike the M103, mounts a two-plane stabiliser.
The L1A2 exhibits excellent accuracy and long-range performance, although due to the sub-par post-penetration effects of APDS in some cases multiple rounds are required to secure a knock-out, particularly at range where critical components or ammunition is less reliably hit. At ranges below 500 m, the gun will obliterate almost any tank and can directly ammo rack even monster tanks such as IS-4M, forcing some enemies to reconsider their plans.
Despite shortcomings, such as occasional "shell shattered", the Conqueror performs admirably as a sniper, covering capture points or thoroughfares, and should primarily rely on APDS with careful thought as to placement. It's important to remember that the Conqueror has a reasonably long reload of 19.4 seconds at base; and as such careful consideration should be made as to what to prioritise disabling first. Sometimes enemies intentionally avoid being targeted by APDS and then HESH may prove useful against lighter vehicles or in cases where a target's side armour is exposed, but otherwise is should not be relied on for anything besides pure luck.
| 120 mm Ordnance QF Tk. L1A2 | Turret rotation speed (°/s) | Reloading rate (seconds) | |||||||||||
|---|---|---|---|---|---|---|---|---|---|---|---|---|---|
| Mode | Capacity | Vertical | Horizontal | Stabilizer | Stock | Upgraded | Full | Expert | Aced | Stock | Full | Expert | Aced |
| Arcade | 35 | -7°/+15° | ±180° | Two-plane | 13.2 | 18.3 | 22.2 | 24.5 | 26.1 | 19.37 | 17.14 | 15.80 | 14.90 |
| Realistic | 9.7 | 11.4 | 13.9 | 15.3 | 16.3 | ||||||||
Ammunition
| Penetration statistics | |||||||
|---|---|---|---|---|---|---|---|
| Ammunition | Type of warhead |
Penetration @ 0° Angle of Attack (mm) | |||||
| 10 m | 100 m | 500 m | 1,000 m | 1,500 m | 2,000 m | ||
| Shot L1G | APDS | 502 | 496 | 474 | 447 | 422 | 398 |
| Shell L1TK | HESH | 152 | 152 | 152 | 152 | 152 | 152 |
| Shell details | ||||||||||||
|---|---|---|---|---|---|---|---|---|---|---|---|---|
| Ammunition | Type of warhead |
Velocity (m/s) |
Projectile mass (kg) |
Fuse delay (m) |
Fuse sensitivity (mm) |
Explosive mass (TNT equivalent) (kg) |
Ricochet | |||||
| 0% | 50% | 100% | ||||||||||
| Shot L1G | APDS | 1,493 | 6.37 | - | - | - | 75° | 78° | 80° | |||
| Shell L1TK | HESH | 792 | 15.87 | 0.1 | 4 | 3.97 | 73° | 77° | 80° | |||
Ammo racks
| Full ammo |
Ammo type |
1st rack empty |
2nd rack empty |
3rd rack empty |
4th rack empty |
5th rack empty |
6th rack empty |
7th rack empty |
8th rack empty |
9th rack empty |
Visual discrepancy |
|---|---|---|---|---|---|---|---|---|---|---|---|
| 35 | Projectiles | 34 (+1) | 31 (+4) | 29 (+6) | 27 (+8) | 23 (+12) | 22 (+13) | 17 (+18) | 9 (+26) | 1 (+34) | No |
| Propellants | 35 (+0) | 34 (+1) | 33 (+2) | 32 (+3) | 23 (+12) | 9 (+26) | 1 (+34) | N/A | N/A |

Notes:
- The first propellant rack contains only a single charge of propellant, so even when bringing a full load of 35 rounds this rack will always be empty as the first round loaded into the gun upon spawn.
- It is advised to take 22 rounds into combat if you wish to maximise available sniper shots but remove the propellant charges racked just beside the driver if considering the weak spot that is the lower front plate of the Conqueror.
- The propellant portion of the ready rack is comprised of a single charge rack and a seven-charge rack. As these spaces make up the 8 round ready rack ammo count they are considered as a single rack for the purposes of deciding how much ammo to take. However if a player were to take only 7 rounds the single rack to the left of the loader would be empty of a charge.
Machine guns
The Conqueror sports two machine guns, one of which is pintle-mounted and may prove itself a deterrent to some close air support. The machine guns may on occasion prove useful for destroying incoming ATGMs, given a bit of luck.
| 7.62 mm L3A1 | ||||
|---|---|---|---|---|
| Mount | Capacity (Belt) | Fire rate | Vertical | Horizontal |
| Coaxial | 3,750 (250) | 500 | N/A | N/A |
| Pintle | 3,750 (250) | 500 | -10°/+30° | ±180° |
Usage in battles
Conqueror is best used against Soviet and American tanks, which other tanks in your lineup might struggle against. It can shrug off their popular ammunition and dish out instant punishment. While driving this heavy tank may feel like driving an actual battleship, it should not be played in a brawling role if at all possible, as it will easily be flanked and disposed of by the side armour plates. Much like all heavy tanks, it becomes increasingly obsolete with the introduction of APFSDS.
The Conqueror can be effectively played as a sniper (kind of like Conway) or as a steady breakthrough tank (providing the vehicle's slow reload and weak lower front plate are considered). Regardless of whom they are fighting, commanders are advised to remain on these roles:
Sniper Role
When used in a sniper role, the Conqueror should utilise extreme ranges with some form of cover available, in case the situation goes awry. Sniping may be a bit boring, but the tank has somewhat better optics than the Conway (the commander sight has X10 zoom) and with decent aim there is no point in putting yourself in danger by going too close.
You can take more ammunition in this role, but maintain awareness for light flanking vehicles or enemy sniping vehicles on off-angles that may be able to disable the Conqueror through side armour. Play conservatively, avoid wasting shots (and thus having to wait for the long reload time), avoid exposing the hull where possible.
Remember about the rangefinder and if possible find locations that cover both the hull and the turret of the Conqueror, but allow to poke the cupola out. This allows to rangefind enemy tanks via commander sight, then pull the tank up and quickly snipe enemy with a fully stabilised gun, then back off. If someone is being extra annoying by destroying your gun breech or by firing an ATGM at you every time you try to pull up, you can try to drop HESH right on their roof, if they are far enough.
Breakthrough Role
The Conqueror may be utilised in a breakthrough role, although it should be played conservatively with allies and with a level of map awareness at all times.
The stabilised gun allows the Conqueror to comfortably fire on the move, should anyone try to annoy you. Even if you were too late, the commander can also override the gun control should the gunner be hit, so enemy will only have a second to run away. this gives the tank a distinct advantage over most targets it will face at close range, with the ability to reliably hit targets without waiting for the suspension sway to subside or having to learn special techniques, or even having to pay too much attention to the surroundings.
The vehicle's slow reload means that calculated shots are a requirement, and wasting any round may have dire consequences. This is further punctuated by flaws in hull armour, limiting the tank to carry only 8 shots in ammo rack. Still, almost no armour is able to block high calibre APDS at up to 500 m range, so try to study popular enemy tanks and find out where their mandatory ammo racks are located to always deliver lethal shots.
As usual, keep in mind that the vehicle's sides and lower front plate are particularly vulnerable and exposing either to enemy fire will often result in the Conqueror's destruction. If the advance seems to be failing, or the Conqueror is on risk to be flanked, remember about the good reverse speed - this, along with smoke cover, will grant second chances, as enemies will struggle to target your weakspots when they are completely blind.
Breakthrough strategy is most efficient when playing in a team with other heavy tanks - Conqueror can easily countersnipe (or at least scare away) dangerous enemy tanks in a long range encounter and will stomp on most medium and even some heavy tanks that like to corner camp due to its heavy armour and instant kill potential at a point blank range. When fully upgraded, it also doesn't care much about some annoying light tanks like the BMP-1, unless those score a lucky ammo rack hit with their ATGM. In turn, other heavies can provide much needed utility - German Tiger II and French AMX-50 can follow right behind you and wipe out remaining opponents that try to fire on you with their fast firing guns, while Soviet IS-4M and American T32 can take attention away from you when you slip up, machine gun reconnaisance cars that will try to bully you and will in general annihilate tanks that managed to stay alive.
Pros and cons
Pros:
- APDS round is extremely powerful and accurate, can penetrate even some of the heaviest armour at close range
- HESH ammo may have surprising results, and can prove particularly effective against light or side armour
- The L1A2 cannon is fully two-plane stabilised, allowing it to be fired accurately on the move or when camping on a hill
- Conqueror has commander override: a knocked out gunner will not prevent the player from firing and sniping is easier while tank commander is still present due to having strong commander optics
- Turret and upper front plate are very sloped and armoured, with few weak points
- Add-on armour offers even more frontal protection in the form of spaced armour to the turret cheeks and upper plate
- Well-spaced crew make the vehicle unlikely to be affected by crew knock-out in a single hit
- Reasonably good mobility despite weight and huge gun
- Optical rangefinder allows for accurate distance measuring
- Reasonable reverse speed allows the Conqueror to peek shots effectively
- Coaxial machine gun has ballistic performance similar to the HESH round and may be used for ranging
Cons:
- Flawed armour profile - particularly weak side armour and lower front plate will be commonly targeted areas
- Can't carry a lot of ammunition as otherwise it becomes too easy to destroy
- The APDS penetration at angles above 45 degrees is significantly reduced
- HESH is not reliable against any vehicle with semi-decent armour; requires high skills and knowledge of the enemy
- Long reload time (19.4 second base) for British standards, although relatively standard for the calibre
- Only rifle-calibre machine guns
- Has a lot of weakspots vulnerable to heavy tank HE, accessible from just about any direction by knowledgeable enemies
- Only 17 mm of protection on the wide engine deck will be targeted by planes, should they fail to bomb the tank
- Top speed is limited at only 34 km/h; it faces really mobile enemies such as the Leopard Is
- Large cupola can be exploited by APHE ammunition and is in general easy to hit, so commander often dies before becoming useful
History
Development
In 1944, General Staff started a project called A45 Infantry Support Tank, which started around the same time as the development of the A41 Centurion cruiser tank. This project, after the war, was redesignated from a typical "Infantry Tank" and instead focused on a new role of a "Universal Tank" design in the form of the FV 200 series. The "Universal Tank" concept was to design a vehicle that would have a mobility comparable to that of cruiser tanks, but with the armour and firepower of heavy tanks. The FV 200 series designation was adopted and was to serve as a line of vehicles that used the same hull and chassis in different roles like armour recovery vehicles and self-propelled guns. The first tank of this series was to be the FV 201, which would be 55 tons and use the 20-pounder gun.
In 1949, a new requirement for the project called for the use of a 120 mm gun, possibly in response to the reveal of the Soviet IS-3 heavy tank in the Berlin Victory Parade in 1945. This new requirement would delay the initial deadlines for the tank as no gun of that calibre had been developed yet. As a interim development before such a gun could be made, the FV 201 hull was mounted with a turret from the Centurion tank and this created the FV 221 Caernarvon, with Mark I for a 17-pounder armament and a Mark II for a 20-pounder armament. However, the success of the lighter Centurion tank made the Caernarvon unsuitable in a "Main Battle Tank" role. Further development on the Caernarvon, with emphasis on the armour and armament, would develop the FV 214 Conqueror tanks, some were straight up conversions of Caernarvon Mark IIs. About 185 Conquerors were produced in Mk.1 and Mk.2 variants from 1955 to 1959.
Design
The FV 214 Conqueror, also known as the "Tank, Heavy No. 1, 120 mm Gun, Conqueror", was intended to provide a mobile, long-range anti-tank support for the lighter and more numerous Centurion tanks stationed in Germany. As a response to the heavy IS-3 tank in Soviet service, the tank's armament and armour is taken up and beyond extreme to typical NATO armour development. The armour, with a frontal plate of about seven inches (178 mm), made the tank one of the most protected tanks stationed in West Germany. The abundance of armour made the tank heavy, weighing 64 tons, and this impeded the tank's top speed and made it mechanically unreliable. However, the tank was very mobile in cross-country terrain, seen as equal as the lighter and faster Centurion tank.
The gun was the very large 120 mm cannon, the largest calibre tank gun available when it was introduced. The gun was American-developed, the same 120 mm cannon that would arm the M103 heavy tank. The gun uses a two-piece ammunition and the tank allowed for a ammo stowage of 35 rounds. Another notable feature of the Conqueror aside from its large cannon and thick armour was the unique and rotatable commander's cupola. In the cupola was the Conqueror's fire control system and had many features that made it ahead of its time. Being able to be rotated independent from the turret, plus with a coincidence rangefinder, the commander could align the cupola to a target, measure its range, and direct the gunner to the designated target. While the gunner located and engage the target, the commander could go and find a different target to designate and range.
Usage
The Conqueror were all stationed in West German in the armoured regiments stationed there. Each regiment received 9 Conquerors and were organized in groups of three as tank troops to support the Centurions in any conflict that arise from the tense situation of the Cold War. As history played out, the Cold War never became "hot" and no hostile conflicts arise in the borders of Germany, thus the Conquerors never saw any use aside from training as they were all exclusively stationed on the German borders. The Conqueror's intention to provide a long-range anti-tank capability for the Centurions, became less significant when the Centurions began to arm themselves with the more powerful 105 mm L7 gun, such as the Centurion Mk 10. The lower tactical value of the Conqueror and further development on heavy tanks in Britain had the Conquerors replaced in 1966 with the much more powerful and armoured, yet lighter, FV 4201 Chieftain tank.
Media
- Skins
- Videos
See also
- Related Development
- Shared operational history
- Analogues of other nations
External links
References
| Britain heavy tanks | |
|---|---|
| Matilda | Matilda III · Matilda Hedgehog |
| Churchill | Churchill I · Churchill III · Churchill VII · Churchill Crocodile · Churchill NA75 · Black Prince |
| Post-war | Caernarvon · Conqueror |
| Other | Independent · Excelsior · TOG II |
