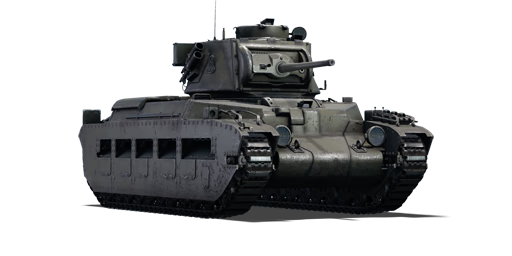
Matilda III

From War Thunder Wiki
Jump to: navigation, search
Rank VI | Premium | Golden Eagles
Chinese A-5C Pack
This page is about the British heavy tank Matilda III. For other versions, see Matilda (Family).
uk_a_12_mk_2_matilda_2.png
GarageImage Matilda III.jpg
ArtImage Matilda III.png
Matilda III
AB RB SB
2.7 2.7 2.7
Class:
Research:9 200 Specs-Card-Exp.png
Purchase:16 000 Specs-Card-Lion.png
Show in game

Description

The Tank, Infantry, Mk IIA*, Matilda III (A12) (or just Matilda III) is a rank II British heavy tank with a battle rating of 2.7 (AB/RB/SB). It was introduced in Update 1.55 "Royal Armour" along with the rest of the initial British Ground Forces Tree. The Matilda III in the game reflects its real-life counterpart with its extreme slow speed, but formidable front armour.

The Matilda is a great character on the battlefield. The name and its historical significance makes the Matilda a more noteworthy target than your teammates. The Matilda should be played like most other heavy tanks, absorbing damage for your team mates and dealing damage against the enemy as they try to penetrate your armour. Stay away from the front line to maximise armour effectiveness with distance.

General info

Survivability and armour

Smoke grenades
Creation of a smoke screen in front of the vehicle
Armourfront / side / back
Hull75 / 70 / 55
Turret75 / 75 / 75
Crew4 people
Visibility84 %

Armour type:

  • Cast homogeneous armour (Front hull, Turret, Side top)
  • Rolled homogeneous armour (Hull side, Hull rear, Hull roof)
Armour Front Sides Rear Roof
Hull 75 mm (0-7°) Front plate
22-47 mm (69°) Front glacis
22-78 mm (12-46°) Joint area
22 mm + 40 mm (56°) Lower glacis
70 mm (21-26°) Top
40 + 25 mm Bottom
20 mm (32-79°) Top
55 mm (25°) Bottom
20 mm
35 mm Driver's port
Turret 75 mm (1-48°) Turret front
75 mm (0-22°) Gun mantlet
75 mm (0-22°) 75 mm 18 mm
Cupola 75 mm (6-7°) 75 mm (6-7°) 75 mm (6-7°) 18 mm

Notes:

  • Suspension wheels and tracks are both 20 mm thick.
  • Side skirts are not all flat. Small protrusions in the center area go inwards by 54° and are 13 mm thick, giving that portion 40 + 13 mm thick.
  • Smoke Launchers on right side of tank.
  • On the frontal lower glacis there's another 40 mm thick armour plate right behind 22 mm thick armour.

Mobility

Speedforward / back
AB26 / 5 km/h
RB and SB24 / 4 km/h
Number of gears6 forward
1 back
Weight27.3 t
Engine power
AB363 hp
RB and SB190 hp
Power-to-weight ratio
AB13.3 hp/t
RB and SB7.0 hp/t
Game Mode Max Speed (km/h) Weight (tons) Engine power (horsepower) Power-to-weight ratio (hp/ton)
Forward Reverse Stock Upgraded Stock Upgraded
Arcade 26 5 27.3 245 363 8.97 13.3
Realistic 24 4 168 190 6.15 6.96

Modifications and economy

Repair costBasic → Reference
AB867 → 1 125 Sl icon.png
RB884 → 1 147 Sl icon.png
SB1 149 → 1 491 Sl icon.png
Total cost of modifications8 430 Rp icon.png
9 430 Sl icon.png
Talisman cost640 Ge icon.png
Crew training4 500 Sl icon.png
Experts16 000 Sl icon.png
Aces160 Ge icon.png
Research Aces190 000 Rp icon.png
Reward for battleAB / RB / SB
40 / 60 / 60 % Sl icon.png
118 / 118 / 118 % Rp icon.png
Modifications
Mobility Protection Firepower
Mods new tank traks.png
Tracks
Research:
420 Rp icon.png
Cost:
470 Sl icon.png
75 Ge icon.png
Mods new tank suspension.png
Suspension
Research:
380 Rp icon.png
Cost:
430 Sl icon.png
70 Ge icon.png
Mods new tank break.png
Brake System
Research:
380 Rp icon.png
Cost:
430 Sl icon.png
70 Ge icon.png
Mods new tank filter.png
Filters
Research:
530 Rp icon.png
Cost:
600 Sl icon.png
95 Ge icon.png
Mods new tank transmission.png
Transmission
Research:
910 Rp icon.png
Cost:
1 000 Sl icon.png
165 Ge icon.png
Mods new tank engine.png
Engine
Research:
910 Rp icon.png
Cost:
1 000 Sl icon.png
165 Ge icon.png
Mods tank tool kit.png
Improved Parts
Research:
420 Rp icon.png
Cost:
470 Sl icon.png
75 Ge icon.png
Mods extinguisher.png
Improved FPE
Research:
380 Rp icon.png
Cost:
430 Sl icon.png
70 Ge icon.png
Mods tank reinforcement uk.png
Crew Replenishment
Research:
530 Rp icon.png
Cost:
600 Sl icon.png
95 Ge icon.png
Mods new tank horizontal aiming.png
Horizontal Drive
Research:
420 Rp icon.png
Cost:
470 Sl icon.png
75 Ge icon.png
Mods tank ammo.png
40mm_uk_2pdr_APHV_ammo_pack
Research:
420 Rp icon.png
Cost:
470 Sl icon.png
75 Ge icon.png
Mods tank cannon.png
Adjustment of Fire
Research:
380 Rp icon.png
Cost:
430 Sl icon.png
70 Ge icon.png
Mods tank ammo.png
40mm_uk_2pdr_APHE_ammo_pack
Research:
380 Rp icon.png
Cost:
430 Sl icon.png
70 Ge icon.png
Mods new tank vertical aiming.png
Elevation Mechanism
Research:
530 Rp icon.png
Cost:
600 Sl icon.png
95 Ge icon.png
Mods smoke screen.png
Smoke grenade
Research:
530 Rp icon.png
Cost:
600 Sl icon.png
95 Ge icon.png
Mods tank ammo.png
40mm_uk_2pdr_APCBC_ammo_pack
Research:
910 Rp icon.png
Cost:
1 000 Sl icon.png
165 Ge icon.png

Armaments

Main armament

Shoulder stabilizer
Reduces the swing of the gun in one plane while moving
Ammunition93 rounds
Reloadbasic crew → aces
3.6 → 2.8 s
Vertical guidance-20° / 20°
Main article: QF 2-pounder (40 mm)
40 mm QF 2-pounder Turret rotation speed (°/s) Reloading rate (seconds)
Mode Capacity Vertical Horizontal Stabilizer Stock Upgraded Full Expert Aced Stock Full Expert Aced
Arcade 93 ±20° ±180° Vertical 16.18 22.40 27.20 30.08 32.00 3.64 3.22 2.97 2.80
Realistic 11.90 14.00 17.00 18.80 20.00

Ammunition

Penetration statistics
Ammunition Type of
warhead
Penetration @ 0° Angle of Attack (mm)
10 m 100 m 500 m 1,000 m 1,500 m 2,000 m
Shot Mk.1 AP/T AP 72 68 52 37 27 19
Shell Mk.2 HE 9 8 7 6 6 5
Shot Mk.IXB APCBC/T APCBC 89 86 77 66 57 50
Shot Mk.1 APHV/T AP 80 75 58 41 30 21
Shell Mk.1 AP/T APHE 66 62 49 36 26 20
Shell details
Ammunition Type of
warhead
Velocity
(m/s)
Projectile
mass (kg)
Fuse delay
(m)
Fuse sensitivity
(mm)
Explosive mass
(TNT equivalent) (g)
Ricochet
0% 50% 100%
Shot Mk.1 AP/T AP 792 1.08 - - - 47° 60° 65°
Shell Mk.2 HE 687 1.34 0.1 0.1 85 79° 80° 81°
Shot Mk.IXB APCBC/T APCBC 792 1.24 - - - 48° 63° 71°
Shot Mk.1 APHV/T AP 853 1.08 - - - 47° 60° 65°
Shell Mk.1 AP/T APHE 792 1.08 1.2 9 20.9 47° 60° 65°

Ammo racks

Ammo racks of the Matilda III
Full
ammo
1st
rack empty
2nd
rack empty
3rd
rack empty
4th
rack empty
5th
rack empty
6th
rack empty
7th
rack empty
8th
rack empty
Visual
discrepancy
93 87 (+6) 79 (+14) 64 (+29) 53 (+40) 41 (+52) 28 (+65) 15 (+78) (+92) No

Notes:

  • Racks disappear after you've fired all shells in the rack.
  • Turret empty: 53 (+40) shells.

Optics

Matilda III Optics
Which ones Default magnification Maximum magnification
Main Gun optics x1.85 x3.5
Comparable optics Chi-Nu

Machine guns

Ammunition4 050 rounds
Belt capacity225 rounds
Reloadbasic crew → aces
10.4 → 8.0 s
Fire rate600 shots/min
Main article: BESA (7.92 mm)
7.92 mm BESA
Mount Capacity (Belt) Fire rate Vertical Horizontal
Coaxial 4,050 (225) 600 N/A N/A

Usage in battles

If attacking, the Matilda should take point in the attacking force (if your team will wait for you) and crawl slowly towards the enemy locations with support from your team members. Stop and fire at any target that reveals itself to attack you. When defending, park some distance away from a choke point to a vital area and blast enemies as they try to enter. Remember to maintain team support so that enemies don't try to out manoeuvre you. Make sure to keep a safe distance away from the enemy to maximise the effectiveness of your armour with the shell damage drop-off. Like this, your armour will be very hard to penetrate. At the same time use the 2-pounder gun to attack the enemy. Close-distance fighting is ill-advised as opponents will be able to more easily penetrate the front armour and find weak points. A very important tip to know about the Matilda III is to not go into towns. You will be easily outmanoeuvred, allowing your opponents to get close and flank and destroy you.

Opponents that deserve extra attention are the tank destroyers. The two German Marders carry a gun that can easily knock you out at long range, especially the Marder III H, but those have thin armour, so use that to your advantage. The more armoured German TD, the StuG III, is even more dangerous. The StuG III A carry the short 75 mm that can fire high-penetrating HEAT rounds while its front armour can resist the 2-pounder's shots from a longer distance. The StuG III F is a bigger problem with its longer 75 mm gun and thicker armour. The Matilda will have a hard time to fight the StuGs due to the front armour and inability to manoeuvre to hit the side armour, thus it would be better to leave that to more manoeuvrable team members.

Other tanks to worry about are the more common medium tanks each nation carries from the M4 Shermans, Panzer IVs, and T-34s. These medium tanks have frontal armour able to resist the Matilda's 2-pounder rounds and easily out manoeuvre it as well. The most noteworthy tank to worry about is the Panzer IV with the long 75 mm guns, which can easily destroy your frontal armour.

Pros and cons

Pros:

  • Excellent armour, comparable to KV-1 (L-11)
  • Fast reloading gun with decent penetration
  • Great in-game gun depression -20° to +20°
  • Good turret rotation
  • Small profile for a heavy tank
  • Fast reload rate
  • Can be paired with enemy tanks that the 2-pounder can destroy while they can't easily penetrate Matilda's armour

Cons:

  • Pitiful mobility, even for British infantry tanks
  • Gun is ineffective against heavily armoured foes like the KV-1 and the Churchill
  • Gun is inaccurate at longer ranges
  • Slow, can't outflank others and will take a long time just to get to the combat zone
  • Doesn't like hills and other obstacles
  • Small calibre gun
  • 3/4 crew in turret, a single shot will knock out the tank
  • Can be easily penetrated by HEAT and APCR shells, especially from German tanks
  • Small size makes penetrating shot more likely to incapacitate entire crew
  • Can be paired against higher tanks like the Panzer IV F2 that can easily penetrate armour

History

A captured Matilda II in North Africa.

Development

With the development of tanks, the British Army doctrine regarding tanks split the classification into two types, the infantry and cruiser tanks. Cruiser tanks were high-speed tanks meant to exploit breakthroughs in enemy lines while infantry tanks were tanks meant to support the infantry advances. Tank developments were based off these classifications. Then in 1934, Major-General Percy Hobart came with a concept for two types of infantry tanks, one machine-gun armed tank with heavy armour and another heavier armoured tank with a cannon and machine gun. The former was developed by Vickers into the A11 Infantry Tank Mark I, or the A11 Matilda. The larger cannon-armed infantry tank was not produced for some time due to finance restrictions. The designing for the latter infantry tank started with the General Staff specification A12 given in 1936. It was considered an improvement over the A11 Matilda and was produced by Woolwich, with Vulcan Foundry as the manufacturer. The A12 took many design implements of an older medium tank known as A7. The increased armour of the developing tank suffered from a lack of engine power, to which it was solved with two AEC diesel engines used in London buses. An order for two wooden mock-ups and two steel prototypes were made to Vulcan in November 1936, to which they presented the wooden ones in 1937 and the steel prototypes in April 1938. The functioning prototype performed well in a 1,000 mile test and only required a few modifications to improve the gearbox, suspension, and the engine cooling. With the approach of World War II, the A12 was adopted and designated the A12 Infantry Tank Mk.II Matilda II, but became more widely known by the name Matilda than its predecessor. The first orders were made after the trials with an order for 140 made in June 1938. Production started from 1937 from its test trials and lasted to 1943 with a total of 2,987 Matilda IIs produced.

Design

Matilda II, weighing in at 27 tons, was considerably well armoured for the weight it is given. At 78 mm thick, the front glacis was one of the thickest armour at the time, the Panzer IV at the time had an average armour thickness between 30 to 50 mm thick. Even the side armour of the tank was between 65 to 70 mm thick. The armour became its best known feature, that the tank was known as the "Queen of the Desert" for its service in North Africa. The cast three-man turret, also with great armour thickness, carried a 2-pounder and a BESA machine gun. It is traversed by a hydraulic system. Two smoke grenade dischargers are present on the right side of the turret that allows concealment when launched. The heavy armour was also the cause of the slow speed the Matilda II is also famous for, able to reach about 9.7 km/h in cross-country terrain and 26 km/h on roads. Though this slow speed was not taken as a drawback due to the tank's role as an infantry tank, going as fast as an infantry man could run made it able to support the infantry at the same pace they march. The engine powering the tank was two AEC 6-cylinder bus engines linked to a single shaft. Giving only 87 hp from each engine, the high mechanical attentions and a troublesome suspension system contributed to the Matilda's low speed.

Combat usage

The Matilda II first saw service during the Battle of France in 1940 in the 7th Royal Tank Regiment. They only had 23 Matilda IIs at the start of the war, but it's presence in the Allied inventory sent waves through the German lines. The Matilda II proved to be mostly immune to all but the heaviest of German guns and are able disrupt German activities, as such in the counter attack at Arras in May 21, 1940. However, the Battle of France became lost within the months, and the remaining Matilda IIs that survived were abandoned when the Allies evacuated at Dunkirk.

The Matilda II saw service again in the North African Campaign against the Italian and German forces. In late 1940 in Operation Compass, the Matildas in the 7th Armoured Division caused major damage in the Italian forces positioned in Egypt. The Italians, armed with only tankettes and 37-mm armed medium tanks, were unable to stop the Matilda's advances. The Matildas pushed Italian troops out of Egypt and all the way to Libya, where they proceeded to take over Bardia and Tobruk as well. The Matilda's armour became very well known in this time period, as in late 1941 the Axis forces, even the Germans, were still struggling to receive adequate equipment to take out the Matildas. The open terrain of the desert made the Matilda's low speed and mechanical issues a major problem, as it reduced its manoeuvrability. The open terrain also presented the Matilda a major target to the 88 mm FlaK guns in German inventory, which was more than capable in destroying the Matilda through the front. The devastating losses to these more potent anti-tank weaponry became well known in Operation Battleaxe in June 1941, and became more widespread with the presence of the more powerful 50 mm and 75 mm anti-tank guns in German service. Despite that, the Matildas were still used in the battlefield to fight against the Germans until they were effectively deemed insufficient against the German tanks and defenses sometime in 1942. The Matilda could not be up-gunned with better British weaponry due to the small turret on the tank, and thus was replaced by the heavier armoured Churchill and Valentine infantry tanks. These tanks proved much more economical, yet with room for upgrades, and the Matilda became a rare sight by the Second Battle of El Alamein. The remaining Matildas in North Africa were modified into mine-clearers known as Matilda Scorpions.

After being taken out of service in a front-line role, the Matilda II still saw service among British Allies. The Soviets received about 918 Matilda IIs, to which they used in the Battle of Moscow. Despite the unreliability and slowness of the Matilda II, they were used in the same capacity as their KV-1 heavy tanks, but the reduced firepower of the 2-pounder. Though most were lost by 1942, some were still seen as late as 1944. In the Pacific, the Matilda II continued to see use among the Australian forces, such as the 4th Armoured Brigade. It saw service in the Huon Peninsula Campaign in October 1943 and remained in service up until the end of the war. The Matilda II stayed in service due to the inferior tank designs of the Japanese tanks and the lack of heavy anti-tank guns, causing the Matildas to become dangerous foes against the Japanese forces. A few Matildas were captured by the Axis forces when a few were damaged in Operation Battleaxe, to which they were repaired and put into service by the Germans as the Infanterie Panzerkampfwagen Mk.II 748(e), which were well received by German troops despite causing confusion on friend-foe identity between the different sides.

Media

Skins
Videos

See also

Links to the articles on the War Thunder Wiki that you think will be useful for the reader, for example:

  • reference to the series of the vehicles;
  • links to approximate analogues of other nations and research trees.

External links

Paste links to sources and external resources, such as:

  • topic on the official game forum;
  • other literature.


Britain heavy tanks
Matilda  Matilda III · Matilda Hedgehog
Churchill  Churchill I · Churchill III · Churchill VII · Churchill Crocodile · Churchill NA75 · Black Prince
Post-war  Caernarvon · Conqueror
Other  Independent · Excelsior · TOG II