Difference between revisions of "M3 Bradley"
Colok76286 (talk | contribs) (Edits) |
(→Additional armament: updated the battle gear speed to 5km/h) (Tag: Visual edit) |
||
| (30 intermediate revisions by 12 users not shown) | |||
| Line 1: | Line 1: | ||
| + | {{Specs-Card|code=us_m3_bradley}} | ||
{{About | {{About | ||
| − | | about = | + | |about = light tank '''{{PAGENAME}}''' |
| − | + | |usage = other uses | |
| − | + | |link = M3 (Disambiguation) | |
| − | |||
| − | | usage | ||
| − | | link | ||
| − | |||
| − | |||
| − | |||
| − | |||
}} | }} | ||
== Description == | == Description == | ||
<!-- ''In the description, the first part should be about the history of the creation and combat usage of the vehicle, as well as its key features. In the second part, tell the reader about the ground vehicle in the game. Insert a screenshot of the vehicle, so that if the novice player does not remember the vehicle by name, he will immediately understand what kind of vehicle the article is talking about.'' --> | <!-- ''In the description, the first part should be about the history of the creation and combat usage of the vehicle, as well as its key features. In the second part, tell the reader about the ground vehicle in the game. Insert a screenshot of the vehicle, so that if the novice player does not remember the vehicle by name, he will immediately understand what kind of vehicle the article is talking about.'' --> | ||
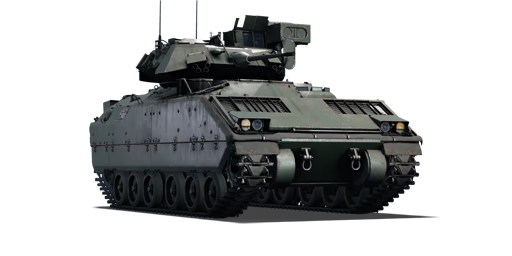
| − | The | + | [[File:GarageImage_{{PAGENAME}}.jpg|420px|thumb|left]] |
| − | + | {{Break}} | |
| − | + | The '''{{Specs|name}}''', or '''{{Specs|pseudonym}}''', is a rank {{Specs|rank}} American light tank {{Battle-rating}}. It was introduced in [[Update 1.85 "Supersonic"]]. | |
== General info == | == General info == | ||
=== Survivability and armour === | === Survivability and armour === | ||
| − | |||
<!-- ''Describe armour protection. Note the most well protected and key weak areas. Appreciate the layout of modules as well as the number and location of crew members. Is the level of armour protection sufficient, is the placement of modules helpful for survival in combat? If necessary use a visual template to indicate the most secure and weak zones of the armour.'' --> | <!-- ''Describe armour protection. Note the most well protected and key weak areas. Appreciate the layout of modules as well as the number and location of crew members. Is the level of armour protection sufficient, is the placement of modules helpful for survival in combat? If necessary use a visual template to indicate the most secure and weak zones of the armour.'' --> | ||
| − | Armour protection of the Bradley CFV (Cavalry Fighting Vehicle) is relatively weak, it does offer protection from machine guns and some lower penetrating autocannon fire from the front, but most autocannons will easily penetrate the sides of the vehicle damaging components, crew and often detonating ammo stored in the rear of the vehicle. As aside, the engine mounted in front of the vehicle will offer some protection from main guns on tanks by absorbing spalling, saving crew members and preventing ammo detonations. Getting your gunner shot out is common, however, the | + | Armour protection of the Bradley CFV (Cavalry Fighting Vehicle) is relatively weak, it does offer protection from machine guns and some lower penetrating autocannon fire from the front, but most autocannons will easily penetrate the sides of the vehicle damaging components, crew and often detonating ammo stored in the rear of the vehicle. As aside, the engine mounted in front of the vehicle will offer some protection from main guns on tanks by absorbing spalling, saving crew members and preventing ammo detonations. Getting your gunner shot out is common, however, the breach of the autocannon is very small and therefore does not generally get knocked out. The vehicle does not often hull break although losing too many crew members is common, as there are only 3 in the tank. |
=== Mobility === | === Mobility === | ||
| − | |||
<!-- ''Write about the mobility of the ground vehicle. Estimate the specific power and manoeuvrability, as well as the maximum speed forwards and backwards.'' --> | <!-- ''Write about the mobility of the ground vehicle. Estimate the specific power and manoeuvrability, as well as the maximum speed forwards and backwards.'' --> | ||
| Line 32: | Line 24: | ||
The {{PAGENAME}} has a maximum speed forward of 66 km/h or 49 km/h in battlefield conditions as well as -12 km/h in reverse. The transmission features 6 forward gears, 2 reverse as well as neutral steering. The vehicle is quite nimble and really only struggles to neutral steer in thick mud. Its lightweight allows it to traverse steep inclines with ease. It should be noted that the vehicles TOW missile launcher will automatically retract when the vehicle reaches speeds in excess of 10km/h. | The {{PAGENAME}} has a maximum speed forward of 66 km/h or 49 km/h in battlefield conditions as well as -12 km/h in reverse. The transmission features 6 forward gears, 2 reverse as well as neutral steering. The vehicle is quite nimble and really only struggles to neutral steer in thick mud. Its lightweight allows it to traverse steep inclines with ease. It should be noted that the vehicles TOW missile launcher will automatically retract when the vehicle reaches speeds in excess of 10km/h. | ||
| − | |||
| − | |||
| − | |||
== Armaments == | == Armaments == | ||
| − | |||
=== Main armament === | === Main armament === | ||
| − | |||
<!-- ''Give the reader information about the characteristics of the main gun. Assess its effectiveness in a battle based on the reloading speed, ballistics and the power of shells. Do not forget about the flexibility of the fire, that is how quickly the cannon can be aimed at the target, open fire on it and aim at another enemy. Add a link to the main article on the gun: <code><nowiki>{{main|Name of the weapon}}</nowiki></code>. Describe in general terms the ammunition available for the main gun. Give advice on how to use them and how to fill the ammunition storage.'' --> | <!-- ''Give the reader information about the characteristics of the main gun. Assess its effectiveness in a battle based on the reloading speed, ballistics and the power of shells. Do not forget about the flexibility of the fire, that is how quickly the cannon can be aimed at the target, open fire on it and aim at another enemy. Add a link to the main article on the gun: <code><nowiki>{{main|Name of the weapon}}</nowiki></code>. Describe in general terms the ammunition available for the main gun. Give advice on how to use them and how to fill the ammunition storage.'' --> | ||
{{main|M242 (25 mm)}} | {{main|M242 (25 mm)}} | ||
| Line 52: | Line 39: | ||
|- | |- | ||
! ''Arcade'' | ! ''Arcade'' | ||
| − | | rowspan="2" | | + | | rowspan="2" | 1500 (300) || rowspan="2" | 201 || rowspan="2" | -9°/+59° || rowspan="2" | ±180° || rowspan="2" | Two-plane || 57.1 || 78.83 || 96 || 106.16 || 112.94 || rowspan="2" | 0.26 || rowspan="2" | 0.23 || rowspan="2" | 0.21 || rowspan="2" | 0.20 |
|- | |- | ||
! ''Realistic'' | ! ''Realistic'' | ||
| − | | 35. | + | | 35.70 || 42.13 || 51 || 56.4 || 60 |
|- | |- | ||
|} | |} | ||
| Line 61: | Line 48: | ||
==== Ammunition ==== | ==== Ammunition ==== | ||
| − | * '''Default:''' {{Annotation| | + | * '''Default:''' {{Annotation|HEI-T|High-explosive incendiary tracer}}{{-}}{{Annotation|APDS|Armour-piercing discarding sabot}} |
| − | * '''M792:''' {{Annotation|HEI-T | + | * '''M792:''' {{Annotation|HEI-T|High-explosive incendiary tracer}}{{-}}{{Annotation|HEI-T|High-explosive incendiary tracer}}{{-}}{{Annotation|HEI-T|High-explosive incendiary tracer}}{{-}}{{Annotation|APDS|Armour-piercing discarding sabot}} |
| − | * '''M791:''' {{Annotation|APDS|Armour-piercing discarding sabot}}{{-}}{{Annotation|APDS|Armour-piercing discarding sabot}}{{-}}{{Annotation|APDS|Armour-piercing discarding sabot}}{{-}}{{Annotation|HEI-T | + | * '''M791:''' {{Annotation|APDS|Armour-piercing discarding sabot}}{{-}}{{Annotation|APDS|Armour-piercing discarding sabot}}{{-}}{{Annotation|APDS|Armour-piercing discarding sabot}}{{-}}{{Annotation|HEI-T|High-explosive incendiary tracer}} |
| − | { | + | {| class="wikitable sortable" style="text-align:center" width="100%" |
| + | ! colspan="7" | Penetration statistics | ||
| + | |- | ||
| + | ! rowspan="2" data-sort-type="text" | Ammunition | ||
| + | ! colspan="6" | '''Penetration @ 0° Angle of Attack (mm)''' | ||
| + | |- | ||
| + | ! 10 m !! 100 m !! 500 m !! 1,000 m !! 1,500 m !! 2,000 m | ||
| + | |- | ||
| + | | Default || 81 || 80 || 76 || 70 || 66 || 61 | ||
| + | |- | ||
| + | | M791 || 81 || 80 || 76 || 70 || 66 || 61 | ||
| + | |- | ||
| + | | M792 || 81 || 80 || 76 || 70 || 66 || 61 | ||
| + | |- | ||
| + | |} | ||
==== [[Ammo racks]] ==== | ==== [[Ammo racks]] ==== | ||
| − | [[File:Ammoracks_{{PAGENAME}}.png|right|thumb|x250px|[[Ammo racks]] of the {{PAGENAME}}. Racks outlined in red are 25 mm clips | + | [[File:Ammoracks_{{PAGENAME}}.png|right|thumb|x250px|[[Ammo racks]] of the {{PAGENAME}}. Racks outlined in red are 25 mm clips]] |
| − | |||
{| class="wikitable" style="text-align:center" | {| class="wikitable" style="text-align:center" | ||
|- | |- | ||
| Line 84: | Line 84: | ||
=== Additional armament === | === Additional armament === | ||
| − | |||
<!-- ''Some tanks are armed with several guns in one or more turrets. Evaluate the additional weaponry and give advice on its use. Describe the ammunition available for additional weaponry. Give advice on about how to use them and how to fill the ammunition storage. If there is no additional weaponry remove this subsection.'' --> | <!-- ''Some tanks are armed with several guns in one or more turrets. Evaluate the additional weaponry and give advice on its use. Describe the ammunition available for additional weaponry. Give advice on about how to use them and how to fill the ammunition storage. If there is no additional weaponry remove this subsection.'' --> | ||
| − | {{main|BGM- | + | {{main|BGM-71B TOW}} |
| − | The M3 Bradley comes equipped with a BGM-71B TOW ATGM launcher. The launcher contains two TOW missiles, which can be fired one after another in quick succession. Then, they are reloaded. Before you can fire, though, you have to be either stopped or moving at very low speeds, around 5 km/h. At higher speeds, the launcher folds up against the turret. When you stop, it takes time for the launcher to unfold before you can fire. This is where cruise control can be important. The first cruise control setting for forward and reverse speed is the "battle" setting. This controls the speed of the vehicle to where it is slow enough that you can fire the TOW missiles on the move. As before stated, this speed is very low, only about | + | The M3 Bradley comes equipped with a BGM-71B TOW ATGM launcher. The launcher contains two TOW missiles, which can be fired one after another in quick succession. Then, they are reloaded. Before you can fire, though, you have to be either stopped or moving at very low speeds, around 5 km/h. At higher speeds, the launcher folds up against the turret. When you stop, it takes time for the launcher to unfold before you can fire. This is where cruise control can be important. The first cruise control setting for forward and reverse speed is the "battle" setting. This controls the speed of the vehicle to where it is slow enough that you can fire the TOW missiles on the move. As before stated, this speed is very low, only about 10 km/h, so you should probably not drive in this mode of cruise control for the whole battle. |
| + | ==== Ammunition ==== | ||
{| class="wikitable" style="text-align:center" width="100%" | {| class="wikitable" style="text-align:center" width="100%" | ||
| + | ! colspan="8" | Penetration statistics | ||
|- | |- | ||
| − | ! colspan=" | + | ! rowspan="2" data-sort-type="text" | Ammunition |
| + | ! rowspan="2" | Type of<br>warhead | ||
| + | ! colspan="6" | '''Penetration @ 0° Angle of Attack (mm)''' | ||
|- | |- | ||
| − | ! | + | ! 10 m !! 100 m !! 500 m !! 1,000 m !! 1,500 m !! 2,000 m |
|- | |- | ||
| − | | | + | | TOW || ATGM || 430 || 430 || 430 || 430 || 430 || 430 |
| + | |- | ||
| + | |} | ||
| + | {| class="wikitable" style="text-align:center" width="100%" | ||
| + | ! colspan="10" | Shell details | ||
| + | |- | ||
| + | ! rowspan="2" data-sort-type="text" | Ammunition | ||
| + | ! rowspan="2" | Type of<br>warhead | ||
| + | ! rowspan="2" | Velocity<br>(m/s) | ||
| + | ! rowspan="2" | Projectile<br>Mass (kg) | ||
| + | ! rowspan="2" | Fuse delay<br>(m) | ||
| + | ! rowspan="2" | Fuse sensitivity<br>(mm) | ||
| + | ! rowspan="2" | Explosive Mass<br>(TNT equivalent) (g) | ||
| + | ! colspan="3" | Ricochet | ||
| + | |- | ||
| + | ! 0% !! 50% !! 100% | ||
| + | |- | ||
| + | | TOW || ATGM || 299 || 18.8 || N/A || 0.1 || 2,450 || 80° || 82° || 90° | ||
|- | |- | ||
|} | |} | ||
| − | |||
| − | |||
| − | |||
==== [[Ammo racks]] ==== | ==== [[Ammo racks]] ==== | ||
[[File:Ammoracks_{{PAGENAME}}.png|right|thumb|x250px|[[Ammo racks]] of the {{PAGENAME}}. Racks outlined in green are ATGMs.]] | [[File:Ammoracks_{{PAGENAME}}.png|right|thumb|x250px|[[Ammo racks]] of the {{PAGENAME}}. Racks outlined in green are ATGMs.]] | ||
| − | |||
{| class="wikitable" style="text-align:center" | {| class="wikitable" style="text-align:center" | ||
|- | |- | ||
| Line 121: | Line 137: | ||
=== Machine guns === | === Machine guns === | ||
| − | |||
<!-- ''Offensive and anti-aircraft machine guns not only allow you to fight some aircraft but also are effective against lightly armoured vehicles. Evaluate machine guns and give recommendations on its use.'' --> | <!-- ''Offensive and anti-aircraft machine guns not only allow you to fight some aircraft but also are effective against lightly armoured vehicles. Evaluate machine guns and give recommendations on its use.'' --> | ||
{{main|M240 (7.62 mm)}} | {{main|M240 (7.62 mm)}} | ||
| − | {| class="wikitable" style="text-align:center | + | {| class="wikitable" style="text-align:center" |
|- | |- | ||
! colspan="5" | [[M240 (7.62 mm)|7.62 mm M240]] | ! colspan="5" | [[M240 (7.62 mm)|7.62 mm M240]] | ||
|- | |- | ||
| − | ! Mount | + | ! Mount |
| + | ! Capacity<br>(Belt capacity) | ||
| + | ! Rate of fire<br>(shots/minute) | ||
| + | ! Vertical<br>guidance | ||
| + | ! Horizontal<br>guidance | ||
|- | |- | ||
| − | | Coaxial || 4,400 (200) || | + | | Coaxial || 4,400 (200) || 750 || N/A || N/A |
|- | |- | ||
|} | |} | ||
| Line 145: | Line 164: | ||
In arcade mode, the Bradley can be used very effectively as an anti-aircraft vehicle. Since in arcade you get a lead indicator, you should be able to accurately hit planes and helicopters. When using the HEI-T* ammunition one to two hits is usually fatal for an aircraft. TOW missiles can be used to great effect against helicopters as well, but it is probably smarter to save the ATGMs for ground targets. Also, it can be hard to hit a moving helicopter with an ATGM for someone who's inexperienced with ATGMs. | In arcade mode, the Bradley can be used very effectively as an anti-aircraft vehicle. Since in arcade you get a lead indicator, you should be able to accurately hit planes and helicopters. When using the HEI-T* ammunition one to two hits is usually fatal for an aircraft. TOW missiles can be used to great effect against helicopters as well, but it is probably smarter to save the ATGMs for ground targets. Also, it can be hard to hit a moving helicopter with an ATGM for someone who's inexperienced with ATGMs. | ||
| − | One last note: the TOW missiles should be your primary weapon, not your autocannon. Firing the autocannon will likely give away your position instantly, so unless you have already been seen, or if you know you can kill the target quickly, do not use the autocannon. The autocannon can not effectively destroy tanks but is mostly just effective against SPAA's and light tanks. Those targets can also kill you very easily though, so it is almost always better to use the TOW missiles, in order to destroy the enemy tank quickly and efficiently. On the other hand, if an enemy tank is at close range, and has spotted you, you can often use the autocannon to damage or destroy their gun barrel with multiple, well-aimed, shots, to | + | One last note: the TOW missiles should be your primary weapon, not your autocannon. Firing the autocannon will likely give away your position instantly, so unless you have already been seen, or if you know you can kill the target quickly, do not use the autocannon. The autocannon can not effectively destroy tanks but is mostly just effective against SPAA's and light tanks. Those targets can also kill you very easily though, so it is almost always better to use the TOW missiles, in order to destroy the enemy tank quickly and efficiently. On the other hand, if an enemy tank is at close range, and has spotted you, you can often use the autocannon to damage or destroy their gun barrel with multiple, well-aimed, shots, to by yourself more time. |
| + | |||
| + | === Modules === | ||
| + | {| class="wikitable" | ||
| + | ! Tier | ||
| + | ! colspan="2" | Mobility | ||
| + | ! Protection | ||
| + | ! colspan="3" | Firepower | ||
| + | |- | ||
| + | | I | ||
| + | | Tracks | ||
| + | | | ||
| + | | Parts | ||
| + | | M792 | ||
| + | | Horizontal Drive | ||
| + | | | ||
| + | |- | ||
| + | | II | ||
| + | | Suspension | ||
| + | | Brake System | ||
| + | | FPE | ||
| + | | | ||
| + | | Adjustment of Fire | ||
| + | | Airstrike | ||
| + | |- | ||
| + | | III | ||
| + | | Filters | ||
| + | | | ||
| + | | Crew Replenishment | ||
| + | | M791 | ||
| + | | Elevation Mechanism | ||
| + | | Smoke grenade | ||
| + | |- | ||
| + | | IV | ||
| + | | Transmission | ||
| + | | Engine | ||
| + | | ESS | ||
| + | | Artillery Support | ||
| + | | Improved optics | ||
| + | | NVD | ||
| + | |- | ||
| + | |} | ||
=== Pros and cons === | === Pros and cons === | ||
| Line 153: | Line 213: | ||
* Excels at urban combat, as the gun can be effective when engaging MBTs, except for the Russian MBTs | * Excels at urban combat, as the gun can be effective when engaging MBTs, except for the Russian MBTs | ||
| + | * Low repair and ammo costs | ||
| + | * Massive radiator makes tank hull semi-invulnerable to APHE from the right side, can even survive 3 direct hits from the [[Maus]] if lucky enough | ||
* Outclasses stock 35 mm autocannon tanks which use API or APHE as long as long-range (about 1.1 km) and moderate front armour angle is kept, can even sustain low calibre APDS and HVAP hits from spaded light tanks if it has the high ground | * Outclasses stock 35 mm autocannon tanks which use API or APHE as long as long-range (about 1.1 km) and moderate front armour angle is kept, can even sustain low calibre APDS and HVAP hits from spaded light tanks if it has the high ground | ||
| − | * Can fire missiles at "combat" cruise control, albeit only at about 5 km/h (can be considered as a downgrade after [[M551]], but still | + | * Can fire missiles at "combat" cruise control, albeit only at about 5 km/h (can be considered as a downgrade after [[M551]], but it's still better than most light tanks) |
| − | * | + | * 25mm autocannon can easily tear through lightly armoured SPAAs |
* TOW missiles capable of penetrating many tanks from the front with ease | * TOW missiles capable of penetrating many tanks from the front with ease | ||
| − | * | + | * Fast turret traverse + stabilizer = Easy to deal with air targets while moving |
* Slow ATGM allows for easier aiming onto target | * Slow ATGM allows for easier aiming onto target | ||
| − | * Has access to | + | * Has access to NVD + Thermal sight, which is an absolute advantage against its opponents |
| − | |||
'''Cons:''' | '''Cons:''' | ||
* Additional side armour plates and turret frontal slope protect against 12.7 machine guns, but will always set off APHE, so caution is required | * Additional side armour plates and turret frontal slope protect against 12.7 machine guns, but will always set off APHE, so caution is required | ||
| − | * | + | * M242 cannon has a lower rate of fire compared to the M242 used on the ADATS |
| − | + | * Not entirety of the sides of the hull are protected from machine guns and autocannons, the missile ammo rack in the back and ventilation are vulnerable, turret ring can be exploited by high fire rate autocannons | |
| − | * Relatively slow | + | * Relatively slow |
| − | * | + | * A rather tall and large target, meaning it is very easy to spot |
| − | * Engine, transmission | + | * Quick firing SPAA's can destroy the Bradley quickly |
| − | * | + | * Engine, transmission and driver at front of the vehicle are very prone to damage, although it is better to lose them, than the entire tank |
| − | * | + | * TOW missiles have trouble penetrating later Russian tanks from the front |
| − | * | + | * ATGM is slow and may allow enemies to go into cover before it hits them |
| − | * | + | * Air exhaust near the turret blocks the gunner's thermal sight |
| − | * | + | * Thermal sight has low resolution and overall quality is low |
| − | + | * Like other turbine engines, the engine on the Bradley is loud and makes flanking hard sometimes. | |
| − | |||
== History == | == History == | ||
| Line 197: | Line 257: | ||
;Skins | ;Skins | ||
| − | * [https://live.warthunder.com/feed/camouflages/?vehicle=us_m3_bradley Skins and camouflages for the | + | *[https://live.warthunder.com/feed/camouflages/?vehicleCountry=usa&vehicleType=tank&vehicleClass=light_tank&vehicle=us_m3_bradley '''Skins''' and '''camouflages''' for the M3 Bradley from live.warthunder.com.] |
| − | |||
| − | |||
| − | |||
| − | |||
| − | |||
| − | |||
;Videos | ;Videos | ||
| − | {{Youtube-gallery | + | {{Youtube-gallery|wpm0DcBWhIA|'''The Shooting Range #126''' - ''Pages of History'' section at 05:52 discusses the M3 Bradley.}} |
== See also == | == See also == | ||
| − | + | ''Links to the articles on the War Thunder Wiki that you think will be useful for the reader, for example:'' | |
| + | |||
* ''reference to the series of the vehicles;'' | * ''reference to the series of the vehicles;'' | ||
| − | * ''links to approximate analogues of other nations and research trees.'' | + | * ''links to approximate analogues of other nations and research trees.'' |
| − | |||
| − | |||
| − | |||
| − | |||
| − | |||
| − | |||
| − | |||
== External links == | == External links == | ||
<!-- ''Paste links to sources and external resources, such as:'' | <!-- ''Paste links to sources and external resources, such as:'' | ||
* ''topic on the official game forum;'' | * ''topic on the official game forum;'' | ||
| + | * ''encyclopedia page on the tank;'' | ||
* ''other literature.'' --> | * ''other literature.'' --> | ||
* [[wt:en/news/5919-development-m3-bradley-the-modern-workhorse-en|[Devblog] M3 Bradley: The Modern Workhorse]] | * [[wt:en/news/5919-development-m3-bradley-the-modern-workhorse-en|[Devblog] M3 Bradley: The Modern Workhorse]] | ||
| − | |||
{{USA light tanks}} | {{USA light tanks}} | ||
[[Category:ATGM vehicles]] | [[Category:ATGM vehicles]] | ||
Revision as of 11:42, 31 May 2020
Contents
| This page is about the light tank M3 Bradley. For other uses, see M3 (Disambiguation). |
Description

The Fighting Vehicle, Cavalry, M3, or M3 Bradley, is a rank VI American light tank
with a battle rating of 8.3 (AB/RB/SB). It was introduced in Update 1.85 "Supersonic".
General info
Survivability and armour
Armour protection of the Bradley CFV (Cavalry Fighting Vehicle) is relatively weak, it does offer protection from machine guns and some lower penetrating autocannon fire from the front, but most autocannons will easily penetrate the sides of the vehicle damaging components, crew and often detonating ammo stored in the rear of the vehicle. As aside, the engine mounted in front of the vehicle will offer some protection from main guns on tanks by absorbing spalling, saving crew members and preventing ammo detonations. Getting your gunner shot out is common, however, the breach of the autocannon is very small and therefore does not generally get knocked out. The vehicle does not often hull break although losing too many crew members is common, as there are only 3 in the tank.
Mobility
| Game Mode | Max Speed (km/h) | Weight (tons) | Engine power (horsepower) | Power-to-weight ratio (hp/ton) | |||
|---|---|---|---|---|---|---|---|
| Forward | Reverse | Stock | Upgraded | Stock | Upgraded | ||
| Arcade | 74 | 16 | 22.3 | 786 | 967 | 35.25 | 43.36 |
| Realistic | 66 | 14 | 448 | 507 | 20.09 | 22.74 | |
The M3 Bradley has a maximum speed forward of 66 km/h or 49 km/h in battlefield conditions as well as -12 km/h in reverse. The transmission features 6 forward gears, 2 reverse as well as neutral steering. The vehicle is quite nimble and really only struggles to neutral steer in thick mud. Its lightweight allows it to traverse steep inclines with ease. It should be noted that the vehicles TOW missile launcher will automatically retract when the vehicle reaches speeds in excess of 10km/h.
Armaments
Main armament
| 25 mm M242 | Turret rotation speed (°/s) | Reloading rate (seconds) | ||||||||||||
|---|---|---|---|---|---|---|---|---|---|---|---|---|---|---|
| Mode | Capacity (Belt) | Fire rate | Vertical | Horizontal | Stabilizer | Stock | Upgraded | Full | Expert | Aced | Stock | Full | Expert | Aced |
| Arcade | 1500 (300) | 201 | -9°/+59° | ±180° | Two-plane | 57.1 | 78.83 | 96 | 106.16 | 112.94 | 0.26 | 0.23 | 0.21 | 0.20 |
| Realistic | 35.70 | 42.13 | 51 | 56.4 | 60 | |||||||||
Ammunition
- Default: HEI-T · APDS
- M792: HEI-T · HEI-T · HEI-T · APDS
- M791: APDS · APDS · APDS · HEI-T
| Penetration statistics | ||||||
|---|---|---|---|---|---|---|
| Ammunition | Penetration @ 0° Angle of Attack (mm) | |||||
| 10 m | 100 m | 500 m | 1,000 m | 1,500 m | 2,000 m | |
| Default | 81 | 80 | 76 | 70 | 66 | 61 |
| M791 | 81 | 80 | 76 | 70 | 66 | 61 |
| M792 | 81 | 80 | 76 | 70 | 66 | 61 |
Ammo racks

| Full ammo |
1st rack empty |
2nd rack empty |
3rd rack empty |
4th rack empty |
Visual discrepancy |
|---|---|---|---|---|---|
| 5 | 4 (+1) | 3 (+2) | 2 (+3) | 1 (+4) | No |
Additional armament
The M3 Bradley comes equipped with a BGM-71B TOW ATGM launcher. The launcher contains two TOW missiles, which can be fired one after another in quick succession. Then, they are reloaded. Before you can fire, though, you have to be either stopped or moving at very low speeds, around 5 km/h. At higher speeds, the launcher folds up against the turret. When you stop, it takes time for the launcher to unfold before you can fire. This is where cruise control can be important. The first cruise control setting for forward and reverse speed is the "battle" setting. This controls the speed of the vehicle to where it is slow enough that you can fire the TOW missiles on the move. As before stated, this speed is very low, only about 10 km/h, so you should probably not drive in this mode of cruise control for the whole battle.
Ammunition
| Penetration statistics | |||||||
|---|---|---|---|---|---|---|---|
| Ammunition | Type of warhead |
Penetration @ 0° Angle of Attack (mm) | |||||
| 10 m | 100 m | 500 m | 1,000 m | 1,500 m | 2,000 m | ||
| TOW | ATGM | 430 | 430 | 430 | 430 | 430 | 430 |
| Shell details | |||||||||
|---|---|---|---|---|---|---|---|---|---|
| Ammunition | Type of warhead |
Velocity (m/s) |
Projectile Mass (kg) |
Fuse delay (m) |
Fuse sensitivity (mm) |
Explosive Mass (TNT equivalent) (g) |
Ricochet | ||
| 0% | 50% | 100% | |||||||
| TOW | ATGM | 299 | 18.8 | N/A | 0.1 | 2,450 | 80° | 82° | 90° |
Ammo racks
| Full ammo |
1st rack empty |
2nd rack empty |
3rd rack empty |
4th rack empty |
5th rack empty |
Visual discrepancy |
|---|---|---|---|---|---|---|
| 12 | 10 (+2) | 8 (+4) | 6 (+6) | 4 (+8) | 2 (+10) | Yes |
Machine guns
| 7.62 mm M240 | ||||
|---|---|---|---|---|
| Mount | Capacity (Belt capacity) |
Rate of fire (shots/minute) |
Vertical guidance |
Horizontal guidance |
| Coaxial | 4,400 (200) | 750 | N/A | N/A |
Usage in battles
One way the Bradley can be played is as an ambush vehicle. Find a good location where you have sufficient protective cover to secure your position, but where you can see at least one lane of attack that the enemy is likely to use. Since you will be sitting still, your TOW launcher will be deployed, and you can fire TOW missiles whenever you need to. The best way to use the TOW missiles is to hit the enemy in the side. Two TOW missiles to the side should almost always kill a tank if well aimed.
Another way to use the Bradley is to get hull down, at long range and use the TOW launcher to deadly effect. Since you do not have to calculate for drop for ATGMs, you should be able to reliably hit your target and do major damage. Because you are firing at such long-range, it is likely the enemy will not spot you in time to shoot at you, or they will miss at least their first shot.
The Bradley can also be used effectively in urban combat. If you pick a side street to set up, when the enemy goes past, hopefully without seeing you, you will be able to hit them in the side with the TOW launcher.
In arcade mode, the Bradley can be used very effectively as an anti-aircraft vehicle. Since in arcade you get a lead indicator, you should be able to accurately hit planes and helicopters. When using the HEI-T* ammunition one to two hits is usually fatal for an aircraft. TOW missiles can be used to great effect against helicopters as well, but it is probably smarter to save the ATGMs for ground targets. Also, it can be hard to hit a moving helicopter with an ATGM for someone who's inexperienced with ATGMs.
One last note: the TOW missiles should be your primary weapon, not your autocannon. Firing the autocannon will likely give away your position instantly, so unless you have already been seen, or if you know you can kill the target quickly, do not use the autocannon. The autocannon can not effectively destroy tanks but is mostly just effective against SPAA's and light tanks. Those targets can also kill you very easily though, so it is almost always better to use the TOW missiles, in order to destroy the enemy tank quickly and efficiently. On the other hand, if an enemy tank is at close range, and has spotted you, you can often use the autocannon to damage or destroy their gun barrel with multiple, well-aimed, shots, to by yourself more time.
Modules
| Tier | Mobility | Protection | Firepower | |||
|---|---|---|---|---|---|---|
| I | Tracks | Parts | M792 | Horizontal Drive | ||
| II | Suspension | Brake System | FPE | Adjustment of Fire | Airstrike | |
| III | Filters | Crew Replenishment | M791 | Elevation Mechanism | Smoke grenade | |
| IV | Transmission | Engine | ESS | Artillery Support | Improved optics | NVD |
Pros and cons
Pros:
- Excels at urban combat, as the gun can be effective when engaging MBTs, except for the Russian MBTs
- Low repair and ammo costs
- Massive radiator makes tank hull semi-invulnerable to APHE from the right side, can even survive 3 direct hits from the Maus if lucky enough
- Outclasses stock 35 mm autocannon tanks which use API or APHE as long as long-range (about 1.1 km) and moderate front armour angle is kept, can even sustain low calibre APDS and HVAP hits from spaded light tanks if it has the high ground
- Can fire missiles at "combat" cruise control, albeit only at about 5 km/h (can be considered as a downgrade after M551, but it's still better than most light tanks)
- 25mm autocannon can easily tear through lightly armoured SPAAs
- TOW missiles capable of penetrating many tanks from the front with ease
- Fast turret traverse + stabilizer = Easy to deal with air targets while moving
- Slow ATGM allows for easier aiming onto target
- Has access to NVD + Thermal sight, which is an absolute advantage against its opponents
Cons:
- Additional side armour plates and turret frontal slope protect against 12.7 machine guns, but will always set off APHE, so caution is required
- M242 cannon has a lower rate of fire compared to the M242 used on the ADATS
- Not entirety of the sides of the hull are protected from machine guns and autocannons, the missile ammo rack in the back and ventilation are vulnerable, turret ring can be exploited by high fire rate autocannons
- Relatively slow
- A rather tall and large target, meaning it is very easy to spot
- Quick firing SPAA's can destroy the Bradley quickly
- Engine, transmission and driver at front of the vehicle are very prone to damage, although it is better to lose them, than the entire tank
- TOW missiles have trouble penetrating later Russian tanks from the front
- ATGM is slow and may allow enemies to go into cover before it hits them
- Air exhaust near the turret blocks the gunner's thermal sight
- Thermal sight has low resolution and overall quality is low
- Like other turbine engines, the engine on the Bradley is loud and makes flanking hard sometimes.
History
Development of the Bradley began in the late 1950s when the U.S. Army began seeking a replacement for the ageing M113 APC. However, despite beginning development relatively early, the successor to the M113 wouldn't enter service with the Army in the following two decades.
The reason behind this was the constantly changing specifications, requirements and doctrines around which the new vehicle would be designed. The constantly changing requirements, on the other hand, were driven by various technical and political problems arising during development.
Eventually, in 1979, the final design was presented to the Army and production was approved shortly afterwards in 1980. The Bradley, named after WW2 Army General Omar Bradley, was split into two versions, both closely resembling each other, but featuring minor differences and intended for different roles.
While the M2 Bradley was intended as an IFV, capable of transporting and supporting infantry units in combat, the M3 Bradley CFV (Cavalry Fighting Vehicle) is intended to perform scouting and reconnaissance work, ditching its infantry-carrying ability in favour of improved communications systems and increased ammunition capacity.
The Bradley entered service with the U.S. Army in 1981 and saw extensive combat use during the Gulf War as well as subsequent conflicts. Despite several (unsuccessful) efforts being made to replace the Bradley with a newer design, the vehicle still remains in active service with U.S. armed forces today, with over 6,500 units produced.
- From Devblog
Media
- Skins
- Videos
See also
Links to the articles on the War Thunder Wiki that you think will be useful for the reader, for example:
- reference to the series of the vehicles;
- links to approximate analogues of other nations and research trees.
External links
| USA light tanks | |
|---|---|
| LVT | LVT(A)(1) · ○LVT(A)(1) · LVT(A)(4) |
| M2 | M2A2 · M2A4 · M2A4 (1st Arm.Div.) |
| M3/M5 Stuart | M3 Stuart · M3A1 Stuart · M3A1 (USMC) · M5A1 · M5A1 TD · ▃Stuart VI (5th CAD) |
| M22 Locust | M22 |
| M24 Chaffee | M24 · M24 (TL) |
| M18 Hellcat | M18 GMC · M18 "Black Cat" · Super Hellcat |
| M41 Walker Bulldog | M41A1 |
| M551 Sheridan | M551 · M551(76) |
| M3 Bradley | M3 Bradley · M3A3 Bradley |
| Wheeled | M8 LAC · T18E2 · M1128 · M1128 Wolfpack |
| Other | M8A1 GMC · T92 · T114 · HSTV-L · CCVL · XM8 · AGS |
