Difference between revisions of "M60 AMBT"
m (→Main armament) |
(→Pros and cons) (Tag: Visual edit) |
||
| (31 intermediate revisions by 11 users not shown) | |||
| Line 1: | Line 1: | ||
| + | {{Specs-Card | ||
| + | |code=us_m60a3_slep | ||
| + | |market=items_M60 AMBT (USA) | ||
| + | }} | ||
{{About | {{About | ||
| about = gift American medium tank '''{{PAGENAME}}''' | | about = gift American medium tank '''{{PAGENAME}}''' | ||
| usage = other versions | | usage = other versions | ||
| link = M60 (Family) | | link = M60 (Family) | ||
| − | |||
| − | |||
| − | |||
| − | |||
| − | |||
}} | }} | ||
== Description == | == Description == | ||
<!-- ''In the description, the first part should be about the history of the creation and combat usage of the vehicle, as well as its key features. In the second part, tell the reader about the ground vehicle in the game. Insert a screenshot of the vehicle, so that if the novice player does not remember the vehicle by name, he will immediately understand what kind of vehicle the article is talking about.'' --> | <!-- ''In the description, the first part should be about the history of the creation and combat usage of the vehicle, as well as its key features. In the second part, tell the reader about the ground vehicle in the game. Insert a screenshot of the vehicle, so that if the novice player does not remember the vehicle by name, he will immediately understand what kind of vehicle the article is talking about.'' --> | ||
| + | [[File:GarageImage_{{PAGENAME}}.jpg|420px|thumb|left]] | ||
| + | {{Break}} | ||
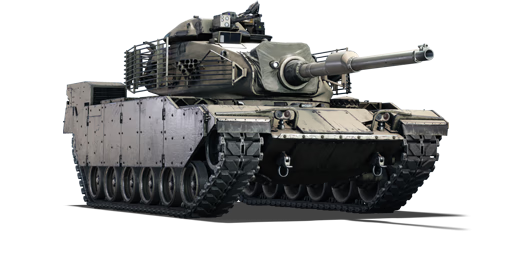
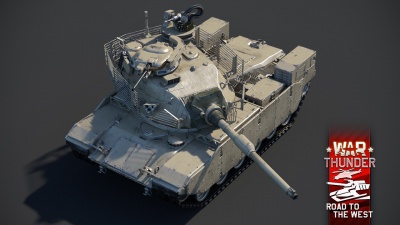
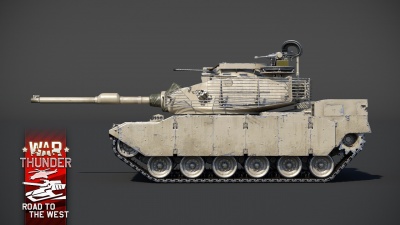
The '''{{Specs|name}}''' is a gift rank {{Specs|rank}} American medium tank {{Battle-rating}}. It was introduced during [[Update "Starfighters"]] as a reward for World War Mode [[Season 3: Road to the West]]. | The '''{{Specs|name}}''' is a gift rank {{Specs|rank}} American medium tank {{Battle-rating}}. It was introduced during [[Update "Starfighters"]] as a reward for World War Mode [[Season 3: Road to the West]]. | ||
== General info == | == General info == | ||
=== Survivability and armour === | === Survivability and armour === | ||
| − | |||
<!-- ''Describe armour protection. Note the most well protected and key weak areas. Appreciate the layout of modules as well as the number and location of crew members. Is the level of armour protection sufficient, is the placement of modules helpful for survival in combat? If necessary use a visual template to indicate the most secure and weak zones of the armour.'' --> | <!-- ''Describe armour protection. Note the most well protected and key weak areas. Appreciate the layout of modules as well as the number and location of crew members. Is the level of armour protection sufficient, is the placement of modules helpful for survival in combat? If necessary use a visual template to indicate the most secure and weak zones of the armour.'' --> | ||
| − | '''Armour | + | '''Armour Composition''' |
| − | * Cast | + | * Cast Homogeneous Armour - The main armour of the turret and hull. |
| − | * Rolled | + | * Rolled Homogeneous Armour - Engine deck and engine compartment rear, additional armour panels (upper and lower glacis). |
| − | * Structural | + | * Structural Steel - Slat armour, fenders, storage boxes. |
| − | * Gun | + | * Gun Steel - All gun barrels. |
| − | * Composite | + | * Composite Screens - Sidescreens. |
{| class="wikitable" | {| class="wikitable" | ||
| Line 31: | Line 31: | ||
! Armour !! Front (Slope angle) !! Sides !! Rear !! Roof | ! Armour !! Front (Slope angle) !! Sides !! Rear !! Roof | ||
|- | |- | ||
| − | | Hull || 108 mm ( | + | | Hull || 108 mm (65) ''Upper Glacis'' |
| + | 137 mm (52) ''Lower Glacis'' 117 mm (55) ''Lower Glacis (Bottom)'' | ||
| + | |||
| + | 114 mm ''Turret Ring Guard'' | ||
| + | | 36 - 70 mm ''Sides'' | ||
| + | 50.8 mm ''Turret Ring Guard'' | ||
| + | | 25 mm ''Engine Compartment Rear'' | ||
| + | 40 mm ''Rear'' 28 mm ''Lower Rear'' | ||
| + | |||
| + | 50.8 mm ''Turret Ring Guard'' | ||
| + | | 36 mm ''Driver's Compartment'' | ||
| + | 20 mm ''Engine Deck'' | ||
|- | |- | ||
| − | | Turret || 230.9 mm ''Front'' Sides | + | | Turret || 230.9 mm ''Front'' Sides |
| + | 76.2 mm ''Below and Above Mantlet''<br>127 mm ''Gun Mantlet (Inner)'' 50.8 mm ''Gun Mantlet (Outer)'' | ||
| + | | 53.8 - 230.9 mm ''Right Side'' | ||
| + | 49.8 - 215.9 mm ''Left Side'' | ||
| + | | 57 mm ''Turret Bustle Rear'' | ||
| + | 25.4 mm ''Lower Rear'' ''and Bustle Underside'' | ||
| + | | 48 mm ''Front'' | ||
| + | 25.4 mm ''Rear'' | ||
|- | |- | ||
| − | | Cupola || 35 mm (Various Angles) ''Front'' | + | | Cupola || 35 mm (Various Angles) ''Front'' |
| + | 35 mm (Various Angles) ''Mantlet'' | ||
| + | | 26 mm || 26 mm || 30 mm | ||
|- | |- | ||
| − | |Additional | + | |Additional |
| + | Armour | ||
| + | |6.35 mm ''Turret Front (Around Mantlet)'' | ||
| + | 25 mm ''Upper and Lower Glacis'' | ||
| + | |65 mm Composite Screens ''Hull Sides'' | ||
| + | 30 mm Slat Armour ''Turret Sides'' | ||
| + | |||
| + | 6.35 mm ''Front and Rear Track Guards'' | ||
| + | |30 mm Slat Armour ''Turret Rear'' | ||
| + | |25.4 mm ''Autocannon Platform'' | ||
|- | |- | ||
|} | |} | ||
| Line 51: | Line 80: | ||
=== Mobility === | === Mobility === | ||
| − | |||
<!-- ''Write about the mobility of the ground vehicle. Estimate the specific power and manoeuvrability, as well as the maximum speed forwards and backwards.'' --> | <!-- ''Write about the mobility of the ground vehicle. Estimate the specific power and manoeuvrability, as well as the maximum speed forwards and backwards.'' --> | ||
| + | ''Write about the mobility of the ground vehicle. Estimate the specific power and manoeuvrability, as well as the maximum speed forwards and backwards.'' | ||
{{tankMobility|abMinHp=1,860|rbMinHp=1,061}} | {{tankMobility|abMinHp=1,860|rbMinHp=1,061}} | ||
| − | |||
| − | |||
| − | |||
== Armaments == | == Armaments == | ||
| − | |||
=== Main armament === | === Main armament === | ||
| − | |||
<!-- ''Give the reader information about the characteristics of the main gun. Assess its effectiveness in a battle based on the reloading speed, ballistics and the power of shells. Do not forget about the flexibility of the fire, that is how quickly the cannon can be aimed at the target, open fire on it and aim at another enemy. Add a link to the main article on the gun: <code><nowiki>{{main|Name of the weapon}}</nowiki></code>. Describe in general terms the ammunition available for the main gun. Give advice on how to use them and how to fill the ammunition storage.'' --> | <!-- ''Give the reader information about the characteristics of the main gun. Assess its effectiveness in a battle based on the reloading speed, ballistics and the power of shells. Do not forget about the flexibility of the fire, that is how quickly the cannon can be aimed at the target, open fire on it and aim at another enemy. Add a link to the main article on the gun: <code><nowiki>{{main|Name of the weapon}}</nowiki></code>. Describe in general terms the ammunition available for the main gun. Give advice on how to use them and how to fill the ammunition storage.'' --> | ||
{{main|M256 (120 mm)}} | {{main|M256 (120 mm)}} | ||
| − | + | The M256 is the same cannon that is used on the [[M1A1 Abrams|M1A1]] and [[M1A2 Abrams]]. The main item that differentiates this cannon from the M1A2's is the round. The M60 AMBT has the "KE-W" APFSDS round which has very high penetration for its BR. The round can be reliably shot centre mass and penetrate most opponents it faces, excluding the top BR tanks in a full uptier. 583 mm at 0° point-blank is an extremely potent round for most engagement ranges you will experience. The AMBT Also has access to the M830 HEAT-FS round which can be useful for killing lightly armoured vehicles and destroying some map obstacles such as buildings or trees. The M60 AMBT also has decent gun handling up its sleeve, it is not the fastest at the BR but it can definitely compete. The vehicle shares the same reload as similar 120 mm and 105 mm cannons: 8.7s reload stock, 7.7s reload maxed crew, 6.7s reload with an aced crew. | |
| − | The M256 is the same cannon that is used on the [[M1A1 Abrams|M1A1]] | ||
{| class="wikitable" style="text-align:center" width="100%" | {| class="wikitable" style="text-align:center" width="100%" | ||
| Line 77: | Line 100: | ||
|- | |- | ||
! ''Arcade'' | ! ''Arcade'' | ||
| − | | rowspan="2" | 40 || rowspan="2" | -10°/+20° || rowspan="2" | ±180° || rowspan="2" | Two-plane || 38.1 || 52.7 || 64.0 || 70.8 || 75.3 || rowspan="2" | 8. | + | | rowspan="2" | 40 || rowspan="2" | -10°/+20° || rowspan="2" | ±180° || rowspan="2" | Two-plane || 38.1 || 52.7 ||64.0||70.8|| 75.3 || rowspan="2" | 8.7 || rowspan="2" |7.7|| rowspan="2" |7.1|| rowspan="2" | 6.7 |
|- | |- | ||
! ''Realistic'' | ! ''Realistic'' | ||
| − | | 23.8 || 28.0 || 34.0 || 37.6 || 40.0 | + | | 23.8 || 28.0 ||34.0||37.6|| 40.0 |
|- | |- | ||
|} | |} | ||
==== Ammunition ==== | ==== Ammunition ==== | ||
| − | {{: | + | {| class="wikitable sortable" style="text-align:center" width="100%" |
| + | ! colspan="8" | Penetration statistics | ||
| + | |- | ||
| + | ! rowspan="2" data-sort-type="text" | Ammunition | ||
| + | ! rowspan="2" | Type of<br>warhead | ||
| + | ! colspan="6" | '''Penetration @ 0° Angle of Attack (mm)''' | ||
| + | |- | ||
| + | ! 10 m !! 100 m !! 500 m !! 1,000 m !! 1,500 m !! 2,000 m | ||
| + | |- | ||
| + | | M830 || HEATFS || 480 || 480 || 480 || 480 || 480 || 480 | ||
| + | |- | ||
| + | | KE-W || APFSDS || 583 || 579 || 569 || 556 || 542 || 528 | ||
| + | |- | ||
| + | |} | ||
| + | {| class="wikitable sortable" style="text-align:center" width="100%" | ||
| + | ! colspan="10" | Shell details | ||
| + | |- | ||
| + | ! rowspan="2" data-sort-type="text" | Ammunition | ||
| + | ! rowspan="2" | Type of<br>warhead | ||
| + | ! rowspan="2" | Velocity<br>(m/s) | ||
| + | ! rowspan="2" | Projectile<br>Mass (kg) | ||
| + | ! rowspan="2" | Fuse delay<br>(m) | ||
| + | ! rowspan="2" | Fuse sensitivity<br>(mm) | ||
| + | ! rowspan="2" | Explosive Mass<br>(TNT equivalent) (g) | ||
| + | ! colspan="3" | Ricochet | ||
| + | |- | ||
| + | ! 0% !! 50% !! 100% | ||
| + | |- | ||
| + | | M830 || HEATFS || 1,140 || 13.10 || N/A || 0.1 || 2,360 || 65° || 72° || 77° | ||
| + | |- | ||
| + | | KE-W || APFSDS || 1,585 || 4.00 || N/A || N/A || N/A || 78° || 80° || 81° | ||
| + | |- | ||
| + | |} | ||
==== [[Ammo racks]] ==== | ==== [[Ammo racks]] ==== | ||
[[File:Ammoracks_{{PAGENAME}}.png|right|thumb|x250px|[[Ammo racks]] of the {{PAGENAME}}]] | [[File:Ammoracks_{{PAGENAME}}.png|right|thumb|x250px|[[Ammo racks]] of the {{PAGENAME}}]] | ||
| − | |||
{| class="wikitable" style="text-align:center" | {| class="wikitable" style="text-align:center" | ||
|- | |- | ||
| Line 108: | Line 162: | ||
=== Additional armament === | === Additional armament === | ||
| − | |||
<!-- ''Some tanks are armed with several guns in one or more turrets. Evaluate the additional weaponry and give advice on its use. Describe the ammunition available for additional weaponry. Give advice on about how to use them and how to fill the ammunition storage. If there is no additional weaponry remove this subsection.'' --> | <!-- ''Some tanks are armed with several guns in one or more turrets. Evaluate the additional weaponry and give advice on its use. Describe the ammunition available for additional weaponry. Give advice on about how to use them and how to fill the ammunition storage. If there is no additional weaponry remove this subsection.'' --> | ||
{{main|LW25 (25 mm)}} | {{main|LW25 (25 mm)}} | ||
| + | ''Some tanks are armed with several guns in one or more turrets. Evaluate the additional weaponry and give advice on its use. Describe the ammunition available for additional weaponry. Give advice on about how to use them and how to fill the ammunition storage. If there is no additional weaponry remove this subsection.'' | ||
{| class="wikitable" style="text-align:center" width="100%" | {| class="wikitable" style="text-align:center" width="100%" | ||
|- | |- | ||
| − | ! colspan="6" | [[LW25 (25 mm)|25 mm LW25]] || colspan="5" | Turret rotation speed (°/s) | + | ! colspan="6" | [[LW25 (25 mm)|25 mm LW25]] || colspan="5" | Turret rotation speed (°/s) || colspan="4" | Reloading rate (seconds) |
|- | |- | ||
! Mode !! Capacity (Belt) !! Fire rate !! Vertical !! Horizontal !! Stabilizer | ! Mode !! Capacity (Belt) !! Fire rate !! Vertical !! Horizontal !! Stabilizer | ||
! Stock !! Upgraded !! Full !! Expert !! Aced | ! Stock !! Upgraded !! Full !! Expert !! Aced | ||
| + | ! Stock !! Full !! Expert !! Aced | ||
|- | |- | ||
! ''Arcade'' | ! ''Arcade'' | ||
| − | | rowspan="2" | 300 (300) || rowspan="2" | | + | | rowspan="2" | 300 (300) || rowspan="2" | 201 || rowspan="2" | -5°/+28° || rowspan="2" | ±180° || rowspan="2" | N/A || 29.0 || 40.0 || __.__ || __.__ || 56.0 || rowspan="2" | 0.5 || rowspan="2" | _.__ || rowspan="2" | _.__ || rowspan="2" | 0.4 |
|- | |- | ||
! ''Realistic'' | ! ''Realistic'' | ||
| − | | 18 || 21 || | + | | 18.0 || 21.0 || __.__ || __.__ || 30.0 |
|- | |- | ||
|} | |} | ||
==== Ammunition ==== | ==== Ammunition ==== | ||
| − | {{: | + | {| class="wikitable" style="text-align:center" width="100%" |
| + | ! colspan="8" | Penetration statistics | ||
| + | |- | ||
| + | ! rowspan="2" data-sort-type="text" | Ammunition | ||
| + | ! rowspan="2" | Type of<br>warhead | ||
| + | ! colspan="6" | '''Penetration @ 0° Angle of Attack (mm)''' | ||
| + | |- | ||
| + | ! 10 m !! 100 m !! 500 m !! 1,000 m !! 1,500 m !! 2,000 m | ||
| + | |- | ||
| + | | M792 || HEI-T || 3 || 3 || 3 || 3 || 3 || 3 | ||
| + | |- | ||
| + | |} | ||
| + | {| class="wikitable" style="text-align:center" width="100%" | ||
| + | ! colspan="10" | Shell details | ||
| + | |- | ||
| + | ! rowspan="2" data-sort-type="text" | Ammunition | ||
| + | ! rowspan="2" | Type of<br>warhead | ||
| + | ! rowspan="2" | Velocity<br>(m/s) | ||
| + | ! rowspan="2" | Projectile<br>Mass (kg) | ||
| + | ! rowspan="2" | Fuse delay<br>(m) | ||
| + | ! rowspan="2" | Fuse sensitivity<br>(mm) | ||
| + | ! rowspan="2" | Explosive Mass<br>(TNT equivalent) (g) | ||
| + | ! colspan="3" | Ricochet | ||
| + | |- | ||
| + | ! 0% !! 50% !! 100% | ||
| + | |- | ||
| + | | M792 || HEI-T || 900 || 0.50 || N/A || 0.1 || 54.4 || 79° || 80° || 81° | ||
| + | |- | ||
| + | |} | ||
=== Machine guns === | === Machine guns === | ||
| − | |||
| − | |||
<!-- ''Offensive and anti-aircraft machine guns not only allow you to fight some aircraft but also are effective against lightly armoured vehicles. Evaluate machine guns and give recommendations on its use.'' --> | <!-- ''Offensive and anti-aircraft machine guns not only allow you to fight some aircraft but also are effective against lightly armoured vehicles. Evaluate machine guns and give recommendations on its use.'' --> | ||
| − | {{main| | + | {{main|M85 (12.7 mm)|M240 (7.62 mm)}} |
| + | ''Offensive and anti-aircraft machine guns not only allow you to fight some aircraft but also are effective against lightly armoured vehicles. Evaluate machine guns and give recommendations on its use.'' | ||
{| class="wikitable" style="text-align:center" width="50%" | {| class="wikitable" style="text-align:center" width="50%" | ||
|- | |- | ||
| − | ! colspan="5" | [[ | + | ! colspan="5" | [[M85 (12.7 mm)|12.7 mm M85]] |
|- | |- | ||
! Mount !! Capacity (Belt) !! Fire rate !! Vertical !! Horizontal | ! Mount !! Capacity (Belt) !! Fire rate !! Vertical !! Horizontal | ||
|- | |- | ||
| − | | Pintle || | + | | Pintle || 900 (200) || 626 || -4°/+60° || -95°/+160° |
|- | |- | ||
|} | |} | ||
| Line 151: | Line 233: | ||
! Mount !! Capacity (Belt) !! Fire rate !! Vertical !! Horizontal | ! Mount !! Capacity (Belt) !! Fire rate !! Vertical !! Horizontal | ||
|- | |- | ||
| − | | Coaxial || | + | | Coaxial || 5,950 (200) || 750 || N/A || N/A |
|- | |- | ||
|} | |} | ||
| Line 157: | Line 239: | ||
== Usage in battles == | == Usage in battles == | ||
<!-- ''Describe the tactics of playing in the vehicle, the features of using vehicles in the team and advice on tactics. Refrain from creating a "guide" - do not impose a single point of view but instead give the reader food for thought. Describe the most dangerous enemies and give recommendations on fighting them. If necessary, note the specifics of the game in different modes (AB, RB, SB).'' --> | <!-- ''Describe the tactics of playing in the vehicle, the features of using vehicles in the team and advice on tactics. Refrain from creating a "guide" - do not impose a single point of view but instead give the reader food for thought. Describe the most dangerous enemies and give recommendations on fighting them. If necessary, note the specifics of the game in different modes (AB, RB, SB).'' --> | ||
| + | ''Describe the tactics of playing in the vehicle, the features of using vehicles in the team and advice on tactics. Refrain from creating a "guide" - do not impose a single point of view but instead give the reader food for thought. Describe the most dangerous enemies and give recommendations on fighting them. If necessary, note the specifics of the game in different modes (AB, RB, SB).''--> | ||
| + | |||
| + | The M60 AMBT, excels as a tank which is able to defend cap zones and destroy foes at far ranges. However, it lack's protection which other MBT's have. The main weakness of the M60 AMBT is, the armour and pure size of it. All enemy tanks which it engages within combat, are able to penetrate it with ease. | ||
| + | |||
| + | |||
| + | |||
| − | |||
| − | |||
| − | |||
| − | |||
| − | + | ||
| − | + | === Modules === | |
| + | {| class="wikitable" | ||
| + | ! Tier | ||
| + | ! colspan="2" | Mobility | ||
| + | ! Protection | ||
| + | ! colspan="3" | Firepower | ||
| + | |- | ||
| + | | I | ||
| + | | Tracks | ||
| + | | | ||
| + | | Parts | ||
| + | | Horizontal Drive | ||
| + | | | ||
| + | | | ||
| + | |- | ||
| + | | II | ||
| + | | Suspension | ||
| + | | Brake System | ||
| + | | FPE | ||
| + | | Adjustment of Fire | ||
| + | | | ||
| + | | | ||
| + | |- | ||
| + | | III | ||
| + | | Filters | ||
| + | | | ||
| + | | Crew Replenishment | ||
| + | | Elevation Mechanism | ||
| + | | KE-W | ||
| + | | Smoke grenade | ||
| + | |- | ||
| + | | IV | ||
| + | | Transmission | ||
| + | | Engine | ||
| + | | | ||
| + | | Artillery Support | ||
| + | | Laser rangefinder | ||
| + | | NVD | ||
| + | |- | ||
| + | |} | ||
=== Pros and cons === | === Pros and cons === | ||
| Line 174: | Line 297: | ||
'''Pros:''' | '''Pros:''' | ||
| − | * | + | * Has the second highest penetrating APFSDS round in the game (after the Swedish/Italian 625 mm round), allowing effective engagement of any target from the front. |
* Has much higher mobility than the other M60 series tanks, making it much more pleasant to play. | * Has much higher mobility than the other M60 series tanks, making it much more pleasant to play. | ||
* Has a 25 mm autocannon on the turret roof, allowing easier engagement of low-flying helicopters. | * Has a 25 mm autocannon on the turret roof, allowing easier engagement of low-flying helicopters. | ||
* Is protected on the sides by composite screens and slat armour which can protect against HEAT projectiles and low-penetration autocannons, though it should not be relied upon. | * Is protected on the sides by composite screens and slat armour which can protect against HEAT projectiles and low-penetration autocannons, though it should not be relied upon. | ||
| − | * No ammunition is located in the turret bustle, which | + | * No ammunition is located in the turret bustle, which means shots to the turret will almost never kill it in one shot. |
| − | + | ||
| − | |||
'''Cons:''' | '''Cons:''' | ||
| Line 190: | Line 312: | ||
* The commander's cupola is very large and the 25 mm gun is mounted high above the turret, and they will often give away your position, especially when trying to go hull down or when cresting a hill or ridge. | * The commander's cupola is very large and the 25 mm gun is mounted high above the turret, and they will often give away your position, especially when trying to go hull down or when cresting a hill or ridge. | ||
* Relatively tall silhouette, enemies have no problem identifying and spotting you. | * Relatively tall silhouette, enemies have no problem identifying and spotting you. | ||
| − | |||
== History == | == History == | ||
| Line 204: | Line 325: | ||
;Skins | ;Skins | ||
| − | * [https://live.warthunder.com/feed/camouflages/?vehicle=us_m60a3_slep Skins and camouflages for the {{PAGENAME}} from live.warthunder.com.] | + | * [https://live.warthunder.com/feed/camouflages/?vehicleCountry=usa&vehicleType=tank&vehicleClass=medium_tank&vehicle=us_m60a3_slep Skins and camouflages for the {{PAGENAME}} from live.warthunder.com.] |
;Images | ;Images | ||
| Line 228: | Line 349: | ||
* [[M60 (Family)]] | * [[M60 (Family)]] | ||
| + | |||
| + | ;Vehicles equipped with the same gun | ||
| + | |||
| + | * [[M1A1 Abrams]] | ||
| + | * [[M1A2 Abrams]] | ||
== External links == | == External links == | ||
<!-- ''Paste links to sources and external resources, such as:'' | <!-- ''Paste links to sources and external resources, such as:'' | ||
* ''topic on the official game forum;'' | * ''topic on the official game forum;'' | ||
| + | * ''encyclopedia page on the tank;'' | ||
* ''other literature.'' --> | * ''other literature.'' --> | ||
Revision as of 20:25, 23 September 2020
Contents
| This page is about the gift American medium tank M60 AMBT. For other versions, see M60 (Family). |
Description

The M60 AMBT is a gift rank VII American medium tank
with a battle rating of 10.0 (AB/RB/SB). It was introduced during Update "Starfighters" as a reward for World War Mode Season 3: Road to the West.
General info
Survivability and armour
Armour Composition
- Cast Homogeneous Armour - The main armour of the turret and hull.
- Rolled Homogeneous Armour - Engine deck and engine compartment rear, additional armour panels (upper and lower glacis).
- Structural Steel - Slat armour, fenders, storage boxes.
- Gun Steel - All gun barrels.
- Composite Screens - Sidescreens.
| Armour | Front (Slope angle) | Sides | Rear | Roof |
|---|---|---|---|---|
| Hull | 108 mm (65) Upper Glacis
137 mm (52) Lower Glacis 117 mm (55) Lower Glacis (Bottom) 114 mm Turret Ring Guard |
36 - 70 mm Sides
50.8 mm Turret Ring Guard |
25 mm Engine Compartment Rear
40 mm Rear 28 mm Lower Rear 50.8 mm Turret Ring Guard |
36 mm Driver's Compartment
20 mm Engine Deck |
| Turret | 230.9 mm Front Sides
76.2 mm Below and Above Mantlet |
53.8 - 230.9 mm Right Side
49.8 - 215.9 mm Left Side |
57 mm Turret Bustle Rear
25.4 mm Lower Rear and Bustle Underside |
48 mm Front
25.4 mm Rear |
| Cupola | 35 mm (Various Angles) Front
35 mm (Various Angles) Mantlet |
26 mm | 26 mm | 30 mm |
| Additional
Armour |
6.35 mm Turret Front (Around Mantlet)
25 mm Upper and Lower Glacis |
65 mm Composite Screens Hull Sides
30 mm Slat Armour Turret Sides 6.35 mm Front and Rear Track Guards |
30 mm Slat Armour Turret Rear | 25.4 mm Autocannon Platform |
Notes:
- The additional armour does not cover the entire face of the surface it is located on
- All Suspension Parts - 20 mm
- Tracks - 30 mm
- Turret Ring - 50.4 mm
- Fenders - 4 mm
- Storage boxes (4 mm) are mounted on top of the fenders
Mobility
Write about the mobility of the ground vehicle. Estimate the specific power and manoeuvrability, as well as the maximum speed forwards and backwards.
| Game Mode | Max Speed (km/h) | Weight (tons) | Engine power (horsepower) | Power-to-weight ratio (hp/ton) | |||
|---|---|---|---|---|---|---|---|
| Forward | Reverse | Stock | Upgraded | Stock | Upgraded | ||
| Arcade | 65 | 16 | 54.5 | 1,860 | 2,290 | 34.13 | 42.02 |
| Realistic | 58 | 15 | 1,061 | 1,200 | 19.47 | 22.02 | |
Armaments
Main armament
The M256 is the same cannon that is used on the M1A1 and M1A2 Abrams. The main item that differentiates this cannon from the M1A2's is the round. The M60 AMBT has the "KE-W" APFSDS round which has very high penetration for its BR. The round can be reliably shot centre mass and penetrate most opponents it faces, excluding the top BR tanks in a full uptier. 583 mm at 0° point-blank is an extremely potent round for most engagement ranges you will experience. The AMBT Also has access to the M830 HEAT-FS round which can be useful for killing lightly armoured vehicles and destroying some map obstacles such as buildings or trees. The M60 AMBT also has decent gun handling up its sleeve, it is not the fastest at the BR but it can definitely compete. The vehicle shares the same reload as similar 120 mm and 105 mm cannons: 8.7s reload stock, 7.7s reload maxed crew, 6.7s reload with an aced crew.
| 120 mm M256 | Turret rotation speed (°/s) | Reloading rate (seconds) | |||||||||||
|---|---|---|---|---|---|---|---|---|---|---|---|---|---|
| Mode | Capacity | Vertical | Horizontal | Stabilizer | Stock | Upgraded | Full | Expert | Aced | Stock | Full | Expert | Aced |
| Arcade | 40 | -10°/+20° | ±180° | Two-plane | 38.1 | 52.7 | 64.0 | 70.8 | 75.3 | 8.7 | 7.7 | 7.1 | 6.7 |
| Realistic | 23.8 | 28.0 | 34.0 | 37.6 | 40.0 | ||||||||
Ammunition
| Penetration statistics | |||||||
|---|---|---|---|---|---|---|---|
| Ammunition | Type of warhead |
Penetration @ 0° Angle of Attack (mm) | |||||
| 10 m | 100 m | 500 m | 1,000 m | 1,500 m | 2,000 m | ||
| M830 | HEATFS | 480 | 480 | 480 | 480 | 480 | 480 |
| KE-W | APFSDS | 583 | 579 | 569 | 556 | 542 | 528 |
| Shell details | |||||||||
|---|---|---|---|---|---|---|---|---|---|
| Ammunition | Type of warhead |
Velocity (m/s) |
Projectile Mass (kg) |
Fuse delay (m) |
Fuse sensitivity (mm) |
Explosive Mass (TNT equivalent) (g) |
Ricochet | ||
| 0% | 50% | 100% | |||||||
| M830 | HEATFS | 1,140 | 13.10 | N/A | 0.1 | 2,360 | 65° | 72° | 77° |
| KE-W | APFSDS | 1,585 | 4.00 | N/A | N/A | N/A | 78° | 80° | 81° |
Ammo racks

| Full ammo |
1st rack empty |
2nd rack empty |
3rd rack empty |
Visual discrepancy |
|---|---|---|---|---|
| 40 | 26 (+14) | 11 (+29) | 1 (+39) | No |
Notes:
- Rack 3 is the first order ammo rack. It totals 10 shells and gets filled first when loading up the tank.
- This rack is also emptied early: the rack depletion order at full capacity is: 3 - 1 - 2.
- If you pack 26 (+14) shells, the rack depletion order will be 3 - 2.
Additional armament
Some tanks are armed with several guns in one or more turrets. Evaluate the additional weaponry and give advice on its use. Describe the ammunition available for additional weaponry. Give advice on about how to use them and how to fill the ammunition storage. If there is no additional weaponry remove this subsection.
| 25 mm LW25 | Turret rotation speed (°/s) | Reloading rate (seconds) | ||||||||||||
|---|---|---|---|---|---|---|---|---|---|---|---|---|---|---|
| Mode | Capacity (Belt) | Fire rate | Vertical | Horizontal | Stabilizer | Stock | Upgraded | Full | Expert | Aced | Stock | Full | Expert | Aced |
| Arcade | 300 (300) | 201 | -5°/+28° | ±180° | N/A | 29.0 | 40.0 | __.__ | __.__ | 56.0 | 0.5 | _.__ | _.__ | 0.4 |
| Realistic | 18.0 | 21.0 | __.__ | __.__ | 30.0 | |||||||||
Ammunition
| Penetration statistics | |||||||
|---|---|---|---|---|---|---|---|
| Ammunition | Type of warhead |
Penetration @ 0° Angle of Attack (mm) | |||||
| 10 m | 100 m | 500 m | 1,000 m | 1,500 m | 2,000 m | ||
| M792 | HEI-T | 3 | 3 | 3 | 3 | 3 | 3 |
| Shell details | |||||||||
|---|---|---|---|---|---|---|---|---|---|
| Ammunition | Type of warhead |
Velocity (m/s) |
Projectile Mass (kg) |
Fuse delay (m) |
Fuse sensitivity (mm) |
Explosive Mass (TNT equivalent) (g) |
Ricochet | ||
| 0% | 50% | 100% | |||||||
| M792 | HEI-T | 900 | 0.50 | N/A | 0.1 | 54.4 | 79° | 80° | 81° |
Machine guns
Offensive and anti-aircraft machine guns not only allow you to fight some aircraft but also are effective against lightly armoured vehicles. Evaluate machine guns and give recommendations on its use.
| 12.7 mm M85 | ||||
|---|---|---|---|---|
| Mount | Capacity (Belt) | Fire rate | Vertical | Horizontal |
| Pintle | 900 (200) | 626 | -4°/+60° | -95°/+160° |
| 7.62 mm M240 | ||||
|---|---|---|---|---|
| Mount | Capacity (Belt) | Fire rate | Vertical | Horizontal |
| Coaxial | 5,950 (200) | 750 | N/A | N/A |
Usage in battles
Describe the tactics of playing in the vehicle, the features of using vehicles in the team and advice on tactics. Refrain from creating a "guide" - do not impose a single point of view but instead give the reader food for thought. Describe the most dangerous enemies and give recommendations on fighting them. If necessary, note the specifics of the game in different modes (AB, RB, SB).-->
The M60 AMBT, excels as a tank which is able to defend cap zones and destroy foes at far ranges. However, it lack's protection which other MBT's have. The main weakness of the M60 AMBT is, the armour and pure size of it. All enemy tanks which it engages within combat, are able to penetrate it with ease.
Modules
| Tier | Mobility | Protection | Firepower | |||
|---|---|---|---|---|---|---|
| I | Tracks | Parts | Horizontal Drive | |||
| II | Suspension | Brake System | FPE | Adjustment of Fire | ||
| III | Filters | Crew Replenishment | Elevation Mechanism | KE-W | Smoke grenade | |
| IV | Transmission | Engine | Artillery Support | Laser rangefinder | NVD | |
Pros and cons
Pros:
- Has the second highest penetrating APFSDS round in the game (after the Swedish/Italian 625 mm round), allowing effective engagement of any target from the front.
- Has much higher mobility than the other M60 series tanks, making it much more pleasant to play.
- Has a 25 mm autocannon on the turret roof, allowing easier engagement of low-flying helicopters.
- Is protected on the sides by composite screens and slat armour which can protect against HEAT projectiles and low-penetration autocannons, though it should not be relied upon.
- No ammunition is located in the turret bustle, which means shots to the turret will almost never kill it in one shot.
Cons:
- Has a stock HEATFS round with the APFSDS round as a Tier III modification; HEATFS can be useful but is generally less effective and versatile than APFSDS.
- Lacks useful armour such as composite or spaced armour: just about any shell that hits it is going to penetrate except for low-penetration autocannons from the front.
- Has a very large and weak mantlet which is able to be penetrated by high-penetration autocannons, such as those on the CV90 series; the turret ring is a target for even weak autocannons.
- Despite the much more powerful engine when compared to earlier M60s, the AMBT still does not have the mobility of the other MBTs at its BR.
- The commander's cupola is very large and the 25 mm gun is mounted high above the turret, and they will often give away your position, especially when trying to go hull down or when cresting a hill or ridge.
- Relatively tall silhouette, enemies have no problem identifying and spotting you.
History
In 2011, the Turkish company StandartBio proposed a large-scale modernization program for outdated M60 tanks. The program was called the Affordable Main Battle Tank (AMBT) and was aimed to increase combat effectiveness of M60 tanks to a level roughly equivalent to modern main battle tanks. The main changes of this modernization were a new 1200 hp diesel engine, a modern fire control system with a ballistic computer and independent stabilization of the aiming line through a digital gunner's sight, as well as a new smooth-bore M256 120-mm gun. The tank's protection also increased slightly by installing solid hull side screens and tower slat screens. In addition, the tank received an electric turret drive, new surveillance optics, and a 25-mm automatic cannon in the commander's turret. The AMBT modernization program was designed entirely for foreign operators of the M60 from several countries in Africa and Southeast Asia.
- From Devblog
Media
- Skins
- Images
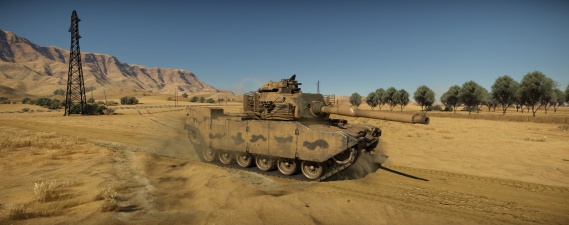
Tricolor summer camouflage of the Turkish Armed Forces, rewarded for collecting 9 World War Stars

- Videos
See also
- Vehicles equipped with the same chassis
- Vehicles equipped with the same gun
External links
| USA medium tanks | |
|---|---|
| M2 | M2 |
| M3 | M3 Lee · ▃Grant I |
| M4 | M4 · Calliope · M4A1 · M4A1 (76) W · M4A2 · M4A2 (76) W · M4A3 (105) · M4A3 (76) W · M4/T26 |
| M26 Pershing | T20 · T25 · M26 · M26 T99 · M26E1 |
| M46/47/48 Patton | M46 · M46 "Tiger" · M47 · M48A1 · T54E1 · T54E2 |
| M60 | M60 · M60A1 (AOS) · M60A1 RISE (P) · M60A2 · M60A3 TTS · M728 CEV · 120S |
| MBT-70 | MBT-70 · XM803 |
| M1 Abrams | XM1 (Chrysler) · XM1 (GM) |
| M1 Abrams · M1 KVT · IPM1 | |
| M1A1 · M1A1 HC · M1A1 Click-Bait | |
| M1A2 Abrams · M1A2 SEP · M1A2 SEP V2 | |
| Other | T95E1 |
| Australia | M1A1 AIM |
| Canada | M4A5 |
| Israel | ▃Magach 3 (ERA) · ▃Merkava Mk.1 · ▃Merkava Mk.2B · ▃Merkava Mk.3D |
| Turkey | M60 AMBT |
