|
|
| (53 intermediate revisions by 11 users not shown) |
| Line 1: |
Line 1: |
| − | {{About | + | {{Specs-Card|code=ussr_isu_122s}} |
| − | |about= Soviet tank destroyer '''{{PAGENAME}}''' | + | {{Notice|''This page is about the tank destroyer '''{{PAGENAME}}'''. For the version equipped with an A-19 cannon, see [[ISU-122]]''}} |
| − | |and
| |
| − | |usage= other versions
| |
| − | |link-1= ISU-122
| |
| − | |link-2= ISU-122 (China)
| |
| − | }}
| |
| − | {{Specs-Card
| |
| − | |code=ussr_isu_122s
| |
| − | |images={{Specs-Card-Image|GarageImage_{{PAGENAME}}.jpg}}
| |
| − | }} | |
| | | | |
| | == Description == | | == Description == |
| | <!-- ''In the description, the first part should be about the history of the creation and combat usage of the vehicle, as well as its key features. In the second part, tell the reader about the ground vehicle in the game. Insert a screenshot of the vehicle, so that if the novice player does not remember the vehicle by name, he will immediately understand what kind of vehicle the article is talking about.'' --> | | <!-- ''In the description, the first part should be about the history of the creation and combat usage of the vehicle, as well as its key features. In the second part, tell the reader about the ground vehicle in the game. Insert a screenshot of the vehicle, so that if the novice player does not remember the vehicle by name, he will immediately understand what kind of vehicle the article is talking about.'' --> |
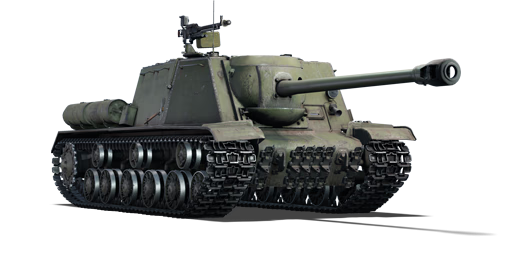
| − | The '''ISU-122S''' was an improved design (rather than a separate variant) of the [[ISU-122]] assault gun used by the Soviets during World War II, mostly in the anti-tank role. A semi-automatic breech block was fitted to the original 122 mm A-19S tank gun. The tank gun with this new design was designated as the 122 mm D-25S. The modification resulted in an increase in the fire rate to 3 rounds per minute from 1.5 rounds per minute. The ball-shaped gun mantlet and double-baffle muzzle brake of the ISU-122S are distinguishing features. The Germans coded the ISU-122S as Type 249 in their official reports. | + | <!-- [[File:GarageImage_{{PAGENAME}}.jpg|420px|thumb|left]] |
| − | | + | {{break}} --> |
| − | Introduced in the Closed Beta Test for Ground Forces before Update 1.41, the ISU-122 is a long-range sniper that performs well in combat due to its high penetration, accuracy, and good reverse speed. Locate a good spot to snipe from and engage the enemy from a distance to keep them from approaching the objectives. Due to the tall profile and inadequate frontal armour, one should always stay away from the frontline to avoid being flanked or swarmed. Although there is a significant reduction in reload time, players should still make their shots count since most enemies reload much more quickly, making it rare to be able to take a follow-up shot if the initial shot misses.
| + | The '''{{Specs|name}}''' is a Rank {{Specs|rank}} Russian tank destroyer {{Battle-rating}}. It was introduced during the Closed Beta Test for Ground Forces before [[Update 1.41]]. |
| | | | |
| | == General info == | | == General info == |
| | === Survivability and armour === | | === Survivability and armour === |
| − | {{Specs-Tank-Armour}}
| + | ''Describe armour protection. Note the most well protected and key weak areas. Appreciate the layout of modules as well as the number and location of crew members. Is the level of armour protection sufficient, is the placement of modules helpful for survival in combat?'' |
| − | <!-- ''Describe armour protection. Note the most well protected and key weak areas. Appreciate the layout of modules as well as the number and location of crew members. Is the level of armour protection sufficient, is the placement of modules helpful for survival in combat? If necessary use a visual template to indicate the most secure and weak zones of the armour.'' -->
| |
| − | The {{PAGENAME}}'s armour profile is almost identical to that of its predecessor, except for a different gun mantlet. The armour will protect against smaller calibre guns and autocannons, but should not be relied upon against most tanks it faces at its battle rating. The gun mantlet is the strongest part of the armour, and, because the gun is offset to the right, it is thus recommended to try and hide the left side and only expose the right side of the front towards enemies.
| |
| − | | |
| − | The relatively thick side armour can cause bounces and ricochets if angled, but depending on this is risky for a turretless vehicle, as it may get its tracks disabled and rendered helpless.
| |
| − | | |
| − | '''Armour type:'''
| |
| | | | |
| − | * Rolled homogeneous armour (hull, superstructure/casemate, roof)
| + | ''If necessary use a visual template to indicate the most secure and weak zones of the armour.'' |
| − | * Cast homogeneous armour (gun mantlet)
| |
| − | | |
| − | {| class="wikitable"
| |
| − | |-
| |
| − | ! Armour !! Front !! Sides !! Rear !! Roof
| |
| − | |-
| |
| − | | Hull || 60 mm (75°) ''Front glacis'' <br> 90 mm (31°) ''Lower glacis'' || 90 mm || 60 mm (50°) ''Top'' <br> 60 mm (39°) ''Bottom'' || 30 mm
| |
| − | |-
| |
| − | | Superstructure || 90 mm (30°) ''Front glacis'' <br> 100 + 65 mm (7-35°) ''Gun mantlet'' || 75 mm (14-15°) || 60 mm || 30 mm
| |
| − | |-
| |
| − | |}
| |
| − | '''Notes:'''
| |
| − | | |
| − | * Suspension wheels are 20 mm thick while tracks are 30 mm thick.
| |
| − | * There is a 40 mm plate under the gun mantlet, reinforcing the original 65 mm gun mantlet case.
| |
| | | | |
| | === Mobility === | | === Mobility === |
| − | {{Specs-Tank-Mobility}}
| + | ''Write about the mobility of the ground vehicle. Estimate the specific power and manoeuvrability, as well as the maximum speed forward and backward.'' |
| − | <!-- ''Write about the mobility of the ground vehicle. Estimate the specific power and manoeuvrability, as well as the maximum speed forwards and backwards.'' -->
| |
| − | | |
| − | {{tankMobility|abMinHp= 739|rbMinHp= 460}}
| |
| − | | |
| − | Based on the IS-2, the {{PAGENAME}} has its robust chassis, wide tracks and powerful engine. It benefits thus from the same good mobility despite being a relatively heavy vehicle. The acceleration is good and it will reach its maximum speed without any problem.
| |
| − | | |
| − | The very high reverse speed allows it to back off from an engagement quickly, once shot at or spotted. The wide tracks give it good handling and performance on soft terrain. The {{PAGENAME}} is quite sluggish in stock condition, especially when turning on the spot. And because of its weight, it is slow when going uphill. If you have to turn quickly on the spot, privilege using your reverse gear because it has more torque.
| |
| − | | |
| − | === Modifications and economy ===
| |
| − | {{Specs-Economy}}
| |
| − | | |
| − | * Start with Parts and FPE for the survivability.
| |
| − | * Proceed with Tracks to increase your mobility.
| |
| − | * After that, prioritize either firepower or mobility modules depending on your needs.
| |
| | | | |
| | == Armaments == | | == Armaments == |
| − | {{Specs-Tank-Armaments}}
| |
| | === Main armament === | | === Main armament === |
| − | {{Specs-Tank-Weapon|1}}
| + | ''Give the reader information about the characteristics of the main gun. Assess its effectiveness in a battle based on the reloading speed, ballistics and the power of shells. Do not forget about the flexibility of the fire, that is how quickly the cannon can be aimed at the target, open fire on it and aim at another enemy. Add a link to the main article on the gun: <code><nowiki>{{main|Name of the weapon}}</nowiki></code>. Describe in general terms the ammunition available for the main gun. Give advice on how to use them and how to fill the ammunition storage.'' |
| − | <!-- ''Give the reader information about the characteristics of the main gun. Assess its effectiveness in a battle based on the reloading speed, ballistics and the power of shells. Do not forget about the flexibility of the fire, that is how quickly the cannon can be aimed at the target, open fire on it and aim at another enemy. Add a link to the main article on the gun: <code><nowiki>{{main|Name of the weapon}}</nowiki></code>. Describe in general terms the ammunition available for the main gun. Give advice on how to use them and how to fill the ammunition storage.'' -->
| |
| − | {{main|D-25S (122 mm)}}
| |
| | | | |
| − | {| class="wikitable" style="text-align:center" width="100%"
| + | === Additional armament === |
| − | |-
| + | ''Some tanks are armed with several guns in one or more turrets. Evaluate the additional weaponry and give advice on its use. Describe the ammunition available for additional weaponry. Give advice on how to use them and how to fill the ammunition storage. If there is no additional weaponry remove this subsection.'' |
| − | ! colspan="5" | [[D-25S (122 mm)|122 mm D-25S]] || colspan="5" | Turret rotation speed (°/s) || colspan="4" | Reloading rate (seconds)
| |
| − | |-
| |
| − | ! Mode !! Capacity !! Vertical !! Horizontal !! Stabilizer
| |
| − | ! Stock !! Upgraded !! Full !! Expert !! Aced
| |
| − | ! Stock !! Full !! Expert !! Aced
| |
| − | |-
| |
| − | ! ''Arcade''
| |
| − | | rowspan="2" | 30 || rowspan="2" | -3°/+20° || rowspan="2" | -3°/+7° || rowspan="2" | N/A || 6.2 || 8.5 || 10.4 || 11.5 || 12.2 || rowspan="2" | 19.76 || rowspan="2" | 17.48 || rowspan="2" | 16.11 || rowspan="2" | 15.20
| |
| − | |-
| |
| − | ! ''Realistic''
| |
| − | | 4.2 || 4.9 || 6.0 || 6.6 || 7.0
| |
| − | |-
| |
| − | |}
| |
| − | | |
| − | [[File:ISU-122S gun horizontal displacement.png|right|thumbnail|Horizontal traverse arc of the {{PAGENAME}}|200px]]
| |
| − | The 122 mm D-25S comes from the same design as the 122 mm D-25T equipped on the IS-2. They have the same ballistic characteristics and the same available ammunition choice. The S stand for "samokhodnaya" (self-propelled) while the T stand for "tank", the main difference being the length of the breech: short breech for the IS-2 in its cramped turret and long breech for the {{PAGENAME}} because of the casemate layout.
| |
| − | | |
| − | Being originally an artillery field gun, the gun uses two-piece ammunition with projectiles and propellant bags. These combined with the large calibre of the gun result in a relatively low rate of fire. This causes the reload time to be 2 to 3 times longer compared to vehicles at the same BR. However, because of the improved breech, the {{PAGENAME}} still reloads faster than the preceding [[ISU-122]] and the [[IS-2 (Family)|IS-2s]].
| |
| − | | |
| − | The gun remains reliably accurate until 1,300 m distance. Beyond 1,000 m, the poor optics will limit its accuracy as the sight magnification is poor. The high muzzle velocity of the shells result in relatively flat trajectories and thus helps hitting moving targets from a distance. Using the "sight distance control" feature can increase your chances of successfully hitting enemy tanks.
| |
| − | | |
| − | The gun has limited horizontal traverse. The traverse arc is asymmetrical due to the commander's position limiting rotation towards the left side. This can make tracking a moving target difficult. This should be taken into account when positioning the vehicle. Additionally, because of the size of the gun and the manual traverse, the gun traverse speed is very slow compared to other tanks at the same rank or battle rating. The result is that the {{PAGENAME}} is rather slow to react against moving targets, and being able to predict a target's movement is a skill that will really help overcome these limitations.
| |
| − | | |
| − | The {{PAGENAME}} also has very poor gun depression and will struggle to bring its gun to bear on a target on all but the flattest of terrain. Gun elevation, on the other hand, is quite good. This can be used to make up for the poor gun depression to some extent with creative positioning.
| |
| − | | |
| − | Your recoil is important but not powerful enough to throw your gun off target after firing: the damping cylinders on the gun are too weak to absorb most of the recoil power and the suspension will absorb much of it. Your reload time being very long, the recoil is not as much of a handicap as it could be.
| |
| − | | |
| − | ==== Ammunition ====
| |
| − | The available choice of ammunition focuses on heavily armoured targets:
| |
| − | | |
| − | * '''BR-471''': APHE; an armour-piercing shell with high explosive mass and high muzzle velocity that will one-shot any tank that it penetrates.
| |
| − | * '''BR-471B''': APHEBC; essentially the same as the BR-471, but with significantly improved performance against sloped armour thanks to the ballistic cap. This shell can reliably penetrate the frontal glacis of a Panther from over 700 m. The preferred shell against armoured targets.
| |
| − | * '''OF-471''': HE; most effective against lightly armoured and open-topped vehicles. However, the projectile contains enough explosive to penetrate the roofs of some tanks via the blast overpressure.
| |
| − | | |
| − | {{:D-25S (122 mm)/Ammunition|BR-471, BR-471B, OF-471}}
| |
| − | | |
| − | ==== [[Ammo racks]] ====
| |
| − | [[File:Ammoracks_{{PAGENAME}}.png|right|thumb|x250px|[[Ammo racks]] of the {{PAGENAME}}]]
| |
| − | <!-- '''Last updated:''' -->
| |
| − | {| class="wikitable" style="text-align:center"
| |
| − | |-
| |
| − | ! Full<br>ammo
| |
| − | ! Ammo<br>part
| |
| − | ! 1st<br>rack empty
| |
| − | ! 2nd<br>rack empty
| |
| − | ! 3rd<br>rack empty
| |
| − | ! 4th<br>rack empty
| |
| − | ! 5th<br>rack empty
| |
| − | ! Visual<br>discrepancy
| |
| − | |-
| |
| − | | '''30''' || ''Projectiles''<br>''Propellants'' || 25 ''(+5)''<br> 25 ''(+5)'' || 19 ''(+11)'' <br> 19 ''(+11)'' || 13 ''(+17)''<br> 17 ''(+13)'' || 7 ''(+23)''<br> 9 ''(+21)'' || 1 ''(+29)''<br> 1 ''(+29)'' || No
| |
| − | |-
| |
| − | |}
| |
| − | '''Notes''':
| |
| − | | |
| − | * The {{PAGENAME}} uses two-piece ammunition, composed of propellant bags (orange) and projectiles (yellow). Both have separate racks.
| |
| − | * To go into battle with the right flank depleted of propellant bags (racks 1 to 3), pack 17 ''(+13)'' shells.
| |
| | | | |
| | === Machine guns === | | === Machine guns === |
| − | {{Specs-Tank-Weapon|2}}
| + | ''Offensive and anti-aircraft machine guns not only allow you to fight some aircraft, but also are effective against lightly armoured vehicles. Evaluate machine guns and give recommendations on its use.'' |
| − | <!-- ''Offensive and anti-aircraft machine guns not only allow you to fight some aircraft but also are effective against lightly armoured vehicles. Evaluate machine guns and give recommendations on its use.'' -->
| |
| − | {{main|DShK (12.7 mm)}}
| |
| − | | |
| − | The 12.7 mm DShK heavy machine gun is located on a pintle mount, manned by the loader, and can act as both an offensive and anti-aircraft machine gun on the {{PAGENAME}}, giving protection against aircraft and lightly armoured vehicles. Effective range is within 500 m against lightly armoured vehicles. The 360° traverse allows you to point the DShK in any given direction. However, the position of the DShK high on the casemate and the poor depression angle make it difficult to shoot at low-profile targets at close range. The DShK also has a slow traverse speed compared to the American .50 cal M2HB mounted on American-made vehicles.
| |
| − | | |
| − | {| class="wikitable" style="text-align:center" width="50%"
| |
| − | |-
| |
| − | ! colspan="5" | [[DShK (12.7 mm)|12.7 mm DShK]]
| |
| − | |-
| |
| − | ! Mount !! Capacity (Belt) !! Fire rate !! Vertical !! Horizontal
| |
| − | |-
| |
| − | | Pintle || 250 (50) || 600 || -5°/+85° || ±180°
| |
| − | |-
| |
| − | |}
| |
| | | | |
| | == Usage in battles == | | == Usage in battles == |
| − | <!-- ''Describe the tactics of playing in the vehicle, the features of using vehicles in the team and advice on tactics. Refrain from creating a "guide" - do not impose a single point of view but instead give the reader food for thought. Describe the most dangerous enemies and give recommendations on fighting them. If necessary, note the specifics of the game in different modes (AB, RB, SB).'' -->
| + | ''Describe the tactics of playing in the vehicle, the features of using vehicles in the team and advice on tactics. Refrain from creating a "guide" - do not impose a single point of view but instead give the reader food for thought. Describe the most dangerous enemies and give recommendations on fighting them. If necessary, note the specifics of the game in different modes (AB, RB, SB).'' |
| − | | |
| − | ;Offensive role
| |
| − | | |
| − | The {{PAGENAME}} performs well as a long range sniper, taking advantage of the APHEBC shell's high penetration values, high gun accuracy and good reverse speed. Find a shooting spot and engage targets from at least 1,000 m away to prevent enemy progress towards the objectives. Because of its high profile (casemate), long reload, and weak frontal armour, always stay away from the frontline to avoid being flanked or swarmed. While your gun is very powerful, your in-game performance will highly be dependent on the map you are playing on. Open maps like Fire Arc, Kursk, or Maginot Line will allow you to make the best use of its sniping capabilities, whereas urban environments like Advance to the Rhine are generally poor maps for the {{PAGENAME}}. In case you are playing on a mixed terrain map, prefer open spaces.
| |
| − | | |
| − | ;Defensive role
| |
| − | | |
| − | In case of an enemy breakthrough, your role is to contain the enemy advance by pinning them down. The enemy will be moving the front line, so engagements will take place at a closer range than you're comfortable with. You should identify and target priority choke points, narrow passages, and corridors of the map that the enemy will be forced to take. Your limited gun traverse only allows you to monitor an area spanning about 175 m at 1,000 m distance without having to reposition your hull. Position the left side of your casemate behind an obstacle to leave only your gun mantlet exposed, the thickest part of the frontal armour.
| |
| − | | |
| − | ;Other roles
| |
| − | | |
| − | If you try to use the {{PAGENAME}} in a different role on the battlefield, you will be confronted with the following:
| |
| − | | |
| − | * If you try to play as a front-line tank, you will be quickly disabled by any type of fire coming from enemy tanks. Your frontal armour is pretty thin for a tank to play at close range, and a successful penetrating shot from the front will usually disable your crew sitting in a line. Your gun traverse is very limited and your turning speed is also too poor to manoeuvre quickly enough in close combat.
| |
| − | * If you attempt to play support tank, your high profile will make it difficult to stay hidden behind obstacles without taking fire. Your good reverse speed can be an advantage but the enemy will flush you out with an artillery strike (which can be accurate enough at medium range to disable you). Even with an escape route planned and cover to hide behind, your chances of survival are meagre. You will also be at risk of being flanked by light tanks or armoured cars, especially if they swarm you. Anyone who manages to get behind you has a very high chance of destroying you. In that role, an undetected flanking enemy, artillery strikes or CAS will be great threats to the {{PAGENAME}}.
| |
| − | | |
| − | ;Notable enemies
| |
| − | | |
| − | * Any tank will disable you with ease in a close range encounter because of your weak unsloped casemate armour.
| |
| − | * For long range engagements, commonly met guns able to penetrate the {{PAGENAME}} from 1,000 m are:
| |
| − | ** USA: tanks equipped with a long 76 mm gun (M4/M41), M36 GMC
| |
| − | ** Germany: any vehicle equipped with a 75 or 88 mm gun like Panthers, Tigers I & II, etc.
| |
| − | ** USSR: any vehicle equipped with an 85 or 122 mm gun like the IS-2, T-34-85, etc.
| |
| − | ** Great Britain: any vehicle equipped with APDS like the Centurion, Challenger, and Charioteer.
| |
| − | ** Japan: Ho-Ri and US-built tanks.
| |
| − | ** China: vehicles similar to the US and USSR ones.
| |
| − | ** France: ARL-44 and AMX-13.
| |
| − | ** Sweden: Ikv 103 and Strv 74.
| |
| − | | |
| − | [[File:Wsp volumetric shell diagram.png|thumb|Differences between non-volumetric shells and volumetric shells hitting a Tiger I]]
| |
| − | An important note when engaging tanks, especially Tiger I's, is that, with the implementation of volumetric shells, you can no longer expect your shells to pierce through small openings or right past an obstacle. The large 122 mm calibre of your shells will result in it catching on an armour plate's edge very often, losing all of its penetration. For example, a Tiger I has some edges that can absorb your shell unexpectedly, despite having flat armour. Thus you must always make sure that where you are aiming at is absolutely free of obstruction, or it may result in a non-penetration or a ricochet. This can be seen in the diagram to the right.
| |
| − | | |
| − | ;Defeating an {{PAGENAME}}
| |
| − | | |
| − | * Wait for {{PAGENAME}} to shoot before engaging it: its long reloading time is a big weakness as it is defenseless for at least 15 seconds like an IS-2. It can however retreat quickly thanks to its good reverse speed. Be careful not to get baited into open field trying to follow your prey.
| |
| − | * The {{PAGENAME}} has a rather thin armour when compared to tanks at the same BR: if you have a very high penetrating power, aim for the casemate.
| |
| − | * In a frontal encounter, the right side of the frontal armour plate is the biggest weak spot. A successful penetration will most likely knock out 3 out of 4 crew members because they sit in line along that axis.
| |
| − | * In a flanking manoeuvre, the center of the casemate is the place to shoot to knock most crew members out.
| |
| − | * From behind, the left side of the casemate is the best spot to disable the {{PAGENAME}}.
| |
| − | * If you are alone, flanking a {{PAGENAME}} undetected remains your best chance to destroy it. But it is difficult because the {{PAGENAME}} ideally positions itself very far from the frontline.
| |
| − | * Force it out of position with indirect fire (artillery strikes) if you're at relative close range.
| |
| − | * In case of a frontal attack (choke point/corridor), try blinding the {{PAGENAME}} with smoke and then swarm it with several tanks to saturate its defensive capacities.
| |
| − | * Engage the {{PAGENAME}} while it is moving: it takes a long time to brake, turn, bring the gun to a stable position and target precisely. With a reload time over 15 seconds, no player will take a shot that has little chance to hit.
| |
| − | * Do not take pot shots or shoot on the move, aim precisely at the weak spots (casemate walls). Your chance of ricochet is increased at long range as your penetration power decreases and the {{PAGENAME}} can angle its hull in a defensive manoeuvre.
| |
| | | | |
| | === Pros and cons === | | === Pros and cons === |
| − | <!-- ''Summarise and briefly evaluate the vehicle in terms of its characteristics and combat effectiveness. Mark its pros and cons in a bulleted list. Try not to use more than 6 points for each of the characteristics. Avoid using categorical definitions such as "bad", "good" and the like - use substitutions with softer forms such as "inadequate" and "effective".'' -->
| + | ''Summarize and briefly evaluate the vehicle in terms of its characteristics and combat effectiveness. Mark its pros and cons in a bulleted list. Try not to use more than 6 points for each of the characteristics. Avoid using categorical definitions such as "bad", "good" and the like - they can be substituted with softer forms such as "inadequate" and "effective".'' |
| | | | |
| | '''Pros:''' | | '''Pros:''' |
| − | | + | * |
| − | * Extremely potent 122 mm gun. | |
| − | * Reloads significantly faster than other 122 mm gun platforms.
| |
| − | * Large gun mantlet can be hard to penetrate.
| |
| − | * Decent all-round protection against autocannons.
| |
| − | * Powerful roof-mounted MG that can rotate at 360°
| |
| − | * High reverse speed.
| |
| | | | |
| | '''Cons:''' | | '''Cons:''' |
| − | | + | * |
| − | * Long reload time compared to most contemporary vehicles. | |
| − | * Unsloped frontal armour that is insufficient against commonly encountered tank guns.
| |
| − | * Cramped crew compartment results in poor survivability.
| |
| − | * Very poor gun depression and narrow traverse arc.
| |
| − | * Prominent gun breech often gets damaged.
| |
| − | * Vulnerable when immobilized and flanked
| |
| | | | |
| | == History == | | == History == |
| − | <!-- ''Describe the history of the creation and combat usage of the vehicle in more detail than in the introduction. If the historical reference turns out to be too long, take it to a separate article, taking a link to the article about the vehicle and adding a block "/History" (example: <nowiki>https://wiki.warthunder.com/(Vehicle-name)/History</nowiki>) and add a link to it here using the <code>main</code> template. Be sure to reference text and sources by using <code><nowiki><ref></ref></nowiki></code>, as well as adding them at the end of the article with <code><nowiki><references /></nowiki></code>. This section may also include the vehicle's dev blog entry (if applicable) and the in-game encyclopedia description (under <code><nowiki>=== In-game description ===</nowiki></code>, also if applicable).'' -->
| + | ''Describe the history of the creation and combat usage of the ground vehicle in more detail than in the introduction. If the historical reference turns out to be too big, take it to a separate article, taking a link to the article about the vehicle and adding a block "/ History" (example: <nowiki>https://wiki.warthunder.com/(Vehicle-name)/History</nowiki>) and add a link to it here using the <code>main</code> template. Be sure to reference text and sources by using <code><nowiki><ref></nowiki></code>, as well as adding them at the end of the article. This section may also include the vehicle's devblog entry (if applicable) and the ingame encyclopedia description (under <code><nowiki>=== Encyclopedia Info ===</nowiki></code>, also if applicable).'' |
| − | ===Development===
| |
| − | When the [[ISU-152]] began production in 1943 with the large 152 mm ML-20S gun, production of the chassis and hull soon exceeded the supply of the ML-20S gun, which caused a decrease in the production of self-propelled guns for the Soviet military. It was determined to speed up self-propelled gun production, the ISU chassis were to be mounted with the 122 mm A-19S gun. Work on this mounting already began before the supply issue in December 1943 at the Chelyabinsk Kirov Plant (ChKZ), which had a design team simply take the ISU-152 chassis and hull and only changing out the armament with the 122 mm gun, but this prototype - ''Object 242'' - was not immediately put into production despite successful testings. When the supply issue arose, the prototype was then adopted by the Soviet Defense Committee for increased production and also that the 122 mm gun had better accuracy against tanks than the 152 mm gun. The ISU armed with the 122 mm gun, designated the '''ISU-122''', began production in April 1944.
| |
| − | | |
| − | ===Upgrade===
| |
| − | The original '''[[ISU-122]]''' is equipped with the 122 mm A-19S gun, which had a firing rate of 1.5 to 2.5 shots per minute due to its manual-piston breech. An attempt to fix this was a modernized A-19 gun called the D-25. The D-25 didn't see instalment onto the ISU-122 for a while due to prioritization on the IS-2 tanks, but it was available for use on self-propelled mounts after September 1944 as the D-25S. The ISU-122 prototype mounting the D-25 gun was called ''Object 249'' which was successfully tested and an improvement over the A-19 gun with an increased firing rate of 2 to 3 shots per minute with one loader and up to 4 shots per minute with an additional loader in the crew. The D-25 also exploited the use of a muzzle brake in order to reduce the recoil forces on the gun, so the recoil buffer on the D-25 was much smaller than the A-19, which helped reduce the size of the gun and improved crew workspace in the self-propelled gun. ''Object 249'' was then adopted as the '''[[ISU-122S]]''', which entered production side by side with the ISU-122 u and both were produced up until the end of 1945. ChKZ produced both vehicles during the war and manufactured 1,735 ISU-122s (April 1944 - December 1945) and 675 ISU-122Ss (September 1944 - December 1945).
| |
| − | | |
| − | ===Combat usage===
| |
| − | The ISU-122 were organized in units in a similar fashion as the [[ISU-152]]. The focus was made to not mix the two vehicles in the same regiments or brigades due to logistical reasons with ammunition and ballistic differences in indirect fire, but some units were equipped with both vehicles anyways. Like the ISU-152, the ISU-122 proved to be a very powerful multi-purpose vehicle as an assault gun, self-propelled artillery, and tank destroyer. The 122 mm gun on the ISU-122 allowed it to engage armour and fortifications with heavy armour-piercing round and a large high-explosive round. The primary role of the ISU-122 was as a tank destroyer due to the gun's superior ballistics compared to the ISU-152's, which large calibre size more suited its role as an assault gun. The ISU-122 did participate as an assault gun role in urban combat to support the infantry, but the lack of rotating turret and long barrel length restricted its manoeuvring and ability to engage all enemies in a large angle. Nevertheless, commanders found the ISU-122 as a very good assault gun. Usage of the ISU-122 in an indirect firing role as a howitzer is rare, but when used could fire up to 14 kilometres away. Usage as an artillery piece is more likely during a rapid offensive where towed artillery behind the lines is unable to keep up with the advancing infantry lines.
| |
| − | | |
| − | {{break}}
| |
| − | {{Navigation-Start|{{Annotation|Archive of the in-game description|An archive of the historical description of the vehicle that was presented in-game prior to Update 1.55 'Royal Armour'}}}}
| |
| − | {{Navigation-First-Simple-Line}}
| |
| − | The ISU-122S self-propelled gun was created in April 1944 as a modernised variation of the ISU-122 SPG. It differed from the latter in that it was equipped with a 122 mm D-25S Mod. 1944 cannon with a wedge-type semi-automatic breech block and a muzzle brake. The barrel's length came to 48 calibres. The height of its firing line came to 1,795 mm. The vehicle had a five-man crew and its crew housing was the same as in the ISU-122. The use of this cannon increased its rate of fire in combat from 2.2 to 3 shots per minute. The cannon's new compact recoil mechanisms and breech housing provided better working conditions for the combat crew. Artillery superiority over the enemy had been absent for some time, but the use of the D-25S cannon brought it back. It had higher combat characteristics than the German 75 mm and 88 mm weapons, and penetrated enemy tank armour at a range of up to 2,500 m. In urban battles however, the 122 mm cannon's barrel length often prevented the vehicle from manoeuvring in tight spots.
| |
| − | | |
| − | From August 1944 to September 1945, the ISU-122 with its A-19 cannon and the modernised ISU-122S with its D-25S cannon were produced in tandem, as the 122 mm D-25S cannon supply was insufficient to furnish all the SPGs. By the 1st of June 1945, 475 ISU-122S SPGs were built and used in battles in the final stage of the Great Patriotic War. In total, 675 of them were made in their mass production period.
| |
| − | | |
| − | ISU-122S SPGs were used across the entire functional scope of self-propelled artillery application. It was used as an assault weapon in breaking through fortified zones and in urban battles, but with reduced effectiveness in comparison to the ISU-152. On the whole, the SPG was highly regarded in this role as well.
| |
| − | | |
| − | In the middle of the 1960s, the SPGs were removed from service in the Soviet Army.
| |
| − | {{Navigation-End}}
| |
| | | | |
| | == Media == | | == Media == |
| − | <!--''Excellent additions to the article would be video guides, screenshots from the game, and photos.''-->
| + | Skin and Camouflages for the [https://live.warthunder.com/feed/camouflages/?vehicleCountry=ussr&vehicleType=tank&vehicleClass=tank_destroyer&vehicle=ussr_isu_122s ISU-122S] in Warthunder Live. |
| − | | |
| − | ;Skins
| |
| − | | |
| − | * [https://live.warthunder.com/feed/camouflages/?vehicle=ussr_isu_122s Skins and Camouflages for the {{PAGENAME}} on live.warthunder.com].
| |
| − | | |
| − | ;Videos
| |
| − | {{Youtube-gallery|7JWqa5QMQUI|'''ISU-122S - One last trick''' - ''Oxy'' (review starts at 00:42)}}
| |
| | | | |
| | == See also == | | == See also == |
| − | <!-- ''Links to the articles on the War Thunder Wiki that you think will be useful for the reader, for example:''
| + | ''Links to the articles on the War Thunder Wiki that you think will be useful for the reader, for example:'' |
| | * ''reference to the series of the vehicles;'' | | * ''reference to the series of the vehicles;'' |
| − | * ''links to approximate analogues of other nations and research trees.'' --> | + | * ''links to approximate analogues of other nations and research trees.'' |
| − | | |
| − | ;Vehicles equipped with the same chassis
| |
| − | | |
| − | * [[ISU-122]] / [[ISU-122 (China)]]
| |
| − | * [[IS-2 (Family)]]
| |
| − | | |
| − | ;Similar Soviet vehicles
| |
| − | | |
| − | * [[SU-152]]
| |
| − | * [[ISU-152]] / [[ISU-152 (China)]]
| |
| − | * [[SU-122-54]]
| |
| − | | |
| − | ;Other vehicles of similar configuration and role
| |
| − | | |
| − | * [[Panzer IV/70(A)]]
| |
| − | * [[Panzer IV/70(V)]]
| |
| − | * [[Jagdpanther]]
| |
| − | * [[Ho-Ri Prototype]]
| |
| − | * [[CA Lorraine]]
| |
| − | * [[Ikv 103]]
| |
| | | | |
| | == External links == | | == External links == |
| − | <!-- ''Paste links to sources and external resources, such as:'' | + | <!--''Paste links to sources and external resources, such as:'' |
| | * ''topic on the official game forum;'' | | * ''topic on the official game forum;'' |
| − | * ''other literature.'' --> | + | * ''encyclopedia page on the tank;'' |
| − | | + | * ''other literature.''--> |
| − | * [[Wikipedia:ISU-122#Variants|[Wikipedia] ISU-122]] | + | * [https://en.wikipedia.org/wiki/ISU-122#Variants [Wikipedia<nowiki>]</nowiki> ISU-122] |
| − | * [https://tanks-encyclopedia.com/ww2/soviet/ISU-122.php Tanks Encyclopedia - ISU-122 & 122S]
| |
| | | | |
| − | {{TankManufacturer ChTZ}}
| |
| | {{USSR tank destroyers}} | | {{USSR tank destroyers}} |