Difference between revisions of "Fox"
GodofHeresy (talk | contribs) (→Pros and cons) (Tag: Visual edit) |
bangerland (talk | contribs) m (→Ammunition: mistake here) |
||
| (4 intermediate revisions by 4 users not shown) | |||
| Line 6: | Line 6: | ||
== Description == | == Description == | ||
<!-- ''In the description, the first part should be about the history of the creation and combat usage of the vehicle, as well as its key features. In the second part, tell the reader about the ground vehicle in the game. Insert a screenshot of the vehicle, so that if the novice player does not remember the vehicle by name, he will immediately understand what kind of vehicle the article is talking about.'' --> | <!-- ''In the description, the first part should be about the history of the creation and combat usage of the vehicle, as well as its key features. In the second part, tell the reader about the ground vehicle in the game. Insert a screenshot of the vehicle, so that if the novice player does not remember the vehicle by name, he will immediately understand what kind of vehicle the article is talking about.'' --> | ||
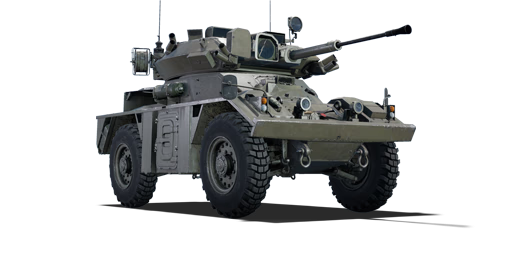
| − | The '''{{Specs|name}}''' is a rank {{Specs|rank}} British light tank {{Battle-rating}}. It was introduced in [[Update "Alpha Strike"]]. | + | The '''{{Specs|name}}''' is a rank {{Specs|rank}} British light tank {{Battle-rating}}. It was introduced in [[Update "Alpha Strike"]]. This car is fullfilling the scout tank role, while bolstering a very powerful, but slow firing autocannon. |
== General info == | == General info == | ||
| Line 12: | Line 12: | ||
{{Specs-Tank-Armour}} | {{Specs-Tank-Armour}} | ||
<!-- ''Describe armour protection. Note the most well protected and key weak areas. Appreciate the layout of modules as well as the number and location of crew members. Is the level of armour protection sufficient, is the placement of modules helpful for survival in combat? If necessary use a visual template to indicate the most secure and weak zones of the armour.'' --> | <!-- ''Describe armour protection. Note the most well protected and key weak areas. Appreciate the layout of modules as well as the number and location of crew members. Is the level of armour protection sufficient, is the placement of modules helpful for survival in combat? If necessary use a visual template to indicate the most secure and weak zones of the armour.'' --> | ||
| − | When it comes to armour protection, the Fox is severely lacking | + | When it comes to armour protection, the Fox is severely lacking. |
| − | The internals of the Fox will not provide much chance to survive either, as the 3 crew members are very tightly packed with not much empty space, so any shots that penetrate are likely to | + | The armour in theory can deflect low rank 20 mm AP-I shells at 500 m range, but the car's hull must be angled, and there are spots on the hull that are always accessible, such as the driver's hatch on the front. The armour will not withstand autocannon ammunition of more modern Rank VI light tanks and SPAA, so those should be avoided. |
| + | |||
| + | The car can tank 12.7 mm calibre bullets head-on from the front, but the driver's hatch is a weak spot once again, especially against tall tanks or high ground. Therefore, angling at least 20 degrees and keeping at least some distance will keep the car from being immediately obliterated by auxillary weapons and aircraft. | ||
| + | |||
| + | Players will quickly find themselves obliterated if targeted by the enemy team's main weapons, so care should be taken to not be seen and to keep moving if seen to become a hard target to hit. The internals of the Fox will not provide much chance to survive either, as the 3 crew members are very tightly packed with not much empty space, so any shots that penetrate are likely to take out at least 2, if not all 3 crew members. Most of the space not taken up by crew is taken by either the engine, transmission or ammunition, so even if the crew does not die straight away, players will typically find themselves either exploding, or stuck in place while the enemy reloads. Firing smokes and leaving when situation seems to become overwhelming is advicable. | ||
'''Armour type:''' <!-- The types of armour present on the vehicle and their general locations --> | '''Armour type:''' <!-- The types of armour present on the vehicle and their general locations --> | ||
| Line 40: | Line 44: | ||
{{Specs-Tank-Mobility}} | {{Specs-Tank-Mobility}} | ||
<!-- ''Write about the mobility of the ground vehicle. Estimate the specific power and manoeuvrability, as well as the maximum speed forwards and backwards.'' --> | <!-- ''Write about the mobility of the ground vehicle. Estimate the specific power and manoeuvrability, as well as the maximum speed forwards and backwards.'' --> | ||
| − | + | Fox is a rather fast vehicle, behaving similarly to Eland 90. It has double (triple in AB) the horse power, so it is much faster. The chassis are rather small, so agressive inclines will slow the car down and ruin the aim, but it is stable enough to generally not care about flipping itself. | |
| + | |||
| + | In RB, it is begrudgingly driving at 40 to 60 km/h offroad in any direction, slowly accelerating towards 80 km/h. If not turning around and driving on flat ground, it will accelerate further at a negligeble rate. On a road, the car will easily reach 80 km/h and speed up towards 100 km/h. | ||
| + | |||
| + | In AB, the car accelerates about 20 km/h per second offroad in any direction until 60 km/h. At this speed, the car can circle around its target indefinitely without much issues. Past that, acceleration drops to about 10 km/h per second and the car will start drifting and losing some of its speed upon turning. 110 km/h speed can be reached even offroad, but at this point car controls will seriosly stiffen and only allow about 30 degree turns without losing all of the speed. On a road, the car will merely accelerate faster, so it doesn't really require them in AB unlike other wheeled cars, but the roads are generally flat and do not pose as much of a risk of flipping the car over a random rock. | ||
| + | |||
| + | A collision at 70 km/h and above can ruin the wheels, so when doing an emergency stop by crashing into objects, avoid ramming them with a corner of chassis. Hitting a random tree with the front bumper will merely stop the car, but hitting it with a wheel can potentially destroy the wheel and incur a 20 seconds repair, or put it into an unfixable "red" state, making the car vulnerable to machine gun interception. | ||
{{tankMobility|abMinHp=302|rbMinHp=172}} | {{tankMobility|abMinHp=302|rbMinHp=172}} | ||
| Line 54: | Line 64: | ||
{{main|L21A1 (30 mm)}} | {{main|L21A1 (30 mm)}} | ||
| − | + | The main weapon of this car is a fairly scary 30 mm autocannon, the same one as on the [[Warrior]]. Players should be aware of the low rate of fire for this weapons calibre, with 0.9 seconds between each shell. The clip size of 3 may look like a downside, but the reload time of the clip is fast enough to not make a difference to the fire rate, only giving a momentary pause between volleys. | |
| − | + | While the car is reasonably stable, any ground incline can ruin the aim, so slowing down to at least 60 km/h is a good idea. | |
| − | + | One redeeming factor of the gun is the ammunition, giving it impressive damage or penetration (for a 30 mm). However, it is still just a 30 mm and players should always be looking for the side or the back of their targets, unless those are very lightly armoured. | |
{| class="wikitable" style="text-align:center" width="100%" | {| class="wikitable" style="text-align:center" width="100%" | ||
| Line 69: | Line 79: | ||
|- | |- | ||
! ''Arcade'' | ! ''Arcade'' | ||
| − | | rowspan="2" | 99 (3) || rowspan="2" | 80 || rowspan="2" | -14°/+40° || rowspan="2" | ±180° || rowspan="2" | - || | + | | rowspan="2" | 99 (3) || rowspan="2" | 80 || rowspan="2" | -14°/+40° || rowspan="2" | ±180° || rowspan="2" | - || 57.1 || 79.1 || 96.0 || 106.2 || 113.0 || rowspan="2" | 1.04 || rowspan="2" | 0.92 || rowspan="2" | 0.85 || rowspan="2" | 0.80 |
|- | |- | ||
! ''Realistic'' | ! ''Realistic'' | ||
| − | | | + | | 35.7 || 42.0 || 51.0 || 56.4 || 60.0 |
|- | |- | ||
|} | |} | ||
| Line 78: | Line 88: | ||
==== Ammunition ==== | ==== Ammunition ==== | ||
{{:L21A1 (30 mm)/Ammunition|30x170 APHE-I, 30x170 HE-I-T, 30x170 APDS-T}} | {{:L21A1 (30 mm)/Ammunition|30x170 APHE-I, 30x170 HE-I-T, 30x170 APDS-T}} | ||
| + | [[File:Fox attacks soviet tank weakspot.jpg|thumb|right|One good shot is all you need. For example, all soviet medium tanks have weak belly armour. Flank, aim, fire.]] | ||
| + | The 30 mm APHE is difficult to use due to an abundance of heavily armoured vehicles in rank V, but they deal very high damage. APHE shells have no tracers and are invisible even on thermal camera, which makes it somewhat difficult for opponents to understand where their tank is being attacked from. Unfortunately, rangefinding is difficult for the same reason. In terms of the damage, if APHE manages to land in the middle of enemy tank crew compartment, the tank will undoubtedly explode due to a high shrapnel amount, but extensive knowledge of tank weakspots will be required. | ||
| + | |||
| + | The HE-I-T is an anti-air shell, which can tear a wing off the plane, assuming it hits. It isn't good for anything else, but could in theory be used as a rangefinder shell in combination with APHE belt until the APDS-T were unlocked. | ||
| + | |||
| + | APDS-T belt is capable of penetrating the front armour of most light vehicles and some medium tanks, and the sides of almost any tank. APDS will also overpenetrate engine decks of any tank, so those cannot block the damage anymore. The sub-par rate of fire and low post-penetration effects mean that gunners will need to pick out individual crew members or modules in each well-placed shot. These shells have tracers, so although it will be difficult to hit moving targets past about 1.5 km, it is still possible if those do not change movement pace after seeing the tracers. The post-penetration damage requires careful aiming to disable enemy vehicles and the Fox will not withstand return fire, so carefully aiming the first shot is rather important. Direct ammo rack hit may or may not be fatal depending on how much armour APDS had to penetrate. | ||
==== [[Ammo racks]] ==== | ==== [[Ammo racks]] ==== | ||
| Line 89: | Line 105: | ||
! 3rd<br>rack empty | ! 3rd<br>rack empty | ||
! 4th<br>rack empty | ! 4th<br>rack empty | ||
| − | |||
| − | |||
! Visual<br>discrepancy | ! Visual<br>discrepancy | ||
|- | |- | ||
| − | | '''33''' || 11 ''(+22)'' || 7 ''(+26)'' || 4 ''(+29)'' || 1 ''(+32)'' | + | | '''33''' || 11 ''(+22)'' || 7 ''(+26)'' || 4 ''(+29)'' || 1 ''(+32)'' || No |
|- | |- | ||
|} | |} | ||
| Line 116: | Line 130: | ||
== Usage in battles == | == Usage in battles == | ||
<!-- ''Describe the tactics of playing in the vehicle, the features of using vehicles in the team and advice on tactics. Refrain from creating a "guide" - do not impose a single point of view but instead give the reader food for thought. Describe the most dangerous enemies and give recommendations on fighting them. If necessary, note the specifics of the game in different modes (AB, RB, SB).'' --> | <!-- ''Describe the tactics of playing in the vehicle, the features of using vehicles in the team and advice on tactics. Refrain from creating a "guide" - do not impose a single point of view but instead give the reader food for thought. Describe the most dangerous enemies and give recommendations on fighting them. If necessary, note the specifics of the game in different modes (AB, RB, SB).'' --> | ||
| − | ' | + | In summary, the Fox plays in a similar fashion to vehicles like the Italian R3. Its mobility allows for players to scout and move to positions faster than the majority of other vehicles seen at the battle rating. |
| + | |||
| + | As the Fox's battle rating is home to the majority of Cold War heavy tanks, most of the teams are usually a combination of heavy tanks and main battle tanks, putting the Fox in a unique position to capture zones before the teams even engage each other. After that, the car can use its high speed and relatively low profile to sneak lethal shots into enemy sides and backs, or to straight up bully tanks with slow turret rotation speed. | ||
| + | |||
| + | The cannon ammunition is also leagues above shells used by competition like the [[BTR-80A]], occasionally allowing to punch through heavy and medium brawler tanks, or to blow up some random light tanks in one or two shots. The 30 mm cannon has a terrible fire rate, so it requires at least some sort of pre-planning for most targets, but can also knock out most things in a single well aimed shot. On the occasion where a Fox is unable to destroy a tank in a fair fight, tracks and cannon barrels will be destroyed by the 30 mm rounds, until opponent is unable to move and their engine deck can be accessed by the overpenetrating APDS shot. | ||
| + | |||
| + | Since APHE belt is invisible, rangefinding for it can be a bit of a pain in RB. HE-I belt has the same ballistics as APHE and has tracers, so you can use it to figure out how to aim. Actually memorizing APHE ballistics might allow for stealthier and faster takedowns against poorly armoured light tanks, even when APDS is available. | ||
| + | |||
| + | 12.7 mm machine gun rounds and higher can penetrate the Fox's armour at a flat angle, so caution should be exercised if the enemy's machine guns are still functional. Try to remain at least somewhat angled to avoid taking unnecessary damage. Avoid directly fighting tanks armed with autocannons and avoid 20 mm SPAA if they are any closer than 500 m - such engagement will not end well for you, even theoretically. | ||
=== Pros and cons === | === Pros and cons === | ||
| Line 123: | Line 145: | ||
'''Pros:''' | '''Pros:''' | ||
| − | * Great mobility and acceleration | + | * Great mobility and acceleration in any direction |
| − | * Effective cannon that can penetrate almost all vehicles from the sides and back | + | * Effective cannon with ammunition that can penetrate almost all vehicles from the sides and back |
| − | * Small profile, allowing for "rat" gameplay and access to a lot of hiding places | + | * Small profile, allowing for "rat" gameplay and access to a lot of hiding places |
'''Cons:''' | '''Cons:''' | ||
| − | * Terrible fire rate | + | * Terrible fire rate, requires actual aiming |
| − | * Can be penetrated by . | + | * Can be penetrated by 12.7 mm unless angled, has frontal weakspot which is always exposed |
| + | * Severely outgunned in a full uptier | ||
== History == | == History == | ||
Latest revision as of 09:05, 29 April 2024

Contents
Description
The FV721 Fox is a rank IV British light tank with a battle rating of 7.0 (AB/RB/SB). It was introduced in Update "Alpha Strike". This car is fullfilling the scout tank role, while bolstering a very powerful, but slow firing autocannon.
General info
Survivability and armour
When it comes to armour protection, the Fox is severely lacking.
The armour in theory can deflect low rank 20 mm AP-I shells at 500 m range, but the car's hull must be angled, and there are spots on the hull that are always accessible, such as the driver's hatch on the front. The armour will not withstand autocannon ammunition of more modern Rank VI light tanks and SPAA, so those should be avoided.
The car can tank 12.7 mm calibre bullets head-on from the front, but the driver's hatch is a weak spot once again, especially against tall tanks or high ground. Therefore, angling at least 20 degrees and keeping at least some distance will keep the car from being immediately obliterated by auxillary weapons and aircraft.
Players will quickly find themselves obliterated if targeted by the enemy team's main weapons, so care should be taken to not be seen and to keep moving if seen to become a hard target to hit. The internals of the Fox will not provide much chance to survive either, as the 3 crew members are very tightly packed with not much empty space, so any shots that penetrate are likely to take out at least 2, if not all 3 crew members. Most of the space not taken up by crew is taken by either the engine, transmission or ammunition, so even if the crew does not die straight away, players will typically find themselves either exploding, or stuck in place while the enemy reloads. Firing smokes and leaving when situation seems to become overwhelming is advicable.
Armour type:
| Armour | Front (Slope angle) | Sides | Rear | Roof |
|---|---|---|---|---|
| Hull | 33.5 mm (53°) Front Glacis
33.5 mm (1-53°) Driver's Port |
41 mm (0-6°) Top 5 mm (0°) Bottom |
38 mm (1°) | 5 mm (89°) |
| Turret | 41 mm (47-60°) Turret front 41 mm (52-55°) Gun mantlet |
41 mm (0°) | 38 mm (36°) | 20 mm (89°) |
| Cupola | 20 mm (60°) | 20 mm (60°) | 20 mm (60°) | 20 mm (59-89°) |
Notes:
Mobility
Fox is a rather fast vehicle, behaving similarly to Eland 90. It has double (triple in AB) the horse power, so it is much faster. The chassis are rather small, so agressive inclines will slow the car down and ruin the aim, but it is stable enough to generally not care about flipping itself.
In RB, it is begrudgingly driving at 40 to 60 km/h offroad in any direction, slowly accelerating towards 80 km/h. If not turning around and driving on flat ground, it will accelerate further at a negligeble rate. On a road, the car will easily reach 80 km/h and speed up towards 100 km/h.
In AB, the car accelerates about 20 km/h per second offroad in any direction until 60 km/h. At this speed, the car can circle around its target indefinitely without much issues. Past that, acceleration drops to about 10 km/h per second and the car will start drifting and losing some of its speed upon turning. 110 km/h speed can be reached even offroad, but at this point car controls will seriosly stiffen and only allow about 30 degree turns without losing all of the speed. On a road, the car will merely accelerate faster, so it doesn't really require them in AB unlike other wheeled cars, but the roads are generally flat and do not pose as much of a risk of flipping the car over a random rock.
A collision at 70 km/h and above can ruin the wheels, so when doing an emergency stop by crashing into objects, avoid ramming them with a corner of chassis. Hitting a random tree with the front bumper will merely stop the car, but hitting it with a wheel can potentially destroy the wheel and incur a 20 seconds repair, or put it into an unfixable "red" state, making the car vulnerable to machine gun interception.
| Game Mode | Max Speed (km/h) | Weight (tons) | Engine power (horsepower) | Power-to-weight ratio (hp/ton) | |||
|---|---|---|---|---|---|---|---|
| Forward | Reverse | Stock | Upgraded | Stock | Upgraded | ||
| Arcade | 110 | 110 | 6.1 | 302 | 372 | 49.51 | 60.98 |
| Realistic | 99 | 99 | 172 | 195 | 28.2 | 31.97 | |
Modifications and economy
| Mobility | Protection | Firepower | ||||||||||||||||||||||||
|---|---|---|---|---|---|---|---|---|---|---|---|---|---|---|---|---|---|---|---|---|---|---|---|---|---|---|
|
|
|
Armaments
Main armament
The main weapon of this car is a fairly scary 30 mm autocannon, the same one as on the Warrior. Players should be aware of the low rate of fire for this weapons calibre, with 0.9 seconds between each shell. The clip size of 3 may look like a downside, but the reload time of the clip is fast enough to not make a difference to the fire rate, only giving a momentary pause between volleys.
While the car is reasonably stable, any ground incline can ruin the aim, so slowing down to at least 60 km/h is a good idea.
One redeeming factor of the gun is the ammunition, giving it impressive damage or penetration (for a 30 mm). However, it is still just a 30 mm and players should always be looking for the side or the back of their targets, unless those are very lightly armoured.
| 30 mm L21A1 | Turret rotation speed (°/s) | Reloading rate (seconds) | ||||||||||||
|---|---|---|---|---|---|---|---|---|---|---|---|---|---|---|
| Mode | Capacity (Belt) | Fire rate | Vertical | Horizontal | Stabilizer | Stock | Upgraded | Full | Expert | Aced | Stock | Full | Expert | Aced |
| Arcade | 99 (3) | 80 | -14°/+40° | ±180° | - | 57.1 | 79.1 | 96.0 | 106.2 | 113.0 | 1.04 | 0.92 | 0.85 | 0.80 |
| Realistic | 35.7 | 42.0 | 51.0 | 56.4 | 60.0 | |||||||||
Ammunition
| Penetration statistics | |||||||
|---|---|---|---|---|---|---|---|
| Ammunition | Type of warhead |
Penetration @ 0° Angle of Attack (mm) | |||||
| 10 m | 100 m | 500 m | 1,000 m | 1,500 m | 2,000 m | ||
| 30x170 APHE-I | SAP-I | 53 | 50 | 39 | 29 | 21 | 16 |
| 30x170 HE-I-T | HEI-T* | 9 | 8 | 7 | 5 | 4 | 4 |
| 30x170 APDS-T | APDS | 110 | 101 | 95 | 69 | 52 | 41 |
| Shell details | ||||||||||||
|---|---|---|---|---|---|---|---|---|---|---|---|---|
| Ammunition | Type of warhead |
Velocity (m/s) |
Projectile mass (kg) |
Fuse delay (m) |
Fuse sensitivity (mm) |
Explosive mass (TNT equivalent) (g) |
Ricochet | |||||
| 0% | 50% | 100% | ||||||||||
| 30x170 APHE-I | SAP-I | 1,080 | 0.36 | 1.2 | 9 | 30.6 | 47° | 56° | 65° | |||
| 30x170 HE-I-T | HEI-T* | 1,080 | 0.36 | 0.1 | 0.1 | 85 | 79° | 80° | 81° | |||
| 30x170 APDS-T | APDS | 1,175 | 0.3 | - | - | - | 75° | 78° | 80° | |||

The 30 mm APHE is difficult to use due to an abundance of heavily armoured vehicles in rank V, but they deal very high damage. APHE shells have no tracers and are invisible even on thermal camera, which makes it somewhat difficult for opponents to understand where their tank is being attacked from. Unfortunately, rangefinding is difficult for the same reason. In terms of the damage, if APHE manages to land in the middle of enemy tank crew compartment, the tank will undoubtedly explode due to a high shrapnel amount, but extensive knowledge of tank weakspots will be required.
The HE-I-T is an anti-air shell, which can tear a wing off the plane, assuming it hits. It isn't good for anything else, but could in theory be used as a rangefinder shell in combination with APHE belt until the APDS-T were unlocked.
APDS-T belt is capable of penetrating the front armour of most light vehicles and some medium tanks, and the sides of almost any tank. APDS will also overpenetrate engine decks of any tank, so those cannot block the damage anymore. The sub-par rate of fire and low post-penetration effects mean that gunners will need to pick out individual crew members or modules in each well-placed shot. These shells have tracers, so although it will be difficult to hit moving targets past about 1.5 km, it is still possible if those do not change movement pace after seeing the tracers. The post-penetration damage requires careful aiming to disable enemy vehicles and the Fox will not withstand return fire, so carefully aiming the first shot is rather important. Direct ammo rack hit may or may not be fatal depending on how much armour APDS had to penetrate.
Ammo racks
| Full ammo |
1st rack empty |
2nd rack empty |
3rd rack empty |
4th rack empty |
Visual discrepancy |
|---|---|---|---|---|---|
| 33 | 11 (+22) | 7 (+26) | 4 (+29) | 1 (+32) | No |
Machine guns
The Fox's L37A2 coaxial machine gun can be used along with the 30 mm autocannon, to take down aircraft that could pose a threat to your vehicle. The machine gun can also be used to counter many open vehicles of the battle rating such as the M53/59 and the M56 Scorpion.
| 7.62 mm L37A2 | ||||
|---|---|---|---|---|
| Mount | Capacity (Belt) | Fire rate | Vertical | Horizontal |
| Coaxial | 2,600 (100) | 650 | - | - |
Usage in battles
In summary, the Fox plays in a similar fashion to vehicles like the Italian R3. Its mobility allows for players to scout and move to positions faster than the majority of other vehicles seen at the battle rating.
As the Fox's battle rating is home to the majority of Cold War heavy tanks, most of the teams are usually a combination of heavy tanks and main battle tanks, putting the Fox in a unique position to capture zones before the teams even engage each other. After that, the car can use its high speed and relatively low profile to sneak lethal shots into enemy sides and backs, or to straight up bully tanks with slow turret rotation speed.
The cannon ammunition is also leagues above shells used by competition like the BTR-80A, occasionally allowing to punch through heavy and medium brawler tanks, or to blow up some random light tanks in one or two shots. The 30 mm cannon has a terrible fire rate, so it requires at least some sort of pre-planning for most targets, but can also knock out most things in a single well aimed shot. On the occasion where a Fox is unable to destroy a tank in a fair fight, tracks and cannon barrels will be destroyed by the 30 mm rounds, until opponent is unable to move and their engine deck can be accessed by the overpenetrating APDS shot.
Since APHE belt is invisible, rangefinding for it can be a bit of a pain in RB. HE-I belt has the same ballistics as APHE and has tracers, so you can use it to figure out how to aim. Actually memorizing APHE ballistics might allow for stealthier and faster takedowns against poorly armoured light tanks, even when APDS is available.
12.7 mm machine gun rounds and higher can penetrate the Fox's armour at a flat angle, so caution should be exercised if the enemy's machine guns are still functional. Try to remain at least somewhat angled to avoid taking unnecessary damage. Avoid directly fighting tanks armed with autocannons and avoid 20 mm SPAA if they are any closer than 500 m - such engagement will not end well for you, even theoretically.
Pros and cons
Pros:
- Great mobility and acceleration in any direction
- Effective cannon with ammunition that can penetrate almost all vehicles from the sides and back
- Small profile, allowing for "rat" gameplay and access to a lot of hiding places
Cons:
- Terrible fire rate, requires actual aiming
- Can be penetrated by 12.7 mm unless angled, has frontal weakspot which is always exposed
- Severely outgunned in a full uptier
History
Beginning development in 1965 by the Daimler company of Coventry, the FV721 Fox was a 4x4 armoured car as a replacement for the Ferret scout car and Saladin armoured car. The first of 15 prototypes was completed in November 1967 with user trials beginning the following year. Following successful trials, the first announcement about the Fox was made in October 1969, with a production order placed with Royal Ordnance Leeds the following year. Production began in 1972 and ran to May 1973, building a total of 325.
200 vehicles saw service with the United Kingdom, with most being used by the Royal Yeomanry and the Queen's Own Yeomanry, part of the British Army of the Rhine. Small numbers were also attached to air mobile, armoured and mechanized infantry battalions to form a reconnaissance platoon. The Fox was retired from British service by 1994.
The remaining vehicles were exported to Malawi and Nigeria, with some remaining in service to this day.
Devblog
In the 1960s, the British Army was looking to replace their outdated Ferret and Saladin armored cars with a more capable vehicle that featured the 30 mm L21A1 RARDEN cannon. Development of the FV721 Fox started in 1965 by Daimler with the first prototype ready and shown to the British Army in 1967. After successful trials, full-scale production of the Fox was given the go ahead and was completed by 1973. Over 300 were built, where most were operated by Britain which are now out of service, and some by Malawi and Nigeria that are still in service today in very limited numbers.
Media
- Videos
See also
Links to the articles on the War Thunder Wiki that you think will be useful for the reader, for example:
- reference to the series of the vehicles;
- links to approximate analogues of other nations and research trees.
External links
| Britain light tanks | |
|---|---|
| A13 | A13 Mk I · A13 Mk I (3rd R.T.R.) · A13 Mk II · A13 Mk II 1939 |
| A15 | Crusader II · Crusader "The Saint" · Crusader III |
| A17 | Tetrarch I |
| IFV | Warrior |
| Wheeled | Daimler Mk II · AEC Mk II · Fox · Vickers Mk.11 |
| Other | VFM5 |
| South Africa | |
| SARC | SARC MkIVa · SARC MkVI (2pdr) · SARC MkVI (6pdr) |
| Ratel | Ratel 90 · Ratel 20 |
| Rooikat | Rooikat Mk.1D · Rooikat 105 · Rooikat MTTD |
| Other | Concept 3 · Eland 90 Mk.7 |
| USA | Stuart I · Stuart III |
