Difference between revisions of "M14/41"
m (→Usage in battles: Removed m13/40 described as reserve as this isn't the case anymore) (Tag: Visual edit) |
(Tag: Visual edit) |
||
| (34 intermediate revisions by 9 users not shown) | |||
| Line 1: | Line 1: | ||
| − | + | {{Specs-Card|code=it_m14_41}} | |
| − | |||
| − | |||
| − | |||
| − | |||
| − | {{Specs-Card | ||
| − | |code=it_m14_41 | ||
| − | |||
| − | }} | ||
== Description == | == Description == | ||
| − | <!-- ''In the description, the first part | + | <!--''In the description, the first part needs to be about the history of the creation and combat usage of the vehicle, as well as its key features. In the second part, tell the reader about the ground vehicle in the game. Insert the screenshot of the vehicle. If the novice player does not remember the vehicle by name, they will immediately understand what kind of vehicle it is talking about.''--> |
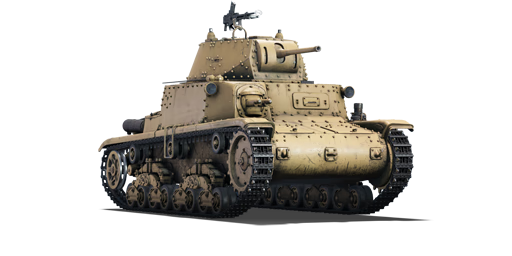
| − | The '''{{Specs|name}}''' is a | + | [[File:GarageImage M14 41.jpg|420px|thumb|left]] |
| + | {{break}} | ||
| + | The '''{{Specs|name}}''' (shortened as '''{{Specs|pseudonym}}''') is a Rank {{Specs|rank}} Italian medium tank {{Battle-rating|1}}. It was introduced in [[Update 1.85 "Supersonic"]]. | ||
== General info == | == General info == | ||
=== Survivability and armour === | === Survivability and armour === | ||
| − | + | <!--''Describe armour protection. Note the most well protected and key weak areas. Appreciate the layout of modules as well as the number and location of crew members. Is the level of armour protection sufficient, is the placement of modules helpful for survival in combat?'' | |
| − | <!-- ''Describe armour protection. Note the most well protected and key weak areas. Appreciate the layout of modules as well as the number and location of crew members. Is the level of armour protection sufficient, is the placement of modules helpful for survival in combat? | ||
| − | '' | + | ''If necessary use a visual template to indicate the most secure and weak zones of the armour.''--> |
| − | + | The M14/41 offers quite good armour and survivability for a rank I vehicle. The turret can block some distant shots with its 45mm front and the sharp edges around the mantlet may riccochet some rounds. The upper glacis is almost impenetrable from the front due to the sharp angle. The most obvious weakspot is drivers vision slit and the side armour is lackluster with 25mm and no slopes. Placement of the crew is very good for the size of the tank, AP shots will often hit only one crew member due to the spacing and the driver and machine gunner sit very low behind the transmission. | |
| − | |||
| − | |||
| − | |||
| − | |||
| − | |||
| − | |||
| − | |||
| − | |||
| − | |||
| − | |||
| − | |||
| − | |||
| − | |||
| − | |||
| − | |||
| − | |||
| − | |||
| − | |||
| − | The | ||
=== Mobility === | === Mobility === | ||
| − | |||
<!-- ''Write about the mobility of the ground vehicle. Estimate the specific power and manoeuvrability, as well as the maximum speed forwards and backwards.'' --> | <!-- ''Write about the mobility of the ground vehicle. Estimate the specific power and manoeuvrability, as well as the maximum speed forwards and backwards.'' --> | ||
| − | {{tankMobility|abMinHp=248|rbMinHp=142 | + | {{tankMobility|abMinHp= 248|rbMinHp= 142}} |
| − | |||
| − | |||
| − | |||
== Armaments == | == Armaments == | ||
| − | |||
=== Main armament === | === Main armament === | ||
| − | + | <!--''Give the reader information about the characteristics of the main gun. Assess its effectiveness in a battle based on the reloading speed, ballistics and the power of shells. Do not forget about the flexibility of the fire, that is how quickly the cannon can be aimed at the target, open fire on it and aim at another enemy. Add a link to the main article on the gun: <code><nowiki>{{main|Name of the weapon}}</nowiki></code>. Describe in general terms the ammunition available for the main gun. Give advice on how to use them and how to fill the ammunition storage.''--> | |
| − | <!-- ''Give the reader information about the characteristics of the main gun. Assess its effectiveness in a battle based on the reloading speed, ballistics and the power of shells. Do not forget about the flexibility of the fire, that is how quickly the cannon can be aimed at the target, open fire on it and aim at another enemy. Add a link to the main article on the gun: <code><nowiki>{{main|Name of the weapon}}</nowiki></code>. Describe in general terms the ammunition available for the main gun. Give advice on how to use them and how to fill the ammunition storage.'' --> | ||
{{main|47/32 mod.35 (47 mm)}} | {{main|47/32 mod.35 (47 mm)}} | ||
| − | {| class="wikitable" style="text-align:center" width=" | + | {| class="wikitable" style="text-align:center" |
| + | |- | ||
| + | ! colspan="6" | [[47/32 mod.35 (47 mm)|47 mm 47/32 mod.35]] | ||
| + | |- | ||
| + | ! colspan="3" rowspan="1" style="width:5em" |Capacity | ||
| + | ! rowspan="1" | Vertical <br> guidance | ||
| + | ! rowspan="1" | Horizontal <br> guidance | ||
| + | ! rowspan="1" | Stabilizer | ||
| + | |- | ||
| + | | colspan="3" | 87 || -15°/+25° || ±180° || N/A | ||
| + | |- | ||
| + | ! colspan="6" | Turret rotation speed (°/s) | ||
|- | |- | ||
| − | ! | + | ! style="width:4em" |Mode |
| + | ! style="width:4em" |Stock | ||
| + | ! style="width:4em" |Upgraded | ||
| + | ! style="width:4em" |Prior + Full crew | ||
| + | ! style="width:4em" |Prior + Expert qualif. | ||
| + | ! style="width:4em" |Prior + Ace qualif. | ||
|- | |- | ||
| − | + | | ''Arcade'' || 13.33 || __.__ || __.__ || __.__ || __.__ | |
| − | |||
| − | |||
|- | |- | ||
| − | + | | ''Realistic'' || 8.33 || __.__ || __.__ || __.__ || __.__ | |
| − | |||
|- | |- | ||
| − | ! | + | ! colspan="4" | Reloading rate (seconds) |
| − | | | + | |- |
| + | ! colspan="1" style="width:4em" |Stock | ||
| + | ! colspan="1" style="width:4em" |Prior + Full crew | ||
| + | ! colspan="1" style="width:4em" |Prior + Expert qualif. | ||
| + | ! colspan="1" style="width:4em" |Prior + Ace qualif. | ||
| + | |- | ||
| + | | 3.77 || __.__ || __.__ || 2.9 | ||
|- | |- | ||
|} | |} | ||
| − | ==== Ammunition ==== | + | ===== Ammunition ===== |
| − | { | + | {| class="wikitable sortable" style="text-align:center" width="100%" |
| + | ! colspan="8" | Penetration statistics | ||
| + | |- | ||
| + | ! rowspan="2" data-sort-type="text" | Ammunition | ||
| + | ! rowspan="2" class="unsortable" | Type of <br /> warhead | ||
| + | ! colspan="6" | '''Penetration''' '''''in mm''''' '''@ 90°''' | ||
| + | |- | ||
| + | ! 10m | ||
| + | ! 100m | ||
| + | ! 500m | ||
| + | ! 1000m | ||
| + | ! 1500m | ||
| + | ! 2000m | ||
| + | |- | ||
| + | | Granata Perforante mod.35 || APHE || 54 || 52 || 40 || 30 || 22 || 16 | ||
| + | |- | ||
| + | | Granata Perforante mod.39 || APBC || 53 || 52 || 45 || 39 || 33 || 28 | ||
| + | |- | ||
| + | |} | ||
| + | {| class="wikitable sortable" style="text-align:center" width="100%" | ||
| + | ! colspan="11" | Shell details | ||
| + | |- | ||
| + | ! rowspan="2" data-sort-type="text" | Ammunition | ||
| + | ! rowspan="2" class="unsortable" | Type of <br /> warhead | ||
| + | ! rowspan="2" |Velocity <br /> in m/s | ||
| + | ! rowspan="2" |Projectile<br />Mass in kg | ||
| + | ! rowspan="2" | ''Fuse delay'' | ||
| + | ''in m:'' | ||
| + | ! rowspan="2" | ''Fuse sensitivity'' | ||
| + | ''in mm:'' | ||
| + | ! rowspan="2" | ''Explosive Mass in g<br /> (TNT equivalent):'' | ||
| + | ! rowspan="2" | ''Normalization At 30° <br> from horizontal:'' | ||
| + | ! colspan="3" | ''Ricochet:'' | ||
| + | |- | ||
| + | ! 0% | ||
| + | ! 50% | ||
| + | ! 100% | ||
| + | |- | ||
| + | | Granata Perforante mod.35 || APHE || 630 || 1.5 || 1.2 || 15 || 30 || ° || 47° || 60° || 65° | ||
| + | |- | ||
| + | | Granata Perforante mod.39 || APBC || 630 || 1.4 || 1.2 || 15 || 30 || ° || 48° || 63° || 71° | ||
| + | |- | ||
| + | |} | ||
| − | ==== [[Ammo racks]] ==== | + | ===== [[Ammo racks|Ammo racks]] ===== |
| − | + | {| class="wikitable sortable" style="text-align:center" | |
| − | |||
| − | {| class="wikitable" style="text-align:center" | ||
|- | |- | ||
| − | ! Full<br>ammo | + | ! class="wikitable unsortable" |Full<br /> ammo |
| − | ! 1st<br>rack empty | + | ! class="wikitable unsortable" |1st<br /> rack empty |
| − | ! 2nd<br>rack empty | + | ! class="wikitable unsortable" |2nd<br /> rack empty |
| − | ! 3rd<br>rack empty | + | ! class="wikitable unsortable" |3rd<br /> rack empty |
| − | ! Visual<br>discrepancy | + | ! class="wikitable unsortable" |Visual<br /> discrepancy |
|- | |- | ||
| − | | '''87''' || | + | || '''87''' || 78 ''(+9)'' || 53 ''(+34)'' || 1 ''(+86)'' || style="text-align:left" | No |
|- | |- | ||
|} | |} | ||
| − | |||
| − | |||
| − | |||
| − | |||
=== Machine guns === | === Machine guns === | ||
| − | + | <!--''Offensive and anti-aircraft machine guns not only allow you to fight some aircraft, but also are effective against lightly armoured vehicles. Evaluate machine guns and give recommendations on its use.''--> | |
| − | |||
| − | <!-- ''Offensive and anti-aircraft machine guns not only allow you to fight some aircraft but also are effective against lightly armoured vehicles. Evaluate machine guns and give recommendations on its use.'' --> | ||
{{main|Breda Mod. 38 (8 mm)}} | {{main|Breda Mod. 38 (8 mm)}} | ||
| − | + | {| class="wikitable" style="text-align:center" | |
| − | + | |- | |
| − | {| class="wikitable" style="text-align:center" width=" | + | ! colspan="7" | [[Breda Mod. 38 (8 mm)|8 mm Breda Mod. 38]] |
| + | |- | ||
| + | ! colspan="7" | ''Coaxial mount'' | ||
| + | |- | ||
| + | ! colspan="4" rowspan="1" style="width:5em" |Capacity (Belt capacity) | ||
| + | ! rowspan="1" | Fire rate <br> (shots/minute) | ||
| + | ! rowspan="1" | Vertical <br> guidance | ||
| + | ! rowspan="1" | Horizontal <br> guidance | ||
|- | |- | ||
| − | + | | colspan="4" | 1,524 (24) || 600 || N/A || N/A | |
|- | |- | ||
| − | ! | + | ! colspan="7" | ''Pintle mount'' |
|- | |- | ||
| − | | | + | ! colspan="4" rowspan="1" style="width:5em" |Capacity (Belt capacity) |
| + | ! rowspan="1" | Fire rate <br> (shots/minute) | ||
| + | ! rowspan="1" | Vertical <br> guidance | ||
| + | ! rowspan="1" | Horizontal <br> guidance | ||
|- | |- | ||
| − | | | + | | colspan="4" | 1,524 (24) || 600 || __° || __° |
|- | |- | ||
|} | |} | ||
== Usage in battles == | == Usage in battles == | ||
| − | + | In an RB battle, the M14/41 functions very similarly to the reserve M13/40 (III) tank, due to the fact that the two are (essentially) the same vehicle, with the M14/41 simply boasting a more powerful engine and sitting at a higher br. The M14/41 features very thick armour for its rank, especially around the turret, where the angled 25mm thick armour will often bounce rounds consistantly, and the 30mm frontal armour is not to be underestimated. Combined with a rather well spaced crew of 4, the M14/41 boasts a suprising amount of durability. This very well-protected tank, of course, has a very cuicial weakpoint: A massive 30mm flat plate on the direct front of the tank. A hit through this plate will often kill the driver and, more likely than not, the crucial gunner that sits behind him(And sometimes the commander aswell, which will kill the tank). To avoid this, you can attempt to hide your flat plate in an engagement from the front by angling your tank about 30 degrees to the left, which will have your much more angled and durable machinegun port face your enemy, reducing the chance that you will be shot through your flat plate. | |
| − | In an RB battle, the M14/41 functions very similarly to the M13/40 (III) tank, due to the fact that the two are (essentially) the same vehicle, with the M14/41 simply boasting a more powerful engine and sitting at a higher | ||
| − | With a top speed of | + | With a top speed of 33kph, the M14/41 is not exactly a fast tank, but not a slow one either. It's speed limits its oppertunities as a flanker, but with its aformentioned very durable armour, and it's very solid 47mm gun, the M14/41 makes a very solid frontline brawler tank. When shooting from range, try to use your insane 15 degrees of gun depression to hide the rather vulnerable hull of your tank. When playing the M14/41, it is impervious to '''always''' check for flankers. Most enemy tanks at this br usually move very fast and have quite powerful guns and small profiles. make sure to listen to engine sounds and to check your sides and rear often. Your turret doesnt turn all too fast and your sides consist of flat 25mm plates. All an M22 or Stuart needs to do is hit you there once and your crew will be dead before you even realised what hit you. Keep your eyes open, and if you see something, make sure to rotate your hull; Pivot turning in the M14/41 will always be faster than turning your turret. |
=== Pros and cons === | === Pros and cons === | ||
| − | + | ''Summarize and briefly evaluate the vehicle in terms of its characteristics and combat effectiveness. Mark its pros and cons in a bulleted list. Try not to use more than 6 points for each of the characteristics. Avoid using categorical definitions such as "bad", "good" and the like - they have a substitution in the form of softer "inadequate", "effective".'' | |
'''Pros:''' | '''Pros:''' | ||
| − | * | + | * Very well armoured |
| + | * Very decent gun | ||
| + | * -15 degrees of gun depression | ||
* Rather well-spaced crew | * Rather well-spaced crew | ||
| − | * | + | * Decent reload |
| − | + | ||
| − | * | + | * |
'''Cons:''' | '''Cons:''' | ||
| − | * Giant flat plate on the | + | * Giant flat plate on the front provides a massive weakspot |
| − | |||
* Low-capacity MGs | * Low-capacity MGs | ||
* Mediocre mobility | * Mediocre mobility | ||
* Slow turret traverse | * Slow turret traverse | ||
| + | * Sitting at 1.7, it can often be sucked up into 2.0 and 2.3 matches | ||
| + | |||
| + | * | ||
== History == | == History == | ||
| − | <!-- ''Describe the history of the creation and combat usage of the vehicle in more detail than in the introduction. If the historical reference turns out to be too | + | <!--''Describe the history of the creation and combat usage of the ground vehicle in more detail than in the introduction. If the historical reference turns out to be too big, take it to a separate article, taking a link to an article about the vehicle and adding a block "/ History" (example: <nowiki>https://wiki.warthunder.com/(Vehicle-name)/History</nowiki>) and add a link to it here using the <code>main</code> template. Be sure to reference text and sources by using <code><nowiki><ref></nowiki></code>, as well as adding them at the end of the article.''--> |
| − | After the extensive use in Yugoslavia, Greece and North Africa uncovered numerous mechanical and reliability problems with the [[M13/40_(I)|M13/40 tank]], Italian engineers set out to address these issues. Instead of developing a whole new vehicle which would replace the flawed M13/40, engineers at Fiat-Ansaldo decided to instead further develop and improve the M13/40's design and solve the various issues along the way. As a result, the new M14/41 was developed. Closely resembling its predecessor, the M14/41 was hard to distinguish from its predecessor as most of the changes and improvements were made to the | + | After the extensive use in Yugoslavia, Greece and North Africa uncovered numerous mechanical and reliability problems with the [[M13/40_(I)|M13/40 tank]], Italian engineers set out to address these issues. Instead of developing a whole new vehicle which would replace the flawed M13/40, engineers at Fiat-Ansaldo decided to instead further develop and improve the M13/40's design and solve the various issues along the way. As a result, the new M14/41 was developed. Closely resembling its predecessor, the M14/41 was hard to distinguish from its predecessor as most of the changes and improvements were made to the vehicle’s internals. Improvements included a new, slightly more powerful engine and transmission, improved air filters and electrics as well as several other changes. Production was quickly approved and began in August 1941, with existing M13/40 hulls simply being upgraded to the M14/41 standard. The first units arrived to frontline troops in North Africa by the end of the year, but only saw limited service in that theatre. The M14/41 was produced for only a short period of time, but close to 700 units were made. |
| − | ''- From [ | + | ''- From [https://warthunder.com/en/news/5910-development-m14-41-smooth-start-en Devblog]'' |
== Media == | == Media == | ||
| − | + | ''An excellent addition to the article will be video guides, as well as screenshots from the game and photos.'' | |
| − | + | == See also == | |
| + | ''Links to the articles on the War Thunder Wiki that you think will be useful for the reader, for example:'' | ||
| − | |||
| − | |||
| − | |||
| − | |||
| − | |||
| − | |||
| − | |||
* ''reference to the series of the vehicles;'' | * ''reference to the series of the vehicles;'' | ||
| − | * ''links to approximate analogues of other nations and research trees.'' | + | * ''links to approximate analogues of other nations and research trees.'' |
| − | |||
| − | |||
| − | |||
| − | |||
| − | |||
| − | |||
| − | |||
| − | |||
| − | |||
== External links == | == External links == | ||
| − | <!-- ''Paste links to sources and external resources, such as:'' | + | <!--''Paste links to sources and external resources, such as:'' |
* ''topic on the official game forum;'' | * ''topic on the official game forum;'' | ||
| − | * ''other literature.'' --> | + | * ''encyclopedia page on tank;'' |
| + | * ''other literature.''--> | ||
| − | * [ | + | * [https://warthunder.com/en/news/5910-development-m14-41-smooth-start-en [Devblog<nowiki>]</nowiki> M14/41: Smooth Start] |
| − | |||
| − | |||
| − | |||
| − | |||
{{Italy medium tanks}} | {{Italy medium tanks}} | ||
Revision as of 07:58, 8 June 2020
Contents
Description

The Fiat-Ansaldo M14/41 (shortened as M14/41) is a Rank I Italian medium tank
with a battle rating of 2.3 (AB) and 2.0 (RB/SB). It was introduced in Update 1.85 "Supersonic".
General info
Survivability and armour
The M14/41 offers quite good armour and survivability for a rank I vehicle. The turret can block some distant shots with its 45mm front and the sharp edges around the mantlet may riccochet some rounds. The upper glacis is almost impenetrable from the front due to the sharp angle. The most obvious weakspot is drivers vision slit and the side armour is lackluster with 25mm and no slopes. Placement of the crew is very good for the size of the tank, AP shots will often hit only one crew member due to the spacing and the driver and machine gunner sit very low behind the transmission.
Mobility
| Game Mode | Max Speed (km/h) | Weight (tons) | Engine power (horsepower) | Power-to-weight ratio (hp/ton) | |||
|---|---|---|---|---|---|---|---|
| Forward | Reverse | Stock | Upgraded | Stock | Upgraded | ||
| Arcade | 38 | 6 | 14.5 | 248 | 305 | 17.1 | 21.03 |
| Realistic | 34 | 6 | 142 | 160 | 9.79 | 11.03 | |
Armaments
Main armament
| 47 mm 47/32 mod.35 | |||||
|---|---|---|---|---|---|
| Capacity | Vertical guidance |
Horizontal guidance |
Stabilizer | ||
| 87 | -15°/+25° | ±180° | N/A | ||
| Turret rotation speed (°/s) | |||||
| Mode | Stock | Upgraded | Prior + Full crew | Prior + Expert qualif. | Prior + Ace qualif. |
| Arcade | 13.33 | __.__ | __.__ | __.__ | __.__ |
| Realistic | 8.33 | __.__ | __.__ | __.__ | __.__ |
| Reloading rate (seconds) | |||||
| Stock | Prior + Full crew | Prior + Expert qualif. | Prior + Ace qualif. | ||
| 3.77 | __.__ | __.__ | 2.9 | ||
Ammunition
| Penetration statistics | |||||||
|---|---|---|---|---|---|---|---|
| Ammunition | Type of warhead |
Penetration in mm @ 90° | |||||
| 10m | 100m | 500m | 1000m | 1500m | 2000m | ||
| Granata Perforante mod.35 | APHE | 54 | 52 | 40 | 30 | 22 | 16 |
| Granata Perforante mod.39 | APBC | 53 | 52 | 45 | 39 | 33 | 28 |
| Shell details | ||||||||||
|---|---|---|---|---|---|---|---|---|---|---|
| Ammunition | Type of warhead |
Velocity in m/s |
Projectile Mass in kg |
Fuse delay
in m: |
Fuse sensitivity
in mm: |
Explosive Mass in g (TNT equivalent): |
Normalization At 30° from horizontal: |
Ricochet: | ||
| 0% | 50% | 100% | ||||||||
| Granata Perforante mod.35 | APHE | 630 | 1.5 | 1.2 | 15 | 30 | ° | 47° | 60° | 65° |
| Granata Perforante mod.39 | APBC | 630 | 1.4 | 1.2 | 15 | 30 | ° | 48° | 63° | 71° |
Ammo racks
| Full ammo |
1st rack empty |
2nd rack empty |
3rd rack empty |
Visual discrepancy |
|---|---|---|---|---|
| 87 | 78 (+9) | 53 (+34) | 1 (+86) | No |
Machine guns
| 8 mm Breda Mod. 38 | ||||||
|---|---|---|---|---|---|---|
| Coaxial mount | ||||||
| Capacity (Belt capacity) | Fire rate (shots/minute) |
Vertical guidance |
Horizontal guidance | |||
| 1,524 (24) | 600 | N/A | N/A | |||
| Pintle mount | ||||||
| Capacity (Belt capacity) | Fire rate (shots/minute) |
Vertical guidance |
Horizontal guidance | |||
| 1,524 (24) | 600 | __° | __° | |||
Usage in battles
In an RB battle, the M14/41 functions very similarly to the reserve M13/40 (III) tank, due to the fact that the two are (essentially) the same vehicle, with the M14/41 simply boasting a more powerful engine and sitting at a higher br. The M14/41 features very thick armour for its rank, especially around the turret, where the angled 25mm thick armour will often bounce rounds consistantly, and the 30mm frontal armour is not to be underestimated. Combined with a rather well spaced crew of 4, the M14/41 boasts a suprising amount of durability. This very well-protected tank, of course, has a very cuicial weakpoint: A massive 30mm flat plate on the direct front of the tank. A hit through this plate will often kill the driver and, more likely than not, the crucial gunner that sits behind him(And sometimes the commander aswell, which will kill the tank). To avoid this, you can attempt to hide your flat plate in an engagement from the front by angling your tank about 30 degrees to the left, which will have your much more angled and durable machinegun port face your enemy, reducing the chance that you will be shot through your flat plate.
With a top speed of 33kph, the M14/41 is not exactly a fast tank, but not a slow one either. It's speed limits its oppertunities as a flanker, but with its aformentioned very durable armour, and it's very solid 47mm gun, the M14/41 makes a very solid frontline brawler tank. When shooting from range, try to use your insane 15 degrees of gun depression to hide the rather vulnerable hull of your tank. When playing the M14/41, it is impervious to always check for flankers. Most enemy tanks at this br usually move very fast and have quite powerful guns and small profiles. make sure to listen to engine sounds and to check your sides and rear often. Your turret doesnt turn all too fast and your sides consist of flat 25mm plates. All an M22 or Stuart needs to do is hit you there once and your crew will be dead before you even realised what hit you. Keep your eyes open, and if you see something, make sure to rotate your hull; Pivot turning in the M14/41 will always be faster than turning your turret.
Pros and cons
Summarize and briefly evaluate the vehicle in terms of its characteristics and combat effectiveness. Mark its pros and cons in a bulleted list. Try not to use more than 6 points for each of the characteristics. Avoid using categorical definitions such as "bad", "good" and the like - they have a substitution in the form of softer "inadequate", "effective".
Pros:
- Very well armoured
- Very decent gun
- -15 degrees of gun depression
- Rather well-spaced crew
- Decent reload
Cons:
- Giant flat plate on the front provides a massive weakspot
- Low-capacity MGs
- Mediocre mobility
- Slow turret traverse
- Sitting at 1.7, it can often be sucked up into 2.0 and 2.3 matches
History
After the extensive use in Yugoslavia, Greece and North Africa uncovered numerous mechanical and reliability problems with the M13/40 tank, Italian engineers set out to address these issues. Instead of developing a whole new vehicle which would replace the flawed M13/40, engineers at Fiat-Ansaldo decided to instead further develop and improve the M13/40's design and solve the various issues along the way. As a result, the new M14/41 was developed. Closely resembling its predecessor, the M14/41 was hard to distinguish from its predecessor as most of the changes and improvements were made to the vehicle’s internals. Improvements included a new, slightly more powerful engine and transmission, improved air filters and electrics as well as several other changes. Production was quickly approved and began in August 1941, with existing M13/40 hulls simply being upgraded to the M14/41 standard. The first units arrived to frontline troops in North Africa by the end of the year, but only saw limited service in that theatre. The M14/41 was produced for only a short period of time, but close to 700 units were made.
- From Devblog
Media
An excellent addition to the article will be video guides, as well as screenshots from the game and photos.
See also
Links to the articles on the War Thunder Wiki that you think will be useful for the reader, for example:
- reference to the series of the vehicles;
- links to approximate analogues of other nations and research trees.
External links
| Italy medium tanks | |
|---|---|
| Italy | |
| M13/40 | M13/40 (I) · M13/40 (II) · M13/40 (III) |
| M14/41 | M14/41 · M14/41 (47/40) |
| M15/42 | M15/42 |
| M16/43 | Celere Sahariano |
| P26/40 | P40 · P40 "G.C. Leoncello" |
| OF-40 | OF-40 · OF-40 Mk.2A · OF-40 (MTCA) |
| Ariete | Ariete (P) · Ariete · Ariete PSO · Ariete AMV |
| Germany | ▄Pz.III N · ▄Pz.IV G · ▄Leopard 1A5 |
| Allied powers | ▄Sherman I Composito · Sherman Ic · ▄Sherman Vc · ▄Sherman V · M26 "D.C.Ariete" · M26A1 · M47 (105/55) · M60A1 "D.C.Ariete" |
| Hungary | |
| Turán | Turan I · Turan II · Turan III |
| Germany | ◔Leopard 2A4 |
| USSR | ◔T-72M1 |
