AUBL/74

Contents
Description
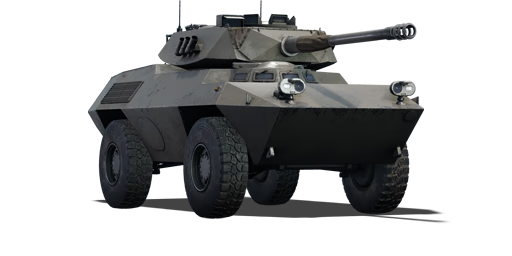
The FIAT AUBL/74 is a rank IV Italian light tank with a battle rating of 6.3 (AB) and 6.7 (RB/SB). It was introduced in Update 1.85 "Supersonic".
Following comparable mobility from the FIAT 6614, the AUBL/74 offers extra flexibility in the offensive gameplay; with the addition of a new turret featuring good traverse and a low-pressure 90 mm Cockerill Mk.III gun.
An inherent weakness of italian light tanks, the lack of reliable armour, is one of the most pressing aspects of the AUBL/74, as even light machine guns have a chance of damaging it at close range. Despite this, the FIAT platform is very mobile on paved grounds and thus excellent to avoid incoming fire if driven with situational awareness. Hence the positioning, the scouting ability and the factor of surprise will be crucial for mastering the AUBL/74.
General info
Survivability and armour
The tank's armour is best described as "glass cannon", as it can be damaged even by 7.62 mm machine guns at close range, particularly in the engine area. It will, however, still protect the crew and easily sustain LMG fire from the front, as long as enemy isn't firing at the weakspots specifically. Any tanks with 12.7+ mm HMG should be avoided like plague or attacked from blind angles only. To compensate, the tank has 3 smoke shell groups on the hull itself, which can be used at any time to disrupt enemy aim and give the car a chance to escape or even attack (AB only). To block sniper aim, cannon smoke shells could be used while approaching the nest.
Due to poor armour, survival against aircraft or artillery is not guaranteed even on a glancing hit, but for tankers that forget to take their chemical shells destroying AUBL/74 isn't as trivial as many people believe, as quite often only 1 crew member suffers from any kinetic shot, and the extremely thin armour won't detonate APHE. It can be extra annoying for the enemy when the tank has crew replenishment modification in AB, allowing it to just randomly survive and shoot its enemy back.
Lastly, AUBL/74 should avoid detonating enemy tanks literally infront of itself, as otherwise the blowback will destroy it. Standing next to allies is also sometimes fatal for the same reason.
For AUBL drivers it is better to approach enemy at a slight angle to avoid centre of mass shots, as those generally instantly put it down even in AB. As an enemy, if you don't have a 12.7 HMG you do not toy with the AUBL and fire the main weapon to destroy it, as otherwise you will regret it.
Armour Type:
- Rolled homogeneous armour (hull, turret)
- Cast homogeneous armour (gun mantlet)
- Wheel (tires)
| Armour | Front (Slope angle) | Sides | Rear | Roof |
|---|---|---|---|---|
| Hull | 8 mm (74°) Upper Glacis 8 mm (29-36°) Driver viewport glacis 8 mm (44°) Lower Glacis |
8 mm (36-46°) Top 5 mm (39°) Engine vents 8 mm (22-30°) Bottom 8 mm Wheelwells |
8 mm (11°) Upper plate 8 mm (44°) Lower glacis |
8 mm (16°) Front glacis 8 mm (spherical) Driver hatch 8 mm Centre 8 mm (4°) Rear |
| Turret | 15 mm (24°) Turret front 8 mm (13°) Turret Cheeks 15 mm (8-50°) Gun mantlet |
8 mm (33°) 15 mm (cylindrical) Cupola well 8 mm (68-72°) Turret underside |
8 mm (11°) | 8 mm (85°) Front 8 mm Centre & Rear |
| Cupola | 15 mm (cylindrical) | 8 mm | ||
Notes:
- The tires are 10 mm thick and the suspension rods are 1 mm thick.
- The side engine grilles are only 5 mm thick, so make sure to protect those weak points.
- There is an engine grille on the roof which is also only 5 mm thick. A weak point planes might look to take advantage of.
- A tightly spaced crew of three makes it easily taken out by machine guns and autocannons.
Mobility
This is one of the fastest tanks in the rank, being mildly slower than the FIAT 6614. You can always expect it to drive at least 60 km/h, being somewhat slower when driving in terrain with movement penalty (like with the majority of snow maps) or over hills, where it will drive at 36 km/h with slow acceleration. On a road it will accelerate towards 80 km/h, maybe even further if driving downhill or straight for a very long time. It will always reverse at -20 km/h on demand.
In AB, it can slowly accelerate to 80 km/h practically anywhere if driven properly and can go up to 110 km/h on a road. Driving past 60 km/h will significantly stiffen its controls, so sometimes slowing down is faster than starting again from 0.
It hates driving onto sharp hills and trenches, failing to climb them from a standstill, but it can rush them with a head start. Since this is a car with no tracks, it has no neutral steering. The turn circle is not too wide, but it needs to be accounted for when brawling.
Due to the tank being very light, sometimes the concern isn't even the road itself, but allies trying to hog the road for themselves. A light tap from any heavy tank can send this car flying into a building, so some care should be taken on a round start.
It can swim if situation demands it, but it swims extremely slowly at 5 km/h and it requires a lot of time to stop wobbling after stopping. At the very least, it allows it to fall off a bridge as an evasive manoeuvre when encountering something it can't beat.
| Game Mode | Max Speed (km/h) | Weight (tons) | Engine power (horsepower) | Power-to-weight ratio (hp/ton) | |||
|---|---|---|---|---|---|---|---|
| Forward | Reverse | Stock | Upgraded | Stock | Upgraded | ||
| Arcade | 112 | 22 | 8.2 | 248 | 305 | 30.24 | 37.2 |
| Realistic | 100 | 20 | 142 | 160 | 17.32 | 19.51 | |
Modifications and economy
| Mobility | Protection | Firepower | ||||||||||||||||||||
|---|---|---|---|---|---|---|---|---|---|---|---|---|---|---|---|---|---|---|---|---|---|---|
|
|
|
Armaments
Main armament
The main weapon of this tank is a 90 mm cannon firing chemical shells. The cannon is extremely inaccurate past 200 m even with all the upgrades and crew skills. It will hit the tank if you fire at its centre, but there is no telling where it will hit. Without the upgrades, the tank can't hit battleship broadside at long range. Due to this, using it to properly snipe or bully enemy artillery tanks is not really feasible even in AB, unless they are flanked so hard that they have no cover at all.
The stability of a gun is quite low, but a fully trained crew with vertical drive upgrade can allow to fire it on the move while driving at about 65 km/h over flat terrain (most likely a road) in RB. In AB the gun is a bit easier to handle, but firing on the move without aim assist can result in a miss.
The tank has only HEAT-FS at first, which is the main shell to use. It doesn't offer any miracles due to it's low explosive mass, but it will penetrate majority of heavy tanks and tank destroyers, at least as long as they don't angle much and the range isn't too great. In comparison, it offers about as much penetration and damage as APDS of some medium tanks, without the caveat of "shell shattered" mechanics, but due to the gun performance any ranged shot is a literal lottery.
HESH can be unlocked to use as a backup shell. It can overpressure light tanks and can be used as a finisher for wounded tanks from the side or behind. It cannot be used as a main shell as it barely has enough penetration for majority of medium tank hulls, meaning it does practically nothing to them and the gun inaccuracy will not let HESH land on their cupolas or other small weak spots, unless the shot was lucky. Still, it can deal fatal damage in RB through some medium tank turrets (on a good side hit) and due to it's ability to go through fences and bushes without detonating, it can be used to "parry" artillery and light tanks through obstacles that block HE and HEAT shells, prevent aim assist from working or otherwise inconvenience them.
A smoke shell can be unlocked to block enemy sniper sights while pushing them, forcing them to either pull up the hill and expose themselves or let the tank get closer, where the gun is effecitve.
| 90 mm Cockerill Mk.3 | Turret rotation speed (°/s) | Reloading rate (seconds) | |||||||||||
|---|---|---|---|---|---|---|---|---|---|---|---|---|---|
| Mode | Capacity | Vertical | Horizontal | Stabilizer | Stock | Upgraded | Full | Expert | Aced | Stock | Full | Expert | Aced |
| Arcade | 32 | -9°/+27° | ±180° | N/A | 28.6 | 39.5 | 48.0 | 53.1 | 56.5 | 8.71 | 7.70 | 7.10 | 6.70 |
| Realistic | 17.9 | 21.0 | 25.5 | 28.2 | 30.0 | ||||||||
Ammunition
| Penetration statistics | |||||||
|---|---|---|---|---|---|---|---|
| Ammunition | Type of warhead |
Penetration @ 0° Angle of Attack (mm) | |||||
| 10 m | 100 m | 500 m | 1,000 m | 1,500 m | 2,000 m | ||
| M620A1 | HEATFS | 250 | 250 | 250 | 250 | 250 | 250 |
| M625A1 | HESH | 102 | 102 | 102 | 102 | 102 | 102 |
| Shell details | ||||||||||||
|---|---|---|---|---|---|---|---|---|---|---|---|---|
| Ammunition | Type of warhead |
Velocity (m/s) |
Projectile mass (kg) |
Fuse delay (m) |
Fuse sensitivity (mm) |
Explosive mass (TNT equivalent) (g) |
Ricochet | |||||
| 0% | 50% | 100% | ||||||||||
| M620A1 | HEATFS | 890 | 4.1 | 0.05 | 0.1 | 890.4 | 65° | 72° | 77° | |||
| M625A1 | HESH | 800 | 4.5 | 0.1 | 4 | 1,730 | 73° | 77° | 80° | |||
| Smoke shell characteristics | ||||||
|---|---|---|---|---|---|---|
| Ammunition | Velocity (m/s) |
Projectile mass (kg) |
Screen radius (m) |
Screen deploy time (s) |
Screen hold time (s) |
Explosive mass (TNT equivalent) (g) |
| M618A1 | 714 | 5.3 | 20 | 5 | 25 | 50 |
Ammo racks

| Full ammo |
1st rack empty |
2nd rack empty |
Visual discrepancy |
|---|---|---|---|
| 32 | 13 (+19) | 1 (+31) | No |
Notes:
- Shells are modelled individually and disappear after having been shot or loaded.
- Rack 2 is a first stage ammo rack. It totals 12 shells and gets filled first when loading up the tank.
- This rack is also emptied early: the rack depletion order at full capacity is: 2 - 1.
- Simply not firing when the gun is loaded will move ammo from racks 1 into rack 2. Firing will interrupt the restocking of the ready racks.
Machine guns
The machine gun on this car has a notably high fire rate, allowing to quickly cut down some unarmoured SPG at the rank. It can also technically destroy a fighter in a shallow dive, but there is no guarantee.
| 7.62 mm Beretta MG42/59 | ||||
|---|---|---|---|---|
| Mount | Capacity (Belt) | Fire rate | Vertical | Horizontal |
| Coaxial | 800 (200) | 801 | N/A | N/A |
Usage in battles
- General gameplay
The AUBL/74 is most effective in a scout-support role from cover or when flanking. The extremely weak armour of the AUBL will not be enough to resist most frontal engagements. The HEAT shell can penetrate most enemies at the rank, but the post-penetration damage is unpredictable due to the gun inaccuracy.
If enemy must be attacked head-on, then most shots should be aimed at key crew members like the gunner, loader, or even machine gunner in the case of tanks wielding 12.7 mm HMG. If you are on defence, then try to make enemy expose themselves to your allies and aim for the driver instead. To avoid being immediately destroyed, driving at an angle is almost required, as it helps to minimize crew damage. Due to the poor armour, the best strategy for RB/SB is to intentionally form a squad with nations that have HMG on the majority of their tanks (like US or USSR), just so you don't have to think about enemy potentially having an auxillary weapon every time you drive somewhere.
If you can afford time to aim, then considering the AUBL's somewhat slow reload speed (an enemy with high crew agility and expert qualification can get their gunner back and shoot before the AUBL reloaded) the ammo racks are often the best areas to target in order to eliminate enemy tanks. Peeking, firing and disappearing (shoot and scoot) is also suggested when fighting on a hilly terrain, as the small numbers of crew members on the AUBL won't resist a shell impact to the turret - firing before being seen and quickly leaving is the best way to engage threats when you don't have an upper hand.
| Practicing with the shortstop key and 'sight lock' on options can increase the accuracy when doing quick shots, as the AUBL/74 lacks any stabilization and is even more likely to miss when not driving on a flat road |
Using AUBL/74 as a lightning fast brawler is possible in a 1v1 scenario, but difficult. It is ill adviced to attempt this against SPG like Jagdpanther G1 as players that use them will just fire immediately on any visual cue when entrenched, and even this car just isn't fast enough. First of all, you want to get a head start, so that your speed is at least 60 km/h (80 km/h in AB), then you need to approach enemy tank at an angle, so that their response shot doesn't instantly nail you in the middle, blasting all the crew members in one go. If they miss, hit only 1 crew member, or you fire first and hit both their gunner and loader at once, you might just win. Technically, AUBL can bully some popular heavy tanks by just flat out outspeeding their turret turn rate, which can be abused to completely dominate and ammo rack German Tigers (assuming you have high enough "reloading" crew skill) and sometimes bully IS-series (assuming that you destroyed their machine gunner beforehand).
- Flanking
The AUBL's high speed allows it to secure a reliable over-watch position early in the match and makes it possible to scout enemies and take potshots if the opportunity arises. The flanking approach will be mainly directed towards spotting and opportunistic medium-ranged ambushes, whilst long range sniping is the last choice and the one requiring most of the skill and luck, because the rather small calibre HEAT rounds and the gun ballistics might not perform as desired at long distances and could just reveal your location to enemies for superficial damage dealt.
Therefore, playing this vehicle like an M18 Hellcat or any other fast vehicles with shells as the APCBC is ill-advised, because often it won't be able to destroy flanked enemies in one reliable shot, leaving the car open to retaliation fire. It still can be a great light tank hunter with the addition of overpressure damage, particularly with HESH, as it can not only obliterate unarmoured SPG, but even other light tanks on a decent hit.
Try to use strong features of the car to your advantage. The amphibious ability increases drastically the possibilities of ambushes and locations that can be exploited by this light tank, on maps like Kuban, Eastern Europe or Tunisia. Another thing to note is the inferior performance on rough terrains and superior performance on roads. this should be taken into account when deciding to spawn in a snowy map like Frozen pass for example as one of the best advantages of the AUBL, the speed, will be hampered, switching the vehicle into a more sluggish support light tank than an energetic flanker. Paved roads and urban maps like Maginot line, on the other hand, bring a lot of possibilities to this light tank but could lead to unwanted frontal engagements. Players should contemplate all this when operating the AUBL.
- Support
Your team can be given an invaluable support with the enemies' location thanks to the AUBL/74's scouting capacities. This is twice as valuable if the player also brings a multi-purpose aircraft in the line up to provide air support. Players that couple the airstrike and scouting abilities of this modest light tank can considerably influence battles. The smoke shells can be equipped depending on the methods of the player and will be good enough to hinder enemy positions and obscure the allied team's advance - at least for a short while.
Despite the apparent passive approach, the support role also supposes to remain close to the brawling tanks in the frontline while performing repairs and having a chance to assist in the point captures. The speedy turret rotation when upgraded does help in this close support usage, as the confrontations require good reflexes and rapid responses. Any needed tactical retreat will happen easily with the good reverse and smoke grenades to cover it. Always have a plan for the next move as it won't be able to turn on the spot, like most wheeled vehicles.
Overall the whole vehicle performance in Realistic battles is hugely affected by the map and the tactical approach to it. Because of the only high-explosive shells available for the AUBL/74 and the mobility limitations, the players might choose to perform support, flanking or not spawning for the battle. If flanking in a tree-covered map, keep in mind the sensibility of the HEAT fuze: even the smallest of the bushes can detonate the warhead and jeopardise the entire vehicle; if fighting in a snowy environment, all speed advantage and flanking potential is lost against the regular tracked vehicles.
- Arcade Battles
In AB, the gameplay is less and more complicated at the same time.
The speed impediment is less present on maps and the brawling style can be forgivingly applied after researching "horizontal drive" and maxing out "targeting" for "practically stabilized" gun experience. The tank can easily reach capture point first, and can get behind enemy lines before they can even prepare to fight. Technically, nothing really stops you from sniping even if the gun is a bit random, as you can use binoculars to shoot them over terrain as they leave cover, if you so desire. Even if you do not trust yourself to survive after passing a corner or a hill, you can always have a guaranteed first hit on the enemy by using "scouting" on the opponent behind cover, dropping some smokes and firing after 10 seconds. Worst case scenario, you can just spam "scouting" on every odd enemy you see to gain airstrike points from "intellegence" assists and then come in with a bomber to help teammates capture a point.
However, enemy also can survive lethal hits due to the "crew replenishment", which can be fatal for you for a great amount of reasons, such as enemy having an HMG, better crew, slow allies behind next building that were late but actually came "just in time", being heavy AND fast, etc... Everyone also have aim assist and will relatively easily find you if they care due to the spotting mechanic, while you have an inherently inaccurate gun with weak ammunition and thus can't reliably disable annoying pursuers. There is also no option to "metagame" the US tanks out of the enemy team.
Your best bet is either playing along with teammates and moving in and out of combat when opportunity arises, or deliberately going into a deep flank way around enemy team. You really need to learn what enemy can and cannot see, comprehend what they might be doing from just glancing at a map and score table, then be decisive and fast, just so you can sneak past the enemy lines and backstab them. It demands a very different skillset from players than any other light tank, but it is also greatly rewarding - usually if enemy is complacent enough to not spot and swat you immediately as you approach 200 m range, then you might freely blast 3 to 4 tanks into their back before someone finally notices people spamming map pings on your location. Remember to not park literally infront of them, as otherwise their explosion will end you as well.
Overall, this particular car isn't the best one of its peers on 6.7-7.3 range, as it has less tricks up it's sleeve, but it is serviceable.
- Notable enemies
Any USA tanks, including the majority of export ones: The USA is obsessed with putting 12.7 MG on every tank, which can instantly obliterate AUBL. It doesn't help that a lot of their tanks also have armour too thick for the small HEAT to even do anything and absurdly high turret rotation speed (especially in AB), so it is best to avoid them and ask teammates to remove them if you can't sneak around. Never, under any circumstances, attack actual USA players directly if their machine gunner is still alive, as they fire HMG on any tanks they see just out of habit. It is so bad, that metagaming in RB in order to make USA an ally is a viable strategy. The same applies to all future Italian light tanks of the rank.
Soviet heavy tanks, heavy SPG and T-44-100: USSR also has a variety of tanks that have 12.7 MG or something even bigger, but their players quite often forget that they have one. Do not fire your MG at them, as they tend to reply and it never ends in AUBL favor. Do not annoy SU-122-54 or Object 268, as those have special HMG that they constantly use even against medium tanks.
Artillery tanks: They can overpressure AUBL even with airburst shells and do not have to load a different shell to completely destroy you, so aggravating them is ill-adviced. Luckily, if you aren't in a focus of their attention, they will often pretend that you do not exist. You can use that to fire HESH at them when the majority of their turret is exposed and leave before they actually got mad and used HMG or HE-VT on you.
Pros and cons
Pros:
- 90 mm HEATFS with reasonable penetration comes stock, HESH and smoke shells are unlockable later
- Very fast on roads, extremely fast in general in AB, decent reverse speed
- Rather fast gun traverse and elevation rates allowing for quick reaction to incoming enemies
- Recoil is not too strong, making aiming the follow-up shot much easier than some other light tanks
- Smoke shells and night vision optics increase survivability
- Amphibious vehicle
Cons:
- The cannon is inherently inaccurate past 200 m, very random and can't land precise shots most of the times
- Light armour is vulnerable to .50 calibre and aircraft cannons from most ranges
- HEAT penetration is kind of low, notable when engaging highly sloped armour, as on the Soviet IS-3 or IS-6
- Bad off-road speed when driving up hills, can barely break 30 km/h, also suffers in maps with movement speed penalty
- Lightweight and tall profile: prone to ramming and explosion shock waves (a bomb going off nearby can flip the vehicle entirely even if it wasn't fatal)
- No stabilization; it must hard stop to fire accurately when driving up a hill, while some up-tiered enemies as the British Centurion Mk 3 do not. However crew skills can compensate the gun wobble on a flat road, to an extent
History
The AUBL/74 (Autoblinda 1974) prototypes were built upon the FIAT 6616 chassis which then got modified with a 90 mm Cockerill Mk. III gun or a 60 mm HVG gun. These modifications intended to meet the Italian army requirements for a combat-capable light reconnaissance vehicle and troop transport of the military branches, but perhaps, more importantly, it aimed to evolve as a distinguished yet economic defence solution for the exportation to any developing country amidst the tensions of the Cold war.
Other countries as United States and France, also sought to fulfil this wheeled armoured car role in the warfare business with the similarly configured Cadillac Gage and the Panhard AML 90.
The project was a collaboration between FIAT and OTO Melara and saw thorough use for peacekeeping operations along with the original FIAT 6114 APCs. Its engine, radiators, and transmission were separated behind a fireproof bulkhead to provide additional survivability to the crew. It also featured NBC filters, night vision devices and run-flat tires - The amphibious capability was also an important characteristic.
Unfortunately, there were no interested exportation customers for the AUBL/74 variant and the turreted prototypes of the FIAT 6616 remained in service with Italy.
Other more successful variants were armed with a 20 mm cannon and an optional 9M14 Malyutka ATGM.
Media
- Skins
- Videos
See also
- Related development
- Similar configuration and role
External links
Paste links to sources and external resources, such as:
- topic on the official game forum;
- other literature.
| Italy light tanks | |
|---|---|
| Italy | |
| L6/40 | L6/40 · L6/40 (31 Rgt.) |
| M11/39 | M11/39 |
| Autoblindo | AB 41 · AB 43 |
| Fiat 6614/6616 | FIAT 6614 · AUBL/74 · AUBL/74 HVG |
| R3 Capraia | R3 T106 FA |
| Centauro | Centauro I 105 · Centauro I 105 R · Centauro I 120 · Centauro RGO · VRCC |
| Freccia | VBC (PT2) · Freccia |
| Dardo | Dardo · VCC-80/60 · VCC-80/30 |
| Other | C13 T90 |
| USA | ▄M3A3 · ▄M24 · ▄M18 |
| Hungary | |
| WWII | Csaba · Toldi IIA |
| Post | ◔BTR-80A · KF41 |
